Source code can be found here

Source code can be found here
In its simple form it is like a proxy for other dependent APIs

It can be easily implemented with NodeJs http-proxy-middleware
Install the following package
npm i http-proxy-middleware
Add the following file in your react application
app_server.js
const express = require('express');
const path = require('path');

const { createProxyMiddleware } = require('http-proxy-middleware');

const app = express();

const api1Service = process.env.API1_ROUTE || 'api1:5555';
const api1Url = `http://${api1Service}`;
console.log(api1Url);

const api2Service = process.env.API2_ROUTE || 'api2:5555';
const api2Url = `http://${api2Service}`;
console.log(api2Url);


app.use(express.static(path.join(__dirname, 'build')));
app.use('/api1', createProxyMiddleware({ target: api1Url, changeOrigin: false}));
app.use('/api2', createProxyMiddleware({ target: api2Url, changeOrigin: false}));


app.get('/status', function(req, res) {
    res.sendStatus(200);
    console.log('working!');
});

app.get('*', function(req, res) {
    res.sendFile(path.join(__dirname, 'build', 'index.html'));
});

let server = app.listen(3000);
Dockerfile
FROM node:10.19.0-jessie

EXPOSE 3000

ENV APP_ROOT=/root/app-root \
    NODEJS_VERSION=8 \
    NPM_RUN=start \
    NAME=nodejs

ENV HOME=${APP_ROOT} \
    NPM_CONFIG_PREFIX=${APP_ROOT}/.npm


COPY . ${APP_ROOT}


WORKDIR ${APP_ROOT}

RUN npm install && npm run build

CMD node app_server.js
With GraphQL we can implement BFF very easily plus it has got lots of other benefits. If possible switch to GraphQL
How do we make sure every component get the data they need ?

Pass data using properties

Consuming data using React Context API

Context basically exposes state (Data) and the API which operates on the data to be consumed by Components and Context has to operate on a specific functional area covering set up components, for Example AuthContext deals with authentication, DataContext provides data for the application it can fine-grained level as well for example ToastContext provides a way to add Notification from anywhere in the application.
Refer this as an example
Providers are basically singletons, and are responsible for interaction with API and updating the state.
export const AuthContext = React.createContext();
const initialState = {
  isAuthenticated: false,
  userId: "",
  roles: [],
  flash: ""
};
constructor(props) {
    super(props);

    this.state = {
      ...initialState,
      doAuthRedirect: (idp, realm) => {
        return this.doAuthRedirect(idp, realm);
      },
      getAuthToken: (code, idp, realm) => {
        return this.getAuthToken(code, idp, realm);
      },
      reAuth: () => {
        return this.reAuth();
      },
      logout: () => {
        return this.logout();
      }
    };
  }
The following example shows how data can be consumed within a Component
export class Content extends Component {

  render() {

    return (<ToastConsumer>
      {({add}) => ( <div title="Notes" onclick= {() => this.copyToClipboard(add)}>
        <NotesIcon />
      </div>)}
    </ToastConsumer>
    )
  }
}
In the following snippet, App is is provider for AuthContext, DataContext and ToastProvider, and App is consumer for DataContext and AuthContext and not for ToastContext
import React from "react";

import "./App.css";
import { AuthContext, AuthProvider } from "../../providers/AuthProvider";
import { DataContext, DataProvider } from "../../providers/DataProvider";
import {ToastProvider} from 'react-toast-notifications';
import { Content } from "../Content/Content";
import {Timeout} from '../Timeout/Timeout'

function App() {
  return (
    <AuthProvider>
      <AuthContext.Consumer>
        {authContext => (
          <DataProvider authContext={authContext}>
            <DataContext.Consumer>
              {dataContext => (
                <ToastProvider>
                  <React.Fragment>
                    <div className="App">
                      <Content key={"app-1"} authContext={authContext} dataContext={dataContext}  />
                    </div>
                    <Timeout />
                  </React.Fragment>
                </ToastProvider>
              )}
            </DataContext.Consumer>
          </DataProvider>
        )}
      </AuthContext.Consumer>
    </AuthProvider>
  );
}
export default App;
Refer this as an example
https://icomoon.io/app/#/select

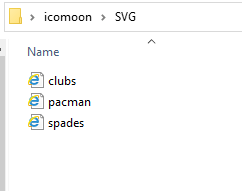
Create SVG file sprites.svg under public folder, and paste the contents, under defs section one by one, each item would go as symbol
<svg version="1.1" xmlns="http://www.w3.org/2000/svg" xmlns:xlink="http://www.w3.org/1999/xlink">
    <defs>
        <symbol id="icon-pacman" viewBox="0 0 32 32">
            <path d="M30.148 5.588c-2.934-3.42-7.288-5.588-12.148-5.588-8.837 0-16 7.163-16 16s7.163 16 16 16c4.86 0 9.213-2.167 12.148-5.588l-10.148-10.412 10.148-10.412zM22 3.769c1.232 0 2.231 0.999 2.231 2.231s-0.999 2.231-2.231 2.231-2.231-0.999-2.231-2.231c0-1.232 0.999-2.231 2.231-2.231z"></path>
        </symbol>
        <symbol id="icon-spades" viewBox="0 0 32 32">
            <path d="M25.549 10.88c-6.049-4.496-8.133-8.094-9.549-10.88v0c-0 0-0-0-0-0v0c-1.415 2.785-3.5 6.384-9.549 10.88-10.314 7.665-0.606 18.365 7.93 12.476-0.556 3.654-2.454 6.318-4.381 7.465v1.179h12.001v-1.179c-1.928-1.147-3.825-3.811-4.382-7.465 8.535 5.889 18.244-4.811 7.93-12.476z"></path>
        </symbol>
        <symbol id="icon-clubs" viewBox="0 0 32 32">
            <path d="M24.588 12.274c-1.845 0-3.503 0.769-4.683 2.022-0.5 0.531-1.368 1.16-2.306 1.713 0.441-1.683 1.834-3.803 2.801-4.733 1.239-1.193 2-2.87 2-4.734 0-3.59-2.859-6.503-6.4-6.541-3.541 0.038-6.4 2.951-6.4 6.541 0 1.865 0.761 3.542 2 4.734 0.967 0.93 2.36 3.050 2.801 4.733-0.939-0.553-1.806-1.182-2.306-1.713-1.18-1.253-2.838-2.022-4.683-2.022-3.575 0-6.471 2.927-6.471 6.541s2.897 6.542 6.471 6.542c1.845 0 3.503-0.792 4.683-2.045 0.525-0.558 1.451-1.254 2.447-1.832-0.094 4.615-2.298 8.005-4.541 9.341v1.179h12v-1.179c-2.244-1.335-4.448-4.726-4.541-9.341 0.995 0.578 1.922 1.274 2.447 1.832 1.18 1.253 2.838 2.045 4.683 2.045 3.575 0 6.471-2.928 6.471-6.542s-2.897-6.541-6.471-6.541z"></path>
        </symbol>
    </defs>
</svg>

Add to your SVG Component
 <svg viewBox="0 0 28.3 28.3" className="icon icon-pacman">
            <use xlinkHref="/sprites.svg#icon-pacman" />
            <span class="name"> icon-pacman</span>
          </svg>

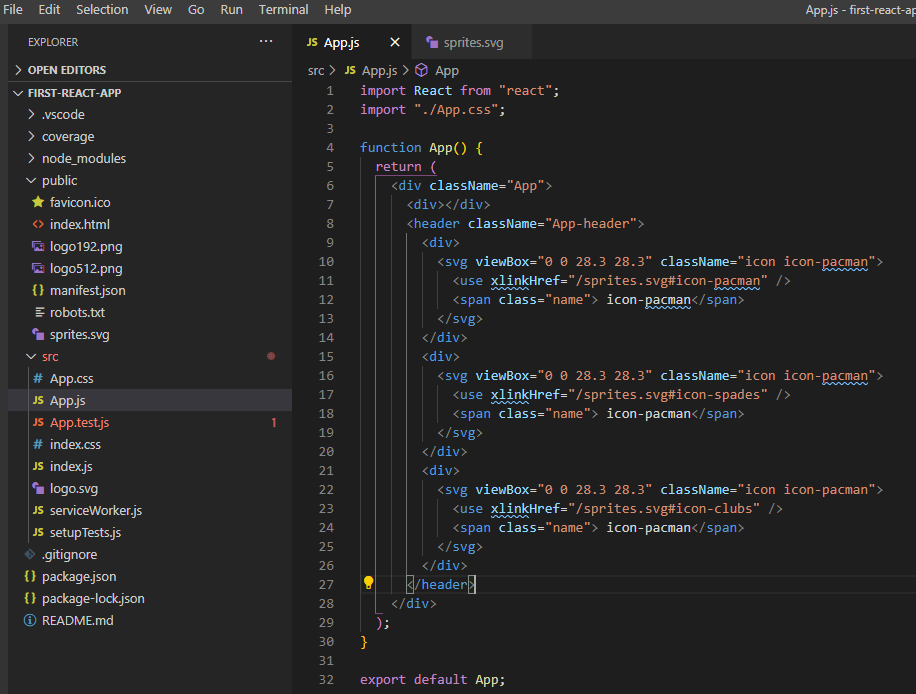
Lets create Icons.svg file as follows under src folder

Lets create Icon.js file as follows
import React from "react";
import Icons from "./Icons.svg";
import PropTypes from 'prop-types';

const Icon = ({ name, color, size }) => (
    <svg className={`icon icon-${name}`} fill={color} width={size} height={size} >
      <use xlinkHref={`${Icons}#icon-${name}`} />
    </svg>
  );

  Icon.propTypes = {
    name: PropTypes.string.isRequired,
    color: PropTypes.string,
    size: PropTypes.number
  };

  export default Icon;
Usage
import React from "react";
import "./App.css";
import Icon from "./Icon.js";

function App() {
  return (
    <div className="App">
      <div></div>
      <header className="App-header">
        <div>
          <Icon name="pacman" color="#FFFFFF" size={35} />
        </div>
        <div>
          <Icon name="spades" color="#FFFFFF" size={35} />
        </div>
        <div>
          <Icon name="clubs" color="#FFFFFF" size={35} />
        </div>
      </header>
    </div>
  );
}

export default App;

TODO
We will use Keycloak as IDP, and OAuth 2 with JWT as AuthToken in react application with NodeJS (Express) back-end
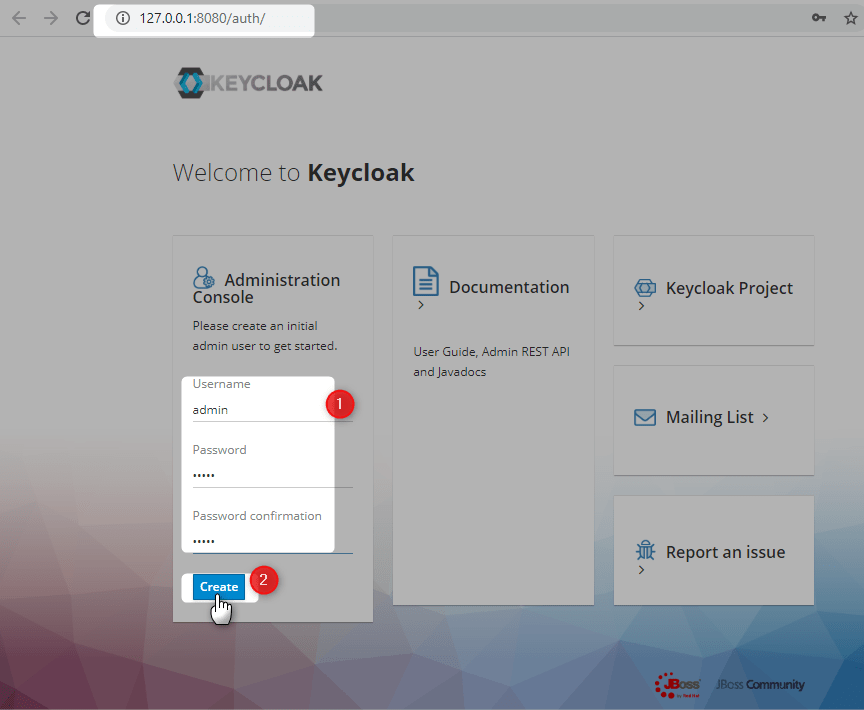
Keycloak is a great tool for IAM from JBOSS, it is easy to get started and configure. Start KeyCloak as follows.
E:\softwares\keycloak-8.0.1\bin>standalone.bat


Add initial console user
E:\softwares\keycloak-8.0.1\bin>add-user.bat -u admin admin
Updated user 'admin' to file 'E:\softwares\keycloak-8.0.1\standalone\configuration\mgmt-users.properties'
Updated user 'admin' to file 'E:\softwares\keycloak-8.0.1\domain\configuration\mgmt-users.properties'
Press any key to continue . . .
Login with the credentials, created above

Start keycloak application


Create initial keycloak user
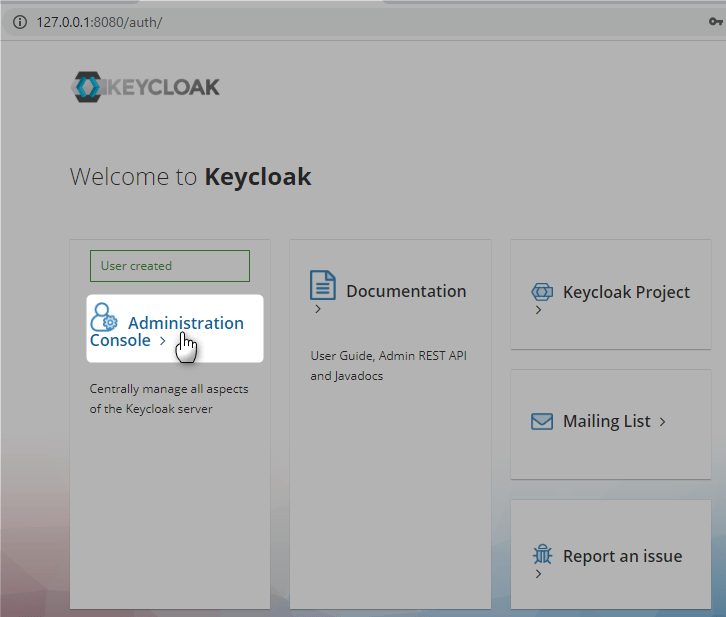
Login with initial keycloak user

Create New Realm


Create new client called react


Access Type should be confidential


Click Save, and go to Roles

New Role demo-user

New Role demo-admin


Client Secret can be found as follows

Add new user mnadeem


Add roles to user


OpenId Configuration
http://127.0.0.1:8080/auth/realms/demo/.well-known/openid-configuration
Lets create react application following this
E:\practices\node>create-react-app react-sso-app

E:\practices\node>code react-sso-app

Lets follow the steps as described in here
E:\practices\node\react-sso-app>mkdir api
E:\practices\node\react-sso-app>cd api
E:\practices\node\react-sso-app\api>npm init --yes
Install dependencies
E:\practices\node\react-sso-app\api> npm install –save-dev babel-cli babel-preset-env nodemon
E:\practices\node\react-sso-app\api>npm install --save express
E:\practices\node\react-sso-app\api>npm install --save-dev rimraf
E:\practices\node\react-sso-app\api>npm install npm-run-all --save-dev
Final package.json of api project under react-sso-app
{
  "name": "api",
  "version": "1.0.0",
  "description": "",
  "main": "index.js",
  "scripts": {
    "test": "echo \"Error: no test specified\" && exit 1",
    "clean": "rimraf ./dist/",
    "build": "babel ./src/ --presets=babel-preset-env --out-dir dist --ignore ./node_modules,./.babelrc,./package.json,./npm-debug.log --copy-files",
    "server:dev": "nodemon ./src/server.js --exec babel-node --presets babel-preset-env",
    "server:prod": "node ./dist/server.js",
    "prod": "npm-run-all clean build server:prod",
    "dev": "npm-run-all server:dev"
  },
  "keywords": [],
  "author": "",
  "license": "ISC",
  "devDependencies": {
    "babel-cli": "^6.26.0",
    "babel-preset-env": "^1.7.0",
    "nodemon": "^2.0.2",
    "npm-run-all": "^4.1.5",
    "rimraf": "^3.0.1"
  },
  "dependencies": {
    "express": "^4.17.1"
  }
}
Add api to workspace


Create files, .babelrc, server.js

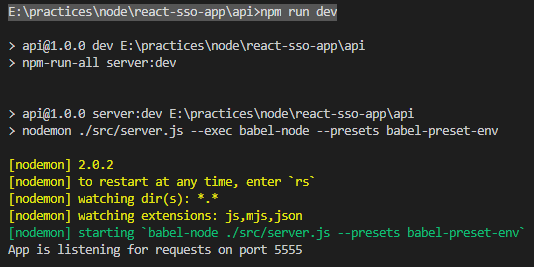
E:\practices\node\react-sso-app\api>npm run dev

> [email protected] dev E:\practices\node\react-sso-app\api
> npm-run-all server:dev


> [email protected] server:dev E:\practices\node\react-sso-app\api
> nodemon ./src/server.js --exec babel-node --presets babel-preset-env

[nodemon] 2.0.2
[nodemon] to restart at any time, enter `rs`
[nodemon] watching dir(s): *.*
[nodemon] watching extensions: js,mjs,json
[nodemon] starting `babel-node ./src/server.js --presets babel-preset-env`
App is listening for requests on port 5555
Lets install the following package
E:\practices\node\react-sso-app\api>npm install --save dotenv
lets create .env file (for local use) in api project

You can get all the details from keycloak (http://127.0.0.1:8080/auth/realms/demo/.well-known/openid-configuration)
SSO_CLIENT_ID=react
SSO_CLIENT_SECRET=202f6844-8b88-45b8-898a-327a74c10ab1
SSO_AUTH_URL=http://127.0.0.1:8080/auth/realms/demo/protocol/openid-connect/auth
SSO_TOKEN_URL=http://127.0.0.1:8080/auth/realms/demo/protocol/openid-connect/token
SSO_SCOPE=openid profile User roles
SSO_REDIRECT_URI=http://localhost:3000

TOKEN_SECRET=2423sdfsfsd3432fdwrerwtg
Lets add the following dependency
E:\practices\node\react-sso-app\api>npm install --save request-promise
E:\practices\node\react-sso-app\api>npm install --save jsonwebtoken
For more details look into the api project and react project
Lets start the api project
E:\practices\node\react-sso-app\api>npm run dev
Lets start the react project
e:\practices\node\react-sso-app>npm start

Make sure keycloak is running.
There are three basic things:

Download and Install Visual Studio Code.


Install all the following extensions.


Install create-react-app npm generator, one time only.
C:\Users\nadeem\AppData\Roaming\npm\create-react-app -> C:\Users\nadeem\AppData\Roaming\npm\node_modules\create-react-app\index.js
+ [email protected]
updated 2 packages in 5.229s

C:\Users\nadeem>
Make sure %APP_DATA%\Roaming\npm is under PATH

E:\practices\react>create-react-app
Please specify the project directory:
  create-react-app <project-directory>

For example:
  create-react-app my-react-app

Run create-react-app --help to see all options.
This will take a while
E:\practices\react>create-react-app first-react-app
Here is the output
Success! Created first-react-app at E:\practices\react\first-react-app
Inside that directory, you can run several commands:

  npm start
    Starts the development server.

  npm run build
    Bundles the app into static files for production.

  npm test
    Starts the test runner.

  npm run eject
    Removes this tool and copies build dependencies, configuration files
    and scripts into the app directory. If you do this, you can’t go back!

We suggest that you begin by typing:

  cd first-react-app
  npm start

Happy hacking!
Start the app
E:\practices\react>cd first-react-app
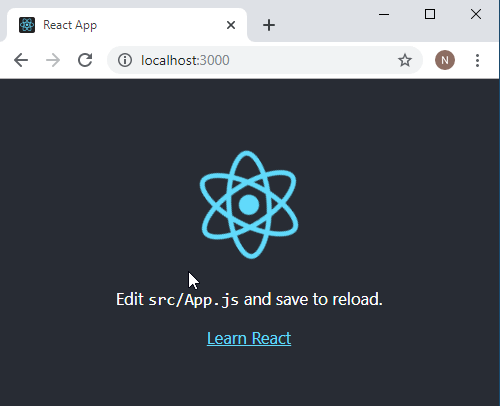
E:\practices\react\first-react-app>npm start
Following window is automatically opened.
Lets leave the react application running and open new terminal, and type the following to open Visual Studio Code.
E:\practices\react>code first-react-app
This would open the following

Congratulations you are all set for React Application development.
| File Name | Purpose |
| README.md | A markdown file under the root of the project. Describes all you need to get started with this generated reach app |
| package.json | References to all the npm packages used by this project, definitions of scripts to manage the script itself. |
| .gitignore | list which files/folder to ignore while commiting to git |
| public folder | contains static part of the application |
| favicon.ico | icon shown in the browsers address bar |
| manifest.json | Configuration file containing metadata according to Progressive Web Apps (PWA) Critera. |
| index.html | HTML Page which reach uses as template, providing a context to react (root), it is starting point of application. |
| npm_modules | generated after first app use, contains npm packages used by project, you don’t need to directly manage these files |
| src | Most important folder, All application files resides here. There are some initial basic basic files – index.js : Starting point for the application – index.css : Base styles for the application – App.js : Contains the definition of Sample component. – App.css : Contains the app component styles – App.test.js : App Component basic test cases. – serviceworker.js : Code to register service worker, in order to allow offline behavior as per the PWA requirements. |
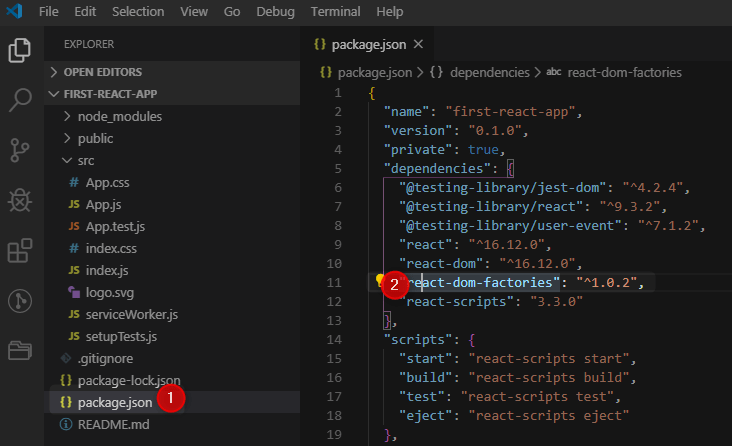
Install react-dom-factories


package.json is automatically updated
Modify the index.html as follows, and save it, the page is automatically refreshed.

Make sure Debugger for Chrome Visual Studio Code extension is installed

Just Click before line number

Configure the chrome debugger

Select chrome

This will add file launch.json under .vscode folder
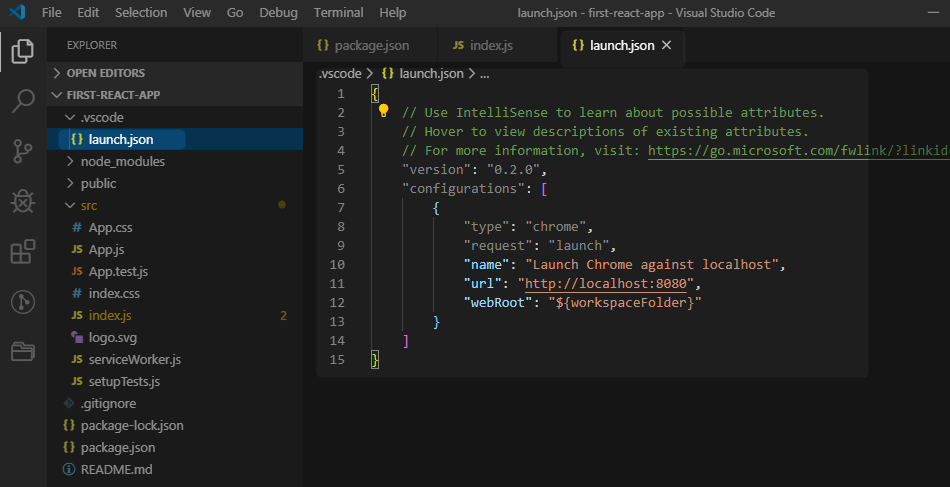
In our case the application is running on port 3000, keep it running, and change the port in launch.json as follows


Play with debugging controlls


Install React Developer tool


