Example of RBAC in Spring Security
Last Updated :
20 May, 2024
Role-based role control (RBAC) is a widely used method for managing resource availability in a system. When we use RBAC in Spring Security, we focus on defining roles and it can assign permissions to those roles and then associate users with specific roles.
Key Terminologies
- Granted Authority: Permission is often represented as an approved authority. These are specific permissions associated with the user, describing the actions that can be performed.
- Authentication: Authentication is the process of verifying the identity of the user. Once authenticated, the system assigns the appropriate roles and permissions to the user based on their credentials.
- Access Control List (ACL): An ACL is a list of permissions attached to an object, specifying which users or system roles are allowed access to the object and what operations are allowed on it This helps to control access to resources of an application.
Implementation Steps:
In Spring Security, RBAC (Role-Based Access Control) is set up using configuration classes and annotations to manage security rules and access control logic.
- Defining Roles and Permissions: Identify the various roles and permissions required in the system, either through code or configuration.
- Configuring Security Rules: Establish security rules within Spring Security to regulate access based on roles and permissions. This involves specifying URL patterns and determining which roles are needed to access them.
- Mapping Users to Roles: Connect users with specific roles based on their responsibilities or access needs. This linkage can be static, defined in configuration, or dynamic, fetched from databases.
- Implementing Authorization Logic: Create logic in the application to verify if users have the necessary roles and permissions for specific actions or resource access. This ensures proper access control based on user roles and permissions.
Implementation of the RBAC in Spring Security
Below are the steps to implement RBAC (Role-Based Access Control) in Spring Security
Step 1: Create a new Spring Boot project using the Spring Initializr and include the specified dependencies, follow these steps:
Dependencies
- Spring Web
- Spring Security
- Lombok
Once the project is created, the file structure will resemble the image below.
Step 2: Open the application.properties file and add the server port connection properties to the project.
spring.application.name=spring-security-RBAC-demo
server.port=8080
Step 3: Create the Security Configuration
We'll create a configuration class to configure Spring Security for the Spring application.
Go to src > org.example.springsecurityrbacdemo > config > SecurityConfig and put the below code.
Java
package org.example.springsecurityrbacdemo.config;


import org.springframework.context.annotation.Bean;
import org.springframework.context.annotation.Configuration;
import org.springframework.security.config.annotation.authentication.builders.AuthenticationManagerBuilder;
import org.springframework.security.config.annotation.web.builders.HttpSecurity;
import org.springframework.security.config.annotation.web.configuration.EnableWebSecurity;
import org.springframework.security.web.SecurityFilterChain;
import org.springframework.stereotype.Component;

@Configuration
@EnableWebSecurity
public class SecurityConfig {

    @Bean
    public SecurityFilterChain securityFilterChain(HttpSecurity http) throws Exception {
        http
                .authorizeRequests()
                .requestMatchers("/admin/**").hasRole("ADMIN")
                .requestMatchers("/user/**").hasRole( "USER")
                .anyRequest().authenticated()
                .and()
                .formLogin()
               // Specify the URL for the registration page

                .and()
                .logout().logoutSuccessUrl("/").permitAll();

        return http.build();
    }

}
Step 3: Create the User Details Configuration
We'll create a configuration class to configure the credentials for Spring Security in the Spring application.
Go to src > org.example.springsecurityrbacdemo > config > UserDetailsCofig and put the below code.
Java
package org.example.springsecurityrbacdemo.config;

import org.springframework.beans.factory.annotation.Autowired;
import org.springframework.context.annotation.Bean;
import org.springframework.context.annotation.Configuration;
import org.springframework.security.config.annotation.authentication.builders.AuthenticationManagerBuilder;
import org.springframework.security.core.userdetails.User;
import org.springframework.security.crypto.bcrypt.BCryptPasswordEncoder;
import org.springframework.security.crypto.password.PasswordEncoder;
import org.springframework.security.provisioning.InMemoryUserDetailsManager;
import org.springframework.security.provisioning.UserDetailsManager;

@Configuration
public class UserDetailsConfig {

    @Bean
    public PasswordEncoder passwordEncoder() {
        return new BCryptPasswordEncoder();
    }

    @Bean
    public UserDetailsManager userDetailsManager() {
        InMemoryUserDetailsManager manager = new InMemoryUserDetailsManager();
        manager.createUser(
                User.withUsername("admin")
                        .password(passwordEncoder().encode("admin"))
                        .roles("ADMIN")
                        .build()
        );
        manager.createUser(
                User.withUsername("user")
                        .password(passwordEncoder().encode("user"))
                        .roles("USER")
                        .build()
        );
        return manager;
    }
}
Step 4: Create the Admin Controller class
Go to src > org.example.springsecurityrbacdemo > controller > AdminController and put the below code.
Java
package org.example.springsecurityrbacdemo.controller;

import org.springframework.web.bind.annotation.GetMapping;
import org.springframework.web.bind.annotation.RequestMapping;
import org.springframework.web.bind.annotation.RestController;

@RestController
@RequestMapping("/admin")
public class AdminController {
    @GetMapping("/dashboard")
    public String admin() {
        return "Welcome Admin!";
    }

}
Step 5: Create the User Controller class
Go to src > org.example.springsecurityrbacdemo > controller > UserController and put the below code.
Java
package org.example.springsecurityrbacdemo.controller;

import org.springframework.web.bind.annotation.GetMapping;
import org.springframework.web.bind.annotation.RequestMapping;
import org.springframework.web.bind.annotation.RestController;

@RestController
@RequestMapping("/user")
public class UserController {

    @GetMapping("/home")
    public String user() {
        return "Welcome User!";
    }
}
Step 6: Main Class
No need to change the main class of the application.
Java
package org.example.springsecurityrbacdemo;

import org.springframework.boot.SpringApplication;
import org.springframework.boot.autoconfigure.SpringBootApplication;

@SpringBootApplication
public class SpringSecurityRbacDemoApplication {

    public static void main(String[] args) {
        SpringApplication.run(SpringSecurityRbacDemoApplication.class, args);
    }

}
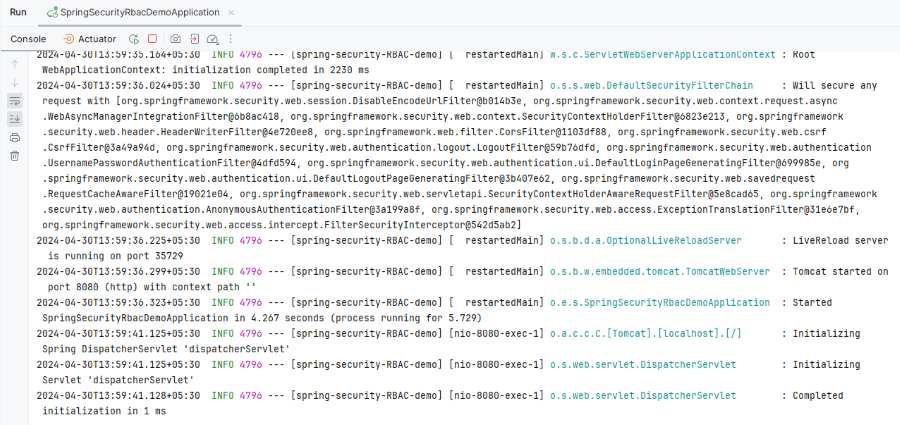
Step 7: Run the Application
Once we run the application, then the project will run at port 8080.
Login into the Admin Credientials

- username: admin
- password: admin
Access the below url:
http://localhost:8080/admin/dashboard
Output:

http://localhost:8080/user/home
Output:

Unauthorized access occurs when attempting to access the user home page, as it is only permitted for the admin, thus preventing access to the URL.
UserLogin Credientials
- username: user
- password: user
Access the Admin Dashboard:
http://localhost:8080/admin/dashboard

Unauthorized request because it only gives permission to access the admin.
http://localhost:8080/user/home
Output:

The above example demonstrates basic setup for RBAC using Spring Security in a Java web application.
Similar Reads
Spring Security - permitAll() Expression with Example
In Spring Security, the permitAll() method is used to configure access rules for specific endpoints or resources, allowing unrestricted access to them without requiring authentication or authorization. It is typically used to define public endpoints that should be accessible to all users, including
7 min read
Spring Security - Basic Authentication
Spring Security is a framework that allows a programmer to use JEE (Java Enterprise Edition) components to set security limitations on Spring Framework-based web applications. As a core part of the Spring ecosystem, it’s a library that can be utilized and customized to suit the demands of the progra
6 min read
Spring Security - Filter Chain with Example
Spring Security is a framework that allows a programmer to use JEE components to set security limitations on Spring-framework-based Web applications. In a nutshell, it’s a library that can be utilized and customized to suit the demands of the programmer. Because it is a part of the same Spring famil
6 min read
Spring Security - Remember Me
In order to remember the users on the computer while logging into a website, via Spring Security, we can maintain that by using a "Remember Me" option. Spring Security provides a "Remember Me" feature to allow users to stay logged in even after closing the browser. sends a cookie to the browser. Thi
7 min read
Spring Security for API Rate Limiting
API rate limiting in Spring Security is an essential technique for modern web applications to control client requests to a particular endpoint over a specified time frame. This practice helps protect APIs from abuse, ensures fair resource usage, and prevents Denial of Service (DoS) attacks by contro
5 min read
Spring Security - JDBC Authentication
JDBC or Java Database Connectivity is a Java API to connect and execute the query with the database. It is a specification from Sun Microsystems that provides a standard abstraction(API or Protocol) for Java applications to communicate with various databases. It provides the language with Java datab
8 min read
Spring Security Annotations
There are multiple annotations supported by Spring Security. But, in this article, we will discuss about these annotations can be used in a Spring Boot project as well. These annotations play a crucial role in creating a web application in Spring Boot. The Spring Security annotations are a powerful
3 min read
Introduction to Spring Security Expressions
Spring Security expressions offer a powerful way to secure applications by using expressions that evaluate security constraints at runtime. These expressions are integrated into the Spring Security framework, allowing for fine-grained access control directly in the application's configuration. Prere
3 min read
Spring Security at Method Level
Spring Security provides a powerful way to secure Java applications, allowing developers to control authentication and access at different levels. One of its key features is method-level security, which lets us use security constraints on specific methods instead of the entire class or application.
2 min read
Spring Security - In-Memory Authentication
Spring Security is a powerful and highly customizable authentication and access-control framework. It is the de-facto standard for securing Spring-based applications. Spring Security is a framework that focuses on providing both authentication and authorization to Java applications. Like all Spring
4 min read