Jupyter Notebook is an open-source web application that allows you to create and share documents containing live code, equations, visualizations and narrative text. It supports over 40 programming languages, including Python.
Note: Python is required for installing Jupyter Notebook itself (Python 3.3+ or Python 2.7)
Installation
There are two main ways to install Jupyter Notebook:
1. Using Anaconda
Anaconda includes Python, Jupyter Notebook and other commonly used packages for data science.
To Download the Anaconda, click here
2. Using PIP
Jupyter Notebook can be installed directly via pip:
pip install jupyter
Setup
To start the Jupyter Notebook server, run the following command in your terminal or command prompt:
jupyter notebook
- This will start the Jupyter Notebook server.
- Your default browser will open at: http://localhost:8888/tree

This Notebook Dashboard shows a list of notebooks, files and directories in the folder where the server started (often your home directory).

Creating a New Notebook
- Click New -> select Python3 from the dropdown.
- A new notebook opens in a separate tab.

Renaming Notebooks
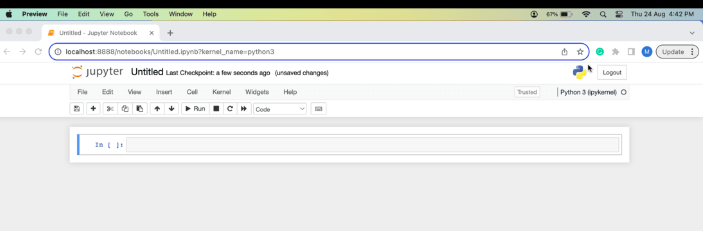
We can notice that at the top of the page is the word Untitled. This is the title for the page and the name of your Notebook. We can change the name by simply clicking on it.

Running and Debugging Code
- Select a cell and click Run in the toolbar (middle row of buttons).
- Or use keyboard shortcuts:
Shift + Enter -> Execute cell and move to next
Ctrl + Enter -> Execute cell in place

Jupyter Notebook Menu Items
Jupyter Notebook contains a list of menus which can be used to perform various functions.
- File: Create, open, save notebooks, export in different formats, manage checkpoints, close notebooks
- Edit: Cut, copy, paste, delete, merge, split or manipulate cell.
- View: Customize notebook layout and appearance
- Insert: Add new code, markdown or other cell types.
- Cell: Run, delete or modify cells; change cell type.
- Kernel: Interrupt, restart or switch kernel (language/environment).
- Widgets: Add interactive elements like buttons, sliders and text boxes.
- Help: Access documentation and support.
Working with Terminals
To open terminal go to the homepage and click on new and then select terminal from the drop-down list.

Managing Running Notebooks
- Go to Running tab in the dashboard to see active notebooks and terminals.
- Shut down notebooks you no longer need to save system resources.

Adding Rich Content
- Jupyter supports Markdown, LaTeX, images, HTML and multimedia.
- This makes notebooks interactive and visually appealing.
Types of Cells
Jupyter Notebook provides several cell types, these cell types enable you to create, edit and organize your content within a notebook. Here are main cell types in Jupyter:
- Code Cells: Execute code in Python, Julia, R, etc. Output appears below the cell
- Markdown Cells: Format text using Markdown. Supports headings, lists, links, tables
- Raw Cells: Unprocessed content, usually for LaTeX or plain text.
- Heading Cells: Section headings and subheadings (Markdown-based).
- Raw NBConvert Cells: Raw content intended for notebook export.
Exporting Notebooks
In Jupyter Notebook, we can export our notebooks in various formats to share with other people. Here's how we can export notebooks. The formats available are: HTML, LaTeX, PDF, RevealJS, Markdown, ReStructuredText, Executable Script.
Converting Notebooks to other Formats
Using nbconvert:
nbconvert is a command-line tool to convert Jupyter Notebooks (.ipynb) into PDF, HTML, Markdown or LaTeX for easy sharing and reporting.
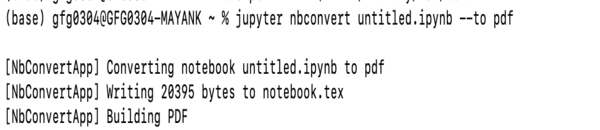
jupyter nbconvert notebook_name.ipynb --to pdf
We can use nbconvert to create PDFs from your notebooks, which is useful for creating reports or presentations from your Jupyter Notebook content.
samplefile:

To convert it into pdf we use command:
jupyter nbconvert untitled1.ipynb --to pdf
After running the command a pdf file is saved in the folder after getting converting from the Notebook.
Useful Commands
Command to open a notebook in the currently running notebook server:
jupyter notebook notebook_name.ipynb
By default, the notebook server starts on port 8888, but you can specify a different port (e.g., 9999) if needed.
jupyter notebook --port 9999
Command to start notebook server without opening a web browser:
jupyter notebook --no-browser
The notebook server provides help messages for other command line arguments using --help flag:
jupyter notebook --help
Jupyter Notebook Shortcuts
Jupyter Notebook provides several keyboard shortcuts to speed up coding, navigation and cell management, making your workflow more efficient.
To change modes (edit, command):
Esc: Change mode to command mode
Enter: Change mode to edit mode
To change content type (code or markdown) [in command mode]:
M: Change cell to markdown
Y: Change cell to code
To execute code or markdown [any mode]:
Shift + Enter: Execute and go to next cell
Ctrl + Enter: Execute and stay in the same cell
To insert cell [in command mode]:
A: Create cell in above to the cell
B: Create cell in below to the cell
To Cut, Copy and Paste [in command mode]:
X: Cut the cell that can be paste anywhere any number of times
C: Copy the cell that can be paste anywhere and any number of times
V: Paste the cell