How to Clear Cache in Windows 11
Last Updated :
23 Jul, 2025
Are you noticing that your Windows 11 system is slowing down or taking up too much storage space? One of the most effective ways to speed up your computer and free up space is by clearing the cache. Over time, temporary files, browser cache, and other cached data can build up and cause performance issues.
Luckily, clearing the cache in Windows 11 is a straightforward process. In this guide, we’ll walk you through all the ways to clear the cache on your Windows 11 PC, including how to use Storage Sense, Disk Cleanup, Command Prompt, and even third-party tools. Whether you're trying to free up space, improve system performance, or simply tidy up your computer, this article has you covered.
1. Flush DNS using Windows Settings
Temporary files, system logs, and other files that might be deleted without harming your computer can be done in a few steps:
- Press Windows + I to open Settings.
- Navigate to "System" and click on "Storage."
- Under the "Local Disk (C:)" section, click on "Temporary files."

- Check the boxes for the types of files you want to remove.
- Click "Remove files" to clear the cache.

2. Clear the Location Cache
This feature enables Windows 11 to store and retrieve users’ location information, which can also be used to advance location-based services. This clears the cache that might be useful in privacy or troubleshooting location related problems. Here's how you can do it:
- Press Windows + I to open Settings and go to "Privacy."
- Select "Location" under "App permission" from the left sidebar.
- Scroll down to "Location history" and click on "Clear."

3. Clear the Microsoft Store Cache
Sometimes, downloading or updating apps may be hampered by the MS Store cache. These issues may be resolved by clearing it up. Here's how you can do it:
- Press Windows + S and search for "wsreset."
- Click on the "wsreset" result, and a Command Prompt window will open briefly.
- Once the process is complete, the Microsoft Store cache is cleared.
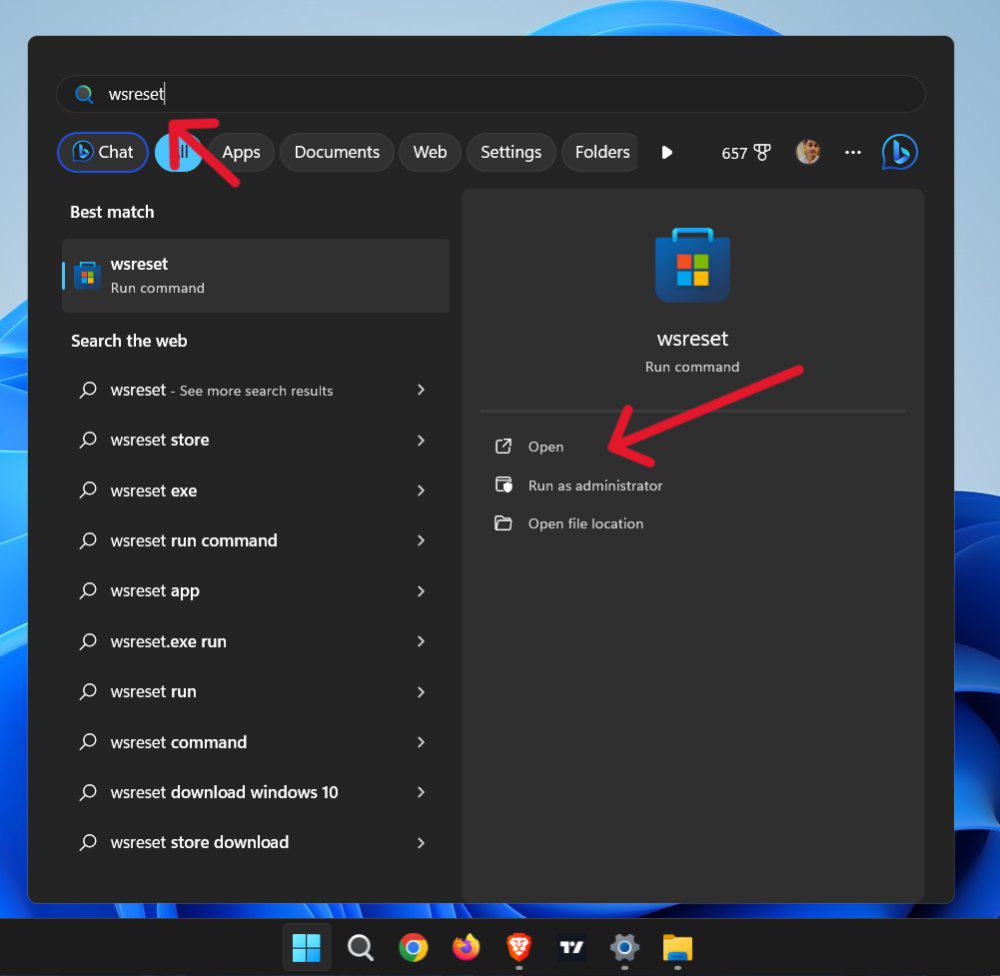
Once the reset is complete, you can open the Microsoft Store and check if the issue has been resolved.
4. Disk Cleanup
Microsoft has included disk cleanup as a part of your Windows 11 that will enable you get rid of temporary and cached files from your PC. Here's how you can do it:
- Open search bar then on input type "Disk Cleanup". To open search bar use shortcut Win + S
- In the "Disk Cleanup" window, select your Windows 11 drive from the "Drives" drop-down menu and click "OK."
- In the "Disk Cleanup" window, check all boxes in "Files to Delete" to remove cache files. Click "OK" at the bottom.
- Click "Delete Files" to confirm.

Disk Cleanup should be the first solution to erase all cached files, especially from system logs, internet browsing, and Windows updates.
5. Using Storage Sense
One of Windows 11 features is Storage Sense, which can clear space on its own by removing the temporaries and the bin contents. Here's a quick guide to perform this action:
- Press Windows + I to access Settings and go to "System."
- Click on "Storage" and click on "Storage Sense" and toggle it ON.
- Adjust the settings as per requirement to remove cache files.

By setting Storage Sense to clear cache files on a schedule, your system will stay clean and optimized.
If you have additional requirement, you can prefer cjhooisng third-party tool for custom setup of cache file deletion and optimize your PC conveniently. Here are some of the famous tool to perform this action:
- CCleaner
- BleachBit
- Glary utilities
These tools offers deep cleaning for your Windows 11 computer, allowing you to remove any unused cached files that cannot be traced or accessible through any of the Windows built-in tools.
How to Flush the DNS Cache: Bonus
Flushing DNS cache helps resolve website issues, update addresses, and improve connectivity. Follow the steps to do the same.
- Open Command Prompt as an administrator (Windows + X and choose "Command Prompt (Admin)").
- Type the command ipconfig /flushdns and press Enter.
- You'll then get a successful message for this operation (DNS clear).
Clearing the DNS cache is especially useful when your internet connection is acting up or when websites are loading improperly.
Conclusion
Clearing Cache in Windows 11 is not a typical task to perform and is among the best way to keep your system clean and lag-free. Using such diversified procedures like clearing general cache or flush DNS record will enhance the smooth running of the users’ experience by avoiding problems that may arise. The best way is to inspect your system regularly and keep it clean and healthy.
Also Read
Similar Reads
How to Clear Browser Cache On Windows 10 You must clear your browser cache periodically to ensure that your web browser is not taking excess loading time. However, clearing the browser cache will have a different approach across browsers. Follow these steps to clear your browsing cache in Windows 10 across Google Chrome, Microsoft Edge, an
4 min read
How to Check for Updates in Windows 11? In addition to performing regular security checks, it is also important to keep compliant with the current trend of keeping almost every device’s software and application up to date. This also applies to the Windows 11 operating System. Updates may include new possible options, improve the existing
4 min read
How to clear cache on a Mac In the fast-paced world of technology, our trusty Mac computers can sometimes start to slow down and behave a bit sluggish. If you've ever experienced the frustration of a Mac that seems to be running as if it's stuck in quicksand, fear not – you're not alone. The culprit, more often than not, is a
10 min read
How to Clean Install Windows 11 Version 24H2 A clean install of Windows 11 24H2 provides a fresh and enriched experience while ensuring that your PC runs smoothly. Whether you're upgrading from an older version or making a fresh Windows 11 installation, this guide will walk you through the process of performing a clean install of Windows 11 24
7 min read
How to Change the Time in Windows 11? Are you struggling to adjust the time on your Windows 11 computer? Don't worry, you're not alone. Knowing how to change the time on your device is crucial for keeping it synchronized and accurate. Whether you need to adjust for time zones, daylight saving time, or simply correct an incorrect time di
6 min read
How to Forget a Network in Windows 11? Knowing how to forget a network in Windows 11 is useful when removing previously connected Wi-Fi networks from your device. This can help in cases where you need to clear saved network settings or troubleshoot connectivity issues. In this guide, we will walk you through the steps to forget Wi-Fi in
5 min read