One of the most important advantages of using React Native is that it can generate applications for both Android and iOS operating systems. In this article, we will discover how to deploy a React Native app to the Play Store, and how to bundle all the files of the application and generate an AAB file.
Steps to Deploy React Native Application
Step 1: Digitally sign the Android App
The official search engine and digital distribution platform for Android applications is Google Play Store. Before publishing the applications, the apps must be digitally signed for security and encryption.
To digitally sign an app, a hash key is needed, which is also known as the release key. For all future updates, this key is used. It is important to keep this key safe and protected, or else access to the app may get lost. Google gives the user an option to manage the signing keys using the feature known as Play App Signing, this feature enables the users to -
- Reduce the app bundle size
- Store the signing keys securely using Google's algorithms
- In case of compromise, it allows the users to update the keys
An upload key is also required by the Google Play Store to upload an Android app.The upload key is created by the user and is used to sign the updates, whereas the release key is generated and managed by Google. It is always advised to use separate keys, as it increases security.If in any case you lose the upload key, a new one can be generated by contacting Google support.
Step 2: Generating an Upload Key
An upload key can be generated with the help of using Java keytool. We will explain how to generate an upload key for both Windows and MacOS.
For Windows
The utility of the keytool is provided by the Java SDK. You need to check where your Java SDK is installed. It's default location in the computer system is -
C:\Program Files\Java\jdkx.x.x_x\
Here, "x.x.x_x" represents the version number. The keytool is present inside the "bin" folder. You need to migrate to this location using this command -
cd "c:\Program Files\Java\jdk1.8.0_152\bin"
To run the keytool, you have to execute this command -
keytool -genkeypair -v -storetype PKCS12 -keystore my-upload-key.keystore -alias my-key-alias -keyalg RSA -keysize 2048 -validity 10000
When this command is run, you will be prompted to enter a password. You will need to remember this password for app signing. After answering a few more questions, the keystore will be generated:
 Generating Upload Key
The generated keystore can be found in the current terminal location. Here is the bin folder:
 Generating Upload Key
For MacOS
The process is similar in the case of MacOS as well. To find the location of Java SDK, use this command -
/usr/libexec/java_home
Using this command will print the location, for example -
/Library/Java/JavaVirtualMachines/jdkX.X.X_XXX.jdk/Contents/Home
Move to this location using the cd command, and run the keytool command:
sudo keytool -genkey -v -keystore my-upload-key.keystore -alias my-key-alias -keyalg RSA -keysize 2048 -validity 10000
Step 3: Updating the Gradle Files
Once you have generated the keystore, it is time to update the gradle files using the keystore information using which our app will get signed with it. The first step is to copy the keystore file from the bin folder to the React Native app's "android/app" folder:
 Folder structure
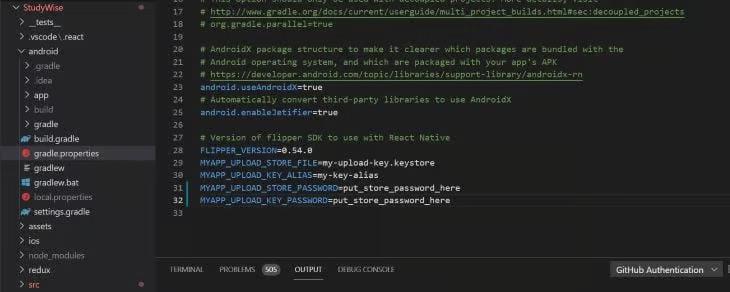
Now, open the "~/.gradle/gradle.properties" or "android/gradle.properties" and add the below references:
MYAPP_UPLOAD_STORE_FILE=my-upload-key.keystore
MYAPP_UPLOAD_KEY_ALIAS=my-key-alias
MYAPP_UPLOAD_STORE_PASSWORD=*****
MYAPP_UPLOAD_KEY_PASSWORD=*****
Now, you need to change the store password and key password to the one you entered while creating the keystore:
 Upgrading Gradle files
In this above step, we have configured the variables. Now we need to configure Gradle to use the values above.
Open the "android/app/build.gradle" file and edit it:
android {

    defaultConfig {    }
    signingConfigs {
        release {
            if (project.hasProperty('MYAPP_UPLOAD_STORE_FILE')) {
                storeFile file(MYAPP_UPLOAD_STORE_FILE)
                storePassword MYAPP_UPLOAD_STORE_PASSWORD
                keyAlias MYAPP_UPLOAD_KEY_ALIAS
                keyPassword MYAPP_UPLOAD_KEY_PASSWORD
            }
        }
    }
    buildTypes {
        release {

            signingConfig signingConfigs.release
        }
    }
}
Step 4: Generating the APK release build
Once all the above steps are completed, the build is ready to be generated. Navigate to the Android directory and run the release build using these commands:
cd android
./gradlew bundleRelease
Using this command an bundle will be created in the AAB format. The generated AAB can be found under
android/app/build/outputs/bundle/release/app-release.aab
For a while now, the basic requirement is for the new apps to be published in AAB. Using this format, Google Play generates optimized APKs for multiple device configurations.
Step 5: Testing the release build
To test the release build without manually installing it on your mobile device, you can run the build with the following command:
npm run android -- --mode="release"
Alternate Publishing Stores
The generated APK includes native code for all major CPU architectures (x86, x86_64, ARMv7a, ARM64-v8a), ensuring broad compatibility across Android devices. Thus, results in larger APK sizes due to potentially unused native code on specific devices. To create APK for each CPU , add the following line in your android/app/build.gradle file:
android {

    splits {
        abi {
            reset()
            enable true
            universalApk false
            include "armeabi-v7a", "arm64-v8a", "x86", "x86_64"
        }
    }

}
Upload these files to stores like Amazon AppStore or F-Droid that support device targeting, making sure users receive the correct APK automatically based on their device. For other markets like APKFiles that don't support multiple APKs, set `universalApk` to true to create a single APK containing binaries for all supported CPUs.
Switching to Google Play's App Signing
If your older React Native app hasn't used Google Play's App Signing, we recommend enabling it for benefits like automatic app splitting. To migrate, generate a new upload key and update your app's build settings in android/app/build.gradle to use this new key instead of the old one. Follow Google Play's instructions to securely send your original release key to them afterwards.
Default Permissions
Most Android apps include the INTERNET permission by default; in debug mode, the SYSTEM_ALERT_WINDOW permission is added but excluded in production builds.
Conclusion
Deploying a React Native app to the Google Play Store involves several important steps, from preparing your app and configuring it for release to uploading it to the Play Store and monitoring its performance. By following this guide, you can ensure a smooth deployment process and reach millions of potential users.
Similar Reads
How to style React Native Application ? In this article, we'll learn how to style React Native applications. There are two major ways to style your React Native Application.Table of ContentStyle PropsUsing StyleSheetStyle Props ExampleUsing StyleSheet ExampleStyle PropsTo style an element with the style props, the value must be a JavaScri
5 min read
How do you deploy a React application? Deploying a React application is the process of making your React project accessible on the internet so that users can interact with it. It involves several steps to ensure your application is properly built, uploaded to a hosting service, and configured to work correctly in a live environment. This
2 min read
Deployment of React Application using GitHub Pages Deploying a React application using GitHub Pages is an easy and efficient way to host your projects online for free. In this article, we will walk you through the steps to deploy your React app, making it accessible to users with a live URL. PrerequisitesA GitHub accountNode.js and npm installedBasi
4 min read
How to Deploy React App on Azure Virtual Machines? In this article, we will study how we can deploy our existing React web application to Azure VM on Ubuntu Server. We will also see how to use the public IP of the Azure VM to access the React application using Nginx. For this article, you should know about setting up a VM in Azure. We will see how t
5 min read
How to Create ToDo App using React Native ? In this article, we'll see how to create a To-Do app using React Native. An ideal illustration of a basic application that can be developed with React Native is a To-Do app. This app enables users to generate, modify, and remove tasks, assisting them in maintaining organization and concentration. To
11 min read