How to Create Multiple Collections in MongoDB Using Mongoose and Node.js
Last Updated :
11 Jun, 2025
When developing stable applications with MongoDB and Node.js, handling many collections in an efficient way is crucial. Mongoose, a flexible ODM (Object Data Modeling) library, allows it to be easy to create and work with multiple collections with schema-based models.
In this article, we will demonstrate how to create and handle multiple MongoDB collections with Mongoose in a Node.js environment. You will learn step-by-step configuration, schema definition, data insertion, and best practices when handling multiple collections.
Introduction to Creating Multiple Collections with Mongoose and Node.js
Creating multiple collections in MongoDB using Mongoose with Node.js involves defining different Mongoose schemas and models for each collection. Mongoose allows for a straightforward and schema-based approach to managing MongoDB collections. Here’s a step-by-step guide on how to create and manage multiple collections using Mongoose in a Node.js application.
To create a collection with Mongoose you have to create two necessary things:
- Schema: It is a document structure that contains the property with its types ( default value, validations, etc. when required) as a key-value pair.
- Model: It is a class created with the help of defined Schema and a MongoDB document is an instance of the Model. Therefore, it acts as an interface for the MongoDB database for creating, reading, updating, and deleting a document.
Why Use Mongoose for Multiple Collections?
Mongoose provides:
- Schema-based structure: Define clear document formats for each collection.
- Model abstraction: Models act as interfaces for querying and modifying collections.
- Validation and defaults: Ensure data integrity for each collection.
- Easy querying and manipulation: Use Mongoose’s rich API for CRUD operations on multiple collections.
Steps to Setup Project
Make a folder structure for the project.
mkdir myapp
Navigate to the project directory
cd myapp
Initialize the NodeJs project inside the myapp folder.
npm init -y
Install the necessary packages/libraries in your project using the following commands.
npm install mongoose
Project Structure:
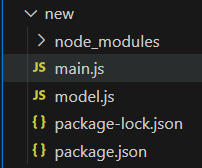
The updated dependencies in package.json file will look like:
"dependencies": {
    "mongoose": "^8.4.3",
  }
Step 1: Create a Folder and include 'model.js' and 'main.js' files into it
- model.js: It contains schemas and models for all the collections you want to create, and then we are exporting all the models created so that they can be imported into the file in which we will create our collections.
- main.js: It is the main server file here we have inserted data into a collection.
Step 2: Write down the following code in the model.js File
// model.js

// Requiring module
const mongoose = require('mongoose');

// Course Modal Schema
const courseSchema = new mongoose.Schema({
    _id: Number,
    name: String,
    category: String
});

// Student Modal Schema
const studentSchema = new mongoose.Schema({
    name: String,
    enroll: Number,
    courseId: Number
});

// Teacher Modal Schema
const teacherSchema = new mongoose.Schema({
    name: String,
    teacher_id: Number,
    courseId: Number
})

// Creating model objects
const Course = mongoose.model('course', courseSchema);
const Student = mongoose.model('student', studentSchema);
const Teacher = mongoose.model('teacher', teacherSchema);

// Exporting our model objects
module.exports = {
    Student, Course, Teacher
}
Step 3: Database connection can be easily established using mongoose like
mongoose.connect('mongodb://localhost:27017/GFG',
{
   useNewUrlParser: true,
   useUnifiedTopology: true,
   useFindAndModify: false
});
If database GFG is already present connection will be established otherwise the first database will be created and a connection will be established Here initially we have an empty database GFG as shown in the image below:
 Initially database is empty
Create data objects, you want to insert, for all the collection then insert as shown in main.js file. As soon as we will insert data our collections will automatically be created.
Step 4: Write down the following code in the main.js file
// main.js

const mongoose = require('mongoose');
const { Student, Course, Teacher } = require('./model.js');

// Connecting to database
mongoose.connect('mongodb://localhost:27017/GFG',
    {
        useNewUrlParser: true,
        useUnifiedTopology: true,
        useFindAndModify: false
    });

// Creating array of course data object
const courseData = [{
    _id: 01,
    name: "NodeJS",
    category: "Backend"
},
{
    _id: 02,
    name: "MongoDB",
    category: "Database"
}]

// Creating array of student data objects
const studentData = [{
    name: "John",
    enroll: 1801,
    courseId: 01
}]

// Creating array of teacher data object
const teacherData = [{
    name: "TeacherX",
    teacher_id: 9901,
    courseId: 01
},
{
    name: "TeacherY",
    teacher_id: 9902,
    courseId: 02
}]

// Inserting course data
Course.insertMany(courseData)
    .then(value => {
        console.log("Saved Successfully");
    })
    .catch(error => {
        console.log(error);
    })

// Inserting student data
Student.insertMany(studentData)
    .then(value => {
        console.log("Saved Successfully");
    })
    .catch(error => {
        console.log(error);
    })

// Inserting teacher data
Teacher.insertMany(teacherData)
    .then(value => {
        console.log("Saved Successfully");
    })
    .catch(error => {
        console.log(error);
    })
Step to Run Application: Run the application using the following command from the root directory of the project
node main.js
 Output after executing main.js
Database: Now we can see that three collections courses, students, teachers are created in our database GFG.
 Database after the creation of multiple collections
Why This Approach Works Well
- Modular and maintainable: Defining schemas and models in a separate file keeps your code clean.
- Schema validation: Enforces data shape and consistency across collections.
- Automatic collection creation: Mongoose handles collection creation on first data insertion.
- Simple insertion APIs:
insertMany() helps insert bulk data efficiently.
Important Points for Managing Multiple Collections
- Use references (populate) to relate documents across collections, e.g., students linked to courses by
courseId. - Consider indexes on frequently queried fields for better performance.
- Use async/await or Promise chaining for better control and error handling in production apps.
- Regularly backup your MongoDB database and monitor collection sizes.
Conclusion
It is simple and effective to create and manage multiple collections using Mongoose in Node.js. By having different schemas and models for every collection, you have an organized, consistent, and easy-to-maintain method of dealing with your data. By following this tutorial, you can simply create your project, establish a connection to MongoDB, and add data into multiple collections confidently.