How to Upload File with Progress Bar using Node.js ?
Last Updated :
20 Jun, 2024
Uploading files in NodeJS involves transferring files from the client's location to the server's location. A progress bar is a visual component that displays the percentage of the total file upload. In this tutorial, we will create a local server and demonstrate how to upload files to a destination folder while updating the progress bar to reflect the upload progress.
Formidable Module
It is a Node.js module for parsing form data, mainly used for file uploads.
Installation Steps
Step 1: Make a folder structure for the project.
mkdir myapp
Step 2: Navigate to the project directory
cd myapp
Step 3: Initialize the NodeJs project inside the myapp folder.
npm init -y
Step 4: Install the necessary packages/libraries in your project using the following commands.
npm install formidable express
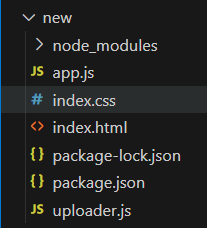
Project Structure:
The updated dependencies in package.json file will look like:
"dependencies": {
    "express": "^4.19.2",
    "formidable": "^3.5.1",
  }
Install Formidable Module
Steps to Create Progress Bar for File Upload
Step 1: First create an 'index.html' file which will act as the frontend for the client. A sample code is given below. We create an empty component progressUpload which will be updated only after files are selected to upload.
HTML
<!-- index.html -->

<!DOCTYPE html>
<html lang="en">

<head>
    <link rel="stylesheet" src="index.css">
    <title>Node.js Upload Files with Progress Bar</title>
</head>

<body>
    <h1>Check The Progress of Uploaded Files</h1>

    <div>
        <span>Select files to upload</span>
        <input type="button" class="chooseFiles" value="Select..." />
        <div class="progressUpload"></div>
    </div>
    <script src="uploader.js"></script>
</body>

</html>
Step 2: Create a 'uploader.js' which will open a pop-up to upload files and display a progress bar. The JS code is given below.
- First, we create an input element for the files and attach that to our browse button on the frontend using the addEventListener function. When a new file is selected the file details are sent using FormData() format.
- To update Progress Bar we addEventlistener to it and update its value in percentage. The progress bar is added to 'index.html' by creating two div components in createProgressbar( ) function.
Node
// uploader.js

const browse = document.getElementsByClassName('chooseFiles')[0];
const selectDialog = document.createElement("INPUT");
selectDialog.setAttribute("type", "file");
selectDialog.setAttribute("multiple", "true");
selectDialog.style.display = "none";
const progressUpload = document.getElementsByClassName("progressUpload")[0];
const progress;
addProgressBar();
browse.addEventListener("click", function () {
  selectDialog.click();

});

selectDialog.addEventListener("change", function () {

  sendFiles(selectDialog.files);

});

function sendFiles(files) {

  resetProgressBar();
  const req = new XMLHttpRequest();
  req.upload.addEventListener("progress", updateProgress);
  req.open("POST", "/uploadFile");
  const form = new FormData();
  for (const file = 0; file < files.length; file++) {

    form.append("file" + file, files[file], files[file].name);

  }
  req.send(form);
}
function updateProgress(e) {

  progress.style.width = (((e.loaded / e.total) * 100)) + "%";

}
function resetProgressBar() {
  progress.style.width = "0%";
}
function addProgressBar() {
  const progressBar = document.createElement("div");
  progressBar.className = "progressBar";
  progressUpload.appendChild(progressBar);
  const innerDIV = document.createElement("div");
  innerDIV.className = "progress";
  progressBar.appendChild(innerDIV);
  progress = document.getElementsByClassName("progress")[0];
}
Step 3: Now create the main server file 'server.js' which will upload the files to the destination and send the requested resources for a webpage to the client-side. We have four different URL request types for HTML, CSS, JS, and upload. Using the Nodejs file system module 'fs' move the file to a new location.
Note: In 'let upd ' add your machine destination address.
Node
// server.js

let http = require("http");
let url = require("url");
let fs = require("fs");
let formidable = require("formidable");
let host = "localhost";
let port = 7777;

http.createServer(function (req, res) {
  let path = url.parse(req.url, true);
  if (path.pathname.endsWith("html")) {
    fs.readFile("." + path.pathname, function (err, data) {
      res.writeHead(200, "OK", { "Content-Type": "text/html" });
      res.write(data);
      res.end();
    });
  } else if (path.pathname.endsWith("css")) {
    fs.readFile("." + path.pathname, function (err, data) {
      res.writeHead(200, "OK", { "Content-Type": "text/css" });
      res.write(data);
      res.end();
    });
  } else if (path.pathname.endsWith("js")) {
    fs.readFile("." + path.pathname, function (err, data) {
      res.writeHead(200, "OK", { "Content-Type": "text/javascript" });
      res.write(data);
      res.end();
    });
  } else if (path.pathname.endsWith("uploadFile")) {
    let form = new formidable.IncomingForm();

    form.parse(req, function (err, fields, files) {

      for (let file in files) {
        if (!files.hasOwnProperty(file)) continue;
        let old = files[file].filepath;
        let upd = 'C:/Users/sunny/' + files[file].name;
        fs.rename(old, upd, function (error) {
          if (error) throw error;
        });
      }
      res.write('File uploaded Successfully');
      res.end();
    });
  }
}).listen(port, host);
Step 4: Finally create a stylesheet 'index.css' to format the display of the progress bar.
CSS
/* index.css */

.progressupload {
    height: 20px;
    margin-top: 25px;
}

.progress {
    background-color: green;
    width: 0%;
    height: 20px;

}

.progressBar {
    padding-top: 2px;
    padding-bottom: 2px;
}
Step 5: Update the NodeJS module by installing npm and run the project by running the command:
node server.js
 Update and Run the project
Step 6: Go To URL http://localhost:7777/index.html and upload the file.
 Run The Server and Upload File.