Introduction to Spring Data JDBC
Last Updated :
27 Aug, 2024
Spring Data JDBC is part of the Spring Data ecosystem that offers a straightforward approach for working with relational databases using plain SQL and simple Java objects. Unlike Spring Data JPA, built on JPA (Java Persistence API) and ORM (Object-Relational Mapping) frameworks, Spring Data JDBC focuses on a more direct and less abstract interaction with the database. This makes it ideal for applications that require high performance and simplicity.
Core Concepts
- Simplicity and Predictability: Spring Data JDBC prioritizes simplicity and predictability by minimizing abstraction layers between the application and the database. Avoiding the complexities of ORM frameworks provides a clear and straightforward way to map database data to Java objects. SQL statements are executed directly, ensuring that results are evident immediately.
- Direct SQL Mapping: Spring Data JDBC lets you write and optimize SQL queries directly. This approach eliminates the need for complex ORM mappings, making it easier to tailor SQL to your needs and improving performance. The focus is on direct SQL execution, which often leads to faster application performance compared to ORM-based solutions.
- Performance: Spring Data JDBC enhances performance by executing queries directly on the data source, bypassing the overhead associated with ORM frameworks. This direct approach reduces server load and can handle high-demand conditions more efficiently.
Knowledge Prerequisites
Before you begin to study Spring Data JDBC, you should first have a basic understanding of the following:
- Java Programming: It is a must to gain skills in the syntax of Java programming language as well as the object-oriented programming concepts.
- Spring Framework: Basic concepts such as dependency injection and the Spring Boot feature.
- SQL and Relational Databases: Knowing the basic knowledge of SQL and relational database might be of use by giving or discussing with someone who knows quite well about the technical concepts of tables, columns, and relationships.
Software Prerequisites
Ensure you have the following software installed and configured:
- Java Development Kit (JDK): JDK 8 or later. Download the Oracle JDK or use an open-source version like OpenJDK.
- Maven or Gradle: Build automation tools. Download Maven from the Apache Software Foundation or Gradle from its official site.
- Integrated Development Environment (IDE): IDEs such as IntelliJ IDEA, Eclipse, or Visual Studio Code. IntelliJ IDEA can be downloaded from JetBrains.
Example: Creating a Book Management System
By using this example, we would be able to understand Spring Data JDBC in the best way. The task is simple and specifically required the development of a simple RESTful API to manage the book collection with Spring Boot and Spring Data JDBC. The API has to make it possible for users to create, read, and update a list of books in the database. Further, the following project details are described in the book.
Step 1: Create a new Spring Boot project in IntelliJ
Here, we are using IntelliJ IDE for illustration purpose, one can use any IDE for creating a spring boot project. To create a spring boot project in IntelliJ follow the below steps:
- Open IntelliJ and then navigate to File -> New -> Project.
- From the left side of the New Project dialog box select Spring Boot.
- Specify the name of the project as per your choice : book-management-system
Select the below configurations for the project.
- Language: Java
- Project: Maven
- Packaging: Jar
- Java: 17
Choose Java 17 SDK from the list or download it if not available. Click Continue.
Select the dependencies:
spring-boot-starter-data-jdbcH2 Database (for an in-memory database)
Click Create to generate the project.

Step 2: Configuring the DataSource
Now, configure the DataSource in your 'application.properties' or 'application.yml' file. The code describes the connection configuration for the H2 database. In src/main/resources/application.properties (or application.yml), configure the H2 database connection:
spring.datasource.url=jdbc:h2:mem:testdb
spring.datasource.driver-class-name=org.h2.Driver
spring.datasource.username=sa
spring.datasource.password=password
spring.h2.console.enabled=true
spring.h2.console.path=/h2-console
spring.datasource.initialization-mode=always
Step 3: Defining an Entity
Create an entity class named Book.java that represents a table in the database. This class includes getter, setter, and toString() methods. In Spring Data JDBC, you only need to use @Id to identify the entity. The @Table annotation maps the class to the BOOKS table.
Java
package com.bookmanagement.bookmanagementsystem.entity;

import org.springframework.data.annotation.Id;
import org.springframework.data.relational.core.mapping.Table;

@Table("BOOKS")
public class Book {
    @Id
    private Long id;
    private String title;
    private String author;

    public Book(Long id, String title, String author) {
        this.id = id;
        this.title = title;
        this.author = author;
    }

    public long getId() {
        return id;
    }

    public String getTitle() {
        return title;
    }

    public String getAuthor() {
        return author;
    }

    public void setId(Long id) {
        this.id = id;
    }

    public void setTitle(String title) {
        this.title = title;
    }

    public void setAuthor(String author) {
        this.author = author;
    }

    @Override
    public String toString() {
        return "Book{" +
                "id=" + id +
                ", title='" + title + '\'' +
                ", author='" + author + '\'' +
                '}';
    }
}
Step 4: Creating a Repository Interface
Define a BookRepository interface that extends CrudRepository. This interface provides methods for CRUD operations:
Java
package com.bookmanagement.bookmanagementsystem.repository;

import com.bookmanagement.bookmanagementsystem.entity.Book;
import org.springframework.data.repository.CrudRepository;
import org.springframework.stereotype.Repository;

@Repository
public interface BookRepository extends CrudRepository<Book, Long> {

}
Step 5: Implementing the CRUD Operations
Create BookController.java to handle HTTP requests for CRUD operations. Use @RestController to define RESTful endpoints, and @RequestMapping to map HTTP requests to methods.
- @RestController is used to map the HTTP requests to view the names and requiring the response body for the methods. @RestController annotation here also simplifies the REST API service creation with the combination of controller and response body and returning the values of it to JSON or XML format.
- @RequestMapping is majorly used for mapping the request with the controller methods.
- Then respective mapping annotation is used for performing various requests.
- @RequestBody is for requesting the data from that of the user to specify.
Note: Also try handling exceptions while making any project on your own, as it is a necessary concept.
Java
package com.bookmanagement.bookmanagementsystem.controller;

import com.bookmanagement.bookmanagementsystem.entity.Book;
import com.bookmanagement.bookmanagementsystem.repository.BookRepository;
import org.springframework.web.bind.annotation.*;

import java.util.List;

@RestController
@RequestMapping("/books")
public class BookController {

    private final BookRepository bookRepository;

    public BookController(BookRepository bookRepository) {
        this.bookRepository = bookRepository;
    }

    @PostMapping("/addBook")
    public Object createBook(@RequestBody Book book) {
        try {
            return bookRepository.save(book);

        }catch (NullPointerException e) {
            return e.getMessage();
        }
    }

    @GetMapping("/getAllBooks")
    public List<Book> getAllBooks() {
        try{
            return (List<Book>) bookRepository.findAll();
        }
        catch (NullPointerException e) {
            return null;
        }

    }

    @GetMapping("/getBookById/{id}")
    public Book getBookById(@PathVariable Long id) {
        try{
            return bookRepository.findById(id).get();
        }
        catch (NullPointerException e) {
            return null;
        }
    }

    @PutMapping("/updateBook/{id}")
    public Book updateBook(@PathVariable Long id, @RequestBody Book updateBook) {
        return bookRepository.findById(id)
                .map(book -> {
                    book.setAuthor(updateBook.getAuthor());
                    book.setTitle(updateBook.getTitle());
                    return bookRepository.save(book);
                })
                .orElseGet(
                    () -> {
                        updateBook.setId(id);
                        return bookRepository.save(updateBook);
                    }
                );
    }

    @DeleteMapping("/deleteBook/{id}")
    public String deleteBook(@PathVariable Long id) {
        try {
            bookRepository.deleteById(id);
        }
        catch(NullPointerException e) {
            return "Delete Book Failed";
        }
        return "Deleted Book Successfully";
    }

    @DeleteMapping("/deleteAllBooks")
    public String deleteAllBooks() {
        try {
            bookRepository.deleteAll();
        }
        catch(NullPointerException e) {
            return "Delete All Books Failed";
        }
        return "Deleted All Books Successfully";
    }
}
Step 6: Add schema.sql and data.sql file
Create schema.sql and data.sql files in src/main/resources to define the database schema and initial data.
-- schema.sql

-- Drop the table if it exists (useful for development purposes)
DROP TABLE IF EXISTS books;

-- Create the books table
CREATE TABLE BOOKS (
                       id BIGINT AUTO_INCREMENT PRIMARY KEY,
                       title VARCHAR(255) NOT NULL,
                       author VARCHAR(255) NOT NULL
);
-- data.sql
INSERT INTO BOOKS (TITLE, AUTHOR) VALUES ('The Catcher in the Rye', 'J.D. Salinger');
INSERT INTO BOOKS (TITLE, AUTHOR) VALUES ('To Kill a Mockingbird', 'Harper Lee');
INSERT INTO BOOKS (TITLE, AUTHOR) VALUES ('1984', 'George Orwell');Step 7: (Optional) Add @ComponentScan in Main Application
Some might get errors while building an application which would be as follows:
Description:

Parameter 0 of constructor in com.bookmanagement.bookmanagementsystem.controller.BookController required a bean of type 'com.bookmanagement.bookmanagementsystem.repository.BookRepository' that could not be found.


Action:

Consider defining a bean of type 'com.bookmanagement.bookmanagementsystem.repository.BookRepository' in your configuration.
So, in order to avoid this error one needs to add the following code into the main application i.e. BookManagementSystemApplication:
Java
package com.bookmanagement.bookmanagementsystem;

import org.springframework.boot.SpringApplication;
import org.springframework.boot.autoconfigure.SpringBootApplication;
import org.springframework.context.annotation.ComponentScan;

@SpringBootApplication
@ComponentScan({"com.bookmanagement.bookmanagementsystem.repository", "com.bookmanagement.bookmanagementsystem.controller", "com.bookmanagement.bookmanagementsystem.entity"})
public class BookManagementSystemApplication {

	public static void main(String[] args) {

		SpringApplication.run(BookManagementSystemApplication.class, args);
	}

}
Step 8: Run the Application
Project Structure:
After doing all the necessary changes the project structure would look similar to the one mentioned below:

Navigate to your BookManagementSystemApplication then Run your application. After successful build and run the application will start running in the port 8080. Then we can start verifying our API using Postman.

Step 9: Test the API Endpoint in Postman
Now, open the Postman and hit the following URL for verifying:
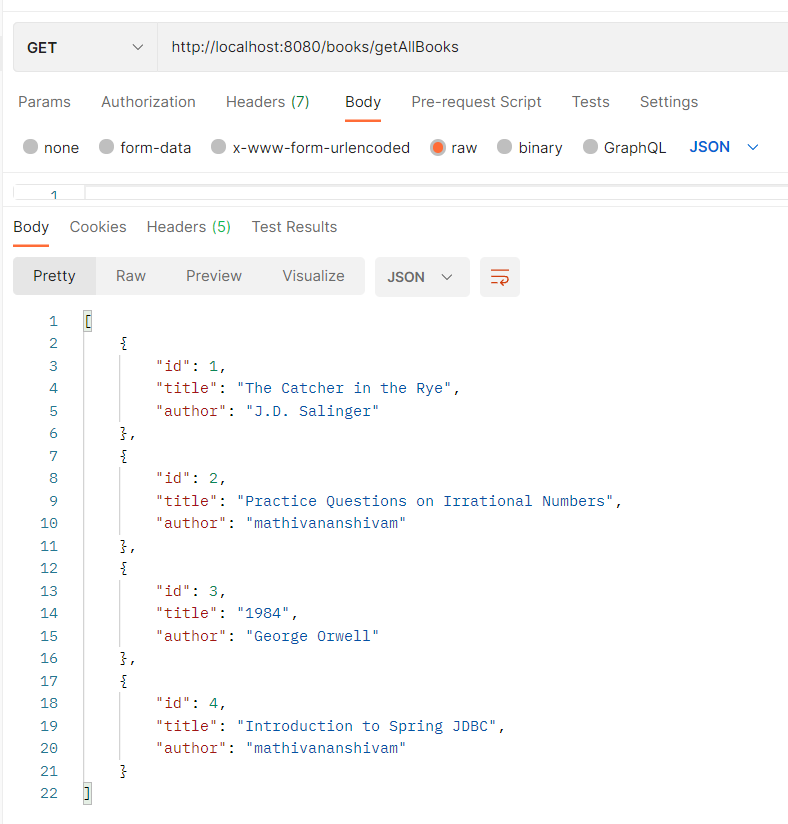
1. GET: get all Books API verification
Enter the below mentioned url and you would get the response to the one mentioned in the same image downwards.
GET: http://localhost:8080/books/getAllBooks
Output:

2. GET: get Book by ID API verification
GET: http://localhost:8080/books/getBookById/{id}Output:

3. POST: add book API verification
POST: http://localhost:8080/books/addBook
Output:

After using POST request the books list would be updated which is mentioned below:

4. PUT: Modifying the existing entry
PUT: http://localhost:8080/books/updateBook/{id}Output:

After using PUT request the books list would be updated which is mentioned below:
5. DELETE: delete book by ID API verification
DELETE: http://localhost:8080/books/deleteBook/{id}Output:

After using DELETE request the books list would be updated which is mentioned below:

6. DELETE: delete all books API verification
DELETE: http://localhost:8080/books/deleteAllBooks
Output:

After using DELETE request the books list would be updated which is mentioned below:

Conclusion
Spring Data JDBC offers a simplified and high-performance approach to data access, bypassing the complexities of ORM frameworks. This example of a Book Management System demonstrates the ease of setting up and using Spring Data JDBC for CRUD operations. For further enhancements, consider adding exception handling, unit testing, and integrating additional Spring features.
Similar Reads
Introduction to Spring Boot Spring is widely used for creating scalable applications. For web applications, Spring provides Spring MVC, a commonly used module for building robust web applications. The major drawback of traditional Spring projects is that configuration can be time-consuming and overwhelming for new developers.
5 min read
Introduction to Spring Framework The Spring Framework is a powerful, lightweight, and widely used Java framework for building enterprise applications. It provides a comprehensive programming and configuration model for Java-based applications, making development faster, scalable, and maintainable.Before Enterprise Java Beans (EJB),
9 min read
Introduction to the Spring Data Framework Spring Data is a powerful data access framework in the Spring ecosystem that simplifies database interactions for relational (SQL) and non-relational (NoSQL) databases. It eliminates boilerplate code and provides an easy-to-use abstraction layer for developers working with JPA, MongoDB, Redis, Cassa
3 min read
Spring Data JDBC Extensions In this article, We will explore the realm of Spring Data JDBC extensions. Discover how they enhance the functionalities of the Spring Data JDBC module. These extensions offer a range of tools that enable developers to handle database interactions, with skill-making tasks, like simplifying queries e
3 min read
Spring JDBC Batch Inserts Batch processing is a common technique used to efficiently handle large volumes of data. In this article, we'll implement Spring JDBC batch inserts in a Spring Boot application. Additionally, we’ll cover performance considerations and optimization strategies for batch operations.Introduction to Batc
6 min read