SlideShare a Scribd company logo
Unit V
ANDROID FORENSICS
Android basics – Key Codes – ADB – Rooting
Android – Boot Process – File Systems – Security –
Tools – Android Forensics – Forensic Procedures –
ADB – Android Only Tools – Dual Use Tools–Oxygen
Forensics – MobilEdit – Android App Decompiling.
Android basics
• Introduction
• Android has a large percentage of the mobile
device market, making it important for
understanding mobile forensics. This knowledge
must include the fundamentails of Android,
including the history of the operating system. But
it also includes more detailed information such as
the various file systems and the system
architecture. Furthermore, there are various tools
for working with Android including Android
Debugging Bridge (ADB).
Android basics
• Android is a very common operating system. It is
obviously found on Android phones, but it is also
found in smart TVs, automobiles, and some IoT
devices. It is clearly quite important to understand
the Android operating system in some depth. The
Android operating system is a Linux-based
operating system, and it is com-pletely open
source. If you have a programming and operating
systems background, you may find it useful to
examine the Android source code from http://
source.android.com/.
Android basics
• Android was first released in 2003 and is the creation of
Rich Miner, Andy Rubin, and Nick Sears. Google acquired
Android in 2005, but still keeps the code open source.
• The versions of Android have been named after sweets:
• Version 1.5 Cupcake
• Version 1.6 Donut
• Version 2.0-2.1 Éclair
• Version 2.2 Froyo
• Version 2.3 Gingerbread
• Version 3.1 - 3.2 Honeycomb
• Version 4.0 Ice Cream Sandwich
• Version 4.1 - 4.2 Jellybean
• Version 4.3 Kitkat
Android basics
• The versions of Android have been named after
sweets: ...
• Version 5.0 Lollipop released November 3, 2014
• Version 6.0 Marshmallow released October 2015
• Version 7.0 Nougat was released in August 2016
Version 8.0 Oreo released August 2017
• Version 9.0 Pie August 6, 2018
• Android 10. This was called Q during beta testing,
and it marks a departure from using the names of
deserts. This was released in September 2019
• Android 11 Released February 2020
Android basics
• The differences from version to version usually
involve adding new features, not a radical change
to the operating system. This means that if you
are comfortable with version 7.0 (Nougat), you
will be able to do forensic examination on version
9.0 (Pie). While the Android source code is open
source, each vendor may make modifications. This
means even the partition layout can vary.
However, there are common partitions that are
present on most Android devices (phones or
tablets).
Android basics
• The boot loader partition is necessary for
hardware initialization and loading the Android
kernel. This is unlikely to have forensically
important data. The boot partition has the
information needed to bootup. Again, this is
unlikely to have forensically important data. The
recovery partition is used to boot the phone into a
recovery console. While the partition may not
have forensically relevant data, sometimes you
may need to boot into recovery mode.
Android basics
• The userdata partition is the one most relevant to
forensic investigations. Here you will find the
majority of user data including all the data for
apps. We will discuss SQLite databases in chapter
8, this directory will contain many of those
database. The cache partition stores frequently
accessed data and recovery logs. This can be very
important for forensic investigations. There can
be data here that the user is not even aware of.
This means the user is less likely to have deleted
it.
Android basics
• The system partition is not usually important for
forensic examinations. Remember that Android is
Linux based, if you have an image of an Android
phone you may be able to execute at least some
Linux commands on it. For ex-ample, using cat
proc/partitions will reveal to you the partitions
that exist on the specific phone you are
examining.
• In addition to these partitions there are specific
directories that may yield forensic evidence.
Android basics
• The acct directory is the mount point for the
control group and provides user accounting. • The
cache directory stores frequently accessed data.
This will almost always be interesting forensically.
• The data directory has data for each app. This is
clearly critical for forensic examinations. • The
mnt directory is a mount point for all file systems
and can indicate in-ternal and external storage
such as SD cards. If you have an Android image,
the Linux ls command used on this directory will
show you the various storage devices.
Android basics
• As you encounter dates on files in Android, there
can be some confusion. Android can use several
different date/time formats. The following lists
the various formats available: • UNIX, based on
Jan 1, 1970 • GPS, based on Jan 6, 1980 • Some
(such as Motorola) may use AOL, based on Jan 1,
1980 64 An In-Depth Guide to Mobile Device
Forensics
Android basics
• Fortunately, there are a number of online
converters for date and time formats. You can
simply search for a converter, but here are a few
you may find useful:
https://www.unixtimestamp.com/index.php
https://timestamp.online/
https://www.onlineconversion.com/date_time.ht
m
SPECIALIZED KEY CODES
• There are a number of keycodes that can be
entered on an Android phone to get useful
information from the phone. Some of these codes
work with all Android models, others are specific
to particular models. These are useful in
diagnostics as well as forensics.
• Diagnostic configuration *#9090# Battery Status
*#0228# System dump mode *#9900# Testing
Menu *#*#4636#*#* Display Info about device
*#*#4636#*#* Factory Restore *#*#7780#*#*
SPECIALIZED KEY CODES
• Camera Information *#*#34971539#*#*
Completely Wipe device, install stock firmware
*2767*3855# Quick GPS Test *#*#1472365#*#*
Wi-Fi Mac Address *#*#232338#*#* RAM version
*#*#3264#*#* Bluetooth test *#*#232331#*#*
Displays IMEI number *#06# Remove Google
account setting *#*#7780#*#* Toggle always-on
display on or off *#99#
SPECIALIZED KEY CODES
• Log test settings *#800# Engineering switch test
mode *#801# GPS TTFF (Time-To-First-Fix) test
mode *#802# Engineering Wi-Fi setting *#803#
Automatic disconnect test mode *#804#
Engineering bluetooth test mode *#805#
Engineering aging test mode *#806# Engineering
automatic test mode *#807#
SPECIALIZED KEY CODES
• Enter engineering mic echo test mode *#809#
Automatically searches for available TDSCDMA
carriers *#814# Automatically searches for
available WCDMA carriers *#824# Automatically
searches for available LTE carriers *#834#
Automatically searches for available GSM carriers
*#844# Test photograph RGB (Red, Green, & Blue
tint) *#900# LCD display test *#*#0*#*#** Packet
loopback *#*#0283#*#* Melody test
*#*#0289#*#*
SPECIALIZED KEY CODES
• Proximity sensor test *#*#0588#*#* Melody test
*#*#0673#*#* Test for vibration and backlight
functionality *#*#0842#*#* Advanced GPS testing
*#*#1575#*#* Touch screen test *#*#2664#*#*
Checks for root *#*#7668#*#* Bluetooth test
*#*#232331#*#*
SPECIALIZED KEY CODES
• These are just a sample of codes. One can search
the internet for something like “Secret codes for
XXXX phones” (replacing xxxx with the model you
are interested in) to get information on codes for
that specific phone model.
ADB
• You can download this free tool from
https://developer.android.com/studio/ command-
line/adb. The Android Debugging Bridge has three
components:
• A client, which sends commands. The client runs on
the development ma-chine. The investigator can
invoke a client from a command-line terminal by
issuing an adb command.
• • A daemon (adbd), which runs commands on a
device. The daemon runs as a background process on
each device.
• • A server, which manages communication between
the client and the daemon. The server runs as a
background process on your development machine.
ABD
• When you start an adb client, the client first
checks whether there is an adb server process
already running. If there isn't, it starts the server
process. When the server starts, it binds to local
TCP port 5037 and listens for commands sent
from adb clients – all adb clients use port 5037 to
communicate with the adb server. When a device
is connected to a computer that has ADB, the first
step is to list all connected devices. This is shown
in Figure 4.1.
ABD
ABD
• If the device does not show as attached, there are
several possibilities. One common issue is that the
developer mode is not turned on. Another
possibility is that the ADB services has a problem.
This requires you to first kill the service, then
restart it as shown here:
• adb kill-server
• adb start-server
ABD
• Once you have connected successfully to the
Android device, there are several commands that
are of interest when using ADB. One of the most
interesting is the adb shell command. The adb
shell command, enters a shell on the Android,
from which the user can utilize standard Linux
commands. This is shown in Figure 4.2
ABD
ABD
• Common Linux commands done from within the
adb shell include pstree, to list all the processes
on the target device, in a tree format. Other
standard Linux commands such as ps, ls, netstat,
and lsof can also be useful. When you wish to exit
the shell, just type exit as shown in Figure 4.3.
ABD
ABD
• To see all the Linux commands available on a
given device, from within the adb shell one can
type ls/system/bin. This will show all the system
binary files (i.e., executables). This is shown in
Figure 4.4.
ABD
ABD
Aside from issuing Linux commands from within the
adb shell, there are also adb specific commands
that can be useful in a forensic examination.
Common ADB commands are summarized in
Table 4.1. Note, as you have seen in the
screenshots,
ABD
ABD
ABD
ABD
you only have to type “adb shell” before a
command if you are using a shell command and
are not currently in the adb shell. These
commands combined with the specialized key
codes discussed earlier can provide a great deal of
information about the phone in question. This
table is not an exhaustive list of adb commands,
but it does provide the most common adb
commands.
ROOTING ANDROID
Unfortunately, there is some data one cannot get to
without rooting the Android phone. The term root
is the Linux term for the administrator. In Linux,
you simply type su (super user or switch user) and
enter the root password. However, Android
phones don’t allow you to do that. Rooting a
phone gives you complete root access to all
aspects of the phone. However, that will also void
any warranty.
ROOTING ANDROID
In the past, rooting was not terribly difficult. There
were even apps one could get that would root the
phone for you. Most of these apps do not work on
current models of Android. However, there are
some methods that might work, depending on a
number of variables. For example, the model you
have, the version of Android, etc. will affect
whether or not you will be successful. It is
important to keep in mind that these are simply
possible techniques. There is no guaranteed
method for rooting an Android phone.
ROOTING ANDROID
Before you can root a phone it must first be OEM
(Original Equipment Manufacturer) unlocked.
And it so happens, that before you can OEM
unlock, you must first unlock it from the
carrier. The only consistently effective method
for carrier unlocking is to contact the carrier,
assuming the contract is paid off, and request a
carrier unlock. After that you have several
options for OEM unlock, again depending on
what manufacturer and model you are working
with.
ROOTING ANDROID
If your phone has “OEM Unlock” enabled and
visible under developer settings, then you have
the option to use ADB (discussed in the previous
section) and move to what is called fastboot
mode. For most phones this is done by using
ADB and typing in adb reboot bootloader. At
that point you can try fastboot oem unlock. If
that does not work, then your model requires
you to get an unlock code and send it to the
vendor to get OEM unlock. This is shown in
Figures 4.5 through 4.7.
ROOTING ANDROID
ROOTING ANDROID
ROOTING ANDROID
ROOTING ANDROID
Once the phone is OEM unlocked, you can then root
the phone. But be aware, that for many phones
getting to the OEM unlock might be very difficult.
by typing.
adb reboot bootloader
followed by
fastboot oem device-info
You will then see the devices OEM unlock status as
shown in Figure 4.8.
ROOTING ANDROID
ROOTING ANDROID
Once it is OEM unlocked, you can use free tools
such as Magisk to install a new image, that is
rooted. Once you have installed Magisk you can
update your system. But you need to push the
image onto the system for Magisk to be able to
find it. That can be done with adb push. Also, for
new images, they take up a lot of space, make
sure you have enough space for the image. The
process, once you have OEM unlocked is as
follows. Once you have the phone OEM-Unlocked,
rooting is not that difficult.
ROOTING ANDROID
You will need a TWRP image, those can be found at
https://twrp.me/Devices/
• Place TWRP recovery image in “ADB and Fastboot”
folder
• Open fastboot
• Check to make sure the device is connected with adb
devices.
• Reboot in boot loader mode by adb reboot bootloader
• Use the phone screen to select Apply Update from ADB
Sideload, or similar entry.
• type fastboot flash recovery twrp.img
ROOTING ANDROID
Note that the twrp.img is whatever image you
intend to put on the phone, and it must be in the
fastboot directory. Also keep in mind, that with
newer phone models, any one of these steps may
fail. Rooting modern phones is a difficult task and
frequently fails.
BOOT PROCESS
Every operating system has a boot process. This
begins when the power is turned on and
completes when the device’s operating system is
fully loaded and functioning. Before the device is
powered on, the device CPU will be in a state
where no in-itializations have been done. Once
the Android device is powered on, execution
starts with the boot ROM code. This boot ROM
code is specific to the CPU the device is using.
BOOT PROCESS
This phase includes two steps, A and B:
Step A: When the boot ROM code is executed,
it initializes the device hardware and
attempts to detect the boot media.
Therefore, the boot ROM code scans until it
finds the boot media.
Step B: Once the boot sequence is established,
the initial boot loader is copied to the
internal RAM. After this, the execution shifts
to the code loaded into RAM.
BOOT PROCESS
This brings us to what is the bootloader? The
bootloader is a relatively small program that is
executed before the operating system starts to
function. Bootloaders are present in all computing
devices and used to get the system booted to the
point that the operating system can be loaded. In
the Android boot loader, there are two stages –
Initial Program Load (IPL) and Second Program
Load (SPL).
BOOT PROCESS
As shown in the following screenshot, this involves the
three steps explained here:
• Step A: IPL deals with detecting and setting up the
external RAM.
• Step B: Once the external RAM is available, SPL is
copied into the RAM and execution is transferred to
it. SPL is responsible for loading the Android
operating system.
• Step C: SPL tries to look for the Linux kernel. It will
load this from boot media and will copy it to the
RAM. Once the boot loader is done with this
process, it transfers the execution to the kernel.
BOOT PROCESS
The kernel is the heart of any operating system. And
for Android phones that is the Linux kernel. The
Linux kernel is the heart of the Android operating
system and is responsible for process
management, memory management, and
enforcing security on the device. Different
versions of Android use different versions of the
Linux kernel. The Android kernel is a variation of
the Linux kernel, but is quite similar to the
standard Linux kernel. This is summarized in Table
4.2.
BOOT PROCESS
BOOT PROCESS
It should be noted that Android includes a number
of different manufacturers. Each manufacturer
may alter the Android code base, and even alter
the Linux kernel used. So, Table 4.2 is just a
general guideline to the kernel version used in
specific Android versions.
BOOT PROCESS
After the kernel is loaded, it mounts the root
filesystem (rootfs) and provides access to system
and user data:
Step A: When the memory management units and
caches have been initialized, the system can use
virtual memory and launch user space processes.
Step B: The kernel will look in the rootfs for the init
process and launch it as the initial user space
process:
BOOT PROCESS
• The process rootfs is the place to start and stop
searching the doubly linked list of mount points. It
is a special instance of ramfs which is a simple file
system used to get the system booted.
• The basic initramfs is the root filesystem image
used for booting the kernel provided as a
compressed archive.
– If an uncompressed cpio archive exists at the start of
the initramfs, extract and load the microcode from it
to CPU.
BOOT PROCESS
– If an uncompressed cpio archive exists at the start of
the initramfs, skip that and set the rest of file as the
basic initramfs. Otherwise, treat the whole in-itramfs
as the basic initramfs.
– Unpack the basic initramfs by treating it as
compressed (currently gzipped) cpio archive into a
RAM-based disk.
– Mount and use the RAM-based disk as the initial root
filesystem.
FILE SYSTEMS
File systems are how files are organized on storage
devices. Whether that is a traditional hard drive,
or a solid-state drive. In chapter 3 we discussed
the APFS file system used with iOS devices. There
are several file systems used with Android.
The major file systems are listed here:
• F2FS: Flash-Friendly File System
• JFFS2: Journaling Flash File System version 2
• YAFFS: Yet Another Flash File System
FILE SYSTEMS
F2FS: FLASH-FRIENDLY FILE SYSTEM
The key data structure is the “node”. Similar to
traditional file structures, F2FS has three types of
nodes: inode, direct node, indirect node. F2FS
assigns 4 KB to an inode block which contains 923
data block indices, two direct node pointers, two
indirect node pointers, and one double indirect
node pointer as described below. A direct node
block contains 1018 data block indices, and an
indirect node block contains 1018 node block
indices. The different nodes are shown in Table
4.3.
FILE SYSTEMS
FILE SYSTEMS
F2FS divides the volume into six regions. The first is
the superblock (SB) which is at the beginning of
the partition. There is a second copy of the
superblock so that if the first becomes corrupt,
the system can recover. Then there is the
checkpoint (CP). This contains information about
the system including entries of active seg-ments
and lists of any orphaned inodes. Next comes the
segment information table (SIT) which has a block
count and bitmap of the main area blocks.
FILE SYSTEMS
This is followed by the node address table (NAT) which contains the
addresses for the nodes. That is in turn followed by the segment
summary area (SSA) which contains information about who owns
the node blocks. These first five segments are essentially metadata
about the volume. They are followed by the main area which has
the file and di-rectory data.
FILE SYSTEMS
JFFS2: JOURNALING FLASH FILE SYSTEM VERSION 2
F2FS was originally developed by Samsung. Was first
included in the Linux kernel in September 2001.
This file system supports two types of nodes:
inodes, and dirent nodes. Dirent nodes are
directory entries. As the name suggest JFFS2 is a
journaling file system. Journaling is a process
whereby changes to the file system are logged,
FILE SYSTEMS
so that in the event of a system failure, the change
can be rolled back or recreated. JFFS2 is the
default flash file system for the AOSP (Android
Open-Source Project) kernels, since Ice Cream
Sandwich. JFFS2 is a replacement to the original
JFFS.
JFFS2 includes garbage collection. This is a process
that fines file system blocks that were not released
by a process but should have been. The garbage
collection then releases them. This is similar to
memory garbage collection that is found in Java
and .Net programming languages.
FILE SYSTEMS
YAFFS: YET ANOTHER FLASH FILE SYSTEM
With YAFFS, data is written as an entire page that includes
the file metadata as well as the data. In YAFFS
terminology a page is referred to as a chunk. Each new
file is given a unique object ID number so that it can be
identified. YAFFS uses a tree data structure of the
physical location of the chunks/pages in the system.
FILE SYSTEMS
YAFFS: YET ANOTHER FLASH FILE SYSTEM
Version 2 was the default AOSP flash file system for kernel
version 2.6.32. YAFFS2 is not sup-ported in the newer
kernel versions and does not appear in the source tree
for the latest kernel versions from kernel.org. However,
individual mobile device vendors may continue to
support YAFFS2.
SECURITY
As Android is marketed on a wide range of devices,
made by different manu-facturers, some of the
Android security features are unique to specific
manu-facturers and models. Cryptography is a
critical part of security with any mobile device.
SECURITY
In February 2019, Google unveiled Adiantum, an
encryption cipher designed primarily for use on
devices that do not have hardware-accelerated
support for the Advanced Encryption Standard
(AES), such as low-end devices. Adiantum is a
cipher construction for disk encryption, which
uses the ChaCha cipher and Advanced Encryption
Standard (AES) ciphers, and Poly1305
cryptographic message authentication code
(MAC). ChaCha is a variant of the Salsa stream
cipher.
SECURITY
You are probably at least somewhat familiar with
AES but may not be familiar with Salsa or ChaCha.
In 2013, Mouha and Preneel published a proof
that 15 rounds of Salsa20 was 128-bit secure
against differential cryptanalysis. Specifically,
Salsa has no differential characteristic with higher
probability than 2130
, so differential cryptanalysis
would be more difficult than 128-bit key ex-
haustion. This is one example of studies done with
the Salsa cipher that show it to be a robust cipher.
SECURITY
Aside from cryptography, the Android operating
system also supports application security.,
Android uses the Linux user-based protection
model to isolate applications from each other. In
Linux systems, each user is assigned a unique User
ID (UID) and users are segregated so that one user
does not have access to the data of another. All
resources under a particular user are run with the
same privileges. In the same manner, each
Android application is assigned a UID and is run as
a separate process. This effectively puts each
Android app in an isolated sandbox.
SECURITY
SELinux (Security-Enhanced Linux) is also a security
enhancement available for Android devices. This
began with Android version 4.2. Android uses
SELinux to impose mandatory access control that
ensures applications work in isolated en-
vironments. Therefore, even if a user installs a
malicious app, the malware cannot easily access
the operating system or other applications.
GENERAL ARCHITECTURE
While Android includes a number of different
vendors, each with their own mod-ifications, the
general overview of the Android architecture is
common to all Android devices. This common
architecture is shown in Figure 4.10.
GENERAL ARCHITECTURE
The first item of note in Figure 4.10 is the
Android runtime (ART). This is the
application environment used by Android. It
is a virtual machine. Each application is
executed in its own copy of the ART. ART
replaces the earlier Dalvik system. Dalvik
used just in time compilation. That means
that an app was compiled to executable
code when it was executed.
GENERAL ARCHITECTURE
This saved storage space but slowed app
launching. ART uses ahead of time compiling
(AOT). As soon as an app is in-stalled, it is
compiled into executable code. This speeds
up performance, but with a cost so storage.
However, modern devices have ever
increasing storage space.
TOOLS
There are various tools made for Android phones. Some are
for specific manu-facturers, and others work with a range
of Android phones. Earlier in this chapter MSDownload
was mentioned. That was one example of an Android
specific tool. It happens that most of these tools are open
source and free downloads. Those that do have a cost,
have a minimal cost.
TOOLS
Another tool is Odin3. This tool is explicitly for Samsung
phones. You can see the tool in Figure 4.11.
Android basics – Key Codes – ADB – Rooting Android – Boot Process – File Systems – Security – Tools – Android Forensics – Forensic Procedures – ADB – Android Only Tools – Dual Use Tools – Oxygen Forensics – MobilEdit – Android App Decompiling.
TOOLS
Odin can be downloaded from https://samsungodin.com/.
This tool is used to flash images onto a Samsung phone.
This includes stock or custom firmware images. And, at
least in theory, root packages that will root the Samsung
phone. The tool was created for internal use by Samsung
in their authorized service centers, and in their factory
for flashing and testing the software. It is usually a good
idea to use the latest version of Odin available.
TOOLS
Another Samsung only software is SamFirm. This is shown
in Figure 4.12. This is also a free flashing tool. You can
download it from https:// samfirmtool.com/. It allows
you to Flash your Samsung device with a different image.
TOOLS
TOOLS
Another tool is the Android Flash Tool. This actually works
via a website, https:// flash.android.com/welcome.
However, it will only work with the Chrome browser. It
has the advantage of being quite simple to use. The tool
is shown in Figure 4.13.
TOOLS
TOOLS
SPFlash tool is also another free download. It is designed to
allow you to flash images onto various Android phones. It
is meant to work with MediaTek Android phones but may
work with others. SPFlash can be downloaded from
https:// spflashtool.com/. This tool can be seen in Figure
4.14.
Unfortunately, all of these tools vary in efficacy from model
to model and Android version to Android version. They
are frequently used to help recover bricked phones or to
bypass phone security. However, the use of these tools is
not without some risk. It is possible to completely brick
your phone using these tools.
TOOLS
Android Forensics
Given the ubiquitous nature of Android devices, Android
forensics is essential. Forensics for Android includes
approaches, techniques, and tools. Many tools are
covered in this chapter, but also extensive use of the
Android debugging bridge (ADB). The focus is on free
tools or low cost tools.
In this chapter, some material from chapter five is
repeated. This is due to the fact that some readers will
only be interested in iOS forensics, or in Android
forensics, and some of the information overlaps.
Android Forensics
One reason why mobile devices provide so much evidence
is the ubiquitous nature of such devices. Many people
would not think of going anywhere without their
smartphone. Others carry a tablet with them
everywhere. More and more of our lives are conducted
on our devices. From or-dering food to communicating
with friends. Because of the pervasive nature of mobile
devices, mobile forensics is important in all types of
investigations.
Android Forensics
Items you should attempt to recover from a mobile device
include the following:
• Call history
• Emails, texts, and/or other messages
• Photos and videos
• Phone information
• Global positioning system (GPS) information
• Network information
Android Forensics
The call history lets you know who the user has spoken to
and for how long. This information is often important to
all types of investigations. Of course, this in-formation is
easily erasable, but many users don’t erase their call
history. Or per-haps the suspect intended to delete this
data and simply did not get to it yet. Usually call history
does not provide direct evidence of a specific crime, so
much as it provides supporting evidence and general
intelligence about the suspect's activity.
Android Forensics
However, in a cyberstalking case, the call history can be of
central importance. The call history can show a pattern of
contact with the victim. However, in other cases, it
provides only circumstantial evidence. For example, if
John Smith is suspected of drug dealing and his call
history shows a pattern of regular calls to a known drug
supplier, by itself this is not adequate evidence of any
crime. However, it aids the investigators in getting an
accurate picture of the entire situation.
Android Forensics
Smartphones also allow text messages and email. There is
also a wide range of chat apps such as Snapchat, Viber,
WhatsApp, WeChat, Signal, etc. Many phone forensics
tools will retrieve information from some apps. However,
given there are hundreds of apps, no tool could possibly
retrieve data from all of them. In fact, most tools only get
data from a few dozen. In chapter 8 we will discuss
SQLite forensics, which will allow you to extract data
from the app databases directly.
Android Forensics
Photos and videos can provide direct evidence of a crime. In
the case of child pornography cases, the relevance is
obvious. But there are certainly other crimes where the
evidence is found in photos and videos on the suspect's
own device. The breach of the U.S. Capitol on January 6,
2021 is a case in point. Many of these who breached the
Capitol building took selfies. In many cases uploading
those to social media platforms.
Android Forensics
This is in no way anomalous. It may surprise you to find that
it is quite common for at least some criminals to have
incriminating photos and videos on their devices. There
are cases of gang members with photos depicting them
with illegal firearms and narcotics, thieves videoing
themselves during a theft, and many more similar
examples. It is always worthwhile to examine photos and
videos on a phone.
Android Forensics
Information about the phone should be one of the first
things you document in your investigation. This will
include model number, IMEI number, serial number of
the SIM card, operating system, and other similar
information. The more detailed, descriptive information
you can document, the better. It is important to fully
document the details of the phone.
Android Forensics
Global positioning system information has become
increasingly important in a variety of cases. GPS
information, even if it is not exact. can determine if a
suspect was in a particular area at the time of the crime.
That data can also provide an alibi. If a crime is
committed, and phone GPS indicates the person
suspected of the crime was actually 100 miles away at
the time, this is a compelling alibi. GPS information has
begun to play a significant role in contentious divorces,
for instance. If someone suspects a spouse of being
unfaithful, determining that the spouse’s phone and his
or her car were at a specific motel when he or she
claimed to be at work can be important.
Android Forensics
It should be noted that with older phones, the phone did
not have true GPS. Rather than use GPS satellites to
determine location (which is the most reliable method),
they instead would use triangulation of signal strength
with various cell towers. This could lead to inaccuracies
of up to 50 to 100 feet. However, this situation has
changed. Most modern phones and/or the apps on the
phone use true GPS for much more accurate data.
Android Forensics
The use of Wi-Fi along with GPS will improve accuracy of
GPS. The reason for this is that various organizations,
including Google, track the Basic Service Set Identifier
(BSSID) used by wireless routers, and correlate it with
physical addresses. The BSSID is a unique address that
identifies the access point/router that creates the
wireless network. To identify access points and their
clients, the access points MAC address is used. This
implies that if your phone connects to a wireless access
point, then even with no other data, the phone’s location
can be pinpointed to within a reasonably close distance
of that access point. Network information is also im-
portant.
Android Forensics
Many phones will store the various Wi-Fi hotspots they
have connected to. This data could give you an indication
of where the phone has been. For example, if the phone
belongs to someone suspected of stalking a victim, and
the suspect’s phone network records show he or she has
frequently been using Wi-Fi networks in close proximity
to the victim’s home, this can be important evidence.
Regardless of the make or model of a mobile phone, these
mobile devices are a repository of invaluable data. As
was stated earlier in this chapter, so much of our lives is
tied to our mobile devices.
FORENSIC PROCEDURES
There are various standards that provide guidelines for
forensic examinations. Mobile forensics is no exception.
One standard procedure that you should abso-lutely
follow is to put the phone in airplane mode while
working with it. You do not want anyone to be able to
remotely access the device. It is also important that you
make as few changes on any device you are examining,
and airplane mode will assist you with that.
FORENSIC PROCEDURES
One group that is at the forefront of digital forensics
procedures is the Scientific Working Group on Digital
Evidence (https://www.swgde.org/). SWGDE provides
guidance on many digital forensics topics. Related to
mobile device forensics, SWGDE provides a general
overview of the types of phone forensic investigations:
FORENSIC PROCEDURES
Mobile Forensics Pyramid – The level of extraction and
analysis required depends on the request and the
specifics of the investigation. Higher levels require a
more comprehensive examination, additional skills and
may not be applicable or possible for every phone or
situation. Each level of the Mobile Forensics Pyramid has
its own corresponding skill set.
FORENSIC PROCEDURES
The levels are:
1. Manual – A process that involves the manual operation
of the keypad and handset. display to document data
present in the phone’s internal memory.
2. Logical – A process that extracts a portion of the file
system.
3. File System – A process that provides access to the file
system.
4. Physical (Non-Invasive) – A process that provides physical
acquisition of a phone’s data without requiring opening
the case of the phone.
FORENSIC PROCEDURES
5. Physical (Invasive) – A process that provides physical
acquisition of a phone’s data requiring disassembly of the
phone providing access to the circuit board (e.g., JTAG).
6. Chip-Off – A process that involves the removal and
reading of a memory chip to conduct analysis.
7. MicroRead – A process that involves the use of a high-
power microscope to provide a physical view of memory
cells.
FORENSIC PROCEDURES
Regardless of the tool you choose, you should ensure that
the examination chosen is adequate for your forensic
needs. Levels 5 and 6, JTAG and MicroRead, are not as
common as the other methods. While level 1, manual, is
usually not detailed en-ough. Level 4 is the most common
used, but sometimes a level 2 or 3 can be sufficient.
FORENSIC PROCEDURES
It is also important to have the appropriate tools for the
examination. The United States National Institute of
Standards (NIST) provides guidance on this issue. The
NIST-sponsored CFTT – Computer Forensics Tool Testing
Program (http:// www.cftt.nist.gov/) provides a measure
of assurance that the tools used in the in-vestigations of
computer-related crimes produce valid results. Testing
includes a set of core requirements as well as optional
requirements. It is a good idea to refer to these
standards when selecting a tool.
FORENSIC PROCEDURES
NIST also provides general guidelines on how to write a
report for a mobile device forensic report.
The guidelines are of what to include are:
• Descriptive list of items submitted for examination,
including serial number, make, and model.
• Identity and signature of the examiner.
• The equipment and setup used in the examination.
• Brief description of steps taken during examination, such
as string searches, graphics image searches, and
recovering erased files.
FORENSIC PROCEDURES
• The guidelines are of what to include are: …
• Supporting materials, such as printouts of particular
items of evidence, digital copies of evidence, and chain of
custody documentation.
• Details of findings:
– Specific files related to the request.
– Other files, including deleted files, that support the findings.
– String searches, keyword searches, and text string searches.
– Internet-related evidence, such as website traffic analysis, chat
logs, cache files, email, and news group activity.
– Graphic image analysis.
FORENSIC PROCEDURES
• Details of findings…
– Indicators of ownership, which could include program
registration data.
– Data analysis.
– Description of relevant programs on the examined items.
– Techniques used to hide or mask data, such as encryption,
steganography, hidden attributes, hidden partitions, and file
name anomalies.
• Report conclusions
FORENSIC PROCEDURES
The United States Department of Justice1 states
The examiner is responsible for completely and accurately
reporting his or her findings and the results of the
analysis of the digital evidence examination.
Documentation is an ongoing process throughout the
examination. It is important to accurately record the
steps taken during the digital evidence examination.
FORENSIC PROCEDURES
The well-respected SANS institute publishes guidelines2 on
digital forensics reports. They state a digital forensics
report should include overview/case summary, details on
the forensic acquisition and exam, details of all steps
taken, etc. The Reference Manual on Scientific Evidence:
Third Edition3 states “Under Federal Rule of Civil
Procedure 26(a)(2)(B)(i), the expert report must contain
the basis and reasons for all opinions expressed, and
certainly the expectation is that oral testi-mony will do
the same.” An inadequate report can lead to the report
and the associated testimony being excluded at trial.
FORENSIC PROCEDURES
The important thing to remember when creating any
forensics report is that it is quite difficult to put too much
detail in. It is much better to have information that is
ultimately not necessary, than to wish you had captured
data later. When forensics cases go to court, there may
be an opposing forensic expert. The idea of a forensic
report is that it is so detailed, that any competent
forensic examiner can recreate the steps you took and
either verify or refute your conclusions. This means that
your report should quite literally create a roadmap of
your investigation, and one that any competent examiner
can follow.
ADB
Android Debugging Bridge was introduced in chapter 4. In
this section it will be used specifically to conduct forensic
examinations of Android devices. If you re-quire a
refresher on ADB, please revisit chapter 4.
When you start an adb client, the client first checks
whether there is an adb server process already running. If
there isn’t, it starts the server process. When the server
starts, it binds to local TCP port 5037 and listens for
commands sent from adb clients – all adb clients use port
5037 to communicate with the adb server. When a
device is connected to a computer that has ADB, the first
step is to list all connected devices.
ADB
One of the first tasks you should do is to make a backup of
the device. The general format of the command is: adb
backup -all -f backup. A specific example would be:
adb backup -all -f c:phonebackup. You can see a backup
in Figure 6.1.
ADB
This will create a backup of all the data on the phone that is
user accessible. In some cases, you may even want to
restore that backup to a lab phone in order to conduct
your investigation. That is not widely practiced in
forensics but would provide a guarantee that you do not
alter anything on the actual device in question. However,
even without working on a lab phone, you do have the
backup which can be used to confirm you did not
accidentally alter any data or settings on the suspect
phone.
ADB
Once one has made a backup, the next step will be to
actually begin the forensic examination on either a lab
phone with the backup restored, or the suspect phone.
Either way, one of the first commands is to list contents
in the Linux shell:
adb shell
ls
This provides a view of what is actually on the device. You
will want to navigate to directories and explore their
contents. You will find some directories have per-mission
denied.
ADB
Those are system directories that can only be accessed on a
rooted phone. Figure 6.2 shows the ls content in the data
directory. Sometimes, you can try su ls (or su any
command) and get the command to work.
There are specific directories you will want to look for
evidence in. These are described in the following
subsections.
ADB
/DATA
This partition contains the user’s data like your contacts,
sms, settings, and all android applications that you have
installed. Should you perform factory reset on your
device, this partition will be wiped out. This directory is
likely to have much of the evidence you are seeking.
Some of it will be in SQLite Databases
The sub=directory /data/app contains apps installed but
not by the vendor. /data/ data/<package>/databases
has the databases for specific apps.
ADB
ADB
/CACHE
This is the partition where Android stores frequently
accessed data and app components. Wiping the cache
doesn’t affect your personal data but simply gets rid of
the existing data there, which gets automatically rebuilt
as you continue using the device. This can sometimes
reveal interesting evidence in a case.
/MISC
This partition contains miscellaneous system settings in
form of on/off switches. These settings may include CID
(Carrier or Region ID), USB configuration and certain
hardware settings etc.
ADB
/MNT
If there is an SD card, internal or external, you will find its
stat here. This is a very important place to check as it
could potentially have quite a bit of evidence. While
there can be variations between models, in general the
subdirectories you will find are listed here:
/mmt/asec (encrypted apps)
/mmt/emmc (internal SD Card)
/mmt/sdcard (external/Internal SD Card)
/mmt/sdcard/external_sd (external SD Card)
ADB
COMMANDS TO EXECUTE
It is also important to get information regarding the phone itself, not
just its content. There are a series of commands that can be
executed for this purpose:
adb shell getprop ro.product.model
adb shell getprop ro.build.version.release
adb shell getprop ro.serialno
adb shell getprop ro.board.platform
adb shell getprop ro.build.description
adb shell getprop ro.product.locale.language
adb shell getprop ro.product.locale.region
adb shell getprop ro.board.platform
adb shell getprop ro.build.version.codename
ADB
Running the preceding shell commands and documenting
the output, is an excellent way to document the system
you are analyzing. It provides the starting point for your
investigation. Then you will begin to navigate through the
various folders utilizing a combination of the ls and cd
commands. The ls will list contents, while cd will change
directories. There are also variations of the ls command
you will find useful. The first such variation is ls -l which
shows file or directory, size, modified date and time, file
or folder name and owner of file and its permission. This
is shown in Figure 6.3
ADB
ADB
All commands in Linux have a number of flags, like the -l
flag shown in Figure 6.3. These alter the behavior of the
command in question, producing dif-ferent outputs. Here
are a few important ls flags you will want to keep in
mind:
Show hidden files: ls -a
Show sizes in a human readable format: ls -lh
Recursively show sub directories: ls -R
Show last modification date: ls –ltr
See UID or GID of files: ls -n
Sort by time and date: ls -t
ADB
If you are working with the actual suspect phone, it will be
useful to have the running processes. The Linux ps
command can provide that. The ps command is shown in
Figure 6.4.
As you may already be able to surmise, the ps command
also has a number of interesting flags that can alter the
input. Some common flags you are likely to find useful
are listed here:
ADB
Show active processes: ps -A or ps -E
See processes running with root privileges: ps -U root -u
root
See the process tree: ps -e –forest
See the process tree for a specific process: ps -f –forest -c
sshd
See child processes for a specific process: ps – C sshd
See all running processes: ps –r
ADB
These are only a few options, but they are important. It
should be quite obvious how these commands might be
of interest in a forensic investigation. With any of the
Linux shell commands you can always type the command
followed by -? or -help to get a list of all the possible
flags.
Another important command will be netstat. This is a
standard command in Linux and in Windows that shows
the network status. Are there any processes on the
device that are establishing or attempting to establish an
external connection? This command will tell you that and
additional relevant details. This can be seen in Figure 6.5.
ADB
ADB
In chapter 4, the pm list packages command was briefly
introduced. This command can be quite interesting
forensically. You can view any packages installed on the
device. If there is spyware, a hidden app, or other
interesting apps, this will help you find them. There are
several variations of this command you will likely find
quite useful.
pm list packages -f See their associated file.
pm list packages -d Filter to only show disabled packages.
pm list packages -e Filter to only show enabled packages.
pm list packages -i See the installer for the packages.
pm list packages -u Also include uninstalled packages.
ADB
The command pm list packages -f is shown in Figure 6.6.
Like many commands, this will often fill up several screens.
That is not useful for forensic examination. So, the first
step is to exit the shell using exit. Then, with any
command, you can export the output to a text file. When
executing shell commands from outside the shell, you
should precede the command with adb shell. This is
shown in Figure 6.7.
ADB
Now this does not provide much on the screen, but you
have just taken what would have been several screens
and output that to a text file. Not only does this allow
you to retain a copy of the text file, but you can easily
search it. You will find that this is often the best way to
conduct forensics on an Android phone using adb.
When searching an Android phone, a great deal of
information will be in the /sdcard/ folder. And images,
such as pictures are usually in the /DCIM folder. You can
see this in Figure 6.8.
ADB
ADB
Once you have identified an item you wish to pull you can
use the adb pull command to pull just that image or the
entire directory to your forensics machine. This is shown
in Figure 6.9. Note, particularly for Windows users, you
do not use the *.* to get everything. You simply give the
path to a directory. If you don’t name a file in the
directory, ADB will assume you want the entire directory.
This makes it quite convenient to pull data from an
Android phone.
ADB
ANDROID ONLY TOOLS
As with chapter 5, we will spend substantial time on specific
tools you can use for Android forensics. We will begin with
low-cost tools that are Android specific. These can be
obtained at little or no cost and retrieve a great deal of the
information you may need in a forensic examination.
TOOL ALL-IN-ONE
This tool will prompt you for a donation, but you can use it for
free. It can be downloaded from
https://androidfilehost.com/?a=show&w=files&flid=38683.
This is essentially a nice GUI for ADB. It does all the things
ADB does, but without requiring you to remember all the ADB
commands. If it cannot recognize your phone, you can simply
choose “generic device.” You will see an initial screen as
shown in Figure 6.10.
ANDROID ONLY TOOLS
ANDROID ONLY TOOLS
As you can readily see, this is not designed just for
forensics. In fact, there are items you probably would
never use in a forensic exam such as “Install Drivers,”
“APK Installer,” or “Erase All Data.” If you choose the
Bootloader unlock, the tool will tell you that this is a
fastboot command and ask if you wish to reboot the
phone in fastboot mode. You may recall fastboot from
chapter 4. The process of unlocking the bootloader is just
as difficult and may not work, but this does give you an
easytofollow GUI to perform the task in. This tool is
primarily helpful if you are trying to reboot into some
specific mode such as fastboot or EDL.
ANDROID ONLY TOOLS
ANDROID TOOLS
This is far more versatile than All-In-One and is a free
download from https://
sourceforge.net/projects/android-tools/. The main
screen is shown in Figure 6.11.
ANDROID ONLY TOOLS
ANDROID ONLY TOOLS
To anyone familiar with ADB this should look quite familiar.
You can see various ADB commands simply at the touch
of the button. You can also launch a shell console to
perform your own Linux commands if you need to. So,
you have all the benefits of a GUI, and still can use the
Linux shell. There is a tab for fastboot commands that
can allow you to attempt to unlock or root the phone.
Just as when you perform this manually, there is no
guarantee it will work. But you can see the fastboot tab
in Figure 6.12.
ANDROID ONLY TOOLS
ANDROID ONLY TOOLS
The advanced tab is very interesting. Among other things it
allows you to work with various ADB backup files. This
can be quite useful. This tab is shown in Figure 6.13. We
are not describing every feature of this tool for two
reasons. The first is that it is automating ADB. And from
chapter 4 and the first part of this chapter, you should be
comfortable with ADB. Secondly, the interface is so
intuitive to use that minimal instruction is needed.
ANDROID ONLY TOOLS
ANDROID ONLY TOOLS
AUTOPSY
Perhaps the most well-known open-source forensics
software is Autopsy. This tool is designed for PC forensics
but can analyze mobile phone images. You can download
Autopsy for free from https://www.autopsy.com/.
Android won’t extract from your phone, but if you have
an image from an Android phone you can examine it with
Autopsy. The first step is to add an image. This is shown
in Figure 6.14.
ANDROID ONLY TOOLS
ANDROID ONLY TOOLS
You can see in Figure 6.15, that Autopsy can extract quite a
bit of information. Results are shown in Figure 6.16. As
you can see the call logs, contacts, mes-sages, GPS track
points and more is retrieved.
ANDROID ONLY TOOLS
ANDROID ONLY TOOLS
ANDROID ONLY TOOLS
BITPIM
This is an open-source tool you can freely download from
https://sourceforge.net/ projects/bitpim/. However, it
is limited in the phones it can recognize. The basic
landing screen is shown in Figure 6.17.
ANDROID ONLY TOOLS
ANDROID ONLY TOOLS
This tool does come with a very useful help file that is easy
to navigate and shown in Figure 6.18.
ANDROID ONLY TOOLS
ANDROID ONLY TOOLS
OSAF
Open-Source Android Forensics is a virtual machine you can
download for free from
https://sourceforge.net/projects/osaftoolkit/. It is
Ubuntu Linux with a great many pre-loaded Android
forensics tools. The default password is forensics. The
desktop is shown in Figure 6.19.
ANDROID ONLY TOOLS
ANDROID ONLY TOOLS
It is beyond the scope of this chapter to provide a detailed
coverage of all the tools in the virtual machine. Many of
the tools are python scripts, and in some cases simply
instructions for how to manually perform tasks such as
imaging a phone. You will also notice there are tools for
app decompiling and analysis, which we will discuss later
in this chapter.
Dual Use Tools
The following tools work with Android or iOS. These were
discussed in Chapter 5. They are covered again here
because some readers will want to focus on only those
chapters that are relevant to their own investigations and
may have skipped Chapter 5.
Dual Use Tools
CELLEBRITE
This is probably the most widely known phone forensics
tool. It is used heavily by federal law enforcement. It is
also well respected in the industry. It is a very robust and
effective tool. The only downside to Cellebrite that I am
aware of is its high cost. It is the most expensive phone
forensics tool I am aware of. Most of the Cellebrite
literature won’t tell you directly the cost, you need to
speak to a sales-person to get a bid. In general, one can
expect to spend in the neighborhood of $10,000 for a
Cellebrite license. Cellebrite is an Israeli company known
not only for their tools, but also for mobile forensics
research.
Dual Use Tools
While this tool is quite popular with law enforcement, and
well respected, there is not a screenshot-by-screenshot
description of the tool in this chapter. This is primarily
due to the fact the Cellebrite is not a single tool.
There are a number of tools available from Cellebrite
including:
• Cellebrite UFED
• Cellebrite Physical Analyzer
• Cellebrite UFED Cloud
• Cellebrite Premium
• Cellebrite Blacklight
• Cellebrite Commander
Dual Use Tools
Even these products have variations. For example, UFED
has UFED Touch 2, UFED Touch 2 Ruggedized, and others.
It would take an entire book to adequately describe the
various Cellebrite products. And, as was discussed earlier,
each can be rather expensive. It is also the case that the
Cellebrite tools usually require formal training, beyond
the scope of this chapter or book. The primary focus in
this chapter will be with tools that are more affordable.
But more importantly, tools that don’t require extensive
training.
Dual Use Tools
DR. FONE
Dr. Fone is a widely used tool for mobile device recovery
and transferring of data. This makes it particularly
interesting for forensics. This tool is very inexpensive and
works with both iPhone and Android. The tool can be
found at https://drfone.wondershare.net. The full version
is $139.95. The main screen is shown in Figure 6.20.
Dual Use Tools
Dual Use Tools
The information tab will allow you to view SMS messages
and phone numbers. These are often critical to a digital
forensic investigation. Using Dr. Fone you can see the file
system discussed earlier. This is shown in Figure 6.21.
Dual Use Tools
Dual Use Tools
Most important will be the ability to copy data from the
phone to your forensics workstation. As you can see, Dr.
Fone supports this ability. There is the backup option and
the transfer option shown in Figure 6.22.
Dual Use Tools
OXYGEN FORENSICS
Oxygen Forensics is known primarily for its easy-to-use
interface. The initial connection with a mobile device is
accomplished via a wizard, thus making it quite easy to
use. It does not have all of the features one finds in tools
such as Cellebrite, but certainly many more than tools
like Dr. Fone. The pricing is in the neighbor-hood of
$7000 per license. The company website is
https://www.oxygenforensic. com/en/.
OXYGEN FORENSICS
They formally offered two tools:
the Detective and
the Analyst version.
Now they only offer the Detective version
. The wizard is very easy to use, and the first step of that
wizard is shown in Figure 6.23.
OXYGEN FORENSICS
OXYGEN FORENSICS
As was stated earlier, the main benefit of Oxygen is a rather
easy to use interface. Once the extraction is done, the
results are very easy to work with. It should be noted
that if you try physical access with an Android, that
Oxygen will attempt a rooting app. These simply do not
work with modern Android phones. Therefore, in the
Wizard choose logical access, unless you have already
rooted the phone. This is shown in Figure 6.24.
OXYGEN FORENSICS
OXYGEN FORENSICS
Figure 6.25 is a screenshot of Oxygen Forensics results for
an older phone I use for forensics labs.
OXYGEN FORENSICS
OXYGEN FORENSICS
As can be seen, there is a substantial amount of data
presented in an easy to find interface. It is quite easy to
navigate to events, phone books, messages, and many
other pieces of data the forensic examiner may have an
interest in. In general, Oxygen is a robust tool with a
number of interesting features. It is a reasonable option
for the professional forensics lab to include. Given the
cost of forensics tools, it is recommended that you seek
out recommendations from colleagues, and not rely
totally on the marketing information from vendors.
MOBILEDIT
MobilEdit is a low-priced forensics tool that has a number
of professional-level features. The MobilEdit Forensic
Express is the tool they recommend for the most robust
forensics. There are different prices. The Forensic Express
Standard is $1500 per license, and you need to contact
their sales department to get more information on the
pricing of Forensic Express Pro. The company website is
https:// www.mobiledit.com/forensic-express. The
starting screen for MobilEdit is shown in Figure 6.26.
MOBILEDIT
MOBILEDIT
Note that you may need to download drivers specific for
your Android model for the connection to work properly.
Once the device is recognized by the software, the
examiner has an opportunity to enter case details. This is
im-portant, as case management becomes rather
complex as you have a growing caseload.
MOBILEDIT
Perhaps the most user-friendly aspect of MobilEdit is the
various reporting formats. As you can see in Figure 6.27,
the examiner can select multiple formats for the report.
The HTML report is easy to navigate. However, the PDF
report is often easiest to submit to some third party such
as an attorney or other party.
MOBILEDIT
MOBILEDIT
The HTML report is shown in Figure 6.28. This format allows
one to simply click on the link on the left in order to
navigate to a portion of the report. Overall, MobilEdit is
an affordable and reasonably fully featured tool. It also
works with both Apple and Android phones, making it
useful on most mobile devices.
MOBILEDIT
ANDROID APP DECOMPILING
Forensics frequently involves understanding the apps on
the phone. The apps could be malware for some time. In
other instances, someone might claim that malware on
their phone is responsible for illegal content, and it is
necessary to be able to view the app to determine if this
is true or not. It is fortunately quite easy to decompile
Android apps.
ANDROID APP DECOMPILING
One such online decompiler can be found at
http://www.javadecompilers.com/ apk. You simply
browse to the APK in question then upload it to the
website. You can see this in Figure 6.29.
ANDROID APP DECOMPILING
When the tool is done you will be able to download the
source code for that APK. This is shown in Figure 6.30.
ANDROID APP DECOMPILING
It is also possible to use the Android Studio to decompile
and debug apps. It is one of the options on the main
screen. This is shown in Figure 6.31.
ANDROID APP DECOMPILING
This starts a user-friendly wizard that guides you to select
the apk you wish to decompile. You can see this in Figure
6.32.
ANDROID APP DECOMPILING
There are other decompilers you can try online:
• http://www.decompileandroid.com/
•https://www.apkdecompilers.com/
The specific decompiler you use is less important than
analyzing the code. Most Android apps are written in
either Java or Kotlin programming languages. One need
not be an expert programmer in order to follow along
with the code. However, at least basic programming skills
are required. It is beyond the scope of this book to teach
programming. It may be that you will require a
consultant who is a programmer to interpret the
decompiled code.

More Related Content

Similar to Android basics – Key Codes – ADB – Rooting Android – Boot Process – File Systems – Security – Tools – Android Forensics – Forensic Procedures – ADB – Android Only Tools – Dual Use Tools – Oxygen Forensics – MobilEdit – Android App Decompiling. (20)

What is operating system
What is operating systemWhat is operating system
What is operating system
રજનીશ સિંહા
 
CNIT 128 Ch 4: Android
CNIT 128 Ch 4: AndroidCNIT 128 Ch 4: Android
CNIT 128 Ch 4: Android
Sam Bowne
 
1668170.ppt
1668170.ppt1668170.ppt
1668170.ppt
230405
 
Making it Rain Android Shells - How 30,000+ Android devices are exposed to th...
Making it Rain Android Shells - How 30,000+ Android devices are exposed to th...Making it Rain Android Shells - How 30,000+ Android devices are exposed to th...
Making it Rain Android Shells - How 30,000+ Android devices are exposed to th...
Steph Jensen
 
Android zensar
Android zensarAndroid zensar
Android zensar
Dr. Ramkumar Lakshminarayanan
 
Tehran's 1st Android bootcamp - Part1
Tehran's 1st Android bootcamp - Part1Tehran's 1st Android bootcamp - Part1
Tehran's 1st Android bootcamp - Part1
Mohsen Mirhoseini
 
EMEA AppForum 2015 Android KitKat & Lollipop - new features for enterprise de...
EMEA AppForum 2015 Android KitKat & Lollipop - new features for enterprise de...EMEA AppForum 2015 Android KitKat & Lollipop - new features for enterprise de...
EMEA AppForum 2015 Android KitKat & Lollipop - new features for enterprise de...
Pietro F. Maggi
 
Android village @nullcon 2012
Android village @nullcon 2012 Android village @nullcon 2012
Android village @nullcon 2012
hakersinfo
 
Android ROM cooking: A practical Tutorial (DroidCon Torino 2014)
Android ROM cooking: A practical Tutorial (DroidCon Torino 2014)Android ROM cooking: A practical Tutorial (DroidCon Torino 2014)
Android ROM cooking: A practical Tutorial (DroidCon Torino 2014)
Ron Munitz
 
Android Fundamentals
Android FundamentalsAndroid Fundamentals
Android Fundamentals
Henry Osborne
 
Android : Deep dive into developing MobileApp using Android
Android : Deep dive into developing MobileApp using AndroidAndroid : Deep dive into developing MobileApp using Android
Android : Deep dive into developing MobileApp using Android
Emertxe Information Technologies Pvt Ltd
 
PPT on Android
PPT on AndroidPPT on Android
PPT on Android
Subhadip Chakraborty
 
01 introduction & setup - Android
01   introduction & setup - Android01   introduction & setup - Android
01 introduction & setup - Android
Wingston
 
Unit 1 Kali Nethunter Android: OS, Debub Bridge
Unit 1 Kali Nethunter Android: OS, Debub BridgeUnit 1 Kali Nethunter Android: OS, Debub Bridge
Unit 1 Kali Nethunter Android: OS, Debub Bridge
ChatanBawankar
 
Android
AndroidAndroid
Android
amitcoolbarik
 
Google android os
Google android osGoogle android os
Google android os
Kirti Choudhary
 
My presentation on Android in my college
My presentation on Android in my collegeMy presentation on Android in my college
My presentation on Android in my college
Sneha Lata
 
Hacker Halted 2014 - Reverse Engineering the Android OS
Hacker Halted 2014 - Reverse Engineering the Android OSHacker Halted 2014 - Reverse Engineering the Android OS
Hacker Halted 2014 - Reverse Engineering the Android OS
EC-Council
 
Hacking Android OS
Hacking Android OSHacking Android OS
Hacking Android OS
Jimmy Software
 
Android System Architecture And  Pen-testing of Android applications
Android System Architecture  And  Pen-testing of Android applications Android System Architecture  And  Pen-testing of Android applications
Android System Architecture And  Pen-testing of Android applications
yavuzwb
 
CNIT 128 Ch 4: Android
CNIT 128 Ch 4: AndroidCNIT 128 Ch 4: Android
CNIT 128 Ch 4: Android
Sam Bowne
 
1668170.ppt
1668170.ppt1668170.ppt
1668170.ppt
230405
 
Making it Rain Android Shells - How 30,000+ Android devices are exposed to th...
Making it Rain Android Shells - How 30,000+ Android devices are exposed to th...Making it Rain Android Shells - How 30,000+ Android devices are exposed to th...
Making it Rain Android Shells - How 30,000+ Android devices are exposed to th...
Steph Jensen
 
Tehran's 1st Android bootcamp - Part1
Tehran's 1st Android bootcamp - Part1Tehran's 1st Android bootcamp - Part1
Tehran's 1st Android bootcamp - Part1
Mohsen Mirhoseini
 
EMEA AppForum 2015 Android KitKat & Lollipop - new features for enterprise de...
EMEA AppForum 2015 Android KitKat & Lollipop - new features for enterprise de...EMEA AppForum 2015 Android KitKat & Lollipop - new features for enterprise de...
EMEA AppForum 2015 Android KitKat & Lollipop - new features for enterprise de...
Pietro F. Maggi
 
Android village @nullcon 2012
Android village @nullcon 2012 Android village @nullcon 2012
Android village @nullcon 2012
hakersinfo
 
Android ROM cooking: A practical Tutorial (DroidCon Torino 2014)
Android ROM cooking: A practical Tutorial (DroidCon Torino 2014)Android ROM cooking: A practical Tutorial (DroidCon Torino 2014)
Android ROM cooking: A practical Tutorial (DroidCon Torino 2014)
Ron Munitz
 
Android Fundamentals
Android FundamentalsAndroid Fundamentals
Android Fundamentals
Henry Osborne
 
01 introduction & setup - Android
01   introduction & setup - Android01   introduction & setup - Android
01 introduction & setup - Android
Wingston
 
Unit 1 Kali Nethunter Android: OS, Debub Bridge
Unit 1 Kali Nethunter Android: OS, Debub BridgeUnit 1 Kali Nethunter Android: OS, Debub Bridge
Unit 1 Kali Nethunter Android: OS, Debub Bridge
ChatanBawankar
 
My presentation on Android in my college
My presentation on Android in my collegeMy presentation on Android in my college
My presentation on Android in my college
Sneha Lata
 
Hacker Halted 2014 - Reverse Engineering the Android OS
Hacker Halted 2014 - Reverse Engineering the Android OSHacker Halted 2014 - Reverse Engineering the Android OS
Hacker Halted 2014 - Reverse Engineering the Android OS
EC-Council
 
Android System Architecture And  Pen-testing of Android applications
Android System Architecture  And  Pen-testing of Android applications Android System Architecture  And  Pen-testing of Android applications
Android System Architecture And  Pen-testing of Android applications
yavuzwb
 

More from ManiMaran230751 (14)

Digital Crime – Substantive Criminal Law – General Conditions – Offenses – In...
Digital Crime – Substantive Criminal Law – General Conditions – Offenses – In...Digital Crime – Substantive Criminal Law – General Conditions – Offenses – In...
Digital Crime – Substantive Criminal Law – General Conditions – Offenses – In...
ManiMaran230751
 
Forensic Science – Digital Forensics – Digital Evidence – The Digital Forensi...
Forensic Science – Digital Forensics – Digital Evidence – The Digital Forensi...Forensic Science – Digital Forensics – Digital Evidence – The Digital Forensi...
Forensic Science – Digital Forensics – Digital Evidence – The Digital Forensi...
ManiMaran230751
 
one shot15729752 Deep Learning for AI and DS
one shot15729752 Deep Learning for AI and DSone shot15729752 Deep Learning for AI and DS
one shot15729752 Deep Learning for AI and DS
ManiMaran230751
 
Deep-Learning-2017-Lecture ML DL RNN.ppt
Deep-Learning-2017-Lecture  ML DL RNN.pptDeep-Learning-2017-Lecture  ML DL RNN.ppt
Deep-Learning-2017-Lecture ML DL RNN.ppt
ManiMaran230751
 
14889574 dl ml RNN Deeplearning MMMm.ppt
14889574 dl ml RNN Deeplearning MMMm.ppt14889574 dl ml RNN Deeplearning MMMm.ppt
14889574 dl ml RNN Deeplearning MMMm.ppt
ManiMaran230751
 
12337673 deep learning RNN RNN DL ML sa.ppt
12337673 deep learning RNN RNN DL ML sa.ppt12337673 deep learning RNN RNN DL ML sa.ppt
12337673 deep learning RNN RNN DL ML sa.ppt
ManiMaran230751
 
HADOOP AND MAPREDUCE ARCHITECTURE-Unit-5.ppt
HADOOP AND MAPREDUCE ARCHITECTURE-Unit-5.pptHADOOP AND MAPREDUCE ARCHITECTURE-Unit-5.ppt
HADOOP AND MAPREDUCE ARCHITECTURE-Unit-5.ppt
ManiMaran230751
 
GNA 13552928 deep learning for GAN a.ppt
GNA 13552928 deep learning for GAN a.pptGNA 13552928 deep learning for GAN a.ppt
GNA 13552928 deep learning for GAN a.ppt
ManiMaran230751
 
Reinforcemnet Leaning in ML and DL.pptx
Reinforcemnet Leaning in ML and  DL.pptxReinforcemnet Leaning in ML and  DL.pptx
Reinforcemnet Leaning in ML and DL.pptx
ManiMaran230751
 
24.09.2021 Reinforcement Learning Algorithms.pptx
24.09.2021 Reinforcement Learning Algorithms.pptx24.09.2021 Reinforcement Learning Algorithms.pptx
24.09.2021 Reinforcement Learning Algorithms.pptx
ManiMaran230751
 
The Stochastic Network Calculus: A Modern Approach.pptx
The Stochastic Network Calculus: A Modern Approach.pptxThe Stochastic Network Calculus: A Modern Approach.pptx
The Stochastic Network Calculus: A Modern Approach.pptx
ManiMaran230751
 
Open Access and IR along with Quality Indicators.pptx
Open Access and IR along with Quality Indicators.pptxOpen Access and IR along with Quality Indicators.pptx
Open Access and IR along with Quality Indicators.pptx
ManiMaran230751
 
Fundamentals of RL.pptx
Fundamentals of RL.pptxFundamentals of RL.pptx
Fundamentals of RL.pptx
ManiMaran230751
 
Acoustic Model.pptx
Acoustic Model.pptxAcoustic Model.pptx
Acoustic Model.pptx
ManiMaran230751
 
Digital Crime – Substantive Criminal Law – General Conditions – Offenses – In...
Digital Crime – Substantive Criminal Law – General Conditions – Offenses – In...Digital Crime – Substantive Criminal Law – General Conditions – Offenses – In...
Digital Crime – Substantive Criminal Law – General Conditions – Offenses – In...
ManiMaran230751
 
Forensic Science – Digital Forensics – Digital Evidence – The Digital Forensi...
Forensic Science – Digital Forensics – Digital Evidence – The Digital Forensi...Forensic Science – Digital Forensics – Digital Evidence – The Digital Forensi...
Forensic Science – Digital Forensics – Digital Evidence – The Digital Forensi...
ManiMaran230751
 
one shot15729752 Deep Learning for AI and DS
one shot15729752 Deep Learning for AI and DSone shot15729752 Deep Learning for AI and DS
one shot15729752 Deep Learning for AI and DS
ManiMaran230751
 
Deep-Learning-2017-Lecture ML DL RNN.ppt
Deep-Learning-2017-Lecture  ML DL RNN.pptDeep-Learning-2017-Lecture  ML DL RNN.ppt
Deep-Learning-2017-Lecture ML DL RNN.ppt
ManiMaran230751
 
14889574 dl ml RNN Deeplearning MMMm.ppt
14889574 dl ml RNN Deeplearning MMMm.ppt14889574 dl ml RNN Deeplearning MMMm.ppt
14889574 dl ml RNN Deeplearning MMMm.ppt
ManiMaran230751
 
12337673 deep learning RNN RNN DL ML sa.ppt
12337673 deep learning RNN RNN DL ML sa.ppt12337673 deep learning RNN RNN DL ML sa.ppt
12337673 deep learning RNN RNN DL ML sa.ppt
ManiMaran230751
 
HADOOP AND MAPREDUCE ARCHITECTURE-Unit-5.ppt
HADOOP AND MAPREDUCE ARCHITECTURE-Unit-5.pptHADOOP AND MAPREDUCE ARCHITECTURE-Unit-5.ppt
HADOOP AND MAPREDUCE ARCHITECTURE-Unit-5.ppt
ManiMaran230751
 
GNA 13552928 deep learning for GAN a.ppt
GNA 13552928 deep learning for GAN a.pptGNA 13552928 deep learning for GAN a.ppt
GNA 13552928 deep learning for GAN a.ppt
ManiMaran230751
 
Reinforcemnet Leaning in ML and DL.pptx
Reinforcemnet Leaning in ML and  DL.pptxReinforcemnet Leaning in ML and  DL.pptx
Reinforcemnet Leaning in ML and DL.pptx
ManiMaran230751
 
24.09.2021 Reinforcement Learning Algorithms.pptx
24.09.2021 Reinforcement Learning Algorithms.pptx24.09.2021 Reinforcement Learning Algorithms.pptx
24.09.2021 Reinforcement Learning Algorithms.pptx
ManiMaran230751
 
The Stochastic Network Calculus: A Modern Approach.pptx
The Stochastic Network Calculus: A Modern Approach.pptxThe Stochastic Network Calculus: A Modern Approach.pptx
The Stochastic Network Calculus: A Modern Approach.pptx
ManiMaran230751
 
Open Access and IR along with Quality Indicators.pptx
Open Access and IR along with Quality Indicators.pptxOpen Access and IR along with Quality Indicators.pptx
Open Access and IR along with Quality Indicators.pptx
ManiMaran230751
 
Ad

Recently uploaded (20)

ISO 10121-Flat Sheet Media-Catalouge-Final.pdf
ISO 10121-Flat Sheet Media-Catalouge-Final.pdfISO 10121-Flat Sheet Media-Catalouge-Final.pdf
ISO 10121-Flat Sheet Media-Catalouge-Final.pdf
FILTRATION ENGINEERING & CUNSULTANT
 
ISO 4020-6.1- Filter Cleanliness Test Rig Catalogue.pdf
ISO 4020-6.1- Filter Cleanliness Test Rig Catalogue.pdfISO 4020-6.1- Filter Cleanliness Test Rig Catalogue.pdf
ISO 4020-6.1- Filter Cleanliness Test Rig Catalogue.pdf
FILTRATION ENGINEERING & CUNSULTANT
 
Enhanced heart disease prediction using SKNDGR ensemble Machine Learning Model
Enhanced heart disease prediction using SKNDGR ensemble Machine Learning ModelEnhanced heart disease prediction using SKNDGR ensemble Machine Learning Model
Enhanced heart disease prediction using SKNDGR ensemble Machine Learning Model
IRJET Journal
 
Software_Engineering_in_6_Hours_lyst1728638742594.pdf
Software_Engineering_in_6_Hours_lyst1728638742594.pdfSoftware_Engineering_in_6_Hours_lyst1728638742594.pdf
Software_Engineering_in_6_Hours_lyst1728638742594.pdf
VanshMunjal7
 
world subdivision.pdf...................
world subdivision.pdf...................world subdivision.pdf...................
world subdivision.pdf...................
bmmederos12
 
Highway Engineering - Pavement materials
Highway Engineering - Pavement materialsHighway Engineering - Pavement materials
Highway Engineering - Pavement materials
AmrutaBhosale9
 
[HIFLUX] Lok Fitting&Valve Catalog 2025 (Eng)
[HIFLUX] Lok Fitting&Valve Catalog 2025 (Eng)[HIFLUX] Lok Fitting&Valve Catalog 2025 (Eng)
[HIFLUX] Lok Fitting&Valve Catalog 2025 (Eng)
하이플럭스 / HIFLUX Co., Ltd.
 
Proposed EPA Municipal Waste Combustor Rule
Proposed EPA Municipal Waste Combustor RuleProposed EPA Municipal Waste Combustor Rule
Proposed EPA Municipal Waste Combustor Rule
AlvaroLinero2
 
Introduction of Structural Audit and Health Montoring.pptx
Introduction of Structural Audit and Health Montoring.pptxIntroduction of Structural Audit and Health Montoring.pptx
Introduction of Structural Audit and Health Montoring.pptx
gunjalsachin
 
ISO 5011 Air Filter Catalogues .pdf
ISO 5011 Air Filter Catalogues      .pdfISO 5011 Air Filter Catalogues      .pdf
ISO 5011 Air Filter Catalogues .pdf
FILTRATION ENGINEERING & CUNSULTANT
 
Video Games and Artificial-Realities.pptx
Video Games and Artificial-Realities.pptxVideo Games and Artificial-Realities.pptx
Video Games and Artificial-Realities.pptx
HadiBadri1
 
Structural Health and Factors affecting.pptx
Structural Health and Factors affecting.pptxStructural Health and Factors affecting.pptx
Structural Health and Factors affecting.pptx
gunjalsachin
 
May 2025 - Top 10 Read Articles in Artificial Intelligence and Applications (...
May 2025 - Top 10 Read Articles in Artificial Intelligence and Applications (...May 2025 - Top 10 Read Articles in Artificial Intelligence and Applications (...
May 2025 - Top 10 Read Articles in Artificial Intelligence and Applications (...
gerogepatton
 
Application Security and Secure Software Development Lifecycle
Application  Security and Secure Software Development LifecycleApplication  Security and Secure Software Development Lifecycle
Application Security and Secure Software Development Lifecycle
DrKavithaP1
 
Fresh concrete Workability Measurement
Fresh concrete  Workability  MeasurementFresh concrete  Workability  Measurement
Fresh concrete Workability Measurement
SasiVarman5
 
HVAC Air Filter Equipment-Catalouge-Final.pdf
HVAC Air Filter Equipment-Catalouge-Final.pdfHVAC Air Filter Equipment-Catalouge-Final.pdf
HVAC Air Filter Equipment-Catalouge-Final.pdf
FILTRATION ENGINEERING & CUNSULTANT
 
Software Developer Portfolio: Backend Architecture & Performance Optimization
Software Developer Portfolio: Backend Architecture & Performance OptimizationSoftware Developer Portfolio: Backend Architecture & Performance Optimization
Software Developer Portfolio: Backend Architecture & Performance Optimization
kiwoong (daniel) kim
 
하이플럭스 락피팅 카달로그 2025 (Lok Fitting Catalog 2025)
하이플럭스 락피팅 카달로그 2025 (Lok Fitting Catalog 2025)하이플럭스 락피팅 카달로그 2025 (Lok Fitting Catalog 2025)
하이플럭스 락피팅 카달로그 2025 (Lok Fitting Catalog 2025)
하이플럭스 / HIFLUX Co., Ltd.
 
MODULE 4 BUILDING PLANNING AND DESIGN SY BTECH HVAC SYSTEM IN BUILDING
MODULE 4 BUILDING PLANNING AND DESIGN SY BTECH HVAC SYSTEM IN BUILDINGMODULE 4 BUILDING PLANNING AND DESIGN SY BTECH HVAC SYSTEM IN BUILDING
MODULE 4 BUILDING PLANNING AND DESIGN SY BTECH HVAC SYSTEM IN BUILDING
Dr. BASWESHWAR JIRWANKAR
 
"The Enigmas of the Riemann Hypothesis" by Julio Chai
"The Enigmas of the Riemann Hypothesis" by Julio Chai"The Enigmas of the Riemann Hypothesis" by Julio Chai
"The Enigmas of the Riemann Hypothesis" by Julio Chai
Julio Chai
 
Enhanced heart disease prediction using SKNDGR ensemble Machine Learning Model
Enhanced heart disease prediction using SKNDGR ensemble Machine Learning ModelEnhanced heart disease prediction using SKNDGR ensemble Machine Learning Model
Enhanced heart disease prediction using SKNDGR ensemble Machine Learning Model
IRJET Journal
 
Software_Engineering_in_6_Hours_lyst1728638742594.pdf
Software_Engineering_in_6_Hours_lyst1728638742594.pdfSoftware_Engineering_in_6_Hours_lyst1728638742594.pdf
Software_Engineering_in_6_Hours_lyst1728638742594.pdf
VanshMunjal7
 
world subdivision.pdf...................
world subdivision.pdf...................world subdivision.pdf...................
world subdivision.pdf...................
bmmederos12
 
Highway Engineering - Pavement materials
Highway Engineering - Pavement materialsHighway Engineering - Pavement materials
Highway Engineering - Pavement materials
AmrutaBhosale9
 
Proposed EPA Municipal Waste Combustor Rule
Proposed EPA Municipal Waste Combustor RuleProposed EPA Municipal Waste Combustor Rule
Proposed EPA Municipal Waste Combustor Rule
AlvaroLinero2
 
Introduction of Structural Audit and Health Montoring.pptx
Introduction of Structural Audit and Health Montoring.pptxIntroduction of Structural Audit and Health Montoring.pptx
Introduction of Structural Audit and Health Montoring.pptx
gunjalsachin
 
Video Games and Artificial-Realities.pptx
Video Games and Artificial-Realities.pptxVideo Games and Artificial-Realities.pptx
Video Games and Artificial-Realities.pptx
HadiBadri1
 
Structural Health and Factors affecting.pptx
Structural Health and Factors affecting.pptxStructural Health and Factors affecting.pptx
Structural Health and Factors affecting.pptx
gunjalsachin
 
May 2025 - Top 10 Read Articles in Artificial Intelligence and Applications (...
May 2025 - Top 10 Read Articles in Artificial Intelligence and Applications (...May 2025 - Top 10 Read Articles in Artificial Intelligence and Applications (...
May 2025 - Top 10 Read Articles in Artificial Intelligence and Applications (...
gerogepatton
 
Application Security and Secure Software Development Lifecycle
Application  Security and Secure Software Development LifecycleApplication  Security and Secure Software Development Lifecycle
Application Security and Secure Software Development Lifecycle
DrKavithaP1
 
Fresh concrete Workability Measurement
Fresh concrete  Workability  MeasurementFresh concrete  Workability  Measurement
Fresh concrete Workability Measurement
SasiVarman5
 
Software Developer Portfolio: Backend Architecture & Performance Optimization
Software Developer Portfolio: Backend Architecture & Performance OptimizationSoftware Developer Portfolio: Backend Architecture & Performance Optimization
Software Developer Portfolio: Backend Architecture & Performance Optimization
kiwoong (daniel) kim
 
하이플럭스 락피팅 카달로그 2025 (Lok Fitting Catalog 2025)
하이플럭스 락피팅 카달로그 2025 (Lok Fitting Catalog 2025)하이플럭스 락피팅 카달로그 2025 (Lok Fitting Catalog 2025)
하이플럭스 락피팅 카달로그 2025 (Lok Fitting Catalog 2025)
하이플럭스 / HIFLUX Co., Ltd.
 
MODULE 4 BUILDING PLANNING AND DESIGN SY BTECH HVAC SYSTEM IN BUILDING
MODULE 4 BUILDING PLANNING AND DESIGN SY BTECH HVAC SYSTEM IN BUILDINGMODULE 4 BUILDING PLANNING AND DESIGN SY BTECH HVAC SYSTEM IN BUILDING
MODULE 4 BUILDING PLANNING AND DESIGN SY BTECH HVAC SYSTEM IN BUILDING
Dr. BASWESHWAR JIRWANKAR
 
"The Enigmas of the Riemann Hypothesis" by Julio Chai
"The Enigmas of the Riemann Hypothesis" by Julio Chai"The Enigmas of the Riemann Hypothesis" by Julio Chai
"The Enigmas of the Riemann Hypothesis" by Julio Chai
Julio Chai
 
Ad

Android basics – Key Codes – ADB – Rooting Android – Boot Process – File Systems – Security – Tools – Android Forensics – Forensic Procedures – ADB – Android Only Tools – Dual Use Tools – Oxygen Forensics – MobilEdit – Android App Decompiling.

  • 1. Unit V ANDROID FORENSICS Android basics – Key Codes – ADB – Rooting Android – Boot Process – File Systems – Security – Tools – Android Forensics – Forensic Procedures – ADB – Android Only Tools – Dual Use Tools–Oxygen Forensics – MobilEdit – Android App Decompiling.
  • 2. Android basics • Introduction • Android has a large percentage of the mobile device market, making it important for understanding mobile forensics. This knowledge must include the fundamentails of Android, including the history of the operating system. But it also includes more detailed information such as the various file systems and the system architecture. Furthermore, there are various tools for working with Android including Android Debugging Bridge (ADB).
  • 3. Android basics • Android is a very common operating system. It is obviously found on Android phones, but it is also found in smart TVs, automobiles, and some IoT devices. It is clearly quite important to understand the Android operating system in some depth. The Android operating system is a Linux-based operating system, and it is com-pletely open source. If you have a programming and operating systems background, you may find it useful to examine the Android source code from http:// source.android.com/.
  • 4. Android basics • Android was first released in 2003 and is the creation of Rich Miner, Andy Rubin, and Nick Sears. Google acquired Android in 2005, but still keeps the code open source. • The versions of Android have been named after sweets: • Version 1.5 Cupcake • Version 1.6 Donut • Version 2.0-2.1 Éclair • Version 2.2 Froyo • Version 2.3 Gingerbread • Version 3.1 - 3.2 Honeycomb • Version 4.0 Ice Cream Sandwich • Version 4.1 - 4.2 Jellybean • Version 4.3 Kitkat
  • 5. Android basics • The versions of Android have been named after sweets: ... • Version 5.0 Lollipop released November 3, 2014 • Version 6.0 Marshmallow released October 2015 • Version 7.0 Nougat was released in August 2016 Version 8.0 Oreo released August 2017 • Version 9.0 Pie August 6, 2018 • Android 10. This was called Q during beta testing, and it marks a departure from using the names of deserts. This was released in September 2019 • Android 11 Released February 2020
  • 6. Android basics • The differences from version to version usually involve adding new features, not a radical change to the operating system. This means that if you are comfortable with version 7.0 (Nougat), you will be able to do forensic examination on version 9.0 (Pie). While the Android source code is open source, each vendor may make modifications. This means even the partition layout can vary. However, there are common partitions that are present on most Android devices (phones or tablets).
  • 7. Android basics • The boot loader partition is necessary for hardware initialization and loading the Android kernel. This is unlikely to have forensically important data. The boot partition has the information needed to bootup. Again, this is unlikely to have forensically important data. The recovery partition is used to boot the phone into a recovery console. While the partition may not have forensically relevant data, sometimes you may need to boot into recovery mode.
  • 8. Android basics • The userdata partition is the one most relevant to forensic investigations. Here you will find the majority of user data including all the data for apps. We will discuss SQLite databases in chapter 8, this directory will contain many of those database. The cache partition stores frequently accessed data and recovery logs. This can be very important for forensic investigations. There can be data here that the user is not even aware of. This means the user is less likely to have deleted it.
  • 9. Android basics • The system partition is not usually important for forensic examinations. Remember that Android is Linux based, if you have an image of an Android phone you may be able to execute at least some Linux commands on it. For ex-ample, using cat proc/partitions will reveal to you the partitions that exist on the specific phone you are examining. • In addition to these partitions there are specific directories that may yield forensic evidence.
  • 10. Android basics • The acct directory is the mount point for the control group and provides user accounting. • The cache directory stores frequently accessed data. This will almost always be interesting forensically. • The data directory has data for each app. This is clearly critical for forensic examinations. • The mnt directory is a mount point for all file systems and can indicate in-ternal and external storage such as SD cards. If you have an Android image, the Linux ls command used on this directory will show you the various storage devices.
  • 11. Android basics • As you encounter dates on files in Android, there can be some confusion. Android can use several different date/time formats. The following lists the various formats available: • UNIX, based on Jan 1, 1970 • GPS, based on Jan 6, 1980 • Some (such as Motorola) may use AOL, based on Jan 1, 1980 64 An In-Depth Guide to Mobile Device Forensics
  • 12. Android basics • Fortunately, there are a number of online converters for date and time formats. You can simply search for a converter, but here are a few you may find useful: https://www.unixtimestamp.com/index.php https://timestamp.online/ https://www.onlineconversion.com/date_time.ht m
  • 13. SPECIALIZED KEY CODES • There are a number of keycodes that can be entered on an Android phone to get useful information from the phone. Some of these codes work with all Android models, others are specific to particular models. These are useful in diagnostics as well as forensics. • Diagnostic configuration *#9090# Battery Status *#0228# System dump mode *#9900# Testing Menu *#*#4636#*#* Display Info about device *#*#4636#*#* Factory Restore *#*#7780#*#*
  • 14. SPECIALIZED KEY CODES • Camera Information *#*#34971539#*#* Completely Wipe device, install stock firmware *2767*3855# Quick GPS Test *#*#1472365#*#* Wi-Fi Mac Address *#*#232338#*#* RAM version *#*#3264#*#* Bluetooth test *#*#232331#*#* Displays IMEI number *#06# Remove Google account setting *#*#7780#*#* Toggle always-on display on or off *#99#
  • 15. SPECIALIZED KEY CODES • Log test settings *#800# Engineering switch test mode *#801# GPS TTFF (Time-To-First-Fix) test mode *#802# Engineering Wi-Fi setting *#803# Automatic disconnect test mode *#804# Engineering bluetooth test mode *#805# Engineering aging test mode *#806# Engineering automatic test mode *#807#
  • 16. SPECIALIZED KEY CODES • Enter engineering mic echo test mode *#809# Automatically searches for available TDSCDMA carriers *#814# Automatically searches for available WCDMA carriers *#824# Automatically searches for available LTE carriers *#834# Automatically searches for available GSM carriers *#844# Test photograph RGB (Red, Green, & Blue tint) *#900# LCD display test *#*#0*#*#** Packet loopback *#*#0283#*#* Melody test *#*#0289#*#*
  • 17. SPECIALIZED KEY CODES • Proximity sensor test *#*#0588#*#* Melody test *#*#0673#*#* Test for vibration and backlight functionality *#*#0842#*#* Advanced GPS testing *#*#1575#*#* Touch screen test *#*#2664#*#* Checks for root *#*#7668#*#* Bluetooth test *#*#232331#*#*
  • 18. SPECIALIZED KEY CODES • These are just a sample of codes. One can search the internet for something like “Secret codes for XXXX phones” (replacing xxxx with the model you are interested in) to get information on codes for that specific phone model.
  • 19. ADB • You can download this free tool from https://developer.android.com/studio/ command- line/adb. The Android Debugging Bridge has three components: • A client, which sends commands. The client runs on the development ma-chine. The investigator can invoke a client from a command-line terminal by issuing an adb command. • • A daemon (adbd), which runs commands on a device. The daemon runs as a background process on each device. • • A server, which manages communication between the client and the daemon. The server runs as a background process on your development machine.
  • 20. ABD • When you start an adb client, the client first checks whether there is an adb server process already running. If there isn't, it starts the server process. When the server starts, it binds to local TCP port 5037 and listens for commands sent from adb clients – all adb clients use port 5037 to communicate with the adb server. When a device is connected to a computer that has ADB, the first step is to list all connected devices. This is shown in Figure 4.1.
  • 21. ABD
  • 22. ABD • If the device does not show as attached, there are several possibilities. One common issue is that the developer mode is not turned on. Another possibility is that the ADB services has a problem. This requires you to first kill the service, then restart it as shown here: • adb kill-server • adb start-server
  • 23. ABD • Once you have connected successfully to the Android device, there are several commands that are of interest when using ADB. One of the most interesting is the adb shell command. The adb shell command, enters a shell on the Android, from which the user can utilize standard Linux commands. This is shown in Figure 4.2
  • 24. ABD
  • 25. ABD • Common Linux commands done from within the adb shell include pstree, to list all the processes on the target device, in a tree format. Other standard Linux commands such as ps, ls, netstat, and lsof can also be useful. When you wish to exit the shell, just type exit as shown in Figure 4.3.
  • 26. ABD
  • 27. ABD • To see all the Linux commands available on a given device, from within the adb shell one can type ls/system/bin. This will show all the system binary files (i.e., executables). This is shown in Figure 4.4.
  • 28. ABD
  • 29. ABD Aside from issuing Linux commands from within the adb shell, there are also adb specific commands that can be useful in a forensic examination. Common ADB commands are summarized in Table 4.1. Note, as you have seen in the screenshots,
  • 30. ABD
  • 31. ABD
  • 32. ABD
  • 33. ABD you only have to type “adb shell” before a command if you are using a shell command and are not currently in the adb shell. These commands combined with the specialized key codes discussed earlier can provide a great deal of information about the phone in question. This table is not an exhaustive list of adb commands, but it does provide the most common adb commands.
  • 34. ROOTING ANDROID Unfortunately, there is some data one cannot get to without rooting the Android phone. The term root is the Linux term for the administrator. In Linux, you simply type su (super user or switch user) and enter the root password. However, Android phones don’t allow you to do that. Rooting a phone gives you complete root access to all aspects of the phone. However, that will also void any warranty.
  • 35. ROOTING ANDROID In the past, rooting was not terribly difficult. There were even apps one could get that would root the phone for you. Most of these apps do not work on current models of Android. However, there are some methods that might work, depending on a number of variables. For example, the model you have, the version of Android, etc. will affect whether or not you will be successful. It is important to keep in mind that these are simply possible techniques. There is no guaranteed method for rooting an Android phone.
  • 36. ROOTING ANDROID Before you can root a phone it must first be OEM (Original Equipment Manufacturer) unlocked. And it so happens, that before you can OEM unlock, you must first unlock it from the carrier. The only consistently effective method for carrier unlocking is to contact the carrier, assuming the contract is paid off, and request a carrier unlock. After that you have several options for OEM unlock, again depending on what manufacturer and model you are working with.
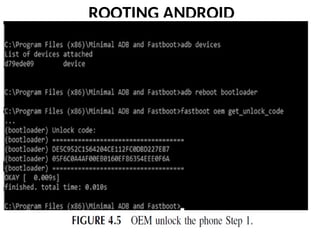
  • 37. ROOTING ANDROID If your phone has “OEM Unlock” enabled and visible under developer settings, then you have the option to use ADB (discussed in the previous section) and move to what is called fastboot mode. For most phones this is done by using ADB and typing in adb reboot bootloader. At that point you can try fastboot oem unlock. If that does not work, then your model requires you to get an unlock code and send it to the vendor to get OEM unlock. This is shown in Figures 4.5 through 4.7.
  • 41. ROOTING ANDROID Once the phone is OEM unlocked, you can then root the phone. But be aware, that for many phones getting to the OEM unlock might be very difficult. by typing. adb reboot bootloader followed by fastboot oem device-info You will then see the devices OEM unlock status as shown in Figure 4.8.
  • 43. ROOTING ANDROID Once it is OEM unlocked, you can use free tools such as Magisk to install a new image, that is rooted. Once you have installed Magisk you can update your system. But you need to push the image onto the system for Magisk to be able to find it. That can be done with adb push. Also, for new images, they take up a lot of space, make sure you have enough space for the image. The process, once you have OEM unlocked is as follows. Once you have the phone OEM-Unlocked, rooting is not that difficult.
  • 44. ROOTING ANDROID You will need a TWRP image, those can be found at https://twrp.me/Devices/ • Place TWRP recovery image in “ADB and Fastboot” folder • Open fastboot • Check to make sure the device is connected with adb devices. • Reboot in boot loader mode by adb reboot bootloader • Use the phone screen to select Apply Update from ADB Sideload, or similar entry. • type fastboot flash recovery twrp.img
  • 45. ROOTING ANDROID Note that the twrp.img is whatever image you intend to put on the phone, and it must be in the fastboot directory. Also keep in mind, that with newer phone models, any one of these steps may fail. Rooting modern phones is a difficult task and frequently fails.
  • 46. BOOT PROCESS Every operating system has a boot process. This begins when the power is turned on and completes when the device’s operating system is fully loaded and functioning. Before the device is powered on, the device CPU will be in a state where no in-itializations have been done. Once the Android device is powered on, execution starts with the boot ROM code. This boot ROM code is specific to the CPU the device is using.
  • 47. BOOT PROCESS This phase includes two steps, A and B: Step A: When the boot ROM code is executed, it initializes the device hardware and attempts to detect the boot media. Therefore, the boot ROM code scans until it finds the boot media. Step B: Once the boot sequence is established, the initial boot loader is copied to the internal RAM. After this, the execution shifts to the code loaded into RAM.
  • 48. BOOT PROCESS This brings us to what is the bootloader? The bootloader is a relatively small program that is executed before the operating system starts to function. Bootloaders are present in all computing devices and used to get the system booted to the point that the operating system can be loaded. In the Android boot loader, there are two stages – Initial Program Load (IPL) and Second Program Load (SPL).
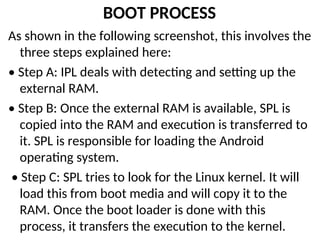
  • 49. BOOT PROCESS As shown in the following screenshot, this involves the three steps explained here: • Step A: IPL deals with detecting and setting up the external RAM. • Step B: Once the external RAM is available, SPL is copied into the RAM and execution is transferred to it. SPL is responsible for loading the Android operating system. • Step C: SPL tries to look for the Linux kernel. It will load this from boot media and will copy it to the RAM. Once the boot loader is done with this process, it transfers the execution to the kernel.
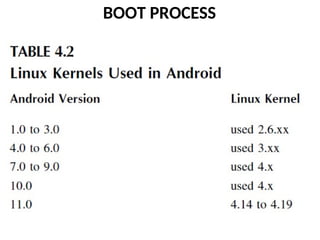
  • 50. BOOT PROCESS The kernel is the heart of any operating system. And for Android phones that is the Linux kernel. The Linux kernel is the heart of the Android operating system and is responsible for process management, memory management, and enforcing security on the device. Different versions of Android use different versions of the Linux kernel. The Android kernel is a variation of the Linux kernel, but is quite similar to the standard Linux kernel. This is summarized in Table 4.2.
  • 52. BOOT PROCESS It should be noted that Android includes a number of different manufacturers. Each manufacturer may alter the Android code base, and even alter the Linux kernel used. So, Table 4.2 is just a general guideline to the kernel version used in specific Android versions.
  • 53. BOOT PROCESS After the kernel is loaded, it mounts the root filesystem (rootfs) and provides access to system and user data: Step A: When the memory management units and caches have been initialized, the system can use virtual memory and launch user space processes. Step B: The kernel will look in the rootfs for the init process and launch it as the initial user space process:
  • 54. BOOT PROCESS • The process rootfs is the place to start and stop searching the doubly linked list of mount points. It is a special instance of ramfs which is a simple file system used to get the system booted. • The basic initramfs is the root filesystem image used for booting the kernel provided as a compressed archive. – If an uncompressed cpio archive exists at the start of the initramfs, extract and load the microcode from it to CPU.
  • 55. BOOT PROCESS – If an uncompressed cpio archive exists at the start of the initramfs, skip that and set the rest of file as the basic initramfs. Otherwise, treat the whole in-itramfs as the basic initramfs. – Unpack the basic initramfs by treating it as compressed (currently gzipped) cpio archive into a RAM-based disk. – Mount and use the RAM-based disk as the initial root filesystem.
  • 56. FILE SYSTEMS File systems are how files are organized on storage devices. Whether that is a traditional hard drive, or a solid-state drive. In chapter 3 we discussed the APFS file system used with iOS devices. There are several file systems used with Android. The major file systems are listed here: • F2FS: Flash-Friendly File System • JFFS2: Journaling Flash File System version 2 • YAFFS: Yet Another Flash File System
  • 57. FILE SYSTEMS F2FS: FLASH-FRIENDLY FILE SYSTEM The key data structure is the “node”. Similar to traditional file structures, F2FS has three types of nodes: inode, direct node, indirect node. F2FS assigns 4 KB to an inode block which contains 923 data block indices, two direct node pointers, two indirect node pointers, and one double indirect node pointer as described below. A direct node block contains 1018 data block indices, and an indirect node block contains 1018 node block indices. The different nodes are shown in Table 4.3.
  • 59. FILE SYSTEMS F2FS divides the volume into six regions. The first is the superblock (SB) which is at the beginning of the partition. There is a second copy of the superblock so that if the first becomes corrupt, the system can recover. Then there is the checkpoint (CP). This contains information about the system including entries of active seg-ments and lists of any orphaned inodes. Next comes the segment information table (SIT) which has a block count and bitmap of the main area blocks.
  • 60. FILE SYSTEMS This is followed by the node address table (NAT) which contains the addresses for the nodes. That is in turn followed by the segment summary area (SSA) which contains information about who owns the node blocks. These first five segments are essentially metadata about the volume. They are followed by the main area which has the file and di-rectory data.
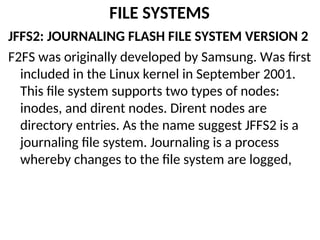
  • 61. FILE SYSTEMS JFFS2: JOURNALING FLASH FILE SYSTEM VERSION 2 F2FS was originally developed by Samsung. Was first included in the Linux kernel in September 2001. This file system supports two types of nodes: inodes, and dirent nodes. Dirent nodes are directory entries. As the name suggest JFFS2 is a journaling file system. Journaling is a process whereby changes to the file system are logged,
  • 62. FILE SYSTEMS so that in the event of a system failure, the change can be rolled back or recreated. JFFS2 is the default flash file system for the AOSP (Android Open-Source Project) kernels, since Ice Cream Sandwich. JFFS2 is a replacement to the original JFFS. JFFS2 includes garbage collection. This is a process that fines file system blocks that were not released by a process but should have been. The garbage collection then releases them. This is similar to memory garbage collection that is found in Java and .Net programming languages.
  • 63. FILE SYSTEMS YAFFS: YET ANOTHER FLASH FILE SYSTEM With YAFFS, data is written as an entire page that includes the file metadata as well as the data. In YAFFS terminology a page is referred to as a chunk. Each new file is given a unique object ID number so that it can be identified. YAFFS uses a tree data structure of the physical location of the chunks/pages in the system.
  • 64. FILE SYSTEMS YAFFS: YET ANOTHER FLASH FILE SYSTEM Version 2 was the default AOSP flash file system for kernel version 2.6.32. YAFFS2 is not sup-ported in the newer kernel versions and does not appear in the source tree for the latest kernel versions from kernel.org. However, individual mobile device vendors may continue to support YAFFS2.
  • 65. SECURITY As Android is marketed on a wide range of devices, made by different manu-facturers, some of the Android security features are unique to specific manu-facturers and models. Cryptography is a critical part of security with any mobile device.
  • 66. SECURITY In February 2019, Google unveiled Adiantum, an encryption cipher designed primarily for use on devices that do not have hardware-accelerated support for the Advanced Encryption Standard (AES), such as low-end devices. Adiantum is a cipher construction for disk encryption, which uses the ChaCha cipher and Advanced Encryption Standard (AES) ciphers, and Poly1305 cryptographic message authentication code (MAC). ChaCha is a variant of the Salsa stream cipher.
  • 67. SECURITY You are probably at least somewhat familiar with AES but may not be familiar with Salsa or ChaCha. In 2013, Mouha and Preneel published a proof that 15 rounds of Salsa20 was 128-bit secure against differential cryptanalysis. Specifically, Salsa has no differential characteristic with higher probability than 2130 , so differential cryptanalysis would be more difficult than 128-bit key ex- haustion. This is one example of studies done with the Salsa cipher that show it to be a robust cipher.
  • 68. SECURITY Aside from cryptography, the Android operating system also supports application security., Android uses the Linux user-based protection model to isolate applications from each other. In Linux systems, each user is assigned a unique User ID (UID) and users are segregated so that one user does not have access to the data of another. All resources under a particular user are run with the same privileges. In the same manner, each Android application is assigned a UID and is run as a separate process. This effectively puts each Android app in an isolated sandbox.
  • 69. SECURITY SELinux (Security-Enhanced Linux) is also a security enhancement available for Android devices. This began with Android version 4.2. Android uses SELinux to impose mandatory access control that ensures applications work in isolated en- vironments. Therefore, even if a user installs a malicious app, the malware cannot easily access the operating system or other applications.
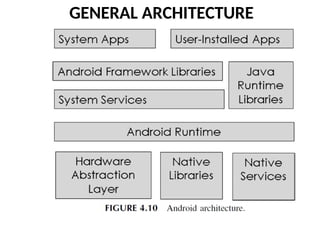
  • 70. GENERAL ARCHITECTURE While Android includes a number of different vendors, each with their own mod-ifications, the general overview of the Android architecture is common to all Android devices. This common architecture is shown in Figure 4.10.
  • 72. GENERAL ARCHITECTURE The first item of note in Figure 4.10 is the Android runtime (ART). This is the application environment used by Android. It is a virtual machine. Each application is executed in its own copy of the ART. ART replaces the earlier Dalvik system. Dalvik used just in time compilation. That means that an app was compiled to executable code when it was executed.
  • 73. GENERAL ARCHITECTURE This saved storage space but slowed app launching. ART uses ahead of time compiling (AOT). As soon as an app is in-stalled, it is compiled into executable code. This speeds up performance, but with a cost so storage. However, modern devices have ever increasing storage space.
  • 74. TOOLS There are various tools made for Android phones. Some are for specific manu-facturers, and others work with a range of Android phones. Earlier in this chapter MSDownload was mentioned. That was one example of an Android specific tool. It happens that most of these tools are open source and free downloads. Those that do have a cost, have a minimal cost.
  • 75. TOOLS Another tool is Odin3. This tool is explicitly for Samsung phones. You can see the tool in Figure 4.11.
  • 77. TOOLS Odin can be downloaded from https://samsungodin.com/. This tool is used to flash images onto a Samsung phone. This includes stock or custom firmware images. And, at least in theory, root packages that will root the Samsung phone. The tool was created for internal use by Samsung in their authorized service centers, and in their factory for flashing and testing the software. It is usually a good idea to use the latest version of Odin available.
  • 78. TOOLS Another Samsung only software is SamFirm. This is shown in Figure 4.12. This is also a free flashing tool. You can download it from https:// samfirmtool.com/. It allows you to Flash your Samsung device with a different image.
  • 79. TOOLS
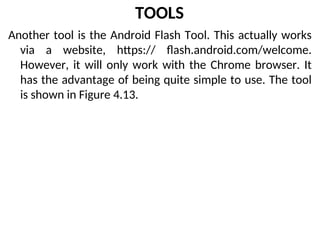
  • 80. TOOLS Another tool is the Android Flash Tool. This actually works via a website, https:// flash.android.com/welcome. However, it will only work with the Chrome browser. It has the advantage of being quite simple to use. The tool is shown in Figure 4.13.
  • 81. TOOLS
  • 82. TOOLS SPFlash tool is also another free download. It is designed to allow you to flash images onto various Android phones. It is meant to work with MediaTek Android phones but may work with others. SPFlash can be downloaded from https:// spflashtool.com/. This tool can be seen in Figure 4.14. Unfortunately, all of these tools vary in efficacy from model to model and Android version to Android version. They are frequently used to help recover bricked phones or to bypass phone security. However, the use of these tools is not without some risk. It is possible to completely brick your phone using these tools.
  • 83. TOOLS
  • 84. Android Forensics Given the ubiquitous nature of Android devices, Android forensics is essential. Forensics for Android includes approaches, techniques, and tools. Many tools are covered in this chapter, but also extensive use of the Android debugging bridge (ADB). The focus is on free tools or low cost tools. In this chapter, some material from chapter five is repeated. This is due to the fact that some readers will only be interested in iOS forensics, or in Android forensics, and some of the information overlaps.
  • 85. Android Forensics One reason why mobile devices provide so much evidence is the ubiquitous nature of such devices. Many people would not think of going anywhere without their smartphone. Others carry a tablet with them everywhere. More and more of our lives are conducted on our devices. From or-dering food to communicating with friends. Because of the pervasive nature of mobile devices, mobile forensics is important in all types of investigations.
  • 86. Android Forensics Items you should attempt to recover from a mobile device include the following: • Call history • Emails, texts, and/or other messages • Photos and videos • Phone information • Global positioning system (GPS) information • Network information
  • 87. Android Forensics The call history lets you know who the user has spoken to and for how long. This information is often important to all types of investigations. Of course, this in-formation is easily erasable, but many users don’t erase their call history. Or per-haps the suspect intended to delete this data and simply did not get to it yet. Usually call history does not provide direct evidence of a specific crime, so much as it provides supporting evidence and general intelligence about the suspect's activity.
  • 88. Android Forensics However, in a cyberstalking case, the call history can be of central importance. The call history can show a pattern of contact with the victim. However, in other cases, it provides only circumstantial evidence. For example, if John Smith is suspected of drug dealing and his call history shows a pattern of regular calls to a known drug supplier, by itself this is not adequate evidence of any crime. However, it aids the investigators in getting an accurate picture of the entire situation.
  • 89. Android Forensics Smartphones also allow text messages and email. There is also a wide range of chat apps such as Snapchat, Viber, WhatsApp, WeChat, Signal, etc. Many phone forensics tools will retrieve information from some apps. However, given there are hundreds of apps, no tool could possibly retrieve data from all of them. In fact, most tools only get data from a few dozen. In chapter 8 we will discuss SQLite forensics, which will allow you to extract data from the app databases directly.
  • 90. Android Forensics Photos and videos can provide direct evidence of a crime. In the case of child pornography cases, the relevance is obvious. But there are certainly other crimes where the evidence is found in photos and videos on the suspect's own device. The breach of the U.S. Capitol on January 6, 2021 is a case in point. Many of these who breached the Capitol building took selfies. In many cases uploading those to social media platforms.
  • 91. Android Forensics This is in no way anomalous. It may surprise you to find that it is quite common for at least some criminals to have incriminating photos and videos on their devices. There are cases of gang members with photos depicting them with illegal firearms and narcotics, thieves videoing themselves during a theft, and many more similar examples. It is always worthwhile to examine photos and videos on a phone.
  • 92. Android Forensics Information about the phone should be one of the first things you document in your investigation. This will include model number, IMEI number, serial number of the SIM card, operating system, and other similar information. The more detailed, descriptive information you can document, the better. It is important to fully document the details of the phone.
  • 93. Android Forensics Global positioning system information has become increasingly important in a variety of cases. GPS information, even if it is not exact. can determine if a suspect was in a particular area at the time of the crime. That data can also provide an alibi. If a crime is committed, and phone GPS indicates the person suspected of the crime was actually 100 miles away at the time, this is a compelling alibi. GPS information has begun to play a significant role in contentious divorces, for instance. If someone suspects a spouse of being unfaithful, determining that the spouse’s phone and his or her car were at a specific motel when he or she claimed to be at work can be important.
  • 94. Android Forensics It should be noted that with older phones, the phone did not have true GPS. Rather than use GPS satellites to determine location (which is the most reliable method), they instead would use triangulation of signal strength with various cell towers. This could lead to inaccuracies of up to 50 to 100 feet. However, this situation has changed. Most modern phones and/or the apps on the phone use true GPS for much more accurate data.
  • 95. Android Forensics The use of Wi-Fi along with GPS will improve accuracy of GPS. The reason for this is that various organizations, including Google, track the Basic Service Set Identifier (BSSID) used by wireless routers, and correlate it with physical addresses. The BSSID is a unique address that identifies the access point/router that creates the wireless network. To identify access points and their clients, the access points MAC address is used. This implies that if your phone connects to a wireless access point, then even with no other data, the phone’s location can be pinpointed to within a reasonably close distance of that access point. Network information is also im- portant.
  • 96. Android Forensics Many phones will store the various Wi-Fi hotspots they have connected to. This data could give you an indication of where the phone has been. For example, if the phone belongs to someone suspected of stalking a victim, and the suspect’s phone network records show he or she has frequently been using Wi-Fi networks in close proximity to the victim’s home, this can be important evidence. Regardless of the make or model of a mobile phone, these mobile devices are a repository of invaluable data. As was stated earlier in this chapter, so much of our lives is tied to our mobile devices.
  • 97. FORENSIC PROCEDURES There are various standards that provide guidelines for forensic examinations. Mobile forensics is no exception. One standard procedure that you should abso-lutely follow is to put the phone in airplane mode while working with it. You do not want anyone to be able to remotely access the device. It is also important that you make as few changes on any device you are examining, and airplane mode will assist you with that.
  • 98. FORENSIC PROCEDURES One group that is at the forefront of digital forensics procedures is the Scientific Working Group on Digital Evidence (https://www.swgde.org/). SWGDE provides guidance on many digital forensics topics. Related to mobile device forensics, SWGDE provides a general overview of the types of phone forensic investigations:
  • 99. FORENSIC PROCEDURES Mobile Forensics Pyramid – The level of extraction and analysis required depends on the request and the specifics of the investigation. Higher levels require a more comprehensive examination, additional skills and may not be applicable or possible for every phone or situation. Each level of the Mobile Forensics Pyramid has its own corresponding skill set.
  • 100. FORENSIC PROCEDURES The levels are: 1. Manual – A process that involves the manual operation of the keypad and handset. display to document data present in the phone’s internal memory. 2. Logical – A process that extracts a portion of the file system. 3. File System – A process that provides access to the file system. 4. Physical (Non-Invasive) – A process that provides physical acquisition of a phone’s data without requiring opening the case of the phone.
  • 101. FORENSIC PROCEDURES 5. Physical (Invasive) – A process that provides physical acquisition of a phone’s data requiring disassembly of the phone providing access to the circuit board (e.g., JTAG). 6. Chip-Off – A process that involves the removal and reading of a memory chip to conduct analysis. 7. MicroRead – A process that involves the use of a high- power microscope to provide a physical view of memory cells.
  • 102. FORENSIC PROCEDURES Regardless of the tool you choose, you should ensure that the examination chosen is adequate for your forensic needs. Levels 5 and 6, JTAG and MicroRead, are not as common as the other methods. While level 1, manual, is usually not detailed en-ough. Level 4 is the most common used, but sometimes a level 2 or 3 can be sufficient.
  • 103. FORENSIC PROCEDURES It is also important to have the appropriate tools for the examination. The United States National Institute of Standards (NIST) provides guidance on this issue. The NIST-sponsored CFTT – Computer Forensics Tool Testing Program (http:// www.cftt.nist.gov/) provides a measure of assurance that the tools used in the in-vestigations of computer-related crimes produce valid results. Testing includes a set of core requirements as well as optional requirements. It is a good idea to refer to these standards when selecting a tool.
  • 104. FORENSIC PROCEDURES NIST also provides general guidelines on how to write a report for a mobile device forensic report. The guidelines are of what to include are: • Descriptive list of items submitted for examination, including serial number, make, and model. • Identity and signature of the examiner. • The equipment and setup used in the examination. • Brief description of steps taken during examination, such as string searches, graphics image searches, and recovering erased files.
  • 105. FORENSIC PROCEDURES • The guidelines are of what to include are: … • Supporting materials, such as printouts of particular items of evidence, digital copies of evidence, and chain of custody documentation. • Details of findings: – Specific files related to the request. – Other files, including deleted files, that support the findings. – String searches, keyword searches, and text string searches. – Internet-related evidence, such as website traffic analysis, chat logs, cache files, email, and news group activity. – Graphic image analysis.
  • 106. FORENSIC PROCEDURES • Details of findings… – Indicators of ownership, which could include program registration data. – Data analysis. – Description of relevant programs on the examined items. – Techniques used to hide or mask data, such as encryption, steganography, hidden attributes, hidden partitions, and file name anomalies. • Report conclusions
  • 107. FORENSIC PROCEDURES The United States Department of Justice1 states The examiner is responsible for completely and accurately reporting his or her findings and the results of the analysis of the digital evidence examination. Documentation is an ongoing process throughout the examination. It is important to accurately record the steps taken during the digital evidence examination.
  • 108. FORENSIC PROCEDURES The well-respected SANS institute publishes guidelines2 on digital forensics reports. They state a digital forensics report should include overview/case summary, details on the forensic acquisition and exam, details of all steps taken, etc. The Reference Manual on Scientific Evidence: Third Edition3 states “Under Federal Rule of Civil Procedure 26(a)(2)(B)(i), the expert report must contain the basis and reasons for all opinions expressed, and certainly the expectation is that oral testi-mony will do the same.” An inadequate report can lead to the report and the associated testimony being excluded at trial.
  • 109. FORENSIC PROCEDURES The important thing to remember when creating any forensics report is that it is quite difficult to put too much detail in. It is much better to have information that is ultimately not necessary, than to wish you had captured data later. When forensics cases go to court, there may be an opposing forensic expert. The idea of a forensic report is that it is so detailed, that any competent forensic examiner can recreate the steps you took and either verify or refute your conclusions. This means that your report should quite literally create a roadmap of your investigation, and one that any competent examiner can follow.
  • 110. ADB Android Debugging Bridge was introduced in chapter 4. In this section it will be used specifically to conduct forensic examinations of Android devices. If you re-quire a refresher on ADB, please revisit chapter 4. When you start an adb client, the client first checks whether there is an adb server process already running. If there isn’t, it starts the server process. When the server starts, it binds to local TCP port 5037 and listens for commands sent from adb clients – all adb clients use port 5037 to communicate with the adb server. When a device is connected to a computer that has ADB, the first step is to list all connected devices.
  • 111. ADB One of the first tasks you should do is to make a backup of the device. The general format of the command is: adb backup -all -f backup. A specific example would be: adb backup -all -f c:phonebackup. You can see a backup in Figure 6.1.
  • 112. ADB This will create a backup of all the data on the phone that is user accessible. In some cases, you may even want to restore that backup to a lab phone in order to conduct your investigation. That is not widely practiced in forensics but would provide a guarantee that you do not alter anything on the actual device in question. However, even without working on a lab phone, you do have the backup which can be used to confirm you did not accidentally alter any data or settings on the suspect phone.
  • 113. ADB Once one has made a backup, the next step will be to actually begin the forensic examination on either a lab phone with the backup restored, or the suspect phone. Either way, one of the first commands is to list contents in the Linux shell: adb shell ls This provides a view of what is actually on the device. You will want to navigate to directories and explore their contents. You will find some directories have per-mission denied.
  • 114. ADB Those are system directories that can only be accessed on a rooted phone. Figure 6.2 shows the ls content in the data directory. Sometimes, you can try su ls (or su any command) and get the command to work. There are specific directories you will want to look for evidence in. These are described in the following subsections.
  • 115. ADB /DATA This partition contains the user’s data like your contacts, sms, settings, and all android applications that you have installed. Should you perform factory reset on your device, this partition will be wiped out. This directory is likely to have much of the evidence you are seeking. Some of it will be in SQLite Databases The sub=directory /data/app contains apps installed but not by the vendor. /data/ data/<package>/databases has the databases for specific apps.
  • 116. ADB
  • 117. ADB /CACHE This is the partition where Android stores frequently accessed data and app components. Wiping the cache doesn’t affect your personal data but simply gets rid of the existing data there, which gets automatically rebuilt as you continue using the device. This can sometimes reveal interesting evidence in a case. /MISC This partition contains miscellaneous system settings in form of on/off switches. These settings may include CID (Carrier or Region ID), USB configuration and certain hardware settings etc.
  • 118. ADB /MNT If there is an SD card, internal or external, you will find its stat here. This is a very important place to check as it could potentially have quite a bit of evidence. While there can be variations between models, in general the subdirectories you will find are listed here: /mmt/asec (encrypted apps) /mmt/emmc (internal SD Card) /mmt/sdcard (external/Internal SD Card) /mmt/sdcard/external_sd (external SD Card)
  • 119. ADB COMMANDS TO EXECUTE It is also important to get information regarding the phone itself, not just its content. There are a series of commands that can be executed for this purpose: adb shell getprop ro.product.model adb shell getprop ro.build.version.release adb shell getprop ro.serialno adb shell getprop ro.board.platform adb shell getprop ro.build.description adb shell getprop ro.product.locale.language adb shell getprop ro.product.locale.region adb shell getprop ro.board.platform adb shell getprop ro.build.version.codename
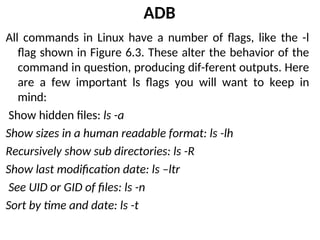
  • 120. ADB Running the preceding shell commands and documenting the output, is an excellent way to document the system you are analyzing. It provides the starting point for your investigation. Then you will begin to navigate through the various folders utilizing a combination of the ls and cd commands. The ls will list contents, while cd will change directories. There are also variations of the ls command you will find useful. The first such variation is ls -l which shows file or directory, size, modified date and time, file or folder name and owner of file and its permission. This is shown in Figure 6.3
  • 121. ADB
  • 122. ADB All commands in Linux have a number of flags, like the -l flag shown in Figure 6.3. These alter the behavior of the command in question, producing dif-ferent outputs. Here are a few important ls flags you will want to keep in mind: Show hidden files: ls -a Show sizes in a human readable format: ls -lh Recursively show sub directories: ls -R Show last modification date: ls –ltr See UID or GID of files: ls -n Sort by time and date: ls -t
  • 123. ADB If you are working with the actual suspect phone, it will be useful to have the running processes. The Linux ps command can provide that. The ps command is shown in Figure 6.4. As you may already be able to surmise, the ps command also has a number of interesting flags that can alter the input. Some common flags you are likely to find useful are listed here:
  • 124. ADB Show active processes: ps -A or ps -E See processes running with root privileges: ps -U root -u root See the process tree: ps -e –forest See the process tree for a specific process: ps -f –forest -c sshd See child processes for a specific process: ps – C sshd See all running processes: ps –r
  • 125. ADB These are only a few options, but they are important. It should be quite obvious how these commands might be of interest in a forensic investigation. With any of the Linux shell commands you can always type the command followed by -? or -help to get a list of all the possible flags. Another important command will be netstat. This is a standard command in Linux and in Windows that shows the network status. Are there any processes on the device that are establishing or attempting to establish an external connection? This command will tell you that and additional relevant details. This can be seen in Figure 6.5.
  • 126. ADB
  • 127. ADB In chapter 4, the pm list packages command was briefly introduced. This command can be quite interesting forensically. You can view any packages installed on the device. If there is spyware, a hidden app, or other interesting apps, this will help you find them. There are several variations of this command you will likely find quite useful. pm list packages -f See their associated file. pm list packages -d Filter to only show disabled packages. pm list packages -e Filter to only show enabled packages. pm list packages -i See the installer for the packages. pm list packages -u Also include uninstalled packages.
  • 128. ADB The command pm list packages -f is shown in Figure 6.6. Like many commands, this will often fill up several screens. That is not useful for forensic examination. So, the first step is to exit the shell using exit. Then, with any command, you can export the output to a text file. When executing shell commands from outside the shell, you should precede the command with adb shell. This is shown in Figure 6.7.
  • 129. ADB Now this does not provide much on the screen, but you have just taken what would have been several screens and output that to a text file. Not only does this allow you to retain a copy of the text file, but you can easily search it. You will find that this is often the best way to conduct forensics on an Android phone using adb. When searching an Android phone, a great deal of information will be in the /sdcard/ folder. And images, such as pictures are usually in the /DCIM folder. You can see this in Figure 6.8.
  • 130. ADB
  • 131. ADB Once you have identified an item you wish to pull you can use the adb pull command to pull just that image or the entire directory to your forensics machine. This is shown in Figure 6.9. Note, particularly for Windows users, you do not use the *.* to get everything. You simply give the path to a directory. If you don’t name a file in the directory, ADB will assume you want the entire directory. This makes it quite convenient to pull data from an Android phone.
  • 132. ADB
  • 133. ANDROID ONLY TOOLS As with chapter 5, we will spend substantial time on specific tools you can use for Android forensics. We will begin with low-cost tools that are Android specific. These can be obtained at little or no cost and retrieve a great deal of the information you may need in a forensic examination. TOOL ALL-IN-ONE This tool will prompt you for a donation, but you can use it for free. It can be downloaded from https://androidfilehost.com/?a=show&w=files&flid=38683. This is essentially a nice GUI for ADB. It does all the things ADB does, but without requiring you to remember all the ADB commands. If it cannot recognize your phone, you can simply choose “generic device.” You will see an initial screen as shown in Figure 6.10.
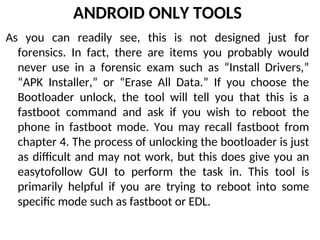
  • 135. ANDROID ONLY TOOLS As you can readily see, this is not designed just for forensics. In fact, there are items you probably would never use in a forensic exam such as “Install Drivers,” “APK Installer,” or “Erase All Data.” If you choose the Bootloader unlock, the tool will tell you that this is a fastboot command and ask if you wish to reboot the phone in fastboot mode. You may recall fastboot from chapter 4. The process of unlocking the bootloader is just as difficult and may not work, but this does give you an easytofollow GUI to perform the task in. This tool is primarily helpful if you are trying to reboot into some specific mode such as fastboot or EDL.
  • 136. ANDROID ONLY TOOLS ANDROID TOOLS This is far more versatile than All-In-One and is a free download from https:// sourceforge.net/projects/android-tools/. The main screen is shown in Figure 6.11.
  • 138. ANDROID ONLY TOOLS To anyone familiar with ADB this should look quite familiar. You can see various ADB commands simply at the touch of the button. You can also launch a shell console to perform your own Linux commands if you need to. So, you have all the benefits of a GUI, and still can use the Linux shell. There is a tab for fastboot commands that can allow you to attempt to unlock or root the phone. Just as when you perform this manually, there is no guarantee it will work. But you can see the fastboot tab in Figure 6.12.
  • 140. ANDROID ONLY TOOLS The advanced tab is very interesting. Among other things it allows you to work with various ADB backup files. This can be quite useful. This tab is shown in Figure 6.13. We are not describing every feature of this tool for two reasons. The first is that it is automating ADB. And from chapter 4 and the first part of this chapter, you should be comfortable with ADB. Secondly, the interface is so intuitive to use that minimal instruction is needed.
  • 142. ANDROID ONLY TOOLS AUTOPSY Perhaps the most well-known open-source forensics software is Autopsy. This tool is designed for PC forensics but can analyze mobile phone images. You can download Autopsy for free from https://www.autopsy.com/. Android won’t extract from your phone, but if you have an image from an Android phone you can examine it with Autopsy. The first step is to add an image. This is shown in Figure 6.14.
  • 144. ANDROID ONLY TOOLS You can see in Figure 6.15, that Autopsy can extract quite a bit of information. Results are shown in Figure 6.16. As you can see the call logs, contacts, mes-sages, GPS track points and more is retrieved.
  • 147. ANDROID ONLY TOOLS BITPIM This is an open-source tool you can freely download from https://sourceforge.net/ projects/bitpim/. However, it is limited in the phones it can recognize. The basic landing screen is shown in Figure 6.17.
  • 149. ANDROID ONLY TOOLS This tool does come with a very useful help file that is easy to navigate and shown in Figure 6.18.
  • 151. ANDROID ONLY TOOLS OSAF Open-Source Android Forensics is a virtual machine you can download for free from https://sourceforge.net/projects/osaftoolkit/. It is Ubuntu Linux with a great many pre-loaded Android forensics tools. The default password is forensics. The desktop is shown in Figure 6.19.
  • 153. ANDROID ONLY TOOLS It is beyond the scope of this chapter to provide a detailed coverage of all the tools in the virtual machine. Many of the tools are python scripts, and in some cases simply instructions for how to manually perform tasks such as imaging a phone. You will also notice there are tools for app decompiling and analysis, which we will discuss later in this chapter.
  • 154. Dual Use Tools The following tools work with Android or iOS. These were discussed in Chapter 5. They are covered again here because some readers will want to focus on only those chapters that are relevant to their own investigations and may have skipped Chapter 5.
  • 155. Dual Use Tools CELLEBRITE This is probably the most widely known phone forensics tool. It is used heavily by federal law enforcement. It is also well respected in the industry. It is a very robust and effective tool. The only downside to Cellebrite that I am aware of is its high cost. It is the most expensive phone forensics tool I am aware of. Most of the Cellebrite literature won’t tell you directly the cost, you need to speak to a sales-person to get a bid. In general, one can expect to spend in the neighborhood of $10,000 for a Cellebrite license. Cellebrite is an Israeli company known not only for their tools, but also for mobile forensics research.
  • 156. Dual Use Tools While this tool is quite popular with law enforcement, and well respected, there is not a screenshot-by-screenshot description of the tool in this chapter. This is primarily due to the fact the Cellebrite is not a single tool. There are a number of tools available from Cellebrite including: • Cellebrite UFED • Cellebrite Physical Analyzer • Cellebrite UFED Cloud • Cellebrite Premium • Cellebrite Blacklight • Cellebrite Commander
  • 157. Dual Use Tools Even these products have variations. For example, UFED has UFED Touch 2, UFED Touch 2 Ruggedized, and others. It would take an entire book to adequately describe the various Cellebrite products. And, as was discussed earlier, each can be rather expensive. It is also the case that the Cellebrite tools usually require formal training, beyond the scope of this chapter or book. The primary focus in this chapter will be with tools that are more affordable. But more importantly, tools that don’t require extensive training.
  • 158. Dual Use Tools DR. FONE Dr. Fone is a widely used tool for mobile device recovery and transferring of data. This makes it particularly interesting for forensics. This tool is very inexpensive and works with both iPhone and Android. The tool can be found at https://drfone.wondershare.net. The full version is $139.95. The main screen is shown in Figure 6.20.
  • 160. Dual Use Tools The information tab will allow you to view SMS messages and phone numbers. These are often critical to a digital forensic investigation. Using Dr. Fone you can see the file system discussed earlier. This is shown in Figure 6.21.
  • 162. Dual Use Tools Most important will be the ability to copy data from the phone to your forensics workstation. As you can see, Dr. Fone supports this ability. There is the backup option and the transfer option shown in Figure 6.22.
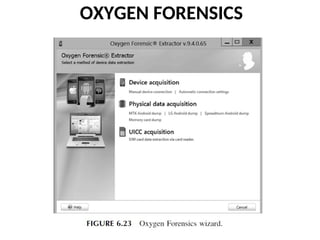
  • 164. OXYGEN FORENSICS Oxygen Forensics is known primarily for its easy-to-use interface. The initial connection with a mobile device is accomplished via a wizard, thus making it quite easy to use. It does not have all of the features one finds in tools such as Cellebrite, but certainly many more than tools like Dr. Fone. The pricing is in the neighbor-hood of $7000 per license. The company website is https://www.oxygenforensic. com/en/.
  • 165. OXYGEN FORENSICS They formally offered two tools: the Detective and the Analyst version. Now they only offer the Detective version . The wizard is very easy to use, and the first step of that wizard is shown in Figure 6.23.
  • 167. OXYGEN FORENSICS As was stated earlier, the main benefit of Oxygen is a rather easy to use interface. Once the extraction is done, the results are very easy to work with. It should be noted that if you try physical access with an Android, that Oxygen will attempt a rooting app. These simply do not work with modern Android phones. Therefore, in the Wizard choose logical access, unless you have already rooted the phone. This is shown in Figure 6.24.
  • 169. OXYGEN FORENSICS Figure 6.25 is a screenshot of Oxygen Forensics results for an older phone I use for forensics labs.
  • 171. OXYGEN FORENSICS As can be seen, there is a substantial amount of data presented in an easy to find interface. It is quite easy to navigate to events, phone books, messages, and many other pieces of data the forensic examiner may have an interest in. In general, Oxygen is a robust tool with a number of interesting features. It is a reasonable option for the professional forensics lab to include. Given the cost of forensics tools, it is recommended that you seek out recommendations from colleagues, and not rely totally on the marketing information from vendors.
  • 172. MOBILEDIT MobilEdit is a low-priced forensics tool that has a number of professional-level features. The MobilEdit Forensic Express is the tool they recommend for the most robust forensics. There are different prices. The Forensic Express Standard is $1500 per license, and you need to contact their sales department to get more information on the pricing of Forensic Express Pro. The company website is https:// www.mobiledit.com/forensic-express. The starting screen for MobilEdit is shown in Figure 6.26.
  • 174. MOBILEDIT Note that you may need to download drivers specific for your Android model for the connection to work properly. Once the device is recognized by the software, the examiner has an opportunity to enter case details. This is im-portant, as case management becomes rather complex as you have a growing caseload.
  • 175. MOBILEDIT Perhaps the most user-friendly aspect of MobilEdit is the various reporting formats. As you can see in Figure 6.27, the examiner can select multiple formats for the report. The HTML report is easy to navigate. However, the PDF report is often easiest to submit to some third party such as an attorney or other party.
  • 177. MOBILEDIT The HTML report is shown in Figure 6.28. This format allows one to simply click on the link on the left in order to navigate to a portion of the report. Overall, MobilEdit is an affordable and reasonably fully featured tool. It also works with both Apple and Android phones, making it useful on most mobile devices.
  • 179. ANDROID APP DECOMPILING Forensics frequently involves understanding the apps on the phone. The apps could be malware for some time. In other instances, someone might claim that malware on their phone is responsible for illegal content, and it is necessary to be able to view the app to determine if this is true or not. It is fortunately quite easy to decompile Android apps.
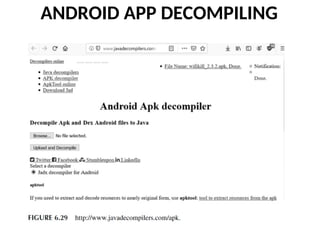
  • 180. ANDROID APP DECOMPILING One such online decompiler can be found at http://www.javadecompilers.com/ apk. You simply browse to the APK in question then upload it to the website. You can see this in Figure 6.29.
  • 182. ANDROID APP DECOMPILING When the tool is done you will be able to download the source code for that APK. This is shown in Figure 6.30.
  • 184. ANDROID APP DECOMPILING It is also possible to use the Android Studio to decompile and debug apps. It is one of the options on the main screen. This is shown in Figure 6.31.
  • 186. ANDROID APP DECOMPILING This starts a user-friendly wizard that guides you to select the apk you wish to decompile. You can see this in Figure 6.32.
  • 188. ANDROID APP DECOMPILING There are other decompilers you can try online: • http://www.decompileandroid.com/ •https://www.apkdecompilers.com/ The specific decompiler you use is less important than analyzing the code. Most Android apps are written in either Java or Kotlin programming languages. One need not be an expert programmer in order to follow along with the code. However, at least basic programming skills are required. It is beyond the scope of this book to teach programming. It may be that you will require a consultant who is a programmer to interpret the decompiled code.