1.Gives basic idea about what is arduino? and their funtionalites.
2. Applications of arduino
3. Adruino programming
4. what is Nodemcu ?
5. pindiagram of Nodemcu
This document is a project report for an embedded systems and advanced robotics project completed to earn a B.Tech degree in Electronics and Instrumentation Engineering. It includes an acknowledgments section thanking project mentors. The contents section lists chapters on interfacing Arduino with components like LEDs, sensors, motors and using Arduino to build an autonomous line follower robot. It provides introductions to embedded systems, Arduino, the Arduino UNO microcontroller and IDE. Circuit diagrams and code are given for sensor interfacing examples.
Contactless digital tachometer using microcontroller IJECEIAES
This document describes a contactless digital tachometer that uses an Arduino microcontroller, infrared sensor, and LCD display. The tachometer counts the number of rotations of a motor shaft using an IR transmitter and receiver without direct contact. It displays the revolutions per minute (RPM) measurement on an LCD screen. The Arduino microcontroller implements the RPM calculation from the IR sensor pulses and controls the LCD output. The tachometer provides contactless RPM measurement for motors in difficult to reach locations.
Automatic Door Opener using PIR SensorRAGHUVARMA09
This document describes an automatic door opening system using a PIR sensor. When a person approaches within the sensor's range, it sends a signal to the microcontroller to open the door using a motor. The door automatically closes after a fixed time delay if no further movement is detected. The system uses an Arduino, PIR sensor, LCD display, motor driver, and other hardware. It is powered by a battery and is designed to open doors automatically for accessibility purposes in places like malls, hotels, and theaters. Further improvements proposed include adding user counting and upgrading to a closed-circuit TV system for security monitoring.
This document describes an energy saving visitor counter project that uses a microcontroller and infrared sensors. The objective is to design a circuit that can count the number of people entering and exiting a room and control the room light accordingly. It uses an IR transmitter and receiver to detect movement and increments or decrements the counter value, which is displayed on seven-segment displays. The microcontroller controls the counting and display functionality while receiving input from the IR sensors. Proteus and Keil software are used to simulate and program the microcontroller respectively.
This document presents a project to create an automatic room light controller that can sense when a person enters or exits a room. It will light up the room when someone enters and also count the number of people entering and exiting using infrared sensors and a microcontroller. The system is designed to save electricity by turning lights off when no motion is detected. It includes a block diagram, descriptions of the power supply, sensors, microcontroller, relay, and advantages like energy savings and easy operation. Potential disadvantages are an inability to detect multiple people at once or control lights manually from inside the room.
This document presents a smart door system that uses a passive infrared (PIR) sensor to automatically open and close doors based on detecting nearby movement. The system includes an ATmega328 microcontroller, PIR sensor, relay driver IC, voltage regulator, LCD display, and other components. When the PIR sensor detects a person within its range, it sends a signal to the microcontroller to open the door. The door then automatically closes after a set time delay if no further movement is detected. The smart door system aims to provide convenience for disabled individuals and reduce contact with doors in places like hospitals.
Bidirectional Visitor Counter with Automatic ON-OFF Switch2DIPAN GHOSH
This document describes a bidirectional visitor counter circuit with an automatic on-off switch. The circuit uses two IR sensors to detect visitors entering and exiting a room. An Arduino counts the visitors and displays the number on an LCD screen. When no visitors are detected, the Arduino turns off a light via a relay. The circuit diagram and Arduino code are included to explain how the sensor signals are read by the Arduino, counted and used to control the light and display the count.
protection on lineman while working on transmission line reportRavi Phadtare
This document describes a system to protect linemen working on transmission lines. The system uses a microcontroller connected to a GSM module and circuit breaker. When a lineman needs to work on a line, they call the microcontroller using a GSM phone. This automatically switches off the power to that line. When work is complete, the lineman calls again to restore power. The microcontroller compares the caller's number to a stored number to authenticate them. This system aims to prevent electrical accidents by allowing linemen to remotely control the power supply while working.
This document summarizes an Arduino seminar report. It discusses what Arduino is, different Arduino boards, how the Arduino board works including the controller, power supply, and USB to serial converter. It also summarizes sensors that can interface with Arduino like temperature sensors and hall sensors. Finally, it provides an overview of a home automation project using Arduino and GSM to control devices remotely through SMS messages.
Automatic room light controller with visible counterMafaz Ahmed
This project creates an automatic room light controller that also counts visitors bidirectionally. When someone enters the room, the counter increments and the light turns on. When someone leaves, the counter decrements and the light turns off once the room is empty. A password must be entered using a keypad to unlock the room. The system uses an ATmega16 microcontroller, infrared sensors, an LCD display, relays and other components. It provides functions like automatic lighting control, visitor counting and secured access with a password. The design aims to ease complexity and control room congestion.
How to measure frequency and duty cycle using arduinoSagar Srivastav
Source - http://www.engineersgarage.com
Arduino has several applications. We may find its application in many different fields and areas. It can be used in measurement field also to measure electrical quantities (like voltage, current, power etc) or physical quantities (like temperature, moisture, light intensity, humidity etc) or electronic component values etc.
Codesign-Oriented Platform for Agile Internet of Things Prototype DevelopmentJonathan Ruiz de Garibay
The Internet of Things offers a growing market open to new products. To be able to take advantages of this opportunity companies need to be able to quickly create prototypes of their products. Given the difficulties that the development of embedded devices presents, both on the hardware and software parts, it is a necessity to create tools that ease this process. In this paper we present a codesing-oriented platform that will help developers to create their prototypes in an agile manner. The presented platform simplifies the usage and integration of standardized peripherals and reduces the complexity of the development process. We also present a prototype created using the platform, showcasing its capabilities.
This document provides a list of 310 Arduino projects ranging from simple to complex builds. Some examples of projects on the list include a coffee gripper, analog input, clock displays, laser tripwires, LED arrays, speedometers, VU meters, temperature displays, motion sensors, synthesizers, GPS trackers, LED cubes, plant watering systems, energy monitors, quadcopters, MIDI instruments, games, and home automation. The wide variety of projects showcase the flexibility of Arduino boards to be used in electronics, art, engineering, and hobbyist applications.
A major project report on Energy Efficient Infrared (IR) Based Home Automatio...Prasant Kumar
The objective of proposed research work is to implement such a system that can reduce efforts, energy losses, provides a comfortable life, enhance living standards and can help the elderly, handicapped, disables as well as the normal beings to control the home appliances.Employment to Population ratio has increased drastically with increasing living standards. Home Automation plays an important role in maintaining these living standards of employed population by providing a secure & convenient environment. Home automation is similar to smart home, digital home, e-home and intelligent household. They both mean a high living condition with many smart devices. It is the residential extension of building automation which is using automation technology, computer technology and telecommunication technology to give the user a developed living condition, entertainment and security. It helps people to reduce house working and household management by its automation. The Home Automation Systems not only benefit the employed population but it also helps the disabled and elderly population.The vision of the system is to provide an efficient based system to control everyday home appliances. The system offers users an easy & effective means of controlling their various home appliances.
This document presents a digital visitor counter and automatic room light controller project. It contains a block diagram, flowchart, and description of the components used. The project uses sensors to count people entering and exiting a room and controls the room lights and fans based on the count. It can help conserve energy by automatically turning lights and fans off when the room is empty. Potential applications include seminar halls and conference rooms to limit capacity. Future developments could include adding voice alarms and increasing the maximum count.
Color Recognition with Matlab Image Processing and Matlab Interfacing with Ar...Sayan Seth
This document discusses using Matlab and Arduino to recognize colors in an image. It describes hardware including an Arduino Uno microcontroller and LED lights. Software used includes the Arduino IDE, Matlab R2017a, and Fritzing. The process takes a picture, separates it into red, green, and blue layers, binarizes the layers, compares the areas, and sends signals to light the corresponding LED on the Arduino. Matlab code is provided to process the image layers and Arduino code controls the LEDs. Schematics illustrate the serial communication between the systems.
This Presentation is developed by Abhishek Jaiswal(Robotics Workshop Trainer).
It Contains information about Robotics & Automation along with Arduino Understanding. This ppt also has some discussions about Sensors.
Learn from basics and develop till advance.
Analog to Digital Conversion Using Microcontroller Education BoardsKyle VanDruten
This document compares the analog-to-digital converter (ADC) performance of the Tiva C Launchpad, Arduino, and MSP430 microcontrollers. It finds that the ADCs of the three boards have comparable performance, despite the Tiva C's advantage of an ARM processor. Using external ADCs or parallel communication could improve speed and accuracy over the boards' serial interfaces. The document also clarifies key terms like microprocessor, microcontroller, and ADC, and reviews the development history and environments of the evaluated boards.
A microcontroller is a computer on a single integrated chip that contains a processor, memory, and input/output ports. Common microcontroller families include Intel, Atmel, Microchip, and ARM. Microcontrollers are used in devices like cellphones, toys, appliances, cars, and cameras. The Arduino is a popular open-source hardware and software platform for building prototypes and interactive objects. It uses a simple programming language based on C/C++ and is inexpensive and easy to use.
Minor Project Report: Automatic Door Control SystemSaban Kumar K.C.
This minor project is based on the automatic door control system used in a room or hall based on IR sensor. This project is applicable at such places where the people are busy and people are in large number.
Bidirectional visitor counter & home automation by Jitendra DhakaNIT srinagar
This document appears to be an industrial training report submitted by Jitendra Dhaka to the National Institute of Technology in Hazratbal, Srinagar, India. The report details Dhaka's winter training on embedded systems conducted at TATA CMC Jaipur. It includes an acknowledgements section thanking various individuals and organizations for their support. It also includes a preface describing the benefits of industrial training for engineering students and an overview of the project Dhaka completed - a bidirectional visitor counter and home automation system.
Automatic doorbell with object detectionAnurag Alaria
This document describes an automatic doorbell system that uses ultrasonic sensors to detect movement and ring a doorbell. It provides details on the components and circuit design of the transmitter and receiver modules that use ultrasonic waves to detect a person. The system is intended to automatically sense someone's presence and ring the doorbell, saving time and enhancing security compared to a traditional doorbell. The document includes circuit diagrams and descriptions of the main integrated circuits used, including the IC 555 timer and LM324 op-amp. It provides specifications and characteristics for the transistors and other components in the design.
Human body temperature sensed automatic door opening systemBhumika PATEL
This project aims to create an automatic door opening system using a PIR sensor to detect human body temperature. When a person approaches within range of the PIR sensor, it sends a signal to the microcontroller to open the door. The door automatically closes after a fixed time delay if no further movement is detected. This system could also count the number of people entering and exiting an area using an EEPROM to store data even if power fails. The project uses a CD loader to demonstrate an actual door opening and closing when triggered by the PIR sensor detecting a human.
This document summarizes a college project to build an Arduino-based robot that can track and follow an infrared LED. The robot uses an array of 8 infrared sensors connected to an Arduino Uno microcontroller. The Arduino processes the sensor data and controls two continuous rotation servomotors that drive the wheels. Testing showed the robot could track the infrared LED from up to 14 meters away. Issues with sensor field of view and reflective surfaces hindered tracking at close ranges. Adding distance sensors was proposed to help with navigation if the infrared signal is lost. The overall goal of building a robot capable of infrared tracking and following was accomplished.
This project report describes an Arduino-based time and temperature display. The project uses an Arduino board interfaced with an LM35 temperature sensor to measure temperature and display it on an LCD. An RTC DS1307 module is also interfaced to measure the current time and display it along with the temperature on the LCD. The report provides details of the components used, circuit diagram, programming code and working of the project to continuously display current time and temperature.
This document provides an introduction to line follower competitions using Arduino microcontrollers. It discusses what a microcontroller is and types of Arduino boards. The coding structure is explained, covering data types, functions, control statements and loop statements. A workshop section describes how to control a DC motor using Arduino to rotate clockwise for 2 seconds and counter-clockwise for 5 seconds in an infinite loop.
The document provides an introduction to Arduino, including what Arduino is, its hardware features, the Arduino IDE for programming, and examples of basic blink programs. It discusses the Arduino community and variants, and describes shields and sensors that can be used with Arduino. Finally, it outlines several applications of Arduino like weather stations, robots, 3D printers, and more.
In the age of darkness light plays an important role in terms of keeping the human race motivated for the good. Projection mapping has been around for some time now. There is hardware, software and possibilities might seem limitless. How about the aspiring artist or an institution with limited funding for anything, anyone who wants to play with projection mapping? One does not want to leave her computer in a space for a month or more. An institution might not have resources to purchase hardware and software.
OfxPiMapper is an addon for the openFrameworks creative coding toolkit that lets one use the Raspberry Pi mini-computer for serious projection mapping projects. It is open source and available on GitHub. It can not only map videos and images, but can map anything openFrameworks is capable of, which includes data driven visuals, interactive motion graphics or generative 3D scenes.
Objective
Inspire, introduce an alternative tool and invite to join ofxPiMapper workshops
Target Audience
Creative coders, designers and artists working with code, the bored front-end developer
Assumed Audience Knowledge
Familiarity with or interest in one of the creative coding frameworks will do
Five Things Audience Members Will Learn
Scenarios where ofxPiMapper can be used
How to use ofxPiMapper
How to create custom generative source to be used with ofxPiMapper
How to prepare a SD card for the Raspberry Pi
Where to get additional information
Today Home Automation is one of the growing requirement in the society. This paper presents the implementation of Home Automation using Raspberry Pi. The Raspberry Pi is a basic embedded system and being a low cost single-board computer used to reduce the complexity of systems in real time applications. This application mainly serves as an efficient base to control various home appliance like Fan, Tube light, Refrigerator through mobile based application. The application is designed to provide a facility to user to access control of many appliances used in homes.
The document provides an overview of the Arduino platform, including what it is, what it is used for, and how to get started using it. Key points:
- Arduino is an open-source hardware and software platform for building interactive electronic projects through a simple programming language.
- It is used for physical computing projects, interactive installations, and rapid prototyping. Projects can include sensors and actuators.
- Getting started requires an Arduino board, USB cable, power supply, and downloading the IDE (integrated development environment) to write and upload code. Basic electrical safety knowledge is also important.
The Raspberry Pi is a credit-card sized computer that can connect to keyboards, monitors and TVs to function similarly to a desktop computer. It was developed by the Raspberry Pi Foundation in the UK to inspire teaching of basic computer science in schools and develop interest in programming. While low in cost at $25-35, the Raspberry Pi runs Linux and can be used for a variety of applications including robotics, programming practice and basic computing tasks.
Face à une économie mondiale caractérisée par l'ouverture des marchés, la libéralisation des échanges et l'avènement des technologies de l'information; les entreprises sont contraintes de remettre en cause leurs pratiques de contrôle de gestion, ainsi que leur modèle d'organisation afin d'améliorer leur performance et d'être compétitives, condition nécessaire à leur pérennité.
The document discusses the creative critical reflection of a 2-minute sci-fi/thriller movie opening created by the author. The opening follows conventions of the genres through its laboratory setting, props, costumes and fast-paced cuts. It aims to convey mystery and tension through background music and sound effects. The opening also engages with social issues around emerging diseases and the need for timely cures. It was meant to be different from the typical romance or horror genres other students chose.
Este documento describe lo que es Arduino, sus utilidades y diferentes tipos de placas. Arduino es una plataforma de hardware y software libre que permite el desarrollo de circuitos electrónicos interactivos. Se puede usar para crear dispositivos autónomos o conectarlos a otros. Existen varios modelos de placas Arduino como Duelmilanove, Mega, Nano y Pro, cada una con características particulares como el microcontrolador y número de entradas/salidas.
The Arduino Nano is a small, breadboard-friendly board based on the ATmega328 or ATmega168 microcontroller. It has 14 digital input/output pins, 8 analog inputs, a 16 MHz crystal oscillator, a micro USB connection, ICSP headers, and a reset button. The Nano can be programmed with the Arduino IDE and powered via USB or an external power source.
The document is a user manual for the Arduino Nano (V2.3) that includes:
- A pin layout diagram of the Arduino Nano labeling the pin numbers and names.
- A mechanical drawing of the board dimensions.
- A bill of materials listing the 18 components included in the Arduino Nano including the microcontroller, USB-serial chip, voltage regulator, crystal oscillator, capacitors, resistors, LEDs, headers and switches.
Slide ini merupakan bahan persentasi saya ketika mengenalkan sekilas tentang Raspberry Pi pada tahun 2015 silam . Raspberry Pi merupakan sebuah Komputer Mungil yang hanya seukuran Kartu ATM. Namun fungsi dari single board computer ini sangatlah banyak, terutama dalam dunia embeddedd system dan Smart City.
This document provides an introduction to Arduino microcontrollers and programming. It discusses physical computing using sensors and actuators, microcontroller architectures and components. It then introduces the Arduino development board as an open source and easy to use platform for physical computing. The document explains the Arduino IDE, programming structure, data types, functions, and basic programming concepts like digital and analog I/O.
Arduino is an open-source electronics platform based on easy-to-use hardware and software. Arduino boards are able to read inputs - light on a sensor, a finger on a button, or a Twitter message - and turn it into an output - activating a motor, turning on an LED, publishing something online.
The document provides an introduction to Arduino and physical computing using microcontrollers. It describes that Arduino boards use ATmega microcontrollers and can be programmed to sense the physical world using sensors, process data, and control physical devices using actuators. The document outlines the basic components of a microcontroller, how the Arduino programming environment works, and the basic structure and functions used in Arduino programs.
The document provides an introduction to programming with Arduino. It explains that Arduino is an open-source hardware and software platform used to build interactive electronic projects. It consists of a microcontroller board that can be programmed and used to read and control sensors, LEDs, motors and more. The document outlines the basic steps to get started which include downloading the Arduino IDE, installing drivers, selecting the board type, and uploading a test "Blink" program to make an LED turn on and off. It also provides explanations of some core electronic components like resistors, LEDs, sensors and describes how to set up a simple temperature sensing project and store the sensor readings in a database.
This document provides an overview of Arduino programming concepts including:
- Microcontrollers contain a CPU, memory, input/output pins and other peripherals on a single integrated circuit.
- Arduino is an open-source electronics platform with a microcontroller, pins to connect circuits, and software to program it.
- The core Arduino functions include setup(), loop(), pinMode(), digitalWrite(), digitalRead(), analogWrite(), analogRead(), and delay().
- Examples demonstrate blinking LEDs, reading input, using conditions and loops, arrays, LCD displays, and controlling servo motors.
- Arduino programming provides an accessible way to learn embedded systems and interact with circuits.
The document describes an Arduino-based home automation system that can sense various parameters like temperature, distance, light, and detect burglars. It transmits the sensor data to an Arduino board which processes the data and checks it against the program code to control devices like fans accordingly. The system also allows users to set alerts. It then provides details about Arduino programming, including the languages, code structure, and functions used. It gives an example of a circuit and code to light LEDs and explains various Arduino functions like pinMode(), digitalWrite(), analogRead() etc.
The Arduino is an open-source electronics prototyping platform intended to make interactive objects and environments more accessible. It was first developed in 2005 in Italy as an inexpensive yet powerful platform for sensing and controlling objects. The Arduino hardware specifications include a microcontroller, digital and analog input/output pins, and interfaces for programming and connecting circuits. It can be programmed through an open-source IDE to sense environmental inputs and control outputs like motors and lights. An example application is a blinking LED controlled by a button press. The Arduino is widely used for prototyping in fields like robotics, home automation, and education.
The document discusses open source hardware and the open source nature of projects from SparkFun and .:oomlout:. Open source means designs, guides, code, and 3D models are freely available to download, reproduce, modify, and distribute under a Creative Commons license as long as credit is given and developments are shared in a similar open manner. The goal is to make physical things as accessible and fun to learn with as open source software has been.
Arduino is an open-source electronics platform that can be used to read inputs like sensors or buttons and turn them into outputs like activating motors or publishing data online. It uses easy to use hardware and software that allows coding to be accessible and transferable using languages like C++. Common Arduino boards include the Arduino Mega, which has 54 digital input/output pins and uses an ATmega2560 microcontroller. To use an Arduino board, the Arduino IDE software must be installed to write and upload code to the board. Programming involves using data types, operators, control flow statements like if/else and loops, and defining a setup and loop structure.
Arduino_CSE ece ppt for working and principal of arduino.pptSAURABHKUMAR892774
The document provides an introduction and overview of Arduino boards and programming. It discusses:
- The different types of Arduino boards available.
- How to get started with the Arduino IDE and programming Arduino boards.
- Examples of common sensors and actuators that can be connected to Arduino boards like LEDs, buttons, temperature sensors.
- The basic structure of Arduino programs including setup(), loop(), and common functions like digitalRead(), digitalWrite(), and pinMode().
This document provides an overview of Arduino, an open-source hardware platform used for building interactive objects and prototypes. It describes Arduino as a single-board microcontroller intended to make electronics projects more accessible. Key topics covered include the Arduino programming environment, common Arduino boards and their features, examples of simple Arduino projects like blinking an LED and building a line-following robot, and comparisons to other prototyping platforms. The document encourages readers to get started with Arduino for its low cost, easy programming environment, and large community support.
The document provides an overview of a workshop on Arduino embedded development boards. It discusses the Arduino architecture and components, programming fundamentals using the Arduino IDE, and examples of projects including blinking an LED, controlling an RGB LED using PWM, interfacing sensors like light and temperature, and motor speed control. The document explains concepts like open and closed loop control systems, analog and digital signals, and serial communication. It also introduces the Arduino Uno board and shows examples of circuits using components like an L293D motor driver, temperature sensor, and potentiometer.
Introduction to Arduino Hardware and ProgrammingEmmanuel Obot
Introduction to Arduino Hardware and Programming:
Arduino is an open-source electronics platform based on easy-to-use hardware and software. It's intended for anyone making interactive projects.
Teachers and students use it to build low cost scientific instruments, to prove chemistry and physics principles, or to get started with programming and robotics. Designers and architects build interactive prototypes, musicians and artists use it for installations and to experiment with new musical instruments. Makers, of course, use it to build many of the projects exhibited at the Maker Faire. Arduino is a key tool to learn new things. Anyone - children, hobbyists, artists, programmers can use it to build an interactive device.
Introduction to Arduino and Hands on to IotSachin S
This is an Introduction to Arduino and Hands on to Iot .
were u can know about the IOT and Arduino .
And also provide an hands on to the user in iot and Arduino uno.
This document provides information about the ARDX Arduino experimentation kit from Oomlout, including:
- The overall goal of the kit is to get comfortable using electronic components through simple circuits and learning why each circuit works.
- Oomlout is a design company focused on producing "delightfully fun open source products."
- All of Oomlout's projects are open source under a Creative Commons license, allowing free downloading, reproduction, modification, and distribution of the materials with credit given to Oomlout.
- The document provides an overview of assembling the kit pieces, installing the software, basic programming and electronics primers, and an index of the circuits included in the
UNIT-4-PPT UNIT COMMITMENT AND ECONOMIC DISPATCHSridhar191373
Statement of unit commitment problem-constraints: spinning reserve, thermal unit constraints, hydro constraints, fuel constraints and other constraints. Solution methods: priority list methods, forward dynamic programming approach. Numerical problems only in priority list method using full load average production cost. Statement of economic dispatch problem-cost of generation-incremental cost curve –co-ordination equations without loss and with loss- solution by direct method and lamda iteration method (No derivation of loss coefficients)
Tesia Dobrydnia brings her many talents to her career as a chemical engineer in the oil and gas industry. With the same enthusiasm she puts into her work, she engages in hobbies and activities including watching movies and television shows, reading, backpacking, and snowboarding. She is a Relief Senior Engineer for Chevron and has been employed by the company since 2007. Tesia is considered a leader in her industry and is known to for her grasp of relief design standards.
Structural Health and Factors affecting.pptxgunjalsachin
Structural Health- Factors affecting Health of Structures,
Causes of deterioration in RC structures-Permeability of concrete, capillary porosity, air voids, Micro cracks and macro cracks, corrosion of reinforcing bars, sulphate attack, alkali silica reaction
Causes of deterioration in Steel Structures: corrosion, Uniform deterioration, pitting, crevice, galvanic, laminar, Erosion, cavitations, fretting, Exfoliation, Stress, causes of defects in connection
Maintenance and inspection of structures.
UNIT-5-PPT Computer Control Power of Power SystemSridhar191373
Introduction
Conceptual Model of the EMS
EMS Functions and SCADA Applications.
Time decomposition of the power system operation.
Open Distributed system in EMS
OOPS
Bituminous binders are sticky, black substances derived from the refining of crude oil. They are used to bind and coat aggregate materials in asphalt mixes, providing cohesion and strength to the pavement.
Electrical and Electronics Engineering: An International Journal (ELELIJ)elelijjournal653
Call For Papers...!!!
Electrical and Electronics Engineering: An International Journal (ELELIJ)
Web page link: https://wireilla.com/engg/eeeij/index.html
Submission Deadline: June 08, 2025
Submission link: [email protected]
Contact Us: [email protected]
UNIT-1-PPT-Introduction about Power System Operation and ControlSridhar191373
Power scenario in Indian grid – National and Regional load dispatching centers –requirements of good power system - necessity of voltage and frequency regulation – real power vs frequency and reactive power vs voltage control loops - system load variation, load curves and basic concepts of load dispatching - load forecasting - Basics of speed governing mechanisms and modeling - speed load characteristics - regulation of two generators in parallel.
This presentation outlines testing methods and equipment for evaluating gas-phase air filtration media using flat sheet samples, in accordance with ISO 10121 standards—specifically designed for assessing the performance of media used in general ventilation and indoor air quality applications.
2. Contents
• What is Microcontroller
• What is an Arduino
• History of arduino
• Programming environment
• Advantage of arduino
• Features of arduino
• Applications of arduino
• Arduino v/s Nodemcu
3. Famous microcontroller
manufacturers are MicroChip,
Atmel, Intel, Analog devices,
and more.
[list]
It is a micro-computer. As any
computer it has internal CPU,
RAM, IOs interface.
It is used for control purposes,
and for data analysis.
Micro-Controller
4. What is Arduino?
• “Arduino is an open-source physical computing
platform based on a simple i/o board and a
development environment that implements the
Processing / Wiring language. Arduino can be
used to develop stand-alone interactive objects
or can be connected to software on your
computer.“ ( www.arduino.cc, 2006 )
5. Arduino is a platform
• A physical Input / Output board (I/O) with a programmable
Integrated Circuit (IC).
7. Arduino UNO:Digital output
~: PWM.
0,1: Serial port.
In circuit Serial
programming
Atmel
MicroControlle
r
Analog input.
Power Supply
USB port
Power input
8. Why Arduino?
• It can run standalone from a computer (chip is
programmable) and it has memory (a small
amount).
• It can work with both Digital and Analog
electronic signals. Sensors and Actuators.
• You can make cool stuff! Some people are even
making simple robots, and we all know robots
are just cool.
9. Advantages of Aurdino
Open source
Simplified and user-friendly programming language
No additional programmer/burner hardware
required for programming board
Portable
Low power consumption
10. Features of Arduino UN0
Microcontroller ATmega328
Operating Voltage 5V and 3.3 V
Input Voltage (recommended) 7-12V
Input Voltage (limits) 6-20V
Digital I/O Pins 14 (of which 6 provide PWM output)
Analog Input Pins 6
DC Current per I/O Pin 40 mA
DC Current for 3.3V Pin 50 mA
Flash Memory 32 KB (ATmega328) of which 0.5 KB used by
Bootloader
SRAM 2 KB (ATmega328)
EEPROM 1 KB (ATmega328)
Clock Speed 16 MHz
14. Arduino IDE
• Also including an Integrated Development
Environment (IDE) for programming.
• The language itself is based in C but is
largely modeled upon the
www.processing.org language.
15. Integer: used with integer variables with value
between 2147483647 and -2147483647.
Ex: int x=1200;
Character: used with single character, represent value
from -127 to 128.
Ex. char c=‘r’;
Long: Long variables are extended size variables for
number storage, and store 32 bits (4 bytes), from -
2,147,483,648 to 2,147,483,647.
Ex. long u=199203;
Floating-point numbers can be as large as
3.4028235E+38 and as low as -3.4028235E+38. They are
stored as 32 bits (4 bytes) of information.
Ex. float num=1.291; [The same as double type]
Data Types and operators
You may need to know about these typed: Array, Boolean, byte, etc. here.
16. Statement represents a command, it ends with ;
Ex:
int x;
x=13;
Operators are symbols that used to indicate a
specific function:
- Math operators: [+,-,*,/,%,^]
- Logic operators: [==, !=, &&, ||]
- Comparison operators: [==, >, <, !=, <=, >=]
Syntax:
; Semicolon, {} curly braces, //single line
comment, /*Multi-line comments*/
Statement and operators
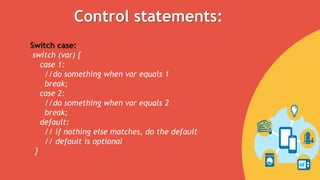
19. Switch case:
switch (var) {
case 1:
//do something when var equals 1
break;
case 2:
//do something when var equals 2
break;
default:
// if nothing else matches, do the default
// default is optional
}
Control statements:
20. Do… while:
do
{
Statements;
}
while(condition); // the statements are run at least
once.
While:
While(condition)
{statements;}
For:
for (int i=0; i <= val; i++){
statements;
}
Loop statements:
Use break statement to stop the loop whenever needed.
21. Void setup()
{
}
//Used to indicate the initial values of system on
starting.
Void loop()
{
}
//Contains the statements that will run whenever
the system is powered after setup.
Code structure:
22. Led blinking example:
Used functions:
pinMode();
digitalRead();
digitalWrite();
delay(time_ms);
other functions:
analogRead();
analogWrite();//PWM.
Input and output:
31. Upload a program
• At this stage we just programmed the LED to blink on and off at a
set time interval.
• Press the reset button on the board and then click ‘Upload to I/O
board’ in the IDE. If all goes well lights should flicker on the board
and the IDE will confirm success.