Django Documentation
0 likes982 views

The document provides an overview of the Django documentation, which contains tutorials, guides, and reference materials on the major components of the Django web framework, including the model layer, view layer, template layer, forms, and the development and deployment processes. It describes how the documentation is organized and where to find information on specific topics like databases, security, internationalization, and contributing to the Django project.


![Django Documentation, Release 1.9.3.dev20160224120324
2.1.2 Install it
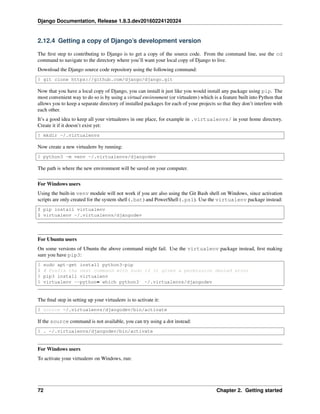
Next, run the Django command-line utility to create the database tables automatically:
$ python manage.py migrate
The migrate command looks at all your available models and creates tables in your database for whichever tables
don’t already exist, as well as optionally providing much richer schema control.
2.1.3 Enjoy the free API
With that, you’ve got a free, and rich, Python API to access your data. The API is created on the fly, no code generation
necessary:
# Import the models we created from our "news" app
>>> from news.models import Reporter, Article
# No reporters are in the system yet.
>>> Reporter.objects.all()
[]
# Create a new Reporter.
>>> r = Reporter(full_name='John Smith')
# Save the object into the database. You have to call save() explicitly.
>>> r.save()
# Now it has an ID.
>>> r.id
1
# Now the new reporter is in the database.
>>> Reporter.objects.all()
[<Reporter: John Smith>]
# Fields are represented as attributes on the Python object.
>>> r.full_name
'John Smith'
# Django provides a rich database lookup API.
>>> Reporter.objects.get(id=1)
<Reporter: John Smith>
>>> Reporter.objects.get(full_name__startswith='John')
<Reporter: John Smith>
>>> Reporter.objects.get(full_name__contains='mith')
<Reporter: John Smith>
>>> Reporter.objects.get(id=2)
Traceback (most recent call last):
...
DoesNotExist: Reporter matching query does not exist.
# Create an article.
>>> from datetime import date
>>> a = Article(pub_date=date.today(), headline='Django is cool',
... content='Yeah.', reporter=r)
>>> a.save()
8 Chapter 2. Getting started](https://image.slidesharecdn.com/20160225-django-documentation-160225091707/85/Django-Documentation-12-320.jpg)
![Django Documentation, Release 1.9.3.dev20160224120324
# Now the article is in the database.
>>> Article.objects.all()
[<Article: Django is cool>]
# Article objects get API access to related Reporter objects.
>>> r = a.reporter
>>> r.full_name
'John Smith'
# And vice versa: Reporter objects get API access to Article objects.
>>> r.article_set.all()
[<Article: Django is cool>]
# The API follows relationships as far as you need, performing efficient
# JOINs for you behind the scenes.
# This finds all articles by a reporter whose name starts with "John".
>>> Article.objects.filter(reporter__full_name__startswith='John')
[<Article: Django is cool>]
# Change an object by altering its attributes and calling save().
>>> r.full_name = 'Billy Goat'
>>> r.save()
# Delete an object with delete().
>>> r.delete()
2.1.4 A dynamic admin interface: it’s not just scaffolding – it’s the whole house
Once your models are defined, Django can automatically create a professional, production ready administrative inter-
face – a website that lets authenticated users add, change and delete objects. It’s as easy as registering your model in
the admin site:
mysite/news/models.py
from django.db import models
class Article(models.Model):
pub_date = models.DateField()
headline = models.CharField(max_length=200)
content = models.TextField()
reporter = models.ForeignKey(Reporter, on_delete=models.CASCADE)
mysite/news/admin.py
from django.contrib import admin
from . import models
admin.site.register(models.Article)
The philosophy here is that your site is edited by a staff, or a client, or maybe just you – and you don’t want to have to
deal with creating backend interfaces just to manage content.
One typical workflow in creating Django apps is to create models and get the admin sites up and running as fast as
possible, so your staff (or clients) can start populating data. Then, develop the way data is presented to the public.
2.1. Django at a glance 9](https://image.slidesharecdn.com/20160225-django-documentation-160225091707/85/Django-Documentation-13-320.jpg)
![Django Documentation, Release 1.9.3.dev20160224120324
2.1.5 Design your URLs
A clean, elegant URL scheme is an important detail in a high-quality Web application. Django encourages beautiful
URL design and doesn’t put any cruft in URLs, like .php or .asp.
To design URLs for an app, you create a Python module called a URLconf. A table of contents for your app, it contains
a simple mapping between URL patterns and Python callback functions. URLconfs also serve to decouple URLs from
Python code.
Here’s what a URLconf might look like for the Reporter/Article example above:
mysite/news/urls.py
from django.conf.urls import url
from . import views
urlpatterns = [
url(r'^articles/([0-9]{4})/$', views.year_archive),
url(r'^articles/([0-9]{4})/([0-9]{2})/$', views.month_archive),
url(r'^articles/([0-9]{4})/([0-9]{2})/([0-9]+)/$', views.article_detail),
]
The code above maps URLs, as simple regular expressions, to the location of Python callback functions (“views”).
The regular expressions use parenthesis to “capture” values from the URLs. When a user requests a page, Django runs
through each pattern, in order, and stops at the first one that matches the requested URL. (If none of them matches,
Django calls a special-case 404 view.) This is blazingly fast, because the regular expressions are compiled at load
time.
Once one of the regexes matches, Django imports and calls the given view, which is a simple Python function. Each
view gets passed a request object – which contains request metadata – and the values captured in the regex.
For example, if a user requested the URL “/articles/2005/05/39323/”, Django would call the function
news.views.article_detail(request, ’2005’, ’05’, ’39323’).
2.1.6 Write your views
Each view is responsible for doing one of two things: Returning an HttpResponse object containing the content
for the requested page, or raising an exception such as Http404. The rest is up to you.
Generally, a view retrieves data according to the parameters, loads a template and renders the template with the
retrieved data. Here’s an example view for year_archive from above:
mysite/news/views.py
from django.shortcuts import render
from .models import Article
def year_archive(request, year):
a_list = Article.objects.filter(pub_date__year=year)
context = {'year': year, 'article_list': a_list}
return render(request, 'news/year_archive.html', context)
This example uses Django’s template system, which has several powerful features but strives to stay simple enough
for non-programmers to use.
10 Chapter 2. Getting started](https://image.slidesharecdn.com/20160225-django-documentation-160225091707/85/Django-Documentation-14-320.jpg)

![Django Documentation, Release 1.9.3.dev20160224120324
It also lets you create multiple versions of a site, with different base templates, while reusing child templates. Django’s
creators have used this technique to create strikingly different mobile versions of sites – simply by creating a new base
template.
Note that you don’t have to use Django’s template system if you prefer another system. While Django’s template
system is particularly well-integrated with Django’s model layer, nothing forces you to use it. For that matter, you
don’t have to use Django’s database API, either. You can use another database abstraction layer, you can read XML
files, you can read files off disk, or anything you want. Each piece of Django – models, views, templates – is decoupled
from the next.
2.1.8 This is just the surface
This has been only a quick overview of Django’s functionality. Some more useful features:
• A caching framework that integrates with memcached or other backends.
• A syndication framework that makes creating RSS and Atom feeds as easy as writing a small Python class.
• More sexy automatically-generated admin features – this overview barely scratched the surface.
The next obvious steps are for you to download Django, read the tutorial and join the community. Thanks for your
interest!
2.2 Quick install guide
Before you can use Django, you’ll need to get it installed. We have a complete installation guide that covers all
the possibilities; this guide will guide you to a simple, minimal installation that’ll work while you walk through the
introduction.
2.2.1 Install Python
Being a Python Web framework, Django requires Python. See What Python version can I use with Django? for details.
Python includes a lightweight database called SQLite so you won’t need to set up a database just yet.
Get the latest version of Python at https://www.python.org/download/ or with your operating system’s package man-
ager.
Django on Jython
If you use Jython (a Python implementation for the Java platform), you’ll need to follow a few additional steps. See
Running Django on Jython for details.
You can verify that Python is installed by typing python from your shell; you should see something like:
Python 3.4.x
[GCC 4.x] on linux
Type "help", "copyright", "credits" or "license" for more information.
>>>
2.2.2 Set up a database
This step is only necessary if you’d like to work with a “large” database engine like PostgreSQL, MySQL, or Oracle.
To install such a database, consult the database installation information.
12 Chapter 2. Getting started](https://image.slidesharecdn.com/20160225-django-documentation-160225091707/85/Django-Documentation-16-320.jpg)


![Django Documentation, Release 1.9.3.dev20160224120324
2.3.4 Write your first view
Let’s write the first view. Open the file polls/views.py and put the following Python code in it:
polls/views.py
from django.http import HttpResponse
def index(request):
return HttpResponse("Hello, world. You're at the polls index.")
This is the simplest view possible in Django. To call the view, we need to map it to a URL - and for this we need a
URLconf.
To create a URLconf in the polls directory, create a file called urls.py. Your app directory should now look like:
polls/
__init__.py
admin.py
apps.py
migrations/
__init__.py
models.py
tests.py
urls.py
views.py
In the polls/urls.py file include the following code:
polls/urls.py
from django.conf.urls import url
from . import views
urlpatterns = [
url(r'^$', views.index, name='index'),
]
The next step is to point the root URLconf at the polls.urls module. In mysite/urls.py, add an import for
django.conf.urls.include and insert an include() in the urlpatterns list, so you have:
mysite/urls.py
from django.conf.urls import include, url
from django.contrib import admin
urlpatterns = [
url(r'^polls/', include('polls.urls')),
url(r'^admin/', admin.site.urls),
]
When to use include()
You should always use include() when you include other URL patterns. admin.site.urls is the only excep-
tion to this.
Doesn’t match what you see?
2.3. Writing your first Django app, part 1 17](https://image.slidesharecdn.com/20160225-django-documentation-160225091707/85/Django-Documentation-21-320.jpg)


![Django Documentation, Release 1.9.3.dev20160224120324
The name of each Field instance (e.g. question_text or pub_date) is the field’s name, in machine-friendly
format. You’ll use this value in your Python code, and your database will use it as the column name.
You can use an optional first positional argument to a Field to designate a human-readable name. That’s used in a
couple of introspective parts of Django, and it doubles as documentation. If this field isn’t provided, Django will use the
machine-readable name. In this example, we’ve only defined a human-readable name for Question.pub_date.
For all other fields in this model, the field’s machine-readable name will suffice as its human-readable name.
Some Field classes have required arguments. CharField, for example, requires that you give it a max_length.
That’s used not only in the database schema, but in validation, as we’ll soon see.
A Field can also have various optional arguments; in this case, we’ve set the default value of votes to 0.
Finally, note a relationship is defined, using ForeignKey. That tells Django each Choice is related to a single
Question. Django supports all the common database relationships: many-to-one, many-to-many, and one-to-one.
2.4.3 Activating models
That small bit of model code gives Django a lot of information. With it, Django is able to:
• Create a database schema (CREATE TABLE statements) for this app.
• Create a Python database-access API for accessing Question and Choice objects.
But first we need to tell our project that the polls app is installed.
Philosophy
Django apps are “pluggable”: You can use an app in multiple projects, and you can distribute apps, because they don’t
have to be tied to a given Django installation.
Edit the mysite/settings.py file again, and change the INSTALLED_APPS setting to include the string
’polls.apps.PollsConfig’. It’ll look like this:
mysite/settings.py
INSTALLED_APPS = [
'polls.apps.PollsConfig',
'django.contrib.admin',
'django.contrib.auth',
'django.contrib.contenttypes',
'django.contrib.sessions',
'django.contrib.messages',
'django.contrib.staticfiles',
]
Now Django knows to include the polls app. Let’s run another command:
$ python manage.py makemigrations polls
You should see something similar to the following:
Migrations for 'polls':
0001_initial.py:
- Create model Choice
- Create model Question
- Add field question to choice
2.4. Writing your first Django app, part 2 21](https://image.slidesharecdn.com/20160225-django-documentation-160225091707/85/Django-Documentation-25-320.jpg)


![Django Documentation, Release 1.9.3.dev20160224120324
>>> import django
>>> django.setup()
If this raises an AttributeError, you’re probably using a version of Django that doesn’t match this tutorial
version. You’ll want to either switch to the older tutorial or the newer Django version.
You must run python from the same directory manage.py is in, or ensure that directory is on the Python path, so
that import mysite works.
For more information on all of this, see the django-admin documentation.
Once you’re in the shell, explore the database API:
>>> from polls.models import Question, Choice # Import the model classes we just wrote.
# No questions are in the system yet.
>>> Question.objects.all()
[]
# Create a new Question.
# Support for time zones is enabled in the default settings file, so
# Django expects a datetime with tzinfo for pub_date. Use timezone.now()
# instead of datetime.datetime.now() and it will do the right thing.
>>> from django.utils import timezone
>>> q = Question(question_text="What's new?", pub_date=timezone.now())
# Save the object into the database. You have to call save() explicitly.
>>> q.save()
# Now it has an ID. Note that this might say "1L" instead of "1", depending
# on which database you're using. That's no biggie; it just means your
# database backend prefers to return integers as Python long integer
# objects.
>>> q.id
1
# Access model field values via Python attributes.
>>> q.question_text
"What's new?"
>>> q.pub_date
datetime.datetime(2012, 2, 26, 13, 0, 0, 775217, tzinfo=<UTC>)
# Change values by changing the attributes, then calling save().
>>> q.question_text = "What's up?"
>>> q.save()
# objects.all() displays all the questions in the database.
>>> Question.objects.all()
[<Question: Question object>]
Wait a minute. <Question: Question object> is, utterly, an unhelpful representation of this object. Let’s
fix that by editing the Question model (in the polls/models.py file) and adding a __str__() method to
both Question and Choice:
polls/models.py
from django.db import models
from django.utils.encoding import python_2_unicode_compatible
24 Chapter 2. Getting started](https://image.slidesharecdn.com/20160225-django-documentation-160225091707/85/Django-Documentation-28-320.jpg)
![Django Documentation, Release 1.9.3.dev20160224120324
@python_2_unicode_compatible # only if you need to support Python 2
class Question(models.Model):
# ...
def __str__(self):
return self.question_text
@python_2_unicode_compatible # only if you need to support Python 2
class Choice(models.Model):
# ...
def __str__(self):
return self.choice_text
It’s important to add __str__() methods to your models, not only for your own convenience when dealing with the
interactive prompt, but also because objects’ representations are used throughout Django’s automatically-generated
admin.
Note these are normal Python methods. Let’s add a custom method, just for demonstration:
polls/models.py
import datetime
from django.db import models
from django.utils import timezone
class Question(models.Model):
# ...
def was_published_recently(self):
return self.pub_date >= timezone.now() - datetime.timedelta(days=1)
Note the addition of import datetime and from django.utils import timezone, to reference
Python’s standard datetime module and Django’s time-zone-related utilities in django.utils.timezone,
respectively. If you aren’t familiar with time zone handling in Python, you can learn more in the time zone support
docs.
Save these changes and start a new Python interactive shell by running python manage.py shell again:
>>> from polls.models import Question, Choice
# Make sure our __str__() addition worked.
>>> Question.objects.all()
[<Question: What's up?>]
# Django provides a rich database lookup API that's entirely driven by
# keyword arguments.
>>> Question.objects.filter(id=1)
[<Question: What's up?>]
>>> Question.objects.filter(question_text__startswith='What')
[<Question: What's up?>]
# Get the question that was published this year.
>>> from django.utils import timezone
>>> current_year = timezone.now().year
>>> Question.objects.get(pub_date__year=current_year)
<Question: What's up?>
# Request an ID that doesn't exist, this will raise an exception.
>>> Question.objects.get(id=2)
2.4. Writing your first Django app, part 2 25](https://image.slidesharecdn.com/20160225-django-documentation-160225091707/85/Django-Documentation-29-320.jpg)
![Django Documentation, Release 1.9.3.dev20160224120324
Traceback (most recent call last):
...
DoesNotExist: Question matching query does not exist.
# Lookup by a primary key is the most common case, so Django provides a
# shortcut for primary-key exact lookups.
# The following is identical to Question.objects.get(id=1).
>>> Question.objects.get(pk=1)
<Question: What's up?>
# Make sure our custom method worked.
>>> q = Question.objects.get(pk=1)
>>> q.was_published_recently()
True
# Give the Question a couple of Choices. The create call constructs a new
# Choice object, does the INSERT statement, adds the choice to the set
# of available choices and returns the new Choice object. Django creates
# a set to hold the "other side" of a ForeignKey relation
# (e.g. a question's choice) which can be accessed via the API.
>>> q = Question.objects.get(pk=1)
# Display any choices from the related object set -- none so far.
>>> q.choice_set.all()
[]
# Create three choices.
>>> q.choice_set.create(choice_text='Not much', votes=0)
<Choice: Not much>
>>> q.choice_set.create(choice_text='The sky', votes=0)
<Choice: The sky>
>>> c = q.choice_set.create(choice_text='Just hacking again', votes=0)
# Choice objects have API access to their related Question objects.
>>> c.question
<Question: What's up?>
# And vice versa: Question objects get access to Choice objects.
>>> q.choice_set.all()
[<Choice: Not much>, <Choice: The sky>, <Choice: Just hacking again>]
>>> q.choice_set.count()
3
# The API automatically follows relationships as far as you need.
# Use double underscores to separate relationships.
# This works as many levels deep as you want; there's no limit.
# Find all Choices for any question whose pub_date is in this year
# (reusing the 'current_year' variable we created above).
>>> Choice.objects.filter(question__pub_date__year=current_year)
[<Choice: Not much>, <Choice: The sky>, <Choice: Just hacking again>]
# Let's delete one of the choices. Use delete() for that.
>>> c = q.choice_set.filter(choice_text__startswith='Just hacking')
>>> c.delete()
For more information on model relations, see Accessing related objects. For more on how to use double underscores
to perform field lookups via the API, see Field lookups. For full details on the database API, see our Database API
reference.
26 Chapter 2. Getting started](https://image.slidesharecdn.com/20160225-django-documentation-160225091707/85/Django-Documentation-30-320.jpg)


![Django Documentation, Release 1.9.3.dev20160224120324
def vote(request, question_id):
return HttpResponse("You're voting on question %s." % question_id)
Wire these new views into the polls.urls module by adding the following url() calls:
polls/urls.py
from django.conf.urls import url
from . import views
urlpatterns = [
# ex: /polls/
url(r'^$', views.index, name='index'),
# ex: /polls/5/
url(r'^(?P<question_id>[0-9]+)/$', views.detail, name='detail'),
# ex: /polls/5/results/
url(r'^(?P<question_id>[0-9]+)/results/$', views.results, name='results'),
# ex: /polls/5/vote/
url(r'^(?P<question_id>[0-9]+)/vote/$', views.vote, name='vote'),
]
Take a look in your browser, at “/polls/34/”. It’ll run the detail() method and display whatever ID you provide
in the URL. Try “/polls/34/results/” and “/polls/34/vote/” too – these will display the placeholder results and voting
pages.
When somebody requests a page from your website – say, “/polls/34/”, Django will load the mysite.urls Python
module because it’s pointed to by the ROOT_URLCONF setting. It finds the variable named urlpatterns and
traverses the regular expressions in order. The include() functions we are using simply reference other URLconfs.
Note that the regular expressions for the include() functions don’t have a $ (end-of-string match character) but
rather a trailing slash. Whenever Django encounters include(), it chops off whatever part of the URL matched up
to that point and sends the remaining string to the included URLconf for further processing.
The idea behind include() is to make it easy to plug-and-play URLs. Since polls are in their own URLconf
(polls/urls.py), they can be placed under “/polls/”, or under “/fun_polls/”, or under “/content/polls/”, or any
other path root, and the app will still work.
Here’s what happens if a user goes to “/polls/34/” in this system:
• Django will find the match at ’^polls/’
• Then, Django will strip off the matching text ("polls/") and send the remaining text – "34/" – to the
‘polls.urls’ URLconf for further processing which matches r’^(?P<question_id>[0-9]+)/$’ resulting
in a call to the detail() view like so:
detail(request=<HttpRequest object>, question_id='34')
The question_id=’34’ part comes from (?P<question_id>[0-9]+). Using parentheses around a pattern
“captures” the text matched by that pattern and sends it as an argument to the view function; ?P<question_id>
defines the name that will be used to identify the matched pattern; and [0-9]+ is a regular expression to match a
sequence of digits (i.e., a number).
Because the URL patterns are regular expressions, there really is no limit on what you can do with them. And there’s
no need to add URL cruft such as .html – unless you want to, in which case you can do something like this:
url(r'^polls/latest.html$', views.index),
But, don’t do that. It’s silly.
32 Chapter 2. Getting started](https://image.slidesharecdn.com/20160225-django-documentation-160225091707/85/Django-Documentation-36-320.jpg)
![Django Documentation, Release 1.9.3.dev20160224120324
2.5.3 Write views that actually do something
Each view is responsible for doing one of two things: returning an HttpResponse object containing the content for
the requested page, or raising an exception such as Http404. The rest is up to you.
Your view can read records from a database, or not. It can use a template system such as Django’s – or a third-party
Python template system – or not. It can generate a PDF file, output XML, create a ZIP file on the fly, anything you
want, using whatever Python libraries you want.
All Django wants is that HttpResponse. Or an exception.
Because it’s convenient, let’s use Django’s own database API, which we covered in Tutorial 2. Here’s one stab at
a new index() view, which displays the latest 5 poll questions in the system, separated by commas, according to
publication date:
polls/views.py
from django.http import HttpResponse
from .models import Question
def index(request):
latest_question_list = Question.objects.order_by('-pub_date')[:5]
output = ', '.join([q.question_text for q in latest_question_list])
return HttpResponse(output)
# Leave the rest of the views (detail, results, vote) unchanged
There’s a problem here, though: the page’s design is hard-coded in the view. If you want to change the way the page
looks, you’ll have to edit this Python code. So let’s use Django’s template system to separate the design from Python
by creating a template that the view can use.
First, create a directory called templates in your polls directory. Django will look for templates in there.
Your project’s TEMPLATES setting describes how Django will load and render templates. The default set-
tings file configures a DjangoTemplates backend whose APP_DIRS option is set to True. By convention
DjangoTemplates looks for a “templates” subdirectory in each of the INSTALLED_APPS.
Within the templates directory you have just created, create another directory called polls,
and within that create a file called index.html. In other words, your template should be at
polls/templates/polls/index.html. Because of how the app_directories template loader
works as described above, you can refer to this template within Django simply as polls/index.html.
Template namespacing
Now we might be able to get away with putting our templates directly in polls/templates (rather than creating
another polls subdirectory), but it would actually be a bad idea. Django will choose the first template it finds whose
name matches, and if you had a template with the same name in a different application, Django would be unable to
distinguish between them. We need to be able to point Django at the right one, and the easiest way to ensure this is by
namespacing them. That is, by putting those templates inside another directory named for the application itself.
Put the following code in that template:
polls/templates/polls/index.html
{% if latest_question_list %}
<ul>
{% for question in latest_question_list %}
2.5. Writing your first Django app, part 3 33](https://image.slidesharecdn.com/20160225-django-documentation-160225091707/85/Django-Documentation-37-320.jpg)
![Django Documentation, Release 1.9.3.dev20160224120324
<li><a href="/polls/{{ question.id }}/">{{ question.question_text }}</a></li>
{% endfor %}
</ul>
{% else %}
<p>No polls are available.</p>
{% endif %}
Now let’s update our index view in polls/views.py to use the template:
polls/views.py
from django.http import HttpResponse
from django.template import loader
from .models import Question
def index(request):
latest_question_list = Question.objects.order_by('-pub_date')[:5]
template = loader.get_template('polls/index.html')
context = {
'latest_question_list': latest_question_list,
}
return HttpResponse(template.render(context, request))
That code loads the template called polls/index.html and passes it a context. The context is a dictionary
mapping template variable names to Python objects.
Load the page by pointing your browser at “/polls/”, and you should see a bulleted-list containing the “What’s up”
question from Tutorial 2. The link points to the question’s detail page.
A shortcut: render()
It’s a very common idiom to load a template, fill a context and return an HttpResponse object with the result of the
rendered template. Django provides a shortcut. Here’s the full index() view, rewritten:
polls/views.py
from django.shortcuts import render
from .models import Question
def index(request):
latest_question_list = Question.objects.order_by('-pub_date')[:5]
context = {'latest_question_list': latest_question_list}
return render(request, 'polls/index.html', context)
Note that once we’ve done this in all these views, we no longer need to import loader and HttpResponse (you’ll
want to keep HttpResponse if you still have the stub methods for detail, results, and vote).
The render() function takes the request object as its first argument, a template name as its second argument and a
dictionary as its optional third argument. It returns an HttpResponse object of the given template rendered with
the given context.
2.5.4 Raising a 404 error
Now, let’s tackle the question detail view – the page that displays the question text for a given poll. Here’s the view:
34 Chapter 2. Getting started](https://image.slidesharecdn.com/20160225-django-documentation-160225091707/85/Django-Documentation-38-320.jpg)

![Django Documentation, Release 1.9.3.dev20160224120324
2.5.5 Use the template system
Back to the detail() view for our poll application. Given the context variable question, here’s what the
polls/detail.html template might look like:
polls/templates/polls/detail.html
<h1>{{ question.question_text }}</h1>
<ul>
{% for choice in question.choice_set.all %}
<li>{{ choice.choice_text }}</li>
{% endfor %}
</ul>
The template system uses dot-lookup syntax to access variable attributes. In the example of {{
question.question_text }}, first Django does a dictionary lookup on the object question. Failing that,
it tries an attribute lookup – which works, in this case. If attribute lookup had failed, it would’ve tried a list-index
lookup.
Method-calling happens in the {% for %} loop: question.choice_set.all is interpreted as the Python code
question.choice_set.all(), which returns an iterable of Choice objects and is suitable for use in the {%
for %} tag.
See the template guide for more about templates.
2.5.6 Removing hardcoded URLs in templates
Remember, when we wrote the link to a question in the polls/index.html template, the link was partially
hardcoded like this:
<li><a href="/polls/{{ question.id }}/">{{ question.question_text }}</a></li>
The problem with this hardcoded, tightly-coupled approach is that it becomes challenging to change URLs on projects
with a lot of templates. However, since you defined the name argument in the url() functions in the polls.urls
module, you can remove a reliance on specific URL paths defined in your url configurations by using the {% url
%} template tag:
<li><a href="{% url 'detail' question.id %}">{{ question.question_text }}</a></li>
The way this works is by looking up the URL definition as specified in the polls.urls module. You can see exactly
where the URL name of ‘detail’ is defined below:
...
# the 'name' value as called by the {% url %} template tag
url(r'^(?P<question_id>[0-9]+)/$', views.detail, name='detail'),
...
If you want to change the URL of the polls detail view to something else, perhaps to something like
polls/specifics/12/ instead of doing it in the template (or templates) you would change it in
polls/urls.py:
...
# added the word 'specifics'
url(r'^specifics/(?P<question_id>[0-9]+)/$', views.detail, name='detail'),
...
36 Chapter 2. Getting started](https://image.slidesharecdn.com/20160225-django-documentation-160225091707/85/Django-Documentation-40-320.jpg)
![Django Documentation, Release 1.9.3.dev20160224120324
2.5.7 Namespacing URL names
The tutorial project has just one app, polls. In real Django projects, there might be five, ten, twenty apps or more.
How does Django differentiate the URL names between them? For example, the polls app has a detail view, and
so might an app on the same project that is for a blog. How does one make it so that Django knows which app view to
create for a url when using the {% url %} template tag?
The answer is to add namespaces to your URLconf. In the polls/urls.py file, go ahead and add an app_name
to set the application namespace:
polls/urls.py
from django.conf.urls import url
from . import views
app_name = 'polls'
urlpatterns = [
url(r'^$', views.index, name='index'),
url(r'^(?P<question_id>[0-9]+)/$', views.detail, name='detail'),
url(r'^(?P<question_id>[0-9]+)/results/$', views.results, name='results'),
url(r'^(?P<question_id>[0-9]+)/vote/$', views.vote, name='vote'),
]
Now change your polls/index.html template from:
polls/templates/polls/index.html
<li><a href="{% url 'detail' question.id %}">{{ question.question_text }}</a></li>
to point at the namespaced detail view:
polls/templates/polls/index.html
<li><a href="{% url 'polls:detail' question.id %}">{{ question.question_text }}</a></li>
When you’re comfortable with writing views, read part 4 of this tutorial to learn about simple form processing and
generic views.
2.6 Writing your first Django app, part 4
This tutorial begins where Tutorial 3 left off. We’re continuing the Web-poll application and will focus on simple form
processing and cutting down our code.
2.6.1 Write a simple form
Let’s update our poll detail template (“polls/detail.html”) from the last tutorial, so that the template contains an HTML
<form> element:
polls/templates/polls/detail.html
<h1>{{ question.question_text }}</h1>
{% if error_message %}<p><strong>{{ error_message }}</strong></p>{% endif %}
<form action="{% url 'polls:vote' question.id %}" method="post">
{% csrf_token %}
2.6. Writing your first Django app, part 4 37](https://image.slidesharecdn.com/20160225-django-documentation-160225091707/85/Django-Documentation-41-320.jpg)
![Django Documentation, Release 1.9.3.dev20160224120324
{% for choice in question.choice_set.all %}
<input type="radio" name="choice" id="choice{{ forloop.counter }}" value="{{ choice.id }}" />
<label for="choice{{ forloop.counter }}">{{ choice.choice_text }}</label><br />
{% endfor %}
<input type="submit" value="Vote" />
</form>
A quick rundown:
• The above template displays a radio button for each question choice. The value of each radio button is the
associated question choice’s ID. The name of each radio button is "choice". That means, when somebody
selects one of the radio buttons and submits the form, it’ll send the POST data choice=# where # is the ID of
the selected choice. This is the basic concept of HTML forms.
• We set the form’s action to {% url ’polls:vote’ question.id %}, and we set
method="post". Using method="post" (as opposed to method="get") is very important, be-
cause the act of submitting this form will alter data server-side. Whenever you create a form that alters data
server-side, use method="post". This tip isn’t specific to Django; it’s just good Web development practice.
• forloop.counter indicates how many times the for tag has gone through its loop
• Since we’re creating a POST form (which can have the effect of modifying data), we need to worry about Cross
Site Request Forgeries. Thankfully, you don’t have to worry too hard, because Django comes with a very easy-
to-use system for protecting against it. In short, all POST forms that are targeted at internal URLs should use
the {% csrf_token %} template tag.
Now, let’s create a Django view that handles the submitted data and does something with it. Remember, in Tutorial 3,
we created a URLconf for the polls application that includes this line:
polls/urls.py
url(r'^(?P<question_id>[0-9]+)/vote/$', views.vote, name='vote'),
We also created a dummy implementation of the vote() function. Let’s create a real version. Add the following to
polls/views.py:
polls/views.py
from django.shortcuts import get_object_or_404, render
from django.http import HttpResponseRedirect, HttpResponse
from django.core.urlresolvers import reverse
from .models import Choice, Question
# ...
def vote(request, question_id):
question = get_object_or_404(Question, pk=question_id)
try:
selected_choice = question.choice_set.get(pk=request.POST['choice'])
except (KeyError, Choice.DoesNotExist):
# Redisplay the question voting form.
return render(request, 'polls/detail.html', {
'question': question,
'error_message': "You didn't select a choice.",
})
else:
selected_choice.votes += 1
selected_choice.save()
# Always return an HttpResponseRedirect after successfully dealing
# with POST data. This prevents data from being posted twice if a
38 Chapter 2. Getting started](https://image.slidesharecdn.com/20160225-django-documentation-160225091707/85/Django-Documentation-42-320.jpg)
![Django Documentation, Release 1.9.3.dev20160224120324
# user hits the Back button.
return HttpResponseRedirect(reverse('polls:results', args=(question.id,)))
This code includes a few things we haven’t covered yet in this tutorial:
• request.POST is a dictionary-like object that lets you access submitted data by key name. In this case,
request.POST[’choice’] returns the ID of the selected choice, as a string. request.POST values are
always strings.
Note that Django also provides request.GET for accessing GET data in the same way – but we’re explicitly
using request.POST in our code, to ensure that data is only altered via a POST call.
• request.POST[’choice’] will raise KeyError if choice wasn’t provided in POST data. The above
code checks for KeyError and redisplays the question form with an error message if choice isn’t given.
• After incrementing the choice count, the code returns an HttpResponseRedirect rather than a normal
HttpResponse. HttpResponseRedirect takes a single argument: the URL to which the user will be
redirected (see the following point for how we construct the URL in this case).
As the Python comment above points out, you should always return an HttpResponseRedirect after
successfully dealing with POST data. This tip isn’t specific to Django; it’s just good Web development practice.
• We are using the reverse() function in the HttpResponseRedirect constructor in this example. This
function helps avoid having to hardcode a URL in the view function. It is given the name of the view that we
want to pass control to and the variable portion of the URL pattern that points to that view. In this case, using
the URLconf we set up in Tutorial 3, this reverse() call will return a string like
'/polls/3/results/'
where the 3 is the value of question.id. This redirected URL will then call the ’results’ view to display
the final page.
As mentioned in Tutorial 3, request is an HttpRequest object. For more on HttpRequest objects, see the
request and response documentation.
After somebody votes in a question, the vote() view redirects to the results page for the question. Let’s write that
view:
polls/views.py
from django.shortcuts import get_object_or_404, render
def results(request, question_id):
question = get_object_or_404(Question, pk=question_id)
return render(request, 'polls/results.html', {'question': question})
This is almost exactly the same as the detail() view from Tutorial 3. The only difference is the template name.
We’ll fix this redundancy later.
Now, create a polls/results.html template:
polls/templates/polls/results.html
<h1>{{ question.question_text }}</h1>
<ul>
{% for choice in question.choice_set.all %}
<li>{{ choice.choice_text }} -- {{ choice.votes }} vote{{ choice.votes|pluralize }}</li>
{% endfor %}
</ul>
2.6. Writing your first Django app, part 4 39](https://image.slidesharecdn.com/20160225-django-documentation-160225091707/85/Django-Documentation-43-320.jpg)

![Django Documentation, Release 1.9.3.dev20160224120324
url(r'^$', views.IndexView.as_view(), name='index'),
url(r'^(?P<pk>[0-9]+)/$', views.DetailView.as_view(), name='detail'),
url(r'^(?P<pk>[0-9]+)/results/$', views.ResultsView.as_view(), name='results'),
url(r'^(?P<question_id>[0-9]+)/vote/$', views.vote, name='vote'),
]
Note that the name of the matched pattern in the regexes of the second and third patterns has changed from
<question_id> to <pk>.
Amend views
Next, we’re going to remove our old index, detail, and results views and use Django’s generic views instead.
To do so, open the polls/views.py file and change it like so:
polls/views.py
from django.shortcuts import get_object_or_404, render
from django.http import HttpResponseRedirect
from django.core.urlresolvers import reverse
from django.views import generic
from .models import Choice, Question
class IndexView(generic.ListView):
template_name = 'polls/index.html'
context_object_name = 'latest_question_list'
def get_queryset(self):
"""Return the last five published questions."""
return Question.objects.order_by('-pub_date')[:5]
class DetailView(generic.DetailView):
model = Question
template_name = 'polls/detail.html'
class ResultsView(generic.DetailView):
model = Question
template_name = 'polls/results.html'
def vote(request, question_id):
... # same as above, no changes needed.
We’re using two generic views here: ListView and DetailView. Respectively, those two views abstract the
concepts of “display a list of objects” and “display a detail page for a particular type of object.”
• Each generic view needs to know what model it will be acting upon. This is provided using the model attribute.
• The DetailView generic view expects the primary key value captured from the URL to be called "pk", so
we’ve changed question_id to pk for the generic views.
By default, the DetailView generic view uses a template called <app name>/<model
name>_detail.html. In our case, it would use the template "polls/question_detail.html".
The template_name attribute is used to tell Django to use a specific template name instead of the autogenerated
default template name. We also specify the template_name for the results list view – this ensures that the
2.6. Writing your first Django app, part 4 41](https://image.slidesharecdn.com/20160225-django-documentation-160225091707/85/Django-Documentation-45-320.jpg)


![Django Documentation, Release 1.9.3.dev20160224120324
b'nnn <ul>n n <li><a href="/polls/1/">Who is your favorite Beatle?</a></li>n n
>>> # If the following doesn't work, you probably omitted the call to
>>> # setup_test_environment() described above
>>> response.context['latest_question_list']
[<Question: Who is your favorite Beatle?>]
Improving our view
The list of polls shows polls that aren’t published yet (i.e. those that have a pub_date in the future). Let’s fix that.
In Tutorial 4 we introduced a class-based view, based on ListView:
polls/views.py
class IndexView(generic.ListView):
template_name = 'polls/index.html'
context_object_name = 'latest_question_list'
def get_queryset(self):
"""Return the last five published questions."""
return Question.objects.order_by('-pub_date')[:5]
We need to amend the get_queryset() method and change it so that it also checks the date by comparing it with
timezone.now(). First we need to add an import:
polls/views.py
from django.utils import timezone
and then we must amend the get_queryset method like so:
polls/views.py
def get_queryset(self):
"""
Return the last five published questions (not including those set to be
published in the future).
"""
return Question.objects.filter(
pub_date__lte=timezone.now()
).order_by('-pub_date')[:5]
Question.objects.filter(pub_date__lte=timezone.now()) returns a queryset containing
Questions whose pub_date is less than or equal to - that is, earlier than or equal to - timezone.now.
Testing our new view
Now you can satisfy yourself that this behaves as expected by firing up the runserver, loading the site in your browser,
creating Questions with dates in the past and future, and checking that only those that have been published are
listed. You don’t want to have to do that every single time you make any change that might affect this - so let’s also
create a test, based on our shell session above.
Add the following to polls/tests.py:
polls/tests.py
from django.core.urlresolvers import reverse
48 Chapter 2. Getting started](https://image.slidesharecdn.com/20160225-django-documentation-160225091707/85/Django-Documentation-52-320.jpg)
![Django Documentation, Release 1.9.3.dev20160224120324
and we’ll create a shortcut function to create questions as well as a new test class:
polls/tests.py
def create_question(question_text, days):
"""
Creates a question with the given `question_text` and published the
given number of `days` offset to now (negative for questions published
in the past, positive for questions that have yet to be published).
"""
time = timezone.now() + datetime.timedelta(days=days)
return Question.objects.create(question_text=question_text,
pub_date=time)
class QuestionViewTests(TestCase):
def test_index_view_with_no_questions(self):
"""
If no questions exist, an appropriate message should be displayed.
"""
response = self.client.get(reverse('polls:index'))
self.assertEqual(response.status_code, 200)
self.assertContains(response, "No polls are available.")
self.assertQuerysetEqual(response.context['latest_question_list'], [])
def test_index_view_with_a_past_question(self):
"""
Questions with a pub_date in the past should be displayed on the
index page.
"""
create_question(question_text="Past question.", days=-30)
response = self.client.get(reverse('polls:index'))
self.assertQuerysetEqual(
response.context['latest_question_list'],
['<Question: Past question.>']
)
def test_index_view_with_a_future_question(self):
"""
Questions with a pub_date in the future should not be displayed on
the index page.
"""
create_question(question_text="Future question.", days=30)
response = self.client.get(reverse('polls:index'))
self.assertContains(response, "No polls are available.",
status_code=200)
self.assertQuerysetEqual(response.context['latest_question_list'], [])
def test_index_view_with_future_question_and_past_question(self):
"""
Even if both past and future questions exist, only past questions
should be displayed.
"""
create_question(question_text="Past question.", days=-30)
create_question(question_text="Future question.", days=30)
response = self.client.get(reverse('polls:index'))
self.assertQuerysetEqual(
response.context['latest_question_list'],
['<Question: Past question.>']
2.7. Writing your first Django app, part 5 49](https://image.slidesharecdn.com/20160225-django-documentation-160225091707/85/Django-Documentation-53-320.jpg)
![Django Documentation, Release 1.9.3.dev20160224120324
)
def test_index_view_with_two_past_questions(self):
"""
The questions index page may display multiple questions.
"""
create_question(question_text="Past question 1.", days=-30)
create_question(question_text="Past question 2.", days=-5)
response = self.client.get(reverse('polls:index'))
self.assertQuerysetEqual(
response.context['latest_question_list'],
['<Question: Past question 2.>', '<Question: Past question 1.>']
)
Let’s look at some of these more closely.
First is a question shortcut function, create_question, to take some repetition out of the process of creating
questions.
test_index_view_with_no_questions doesn’t create any questions, but checks the message: “No polls
are available.” and verifies the latest_question_list is empty. Note that the django.test.TestCase
class provides some additional assertion methods. In these examples, we use assertContains() and
assertQuerysetEqual().
In test_index_view_with_a_past_question, we create a question and verify that it appears in the list.
In test_index_view_with_a_future_question, we create a question with a pub_date in the future.
The database is reset for each test method, so the first question is no longer there, and so again the index shouldn’t
have any questions in it.
And so on. In effect, we are using the tests to tell a story of admin input and user experience on the site, and checking
that at every state and for every new change in the state of the system, the expected results are published.
Testing the DetailView
What we have works well; however, even though future questions don’t appear in the index, users can still reach them
if they know or guess the right URL. So we need to add a similar constraint to DetailView:
polls/views.py
class DetailView(generic.DetailView):
...
def get_queryset(self):
"""
Excludes any questions that aren't published yet.
"""
return Question.objects.filter(pub_date__lte=timezone.now())
And of course, we will add some tests, to check that a Question whose pub_date is in the past can be displayed,
and that one with a pub_date in the future is not:
polls/tests.py
class QuestionIndexDetailTests(TestCase):
def test_detail_view_with_a_future_question(self):
"""
The detail view of a question with a pub_date in the future should
return a 404 not found.
"""
50 Chapter 2. Getting started](https://image.slidesharecdn.com/20160225-django-documentation-160225091707/85/Django-Documentation-54-320.jpg)


![Django Documentation, Release 1.9.3.dev20160224120324
2.9 Writing your first Django app, part 7
This tutorial begins where Tutorial 6 left off. We’re continuing the Web-poll application and will focus on customizing
the Django’s automatically-generated admin site that we first explored in Tutorial 2.
2.9.1 Customize the admin form
By registering the Question model with admin.site.register(Question), Django was able to construct
a default form representation. Often, you’ll want to customize how the admin form looks and works. You’ll do this by
telling Django the options you want when you register the object.
Let’s see how this works by reordering the fields on the edit form. Replace the
admin.site.register(Question) line with:
polls/admin.py
from django.contrib import admin
from .models import Question
class QuestionAdmin(admin.ModelAdmin):
fields = ['pub_date', 'question_text']
admin.site.register(Question, QuestionAdmin)
You’ll follow this pattern – create a model admin class, then pass it as the second argument to
admin.site.register() – any time you need to change the admin options for an model.
This particular change above makes the “Publication date” come before the “Question” field:
This isn’t impressive with only two fields, but for admin forms with dozens of fields, choosing an intuitive order is an
important usability detail.
And speaking of forms with dozens of fields, you might want to split the form up into fieldsets:
polls/admin.py
54 Chapter 2. Getting started](https://image.slidesharecdn.com/20160225-django-documentation-160225091707/85/Django-Documentation-58-320.jpg)
![Django Documentation, Release 1.9.3.dev20160224120324
from django.contrib import admin
from .models import Question
class QuestionAdmin(admin.ModelAdmin):
fieldsets = [
(None, {'fields': ['question_text']}),
('Date information', {'fields': ['pub_date']}),
]
admin.site.register(Question, QuestionAdmin)
The first element of each tuple in fieldsets is the title of the fieldset. Here’s what our form looks like now:
2.9.2 Adding related objects
OK, we have our Question admin page, but a Question has multiple Choices, and the admin page doesn’t display
choices.
Yet.
There are two ways to solve this problem. The first is to register Choice with the admin just as we did with
Question. That’s easy:
polls/admin.py
from django.contrib import admin
from .models import Choice, Question
# ...
admin.site.register(Choice)
2.9. Writing your first Django app, part 7 55](https://image.slidesharecdn.com/20160225-django-documentation-160225091707/85/Django-Documentation-59-320.jpg)
![Django Documentation, Release 1.9.3.dev20160224120324
Now “Choices” is an available option in the Django admin. The “Add choice” form looks like this:
In that form, the “Question” field is a select box containing every question in the database. Django knows that a
ForeignKey should be represented in the admin as a <select> box. In our case, only one question exists at this
point.
Also note the “Add Another” link next to “Question.” Every object with a ForeignKey relationship to another gets
this for free. When you click “Add Another”, you’ll get a popup window with the “Add question” form. If you add a
question in that window and click “Save”, Django will save the question to the database and dynamically add it as the
selected choice on the “Add choice” form you’re looking at.
But, really, this is an inefficient way of adding Choice objects to the system. It’d be better if you could add a bunch
of Choices directly when you create the Question object. Let’s make that happen.
Remove the register() call for the Choice model. Then, edit the Question registration code to read:
polls/admin.py
from django.contrib import admin
from .models import Choice, Question
class ChoiceInline(admin.StackedInline):
model = Choice
extra = 3
class QuestionAdmin(admin.ModelAdmin):
fieldsets = [
(None, {'fields': ['question_text']}),
('Date information', {'fields': ['pub_date'], 'classes': ['collapse']}),
]
inlines = [ChoiceInline]
admin.site.register(Question, QuestionAdmin)
This tells Django: “Choice objects are edited on the Question admin page. By default, provide enough fields for
56 Chapter 2. Getting started](https://image.slidesharecdn.com/20160225-django-documentation-160225091707/85/Django-Documentation-60-320.jpg)


![Django Documentation, Release 1.9.3.dev20160224120324
You can improve that by giving that method (in polls/models.py) a few attributes, as follows:
polls/models.py
class Question(models.Model):
# ...
def was_published_recently(self):
return self.pub_date >= timezone.now() - datetime.timedelta(days=1)
was_published_recently.admin_order_field = 'pub_date'
was_published_recently.boolean = True
was_published_recently.short_description = 'Published recently?'
For more information on these method properties, see list_display.
Edit your polls/admin.py file again and add an improvement to the Question change list page: filters using
the list_filter. Add the following line to QuestionAdmin:
list_filter = ['pub_date']
That adds a “Filter” sidebar that lets people filter the change list by the pub_date field:
The type of filter displayed depends on the type of field you’re filtering on. Because pub_date is a
DateTimeField, Django knows to give appropriate filter options: “Any date”, “Today”, “Past 7 days”, “This
month”, “This year”.
This is shaping up well. Let’s add some search capability:
search_fields = ['question_text']
That adds a search box at the top of the change list. When somebody enters search terms, Django will search the
question_text field. You can use as many fields as you’d like – although because it uses a LIKE query behind
the scenes, limiting the number of search fields to a reasonable number will make it easier for your database to do the
search.
Now’s also a good time to note that change lists give you free pagination. The default is to display 100
items per page. Change list pagination, search boxes, filters, date-hierarchies, and
column-header-ordering all work together like you think they should.
2.9.4 Customize the admin look and feel
Clearly, having “Django administration” at the top of each admin page is ridiculous. It’s just placeholder text.
That’s easy to change, though, using Django’s template system. The Django admin is powered by Django itself, and
its interfaces use Django’s own template system.
60 Chapter 2. Getting started](https://image.slidesharecdn.com/20160225-django-documentation-160225091707/85/Django-Documentation-64-320.jpg)
![Django Documentation, Release 1.9.3.dev20160224120324
Customizing your project’s templates
Create a templates directory in your project directory (the one that contains manage.py). Templates can live
anywhere on your filesystem that Django can access. (Django runs as whatever user your server runs.) However,
keeping your templates within the project is a good convention to follow.
Open your settings file (mysite/settings.py, remember) and add a DIRS option in the TEMPLATES setting:
mysite/settings.py
TEMPLATES = [
{
'BACKEND': 'django.template.backends.django.DjangoTemplates',
'DIRS': [os.path.join(BASE_DIR, 'templates')],
'APP_DIRS': True,
'OPTIONS': {
'context_processors': [
'django.template.context_processors.debug',
'django.template.context_processors.request',
'django.contrib.auth.context_processors.auth',
'django.contrib.messages.context_processors.messages',
],
},
},
]
DIRS is a list of filesystem directories to check when loading Django templates; it’s a search path.
Organizing templates
Just like the static files, we could have all our templates together, in one big templates directory, and it would work
perfectly well. However, templates that belongs to a particular application, we should put in the application’s template
directory (e.g. polls/templates) rather than the project’s (templates). We’ll discuss in more detail in the
reusable apps tutorial why we do this.
Now create a directory called admin inside templates, and copy the template admin/base_site.html
from within the default Django admin template directory in the source code of Django itself
(django/contrib/admin/templates) into that directory.
Where are the Django source files?
If you have difficulty finding where the Django source files are located on your system, run the following command:
$ python -c "import django; print(django.__path__)"
Then, just edit the file and replace {{ site_header|default:_(’Django administration’) }} (in-
cluding the curly braces) with your own site’s name as you see fit. You should end up with a section of code like:
{% block branding %}
<h1 id="site-name"><a href="{% url 'admin:index' %}">Polls Administration</a></h1>
{% endblock %}
We use this approach to teach you how to override templates. In an actual project, you would probably use
the django.contrib.admin.AdminSite.site_header attribute to more easily make this particular cus-
tomization.
2.9. Writing your first Django app, part 7 61](https://image.slidesharecdn.com/20160225-django-documentation-160225091707/85/Django-Documentation-65-320.jpg)


![Django Documentation, Release 1.9.3.dev20160224120324
1. Add "polls" to your INSTALLED_APPS setting like this::
INSTALLED_APPS = [
...
'polls',
]
2. Include the polls URLconf in your project urls.py like this::
url(r'^polls/', include('polls.urls')),
3. Run `python manage.py migrate` to create the polls models.
4. Start the development server and visit http://127.0.0.1:8000/admin/
to create a poll (you'll need the Admin app enabled).
5. Visit http://127.0.0.1:8000/polls/ to participate in the poll.
4. Create a django-polls/LICENSE file. Choosing a license is beyond the scope of this tutorial, but suffice
it to say that code released publicly without a license is useless. Django and many Django-compatible apps
are distributed under the BSD license; however, you’re free to pick your own license. Just be aware that your
licensing choice will affect who is able to use your code.
5. Next we’ll create a setup.py file which provides details about how to build and install the app. A full
explanation of this file is beyond the scope of this tutorial, but the setuptools docs have a good explanation.
Create a file django-polls/setup.py with the following contents:
django-polls/setup.py
import os
from setuptools import find_packages, setup
with open(os.path.join(os.path.dirname(__file__), 'README.rst')) as readme:
README = readme.read()
# allow setup.py to be run from any path
os.chdir(os.path.normpath(os.path.join(os.path.abspath(__file__), os.pardir)))
setup(
name='django-polls',
version='0.1',
packages=find_packages(),
include_package_data=True,
license='BSD License', # example license
description='A simple Django app to conduct Web-based polls.',
long_description=README,
url='https://www.example.com/',
author='Your Name',
author_email='yourname@example.com',
classifiers=[
'Environment :: Web Environment',
'Framework :: Django',
'Framework :: Django :: X.Y', # replace "X.Y" as appropriate
'Intended Audience :: Developers',
'License :: OSI Approved :: BSD License', # example license
'Operating System :: OS Independent',
'Programming Language :: Python',
# Replace these appropriately if you are stuck on Python 2.
'Programming Language :: Python :: 3',
2.10. Advanced tutorial: How to write reusable apps 65](https://image.slidesharecdn.com/20160225-django-documentation-160225091707/85/Django-Documentation-69-320.jpg)
![Django Documentation, Release 1.9.3.dev20160224120324
'Programming Language :: Python :: 3.4',
'Programming Language :: Python :: 3.5',
'Topic :: Internet :: WWW/HTTP',
'Topic :: Internet :: WWW/HTTP :: Dynamic Content',
],
)
6. Only Python modules and packages are included in the package by default. To include additional files,
we’ll need to create a MANIFEST.in file. The setuptools docs referred to in the previous step discuss
this file in more details. To include the templates, the README.rst and our LICENSE file, create a file
django-polls/MANIFEST.in with the following contents:
django-polls/MANIFEST.in
include LICENSE
include README.rst
recursive-include polls/static *
recursive-include polls/templates *
7. It’s optional, but recommended, to include detailed documentation with your app. Create an
empty directory django-polls/docs for future documentation. Add an additional line to
django-polls/MANIFEST.in:
recursive-include docs *
Note that the docs directory won’t be included in your package unless you add some files to it. Many Django
apps also provide their documentation online through sites like readthedocs.org.
8. Try building your package with python setup.py sdist (run from inside django-polls). This cre-
ates a directory called dist and builds your new package, django-polls-0.1.tar.gz.
For more information on packaging, see Python’s Tutorial on Packaging and Distributing Projects.
2.10.5 Using your own package
Since we moved the polls directory out of the project, it’s no longer working. We’ll now fix this by installing our
new django-polls package.
Installing as a user library
The following steps install django-polls as a user library. Per-user installs have a lot of advantages over installing
the package system-wide, such as being usable on systems where you don’t have administrator access as well as
preventing the package from affecting system services and other users of the machine.
Note that per-user installations can still affect the behavior of system tools that run as that user, so virtualenv is a
more robust solution (see below).
1. To install the package, use pip (you already installed it, right?):
pip install --user django-polls/dist/django-polls-0.1.tar.gz
2. With luck, your Django project should now work correctly again. Run the server again to confirm this.
3. To uninstall the package, use pip:
pip uninstall django-polls
66 Chapter 2. Getting started](https://image.slidesharecdn.com/20160225-django-documentation-160225091707/85/Django-Documentation-70-320.jpg)


![Django Documentation, Release 1.9.3.dev20160224120324
While Django’s test suite is running, you’ll see a stream of characters representing the status of each test as it’s run.
E indicates that an error was raised during a test, and F indicates that a test’s assertions failed. Both of these are
considered to be test failures. Meanwhile, x and s indicated expected failures and skipped tests, respectively. Dots
indicate passing tests.
Skipped tests are typically due to missing external libraries required to run the test; see Running all the tests for a list
of dependencies and be sure to install any for tests related to the changes you are making (we won’t need any for this
tutorial).
Once the tests complete, you should be greeted with a message informing you whether the test suite passed or failed.
Since you haven’t yet made any changes to Django’s code, the entire test suite should pass. If you get failures or
errors make sure you’ve followed all of the previous steps properly. See Running the unit tests for more information.
Note that the latest Django trunk may not always be stable. When developing against trunk, you can check Django’s
continuous integration builds to determine if the failures are specific to your machine or if they are also present in
Django’s official builds. If you click to view a particular build, you can view the “Configuration Matrix” which shows
failures broken down by Python version and database backend.
Note: For this tutorial and the ticket we’re working on, testing against SQLite is sufficient, however, it’s possible (and
sometimes necessary) to run the tests using a different database.
2.12.7 Writing some tests for your ticket
In most cases, for a patch to be accepted into Django it has to include tests. For bug fix patches, this means writing a
regression test to ensure that the bug is never reintroduced into Django later on. A regression test should be written in
such a way that it will fail while the bug still exists and pass once the bug has been fixed. For patches containing new
features, you’ll need to include tests which ensure that the new features are working correctly. They too should fail
when the new feature is not present, and then pass once it has been implemented.
A good way to do this is to write your new tests first, before making any changes to the code. This style of development
is called test-driven development and can be applied to both entire projects and single patches. After writing your tests,
you then run them to make sure that they do indeed fail (since you haven’t fixed that bug or added that feature yet). If
your new tests don’t fail, you’ll need to fix them so that they do. After all, a regression test that passes regardless of
whether a bug is present is not very helpful at preventing that bug from reoccurring down the road.
Now for our hands-on example.
Writing some tests for ticket #24788
Ticket #24788 proposes a small feature addition: the ability to specify the class level attribute prefix on Form
classes, so that:
[...] forms which ship with apps could effectively namespace themselves such
that N overlapping form fields could be POSTed at once and resolved to the
correct form.
In order to resolve this ticket, we’ll add a prefix attribute to the BaseForm class. When creating instances of this
class, passing a prefix to the __init__() method will still set that prefix on the created instance. But not passing a
prefix (or passing None) will use the class-level prefix. Before we make those changes though, we’re going to write a
couple tests to verify that our modification functions correctly and continues to function correctly in the future.
Navigate to Django’s tests/forms_tests/tests/ folder and open the test_forms.py file. Add the fol-
lowing code on line 1674 right before the test_forms_with_null_boolean function:
74 Chapter 2. Getting started](https://image.slidesharecdn.com/20160225-django-documentation-160225091707/85/Django-Documentation-78-320.jpg)


![Django Documentation, Release 1.9.3.dev20160224120324
+ >>> class PersonForm(forms.Form):
+ ... ...
+ ... prefix = 'person'
+
+.. versionadded:: 1.9
+
+ The ability to specify ``prefix`` on the form class was added.
diff --git a/docs/releases/1.9.txt b/docs/releases/1.9.txt
index 5b58f79..f9bb9de 100644
--- a/docs/releases/1.9.txt
+++ b/docs/releases/1.9.txt
@@ -161,6 +161,9 @@ Forms
:attr:`~django.forms.Form.field_order` attribute, the ``field_order``
constructor argument , or the :meth:`~django.forms.Form.order_fields` method.
+* A form prefix can be specified inside a form class, not only when
+ instantiating a form. See :ref:`form-prefix` for details.
+
Generic Views
^^^^^^^^^^^^^
diff --git a/tests/forms_tests/tests/test_forms.py b/tests/forms_tests/tests/test_forms.py
index 690f205..e07fae2 100644
--- a/tests/forms_tests/tests/test_forms.py
+++ b/tests/forms_tests/tests/test_forms.py
@@ -1671,6 +1671,18 @@ class FormsTestCase(SimpleTestCase):
self.assertEqual(p.cleaned_data['last_name'], 'Lennon')
self.assertEqual(p.cleaned_data['birthday'], datetime.date(1940, 10, 9))
+ def test_class_prefix(self):
+ # Prefix can be also specified at the class level.
+ class Person(Form):
+ first_name = CharField()
+ prefix = 'foo'
+
+ p = Person()
+ self.assertEqual(p.prefix, 'foo')
+
+ p = Person(prefix='bar')
+ self.assertEqual(p.prefix, 'bar')
+
def test_forms_with_null_boolean(self):
# NullBooleanField is a bit of a special case because its presentation (widget)
# is different than its data. This is handled transparently, though.
2.12.12 So what do I do next?
Congratulations, you’ve generated your very first Django patch! Now that you’ve got that under your belt, you can
put those skills to good use by helping to improve Django’s codebase. Generating patches and attaching them to Trac
tickets is useful, however, since we are using git - adopting a more git oriented workflow is recommended.
Since we never committed our changes locally, perform the following to get your git branch back to a good starting
point:
$ git reset --hard HEAD
$ git checkout master
78 Chapter 2. Getting started](https://image.slidesharecdn.com/20160225-django-documentation-160225091707/85/Django-Documentation-82-320.jpg)


![Django Documentation, Release 1.9.3.dev20160224120324
Using models
Once you have defined your models, you need to tell Django you’re going to use those models. Do this by editing
your settings file and changing the INSTALLED_APPS setting to add the name of the module that contains your
models.py.
For example, if the models for your application live in the module myapp.models (the package structure that is
created for an application by the manage.py startapp script), INSTALLED_APPS should read, in part:
INSTALLED_APPS = [
#...
'myapp',
#...
]
When you add new apps to INSTALLED_APPS, be sure to run manage.py migrate, optionally making migra-
tions for them first with manage.py makemigrations.
Fields
The most important part of a model – and the only required part of a model – is the list of database fields it defines.
Fields are specified by class attributes. Be careful not to choose field names that conflict with the models API like
clean, save, or delete.
Example:
from django.db import models
class Musician(models.Model):
first_name = models.CharField(max_length=50)
last_name = models.CharField(max_length=50)
instrument = models.CharField(max_length=100)
class Album(models.Model):
artist = models.ForeignKey(Musician, on_delete=models.CASCADE)
name = models.CharField(max_length=100)
release_date = models.DateField()
num_stars = models.IntegerField()
Field types
Each field in your model should be an instance of the appropriate Field class. Django uses the field class types to
determine a few things:
• The column type, which tells the database what kind of data to store (e.g. INTEGER, VARCHAR, TEXT).
• The default HTML widget to use when rendering a form field (e.g. <input type="text">, <select>).
• The minimal validation requirements, used in Django’s admin and in automatically-generated forms.
Django ships with dozens of built-in field types; you can find the complete list in the model field reference. You can
easily write your own fields if Django’s built-in ones don’t do the trick; see Writing custom model fields.
Field options
Each field takes a certain set of field-specific arguments (documented in the model field reference). For example,
CharField (and its subclasses) require a max_length argument which specifies the size of the VARCHAR database
3.2. Models and databases 85](https://image.slidesharecdn.com/20160225-django-documentation-160225091707/85/Django-Documentation-89-320.jpg)

![Django Documentation, Release 1.9.3.dev20160224120324
from django.db import models
class Fruit(models.Model):
name = models.CharField(max_length=100, primary_key=True)
>>> fruit = Fruit.objects.create(name='Apple')
>>> fruit.name = 'Pear'
>>> fruit.save()
>>> Fruit.objects.values_list('name', flat=True)
['Apple', 'Pear']
unique If True, this field must be unique throughout the table.
Again, these are just short descriptions of the most common field options. Full details can be found in the common
model field option reference.
Automatic primary key fields
By default, Django gives each model the following field:
id = models.AutoField(primary_key=True)
This is an auto-incrementing primary key.
If you’d like to specify a custom primary key, just specify primary_key=True on one of your fields. If Django
sees you’ve explicitly set Field.primary_key, it won’t add the automatic id column.
Each model requires exactly one field to have primary_key=True (either explicitly declared or automatically
added).
Verbose field names
Each field type, except for ForeignKey, ManyToManyField and OneToOneField, takes an optional first
positional argument – a verbose name. If the verbose name isn’t given, Django will automatically create it using the
field’s attribute name, converting underscores to spaces.
In this example, the verbose name is "person’s first name":
first_name = models.CharField("person's first name", max_length=30)
In this example, the verbose name is "first name":
first_name = models.CharField(max_length=30)
ForeignKey, ManyToManyField and OneToOneField require the first argument to be a model class, so use
the verbose_name keyword argument:
poll = models.ForeignKey(
Poll,
on_delete=models.CASCADE,
verbose_name="the related poll",
)
sites = models.ManyToManyField(Site, verbose_name="list of sites")
place = models.OneToOneField(
Place,
on_delete=models.CASCADE,
verbose_name="related place",
)
3.2. Models and databases 87](https://image.slidesharecdn.com/20160225-django-documentation-160225091707/85/Django-Documentation-91-320.jpg)


![Django Documentation, Release 1.9.3.dev20160224120324
class Membership(models.Model):
person = models.ForeignKey(Person, on_delete=models.CASCADE)
group = models.ForeignKey(Group, on_delete=models.CASCADE)
date_joined = models.DateField()
invite_reason = models.CharField(max_length=64)
When you set up the intermediary model, you explicitly specify foreign keys to the models that are involved in the
many-to-many relationship. This explicit declaration defines how the two models are related.
There are a few restrictions on the intermediate model:
• Your intermediate model must contain one - and only one - foreign key to the source model (this would
be Group in our example), or you must explicitly specify the foreign keys Django should use for the re-
lationship using ManyToManyField.through_fields. If you have more than one foreign key and
through_fields is not specified, a validation error will be raised. A similar restriction applies to the foreign
key to the target model (this would be Person in our example).
• For a model which has a many-to-many relationship to itself through an intermediary model, two foreign keys
to the same model are permitted, but they will be treated as the two (different) sides of the many-to-many
relationship. If there are more than two foreign keys though, you must also specify through_fields as
above, or a validation error will be raised.
• When defining a many-to-many relationship from a model to itself, using an intermediary model, you must use
symmetrical=False (see the model field reference).
Now that you have set up your ManyToManyField to use your intermediary model (Membership, in this case),
you’re ready to start creating some many-to-many relationships. You do this by creating instances of the intermediate
model:
>>> ringo = Person.objects.create(name="Ringo Starr")
>>> paul = Person.objects.create(name="Paul McCartney")
>>> beatles = Group.objects.create(name="The Beatles")
>>> m1 = Membership(person=ringo, group=beatles,
... date_joined=date(1962, 8, 16),
... invite_reason="Needed a new drummer.")
>>> m1.save()
>>> beatles.members.all()
[<Person: Ringo Starr>]
>>> ringo.group_set.all()
[<Group: The Beatles>]
>>> m2 = Membership.objects.create(person=paul, group=beatles,
... date_joined=date(1960, 8, 1),
... invite_reason="Wanted to form a band.")
>>> beatles.members.all()
[<Person: Ringo Starr>, <Person: Paul McCartney>]
Unlike normal many-to-many fields, you can’t use add, create, or assignment (i.e., beatles.members =
[...]) to create relationships:
# THIS WILL NOT WORK
>>> beatles.members.add(john)
# NEITHER WILL THIS
>>> beatles.members.create(name="George Harrison")
# AND NEITHER WILL THIS
>>> beatles.members = [john, paul, ringo, george]
Why? You can’t just create a relationship between a Person and a Group - you need to specify all the detail for the
relationship required by the Membership model. The simple add, create and assignment calls don’t provide a
90 Chapter 3. Using Django](https://image.slidesharecdn.com/20160225-django-documentation-160225091707/85/Django-Documentation-94-320.jpg)
![Django Documentation, Release 1.9.3.dev20160224120324
way to specify this extra detail. As a result, they are disabled for many-to-many relationships that use an intermediate
model. The only way to create this type of relationship is to create instances of the intermediate model.
The remove() method is disabled for similar reasons. However, the clear() method can be used to remove all
many-to-many relationships for an instance:
>>> # Beatles have broken up
>>> beatles.members.clear()
>>> # Note that this deletes the intermediate model instances
>>> Membership.objects.all()
[]
Once you have established the many-to-many relationships by creating instances of your intermediate model, you can
issue queries. Just as with normal many-to-many relationships, you can query using the attributes of the many-to-
many-related model:
# Find all the groups with a member whose name starts with 'Paul'
>>> Group.objects.filter(members__name__startswith='Paul')
[<Group: The Beatles>]
As you are using an intermediate model, you can also query on its attributes:
# Find all the members of the Beatles that joined after 1 Jan 1961
>>> Person.objects.filter(
... group__name='The Beatles',
... membership__date_joined__gt=date(1961,1,1))
[<Person: Ringo Starr]
If you need to access a membership’s information you may do so by directly querying the Membership model:
>>> ringos_membership = Membership.objects.get(group=beatles, person=ringo)
>>> ringos_membership.date_joined
datetime.date(1962, 8, 16)
>>> ringos_membership.invite_reason
'Needed a new drummer.'
Another way to access the same information is by querying the many-to-many reverse relationship from a Person
object:
>>> ringos_membership = ringo.membership_set.get(group=beatles)
>>> ringos_membership.date_joined
datetime.date(1962, 8, 16)
>>> ringos_membership.invite_reason
'Needed a new drummer.'
One-to-one relationships To define a one-to-one relationship, use OneToOneField. You use it just like any other
Field type: by including it as a class attribute of your model.
This is most useful on the primary key of an object when that object “extends” another object in some way.
OneToOneField requires a positional argument: the class to which the model is related.
For example, if you were building a database of “places”, you would build pretty standard stuff such as address, phone
number, etc. in the database. Then, if you wanted to build a database of restaurants on top of the places, instead of
repeating yourself and replicating those fields in the Restaurant model, you could make Restaurant have a
OneToOneField to Place (because a restaurant “is a” place; in fact, to handle this you’d typically use inheritance,
which involves an implicit one-to-one relation).
As with ForeignKey, a recursive relationship can be defined and references to as-yet undefined models can be
made.
3.2. Models and databases 91](https://image.slidesharecdn.com/20160225-django-documentation-160225091707/85/Django-Documentation-95-320.jpg)

![Django Documentation, Release 1.9.3.dev20160224120324
Meta options
Give your model metadata by using an inner class Meta, like so:
from django.db import models
class Ox(models.Model):
horn_length = models.IntegerField()
class Meta:
ordering = ["horn_length"]
verbose_name_plural = "oxen"
Model metadata is “anything that’s not a field”, such as ordering options (ordering), database table name
(db_table), or human-readable singular and plural names (verbose_name and verbose_name_plural).
None are required, and adding class Meta to a model is completely optional.
A complete list of all possible Meta options can be found in the model option reference.
Model attributes
objects The most important attribute of a model is the Manager. It’s the interface through which database query
operations are provided to Django models and is used to retrieve the instances from the database. If no custom
Manager is defined, the default name is objects. Managers are only accessible via model classes, not the
model instances.
Model methods
Define custom methods on a model to add custom “row-level” functionality to your objects. Whereas Manager
methods are intended to do “table-wide” things, model methods should act on a particular model instance.
This is a valuable technique for keeping business logic in one place – the model.
For example, this model has a few custom methods:
from django.db import models
class Person(models.Model):
first_name = models.CharField(max_length=50)
last_name = models.CharField(max_length=50)
birth_date = models.DateField()
def baby_boomer_status(self):
"Returns the person's baby-boomer status."
import datetime
if self.birth_date < datetime.date(1945, 8, 1):
return "Pre-boomer"
elif self.birth_date < datetime.date(1965, 1, 1):
return "Baby boomer"
else:
return "Post-boomer"
def _get_full_name(self):
"Returns the person's full name."
return '%s %s' % (self.first_name, self.last_name)
full_name = property(_get_full_name)
3.2. Models and databases 93](https://image.slidesharecdn.com/20160225-django-documentation-160225091707/85/Django-Documentation-97-320.jpg)


![Django Documentation, Release 1.9.3.dev20160224120324
class Meta:
abstract = True
class Student(CommonInfo):
home_group = models.CharField(max_length=5)
The Student model will have three fields: name, age and home_group. The CommonInfo model cannot be
used as a normal Django model, since it is an abstract base class. It does not generate a database table or have a
manager, and cannot be instantiated or saved directly.
For many uses, this type of model inheritance will be exactly what you want. It provides a way to factor out common
information at the Python level, while still only creating one database table per child model at the database level.
Meta inheritance When an abstract base class is created, Django makes any Meta inner class you declared in the
base class available as an attribute. If a child class does not declare its own Meta class, it will inherit the parent’s Meta.
If the child wants to extend the parent’s Meta class, it can subclass it. For example:
from django.db import models
class CommonInfo(models.Model):
# ...
class Meta:
abstract = True
ordering = ['name']
class Student(CommonInfo):
# ...
class Meta(CommonInfo.Meta):
db_table = 'student_info'
Django does make one adjustment to the Meta class of an abstract base class: before installing the Meta attribute,
it sets abstract=False. This means that children of abstract base classes don’t automatically become abstract
classes themselves. Of course, you can make an abstract base class that inherits from another abstract base class. You
just need to remember to explicitly set abstract=True each time.
Some attributes won’t make sense to include in the Meta class of an abstract base class. For example, including
db_table would mean that all the child classes (the ones that don’t specify their own Meta) would use the same
database table, which is almost certainly not what you want.
Be careful with related_name If you are using the related_name attribute on a ForeignKey or
ManyToManyField, you must always specify a unique reverse name for the field. This would normally cause a
problem in abstract base classes, since the fields on this class are included into each of the child classes, with exactly
the same values for the attributes (including related_name) each time.
To work around this problem, when you are using related_name in an abstract base class (only), part of the name
should contain ’%(app_label)s’ and ’%(class)s’.
• ’%(class)s’ is replaced by the lower-cased name of the child class that the field is used in.
• ’%(app_label)s’ is replaced by the lower-cased name of the app the child class is contained within. Each
installed application name must be unique and the model class names within each app must also be unique,
therefore the resulting name will end up being different.
For example, given an app common/models.py:
from django.db import models
96 Chapter 3. Using Django](https://image.slidesharecdn.com/20160225-django-documentation-160225091707/85/Django-Documentation-100-320.jpg)

![Django Documentation, Release 1.9.3.dev20160224120324
>>> p = Place.objects.get(id=12)
# If p is a Restaurant object, this will give the child class:
>>> p.restaurant
<Restaurant: ...>
However, if p in the above example was not a Restaurant (it had been created directly as a Place object or
was the parent of some other class), referring to p.restaurant would raise a Restaurant.DoesNotExist
exception.
Meta and multi-table inheritance In the multi-table inheritance situation, it doesn’t make sense for a child class to
inherit from its parent’s Meta class. All the Meta options have already been applied to the parent class and applying
them again would normally only lead to contradictory behavior (this is in contrast with the abstract base class case,
where the base class doesn’t exist in its own right).
So a child model does not have access to its parent’s Meta class. However, there are a few limited cases where the
child inherits behavior from the parent: if the child does not specify an ordering attribute or a get_latest_by
attribute, it will inherit these from its parent.
If the parent has an ordering and you don’t want the child to have any natural ordering, you can explicitly disable it:
class ChildModel(ParentModel):
# ...
class Meta:
# Remove parent's ordering effect
ordering = []
Inheritance and reverse relations Because multi-table inheritance uses an implicit OneToOneField to link the
child and the parent, it’s possible to move from the parent down to the child, as in the above example. However, this
uses up the name that is the default related_name value for ForeignKey and ManyToManyField relations.
If you are putting those types of relations on a subclass of the parent model, you must specify the related_name
attribute on each such field. If you forget, Django will raise a validation error.
For example, using the above Place class again, let’s create another subclass with a ManyToManyField:
class Supplier(Place):
customers = models.ManyToManyField(Place)
This results in the error:
Reverse query name for 'Supplier.customers' clashes with reverse query
name for 'Supplier.place_ptr'.
HINT: Add or change a related_name argument to the definition for
'Supplier.customers' or 'Supplier.place_ptr'.
Adding related_name to the customers field as follows would resolve the error:
models.ManyToManyField(Place, related_name=’provider’).
Specifying the parent link field As mentioned, Django will automatically create a OneToOneField linking your
child class back to any non-abstract parent models. If you want to control the name of the attribute linking back to the
parent, you can create your own OneToOneField and set parent_link=True to indicate that your field is the
link back to the parent class.
98 Chapter 3. Using Django](https://image.slidesharecdn.com/20160225-django-documentation-160225091707/85/Django-Documentation-102-320.jpg)
![Django Documentation, Release 1.9.3.dev20160224120324
Proxy models
When using multi-table inheritance, a new database table is created for each subclass of a model. This is usually the
desired behavior, since the subclass needs a place to store any additional data fields that are not present on the base
class. Sometimes, however, you only want to change the Python behavior of a model – perhaps to change the default
manager, or add a new method.
This is what proxy model inheritance is for: creating a proxy for the original model. You can create, delete and update
instances of the proxy model and all the data will be saved as if you were using the original (non-proxied) model. The
difference is that you can change things like the default model ordering or the default manager in the proxy, without
having to alter the original.
Proxy models are declared like normal models. You tell Django that it’s a proxy model by setting the proxy attribute
of the Meta class to True.
For example, suppose you want to add a method to the Person model. You can do it like this:
from django.db import models
class Person(models.Model):
first_name = models.CharField(max_length=30)
last_name = models.CharField(max_length=30)
class MyPerson(Person):
class Meta:
proxy = True
def do_something(self):
# ...
pass
The MyPerson class operates on the same database table as its parent Person class. In particular, any new instances
of Person will also be accessible through MyPerson, and vice-versa:
>>> p = Person.objects.create(first_name="foobar")
>>> MyPerson.objects.get(first_name="foobar")
<MyPerson: foobar>
You could also use a proxy model to define a different default ordering on a model. You might not always want to
order the Person model, but regularly order by the last_name attribute when you use the proxy. This is easy:
class OrderedPerson(Person):
class Meta:
ordering = ["last_name"]
proxy = True
Now normal Person queries will be unordered and OrderedPerson queries will be ordered by last_name.
QuerySets still return the model that was requested There is no way to have Django return, say, a MyPerson
object whenever you query for Person objects. A queryset for Person objects will return those types of objects.
The whole point of proxy objects is that code relying on the original Person will use those and your own code can
use the extensions you included (that no other code is relying on anyway). It is not a way to replace the Person (or
any other) model everywhere with something of your own creation.
Base class restrictions A proxy model must inherit from exactly one non-abstract model class. You can’t inherit
from multiple non-abstract models as the proxy model doesn’t provide any connection between the rows in the different
3.2. Models and databases 99](https://image.slidesharecdn.com/20160225-django-documentation-160225091707/85/Django-Documentation-103-320.jpg)


![Django Documentation, Release 1.9.3.dev20160224120324
QuerySet is evaluated by accessing the database. For more details on exactly when evaluation takes place, see
When QuerySets are evaluated.
Retrieving a single object with get()
filter() will always give you a QuerySet, even if only a single object matches the query - in this case, it will be
a QuerySet containing a single element.
If you know there is only one object that matches your query, you can use the get() method on a Manager which
returns the object directly:
>>> one_entry = Entry.objects.get(pk=1)
You can use any query expression with get(), just like with filter() - again, see Field lookups below.
Note that there is a difference between using get(), and using filter() with a slice of [0]. If there are no results
that match the query, get() will raise a DoesNotExist exception. This exception is an attribute of the model
class that the query is being performed on - so in the code above, if there is no Entry object with a primary key of 1,
Django will raise Entry.DoesNotExist.
Similarly, Django will complain if more than one item matches the get() query. In this case, it will raise
MultipleObjectsReturned, which again is an attribute of the model class itself.
Other QuerySet methods
Most of the time you’ll use all(), get(), filter() and exclude() when you need to look up objects from
the database. However, that’s far from all there is; see the QuerySet API Reference for a complete list of all the various
QuerySet methods.
Limiting QuerySets
Use a subset of Python’s array-slicing syntax to limit your QuerySet to a certain number of results. This is the
equivalent of SQL’s LIMIT and OFFSET clauses.
For example, this returns the first 5 objects (LIMIT 5):
>>> Entry.objects.all()[:5]
This returns the sixth through tenth objects (OFFSET 5 LIMIT 5):
>>> Entry.objects.all()[5:10]
Negative indexing (i.e. Entry.objects.all()[-1]) is not supported.
Generally, slicing a QuerySet returns a new QuerySet – it doesn’t evaluate the query. An exception is if you use
the “step” parameter of Python slice syntax. For example, this would actually execute the query in order to return a
list of every second object of the first 10:
>>> Entry.objects.all()[:10:2]
To retrieve a single object rather than a list (e.g. SELECT foo FROM bar LIMIT 1), use a simple index instead
of a slice. For example, this returns the first Entry in the database, after ordering entries alphabetically by headline:
>>> Entry.objects.order_by('headline')[0]
This is roughly equivalent to:
106 Chapter 3. Using Django](https://image.slidesharecdn.com/20160225-django-documentation-160225091707/85/Django-Documentation-110-320.jpg)
![Django Documentation, Release 1.9.3.dev20160224120324
>>> Entry.objects.order_by('headline')[0:1].get()
Note, however, that the first of these will raise IndexError while the second will raise DoesNotExist if no
objects match the given criteria. See get() for more details.
Field lookups
Field lookups are how you specify the meat of an SQL WHERE clause. They’re specified as keyword arguments to the
QuerySet methods filter(), exclude() and get().
Basic lookups keyword arguments take the form field__lookuptype=value. (That’s a double-underscore).
For example:
>>> Entry.objects.filter(pub_date__lte='2006-01-01')
translates (roughly) into the following SQL:
SELECT * FROM blog_entry WHERE pub_date <= '2006-01-01';
How this is possible
Python has the ability to define functions that accept arbitrary name-value arguments whose names and values are
evaluated at runtime. For more information, see Keyword Arguments in the official Python tutorial.
The field specified in a lookup has to be the name of a model field. There’s one exception though, in case of a
ForeignKey you can specify the field name suffixed with _id. In this case, the value parameter is expected to
contain the raw value of the foreign model’s primary key. For example:
>>> Entry.objects.filter(blog_id=4)
If you pass an invalid keyword argument, a lookup function will raise TypeError.
The database API supports about two dozen lookup types; a complete reference can be found in the field lookup
reference. To give you a taste of what’s available, here’s some of the more common lookups you’ll probably use:
exact An “exact” match. For example:
>>> Entry.objects.get(headline__exact="Cat bites dog")
Would generate SQL along these lines:
SELECT ... WHERE headline = 'Cat bites dog';
If you don’t provide a lookup type – that is, if your keyword argument doesn’t contain a double underscore –
the lookup type is assumed to be exact.
For example, the following two statements are equivalent:
>>> Blog.objects.get(id__exact=14) # Explicit form
>>> Blog.objects.get(id=14) # __exact is implied
This is for convenience, because exact lookups are the common case.
iexact A case-insensitive match. So, the query:
>>> Blog.objects.get(name__iexact="beatles blog")
Would match a Blog titled "Beatles Blog", "beatles blog", or even "BeAtlES blOG".
3.2. Models and databases 107](https://image.slidesharecdn.com/20160225-django-documentation-160225091707/85/Django-Documentation-111-320.jpg)


![Django Documentation, Release 1.9.3.dev20160224120324
Filters can reference fields on the model
In the examples given so far, we have constructed filters that compare the value of a model field with a constant. But
what if you want to compare the value of a model field with another field on the same model?
Django provides F expressions to allow such comparisons. Instances of F() act as a reference to a model field
within a query. These references can then be used in query filters to compare the values of two different fields on the
same model instance.
For example, to find a list of all blog entries that have had more comments than pingbacks, we construct an F() object
to reference the pingback count, and use that F() object in the query:
>>> from django.db.models import F
>>> Entry.objects.filter(n_comments__gt=F('n_pingbacks'))
Django supports the use of addition, subtraction, multiplication, division, modulo, and power arithmetic with F()
objects, both with constants and with other F() objects. To find all the blog entries with more than twice as many
comments as pingbacks, we modify the query:
>>> Entry.objects.filter(n_comments__gt=F('n_pingbacks') * 2)
To find all the entries where the rating of the entry is less than the sum of the pingback count and comment count, we
would issue the query:
>>> Entry.objects.filter(rating__lt=F('n_comments') + F('n_pingbacks'))
You can also use the double underscore notation to span relationships in an F() object. An F() object with a double
underscore will introduce any joins needed to access the related object. For example, to retrieve all the entries where
the author’s name is the same as the blog name, we could issue the query:
>>> Entry.objects.filter(authors__name=F('blog__name'))
For date and date/time fields, you can add or subtract a timedelta object. The following would return all entries
that were modified more than 3 days after they were published:
>>> from datetime import timedelta
>>> Entry.objects.filter(mod_date__gt=F('pub_date') + timedelta(days=3))
The F() objects support bitwise operations by .bitand() and .bitor(), for example:
>>> F('somefield').bitand(16)
The pk lookup shortcut
For convenience, Django provides a pk lookup shortcut, which stands for “primary key”.
In the example Blog model, the primary key is the id field, so these three statements are equivalent:
>>> Blog.objects.get(id__exact=14) # Explicit form
>>> Blog.objects.get(id=14) # __exact is implied
>>> Blog.objects.get(pk=14) # pk implies id__exact
The use of pk isn’t limited to __exact queries – any query term can be combined with pk to perform a query on the
primary key of a model:
# Get blogs entries with id 1, 4 and 7
>>> Blog.objects.filter(pk__in=[1,4,7])
110 Chapter 3. Using Django](https://image.slidesharecdn.com/20160225-django-documentation-160225091707/85/Django-Documentation-114-320.jpg)
![Django Documentation, Release 1.9.3.dev20160224120324
# Get all blog entries with id > 14
>>> Blog.objects.filter(pk__gt=14)
pk lookups also work across joins. For example, these three statements are equivalent:
>>> Entry.objects.filter(blog__id__exact=3) # Explicit form
>>> Entry.objects.filter(blog__id=3) # __exact is implied
>>> Entry.objects.filter(blog__pk=3) # __pk implies __id__exact
Escaping percent signs and underscores in LIKE statements
The field lookups that equate to LIKE SQL statements (iexact, contains, icontains, startswith,
istartswith, endswith and iendswith) will automatically escape the two special characters used in LIKE
statements – the percent sign and the underscore. (In a LIKE statement, the percent sign signifies a multiple-character
wildcard and the underscore signifies a single-character wildcard.)
This means things should work intuitively, so the abstraction doesn’t leak. For example, to retrieve all the entries that
contain a percent sign, just use the percent sign as any other character:
>>> Entry.objects.filter(headline__contains='%')
Django takes care of the quoting for you; the resulting SQL will look something like this:
SELECT ... WHERE headline LIKE '%%%';
Same goes for underscores. Both percentage signs and underscores are handled for you transparently.
Caching and QuerySets
Each QuerySet contains a cache to minimize database access. Understanding how it works will allow you to write
the most efficient code.
In a newly created QuerySet, the cache is empty. The first time a QuerySet is evaluated – and, hence, a database
query happens – Django saves the query results in the QuerySet’s cache and returns the results that have been
explicitly requested (e.g., the next element, if the QuerySet is being iterated over). Subsequent evaluations of the
QuerySet reuse the cached results.
Keep this caching behavior in mind, because it may bite you if you don’t use your QuerySets correctly. For example,
the following will create two QuerySets, evaluate them, and throw them away:
>>> print([e.headline for e in Entry.objects.all()])
>>> print([e.pub_date for e in Entry.objects.all()])
That means the same database query will be executed twice, effectively doubling your database load. Also, there’s
a possibility the two lists may not include the same database records, because an Entry may have been added or
deleted in the split second between the two requests.
To avoid this problem, simply save the QuerySet and reuse it:
>>> queryset = Entry.objects.all()
>>> print([p.headline for p in queryset]) # Evaluate the query set.
>>> print([p.pub_date for p in queryset]) # Re-use the cache from the evaluation.
When QuerySets are not cached Querysets do not always cache their results. When evaluating only part of the
queryset, the cache is checked, but if it is not populated then the items returned by the subsequent query are not cached.
Specifically, this means that limiting the queryset using an array slice or an index will not populate the cache.
3.2. Models and databases 111](https://image.slidesharecdn.com/20160225-django-documentation-160225091707/85/Django-Documentation-115-320.jpg)
![Django Documentation, Release 1.9.3.dev20160224120324
For example, repeatedly getting a certain index in a queryset object will query the database each time:
>>> queryset = Entry.objects.all()
>>> print queryset[5] # Queries the database
>>> print queryset[5] # Queries the database again
However, if the entire queryset has already been evaluated, the cache will be checked instead:
>>> queryset = Entry.objects.all()
>>> [entry for entry in queryset] # Queries the database
>>> print queryset[5] # Uses cache
>>> print queryset[5] # Uses cache
Here are some examples of other actions that will result in the entire queryset being evaluated and therefore populate
the cache:
>>> [entry for entry in queryset]
>>> bool(queryset)
>>> entry in queryset
>>> list(queryset)
Note: Simply printing the queryset will not populate the cache. This is because the call to __repr__() only returns
a slice of the entire queryset.
Complex lookups with Q objects
Keyword argument queries – in filter(), etc. – are “AND”ed together. If you need to execute more complex
queries (for example, queries with OR statements), you can use Q objects.
A Q object (django.db.models.Q) is an object used to encapsulate a collection of keyword arguments. These
keyword arguments are specified as in “Field lookups” above.
For example, this Q object encapsulates a single LIKE query:
from django.db.models import Q
Q(question__startswith='What')
Q objects can be combined using the & and | operators. When an operator is used on two Q objects, it yields a new Q
object.
For example, this statement yields a single Q object that represents the “OR” of two "question__startswith"
queries:
Q(question__startswith='Who') | Q(question__startswith='What')
This is equivalent to the following SQL WHERE clause:
WHERE question LIKE 'Who%' OR question LIKE 'What%'
You can compose statements of arbitrary complexity by combining Q objects with the & and | operators and use
parenthetical grouping. Also, Q objects can be negated using the ~ operator, allowing for combined lookups that
combine both a normal query and a negated (NOT) query:
Q(question__startswith='Who') | ~Q(pub_date__year=2005)
Each lookup function that takes keyword-arguments (e.g. filter(), exclude(), get()) can also be passed
one or more Q objects as positional (not-named) arguments. If you provide multiple Q object arguments to a lookup
function, the arguments will be “AND”ed together. For example:
112 Chapter 3. Using Django](https://image.slidesharecdn.com/20160225-django-documentation-160225091707/85/Django-Documentation-116-320.jpg)

![Django Documentation, Release 1.9.3.dev20160224120324
For example, this deletes all Entry objects with a pub_date year of 2005:
>>> Entry.objects.filter(pub_date__year=2005).delete()
(5, {'webapp.Entry': 5})
Keep in mind that this will, whenever possible, be executed purely in SQL, and so the delete() methods of in-
dividual object instances will not necessarily be called during the process. If you’ve provided a custom delete()
method on a model class and want to ensure that it is called, you will need to “manually” delete instances of that model
(e.g., by iterating over a QuerySet and calling delete() on each object individually) rather than using the bulk
delete() method of a QuerySet.
The return value describing the number of objects deleted was added.
When Django deletes an object, by default it emulates the behavior of the SQL constraint ON DELETE CASCADE –
in other words, any objects which had foreign keys pointing at the object to be deleted will be deleted along with it.
For example:
b = Blog.objects.get(pk=1)
# This will delete the Blog and all of its Entry objects.
b.delete()
This cascade behavior is customizable via the on_delete argument to the ForeignKey.
Note that delete() is the only QuerySet method that is not exposed on a Manager itself. This is a safety
mechanism to prevent you from accidentally requesting Entry.objects.delete(), and deleting all the entries.
If you do want to delete all the objects, then you have to explicitly request a complete query set:
Entry.objects.all().delete()
Copying model instances
Although there is no built-in method for copying model instances, it is possible to easily create new instance with all
fields’ values copied. In the simplest case, you can just set pk to None. Using our blog example:
blog = Blog(name='My blog', tagline='Blogging is easy')
blog.save() # blog.pk == 1
blog.pk = None
blog.save() # blog.pk == 2
Things get more complicated if you use inheritance. Consider a subclass of Blog:
class ThemeBlog(Blog):
theme = models.CharField(max_length=200)
django_blog = ThemeBlog(name='Django', tagline='Django is easy', theme='python')
django_blog.save() # django_blog.pk == 3
Due to how inheritance works, you have to set both pk and id to None:
django_blog.pk = None
django_blog.id = None
django_blog.save() # django_blog.pk == 4
This process does not copy related objects. If you want to copy relations, you have to write a little bit more code. In
our example, Entry has a many to many field to Author:
entry = Entry.objects.all()[0] # some previous entry
old_authors = entry.authors.all()
114 Chapter 3. Using Django](https://image.slidesharecdn.com/20160225-django-documentation-160225091707/85/Django-Documentation-118-320.jpg)


![Django Documentation, Release 1.9.3.dev20160224120324
To assign the members of a related set in one fell swoop, just assign to it from any iterable object. The iterable can
contain object instances, or just a list of primary key values. For example:
b = Blog.objects.get(id=1)
b.entry_set = [e1, e2]
In this example, e1 and e2 can be full Entry instances, or integer primary key values.
If the clear() method is available, any pre-existing objects will be removed from the entry_set before all
objects in the iterable (in this case, a list) are added to the set. If the clear() method is not available, all objects in
the iterable will be added without removing any existing elements.
Each “reverse” operation described in this section has an immediate effect on the database. Every addition, creation
and deletion is immediately and automatically saved to the database.
Many-to-many relationships
Both ends of a many-to-many relationship get automatic API access to the other end. The API works just as a
“backward” one-to-many relationship, above.
The only difference is in the attribute naming: The model that defines the ManyToManyField uses the attribute
name of that field itself, whereas the “reverse” model uses the lowercased model name of the original model, plus
’_set’ (just like reverse one-to-many relationships).
An example makes this easier to understand:
e = Entry.objects.get(id=3)
e.authors.all() # Returns all Author objects for this Entry.
e.authors.count()
e.authors.filter(name__contains='John')
a = Author.objects.get(id=5)
a.entry_set.all() # Returns all Entry objects for this Author.
Like ForeignKey, ManyToManyField can specify related_name. In the above example, if the
ManyToManyField in Entry had specified related_name=’entries’, then each Author instance would
have an entries attribute instead of entry_set.
One-to-one relationships
One-to-one relationships are very similar to many-to-one relationships. If you define a OneToOneField on your
model, instances of that model will have access to the related object via a simple attribute of the model.
For example:
class EntryDetail(models.Model):
entry = models.OneToOneField(Entry, on_delete=models.CASCADE)
details = models.TextField()
ed = EntryDetail.objects.get(id=2)
ed.entry # Returns the related Entry object.
The difference comes in “reverse” queries. The related model in a one-to-one relationship also has access to a
Manager object, but that Manager represents a single object, rather than a collection of objects:
e = Entry.objects.get(id=2)
e.entrydetail # returns the related EntryDetail object
118 Chapter 3. Using Django](https://image.slidesharecdn.com/20160225-django-documentation-160225091707/85/Django-Documentation-122-320.jpg)


![Django Documentation, Release 1.9.3.dev20160224120324
>>> pubs
[<Publisher BaloneyPress>, <Publisher SalamiPress>, ...]
>>> pubs[0].num_books
73
# The top 5 publishers, in order by number of books.
>>> pubs = Publisher.objects.annotate(num_books=Count('book')).order_by('-num_books')[:5]
>>> pubs[0].num_books
1323
Generating aggregates over a QuerySet
Django provides two ways to generate aggregates. The first way is to generate summary values over an entire
QuerySet. For example, say you wanted to calculate the average price of all books available for sale. Django’s
query syntax provides a means for describing the set of all books:
>>> Book.objects.all()
What we need is a way to calculate summary values over the objects that belong to this QuerySet. This is done by
appending an aggregate() clause onto the QuerySet:
>>> from django.db.models import Avg
>>> Book.objects.all().aggregate(Avg('price'))
{'price__avg': 34.35}
The all() is redundant in this example, so this could be simplified to:
>>> Book.objects.aggregate(Avg('price'))
{'price__avg': 34.35}
The argument to the aggregate() clause describes the aggregate value that we want to compute - in this case, the
average of the price field on the Book model. A list of the aggregate functions that are available can be found in the
QuerySet reference.
aggregate() is a terminal clause for a QuerySet that, when invoked, returns a dictionary of name-value pairs.
The name is an identifier for the aggregate value; the value is the computed aggregate. The name is automatically
generated from the name of the field and the aggregate function. If you want to manually specify a name for the
aggregate value, you can do so by providing that name when you specify the aggregate clause:
>>> Book.objects.aggregate(average_price=Avg('price'))
{'average_price': 34.35}
If you want to generate more than one aggregate, you just add another argument to the aggregate() clause. So, if
we also wanted to know the maximum and minimum price of all books, we would issue the query:
>>> from django.db.models import Avg, Max, Min
>>> Book.objects.aggregate(Avg('price'), Max('price'), Min('price'))
{'price__avg': 34.35, 'price__max': Decimal('81.20'), 'price__min': Decimal('12.99')}
Generating aggregates for each item in a QuerySet
The second way to generate summary values is to generate an independent summary for each object in a QuerySet.
For example, if you are retrieving a list of books, you may want to know how many authors contributed to each book.
Each Book has a many-to-many relationship with the Author; we want to summarize this relationship for each book
in the QuerySet.
3.2. Models and databases 121](https://image.slidesharecdn.com/20160225-django-documentation-160225091707/85/Django-Documentation-125-320.jpg)
![Django Documentation, Release 1.9.3.dev20160224120324
Per-object summaries can be generated using the annotate() clause. When an annotate() clause is specified,
each object in the QuerySet will be annotated with the specified values.
The syntax for these annotations is identical to that used for the aggregate() clause. Each argument to
annotate() describes an aggregate that is to be calculated. For example, to annotate books with the number of
authors:
# Build an annotated queryset
>>> from django.db.models import Count
>>> q = Book.objects.annotate(Count('authors'))
# Interrogate the first object in the queryset
>>> q[0]
<Book: The Definitive Guide to Django>
>>> q[0].authors__count
2
# Interrogate the second object in the queryset
>>> q[1]
<Book: Practical Django Projects>
>>> q[1].authors__count
1
As with aggregate(), the name for the annotation is automatically derived from the name of the aggregate function
and the name of the field being aggregated. You can override this default name by providing an alias when you specify
the annotation:
>>> q = Book.objects.annotate(num_authors=Count('authors'))
>>> q[0].num_authors
2
>>> q[1].num_authors
1
Unlike aggregate(), annotate() is not a terminal clause. The output of the annotate() clause is
a QuerySet; this QuerySet can be modified using any other QuerySet operation, including filter(),
order_by(), or even additional calls to annotate().
Combining multiple aggregations
Combining multiple aggregations with annotate() will yield the wrong results because joins are used instead of
subqueries:
>>> Book.objects.first().authors.count()
2
>>> Book.objects.first().chapters.count()
3
>>> q = Book.objects.annotate(Count('authors'), Count('chapters'))
>>> q[0].authors__count
6
>>> q[0].chapters__count
6
For most aggregates, there is no way to avoid this problem, however, the Count aggregate has a distinct parameter
that may help:
>>> q = Book.objects.annotate(Count('authors', distinct=True), Count('chapters', distinct=True))
>>> q[0].authors__count
2
>>> q[0].chapters__count
3
122 Chapter 3. Using Django](https://image.slidesharecdn.com/20160225-django-documentation-160225091707/85/Django-Documentation-126-320.jpg)


![Django Documentation, Release 1.9.3.dev20160224120324
result for each result in the original QuerySet, the original results are grouped according to the unique combinations
of the fields specified in the values() clause. An annotation is then provided for each unique group; the annotation
is computed over all members of the group.
For example, consider an author query that attempts to find out the average rating of books written by each author:
>>> Author.objects.annotate(average_rating=Avg('book__rating'))
This will return one result for each author in the database, annotated with their average book rating.
However, the result will be slightly different if you use a values() clause:
>>> Author.objects.values('name').annotate(average_rating=Avg('book__rating'))
In this example, the authors will be grouped by name, so you will only get an annotated result for each unique author
name. This means if you have two authors with the same name, their results will be merged into a single result in the
output of the query; the average will be computed as the average over the books written by both authors.
Order of annotate() and values() clauses As with the filter() clause, the order in which annotate()
and values() clauses are applied to a query is significant. If the values() clause precedes the annotate(),
the annotation will be computed using the grouping described by the values() clause.
However, if the annotate() clause precedes the values() clause, the annotations will be generated over the
entire query set. In this case, the values() clause only constrains the fields that are generated on output.
For example, if we reverse the order of the values() and annotate() clause from our previous example:
>>> Author.objects.annotate(average_rating=Avg('book__rating')).values('name', 'average_rating')
This will now yield one unique result for each author; however, only the author’s name and the average_rating
annotation will be returned in the output data.
You should also note that average_rating has been explicitly included in the list of values to be returned. This is
required because of the ordering of the values() and annotate() clause.
If the values() clause precedes the annotate() clause, any annotations will be automatically added to the result
set. However, if the values() clause is applied after the annotate() clause, you need to explicitly include the
aggregate column.
Interaction with default ordering or order_by() Fields that are mentioned in the order_by() part of a
queryset (or which are used in the default ordering on a model) are used when selecting the output data, even if they
are not otherwise specified in the values() call. These extra fields are used to group “like” results together and they
can make otherwise identical result rows appear to be separate. This shows up, particularly, when counting things.
By way of example, suppose you have a model like this:
from django.db import models
class Item(models.Model):
name = models.CharField(max_length=10)
data = models.IntegerField()
class Meta:
ordering = ["name"]
The important part here is the default ordering on the name field. If you want to count how many times each distinct
data value appears, you might try this:
126 Chapter 3. Using Django](https://image.slidesharecdn.com/20160225-django-documentation-160225091707/85/Django-Documentation-130-320.jpg)

![Django Documentation, Release 1.9.3.dev20160224120324
#...
people = models.Manager()
Using this example model, Person.objects will generate an AttributeError exception, but
Person.people.all() will provide a list of all Person objects.
Custom managers
You can use a custom Manager in a particular model by extending the base Manager class and instantiating your
custom Manager in your model.
There are two reasons you might want to customize a Manager: to add extra Manager methods, and/or to modify
the initial QuerySet the Manager returns.
Adding extra manager methods
Adding extra Manager methods is the preferred way to add “table-level” functionality to your models. (For “row-
level” functionality – i.e., functions that act on a single instance of a model object – use Model methods, not custom
Manager methods.)
A custom Manager method can return anything you want. It doesn’t have to return a QuerySet.
For example, this custom Manager offers a method with_counts(), which returns a list of all OpinionPoll
objects, each with an extra num_responses attribute that is the result of an aggregate query:
from django.db import models
class PollManager(models.Manager):
def with_counts(self):
from django.db import connection
cursor = connection.cursor()
cursor.execute("""
SELECT p.id, p.question, p.poll_date, COUNT(*)
FROM polls_opinionpoll p, polls_response r
WHERE p.id = r.poll_id
GROUP BY p.id, p.question, p.poll_date
ORDER BY p.poll_date DESC""")
result_list = []
for row in cursor.fetchall():
p = self.model(id=row[0], question=row[1], poll_date=row[2])
p.num_responses = row[3]
result_list.append(p)
return result_list
class OpinionPoll(models.Model):
question = models.CharField(max_length=200)
poll_date = models.DateField()
objects = PollManager()
class Response(models.Model):
poll = models.ForeignKey(OpinionPoll, on_delete=models.CASCADE)
person_name = models.CharField(max_length=50)
response = models.TextField()
With this example, you’d use OpinionPoll.objects.with_counts() to return that list of OpinionPoll
objects with num_responses attributes.
128 Chapter 3. Using Django](https://image.slidesharecdn.com/20160225-django-documentation-160225091707/85/Django-Documentation-132-320.jpg)


![Django Documentation, Release 1.9.3.dev20160224120324
>>> first_person = Person.objects.raw('SELECT * FROM myapp_person')[0]
However, the indexing and slicing are not performed at the database level. If you have a large number of Person
objects in your database, it is more efficient to limit the query at the SQL level:
>>> first_person = Person.objects.raw('SELECT * FROM myapp_person LIMIT 1')[0]
Deferring model fields
Fields may also be left out:
>>> people = Person.objects.raw('SELECT id, first_name FROM myapp_person')
The Person objects returned by this query will be deferred model instances (see defer()). This means that the
fields that are omitted from the query will be loaded on demand. For example:
>>> for p in Person.objects.raw('SELECT id, first_name FROM myapp_person'):
... print(p.first_name, # This will be retrieved by the original query
... p.last_name) # This will be retrieved on demand
...
John Smith
Jane Jones
From outward appearances, this looks like the query has retrieved both the first name and last name. However, this
example actually issued 3 queries. Only the first names were retrieved by the raw() query – the last names were both
retrieved on demand when they were printed.
There is only one field that you can’t leave out - the primary key field. Django uses the primary key to identify model
instances, so it must always be included in a raw query. An InvalidQuery exception will be raised if you forget to
include the primary key.
Adding annotations
You can also execute queries containing fields that aren’t defined on the model. For example, we could use Post-
greSQL’s age() function to get a list of people with their ages calculated by the database:
>>> people = Person.objects.raw('SELECT *, age(birth_date) AS age FROM myapp_person')
>>> for p in people:
... print("%s is %s." % (p.first_name, p.age))
John is 37.
Jane is 42.
...
Passing parameters into raw()
If you need to perform parameterized queries, you can use the params argument to raw():
>>> lname = 'Doe'
>>> Person.objects.raw('SELECT * FROM myapp_person WHERE last_name = %s', [lname])
params is a list or dictionary of parameters. You’ll use %s placeholders in the query string for a list, or %(key)s
placeholders for a dictionary (where key is replaced by a dictionary key, of course), regardless of your database
engine. Such placeholders will be replaced with parameters from the params argument.
3.2. Models and databases 137](https://image.slidesharecdn.com/20160225-django-documentation-160225091707/85/Django-Documentation-141-320.jpg)
![Django Documentation, Release 1.9.3.dev20160224120324
Note: Dictionary params are not supported with the SQLite backend; with this backend, you must pass parameters as
a list.
Warning: Do not use string formatting on raw queries!
It’s tempting to write the above query as:
>>> query = 'SELECT * FROM myapp_person WHERE last_name = %s' % lname
>>> Person.objects.raw(query)
Don’t.
Using the params argument completely protects you from SQL injection attacks, a common exploit where at-
tackers inject arbitrary SQL into your database. If you use string interpolation, sooner or later you’ll fall victim to
SQL injection. As long as you remember to always use the params argument you’ll be protected.
Executing custom SQL directly
Sometimes even Manager.raw() isn’t quite enough: you might need to perform queries that don’t map cleanly to
models, or directly execute UPDATE, INSERT, or DELETE queries.
In these cases, you can always access the database directly, routing around the model layer entirely.
The object django.db.connection represents the default database connection. To use the database connec-
tion, call connection.cursor() to get a cursor object. Then, call cursor.execute(sql, [params]) to
execute the SQL and cursor.fetchone() or cursor.fetchall() to return the resulting rows.
For example:
from django.db import connection
def my_custom_sql(self):
cursor = connection.cursor()
cursor.execute("UPDATE bar SET foo = 1 WHERE baz = %s", [self.baz])
cursor.execute("SELECT foo FROM bar WHERE baz = %s", [self.baz])
row = cursor.fetchone()
return row
Note that if you want to include literal percent signs in the query, you have to double them in the case you are passing
parameters:
cursor.execute("SELECT foo FROM bar WHERE baz = '30%'")
cursor.execute("SELECT foo FROM bar WHERE baz = '30%%' AND id = %s", [self.id])
If you are using more than one database, you can use django.db.connections to obtain the connection (and
cursor) for a specific database. django.db.connections is a dictionary-like object that allows you to retrieve a
specific connection using its alias:
from django.db import connections
cursor = connections['my_db_alias'].cursor()
# Your code here...
By default, the Python DB API will return results without their field names, which means you end up with a list
of values, rather than a dict. At a small performance and memory cost, you can return results as a dict by using
something like this:
138 Chapter 3. Using Django](https://image.slidesharecdn.com/20160225-django-documentation-160225091707/85/Django-Documentation-142-320.jpg)
![Django Documentation, Release 1.9.3.dev20160224120324
def dictfetchall(cursor):
"Return all rows from a cursor as a dict"
columns = [col[0] for col in cursor.description]
return [
dict(zip(columns, row))
for row in cursor.fetchall()
]
Another option is to use collections.namedtuple() from the Python standard library. A namedtuple is a
tuple-like object that has fields accessible by attribute lookup; it’s also indexable and iterable. Results are immutable
and accessible by field names or indices, which might be useful:
from collections import namedtuple
def namedtuplefetchall(cursor):
"Return all rows from a cursor as a namedtuple"
desc = cursor.description
nt_result = namedtuple('Result', [col[0] for col in desc])
return [nt_result(*row) for row in cursor.fetchall()]
Here is an example of the difference between the three:
>>> cursor.execute("SELECT id, parent_id FROM test LIMIT 2");
>>> cursor.fetchall()
((54360982, None), (54360880, None))
>>> cursor.execute("SELECT id, parent_id FROM test LIMIT 2");
>>> dictfetchall(cursor)
[{'parent_id': None, 'id': 54360982}, {'parent_id': None, 'id': 54360880}]
>>> cursor.execute("SELECT id, parent_id FROM test LIMIT 2");
>>> results = namedtuplefetchall(cursor)
>>> results
[Result(id=54360982, parent_id=None), Result(id=54360880, parent_id=None)]
>>> results[0].id
54360982
>>> results[0][0]
54360982
Connections and cursors
connection and cursor mostly implement the standard Python DB-API described in PEP 249 — except when it
comes to transaction handling.
If you’re not familiar with the Python DB-API, note that the SQL statement in cursor.execute() uses placehold-
ers, "%s", rather than adding parameters directly within the SQL. If you use this technique, the underlying database
library will automatically escape your parameters as necessary.
Also note that Django expects the "%s" placeholder, not the "?" placeholder, which is used by the SQLite Python
bindings. This is for the sake of consistency and sanity.
Using a cursor as a context manager:
with connection.cursor() as c:
c.execute(...)
is equivalent to:
3.2. Models and databases 139](https://image.slidesharecdn.com/20160225-django-documentation-160225091707/85/Django-Documentation-143-320.jpg)


![Django Documentation, Release 1.9.3.dev20160224120324
return None
def allow_relation(self, obj1, obj2, **hints):
"""
Allow relations if a model in the auth app is involved.
"""
if obj1._meta.app_label == 'auth' or
obj2._meta.app_label == 'auth':
return True
return None
def allow_migrate(self, db, app_label, model_name=None, **hints):
"""
Make sure the auth app only appears in the 'auth_db'
database.
"""
if app_label == 'auth':
return db == 'auth_db'
return None
And we also want a router that sends all other apps to the primary/replica configuration, and randomly chooses a
replica to read from:
import random
class PrimaryReplicaRouter(object):
def db_for_read(self, model, **hints):
"""
Reads go to a randomly-chosen replica.
"""
return random.choice(['replica1', 'replica2'])
def db_for_write(self, model, **hints):
"""
Writes always go to primary.
"""
return 'primary'
def allow_relation(self, obj1, obj2, **hints):
"""
Relations between objects are allowed if both objects are
in the primary/replica pool.
"""
db_list = ('primary', 'replica1', 'replica2')
if obj1._state.db in db_list and obj2._state.db in db_list:
return True
return None
def allow_migrate(self, db, app_label, model_name=None, **hints):
"""
All non-auth models end up in this pool.
"""
return True
Finally, in the settings file, we add the following (substituting path.to. with the actual Python path to the module(s)
where the routers are defined):
DATABASE_ROUTERS = ['path.to.AuthRouter', 'path.to.PrimaryReplicaRouter']
3.2. Models and databases 153](https://image.slidesharecdn.com/20160225-django-documentation-160225091707/85/Django-Documentation-157-320.jpg)


![Django Documentation, Release 1.9.3.dev20160224120324
def formfield_for_foreignkey(self, db_field, request=None, **kwargs):
# Tell Django to populate ForeignKey widgets using a query
# on the 'other' database.
return super(MultiDBModelAdmin, self).formfield_for_foreignkey(db_field, request=request, usi
def formfield_for_manytomany(self, db_field, request=None, **kwargs):
# Tell Django to populate ManyToMany widgets using a query
# on the 'other' database.
return super(MultiDBModelAdmin, self).formfield_for_manytomany(db_field, request=request, usi
The implementation provided here implements a multi-database strategy where all objects of a given type are stored
on a specific database (e.g., all User objects are in the other database). If your usage of multiple databases is more
complex, your ModelAdmin will need to reflect that strategy.
Inlines can be handled in a similar fashion. They require three customized methods:
class MultiDBTabularInline(admin.TabularInline):
using = 'other'
def get_queryset(self, request):
# Tell Django to look for inline objects on the 'other' database.
return super(MultiDBTabularInline, self).get_queryset(request).using(self.using)
def formfield_for_foreignkey(self, db_field, request=None, **kwargs):
# Tell Django to populate ForeignKey widgets using a query
# on the 'other' database.
return super(MultiDBTabularInline, self).formfield_for_foreignkey(db_field, request=request,
def formfield_for_manytomany(self, db_field, request=None, **kwargs):
# Tell Django to populate ManyToMany widgets using a query
# on the 'other' database.
return super(MultiDBTabularInline, self).formfield_for_manytomany(db_field, request=request,
Once you’ve written your model admin definitions, they can be registered with any Admin instance:
from django.contrib import admin
# Specialize the multi-db admin objects for use with specific models.
class BookInline(MultiDBTabularInline):
model = Book
class PublisherAdmin(MultiDBModelAdmin):
inlines = [BookInline]
admin.site.register(Author, MultiDBModelAdmin)
admin.site.register(Publisher, PublisherAdmin)
othersite = admin.AdminSite('othersite')
othersite.register(Publisher, MultiDBModelAdmin)
This example sets up two admin sites. On the first site, the Author and Publisher objects are exposed;
Publisher objects have an tabular inline showing books published by that publisher. The second site exposes
just publishers, without the inlines.
3.2. Models and databases 157](https://image.slidesharecdn.com/20160225-django-documentation-160225091707/85/Django-Documentation-161-320.jpg)
![Django Documentation, Release 1.9.3.dev20160224120324
Using raw cursors with multiple databases
If you are using more than one database you can use django.db.connections to obtain the connection (and
cursor) for a specific database. django.db.connections is a dictionary-like object that allows you to retrieve a
specific connection using its alias:
from django.db import connections
cursor = connections['my_db_alias'].cursor()
Limitations of multiple databases
Cross-database relations
Django doesn’t currently provide any support for foreign key or many-to-many relationships spanning multiple
databases. If you have used a router to partition models to different databases, any foreign key and many-to-many
relationships defined by those models must be internal to a single database.
This is because of referential integrity. In order to maintain a relationship between two objects, Django needs to know
that the primary key of the related object is valid. If the primary key is stored on a separate database, it’s not possible
to easily evaluate the validity of a primary key.
If you’re using Postgres, Oracle, or MySQL with InnoDB, this is enforced at the database integrity level – database
level key constraints prevent the creation of relations that can’t be validated.
However, if you’re using SQLite or MySQL with MyISAM tables, there is no enforced referential integrity; as a
result, you may be able to ‘fake’ cross database foreign keys. However, this configuration is not officially supported
by Django.
Behavior of contrib apps
Several contrib apps include models, and some apps depend on others. Since cross-database relationships are impos-
sible, this creates some restrictions on how you can split these models across databases:
• each one of contenttypes.ContentType, sessions.Session and sites.Site can be stored in
any database, given a suitable router.
• auth models — User, Group and Permission — are linked together and linked to ContentType, so
they must be stored in the same database as ContentType.
• admin depends on auth, so their models must be in the same database as auth.
• flatpages and redirects depend on sites, so their models must be in the same database as sites.
In addition, some objects are automatically created just after migrate creates a table to hold them in a database:
• a default Site,
• a ContentType for each model (including those not stored in that database),
• three Permission for each model (including those not stored in that database).
For common setups with multiple databases, it isn’t useful to have these objects in more than one database. Common
setups include primary/replica and connecting to external databases. Therefore, it’s recommended to write a database
router that allows synchronizing these three models to only one database. Use the same approach for contrib and
third-party apps that don’t need their tables in multiple databases.
158 Chapter 3. Using Django](https://image.slidesharecdn.com/20160225-django-documentation-160225091707/85/Django-Documentation-162-320.jpg)


![Django Documentation, Release 1.9.3.dev20160224120324
Use QuerySet.update() and delete()
Rather than retrieve a load of objects, set some values, and save them individual, use a bulk SQL UPDATE statement,
via QuerySet.update(). Similarly, do bulk deletes where possible.
Note, however, that these bulk update methods cannot call the save() or delete() methods of individual instances,
which means that any custom behavior you have added for these methods will not be executed, including anything
driven from the normal database object signals.
Use foreign key values directly
If you only need a foreign key value, use the foreign key value that is already on the object you’ve got, rather than
getting the whole related object and taking its primary key. i.e. do:
entry.blog_id
instead of:
entry.blog.id
Don’t order results if you don’t care
Ordering is not free; each field to order by is an operation the database must perform. If a model has a default ordering
(Meta.ordering) and you don’t need it, remove it on a QuerySet by calling order_by() with no parameters.
Adding an index to your database may help to improve ordering performance.
Insert in bulk
When creating objects, where possible, use the bulk_create() method to reduce the number of SQL queries. For
example:
Entry.objects.bulk_create([
Entry(headline="Python 3.0 Released"),
Entry(headline="Python 3.1 Planned")
])
...is preferable to:
Entry.objects.create(headline="Python 3.0 Released")
Entry.objects.create(headline="Python 3.1 Planned")
Note that there are a number of caveats to this method, so make sure it’s appropriate for your use case.
This also applies to ManyToManyFields, so doing:
my_band.members.add(me, my_friend)
...is preferable to:
my_band.members.add(me)
my_band.members.add(my_friend)
...where Bands and Artists have a many-to-many relationship.
164 Chapter 3. Using Django](https://image.slidesharecdn.com/20160225-django-documentation-160225091707/85/Django-Documentation-168-320.jpg)
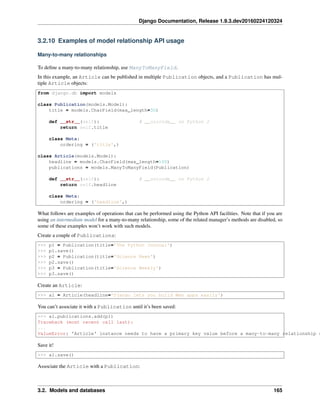
![Django Documentation, Release 1.9.3.dev20160224120324
>>> a1.publications.add(p1)
Create another Article, and set it to appear in both Publications:
>>> a2 = Article(headline='NASA uses Python')
>>> a2.save()
>>> a2.publications.add(p1, p2)
>>> a2.publications.add(p3)
Adding a second time is OK:
>>> a2.publications.add(p3)
Adding an object of the wrong type raises TypeError:
>>> a2.publications.add(a1)
Traceback (most recent call last):
...
TypeError: 'Publication' instance expected
Create and add a Publication to an Article in one step using create():
>>> new_publication = a2.publications.create(title='Highlights for Children')
Article objects have access to their related Publication objects:
>>> a1.publications.all()
[<Publication: The Python Journal>]
>>> a2.publications.all()
[<Publication: Highlights for Children>, <Publication: Science News>, <Publication: Science Weekly>,
Publication objects have access to their related Article objects:
>>> p2.article_set.all()
[<Article: NASA uses Python>]
>>> p1.article_set.all()
[<Article: Django lets you build Web apps easily>, <Article: NASA uses Python>]
>>> Publication.objects.get(id=4).article_set.all()
[<Article: NASA uses Python>]
Many-to-many relationships can be queried using lookups across relationships:
>>> Article.objects.filter(publications__id=1)
[<Article: Django lets you build Web apps easily>, <Article: NASA uses Python>]
>>> Article.objects.filter(publications__pk=1)
[<Article: Django lets you build Web apps easily>, <Article: NASA uses Python>]
>>> Article.objects.filter(publications=1)
[<Article: Django lets you build Web apps easily>, <Article: NASA uses Python>]
>>> Article.objects.filter(publications=p1)
[<Article: Django lets you build Web apps easily>, <Article: NASA uses Python>]
>>> Article.objects.filter(publications__title__startswith="Science")
[<Article: NASA uses Python>, <Article: NASA uses Python>]
>>> Article.objects.filter(publications__title__startswith="Science").distinct()
[<Article: NASA uses Python>]
The count() function respects distinct() as well:
166 Chapter 3. Using Django](https://image.slidesharecdn.com/20160225-django-documentation-160225091707/85/Django-Documentation-170-320.jpg)
![Django Documentation, Release 1.9.3.dev20160224120324
>>> Article.objects.filter(publications__title__startswith="Science").count()
2
>>> Article.objects.filter(publications__title__startswith="Science").distinct().count()
1
>>> Article.objects.filter(publications__in=[1,2]).distinct()
[<Article: Django lets you build Web apps easily>, <Article: NASA uses Python>]
>>> Article.objects.filter(publications__in=[p1,p2]).distinct()
[<Article: Django lets you build Web apps easily>, <Article: NASA uses Python>]
Reverse m2m queries are supported (i.e., starting at the table that doesn’t have a ManyToManyField):
>>> Publication.objects.filter(id=1)
[<Publication: The Python Journal>]
>>> Publication.objects.filter(pk=1)
[<Publication: The Python Journal>]
>>> Publication.objects.filter(article__headline__startswith="NASA")
[<Publication: Highlights for Children>, <Publication: Science News>, <Publication: Science Weekly>,
>>> Publication.objects.filter(article__id=1)
[<Publication: The Python Journal>]
>>> Publication.objects.filter(article__pk=1)
[<Publication: The Python Journal>]
>>> Publication.objects.filter(article=1)
[<Publication: The Python Journal>]
>>> Publication.objects.filter(article=a1)
[<Publication: The Python Journal>]
>>> Publication.objects.filter(article__in=[1,2]).distinct()
[<Publication: Highlights for Children>, <Publication: Science News>, <Publication: Science Weekly>,
>>> Publication.objects.filter(article__in=[a1,a2]).distinct()
[<Publication: Highlights for Children>, <Publication: Science News>, <Publication: Science Weekly>,
Excluding a related item works as you would expect, too (although the SQL involved is a little complex):
>>> Article.objects.exclude(publications=p2)
[<Article: Django lets you build Web apps easily>]
If we delete a Publication, its Articles won’t be able to access it:
>>> p1.delete()
>>> Publication.objects.all()
[<Publication: Highlights for Children>, <Publication: Science News>, <Publication: Science Weekly>]
>>> a1 = Article.objects.get(pk=1)
>>> a1.publications.all()
[]
If we delete an Article, its Publications won’t be able to access it:
>>> a2.delete()
>>> Article.objects.all()
[<Article: Django lets you build Web apps easily>]
>>> p2.article_set.all()
[]
Adding via the ‘other’ end of an m2m:
3.2. Models and databases 167](https://image.slidesharecdn.com/20160225-django-documentation-160225091707/85/Django-Documentation-171-320.jpg)
![Django Documentation, Release 1.9.3.dev20160224120324
>>> a4 = Article(headline='NASA finds intelligent life on Earth')
>>> a4.save()
>>> p2.article_set.add(a4)
>>> p2.article_set.all()
[<Article: NASA finds intelligent life on Earth>]
>>> a4.publications.all()
[<Publication: Science News>]
Adding via the other end using keywords:
>>> new_article = p2.article_set.create(headline='Oxygen-free diet works wonders')
>>> p2.article_set.all()
[<Article: NASA finds intelligent life on Earth>, <Article: Oxygen-free diet works wonders>]
>>> a5 = p2.article_set.all()[1]
>>> a5.publications.all()
[<Publication: Science News>]
Removing Publication from an Article:
>>> a4.publications.remove(p2)
>>> p2.article_set.all()
[<Article: Oxygen-free diet works wonders>]
>>> a4.publications.all()
[]
And from the other end:
>>> p2.article_set.remove(a5)
>>> p2.article_set.all()
[]
>>> a5.publications.all()
[]
Relation sets can be assigned. Assignment clears any existing set members:
>>> a4.publications.all()
[<Publication: Science News>]
>>> a4.publications = [p3]
>>> a4.publications.all()
[<Publication: Science Weekly>]
Relation sets can be cleared:
>>> p2.article_set.clear()
>>> p2.article_set.all()
[]
And you can clear from the other end:
>>> p2.article_set.add(a4, a5)
>>> p2.article_set.all()
[<Article: NASA finds intelligent life on Earth>, <Article: Oxygen-free diet works wonders>]
>>> a4.publications.all()
[<Publication: Science News>, <Publication: Science Weekly>]
>>> a4.publications.clear()
>>> a4.publications.all()
[]
>>> p2.article_set.all()
[<Article: Oxygen-free diet works wonders>]
168 Chapter 3. Using Django](https://image.slidesharecdn.com/20160225-django-documentation-160225091707/85/Django-Documentation-172-320.jpg)
![Django Documentation, Release 1.9.3.dev20160224120324
Recreate the Article and Publication we have deleted:
>>> p1 = Publication(title='The Python Journal')
>>> p1.save()
>>> a2 = Article(headline='NASA uses Python')
>>> a2.save()
>>> a2.publications.add(p1, p2, p3)
Bulk delete some Publications - references to deleted publications should go:
>>> Publication.objects.filter(title__startswith='Science').delete()
>>> Publication.objects.all()
[<Publication: Highlights for Children>, <Publication: The Python Journal>]
>>> Article.objects.all()
[<Article: Django lets you build Web apps easily>, <Article: NASA finds intelligent life on Earth>, <
>>> a2.publications.all()
[<Publication: The Python Journal>]
Bulk delete some articles - references to deleted objects should go:
>>> q = Article.objects.filter(headline__startswith='Django')
>>> print(q)
[<Article: Django lets you build Web apps easily>]
>>> q.delete()
After the delete(), the QuerySet cache needs to be cleared, and the referenced objects should be gone:
>>> print(q)
[]
>>> p1.article_set.all()
[<Article: NASA uses Python>]
An alternate to calling clear() is to assign the empty set:
>>> p1.article_set = []
>>> p1.article_set.all()
[]
>>> a2.publications = [p1, new_publication]
>>> a2.publications.all()
[<Publication: Highlights for Children>, <Publication: The Python Journal>]
>>> a2.publications = []
>>> a2.publications.all()
[]
Many-to-one relationships
To define a many-to-one relationship, use ForeignKey:
from django.db import models
class Reporter(models.Model):
first_name = models.CharField(max_length=30)
last_name = models.CharField(max_length=30)
email = models.EmailField()
def __str__(self): # __unicode__ on Python 2
return "%s %s" % (self.first_name, self.last_name)
3.2. Models and databases 169](https://image.slidesharecdn.com/20160225-django-documentation-160225091707/85/Django-Documentation-173-320.jpg)
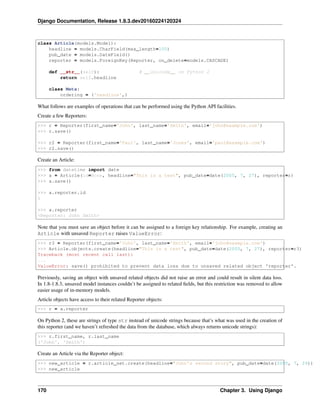
![Django Documentation, Release 1.9.3.dev20160224120324
<Article: John's second story>
>>> new_article.reporter
<Reporter: John Smith>
>>> new_article.reporter.id
1
Create a new article, and add it to the article set:
>>> new_article2 = Article(headline="Paul's story", pub_date=date(2006, 1, 17))
>>> r.article_set.add(new_article2)
>>> new_article2.reporter
<Reporter: John Smith>
>>> new_article2.reporter.id
1
>>> r.article_set.all()
[<Article: John's second story>, <Article: Paul's story>, <Article: This is a test>]
Add the same article to a different article set - check that it moves:
>>> r2.article_set.add(new_article2)
>>> new_article2.reporter.id
2
>>> new_article2.reporter
<Reporter: Paul Jones>
Adding an object of the wrong type raises TypeError:
>>> r.article_set.add(r2)
Traceback (most recent call last):
...
TypeError: 'Article' instance expected
>>> r.article_set.all()
[<Article: John's second story>, <Article: This is a test>]
>>> r2.article_set.all()
[<Article: Paul's story>]
>>> r.article_set.count()
2
>>> r2.article_set.count()
1
Note that in the last example the article has moved from John to Paul.
Related managers support field lookups as well. The API automatically follows relationships as far as you need. Use
double underscores to separate relationships. This works as many levels deep as you want. There’s no limit. For
example:
>>> r.article_set.filter(headline__startswith='This')
[<Article: This is a test>]
# Find all Articles for any Reporter whose first name is "John".
>>> Article.objects.filter(reporter__first_name='John')
[<Article: John's second story>, <Article: This is a test>]
Exact match is implied here:
>>> Article.objects.filter(reporter__first_name='John')
[<Article: John's second story>, <Article: This is a test>]
3.2. Models and databases 171](https://image.slidesharecdn.com/20160225-django-documentation-160225091707/85/Django-Documentation-175-320.jpg)
![Django Documentation, Release 1.9.3.dev20160224120324
Query twice over the related field. This translates to an AND condition in the WHERE clause:
>>> Article.objects.filter(reporter__first_name='John', reporter__last_name='Smith')
[<Article: John's second story>, <Article: This is a test>]
For the related lookup you can supply a primary key value or pass the related object explicitly:
>>> Article.objects.filter(reporter__pk=1)
[<Article: John's second story>, <Article: This is a test>]
>>> Article.objects.filter(reporter=1)
[<Article: John's second story>, <Article: This is a test>]
>>> Article.objects.filter(reporter=r)
[<Article: John's second story>, <Article: This is a test>]
>>> Article.objects.filter(reporter__in=[1,2]).distinct()
[<Article: John's second story>, <Article: Paul's story>, <Article: This is a test>]
>>> Article.objects.filter(reporter__in=[r,r2]).distinct()
[<Article: John's second story>, <Article: Paul's story>, <Article: This is a test>]
You can also use a queryset instead of a literal list of instances:
>>> Article.objects.filter(reporter__in=Reporter.objects.filter(first_name='John')).distinct()
[<Article: John's second story>, <Article: This is a test>]
Querying in the opposite direction:
>>> Reporter.objects.filter(article__pk=1)
[<Reporter: John Smith>]
>>> Reporter.objects.filter(article=1)
[<Reporter: John Smith>]
>>> Reporter.objects.filter(article=a)
[<Reporter: John Smith>]
>>> Reporter.objects.filter(article__headline__startswith='This')
[<Reporter: John Smith>, <Reporter: John Smith>, <Reporter: John Smith>]
>>> Reporter.objects.filter(article__headline__startswith='This').distinct()
[<Reporter: John Smith>]
Counting in the opposite direction works in conjunction with distinct():
>>> Reporter.objects.filter(article__headline__startswith='This').count()
3
>>> Reporter.objects.filter(article__headline__startswith='This').distinct().count()
1
Queries can go round in circles:
>>> Reporter.objects.filter(article__reporter__first_name__startswith='John')
[<Reporter: John Smith>, <Reporter: John Smith>, <Reporter: John Smith>, <Reporter: John Smith>]
>>> Reporter.objects.filter(article__reporter__first_name__startswith='John').distinct()
[<Reporter: John Smith>]
>>> Reporter.objects.filter(article__reporter=r).distinct()
[<Reporter: John Smith>]
If you delete a reporter, his articles will be deleted (assuming that the ForeignKey was defined with
django.db.models.ForeignKey.on_delete set to CASCADE, which is the default):
>>> Article.objects.all()
[<Article: John's second story>, <Article: Paul's story>, <Article: This is a test>]
>>> Reporter.objects.order_by('first_name')
[<Reporter: John Smith>, <Reporter: Paul Jones>]
172 Chapter 3. Using Django](https://image.slidesharecdn.com/20160225-django-documentation-160225091707/85/Django-Documentation-176-320.jpg)
![Django Documentation, Release 1.9.3.dev20160224120324
>>> r2.delete()
>>> Article.objects.all()
[<Article: John's second story>, <Article: This is a test>]
>>> Reporter.objects.order_by('first_name')
[<Reporter: John Smith>]
You can delete using a JOIN in the query:
>>> Reporter.objects.filter(article__headline__startswith='This').delete()
>>> Reporter.objects.all()
[]
>>> Article.objects.all()
[]
One-to-one relationships
To define a one-to-one relationship, use OneToOneField.
In this example, a Place optionally can be a Restaurant:
from django.db import models
class Place(models.Model):
name = models.CharField(max_length=50)
address = models.CharField(max_length=80)
def __str__(self): # __unicode__ on Python 2
return "%s the place" % self.name
class Restaurant(models.Model):
place = models.OneToOneField(
Place,
on_delete=models.CASCADE,
primary_key=True,
)
serves_hot_dogs = models.BooleanField(default=False)
serves_pizza = models.BooleanField(default=False)
def __str__(self): # __unicode__ on Python 2
return "%s the restaurant" % self.place.name
class Waiter(models.Model):
restaurant = models.ForeignKey(Restaurant, on_delete=models.CASCADE)
name = models.CharField(max_length=50)
def __str__(self): # __unicode__ on Python 2
return "%s the waiter at %s" % (self.name, self.restaurant)
What follows are examples of operations that can be performed using the Python API facilities.
Create a couple of Places:
>>> p1 = Place(name='Demon Dogs', address='944 W. Fullerton')
>>> p1.save()
>>> p2 = Place(name='Ace Hardware', address='1013 N. Ashland')
>>> p2.save()
Create a Restaurant. Pass the ID of the “parent” object as this object’s ID:
3.2. Models and databases 173](https://image.slidesharecdn.com/20160225-django-documentation-160225091707/85/Django-Documentation-177-320.jpg)

![Django Documentation, Release 1.9.3.dev20160224120324
>>> Restaurant.objects.all()
[<Restaurant: Demon Dogs the restaurant>, <Restaurant: Ace Hardware the restaurant>]
Place.objects.all() returns all Places, regardless of whether they have Restaurants:
>>> Place.objects.order_by('name')
[<Place: Ace Hardware the place>, <Place: Demon Dogs the place>]
You can query the models using lookups across relationships:
>>> Restaurant.objects.get(place=p1)
<Restaurant: Demon Dogs the restaurant>
>>> Restaurant.objects.get(place__pk=1)
<Restaurant: Demon Dogs the restaurant>
>>> Restaurant.objects.filter(place__name__startswith="Demon")
[<Restaurant: Demon Dogs the restaurant>]
>>> Restaurant.objects.exclude(place__address__contains="Ashland")
[<Restaurant: Demon Dogs the restaurant>]
This of course works in reverse:
>>> Place.objects.get(pk=1)
<Place: Demon Dogs the place>
>>> Place.objects.get(restaurant__place=p1)
<Place: Demon Dogs the place>
>>> Place.objects.get(restaurant=r)
<Place: Demon Dogs the place>
>>> Place.objects.get(restaurant__place__name__startswith="Demon")
<Place: Demon Dogs the place>
Add a Waiter to the Restaurant:
>>> w = r.waiter_set.create(name='Joe')
>>> w.save()
>>> w
<Waiter: Joe the waiter at Demon Dogs the restaurant>
Query the waiters:
>>> Waiter.objects.filter(restaurant__place=p1)
[<Waiter: Joe the waiter at Demon Dogs the restaurant>]
>>> Waiter.objects.filter(restaurant__place__name__startswith="Demon")
[<Waiter: Joe the waiter at Demon Dogs the restaurant>]
3.3 Handling HTTP requests
Information on handling HTTP requests in Django:
3.3.1 URL dispatcher
A clean, elegant URL scheme is an important detail in a high-quality Web application. Django lets you design URLs
however you want, with no framework limitations.
There’s no .php or .cgi required, and certainly none of that 0,2097,1-1-1928,00 nonsense.
See Cool URIs don’t change, by World Wide Web creator Tim Berners-Lee, for excellent arguments on why URLs
should be clean and usable.
3.3. Handling HTTP requests 175](https://image.slidesharecdn.com/20160225-django-documentation-160225091707/85/Django-Documentation-179-320.jpg)
![Django Documentation, Release 1.9.3.dev20160224120324
Overview
To design URLs for an app, you create a Python module informally called a URLconf (URL configuration). This
module is pure Python code and is a simple mapping between URL patterns (simple regular expressions) to Python
functions (your views).
This mapping can be as short or as long as needed. It can reference other mappings. And, because it’s pure Python
code, it can be constructed dynamically.
Django also provides a way to translate URLs according to the active language. See the internationalization documen-
tation for more information.
How Django processes a request
When a user requests a page from your Django-powered site, this is the algorithm the system follows to determine
which Python code to execute:
1. Django determines the root URLconf module to use. Ordinarily, this is the value of the ROOT_URLCONF
setting, but if the incoming HttpRequest object has a urlconf attribute (set by middleware request pro-
cessing), its value will be used in place of the ROOT_URLCONF setting.
2. Django loads that Python module and looks for the variable urlpatterns. This should be a Python list of
django.conf.urls.url() instances.
3. Django runs through each URL pattern, in order, and stops at the first one that matches the requested URL.
4. Once one of the regexes matches, Django imports and calls the given view, which is a simple Python function
(or a class-based view). The view gets passed the following arguments:
• An instance of HttpRequest.
• If the matched regular expression returned no named groups, then the matches from the regular expression
are provided as positional arguments.
• The keyword arguments are made up of any named groups matched by the regular expression, overridden
by any arguments specified in the optional kwargs argument to django.conf.urls.url().
5. If no regex matches, or if an exception is raised during any point in this process, Django invokes an appropriate
error-handling view. See Error handling below.
Example
Here’s a sample URLconf:
from django.conf.urls import url
from . import views
urlpatterns = [
url(r'^articles/2003/$', views.special_case_2003),
url(r'^articles/([0-9]{4})/$', views.year_archive),
url(r'^articles/([0-9]{4})/([0-9]{2})/$', views.month_archive),
url(r'^articles/([0-9]{4})/([0-9]{2})/([0-9]+)/$', views.article_detail),
]
Notes:
• To capture a value from the URL, just put parenthesis around it.
176 Chapter 3. Using Django](https://image.slidesharecdn.com/20160225-django-documentation-160225091707/85/Django-Documentation-180-320.jpg)
![Django Documentation, Release 1.9.3.dev20160224120324
• There’s no need to add a leading slash, because every URL has that. For example, it’s ^articles, not
^/articles.
• The ’r’ in front of each regular expression string is optional but recommended. It tells Python that a string is
“raw” – that nothing in the string should be escaped. See Dive Into Python’s explanation.
Example requests:
• A request to /articles/2005/03/ would match the third entry in the list. Django would call the function
views.month_archive(request, ’2005’, ’03’).
• /articles/2005/3/ would not match any URL patterns, because the third entry in the list requires two
digits for the month.
• /articles/2003/ would match the first pattern in the list, not the second one, because the patterns are
tested in order, and the first one is the first test to pass. Feel free to exploit the ordering to insert special cases
like this. Here, Django would call the function views.special_case_2003(request)
• /articles/2003 would not match any of these patterns, because each pattern requires that the URL end
with a slash.
• /articles/2003/03/03/ would match the final pattern. Django would call the function
views.article_detail(request, ’2003’, ’03’, ’03’).
Named groups
The above example used simple, non-named regular-expression groups (via parenthesis) to capture bits of the URL and
pass them as positional arguments to a view. In more advanced usage, it’s possible to use named regular-expression
groups to capture URL bits and pass them as keyword arguments to a view.
In Python regular expressions, the syntax for named regular-expression groups is (?P<name>pattern), where
name is the name of the group and pattern is some pattern to match.
Here’s the above example URLconf, rewritten to use named groups:
from django.conf.urls import url
from . import views
urlpatterns = [
url(r'^articles/2003/$', views.special_case_2003),
url(r'^articles/(?P<year>[0-9]{4})/$', views.year_archive),
url(r'^articles/(?P<year>[0-9]{4})/(?P<month>[0-9]{2})/$', views.month_archive),
url(r'^articles/(?P<year>[0-9]{4})/(?P<month>[0-9]{2})/(?P<day>[0-9]{2})/$', views.article_detail
]
This accomplishes exactly the same thing as the previous example, with one subtle difference: The captured values
are passed to view functions as keyword arguments rather than positional arguments. For example:
• A request to /articles/2005/03/ would call the function views.month_archive(request,
year=’2005’, month=’03’), instead of views.month_archive(request, ’2005’, ’03’).
• A request to /articles/2003/03/03/ would call the function views.article_detail(request,
year=’2003’, month=’03’, day=’03’).
In practice, this means your URLconfs are slightly more explicit and less prone to argument-order bugs – and you can
reorder the arguments in your views’ function definitions. Of course, these benefits come at the cost of brevity; some
developers find the named-group syntax ugly and too verbose.
3.3. Handling HTTP requests 177](https://image.slidesharecdn.com/20160225-django-documentation-160225091707/85/Django-Documentation-181-320.jpg)
![Django Documentation, Release 1.9.3.dev20160224120324
The matching/grouping algorithm
Here’s the algorithm the URLconf parser follows, with respect to named groups vs. non-named groups in a regular
expression:
1. If there are any named arguments, it will use those, ignoring non-named arguments.
2. Otherwise, it will pass all non-named arguments as positional arguments.
In both cases, any extra keyword arguments that have been given as per Passing extra options to view functions (below)
will also be passed to the view.
What the URLconf searches against
The URLconf searches against the requested URL, as a normal Python string. This does not include GET or POST
parameters, or the domain name.
For example, in a request to https://www.example.com/myapp/, the URLconf will look for myapp/.
In a request to https://www.example.com/myapp/?page=3, the URLconf will look for myapp/.
The URLconf doesn’t look at the request method. In other words, all request methods – POST, GET, HEAD, etc. – will
be routed to the same function for the same URL.
Captured arguments are always strings
Each captured argument is sent to the view as a plain Python string, regardless of what sort of match the regular
expression makes. For example, in this URLconf line:
url(r'^articles/(?P<year>[0-9]{4})/$', views.year_archive),
...the year argument passed to views.year_archive() will be a string, not an integer, even though the
[0-9]{4} will only match integer strings.
Specifying defaults for view arguments
A convenient trick is to specify default parameters for your views’ arguments. Here’s an example URLconf and view:
# URLconf
from django.conf.urls import url
from . import views
urlpatterns = [
url(r'^blog/$', views.page),
url(r'^blog/page(?P<num>[0-9]+)/$', views.page),
]
# View (in blog/views.py)
def page(request, num="1"):
# Output the appropriate page of blog entries, according to num.
...
In the above example, both URL patterns point to the same view – views.page – but the first pattern doesn’t capture
anything from the URL. If the first pattern matches, the page() function will use its default argument for num, "1".
If the second pattern matches, page() will use whatever num value was captured by the regex.
178 Chapter 3. Using Django](https://image.slidesharecdn.com/20160225-django-documentation-160225091707/85/Django-Documentation-182-320.jpg)
![Django Documentation, Release 1.9.3.dev20160224120324
Performance
Each regular expression in a urlpatterns is compiled the first time it’s accessed. This makes the system blazingly
fast.
Syntax of the urlpatterns variable
urlpatterns should be a Python list of url() instances.
Error handling
When Django can’t find a regex matching the requested URL, or when an exception is raised, Django will invoke an
error-handling view.
The views to use for these cases are specified by four variables. Their default values should suffice for most projects,
but further customization is possible by overriding their default values.
See the documentation on customizing error views for the full details.
Such values can be set in your root URLconf. Setting these variables in any other URLconf will have no effect.
Values must be callables, or strings representing the full Python import path to the view that should be called to handle
the error condition at hand.
The variables are:
• handler400 – See django.conf.urls.handler400.
• handler403 – See django.conf.urls.handler403.
• handler404 – See django.conf.urls.handler404.
• handler500 – See django.conf.urls.handler500.
Including other URLconfs
At any point, your urlpatterns can “include” other URLconf modules. This essentially “roots” a set of URLs
below other ones.
For example, here’s an excerpt of the URLconf for the Django website itself. It includes a number of other URLconfs:
from django.conf.urls import include, url
urlpatterns = [
# ... snip ...
url(r'^community/', include('django_website.aggregator.urls')),
url(r'^contact/', include('django_website.contact.urls')),
# ... snip ...
]
Note that the regular expressions in this example don’t have a $ (end-of-string match character) but do include a trailing
slash. Whenever Django encounters include() (django.conf.urls.include()), it chops off whatever part
of the URL matched up to that point and sends the remaining string to the included URLconf for further processing.
Another possibility is to include additional URL patterns by using a list of url() instances. For example, consider
this URLconf:
3.3. Handling HTTP requests 179](https://image.slidesharecdn.com/20160225-django-documentation-160225091707/85/Django-Documentation-183-320.jpg)
![Django Documentation, Release 1.9.3.dev20160224120324
from django.conf.urls import include, url
from apps.main import views as main_views
from credit import views as credit_views
extra_patterns = [
url(r'^reports/$', credit_views.report),
url(r'^reports/(?P<id>[0-9]+)/$', credit_views.report),
url(r'^charge/$', credit_views.charge),
]
urlpatterns = [
url(r'^$', main_views.homepage),
url(r'^help/', include('apps.help.urls')),
url(r'^credit/', include(extra_patterns)),
]
In this example, the /credit/reports/ URL will be handled by the credit_views.report() Django view.
This can be used to remove redundancy from URLconfs where a single pattern prefix is used repeatedly. For example,
consider this URLconf:
from django.conf.urls import url
from . import views
urlpatterns = [
url(r'^(?P<page_slug>[w-]+)-(?P<page_id>w+)/history/$', views.history),
url(r'^(?P<page_slug>[w-]+)-(?P<page_id>w+)/edit/$', views.edit),
url(r'^(?P<page_slug>[w-]+)-(?P<page_id>w+)/discuss/$', views.discuss),
url(r'^(?P<page_slug>[w-]+)-(?P<page_id>w+)/permissions/$', views.permissions),
]
We can improve this by stating the common path prefix only once and grouping the suffixes that differ:
from django.conf.urls import include, url
from . import views
urlpatterns = [
url(r'^(?P<page_slug>[w-]+)-(?P<page_id>w+)/', include([
url(r'^history/$', views.history),
url(r'^edit/$', views.edit),
url(r'^discuss/$', views.discuss),
url(r'^permissions/$', views.permissions),
])),
]
Captured parameters
An included URLconf receives any captured parameters from parent URLconfs, so the following example is valid:
# In settings/urls/main.py
from django.conf.urls import include, url
urlpatterns = [
url(r'^(?P<username>w+)/blog/', include('foo.urls.blog')),
]
# In foo/urls/blog.py
180 Chapter 3. Using Django](https://image.slidesharecdn.com/20160225-django-documentation-160225091707/85/Django-Documentation-184-320.jpg)
![Django Documentation, Release 1.9.3.dev20160224120324
from django.conf.urls import url
from . import views
urlpatterns = [
url(r'^$', views.blog.index),
url(r'^archive/$', views.blog.archive),
]
In the above example, the captured "username" variable is passed to the included URLconf, as expected.
Nested arguments
Regular expressions allow nested arguments, and Django will resolve them and pass them to the view. When reversing,
Django will try to fill in all outer captured arguments, ignoring any nested captured arguments. Consider the following
URL patterns which optionally take a page argument:
from django.conf.urls import url
urlpatterns = [
url(r'blog/(page-(d+)/)?$', blog_articles), # bad
url(r'comments/(?:page-(?P<page_number>d+)/)?$', comments), # good
]
Both patterns use nested arguments and will resolve: for example, blog/page-2/ will result in a match to
blog_articles with two positional arguments: page-2/ and 2. The second pattern for comments will match
comments/page-2/ with keyword argument page_number set to 2. The outer argument in this case is a non-
capturing argument (?:...).
The blog_articles view needs the outermost captured argument to be reversed, page-2/ or no arguments in
this case, while comments can be reversed with either no arguments or a value for page_number.
Nested captured arguments create a strong coupling between the view arguments and the URL as illustrated by
blog_articles: the view receives part of the URL (page-2/) instead of only the value the view is interested in.
This coupling is even more pronounced when reversing, since to reverse the view we need to pass the piece of URL
instead of the page number.
As a rule of thumb, only capture the values the view needs to work with and use non-capturing arguments when the
regular expression needs an argument but the view ignores it.
Passing extra options to view functions
URLconfs have a hook that lets you pass extra arguments to your view functions, as a Python dictionary.
The django.conf.urls.url() function can take an optional third argument which should be a dictionary of
extra keyword arguments to pass to the view function.
For example:
from django.conf.urls import url
from . import views
urlpatterns = [
url(r'^blog/(?P<year>[0-9]{4})/$', views.year_archive, {'foo': 'bar'}),
]
In this example, for a request to /blog/2005/, Django will call views.year_archive(request,
year=’2005’, foo=’bar’).
3.3. Handling HTTP requests 181](https://image.slidesharecdn.com/20160225-django-documentation-160225091707/85/Django-Documentation-185-320.jpg)
![Django Documentation, Release 1.9.3.dev20160224120324
This technique is used in the syndication framework to pass metadata and options to views.
Dealing with conflicts
It’s possible to have a URL pattern which captures named keyword arguments, and also passes arguments with the
same names in its dictionary of extra arguments. When this happens, the arguments in the dictionary will be used
instead of the arguments captured in the URL.
Passing extra options to include()
Similarly, you can pass extra options to include(). When you pass extra options to include(), each line in the
included URLconf will be passed the extra options.
For example, these two URLconf sets are functionally identical:
Set one:
# main.py
from django.conf.urls import include, url
urlpatterns = [
url(r'^blog/', include('inner'), {'blogid': 3}),
]
# inner.py
from django.conf.urls import url
from mysite import views
urlpatterns = [
url(r'^archive/$', views.archive),
url(r'^about/$', views.about),
]
Set two:
# main.py
from django.conf.urls import include, url
from mysite import views
urlpatterns = [
url(r'^blog/', include('inner')),
]
# inner.py
from django.conf.urls import url
urlpatterns = [
url(r'^archive/$', views.archive, {'blogid': 3}),
url(r'^about/$', views.about, {'blogid': 3}),
]
Note that extra options will always be passed to every line in the included URLconf, regardless of whether the line’s
view actually accepts those options as valid. For this reason, this technique is only useful if you’re certain that every
view in the included URLconf accepts the extra options you’re passing.
182 Chapter 3. Using Django](https://image.slidesharecdn.com/20160225-django-documentation-160225091707/85/Django-Documentation-186-320.jpg)
![Django Documentation, Release 1.9.3.dev20160224120324
Reverse resolution of URLs
A common need when working on a Django project is the possibility to obtain URLs in their final forms either
for embedding in generated content (views and assets URLs, URLs shown to the user, etc.) or for handling of the
navigation flow on the server side (redirections, etc.)
It is strongly desirable to avoid hard-coding these URLs (a laborious, non-scalable and error-prone strategy). Equally
dangerous is devising ad-hoc mechanisms to generate URLs that are parallel to the design described by the URLconf,
which can result in the production of URLs that become stale over time.
In other words, what’s needed is a DRY mechanism. Among other advantages it would allow evolution of the URL
design without having to go over all the project source code to search and replace outdated URLs.
The primary piece of information we have available to get a URL is an identification (e.g. the name) of the view in
charge of handling it. Other pieces of information that necessarily must participate in the lookup of the right URL are
the types (positional, keyword) and values of the view arguments.
Django provides a solution such that the URL mapper is the only repository of the URL design. You feed it with your
URLconf and then it can be used in both directions:
• Starting with a URL requested by the user/browser, it calls the right Django view providing any arguments it
might need with their values as extracted from the URL.
• Starting with the identification of the corresponding Django view plus the values of arguments that would be
passed to it, obtain the associated URL.
The first one is the usage we’ve been discussing in the previous sections. The second one is what is known as reverse
resolution of URLs, reverse URL matching, reverse URL lookup, or simply URL reversing.
Django provides tools for performing URL reversing that match the different layers where URLs are needed:
• In templates: Using the url template tag.
• In Python code: Using the django.core.urlresolvers.reverse() function.
• In higher level code related to handling of URLs of Django model instances: The get_absolute_url()
method.
Examples
Consider again this URLconf entry:
from django.conf.urls import url
from . import views
urlpatterns = [
#...
url(r'^articles/([0-9]{4})/$', views.year_archive, name='news-year-archive'),
#...
]
According to this design, the URL for the archive corresponding to year nnnn is /articles/nnnn/.
You can obtain these in template code by using:
<a href="{% url 'news-year-archive' 2012 %}">2012 Archive</a>
{# Or with the year in a template context variable: #}
<ul>
{% for yearvar in year_list %}
<li><a href="{% url 'news-year-archive' yearvar %}">{{ yearvar }} Archive</a></li>
3.3. Handling HTTP requests 183](https://image.slidesharecdn.com/20160225-django-documentation-160225091707/85/Django-Documentation-187-320.jpg)

![Django Documentation, Release 1.9.3.dev20160224120324
is used to specify a default instance of an application. For example, the default Django admin instance has an
instance namespace of ’admin’.
Namespaced URLs are specified using the ’:’ operator. For example, the main index page of the admin application
is referenced using ’admin:index’. This indicates a namespace of ’admin’, and a named URL of ’index’.
Namespaces can also be nested. The named URL ’sports:polls:index’ would look for a pattern named
’index’ in the namespace ’polls’ that is itself defined within the top-level namespace ’sports’.
Reversing namespaced URLs
When given a namespaced URL (e.g. ’polls:index’) to resolve, Django splits the fully qualified name into parts
and then tries the following lookup:
1. First, Django looks for a matching application namespace (in this example, ’polls’). This will yield a list of
instances of that application.
2. If there is a current application defined, Django finds and returns the URL resolver for that instance. The current
application can be specified with the current_app argument to the reverse() function.
The url template tag uses the namespace of the currently resolved view as the current application
in a RequestContext. You can override this default by setting the current application on the
request.current_app attribute.
In previous versions of Django, you had to set the current_app attribute on any Context or
RequestContext that is used to render a template.
Previously, the url template tag did not use the namespace of the currently resolved view and you had to set
the current_app attribute on the request.
3. If there is no current application. Django looks for a default application instance. The default application
instance is the instance that has an instance namespace matching the application namespace (in this example,
an instance of polls called ’polls’).
4. If there is no default application instance, Django will pick the last deployed instance of the application, whatever
its instance name may be.
5. If the provided namespace doesn’t match an application namespace in step 1, Django will attempt a direct
lookup of the namespace as an instance namespace.
If there are nested namespaces, these steps are repeated for each part of the namespace until only the view name is
unresolved. The view name will then be resolved into a URL in the namespace that has been found.
Example To show this resolution strategy in action, consider an example of two instances of the polls application
from the tutorial: one called ’author-polls’ and one called ’publisher-polls’. Assume we have enhanced
that application so that it takes the instance namespace into consideration when creating and displaying polls.
urls.py
from django.conf.urls import include, url
urlpatterns = [
url(r'^author-polls/', include('polls.urls', namespace='author-polls')),
url(r'^publisher-polls/', include('polls.urls', namespace='publisher-polls')),
]
polls/urls.py
3.3. Handling HTTP requests 185](https://image.slidesharecdn.com/20160225-django-documentation-160225091707/85/Django-Documentation-189-320.jpg)
![Django Documentation, Release 1.9.3.dev20160224120324
from django.conf.urls import url
from . import views
app_name = 'polls'
urlpatterns = [
url(r'^$', views.IndexView.as_view(), name='index'),
url(r'^(?P<pk>d+)/$', views.DetailView.as_view(), name='detail'),
...
]
Using this setup, the following lookups are possible:
• If one of the instances is current - say, if we were rendering the detail page in the instance ’author-polls’ -
’polls:index’ will resolve to the index page of the ’author-polls’ instance; i.e. both of the following
will result in "/author-polls/".
In the method of a class-based view:
reverse('polls:index', current_app=self.request.resolver_match.namespace)
and in the template:
{% url 'polls:index' %}
• If there is no current instance - say, if we were rendering a page somewhere else on the site - ’polls:index’
will resolve to the last registered instance of polls. Since there is no default instance (instance namespace of
’polls’), the last instance of polls that is registered will be used. This would be ’publisher-polls’
since it’s declared last in the urlpatterns.
• ’author-polls:index’ will always resolve to the index page of the instance ’author-polls’ (and
likewise for ’publisher-polls’) .
If there were also a default instance - i.e., an instance named ’polls’ - the only change from above would be in
the case where there is no current instance (the second item in the list above). In this case ’polls:index’ would
resolve to the index page of the default instance instead of the instance declared last in urlpatterns.
URL namespaces and included URLconfs
Application namespaces of included URLconfs can be specified in two ways.
Firstly, you can set an app_name attribute in the included URLconf module, at the same level as the urlpatterns
attribute. You have to pass the actual module, or a string reference to the module, to include(), not the list of
urlpatterns itself.
polls/urls.py
from django.conf.urls import url
from . import views
app_name = 'polls'
urlpatterns = [
url(r'^$', views.IndexView.as_view(), name='index'),
url(r'^(?P<pk>d+)/$', views.DetailView.as_view(), name='detail'),
...
]
urls.py
186 Chapter 3. Using Django](https://image.slidesharecdn.com/20160225-django-documentation-160225091707/85/Django-Documentation-190-320.jpg)
![Django Documentation, Release 1.9.3.dev20160224120324
from django.conf.urls import include, url
urlpatterns = [
url(r'^polls/', include('polls.urls')),
]
The URLs defined in polls.urls will have an application namespace polls.
Secondly, you can include an object that contains embedded namespace data. If you include() a list of url() in-
stances, the URLs contained in that object will be added to the global namespace. However, you can also include()
a 2-tuple containing:
(<list of url() instances>, <application namespace>)
For example:
from django.conf.urls import include, url
from . import views
polls_patterns = ([
url(r'^$', views.IndexView.as_view(), name='index'),
url(r'^(?P<pk>d+)/$', views.DetailView.as_view(), name='detail'),
], 'polls')
url(r'^polls/', include(polls_patterns)),
This will include the nominated URL patterns into the given application namespace.
The instance namespace can be specified using the namespace argument to include(). If the instance namespace
is not specified, it will default to the included URLconf’s application namespace. This means it will also be the default
instance for that namespace.
In previous versions, you had to specify both the application namespace and the instance namespace in a single place,
either by passing them as parameters to include() or by including a 3-tuple containing (<list of url()
instances>, <application namespace>, <instance namespace>).
3.3.2 Writing views
A view function, or view for short, is simply a Python function that takes a Web request and returns a Web response.
This response can be the HTML contents of a Web page, or a redirect, or a 404 error, or an XML document, or an
image . . . or anything, really. The view itself contains whatever arbitrary logic is necessary to return that response.
This code can live anywhere you want, as long as it’s on your Python path. There’s no other requirement–no “magic,”
so to speak. For the sake of putting the code somewhere, the convention is to put views in a file called views.py,
placed in your project or application directory.
A simple view
Here’s a view that returns the current date and time, as an HTML document:
from django.http import HttpResponse
import datetime
def current_datetime(request):
now = datetime.datetime.now()
html = "<html><body>It is now %s.</body></html>" % now
return HttpResponse(html)
3.3. Handling HTTP requests 187](https://image.slidesharecdn.com/20160225-django-documentation-160225091707/85/Django-Documentation-191-320.jpg)


![Django Documentation, Release 1.9.3.dev20160224120324
Allowed HTTP methods
The decorators in django.views.decorators.http can be used to restrict access to views based on the request
method. These decorators will return a django.http.HttpResponseNotAllowed if the conditions are not
met.
require_http_methods(request_method_list)
Decorator to require that a view only accepts particular request methods. Usage:
from django.views.decorators.http import require_http_methods
@require_http_methods(["GET", "POST"])
def my_view(request):
# I can assume now that only GET or POST requests make it this far
# ...
pass
Note that request methods should be in uppercase.
require_GET()
Decorator to require that a view only accepts the GET method.
require_POST()
Decorator to require that a view only accepts the POST method.
require_safe()
Decorator to require that a view only accepts the GET and HEAD methods. These methods are commonly
considered “safe” because they should not have the significance of taking an action other than retrieving the
requested resource.
Note: Django will automatically strip the content of responses to HEAD requests while leaving the headers un-
changed, so you may handle HEAD requests exactly like GET requests in your views. Since some software, such
as link checkers, rely on HEAD requests, you might prefer using require_safe instead of require_GET.
Conditional view processing
The following decorators in django.views.decorators.http can be used to control caching behavior on
particular views.
condition(etag_func=None, last_modified_func=None)
etag(etag_func)
last_modified(last_modified_func)
These decorators can be used to generate ETag and Last-Modified headers; see conditional view process-
ing.
GZip compression
The decorators in django.views.decorators.gzip control content compression on a per-view basis.
gzip_page()
This decorator compresses content if the browser allows gzip compression. It sets the Vary header accordingly,
so that caches will base their storage on the Accept-Encoding header.
190 Chapter 3. Using Django](https://image.slidesharecdn.com/20160225-django-documentation-160225091707/85/Django-Documentation-194-320.jpg)
![Django Documentation, Release 1.9.3.dev20160224120324
Vary headers
The decorators in django.views.decorators.vary can be used to control caching based on specific request
headers.
vary_on_cookie(func)
vary_on_headers(*headers)
The Vary header defines which request headers a cache mechanism should take into account when building its
cache key.
See using vary headers.
Caching
The decorators in django.views.decorators.cache control server and client-side caching.
never_cache(view_func)
This decorator adds a Cache-Control: max-age=0, no-cache, no-store,
must-revalidate header to a response to indicate that a page should never be cached.
Before Django 1.9, Cache-Control: max-age=0 was sent. This didn’t reliably prevent caching in all
browsers.
3.3.4 File Uploads
When Django handles a file upload, the file data ends up placed in request.FILES (for more on the request
object see the documentation for request and response objects). This document explains how files are stored on disk
and in memory, and how to customize the default behavior.
Warning: There are security risks if you are accepting uploaded content from untrusted users! See the security
guide’s topic on User-uploaded content for mitigation details.
Basic file uploads
Consider a simple form containing a FileField:
# In forms.py...
from django import forms
class UploadFileForm(forms.Form):
title = forms.CharField(max_length=50)
file = forms.FileField()
A view handling this form will receive the file data in request.FILES, which is a dictionary containing a key for
each FileField (or ImageField, or other FileField subclass) in the form. So the data from the above form
would be accessible as request.FILES[’file’].
Note that request.FILES will only contain data if the request method was POST and the <form> that posted the
request has the attribute enctype="multipart/form-data". Otherwise, request.FILES will be empty.
Most of the time, you’ll simply pass the file data from request into the form as described in Binding uploaded files
to a form. This would look something like:
3.3. Handling HTTP requests 191](https://image.slidesharecdn.com/20160225-django-documentation-160225091707/85/Django-Documentation-195-320.jpg)
![Django Documentation, Release 1.9.3.dev20160224120324
from django.http import HttpResponseRedirect
from django.shortcuts import render
from .forms import UploadFileForm
# Imaginary function to handle an uploaded file.
from somewhere import handle_uploaded_file
def upload_file(request):
if request.method == 'POST':
form = UploadFileForm(request.POST, request.FILES)
if form.is_valid():
handle_uploaded_file(request.FILES['file'])
return HttpResponseRedirect('/success/url/')
else:
form = UploadFileForm()
return render(request, 'upload.html', {'form': form})
Notice that we have to pass request.FILES into the form’s constructor; this is how file data gets bound into a
form.
Here’s a common way you might handle an uploaded file:
def handle_uploaded_file(f):
with open('some/file/name.txt', 'wb+') as destination:
for chunk in f.chunks():
destination.write(chunk)
Looping over UploadedFile.chunks() instead of using read() ensures that large files don’t overwhelm your
system’s memory.
There are a few other methods and attributes available on UploadedFile objects; see UploadedFile for a
complete reference.
Handling uploaded files with a model
If you’re saving a file on a Model with a FileField, using a ModelForm makes this process much easier. The
file object will be saved to the location specified by the upload_to argument of the corresponding FileField
when calling form.save():
from django.http import HttpResponseRedirect
from django.shortcuts import render
from .forms import ModelFormWithFileField
def upload_file(request):
if request.method == 'POST':
form = ModelFormWithFileField(request.POST, request.FILES)
if form.is_valid():
# file is saved
form.save()
return HttpResponseRedirect('/success/url/')
else:
form = ModelFormWithFileField()
return render(request, 'upload.html', {'form': form})
If you are constructing an object manually, you can simply assign the file object from request.FILES to the file
field in the model:
192 Chapter 3. Using Django](https://image.slidesharecdn.com/20160225-django-documentation-160225091707/85/Django-Documentation-196-320.jpg)
![Django Documentation, Release 1.9.3.dev20160224120324
from django.http import HttpResponseRedirect
from django.shortcuts import render
from .forms import UploadFileForm
from .models import ModelWithFileField
def upload_file(request):
if request.method == 'POST':
form = UploadFileForm(request.POST, request.FILES)
if form.is_valid():
instance = ModelWithFileField(file_field=request.FILES['file'])
instance.save()
return HttpResponseRedirect('/success/url/')
else:
form = UploadFileForm()
return render(request, 'upload.html', {'form': form})
Upload Handlers
When a user uploads a file, Django passes off the file data to an upload handler – a small class that handles file data as
it gets uploaded. Upload handlers are initially defined in the FILE_UPLOAD_HANDLERS setting, which defaults to:
["django.core.files.uploadhandler.MemoryFileUploadHandler",
"django.core.files.uploadhandler.TemporaryFileUploadHandler"]
Together MemoryFileUploadHandler and TemporaryFileUploadHandler provide Django’s default file
upload behavior of reading small files into memory and large ones onto disk.
You can write custom handlers that customize how Django handles files. You could, for example, use custom handlers
to enforce user-level quotas, compress data on the fly, render progress bars, and even send data to another storage
location directly without storing it locally. See Writing custom upload handlers for details on how you can customize
or completely replace upload behavior.
Where uploaded data is stored
Before you save uploaded files, the data needs to be stored somewhere.
By default, if an uploaded file is smaller than 2.5 megabytes, Django will hold the entire contents of the upload in
memory. This means that saving the file involves only a read from memory and a write to disk and thus is very fast.
However, if an uploaded file is too large, Django will write the uploaded file to a temporary file stored in your system’s
temporary directory. On a Unix-like platform this means you can expect Django to generate a file called something
like /tmp/tmpzfp6I6.upload. If an upload is large enough, you can watch this file grow in size as Django
streams the data onto disk.
These specifics – 2.5 megabytes; /tmp; etc. – are simply “reasonable defaults” which can be customized as described
in the next section.
Changing upload handler behavior
There are a few settings which control Django’s file upload behavior. See File Upload Settings for details.
3.3. Handling HTTP requests 193](https://image.slidesharecdn.com/20160225-django-documentation-160225091707/85/Django-Documentation-197-320.jpg)
![Django Documentation, Release 1.9.3.dev20160224120324
Modifying upload handlers on the fly
Sometimes particular views require different upload behavior. In these cases, you can override upload handlers on a
per-request basis by modifying request.upload_handlers. By default, this list will contain the upload handlers
given by FILE_UPLOAD_HANDLERS, but you can modify the list as you would any other list.
For instance, suppose you’ve written a ProgressBarUploadHandler that provides feedback on upload progress
to some sort of AJAX widget. You’d add this handler to your upload handlers like this:
request.upload_handlers.insert(0, ProgressBarUploadHandler())
You’d probably want to use list.insert() in this case (instead of append()) because a progress bar handler
would need to run before any other handlers. Remember, the upload handlers are processed in order.
If you want to replace the upload handlers completely, you can just assign a new list:
request.upload_handlers = [ProgressBarUploadHandler()]
Note: You can only modify upload handlers before accessing request.POST or request.FILES – it
doesn’t make sense to change upload handlers after upload handling has already started. If you try to modify
request.upload_handlers after reading from request.POST or request.FILES Django will throw an
error.
Thus, you should always modify uploading handlers as early in your view as possible.
Also, request.POST is accessed by CsrfViewMiddleware which is enabled by default. This means you will
need to use csrf_exempt() on your view to allow you to change the upload handlers. You will then need to use
csrf_protect() on the function that actually processes the request. Note that this means that the handlers may
start receiving the file upload before the CSRF checks have been done. Example code:
from django.views.decorators.csrf import csrf_exempt, csrf_protect
@csrf_exempt
def upload_file_view(request):
request.upload_handlers.insert(0, ProgressBarUploadHandler())
return _upload_file_view(request)
@csrf_protect
def _upload_file_view(request):
... # Process request
3.3.5 Django shortcut functions
The package django.shortcuts collects helper functions and classes that “span” multiple levels of MVC. In
other words, these functions/classes introduce controlled coupling for convenience’s sake.
render()
render(request, template_name, context=None, context_instance=_context_instance_undefined, con-
tent_type=None, status=None, current_app=_current_app_undefined, dirs=_dirs_undefined, us-
ing=None)
Combines a given template with a given context dictionary and returns an HttpResponse object with that
rendered text.
194 Chapter 3. Using Django](https://image.slidesharecdn.com/20160225-django-documentation-160225091707/85/Django-Documentation-198-320.jpg)


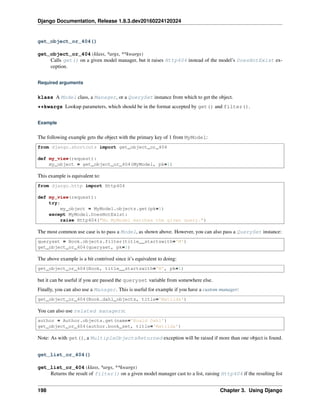

![Django Documentation, Release 1.9.3.dev20160224120324
'django.contrib.auth.middleware.AuthenticationMiddleware',
'django.contrib.auth.middleware.SessionAuthenticationMiddleware',
'django.contrib.messages.middleware.MessageMiddleware',
'django.middleware.clickjacking.XFrameOptionsMiddleware',
]
A Django installation doesn’t require any middleware — MIDDLEWARE_CLASSES can be empty, if you’d like —
but it’s strongly suggested that you at least use CommonMiddleware.
The order in MIDDLEWARE_CLASSES matters because a middleware can depend on other middleware. For in-
stance, AuthenticationMiddleware stores the authenticated user in the session; therefore, it must run after
SessionMiddleware. See Middleware ordering for some common hints about ordering of Django middleware
classes.
Hooks and application order
During the request phase, before calling the view, Django applies middleware in the order it’s defined in
MIDDLEWARE_CLASSES, top-down. Two hooks are available:
• process_request()
• process_view()
During the response phase, after calling the view, middleware are applied in reverse order, from the bottom up. Three
hooks are available:
• process_exception() (only if the view raised an exception)
• process_template_response() (only for template responses)
• process_response()
200 Chapter 3. Using Django](https://image.slidesharecdn.com/20160225-django-documentation-160225091707/85/Django-Documentation-204-320.jpg)


![Django Documentation, Release 1.9.3.dev20160224120324
Warning: If the SECRET_KEY is not kept secret and you are using the PickleSerializer, this can
lead to arbitrary remote code execution.
An attacker in possession of the SECRET_KEY can not only generate falsified session data, which your site will
trust, but also remotely execute arbitrary code, as the data is serialized using pickle.
If you use cookie-based sessions, pay extra care that your secret key is always kept completely secret, for any
system which might be remotely accessible.
The session data is signed but not encrypted
When using the cookies backend the session data can be read by the client.
A MAC (Message Authentication Code) is used to protect the data against changes by the client, so that the session
data will be invalidated when being tampered with. The same invalidation happens if the client storing the cookie
(e.g. your user’s browser) can’t store all of the session cookie and drops data. Even though Django compresses the
data, it’s still entirely possible to exceed the common limit of 4096 bytes per cookie.
No freshness guarantee
Note also that while the MAC can guarantee the authenticity of the data (that it was generated by your site, and
not someone else), and the integrity of the data (that it is all there and correct), it cannot guarantee freshness i.e.
that you are being sent back the last thing you sent to the client. This means that for some uses of session data,
the cookie backend might open you up to replay attacks. Unlike other session backends which keep a server-side
record of each session and invalidate it when a user logs out, cookie-based sessions are not invalidated when a user
logs out. Thus if an attacker steals a user’s cookie, they can use that cookie to login as that user even if the user
logs out. Cookies will only be detected as ‘stale’ if they are older than your SESSION_COOKIE_AGE.
Performance
Finally, the size of a cookie can have an impact on the speed of your site.
Using sessions in views
When SessionMiddleware is activated, each HttpRequest object – the first argument to any Django view
function – will have a session attribute, which is a dictionary-like object.
You can read it and write to request.session at any point in your view. You can edit it multiple times.
class backends.base.SessionBase
This is the base class for all session objects. It has the following standard dictionary methods:
__getitem__(key)
Example: fav_color = request.session[’fav_color’]
__setitem__(key, value)
Example: request.session[’fav_color’] = ’blue’
__delitem__(key)
Example: del request.session[’fav_color’]. This raises KeyError if the given key isn’t
already in the session.
__contains__(key)
Example: ’fav_color’ in request.session
get(key, default=None)
Example: fav_color = request.session.get(’fav_color’, ’red’)
pop(key, default=None)
Example: fav_color = request.session.pop(’fav_color’, ’blue’)
keys()
items()
setdefault()
206 Chapter 3. Using Django](https://image.slidesharecdn.com/20160225-django-documentation-160225091707/85/Django-Documentation-210-320.jpg)

![Django Documentation, Release 1.9.3.dev20160224120324
clear_expired()
Removes expired sessions from the session store. This class method is called by clearsessions.
cycle_key()
Creates a new session key while retaining the current session data.
django.contrib.auth.login() calls this method to mitigate against session fixation.
Session serialization
By default, Django serializes session data using JSON. You can use the SESSION_SERIALIZER setting to customize
the session serialization format. Even with the caveats described in Write your own serializer, we highly recommend
sticking with JSON serialization especially if you are using the cookie backend.
For example, here’s an attack scenario if you use pickle to serialize session data. If you’re using the signed cookie
session backend and SECRET_KEY is known by an attacker (there isn’t an inherent vulnerability in Django that would
cause it to leak), the attacker could insert a string into their session which, when unpickled, executes arbitrary code
on the server. The technique for doing so is simple and easily available on the internet. Although the cookie session
storage signs the cookie-stored data to prevent tampering, a SECRET_KEY leak immediately escalates to a remote
code execution vulnerability.
Bundled serializers
class serializers.JSONSerializer
A wrapper around the JSON serializer from django.core.signing. Can only serialize basic data types.
In addition, as JSON supports only string keys, note that using non-string keys in request.session won’t
work as expected:
>>> # initial assignment
>>> request.session[0] = 'bar'
>>> # subsequent requests following serialization & deserialization
>>> # of session data
>>> request.session[0] # KeyError
>>> request.session['0']
'bar'
See the Write your own serializer section for more details on limitations of JSON serialization.
class serializers.PickleSerializer
Supports arbitrary Python objects, but, as described above, can lead to a remote code execution vulnerability if
SECRET_KEY becomes known by an attacker.
Write your own serializer Note that unlike PickleSerializer, the JSONSerializer cannot han-
dle arbitrary Python data types. As is often the case, there is a trade-off between convenience and secu-
rity. If you wish to store more advanced data types including datetime and Decimal in JSON backed
sessions, you will need to write a custom serializer (or convert such values to a JSON serializable ob-
ject before storing them in request.session). While serializing these values is fairly straightforward
(django.core.serializers.json.DateTimeAwareJSONEncoder may be helpful), writing a decoder
that can reliably get back the same thing that you put in is more fragile. For example, you run the risk of returning a
datetime that was actually a string that just happened to be in the same format chosen for datetimes).
Your serializer class must implement two methods, dumps(self, obj) and loads(self, data), to serialize
and deserialize the dictionary of session data, respectively.
208 Chapter 3. Using Django](https://image.slidesharecdn.com/20160225-django-documentation-160225091707/85/Django-Documentation-212-320.jpg)
![Django Documentation, Release 1.9.3.dev20160224120324
Session object guidelines
• Use normal Python strings as dictionary keys on request.session. This is more of a convention than a
hard-and-fast rule.
• Session dictionary keys that begin with an underscore are reserved for internal use by Django.
• Don’t override request.session with a new object, and don’t access or set its attributes. Use it like a
Python dictionary.
Examples
This simplistic view sets a has_commented variable to True after a user posts a comment. It doesn’t let a user post
a comment more than once:
def post_comment(request, new_comment):
if request.session.get('has_commented', False):
return HttpResponse("You've already commented.")
c = comments.Comment(comment=new_comment)
c.save()
request.session['has_commented'] = True
return HttpResponse('Thanks for your comment!')
This simplistic view logs in a “member” of the site:
def login(request):
m = Member.objects.get(username=request.POST['username'])
if m.password == request.POST['password']:
request.session['member_id'] = m.id
return HttpResponse("You're logged in.")
else:
return HttpResponse("Your username and password didn't match.")
...And this one logs a member out, according to login() above:
def logout(request):
try:
del request.session['member_id']
except KeyError:
pass
return HttpResponse("You're logged out.")
The standard django.contrib.auth.logout() function actually does a bit more than this to prevent inadver-
tent data leakage. It calls the flush() method of request.session. We are using this example as a demonstra-
tion of how to work with session objects, not as a full logout() implementation.
Setting test cookies
As a convenience, Django provides an easy way to test whether the user’s browser accepts cookies. Just call the
set_test_cookie() method of request.session in a view, and call test_cookie_worked() in a sub-
sequent view – not in the same view call.
This awkward split between set_test_cookie() and test_cookie_worked() is necessary due to the way
cookies work. When you set a cookie, you can’t actually tell whether a browser accepted it until the browser’s next
request.
3.3. Handling HTTP requests 209](https://image.slidesharecdn.com/20160225-django-documentation-160225091707/85/Django-Documentation-213-320.jpg)
![Django Documentation, Release 1.9.3.dev20160224120324
It’s good practice to use delete_test_cookie() to clean up after yourself. Do this after you’ve verified that the
test cookie worked.
Here’s a typical usage example:
from django.http import HttpResponse
from django.shortcuts import render
def login(request):
if request.method == 'POST':
if request.session.test_cookie_worked():
request.session.delete_test_cookie()
return HttpResponse("You're logged in.")
else:
return HttpResponse("Please enable cookies and try again.")
request.session.set_test_cookie()
return render(request, 'foo/login_form.html')
Using sessions out of views
Note: The examples in this section import the SessionStore object directly from the
django.contrib.sessions.backends.db backend. In your own code, you should consider import-
ing SessionStore from the session engine designated by SESSION_ENGINE, as below:
>>> from importlib import import_module
>>> from django.conf import settings
>>> SessionStore = import_module(settings.SESSION_ENGINE).SessionStore
An API is available to manipulate session data outside of a view:
>>> from django.contrib.sessions.backends.db import SessionStore
>>> s = SessionStore()
>>> # stored as seconds since epoch since datetimes are not serializable in JSON.
>>> s['last_login'] = 1376587691
>>> s.save()
>>> s.session_key
'2b1189a188b44ad18c35e113ac6ceead'
>>> s = SessionStore(session_key='2b1189a188b44ad18c35e113ac6ceead')
>>> s['last_login']
1376587691
In order to mitigate session fixation attacks, sessions keys that don’t exist are regenerated:
>>> from django.contrib.sessions.backends.db import SessionStore
>>> s = SessionStore(session_key='no-such-session-here')
>>> s.save()
>>> s.session_key
'ff882814010ccbc3c870523934fee5a2'
If you’re using the django.contrib.sessions.backends.db backend, each session is just a normal Django
model. The Session model is defined in django/contrib/sessions/models.py. Because it’s a normal
model, you can access sessions using the normal Django database API:
>>> from django.contrib.sessions.models import Session
>>> s = Session.objects.get(pk='2b1189a188b44ad18c35e113ac6ceead')
210 Chapter 3. Using Django](https://image.slidesharecdn.com/20160225-django-documentation-160225091707/85/Django-Documentation-214-320.jpg)
![Django Documentation, Release 1.9.3.dev20160224120324
>>> s.expire_date
datetime.datetime(2005, 8, 20, 13, 35, 12)
Note that you’ll need to call get_decoded() to get the session dictionary. This is necessary because the dictionary
is stored in an encoded format:
>>> s.session_data
'KGRwMQpTJ19hdXRoX3VzZXJfaWQnCnAyCkkxCnMuMTExY2ZjODI2Yj...'
>>> s.get_decoded()
{'user_id': 42}
When sessions are saved
By default, Django only saves to the session database when the session has been modified – that is if any of its
dictionary values have been assigned or deleted:
# Session is modified.
request.session['foo'] = 'bar'
# Session is modified.
del request.session['foo']
# Session is modified.
request.session['foo'] = {}
# Gotcha: Session is NOT modified, because this alters
# request.session['foo'] instead of request.session.
request.session['foo']['bar'] = 'baz'
In the last case of the above example, we can tell the session object explicitly that it has been modified by setting the
modified attribute on the session object:
request.session.modified = True
To change this default behavior, set the SESSION_SAVE_EVERY_REQUEST setting to True. When set to True,
Django will save the session to the database on every single request.
Note that the session cookie is only sent when a session has been created or modified. If
SESSION_SAVE_EVERY_REQUEST is True, the session cookie will be sent on every request.
Similarly, the expires part of a session cookie is updated each time the session cookie is sent.
The session is not saved if the response’s status code is 500.
Browser-length sessions vs. persistent sessions
You can control whether the session framework uses browser-length sessions vs. persistent sessions with the
SESSION_EXPIRE_AT_BROWSER_CLOSE setting.
By default, SESSION_EXPIRE_AT_BROWSER_CLOSE is set to False, which means session cookies will be
stored in users’ browsers for as long as SESSION_COOKIE_AGE. Use this if you don’t want people to have to
log in every time they open a browser.
If SESSION_EXPIRE_AT_BROWSER_CLOSE is set to True, Django will use browser-length cookies – cookies
that expire as soon as the user closes their browser. Use this if you want people to have to log in every time they open
a browser.
3.3. Handling HTTP requests 211](https://image.slidesharecdn.com/20160225-django-documentation-160225091707/85/Django-Documentation-215-320.jpg)


![Django Documentation, Release 1.9.3.dev20160224120324
subject = form.cleaned_data['subject']
message = form.cleaned_data['message']
sender = form.cleaned_data['sender']
cc_myself = form.cleaned_data['cc_myself']
recipients = ['info@example.com']
if cc_myself:
recipients.append(sender)
send_mail(subject, message, sender, recipients)
return HttpResponseRedirect('/thanks/')
Tip: For more on sending email from Django, see Sending email.
Some field types need some extra handling. For example, files that are uploaded using a form need to be handled
differently (they can be retrieved from request.FILES, rather than request.POST). For details of how to handle
file uploads with your form, see Binding uploaded files to a form.
3.4.6 Working with form templates
All you need to do to get your form into a template is to place the form instance into the template context. So if your
form is called form in the context, {{ form }} will render its <label> and <input> elements appropriately.
Form rendering options
Additional form template furniture
Don’t forget that a form’s output does not include the surrounding <form> tags, or the form’s submit control. You
will have to provide these yourself.
There are other output options though for the <label>/<input> pairs:
• {{ form.as_table }} will render them as table cells wrapped in <tr> tags
• {{ form.as_p }} will render them wrapped in <p> tags
• {{ form.as_ul }} will render them wrapped in <li> tags
Note that you’ll have to provide the surrounding <table> or <ul> elements yourself.
Here’s the output of {{ form.as_p }} for our ContactForm instance:
<p><label for="id_subject">Subject:</label>
<input id="id_subject" type="text" name="subject" maxlength="100" /></p>
<p><label for="id_message">Message:</label>
<input type="text" name="message" id="id_message" /></p>
<p><label for="id_sender">Sender:</label>
<input type="email" name="sender" id="id_sender" /></p>
<p><label for="id_cc_myself">Cc myself:</label>
<input type="checkbox" name="cc_myself" id="id_cc_myself" /></p>
Note that each form field has an ID attribute set to id_<field-name>, which is referenced by the accompanying
label tag. This is important in ensuring that forms are accessible to assistive technology such as screen reader software.
You can also customize the way in which labels and ids are generated.
222 Chapter 3. Using Django](https://image.slidesharecdn.com/20160225-django-documentation-160225091707/85/Django-Documentation-226-320.jpg)


![Django Documentation, Release 1.9.3.dev20160224120324
>>> import datetime
>>> from django.forms import formset_factory
>>> from myapp.forms import ArticleForm
>>> ArticleFormSet = formset_factory(ArticleForm, extra=2)
>>> formset = ArticleFormSet(initial=[
... {'title': 'Django is now open source',
... 'pub_date': datetime.date.today(),}
... ])
>>> for form in formset:
... print(form.as_table())
<tr><th><label for="id_form-0-title">Title:</label></th><td><input type="text" name="form-0-title" va
<tr><th><label for="id_form-0-pub_date">Pub date:</label></th><td><input type="text" name="form-0-pub
<tr><th><label for="id_form-1-title">Title:</label></th><td><input type="text" name="form-1-title" id
<tr><th><label for="id_form-1-pub_date">Pub date:</label></th><td><input type="text" name="form-1-pub
<tr><th><label for="id_form-2-title">Title:</label></th><td><input type="text" name="form-2-title" id
<tr><th><label for="id_form-2-pub_date">Pub date:</label></th><td><input type="text" name="form-2-pub
There are now a total of three forms showing above. One for the initial data that was passed in and two extra forms.
Also note that we are passing in a list of dictionaries as the initial data.
See also:
Creating formsets from models with model formsets.
Limiting the maximum number of forms
The max_num parameter to formset_factory() gives you the ability to limit the number of forms the formset
will display:
>>> from django.forms import formset_factory
>>> from myapp.forms import ArticleForm
>>> ArticleFormSet = formset_factory(ArticleForm, extra=2, max_num=1)
>>> formset = ArticleFormSet()
>>> for form in formset:
... print(form.as_table())
<tr><th><label for="id_form-0-title">Title:</label></th><td><input type="text" name="form-0-title" id
<tr><th><label for="id_form-0-pub_date">Pub date:</label></th><td><input type="text" name="form-0-pub
If the value of max_num is greater than the number of existing items in the initial data, up to extra additional blank
forms will be added to the formset, so long as the total number of forms does not exceed max_num. For example, if
extra=2 and max_num=2 and the formset is initialized with one initial item, a form for the initial item and one
blank form will be displayed.
If the number of items in the initial data exceeds max_num, all initial data forms will be displayed regardless of the
value of max_num and no extra forms will be displayed. For example, if extra=3 and max_num=1 and the formset
is initialized with two initial items, two forms with the initial data will be displayed.
A max_num value of None (the default) puts a high limit on the number of forms displayed (1000). In practice this
is equivalent to no limit.
By default, max_num only affects how many forms are displayed and does not affect validation. If
validate_max=True is passed to the formset_factory(), then max_num will affect validation. See Vali-
dating the number of forms in a formset.
3.4. Working with forms 227](https://image.slidesharecdn.com/20160225-django-documentation-160225091707/85/Django-Documentation-231-320.jpg)
![Django Documentation, Release 1.9.3.dev20160224120324
Formset validation
Validation with a formset is almost identical to a regular Form. There is an is_valid method on the formset to
provide a convenient way to validate all forms in the formset:
>>> from django.forms import formset_factory
>>> from myapp.forms import ArticleForm
>>> ArticleFormSet = formset_factory(ArticleForm)
>>> data = {
... 'form-TOTAL_FORMS': '1',
... 'form-INITIAL_FORMS': '0',
... 'form-MAX_NUM_FORMS': '',
... }
>>> formset = ArticleFormSet(data)
>>> formset.is_valid()
True
We passed in no data to the formset which is resulting in a valid form. The formset is smart enough to ignore extra
forms that were not changed. If we provide an invalid article:
>>> data = {
... 'form-TOTAL_FORMS': '2',
... 'form-INITIAL_FORMS': '0',
... 'form-MAX_NUM_FORMS': '',
... 'form-0-title': 'Test',
... 'form-0-pub_date': '1904-06-16',
... 'form-1-title': 'Test',
... 'form-1-pub_date': '', # <-- this date is missing but required
... }
>>> formset = ArticleFormSet(data)
>>> formset.is_valid()
False
>>> formset.errors
[{}, {'pub_date': ['This field is required.']}]
As we can see, formset.errors is a list whose entries correspond to the forms in the formset. Validation was
performed for each of the two forms, and the expected error message appears for the second item.
BaseFormSet.total_error_count()
To check how many errors there are in the formset, we can use the total_error_count method:
>>> # Using the previous example
>>> formset.errors
[{}, {'pub_date': ['This field is required.']}]
>>> len(formset.errors)
2
>>> formset.total_error_count()
1
We can also check if form data differs from the initial data (i.e. the form was sent without any data):
>>> data = {
... 'form-TOTAL_FORMS': '1',
... 'form-INITIAL_FORMS': '0',
... 'form-MAX_NUM_FORMS': '',
... 'form-0-title': '',
... 'form-0-pub_date': '',
... }
>>> formset = ArticleFormSet(data)
228 Chapter 3. Using Django](https://image.slidesharecdn.com/20160225-django-documentation-160225091707/85/Django-Documentation-232-320.jpg)
![Django Documentation, Release 1.9.3.dev20160224120324
>>> formset.has_changed()
False
Understanding the ManagementForm You may have noticed the additional data (form-TOTAL_FORMS,
form-INITIAL_FORMS and form-MAX_NUM_FORMS) that was required in the formset’s data above. This data is
required for the ManagementForm. This form is used by the formset to manage the collection of forms contained
in the formset. If you don’t provide this management data, an exception will be raised:
>>> data = {
... 'form-0-title': 'Test',
... 'form-0-pub_date': '',
... }
>>> formset = ArticleFormSet(data)
>>> formset.is_valid()
Traceback (most recent call last):
...
django.forms.utils.ValidationError: ['ManagementForm data is missing or has been tampered with']
It is used to keep track of how many form instances are being displayed. If you are adding new forms via JavaScript,
you should increment the count fields in this form as well. On the other hand, if you are using JavaScript to allow
deletion of existing objects, then you need to ensure the ones being removed are properly marked for deletion by
including form-#-DELETE in the POST data. It is expected that all forms are present in the POST data regardless.
The management form is available as an attribute of the formset itself. When rendering a formset in a template, you
can include all the management data by rendering {{ my_formset.management_form }} (substituting the
name of your formset as appropriate).
total_form_count and initial_form_count BaseFormSet has a couple of methods that are closely
related to the ManagementForm, total_form_count and initial_form_count.
total_form_count returns the total number of forms in this formset. initial_form_count returns the
number of forms in the formset that were pre-filled, and is also used to determine how many forms are required. You
will probably never need to override either of these methods, so please be sure you understand what they do before
doing so.
empty_form BaseFormSet provides an additional attribute empty_form which returns a form instance with
a prefix of __prefix__ for easier use in dynamic forms with JavaScript.
Custom formset validation A formset has a clean method similar to the one on a Form class. This is where you
define your own validation that works at the formset level:
>>> from django.forms import BaseFormSet
>>> from django.forms import formset_factory
>>> from myapp.forms import ArticleForm
>>> class BaseArticleFormSet(BaseFormSet):
... def clean(self):
... """Checks that no two articles have the same title."""
... if any(self.errors):
... # Don't bother validating the formset unless each form is valid on its own
... return
... titles = []
... for form in self.forms:
... title = form.cleaned_data['title']
3.4. Working with forms 229](https://image.slidesharecdn.com/20160225-django-documentation-160225091707/85/Django-Documentation-233-320.jpg)
![Django Documentation, Release 1.9.3.dev20160224120324
... if title in titles:
... raise forms.ValidationError("Articles in a set must have distinct titles.")
... titles.append(title)
>>> ArticleFormSet = formset_factory(ArticleForm, formset=BaseArticleFormSet)
>>> data = {
... 'form-TOTAL_FORMS': '2',
... 'form-INITIAL_FORMS': '0',
... 'form-MAX_NUM_FORMS': '',
... 'form-0-title': 'Test',
... 'form-0-pub_date': '1904-06-16',
... 'form-1-title': 'Test',
... 'form-1-pub_date': '1912-06-23',
... }
>>> formset = ArticleFormSet(data)
>>> formset.is_valid()
False
>>> formset.errors
[{}, {}]
>>> formset.non_form_errors()
['Articles in a set must have distinct titles.']
The formset clean method is called after all the Form.clean methods have been called. The errors will be found
using the non_form_errors() method on the formset.
Validating the number of forms in a formset
Django provides a couple ways to validate the minimum or maximum number of submitted forms. Applications which
need more customizable validation of the number of forms should use custom formset validation.
validate_max If validate_max=True is passed to formset_factory(), validation will also check that
the number of forms in the data set, minus those marked for deletion, is less than or equal to max_num.
>>> from django.forms import formset_factory
>>> from myapp.forms import ArticleForm
>>> ArticleFormSet = formset_factory(ArticleForm, max_num=1, validate_max=True)
>>> data = {
... 'form-TOTAL_FORMS': '2',
... 'form-INITIAL_FORMS': '0',
... 'form-MIN_NUM_FORMS': '',
... 'form-MAX_NUM_FORMS': '',
... 'form-0-title': 'Test',
... 'form-0-pub_date': '1904-06-16',
... 'form-1-title': 'Test 2',
... 'form-1-pub_date': '1912-06-23',
... }
>>> formset = ArticleFormSet(data)
>>> formset.is_valid()
False
>>> formset.errors
[{}, {}]
>>> formset.non_form_errors()
['Please submit 1 or fewer forms.']
validate_max=True validates against max_num strictly even if max_num was exceeded because the amount of
initial data supplied was excessive.
230 Chapter 3. Using Django](https://image.slidesharecdn.com/20160225-django-documentation-160225091707/85/Django-Documentation-234-320.jpg)
![Django Documentation, Release 1.9.3.dev20160224120324
Note: Regardless of validate_max, if the number of forms in a data set exceeds max_num by more than 1000,
then the form will fail to validate as if validate_max were set, and additionally only the first 1000 forms above
max_num will be validated. The remainder will be truncated entirely. This is to protect against memory exhaustion
attacks using forged POST requests.
validate_min If validate_min=True is passed to formset_factory(), validation will also check that
the number of forms in the data set, minus those marked for deletion, is greater than or equal to min_num.
>>> from django.forms import formset_factory
>>> from myapp.forms import ArticleForm
>>> ArticleFormSet = formset_factory(ArticleForm, min_num=3, validate_min=True)
>>> data = {
... 'form-TOTAL_FORMS': '2',
... 'form-INITIAL_FORMS': '0',
... 'form-MIN_NUM_FORMS': '',
... 'form-MAX_NUM_FORMS': '',
... 'form-0-title': 'Test',
... 'form-0-pub_date': '1904-06-16',
... 'form-1-title': 'Test 2',
... 'form-1-pub_date': '1912-06-23',
... }
>>> formset = ArticleFormSet(data)
>>> formset.is_valid()
False
>>> formset.errors
[{}, {}]
>>> formset.non_form_errors()
['Please submit 3 or more forms.']
Dealing with ordering and deletion of forms
The formset_factory() provides two optional parameters can_order and can_delete to help with order-
ing of forms in formsets and deletion of forms from a formset.
can_order
BaseFormSet.can_order
Default: False
Lets you create a formset with the ability to order:
>>> from django.forms import formset_factory
>>> from myapp.forms import ArticleForm
>>> ArticleFormSet = formset_factory(ArticleForm, can_order=True)
>>> formset = ArticleFormSet(initial=[
... {'title': 'Article #1', 'pub_date': datetime.date(2008, 5, 10)},
... {'title': 'Article #2', 'pub_date': datetime.date(2008, 5, 11)},
... ])
>>> for form in formset:
... print(form.as_table())
<tr><th><label for="id_form-0-title">Title:</label></th><td><input type="text" name="form-0-title" va
<tr><th><label for="id_form-0-pub_date">Pub date:</label></th><td><input type="text" name="form-0-pub
<tr><th><label for="id_form-0-ORDER">Order:</label></th><td><input type="number" name="form-0-ORDER"
<tr><th><label for="id_form-1-title">Title:</label></th><td><input type="text" name="form-1-title" va
3.4. Working with forms 231](https://image.slidesharecdn.com/20160225-django-documentation-160225091707/85/Django-Documentation-235-320.jpg)
![Django Documentation, Release 1.9.3.dev20160224120324
<tr><th><label for="id_form-1-pub_date">Pub date:</label></th><td><input type="text" name="form-1-pub
<tr><th><label for="id_form-1-ORDER">Order:</label></th><td><input type="number" name="form-1-ORDER"
<tr><th><label for="id_form-2-title">Title:</label></th><td><input type="text" name="form-2-title" id
<tr><th><label for="id_form-2-pub_date">Pub date:</label></th><td><input type="text" name="form-2-pub
<tr><th><label for="id_form-2-ORDER">Order:</label></th><td><input type="number" name="form-2-ORDER"
This adds an additional field to each form. This new field is named ORDER and is an forms.IntegerField.
For the forms that came from the initial data it automatically assigned them a numeric value. Let’s look at what will
happen when the user changes these values:
>>> data = {
... 'form-TOTAL_FORMS': '3',
... 'form-INITIAL_FORMS': '2',
... 'form-MAX_NUM_FORMS': '',
... 'form-0-title': 'Article #1',
... 'form-0-pub_date': '2008-05-10',
... 'form-0-ORDER': '2',
... 'form-1-title': 'Article #2',
... 'form-1-pub_date': '2008-05-11',
... 'form-1-ORDER': '1',
... 'form-2-title': 'Article #3',
... 'form-2-pub_date': '2008-05-01',
... 'form-2-ORDER': '0',
... }
>>> formset = ArticleFormSet(data, initial=[
... {'title': 'Article #1', 'pub_date': datetime.date(2008, 5, 10)},
... {'title': 'Article #2', 'pub_date': datetime.date(2008, 5, 11)},
... ])
>>> formset.is_valid()
True
>>> for form in formset.ordered_forms:
... print(form.cleaned_data)
{'pub_date': datetime.date(2008, 5, 1), 'ORDER': 0, 'title': 'Article #3'}
{'pub_date': datetime.date(2008, 5, 11), 'ORDER': 1, 'title': 'Article #2'}
{'pub_date': datetime.date(2008, 5, 10), 'ORDER': 2, 'title': 'Article #1'}
can_delete
BaseFormSet.can_delete
Default: False
Lets you create a formset with the ability to select forms for deletion:
>>> from django.forms import formset_factory
>>> from myapp.forms import ArticleForm
>>> ArticleFormSet = formset_factory(ArticleForm, can_delete=True)
>>> formset = ArticleFormSet(initial=[
... {'title': 'Article #1', 'pub_date': datetime.date(2008, 5, 10)},
... {'title': 'Article #2', 'pub_date': datetime.date(2008, 5, 11)},
... ])
>>> for form in formset:
... print(form.as_table())
<tr><th><label for="id_form-0-title">Title:</label></th><td><input type="text" name="form-0-title" va
<tr><th><label for="id_form-0-pub_date">Pub date:</label></th><td><input type="text" name="form-0-pub
<tr><th><label for="id_form-0-DELETE">Delete:</label></th><td><input type="checkbox" name="form-0-DEL
<tr><th><label for="id_form-1-title">Title:</label></th><td><input type="text" name="form-1-title" va
<tr><th><label for="id_form-1-pub_date">Pub date:</label></th><td><input type="text" name="form-1-pub
<tr><th><label for="id_form-1-DELETE">Delete:</label></th><td><input type="checkbox" name="form-1-DEL
232 Chapter 3. Using Django](https://image.slidesharecdn.com/20160225-django-documentation-160225091707/85/Django-Documentation-236-320.jpg)
![Django Documentation, Release 1.9.3.dev20160224120324
<tr><th><label for="id_form-2-title">Title:</label></th><td><input type="text" name="form-2-title" id
<tr><th><label for="id_form-2-pub_date">Pub date:</label></th><td><input type="text" name="form-2-pub
<tr><th><label for="id_form-2-DELETE">Delete:</label></th><td><input type="checkbox" name="form-2-DEL
Similar to can_order this adds a new field to each form named DELETE and is a forms.BooleanField. When
data comes through marking any of the delete fields you can access them with deleted_forms:
>>> data = {
... 'form-TOTAL_FORMS': '3',
... 'form-INITIAL_FORMS': '2',
... 'form-MAX_NUM_FORMS': '',
... 'form-0-title': 'Article #1',
... 'form-0-pub_date': '2008-05-10',
... 'form-0-DELETE': 'on',
... 'form-1-title': 'Article #2',
... 'form-1-pub_date': '2008-05-11',
... 'form-1-DELETE': '',
... 'form-2-title': '',
... 'form-2-pub_date': '',
... 'form-2-DELETE': '',
... }
>>> formset = ArticleFormSet(data, initial=[
... {'title': 'Article #1', 'pub_date': datetime.date(2008, 5, 10)},
... {'title': 'Article #2', 'pub_date': datetime.date(2008, 5, 11)},
... ])
>>> [form.cleaned_data for form in formset.deleted_forms]
[{'DELETE': True, 'pub_date': datetime.date(2008, 5, 10), 'title': 'Article #1'}]
If you are using a ModelFormSet, model instances for deleted forms will be deleted when you call
formset.save().
If you call formset.save(commit=False), objects will not be deleted automatically. You’ll need to call
delete() on each of the formset.deleted_objects to actually delete them:
>>> instances = formset.save(commit=False)
>>> for obj in formset.deleted_objects:
... obj.delete()
On the other hand, if you are using a plain FormSet, it’s up to you to handle formset.deleted_forms, perhaps
in your formset’s save() method, as there’s no general notion of what it means to delete a form.
Adding additional fields to a formset
If you need to add additional fields to the formset this can be easily accomplished. The formset base class provides
an add_fields method. You can simply override this method to add your own fields or even redefine the default
fields/attributes of the order and deletion fields:
>>> from django.forms import BaseFormSet
>>> from django.forms import formset_factory
>>> from myapp.forms import ArticleForm
>>> class BaseArticleFormSet(BaseFormSet):
... def add_fields(self, form, index):
... super(BaseArticleFormSet, self).add_fields(form, index)
... form.fields["my_field"] = forms.CharField()
>>> ArticleFormSet = formset_factory(ArticleForm, formset=BaseArticleFormSet)
>>> formset = ArticleFormSet()
3.4. Working with forms 233](https://image.slidesharecdn.com/20160225-django-documentation-160225091707/85/Django-Documentation-237-320.jpg)
![Django Documentation, Release 1.9.3.dev20160224120324
>>> for form in formset:
... print(form.as_table())
<tr><th><label for="id_form-0-title">Title:</label></th><td><input type="text" name="form-0-title" id
<tr><th><label for="id_form-0-pub_date">Pub date:</label></th><td><input type="text" name="form-0-pub
<tr><th><label for="id_form-0-my_field">My field:</label></th><td><input type="text" name="form-0-my_
Passing custom parameters to formset forms
Sometimes your form class takes custom parameters, like MyArticleForm. You can pass this parameter when
instantiating the formset:
>>> from django.forms import BaseFormSet
>>> from django.forms import formset_factory
>>> from myapp.forms import ArticleForm
>>> class MyArticleForm(ArticleForm):
... def __init__(self, *args, **kwargs):
... self.user = kwargs.pop('user')
... super(MyArticleForm, self).__init__(*args, **kwargs)
>>> ArticleFormSet = formset_factory(MyArticleForm)
>>> formset = ArticleFormSet(form_kwargs={'user': request.user})
The form_kwargs may also depend on the specific form instance. The formset base class provides a
get_form_kwargs method. The method takes a single argument - the index of the form in the formset. The
index is None for the empty_form:
>>> from django.forms import BaseFormSet
>>> from django.forms import formset_factory
>>> class BaseArticleFormSet(BaseFormSet):
... def get_form_kwargs(self, index):
... kwargs = super(BaseArticleFormSet, self).get_form_kwargs(index)
... kwargs['custom_kwarg'] = index
... return kwargs
The form_kwargs argument was added.
Using a formset in views and templates
Using a formset inside a view is as easy as using a regular Form class. The only thing you will want to be aware of is
making sure to use the management form inside the template. Let’s look at a sample view:
from django.forms import formset_factory
from django.shortcuts import render
from myapp.forms import ArticleForm
def manage_articles(request):
ArticleFormSet = formset_factory(ArticleForm)
if request.method == 'POST':
formset = ArticleFormSet(request.POST, request.FILES)
if formset.is_valid():
# do something with the formset.cleaned_data
pass
else:
234 Chapter 3. Using Django](https://image.slidesharecdn.com/20160225-django-documentation-160225091707/85/Django-Documentation-238-320.jpg)

![Django Documentation, Release 1.9.3.dev20160224120324
book_formset = BookFormSet(request.POST, request.FILES, prefix='books')
if article_formset.is_valid() and book_formset.is_valid():
# do something with the cleaned_data on the formsets.
pass
else:
article_formset = ArticleFormSet(prefix='articles')
book_formset = BookFormSet(prefix='books')
return render(request, 'manage_articles.html', {
'article_formset': article_formset,
'book_formset': book_formset,
})
You would then render the formsets as normal. It is important to point out that you need to pass prefix on both the
POST and non-POST cases so that it is rendered and processed correctly.
Creating forms from models
ModelForm
class ModelForm
If you’re building a database-driven app, chances are you’ll have forms that map closely to Django models. For
instance, you might have a BlogComment model, and you want to create a form that lets people submit comments.
In this case, it would be redundant to define the field types in your form, because you’ve already defined the fields in
your model.
For this reason, Django provides a helper class that lets you create a Form class from a Django model.
For example:
>>> from django.forms import ModelForm
>>> from myapp.models import Article
# Create the form class.
>>> class ArticleForm(ModelForm):
... class Meta:
... model = Article
... fields = ['pub_date', 'headline', 'content', 'reporter']
# Creating a form to add an article.
>>> form = ArticleForm()
# Creating a form to change an existing article.
>>> article = Article.objects.get(pk=1)
>>> form = ArticleForm(instance=article)
Field types The generated Form class will have a form field for every model field specified, in the order specified
in the fields attribute.
Each model field has a corresponding default form field. For example, a CharField on a model is represented as a
CharField on a form. A model ManyToManyField is represented as a MultipleChoiceField. Here is the
full list of conversions:
236 Chapter 3. Using Django](https://image.slidesharecdn.com/20160225-django-documentation-160225091707/85/Django-Documentation-240-320.jpg)

![Django Documentation, Release 1.9.3.dev20160224120324
from django.db import models
from django.forms import ModelForm
TITLE_CHOICES = (
('MR', 'Mr.'),
('MRS', 'Mrs.'),
('MS', 'Ms.'),
)
class Author(models.Model):
name = models.CharField(max_length=100)
title = models.CharField(max_length=3, choices=TITLE_CHOICES)
birth_date = models.DateField(blank=True, null=True)
def __str__(self): # __unicode__ on Python 2
return self.name
class Book(models.Model):
name = models.CharField(max_length=100)
authors = models.ManyToManyField(Author)
class AuthorForm(ModelForm):
class Meta:
model = Author
fields = ['name', 'title', 'birth_date']
class BookForm(ModelForm):
class Meta:
model = Book
fields = ['name', 'authors']
With these models, the ModelForm subclasses above would be roughly equivalent to this (the only difference being
the save() method, which we’ll discuss in a moment.):
from django import forms
class AuthorForm(forms.Form):
name = forms.CharField(max_length=100)
title = forms.CharField(max_length=3,
widget=forms.Select(choices=TITLE_CHOICES))
birth_date = forms.DateField(required=False)
class BookForm(forms.Form):
name = forms.CharField(max_length=100)
authors = forms.ModelMultipleChoiceField(queryset=Author.objects.all())
Validation on a ModelForm There are two main steps involved in validating a ModelForm:
1. Validating the form
2. Validating the model instance
Just like normal form validation, model form validation is triggered implicitly when calling is_valid() or access-
ing the errors attribute and explicitly when calling full_clean(), although you will typically not use the latter
method in practice.
Model validation (Model.full_clean()) is triggered from within the form validation step, right after the form’s
clean() method is called.
238 Chapter 3. Using Django](https://image.slidesharecdn.com/20160225-django-documentation-160225091707/85/Django-Documentation-242-320.jpg)


![Django Documentation, Release 1.9.3.dev20160224120324
Selecting the fields to use It is strongly recommended that you explicitly set all fields that should be edited in the
form using the fields attribute. Failure to do so can easily lead to security problems when a form unexpectedly
allows a user to set certain fields, especially when new fields are added to a model. Depending on how the form is
rendered, the problem may not even be visible on the web page.
The alternative approach would be to include all fields automatically, or blacklist only some. This fundamental ap-
proach is known to be much less secure and has led to serious exploits on major websites (e.g. GitHub).
There are, however, two shortcuts available for cases where you can guarantee these security concerns do not apply to
you:
1. Set the fields attribute to the special value ’__all__’ to indicate that all fields in the model should be
used. For example:
from django.forms import ModelForm
class AuthorForm(ModelForm):
class Meta:
model = Author
fields = '__all__'
2. Set the exclude attribute of the ModelForm’s inner Meta class to a list of fields to be excluded from the
form.
For example:
class PartialAuthorForm(ModelForm):
class Meta:
model = Author
exclude = ['title']
Since the Author model has the 3 fields name, title and birth_date, this will result in the fields name
and birth_date being present on the form.
If either of these are used, the order the fields appear in the form will be the order the fields are defined in the model,
with ManyToManyField instances appearing last.
In addition, Django applies the following rule: if you set editable=False on the model field, any form created
from the model via ModelForm will not include that field.
In older versions, omitting both fields and exclude resulted in a form with all the model’s fields. Doing this now
raises an ImproperlyConfigured exception.
Note: Any fields not included in a form by the above logic will not be set by the form’s save() method. Also, if
you manually add the excluded fields back to the form, they will not be initialized from the model instance.
Django will prevent any attempt to save an incomplete model, so if the model does not allow the missing fields to
be empty, and does not provide a default value for the missing fields, any attempt to save() a ModelForm with
missing fields will fail. To avoid this failure, you must instantiate your model with initial values for the missing, but
required fields:
author = Author(title='Mr')
form = PartialAuthorForm(request.POST, instance=author)
form.save()
Alternatively, you can use save(commit=False) and manually set any extra required fields:
form = PartialAuthorForm(request.POST)
author = form.save(commit=False)
author.title = 'Mr'
author.save()
3.4. Working with forms 241](https://image.slidesharecdn.com/20160225-django-documentation-160225091707/85/Django-Documentation-245-320.jpg)
![Django Documentation, Release 1.9.3.dev20160224120324
See the section on saving forms for more details on using save(commit=False).
Overriding the default fields The default field types, as described in the Field types table above, are sensible
defaults. If you have a DateField in your model, chances are you’d want that to be represented as a DateField
in your form. But ModelForm gives you the flexibility of changing the form field for a given model.
To specify a custom widget for a field, use the widgets attribute of the inner Meta class. This should be a dictionary
mapping field names to widget classes or instances.
For example, if you want the CharField for the name attribute of Author to be represented by a <textarea>
instead of its default <input type="text">, you can override the field’s widget:
from django.forms import ModelForm, Textarea
from myapp.models import Author
class AuthorForm(ModelForm):
class Meta:
model = Author
fields = ('name', 'title', 'birth_date')
widgets = {
'name': Textarea(attrs={'cols': 80, 'rows': 20}),
}
The widgets dictionary accepts either widget instances (e.g., Textarea(...)) or classes (e.g., Textarea).
Similarly, you can specify the labels, help_texts and error_messages attributes of the inner Meta class if
you want to further customize a field.
For example if you wanted to customize the wording of all user facing strings for the name field:
from django.utils.translation import ugettext_lazy as _
class AuthorForm(ModelForm):
class Meta:
model = Author
fields = ('name', 'title', 'birth_date')
labels = {
'name': _('Writer'),
}
help_texts = {
'name': _('Some useful help text.'),
}
error_messages = {
'name': {
'max_length': _("This writer's name is too long."),
},
}
You can also specify field_classes to customize the type of fields instantiated by the form.
For example, if you wanted to use MySlugFormField for the slug field, you could do the following:
from django.forms import ModelForm
from myapp.models import Article
class ArticleForm(ModelForm):
class Meta:
model = Article
fields = ['pub_date', 'headline', 'content', 'reporter', 'slug']
242 Chapter 3. Using Django](https://image.slidesharecdn.com/20160225-django-documentation-160225091707/85/Django-Documentation-246-320.jpg)
![Django Documentation, Release 1.9.3.dev20160224120324
field_classes = {
'slug': MySlugFormField,
}
Finally, if you want complete control over of a field – including its type, validators, required, etc. – you can do this by
declaratively specifying fields like you would in a regular Form.
If you want to specify a field’s validators, you can do so by defining the field declaratively and setting its validators
parameter:
from django.forms import ModelForm, CharField
from myapp.models import Article
class ArticleForm(ModelForm):
slug = CharField(validators=[validate_slug])
class Meta:
model = Article
fields = ['pub_date', 'headline', 'content', 'reporter', 'slug']
The Meta.field_classes attribute was added.
Note: When you explicitly instantiate a form field like this, it is important to understand how ModelForm and
regular Form are related.
ModelForm is a regular Form which can automatically generate certain fields. The fields that are automatically
generated depend on the content of the Meta class and on which fields have already been defined declaratively.
Basically, ModelForm will only generate fields that are missing from the form, or in other words, fields that weren’t
defined declaratively.
Fields defined declaratively are left as-is, therefore any customizations made to Meta attributes such as widgets,
labels, help_texts, or error_messages are ignored; these only apply to fields that are generated automati-
cally.
Similarly, fields defined declaratively do not draw their attributes like max_length or required from the corre-
sponding model. If you want to maintain the behavior specified in the model, you must set the relevant arguments
explicitly when declaring the form field.
For example, if the Article model looks like this:
class Article(models.Model):
headline = models.CharField(max_length=200, null=True, blank=True,
help_text="Use puns liberally")
content = models.TextField()
and you want to do some custom validation for headline, while keeping the blank and help_text values as
specified, you might define ArticleForm like this:
class ArticleForm(ModelForm):
headline = MyFormField(max_length=200, required=False,
help_text="Use puns liberally")
class Meta:
model = Article
fields = ['headline', 'content']
You must ensure that the type of the form field can be used to set the contents of the corresponding model field. When
they are not compatible, you will get a ValueError as no implicit conversion takes place.
3.4. Working with forms 243](https://image.slidesharecdn.com/20160225-django-documentation-160225091707/85/Django-Documentation-247-320.jpg)

![Django Documentation, Release 1.9.3.dev20160224120324
>>> article = Article.objects.get(pk=1)
>>> article.headline
'My headline'
>>> form = ArticleForm(initial={'headline': 'Initial headline'}, instance=article)
>>> form['headline'].value()
'Initial headline'
ModelForm factory function You can create forms from a given model using the standalone function
modelform_factory(), instead of using a class definition. This may be more convenient if you do not have
many customizations to make:
>>> from django.forms import modelform_factory
>>> from myapp.models import Book
>>> BookForm = modelform_factory(Book, fields=("author", "title"))
This can also be used to make simple modifications to existing forms, for example by specifying the widgets to be
used for a given field:
>>> from django.forms import Textarea
>>> Form = modelform_factory(Book, form=BookForm,
... widgets={"title": Textarea()})
The fields to include can be specified using the fields and exclude keyword arguments, or the corresponding
attributes on the ModelForm inner Meta class. Please see the ModelForm Selecting the fields to use documentation.
... or enable localization for specific fields:
>>> Form = modelform_factory(Author, form=AuthorForm, localized_fields=("birth_date",))
Model formsets
class models.BaseModelFormSet
Like regular formsets, Django provides a couple of enhanced formset classes that make it easy to work with Django
models. Let’s reuse the Author model from above:
>>> from django.forms import modelformset_factory
>>> from myapp.models import Author
>>> AuthorFormSet = modelformset_factory(Author, fields=('name', 'title'))
Using fields restricts the formset to use only the given fields. Alternatively, you can take an “opt-out” approach,
specifying which fields to exclude:
>>> AuthorFormSet = modelformset_factory(Author, exclude=('birth_date',))
In older versions, omitting both fields and exclude resulted in a formset with all the model’s fields. Doing this
now raises an ImproperlyConfigured exception.
This will create a formset that is capable of working with the data associated with the Author model. It works just
like a regular formset:
>>> formset = AuthorFormSet()
>>> print(formset)
<input type="hidden" name="form-TOTAL_FORMS" value="1" id="id_form-TOTAL_FORMS" /><input type="hidden
<tr><th><label for="id_form-0-name">Name:</label></th><td><input id="id_form-0-name" type="text" name
<tr><th><label for="id_form-0-title">Title:</label></th><td><select name="form-0-title" id="id_form-0
<option value="" selected="selected">---------</option>
3.4. Working with forms 245](https://image.slidesharecdn.com/20160225-django-documentation-160225091707/85/Django-Documentation-249-320.jpg)

![Django Documentation, Release 1.9.3.dev20160224120324
models.BaseModelFormSet.new_objects
Limiting the number of editable objects As with regular formsets, you can use the max_num and extra param-
eters to modelformset_factory() to limit the number of extra forms displayed.
max_num does not prevent existing objects from being displayed:
>>> Author.objects.order_by('name')
[<Author: Charles Baudelaire>, <Author: Paul Verlaine>, <Author: Walt Whitman>]
>>> AuthorFormSet = modelformset_factory(Author, fields=('name',), max_num=1)
>>> formset = AuthorFormSet(queryset=Author.objects.order_by('name'))
>>> [x.name for x in formset.get_queryset()]
['Charles Baudelaire', 'Paul Verlaine', 'Walt Whitman']
Also, extra=0 doesn’t prevent creation of new model instances as you can add additional forms with JavaScript or
just send additional POST data. Formsets don’t yet provide functionality for an “edit only” view that prevents creation
of new instances.
If the value of max_num is greater than the number of existing related objects, up to extra additional blank forms
will be added to the formset, so long as the total number of forms does not exceed max_num:
>>> AuthorFormSet = modelformset_factory(Author, fields=('name',), max_num=4, extra=2)
>>> formset = AuthorFormSet(queryset=Author.objects.order_by('name'))
>>> for form in formset:
... print(form.as_table())
<tr><th><label for="id_form-0-name">Name:</label></th><td><input id="id_form-0-name" type="text" name
<tr><th><label for="id_form-1-name">Name:</label></th><td><input id="id_form-1-name" type="text" name
<tr><th><label for="id_form-2-name">Name:</label></th><td><input id="id_form-2-name" type="text" name
<tr><th><label for="id_form-3-name">Name:</label></th><td><input id="id_form-3-name" type="text" name
A max_num value of None (the default) puts a high limit on the number of forms displayed (1000). In practice this
is equivalent to no limit.
Using a model formset in a view Model formsets are very similar to formsets. Let’s say we want to present a
formset to edit Author model instances:
from django.forms import modelformset_factory
from django.shortcuts import render
from myapp.models import Author
def manage_authors(request):
AuthorFormSet = modelformset_factory(Author, fields=('name', 'title'))
if request.method == 'POST':
formset = AuthorFormSet(request.POST, request.FILES)
if formset.is_valid():
formset.save()
# do something.
else:
formset = AuthorFormSet()
return render(request, 'manage_authors.html', {'formset': formset})
As you can see, the view logic of a model formset isn’t drastically different than that of a “normal” formset. The only
difference is that we call formset.save() to save the data into the database. (This was described above, in Saving
objects in the formset.)
248 Chapter 3. Using Django](https://image.slidesharecdn.com/20160225-django-documentation-160225091707/85/Django-Documentation-252-320.jpg)
![Django Documentation, Release 1.9.3.dev20160224120324
Overriding clean() on a ModelFormSet Just like with ModelForms, by default the clean() method
of a ModelFormSet will validate that none of the items in the formset violate the unique constraints on your
model (either unique, unique_together or unique_for_date|month|year). If you want to override
the clean() method on a ModelFormSet and maintain this validation, you must call the parent class’s clean
method:
from django.forms import BaseModelFormSet
class MyModelFormSet(BaseModelFormSet):
def clean(self):
super(MyModelFormSet, self).clean()
# example custom validation across forms in the formset
for form in self.forms:
# your custom formset validation
...
Also note that by the time you reach this step, individual model instances have already been created for each Form.
Modifying a value in form.cleaned_data is not sufficient to affect the saved value. If you wish to modify a value
in ModelFormSet.clean() you must modify form.instance:
from django.forms import BaseModelFormSet
class MyModelFormSet(BaseModelFormSet):
def clean(self):
super(MyModelFormSet, self).clean()
for form in self.forms:
name = form.cleaned_data['name'].upper()
form.cleaned_data['name'] = name
# update the instance value.
form.instance.name = name
Using a custom queryset As stated earlier, you can override the default queryset used by the model formset:
from django.forms import modelformset_factory
from django.shortcuts import render
from myapp.models import Author
def manage_authors(request):
AuthorFormSet = modelformset_factory(Author, fields=('name', 'title'))
if request.method == "POST":
formset = AuthorFormSet(request.POST, request.FILES,
queryset=Author.objects.filter(name__startswith='O'))
if formset.is_valid():
formset.save()
# Do something.
else:
formset = AuthorFormSet(queryset=Author.objects.filter(name__startswith='O'))
return render(request, 'manage_authors.html', {'formset': formset})
Note that we pass the queryset argument in both the POST and GET cases in this example.
Using the formset in the template There are three ways to render a formset in a Django template.
First, you can let the formset do most of the work:
3.4. Working with forms 249](https://image.slidesharecdn.com/20160225-django-documentation-160225091707/85/Django-Documentation-253-320.jpg)


![Django Documentation, Release 1.9.3.dev20160224120324
files in the <head> block of your HTML page.
However, Media objects have some other interesting properties.
Subsets of assets If you only want files of a particular type, you can use the subscript operator to filter out a medium
of interest. For example:
>>> w = CalendarWidget()
>>> print(w.media)
<link href="http://static.example.com/pretty.css" type="text/css" media="all" rel="stylesheet" />
<script type="text/javascript" src="http://static.example.com/animations.js"></script>
<script type="text/javascript" src="http://static.example.com/actions.js"></script>
>>> print(w.media['css'])
<link href="http://static.example.com/pretty.css" type="text/css" media="all" rel="stylesheet" />
When you use the subscript operator, the value that is returned is a new Media object – but one that only contains the
media of interest.
Combining Media objects Media objects can also be added together. When two Media objects are added, the
resulting Media object contains the union of the assets specified by both:
>>> from django import forms
>>> class CalendarWidget(forms.TextInput):
... class Media:
... css = {
... 'all': ('pretty.css',)
... }
... js = ('animations.js', 'actions.js')
>>> class OtherWidget(forms.TextInput):
... class Media:
... js = ('whizbang.js',)
>>> w1 = CalendarWidget()
>>> w2 = OtherWidget()
>>> print(w1.media + w2.media)
<link href="http://static.example.com/pretty.css" type="text/css" media="all" rel="stylesheet" />
<script type="text/javascript" src="http://static.example.com/animations.js"></script>
<script type="text/javascript" src="http://static.example.com/actions.js"></script>
<script type="text/javascript" src="http://static.example.com/whizbang.js"></script>
Media on Forms
Widgets aren’t the only objects that can have media definitions – forms can also define media. The rules for media
definitions on forms are the same as the rules for widgets: declarations can be static or dynamic; path and inheritance
rules for those declarations are exactly the same.
Regardless of whether you define a media declaration, all Form objects have a media property. The default value
for this property is the result of adding the media definitions for all widgets that are part of the form:
>>> from django import forms
>>> class ContactForm(forms.Form):
... date = DateField(widget=CalendarWidget)
... name = CharField(max_length=40, widget=OtherWidget)
256 Chapter 3. Using Django](https://image.slidesharecdn.com/20160225-django-documentation-160225091707/85/Django-Documentation-260-320.jpg)

![Django Documentation, Release 1.9.3.dev20160224120324
3.5.1 Support for template engines
Support for multiple template engines and the TEMPLATES setting were added in Django 1.8.
Configuration
Templates engines are configured with the TEMPLATES setting. It’s a list of configurations, one for each engine.
The default value is empty. The settings.py generated by the startproject command defines a more useful
value:
TEMPLATES = [
{
'BACKEND': 'django.template.backends.django.DjangoTemplates',
'DIRS': [],
'APP_DIRS': True,
'OPTIONS': {
# ... some options here ...
},
},
]
BACKEND is a dotted Python path to a template engine class implementing Django’s template back-
end API. The built-in backends are django.template.backends.django.DjangoTemplates and
django.template.backends.jinja2.Jinja2.
Since most engines load templates from files, the top-level configuration for each engine contains two common set-
tings:
• DIRS defines a list of directories where the engine should look for template source files, in search order.
• APP_DIRS tells whether the engine should look for templates inside installed applications. Each backend
defines a conventional name for the subdirectory inside applications where its templates should be stored.
While uncommon, it’s possible to configure several instances of the same backend with different options. In that case
you should define a unique NAME for each engine.
OPTIONS contains backend-specific settings.
Usage
The django.template.loader module defines two functions to load templates.
get_template(template_name, dirs=_dirs_undefined, using=None)
This function loads the template with the given name and returns a Template object.
The exact type of the return value depends on the backend that loaded the template. Each backend has its own
Template class.
get_template() tries each template engine in order until one succeeds. If the template cannot be
found, it raises TemplateDoesNotExist. If the template is found but contains invalid syntax, it raises
TemplateSyntaxError.
How templates are searched and loaded depends on each engine’s backend and configuration.
If you want to restrict the search to a particular template engine, pass the engine’s NAME in the using argument.
Deprecated since version 1.8: The dirs parameter was deprecated.
The using parameter was added.
258 Chapter 3. Using Django](https://image.slidesharecdn.com/20160225-django-documentation-160225091707/85/Django-Documentation-262-320.jpg)
![Django Documentation, Release 1.9.3.dev20160224120324
get_template() returns a backend-dependent Template instead of a django.template.Template.
select_template(template_name_list, dirs=_dirs_undefined, using=None)
select_template() is just like get_template(), except it takes a list of template names. It tries each
name in order and returns the first template that exists.
Deprecated since version 1.8: The dirs parameter was deprecated.
The using parameter was added.
select_template() returns a backend-dependent Template instead of a
django.template.Template.
If loading a template fails, the following two exceptions, defined in django.template, may be raised:
exception TemplateDoesNotExist(msg, tried=None, backend=None, chain=None)
This exception is raised when a template cannot be found. It accepts the following optional arguments for
populating the template postmortem on the debug page:
backend The template backend instance from which the exception originated.
tried A list of sources that were tried when finding the template. This is formatted as a list of tuples containing
(origin, status), where origin is an origin-like object and status is a string with the reason
the template wasn’t found.
chain A list of intermediate TemplateDoesNotExist exceptions raised when trying to load a template.
This is used by functions, such as get_template(), that try to load a given template from multiple
engines.
The backend, tried, and chain arguments were added.
exception TemplateSyntaxError(msg)
This exception is raised when a template was found but contains errors.
Template objects returned by get_template() and select_template() must provide a render()
method with the following signature:
Template.render(context=None, request=None)
Renders this template with a given context.
If context is provided, it must be a dict. If it isn’t provided, the engine will render the template with an
empty context.
If request is provided, it must be an HttpRequest. Then the engine must make it, as well as the CSRF
token, available in the template. How this is achieved is up to each backend.
Here’s an example of the search algorithm. For this example the TEMPLATES setting is:
TEMPLATES = [
{
'BACKEND': 'django.template.backends.django.DjangoTemplates',
'DIRS': [
'/home/html/example.com',
'/home/html/default',
],
},
{
'BACKEND': 'django.template.backends.jinja2.Jinja2',
'DIRS': [
'/home/html/jinja2',
],
},
]
3.5. Templates 259](https://image.slidesharecdn.com/20160225-django-documentation-160225091707/85/Django-Documentation-263-320.jpg)
![Django Documentation, Release 1.9.3.dev20160224120324
If you call get_template(’story_detail.html’), here are the files Django will look for, in order:
• /home/html/example.com/story_detail.html (’django’ engine)
• /home/html/default/story_detail.html (’django’ engine)
• /home/html/jinja2/story_detail.html (’jinja2’ engine)
If you call select_template([’story_253_detail.html’, ’story_detail.html’]), here’s what
Django will look for:
• /home/html/example.com/story_253_detail.html (’django’ engine)
• /home/html/default/story_253_detail.html (’django’ engine)
• /home/html/jinja2/story_253_detail.html (’jinja2’ engine)
• /home/html/example.com/story_detail.html (’django’ engine)
• /home/html/default/story_detail.html (’django’ engine)
• /home/html/jinja2/story_detail.html (’jinja2’ engine)
When Django finds a template that exists, it stops looking.
Tip
You can use select_template() for flexible template loading. For example, if you’ve
written a news story and want some stories to have custom templates, use something like
select_template([’story_%s_detail.html’ % story.id, ’story_detail.html’]).
That’ll allow you to use a custom template for an individual story, with a fallback template for stories that don’t have
custom templates.
It’s possible – and preferable – to organize templates in subdirectories inside each directory containing templates. The
convention is to make a subdirectory for each Django app, with subdirectories within those subdirectories as needed.
Do this for your own sanity. Storing all templates in the root level of a single directory gets messy.
To load a template that’s within a subdirectory, just use a slash, like so:
get_template('news/story_detail.html')
Using the same TEMPLATES option as above, this will attempt to load the following templates:
• /home/html/example.com/news/story_detail.html (’django’ engine)
• /home/html/default/news/story_detail.html (’django’ engine)
• /home/html/jinja2/news/story_detail.html (’jinja2’ engine)
In addition, to cut down on the repetitive nature of loading and rendering templates, Django provides a shortcut
function which automates the process.
render_to_string(template_name, context=None, context_instance=_context_instance_undefined, re-
quest=None, using=None)
render_to_string() loads a template like get_template() and calls its render() method imme-
diately. It takes the following arguments.
template_name The name of the template to load and render. If it’s a list of template names, Django uses
select_template() instead of get_template() to find the template.
context A dict to be used as the template’s context for rendering.
The context argument used to be called dictionary. That name is deprecated in Django 1.8 and will
be removed in Django 1.10.
260 Chapter 3. Using Django](https://image.slidesharecdn.com/20160225-django-documentation-160225091707/85/Django-Documentation-264-320.jpg)
![Django Documentation, Release 1.9.3.dev20160224120324
context is now optional. An empty context will be used if it isn’t provided.
context_instance An instance of Context or a subclass (e.g., an instance of RequestContext) to
use as the template’s context.
Deprecated since version 1.8: The context_instance argument is deprecated. Use context and if
needed request.
request An optional HttpRequest that will be available during the template’s rendering process.
The request argument was added.
See also the render() shortcut which calls render_to_string() and feeds the result into an HttpResponse
suitable for returning from a view.
Finally, you can use configured engines directly:
engines
Template engines are available in django.template.engines:
from django.template import engines
django_engine = engines['django']
template = django_engine.from_string("Hello {{ name }}!")
The lookup key — ’django’ in this example — is the engine’s NAME.
Built-in backends
class DjangoTemplates
Set BACKEND to ’django.template.backends.django.DjangoTemplates’ to configure a Django
template engine.
When APP_DIRS is True, DjangoTemplates engines look for templates in the templates subdirectory of
installed applications. This generic name was kept for backwards-compatibility.
DjangoTemplates engines accept the following OPTIONS:
• ’allowed_include_roots’: a list of strings representing allowed prefixes for the {% ssi %} template
tag. This is a security measure, so that template authors can’t access files that they shouldn’t be accessing.
For example, if ’allowed_include_roots’ is [’/home/html’, ’/var/www’], then {% ssi
/home/html/foo.txt %} would work, but {% ssi /etc/passwd %} wouldn’t.
It defaults to an empty list.
Deprecated since version 1.8: allowed_include_roots is deprecated because the {% ssi %} tag is dep-
recated.
• ’context_processors’: a list of dotted Python paths to callables that are used to populate the context
when a template is rendered with a request. These callables take a request object as their argument and return a
dict of items to be merged into the context.
It defaults to an empty list.
See RequestContext for more information.
• ’debug’: a boolean that turns on/off template debug mode. If it is True, the fancy error page will display a
detailed report for any exception raised during template rendering. This report contains the relevant snippet of
the template with the appropriate line highlighted.
It defaults to the value of the DEBUG setting.
3.5. Templates 261](https://image.slidesharecdn.com/20160225-django-documentation-160225091707/85/Django-Documentation-265-320.jpg)
![Django Documentation, Release 1.9.3.dev20160224120324
• ’loaders’: a list of dotted Python paths to template loader classes. Each Loader class knows how to import
templates from a particular source. Optionally, a tuple can be used instead of a string. The first item in the tuple
should be the Loader class name, and subsequent items are passed to the Loader during initialization.
The default depends on the values of DIRS and APP_DIRS.
See Loader types for details.
• ’string_if_invalid’: the output, as a string, that the template system should use for invalid (e.g. mis-
spelled) variables.
It defaults to an empty string.
See How invalid variables are handled for details.
• ’file_charset’: the charset used to read template files on disk.
It defaults to the value of FILE_CHARSET.
• ’libraries’: A dictionary of labels and dotted Python paths of template tag modules to register with the
template engine. This can be used to add new libraries or provide alternate labels for existing ones. For example:
OPTIONS={
'libraries': {
'myapp_tags': 'path.to.myapp.tags',
'admin.urls': 'django.contrib.admin.templatetags.admin_urls',
},
}
Libraries can be loaded by passing the corresponding dictionary key to the {% load %} tag.
• ’builtins’: A list of dotted Python paths of template tag modules to add to built-ins. For example:
OPTIONS={
'builtins': ['myapp.builtins'],
}
Tags and filters from built-in libraries can be used without first calling the {% load %} tag.
The libraries and builtins arguments were added.
class Jinja2
Requires Jinja2 to be installed:
$ pip install Jinja2
Set BACKEND to ’django.template.backends.jinja2.Jinja2’ to configure a Jinja2 engine.
When APP_DIRS is True, Jinja2 engines look for templates in the jinja2 subdirectory of installed applications.
The most important entry in OPTIONS is ’environment’. It’s a dotted Python path to a callable returning a Jinja2
environment. It defaults to ’jinja2.Environment’. Django invokes that callable and passes other options as
keyword arguments. Furthermore, Django adds defaults that differ from Jinja2’s for a few options:
• ’autoescape’: True
• ’loader’: a loader configured for DIRS and APP_DIRS
• ’auto_reload’: settings.DEBUG
• ’undefined’: DebugUndefined if settings.DEBUG else Undefined
The default configuration is purposefully kept to a minimum. The Jinja2 backend doesn’t create a Django-flavored
environment. It doesn’t know about Django context processors, filters, and tags. In order to use Django-specific APIs,
you must configure them into the environment.
262 Chapter 3. Using Django](https://image.slidesharecdn.com/20160225-django-documentation-160225091707/85/Django-Documentation-266-320.jpg)

![Django Documentation, Release 1.9.3.dev20160224120324
def from_string(self, template_code):
try:
return Template(self.engine.from_string(template_code))
except foobar.TemplateCompilationFailed as exc:
raise TemplateSyntaxError(exc.args)
def get_template(self, template_name):
try:
return Template(self.engine.get_template(template_name))
except foobar.TemplateNotFound as exc:
raise TemplateDoesNotExist(exc.args, backend=self)
except foobar.TemplateCompilationFailed as exc:
raise TemplateSyntaxError(exc.args)
class Template(object):
def __init__(self, template):
self.template = template
def render(self, context=None, request=None):
if context is None:
context = {}
if request is not None:
context['request'] = request
context['csrf_input'] = csrf_input_lazy(request)
context['csrf_token'] = csrf_token_lazy(request)
return self.template.render(context)
See DEP 182 for more information.
Debug integration for custom engines
Debug page integration for non-Django template engines was added.
The Django debug page has hooks to provide detailed information when a template error arises. Custom template
engines can use these hooks to enhance the traceback information that appears to users. The following hooks are
available:
Template postmortem
The postmortem appears when TemplateDoesNotExist is raised. It lists the template engines and loaders that
were used when trying to find a given template. For example, if two Django engines are configured, the postmortem
will appear like:
264 Chapter 3. Using Django](https://image.slidesharecdn.com/20160225-django-documentation-160225091707/85/Django-Documentation-268-320.jpg)

![Django Documentation, Release 1.9.3.dev20160224120324
],
'line': 4,
'before': 'Hello ',
'during': '{% syntax error %}',
'after': ' {{ world }}n',
'total': 9,
'bottom': 9,
'top': 1,
}
Origin API and 3rd-party integration
Django templates have an Origin object available through the template.origin attribute. This enables debug
information to be displayed in the template postmortem, as well as in 3rd-party libraries, like the Django Debug
Toolbar.
Custom engines can provide their own template.origin information by creating an object that specifies the
following attributes:
• ’name’: The full path to the template.
• ’template_name’: The relative path to the template as passed into the the template loading methods.
• ’loader_name’: An optional string identifying the function or class used to load the template, e.g.
django.template.loaders.filesystem.Loader.
3.5.2 The Django template language
Syntax
About this section
This is an overview of the Django template language’s syntax. For details see the language syntax reference.
A Django template is simply a text document or a Python string marked-up using the Django template language. Some
constructs are recognized and interpreted by the template engine. The main ones are variables and tags.
A template is rendered with a context. Rendering replaces variables with their values, which are looked up in the
context, and executes tags. Everything else is output as is.
The syntax of the Django template language involves four constructs.
Variables
A variable outputs a value from the context, which is a dict-like object mapping keys to values.
Variables are surrounded by {{ and }} like this:
My first name is {{ first_name }}. My last name is {{ last_name }}.
With a context of {’first_name’: ’John’, ’last_name’: ’Doe’}, this template renders to:
My first name is John. My last name is Doe.
266 Chapter 3. Using Django](https://image.slidesharecdn.com/20160225-django-documentation-160225091707/85/Django-Documentation-270-320.jpg)


![Django Documentation, Release 1.9.3.dev20160224120324
from django.http import HttpResponse
def my_view(request):
if request.method == 'GET':
# <view logic>
return HttpResponse('result')
In a class-based view, this would become:
from django.http import HttpResponse
from django.views.generic import View
class MyView(View):
def get(self, request):
# <view logic>
return HttpResponse('result')
Because Django’s URL resolver expects to send the request and associated arguments to a callable function, not a
class, class-based views have an as_view() class method which serves as the callable entry point to your class. The
as_view entry point creates an instance of your class and calls its dispatch() method. dispatch looks at the
request to determine whether it is a GET, POST, etc, and relays the request to a matching method if one is defined, or
raises HttpResponseNotAllowed if not:
# urls.py
from django.conf.urls import url
from myapp.views import MyView
urlpatterns = [
url(r'^about/', MyView.as_view()),
]
It is worth noting that what your method returns is identical to what you return from a function-based view, namely
some form of HttpResponse. This means that http shortcuts or TemplateResponse objects are valid to use
inside a class-based view.
While a minimal class-based view does not require any class attributes to perform its job, class attributes are useful in
many class-based designs, and there are two ways to configure or set class attributes.
The first is the standard Python way of subclassing and overriding attributes and methods in the subclass. So that if
your parent class had an attribute greeting like this:
from django.http import HttpResponse
from django.views.generic import View
class GreetingView(View):
greeting = "Good Day"
def get(self, request):
return HttpResponse(self.greeting)
You can override that in a subclass:
class MorningGreetingView(GreetingView):
greeting = "Morning to ya"
Another option is to configure class attributes as keyword arguments to the as_view() call in the URLconf:
urlpatterns = [
url(r'^about/', GreetingView.as_view(greeting="G'day")),
]
270 Chapter 3. Using Django](https://image.slidesharecdn.com/20160225-django-documentation-160225091707/85/Django-Documentation-274-320.jpg)

![Django Documentation, Release 1.9.3.dev20160224120324
def get(self, request, *args, **kwargs):
form = self.form_class(initial=self.initial)
return render(request, self.template_name, {'form': form})
def post(self, request, *args, **kwargs):
form = self.form_class(request.POST)
if form.is_valid():
# <process form cleaned data>
return HttpResponseRedirect('/success/')
return render(request, self.template_name, {'form': form})
This is a very simple case, but you can see that you would then have the option of customizing this view by overriding
any of the class attributes, e.g. form_class, via URLconf configuration, or subclassing and overriding one or more
of the methods (or both!).
Decorating class-based views
The extension of class-based views isn’t limited to using mixins. You can also use decorators. Since class-based views
aren’t functions, decorating them works differently depending on if you’re using as_view() or creating a subclass.
Decorating in URLconf
The simplest way of decorating class-based views is to decorate the result of the as_view() method. The easiest
place to do this is in the URLconf where you deploy your view:
from django.contrib.auth.decorators import login_required, permission_required
from django.views.generic import TemplateView
from .views import VoteView
urlpatterns = [
url(r'^about/', login_required(TemplateView.as_view(template_name="secret.html"))),
url(r'^vote/', permission_required('polls.can_vote')(VoteView.as_view())),
]
This approach applies the decorator on a per-instance basis. If you want every instance of a view to be decorated, you
need to take a different approach.
Decorating the class
To decorate every instance of a class-based view, you need to decorate the class definition itself. To do this you apply
the decorator to the dispatch() method of the class.
A method on a class isn’t quite the same as a standalone function, so you can’t just apply a function decorator to the
method – you need to transform it into a method decorator first. The method_decorator decorator transforms a
function decorator into a method decorator so that it can be used on an instance method. For example:
from django.contrib.auth.decorators import login_required
from django.utils.decorators import method_decorator
from django.views.generic import TemplateView
class ProtectedView(TemplateView):
template_name = 'secret.html'
272 Chapter 3. Using Django](https://image.slidesharecdn.com/20160225-django-documentation-160225091707/85/Django-Documentation-276-320.jpg)
![Django Documentation, Release 1.9.3.dev20160224120324
@method_decorator(login_required)
def dispatch(self, *args, **kwargs):
return super(ProtectedView, self).dispatch(*args, **kwargs)
Or, more succinctly, you can decorate the class instead and pass the name of the method to be decorated as the keyword
argument name:
@method_decorator(login_required, name='dispatch')
class ProtectedView(TemplateView):
template_name = 'secret.html'
If you have a set of common decorators used in several places, you can define a list or tuple of decorators and use this
instead of invoking method_decorator() multiple times. These two classes are equivalent:
decorators = [never_cache, login_required]
@method_decorator(decorators, name='dispatch')
class ProtectedView(TemplateView):
template_name = 'secret.html'
@method_decorator(never_cache, name='dispatch')
@method_decorator(login_required, name='dispatch')
class ProtectedView(TemplateView):
template_name = 'secret.html'
The decorators will process a request in the order they are passed to the decorator. In the example, never_cache()
will process the request before login_required().
The ability to use method_decorator() on a class and the ability for it to accept a list or tuple of decorators were
added.
In this example, every instance of ProtectedView will have login protection.
Note: method_decorator passes *args and **kwargs as parameters to the decorated method on the class. If
your method does not accept a compatible set of parameters it will raise a TypeError exception.
3.6.2 Built-in class-based generic views
Writing Web applications can be monotonous, because we repeat certain patterns again and again. Django tries to take
away some of that monotony at the model and template layers, but Web developers also experience this boredom at
the view level.
Django’s generic views were developed to ease that pain. They take certain common idioms and patterns found in
view development and abstract them so that you can quickly write common views of data without having to write too
much code.
We can recognize certain common tasks, like displaying a list of objects, and write code that displays a list of any
object. Then the model in question can be passed as an extra argument to the URLconf.
Django ships with generic views to do the following:
• Display list and detail pages for a single object. If we were creating an application to manage conferences then
a TalkListView and a RegisteredUserListView would be examples of list views. A single talk page
is an example of what we call a “detail” view.
• Present date-based objects in year/month/day archive pages, associated detail, and “latest” pages.
3.6. Class-based views 273](https://image.slidesharecdn.com/20160225-django-documentation-160225091707/85/Django-Documentation-277-320.jpg)
![Django Documentation, Release 1.9.3.dev20160224120324
• Allow users to create, update, and delete objects – with or without authorization.
Taken together, these views provide easy interfaces to perform the most common tasks developers encounter.
Extending generic views
There’s no question that using generic views can speed up development substantially. In most projects, however, there
comes a moment when the generic views no longer suffice. Indeed, the most common question asked by new Django
developers is how to make generic views handle a wider array of situations.
This is one of the reasons generic views were redesigned for the 1.3 release - previously, they were just view functions
with a bewildering array of options; now, rather than passing in a large amount of configuration in the URLconf, the
recommended way to extend generic views is to subclass them, and override their attributes or methods.
That said, generic views will have a limit. If you find you’re struggling to implement your view as a subclass of
a generic view, then you may find it more effective to write just the code you need, using your own class-based or
functional views.
More examples of generic views are available in some third party applications, or you could write your own as needed.
Generic views of objects
TemplateView certainly is useful, but Django’s generic views really shine when it comes to presenting views of
your database content. Because it’s such a common task, Django comes with a handful of built-in generic views that
make generating list and detail views of objects incredibly easy.
Let’s start by looking at some examples of showing a list of objects or an individual object.
We’ll be using these models:
# models.py
from django.db import models
class Publisher(models.Model):
name = models.CharField(max_length=30)
address = models.CharField(max_length=50)
city = models.CharField(max_length=60)
state_province = models.CharField(max_length=30)
country = models.CharField(max_length=50)
website = models.URLField()
class Meta:
ordering = ["-name"]
def __str__(self): # __unicode__ on Python 2
return self.name
class Author(models.Model):
salutation = models.CharField(max_length=10)
name = models.CharField(max_length=200)
email = models.EmailField()
headshot = models.ImageField(upload_to='author_headshots')
def __str__(self): # __unicode__ on Python 2
return self.name
class Book(models.Model):
title = models.CharField(max_length=100)
274 Chapter 3. Using Django](https://image.slidesharecdn.com/20160225-django-documentation-160225091707/85/Django-Documentation-278-320.jpg)
![Django Documentation, Release 1.9.3.dev20160224120324
authors = models.ManyToManyField('Author')
publisher = models.ForeignKey(Publisher, on_delete=models.CASCADE)
publication_date = models.DateField()
Now we need to define a view:
# views.py
from django.views.generic import ListView
from books.models import Publisher
class PublisherList(ListView):
model = Publisher
Finally hook that view into your urls:
# urls.py
from django.conf.urls import url
from books.views import PublisherList
urlpatterns = [
url(r'^publishers/$', PublisherList.as_view()),
]
That’s all the Python code we need to write. We still need to write a template, however. We could explicitly
tell the view which template to use by adding a template_name attribute to the view, but in the absence of
an explicit template Django will infer one from the object’s name. In this case, the inferred template will be
"books/publisher_list.html" – the “books” part comes from the name of the app that defines the model,
while the “publisher” bit is just the lowercased version of the model’s name.
Note: Thus, when (for example) the APP_DIRS option of a DjangoTemplates backend is set to True in
TEMPLATES, a template location could be: /path/to/project/books/templates/books/publisher_list.html
This template will be rendered against a context containing a variable called object_list that contains all the
publisher objects. A very simple template might look like the following:
{% extends "base.html" %}
{% block content %}
<h2>Publishers</h2>
<ul>
{% for publisher in object_list %}
<li>{{ publisher.name }}</li>
{% endfor %}
</ul>
{% endblock %}
That’s really all there is to it. All the cool features of generic views come from changing the attributes set on the
generic view. The generic views reference documents all the generic views and their options in detail; the rest of this
document will consider some of the common ways you might customize and extend generic views.
Making “friendly” template contexts
You might have noticed that our sample publisher list template stores all the publishers in a variable named
object_list. While this works just fine, it isn’t all that “friendly” to template authors: they have to “just know”
that they’re dealing with publishers here.
3.6. Class-based views 275](https://image.slidesharecdn.com/20160225-django-documentation-160225091707/85/Django-Documentation-279-320.jpg)
![Django Documentation, Release 1.9.3.dev20160224120324
Well, if you’re dealing with a model object, this is already done for you. When you are dealing with an object
or queryset, Django is able to populate the context using the lower cased version of the model class’ name. This is
provided in addition to the default object_list entry, but contains exactly the same data, i.e. publisher_list.
If this still isn’t a good match, you can manually set the name of the context variable. The context_object_name
attribute on a generic view specifies the context variable to use:
# views.py
from django.views.generic import ListView
from books.models import Publisher
class PublisherList(ListView):
model = Publisher
context_object_name = 'my_favorite_publishers'
Providing a useful context_object_name is always a good idea. Your coworkers who design templates will
thank you.
Adding extra context
Often you simply need to present some extra information beyond that provided by the generic view. For example,
think of showing a list of all the books on each publisher detail page. The DetailView generic view provides the
publisher to the context, but how do we get additional information in that template?
The answer is to subclass DetailView and provide your own implementation of the get_context_data
method. The default implementation simply adds the object being displayed to the template, but you can override
it to send more:
from django.views.generic import DetailView
from books.models import Publisher, Book
class PublisherDetail(DetailView):
model = Publisher
def get_context_data(self, **kwargs):
# Call the base implementation first to get a context
context = super(PublisherDetail, self).get_context_data(**kwargs)
# Add in a QuerySet of all the books
context['book_list'] = Book.objects.all()
return context
Note: Generally, get_context_data will merge the context data of all parent classes with those of the current
class. To preserve this behavior in your own classes where you want to alter the context, you should be sure to call
get_context_data on the super class. When no two classes try to define the same key, this will give the expected
results. However if any class attempts to override a key after parent classes have set it (after the call to super), any
children of that class will also need to explicitly set it after super if they want to be sure to override all parents. If
you’re having trouble, review the method resolution order of your view.
Another consideration is that the context data from class-based generic views will override data provided by context
processors; see get_context_data() for an example.
276 Chapter 3. Using Django](https://image.slidesharecdn.com/20160225-django-documentation-160225091707/85/Django-Documentation-280-320.jpg)

![Django Documentation, Release 1.9.3.dev20160224120324
arbitrary publisher?
Handily, the ListView has a get_queryset() method we can override. Previously, it has just been returning the
value of the queryset attribute, but now we can add more logic.
The key part to making this work is that when class-based views are called, various useful things are stored on self; as
well as the request (self.request) this includes the positional (self.args) and name-based (self.kwargs)
arguments captured according to the URLconf.
Here, we have a URLconf with a single captured group:
# urls.py
from django.conf.urls import url
from books.views import PublisherBookList
urlpatterns = [
url(r'^books/([w-]+)/$', PublisherBookList.as_view()),
]
Next, we’ll write the PublisherBookList view itself:
# views.py
from django.shortcuts import get_object_or_404
from django.views.generic import ListView
from books.models import Book, Publisher
class PublisherBookList(ListView):
template_name = 'books/books_by_publisher.html'
def get_queryset(self):
self.publisher = get_object_or_404(Publisher, name=self.args[0])
return Book.objects.filter(publisher=self.publisher)
As you can see, it’s quite easy to add more logic to the queryset selection; if we wanted, we could use
self.request.user to filter using the current user, or other more complex logic.
We can also add the publisher into the context at the same time, so we can use it in the template:
# ...
def get_context_data(self, **kwargs):
# Call the base implementation first to get a context
context = super(PublisherBookList, self).get_context_data(**kwargs)
# Add in the publisher
context['publisher'] = self.publisher
return context
Performing extra work
The last common pattern we’ll look at involves doing some extra work before or after calling the generic view.
Imagine we had a last_accessed field on our Author model that we were using to keep track of the last time
anybody looked at that author:
# models.py
from django.db import models
class Author(models.Model):
salutation = models.CharField(max_length=10)
278 Chapter 3. Using Django](https://image.slidesharecdn.com/20160225-django-documentation-160225091707/85/Django-Documentation-282-320.jpg)
![Django Documentation, Release 1.9.3.dev20160224120324
name = models.CharField(max_length=200)
email = models.EmailField()
headshot = models.ImageField(upload_to='author_headshots')
last_accessed = models.DateTimeField()
The generic DetailView class, of course, wouldn’t know anything about this field, but once again we could easily
write a custom view to keep that field updated.
First, we’d need to add an author detail bit in the URLconf to point to a custom view:
from django.conf.urls import url
from books.views import AuthorDetailView
urlpatterns = [
#...
url(r'^authors/(?P<pk>[0-9]+)/$', AuthorDetailView.as_view(), name='author-detail'),
]
Then we’d write our new view – get_object is the method that retrieves the object – so we simply override it and
wrap the call:
from django.views.generic import DetailView
from django.utils import timezone
from books.models import Author
class AuthorDetailView(DetailView):
queryset = Author.objects.all()
def get_object(self):
# Call the superclass
object = super(AuthorDetailView, self).get_object()
# Record the last accessed date
object.last_accessed = timezone.now()
object.save()
# Return the object
return object
Note: The URLconf here uses the named group pk - this name is the default name that DetailView uses to find
the value of the primary key used to filter the queryset.
If you want to call the group something else, you can set pk_url_kwarg on the view. More details can be found in
the reference for DetailView
3.6.3 Form handling with class-based views
Form processing generally has 3 paths:
• Initial GET (blank or prepopulated form)
• POST with invalid data (typically redisplay form with errors)
• POST with valid data (process the data and typically redirect)
Implementing this yourself often results in a lot of repeated boilerplate code (see Using a form in a view). To help
avoid this, Django provides a collection of generic class-based views for form processing.
3.6. Class-based views 279](https://image.slidesharecdn.com/20160225-django-documentation-160225091707/85/Django-Documentation-283-320.jpg)

![Django Documentation, Release 1.9.3.dev20160224120324
Note: When specifying a custom form class, you must still specify the model, even though the form_class may
be a ModelForm.
First we need to add get_absolute_url() to our Author class:
models.py
from django.core.urlresolvers import reverse
from django.db import models
class Author(models.Model):
name = models.CharField(max_length=200)
def get_absolute_url(self):
return reverse('author-detail', kwargs={'pk': self.pk})
Then we can use CreateView and friends to do the actual work. Notice how we’re just configuring the generic
class-based views here; we don’t have to write any logic ourselves:
views.py
from django.views.generic.edit import CreateView, UpdateView, DeleteView
from django.core.urlresolvers import reverse_lazy
from myapp.models import Author
class AuthorCreate(CreateView):
model = Author
fields = ['name']
class AuthorUpdate(UpdateView):
model = Author
fields = ['name']
class AuthorDelete(DeleteView):
model = Author
success_url = reverse_lazy('author-list')
Note: We have to use reverse_lazy() here, not just reverse as the urls are not loaded when the file is
imported.
The fields attribute works the same way as the fields attribute on the inner Meta class on ModelForm.
Unless you define the form class in another way, the attribute is required and the view will raise an
ImproperlyConfigured exception if it’s not.
If you specify both the fields and form_class attributes, an ImproperlyConfigured exception will be
raised.
Omitting the fields attribute was previously allowed and resulted in a form with all of the model’s fields.
Previously if both fields and form_class were specified, fields was silently ignored.
Finally, we hook these new views into the URLconf:
urls.py
from django.conf.urls import url
from myapp.views import AuthorCreate, AuthorUpdate, AuthorDelete
3.6. Class-based views 281](https://image.slidesharecdn.com/20160225-django-documentation-160225091707/85/Django-Documentation-285-320.jpg)
![Django Documentation, Release 1.9.3.dev20160224120324
urlpatterns = [
# ...
url(r'author/add/$', AuthorCreate.as_view(), name='author-add'),
url(r'author/(?P<pk>[0-9]+)/$', AuthorUpdate.as_view(), name='author-update'),
url(r'author/(?P<pk>[0-9]+)/delete/$', AuthorDelete.as_view(), name='author-delete'),
]
Note: These views inherit SingleObjectTemplateResponseMixin which uses
template_name_suffix to construct the template_name based on the model.
In this example:
• CreateView and UpdateView use myapp/author_form.html
• DeleteView uses myapp/author_confirm_delete.html
If you wish to have separate templates for CreateView and UpdateView, you can set either template_name
or template_name_suffix on your view class.
Models and request.user
To track the user that created an object using a CreateView, you can use a custom ModelForm to do this. First,
add the foreign key relation to the model:
models.py
from django.contrib.auth.models import User
from django.db import models
class Author(models.Model):
name = models.CharField(max_length=200)
created_by = models.ForeignKey(User, on_delete=models.CASCADE)
# ...
In the view, ensure that you don’t include created_by in the list of fields to edit, and override form_valid() to
add the user:
views.py
from django.views.generic.edit import CreateView
from myapp.models import Author
class AuthorCreate(CreateView):
model = Author
fields = ['name']
def form_valid(self, form):
form.instance.created_by = self.request.user
return super(AuthorCreate, self).form_valid(form)
Note that you’ll need to decorate this view using login_required(), or alternatively handle unauthorized users
in the form_valid().
282 Chapter 3. Using Django](https://image.slidesharecdn.com/20160225-django-documentation-160225091707/85/Django-Documentation-286-320.jpg)
![Django Documentation, Release 1.9.3.dev20160224120324
AJAX example
Here is a simple example showing how you might go about implementing a form that works for AJAX requests as
well as ‘normal’ form POSTs:
from django.http import JsonResponse
from django.views.generic.edit import CreateView
from myapp.models import Author
class AjaxableResponseMixin(object):
"""
Mixin to add AJAX support to a form.
Must be used with an object-based FormView (e.g. CreateView)
"""
def form_invalid(self, form):
response = super(AjaxableResponseMixin, self).form_invalid(form)
if self.request.is_ajax():
return JsonResponse(form.errors, status=400)
else:
return response
def form_valid(self, form):
# We make sure to call the parent's form_valid() method because
# it might do some processing (in the case of CreateView, it will
# call form.save() for example).
response = super(AjaxableResponseMixin, self).form_valid(form)
if self.request.is_ajax():
data = {
'pk': self.object.pk,
}
return JsonResponse(data)
else:
return response
class AuthorCreate(AjaxableResponseMixin, CreateView):
model = Author
fields = ['name']
3.6.4 Using mixins with class-based views
Caution: This is an advanced topic. A working knowledge of Django’s class-based views is advised before
exploring these techniques.
Django’s built-in class-based views provide a lot of functionality, but some of it you may want to use separately.
For instance, you may want to write a view that renders a template to make the HTTP response, but you can’t use
TemplateView; perhaps you need to render a template only on POST, with GET doing something else entirely.
While you could use TemplateResponse directly, this will likely result in duplicate code.
For this reason, Django also provides a number of mixins that provide more discrete functionality. Template rendering,
for instance, is encapsulated in the TemplateResponseMixin. The Django reference documentation contains full
documentation of all the mixins.
3.6. Class-based views 283](https://image.slidesharecdn.com/20160225-django-documentation-160225091707/85/Django-Documentation-287-320.jpg)


![Django Documentation, Release 1.9.3.dev20160224120324
def post(self, request, *args, **kwargs):
if not request.user.is_authenticated():
return HttpResponseForbidden()
# Look up the author we're interested in.
self.object = self.get_object()
# Actually record interest somehow here!
return HttpResponseRedirect(reverse('author-detail', kwargs={'pk': self.object.pk}))
In practice you’d probably want to record the interest in a key-value store rather than in a relational database, so we’ve
left that bit out. The only bit of the view that needs to worry about using SingleObjectMixin is where we want
to look up the author we’re interested in, which it just does with a simple call to self.get_object(). Everything
else is taken care of for us by the mixin.
We can hook this into our URLs easily enough:
urls.py
from django.conf.urls import url
from books.views import RecordInterest
urlpatterns = [
#...
url(r'^author/(?P<pk>[0-9]+)/interest/$', RecordInterest.as_view(), name='author-interest'),
]
Note the pk named group, which get_object() uses to look up the Author instance. You could also use a slug,
or any of the other features of SingleObjectMixin.
Using SingleObjectMixin with ListView
ListView provides built-in pagination, but you might want to paginate a list of objects that are all linked (by a
foreign key) to another object. In our publishing example, you might want to paginate through all the books by a
particular publisher.
One way to do this is to combine ListView with SingleObjectMixin, so that the queryset for the paginated
list of books can hang off the publisher found as the single object. In order to do this, we need to have two different
querysets:
Book queryset for use by ListView Since we have access to the Publisher whose books we want to list, we
simply override get_queryset() and use the Publisher’s reverse foreign key manager.
Publisher queryset for use in get_object() We’ll rely on the default implementation of get_object()
to fetch the correct Publisher object. However, we need to explicitly pass a queryset argument because
otherwise the default implementation of get_object() would call get_queryset() which we have over-
ridden to return Book objects instead of Publisher ones.
Note: We have to think carefully about get_context_data(). Since both SingleObjectMixin and
ListView will put things in the context data under the value of context_object_name if it’s set, we’ll in-
stead explicitly ensure the Publisher is in the context data. ListView will add in the suitable page_obj and
paginator for us providing we remember to call super().
Now we can write a new PublisherDetail:
286 Chapter 3. Using Django](https://image.slidesharecdn.com/20160225-django-documentation-160225091707/85/Django-Documentation-290-320.jpg)
![Django Documentation, Release 1.9.3.dev20160224120324
from django.views.generic import ListView
from django.views.generic.detail import SingleObjectMixin
from books.models import Publisher
class PublisherDetail(SingleObjectMixin, ListView):
paginate_by = 2
template_name = "books/publisher_detail.html"
def get(self, request, *args, **kwargs):
self.object = self.get_object(queryset=Publisher.objects.all())
return super(PublisherDetail, self).get(request, *args, **kwargs)
def get_context_data(self, **kwargs):
context = super(PublisherDetail, self).get_context_data(**kwargs)
context['publisher'] = self.object
return context
def get_queryset(self):
return self.object.book_set.all()
Notice how we set self.object within get() so we can use it again later in get_context_data() and
get_queryset(). If you don’t set template_name, the template will default to the normal ListView choice,
which in this case would be "books/book_list.html" because it’s a list of books; ListView knows nothing
about SingleObjectMixin, so it doesn’t have any clue this view is anything to do with a Publisher.
The paginate_by is deliberately small in the example so you don’t have to create lots of books to see the pagination
working! Here’s the template you’d want to use:
{% extends "base.html" %}
{% block content %}
<h2>Publisher {{ publisher.name }}</h2>
<ol>
{% for book in page_obj %}
<li>{{ book.title }}</li>
{% endfor %}
</ol>
<div class="pagination">
<span class="step-links">
{% if page_obj.has_previous %}
<a href="?page={{ page_obj.previous_page_number }}">previous</a>
{% endif %}
<span class="current">
Page {{ page_obj.number }} of {{ paginator.num_pages }}.
</span>
{% if page_obj.has_next %}
<a href="?page={{ page_obj.next_page_number }}">next</a>
{% endif %}
</span>
</div>
{% endblock %}
3.6. Class-based views 287](https://image.slidesharecdn.com/20160225-django-documentation-160225091707/85/Django-Documentation-291-320.jpg)

![Django Documentation, Release 1.9.3.dev20160224120324
form_class = AuthorInterestForm
def get_success_url(self):
return reverse('author-detail', kwargs={'pk': self.object.pk})
def get_context_data(self, **kwargs):
context = super(AuthorDetail, self).get_context_data(**kwargs)
context['form'] = self.get_form()
return context
def post(self, request, *args, **kwargs):
if not request.user.is_authenticated():
return HttpResponseForbidden()
self.object = self.get_object()
form = self.get_form()
if form.is_valid():
return self.form_valid(form)
else:
return self.form_invalid(form)
def form_valid(self, form):
# Here, we would record the user's interest using the message
# passed in form.cleaned_data['message']
return super(AuthorDetail, self).form_valid(form)
get_success_url() is just providing somewhere to redirect to, which gets used in the default implementation of
form_valid(). We have to provide our own post() as noted earlier, and override get_context_data() to
make the Form available in the context data.
A better solution
It should be obvious that the number of subtle interactions between FormMixin and DetailView is already testing
our ability to manage things. It’s unlikely you’d want to write this kind of class yourself.
In this case, it would be fairly easy to just write the post() method yourself, keeping DetailView as the only
generic functionality, although writing Form handling code involves a lot of duplication.
Alternatively, it would still be easier than the above approach to have a separate view for processing the form, which
could use FormView distinct from DetailView without concerns.
An alternative better solution
What we’re really trying to do here is to use two different class based views from the same URL. So why not do just
that? We have a very clear division here: GET requests should get the DetailView (with the Form added to the
context data), and POST requests should get the FormView. Let’s set up those views first.
The AuthorDisplay view is almost the same as when we first introduced AuthorDetail; we have to write our
own get_context_data() to make the AuthorInterestForm available to the template. We’ll skip the
get_object() override from before for clarity:
from django.views.generic import DetailView
from django import forms
from books.models import Author
class AuthorInterestForm(forms.Form):
message = forms.CharField()
3.6. Class-based views 289](https://image.slidesharecdn.com/20160225-django-documentation-160225091707/85/Django-Documentation-293-320.jpg)
![Django Documentation, Release 1.9.3.dev20160224120324
class AuthorDisplay(DetailView):
model = Author
def get_context_data(self, **kwargs):
context = super(AuthorDisplay, self).get_context_data(**kwargs)
context['form'] = AuthorInterestForm()
return context
Then the AuthorInterest is a simple FormView, but we have to bring in SingleObjectMixin so we can
find the author we’re talking about, and we have to remember to set template_name to ensure that form errors will
render the same template as AuthorDisplay is using on GET:
from django.core.urlresolvers import reverse
from django.http import HttpResponseForbidden
from django.views.generic import FormView
from django.views.generic.detail import SingleObjectMixin
class AuthorInterest(SingleObjectMixin, FormView):
template_name = 'books/author_detail.html'
form_class = AuthorInterestForm
model = Author
def post(self, request, *args, **kwargs):
if not request.user.is_authenticated():
return HttpResponseForbidden()
self.object = self.get_object()
return super(AuthorInterest, self).post(request, *args, **kwargs)
def get_success_url(self):
return reverse('author-detail', kwargs={'pk': self.object.pk})
Finally we bring this together in a new AuthorDetail view. We already know that calling as_view() on a
class-based view gives us something that behaves exactly like a function based view, so we can do that at the point we
choose between the two subviews.
You can of course pass through keyword arguments to as_view() in the same way you would in your URLconf,
such as if you wanted the AuthorInterest behavior to also appear at another URL but using a different template:
from django.views.generic import View
class AuthorDetail(View):
def get(self, request, *args, **kwargs):
view = AuthorDisplay.as_view()
return view(request, *args, **kwargs)
def post(self, request, *args, **kwargs):
view = AuthorInterest.as_view()
return view(request, *args, **kwargs)
This approach can also be used with any other generic class-based views or your own class-based views inheriting
directly from View or TemplateView, as it keeps the different views as separate as possible.
More than just HTML
Where class-based views shine is when you want to do the same thing many times. Suppose you’re writing an API,
and every view should return JSON instead of rendered HTML.
290 Chapter 3. Using Django](https://image.slidesharecdn.com/20160225-django-documentation-160225091707/85/Django-Documentation-294-320.jpg)

![Django Documentation, Release 1.9.3.dev20160224120324
the implementation of render_to_response() to defer to the appropriate rendering method depending on the
type of response that the user requested:
from django.views.generic.detail import SingleObjectTemplateResponseMixin
class HybridDetailView(JSONResponseMixin, SingleObjectTemplateResponseMixin, BaseDetailView):
def render_to_response(self, context):
# Look for a 'format=json' GET argument
if self.request.GET.get('format') == 'json':
return self.render_to_json_response(context)
else:
return super(HybridDetailView, self).render_to_response(context)
Because of the way that Python resolves method overloading, the call to super(HybridDetailView,
self).render_to_response(context) ends up calling the render_to_response() implementation
of TemplateResponseMixin.
3.6.5 Basic examples
Django provides base view classes which will suit a wide range of applications. All views inherit from the
View class, which handles linking the view in to the URLs, HTTP method dispatching and other simple features.
RedirectView is for a simple HTTP redirect, and TemplateView extends the base class to make it also render
a template.
3.6.6 Simple usage in your URLconf
The simplest way to use generic views is to create them directly in your URLconf. If you’re only changing a few
simple attributes on a class-based view, you can simply pass them into the as_view() method call itself:
from django.conf.urls import url
from django.views.generic import TemplateView
urlpatterns = [
url(r'^about/', TemplateView.as_view(template_name="about.html")),
]
Any arguments passed to as_view() will override attributes set on the class. In this example, we set
template_name on the TemplateView. A similar overriding pattern can be used for the url attribute on
RedirectView.
3.6.7 Subclassing generic views
The second, more powerful way to use generic views is to inherit from an existing view and override attributes (such
as the template_name) or methods (such as get_context_data) in your subclass to provide new values or
methods. Consider, for example, a view that just displays one template, about.html. Django has a generic view to
do this - TemplateView - so we can just subclass it, and override the template name:
# some_app/views.py
from django.views.generic import TemplateView
class AboutView(TemplateView):
template_name = "about.html"
Then we just need to add this new view into our URLconf. TemplateView is a class, not a function, so we point
the URL to the as_view() class method instead, which provides a function-like entry to class-based views:
292 Chapter 3. Using Django](https://image.slidesharecdn.com/20160225-django-documentation-160225091707/85/Django-Documentation-296-320.jpg)
![Django Documentation, Release 1.9.3.dev20160224120324
# urls.py
from django.conf.urls import url
from some_app.views import AboutView
urlpatterns = [
url(r'^about/', AboutView.as_view()),
]
For more information on how to use the built in generic views, consult the next topic on generic class-based views.
Supporting other HTTP methods
Suppose somebody wants to access our book library over HTTP using the views as an API. The API client would
connect every now and then and download book data for the books published since last visit. But if no new books
appeared since then, it is a waste of CPU time and bandwidth to fetch the books from the database, render a full
response and send it to the client. It might be preferable to ask the API when the most recent book was published.
We map the URL to book list view in the URLconf:
from django.conf.urls import url
from books.views import BookListView
urlpatterns = [
url(r'^books/$', BookListView.as_view()),
]
And the view:
from django.http import HttpResponse
from django.views.generic import ListView
from books.models import Book
class BookListView(ListView):
model = Book
def head(self, *args, **kwargs):
last_book = self.get_queryset().latest('publication_date')
response = HttpResponse('')
# RFC 1123 date format
response['Last-Modified'] = last_book.publication_date.strftime('%a, %d %b %Y %H:%M:%S GMT')
return response
If the view is accessed from a GET request, a plain-and-simple object list is returned in the response (using
book_list.html template). But if the client issues a HEAD request, the response has an empty body and the
Last-Modified header indicates when the most recent book was published. Based on this information, the client
may or may not download the full object list.
3.7 Migrations
Migrations are Django’s way of propagating changes you make to your models (adding a field, deleting a model,
etc.) into your database schema. They’re designed to be mostly automatic, but you’ll need to know when to make
migrations, when to run them, and the common problems you might run into.
3.7. Migrations 293](https://image.slidesharecdn.com/20160225-django-documentation-160225091707/85/Django-Documentation-297-320.jpg)


![Django Documentation, Release 1.9.3.dev20160224120324
Version control
Because migrations are stored in version control, you’ll occasionally come across situations where you and another
developer have both committed a migration to the same app at the same time, resulting in two migrations with the
same number.
Don’t worry - the numbers are just there for developers’ reference, Django just cares that each migration has a different
name. Migrations specify which other migrations they depend on - including earlier migrations in the same app - in
the file, so it’s possible to detect when there’s two new migrations for the same app that aren’t ordered.
When this happens, Django will prompt you and give you some options. If it thinks it’s safe enough, it will offer to
automatically linearize the two migrations for you. If not, you’ll have to go in and modify the migrations yourself -
don’t worry, this isn’t difficult, and is explained more in Migration files below.
3.7.4 Dependencies
While migrations are per-app, the tables and relationships implied by your models are too complex to be created for
just one app at a time. When you make a migration that requires something else to run - for example, you add a
ForeignKey in your books app to your authors app - the resulting migration will contain a dependency on a
migration in authors.
This means that when you run the migrations, the authors migration runs first and creates the table the
ForeignKey references, and then the migration that makes the ForeignKey column runs afterwards and cre-
ates the constraint. If this didn’t happen, the migration would try to create the ForeignKey column without the table
it’s referencing existing and your database would throw an error.
This dependency behavior affects most migration operations where you restrict to a single app. Restricting to a single
app (either in makemigrations or migrate) is a best-efforts promise, and not a guarantee; any other apps that
need to be used to get dependencies correct will be.
3.7.5 Migration files
Migrations are stored as an on-disk format, referred to here as “migration files”. These files are actually just normal
Python files with an agreed-upon object layout, written in a declarative style.
A basic migration file looks like this:
from django.db import migrations, models
class Migration(migrations.Migration):
dependencies = [("migrations", "0001_initial")]
operations = [
migrations.DeleteModel("Tribble"),
migrations.AddField("Author", "rating", models.IntegerField(default=0)),
]
What Django looks for when it loads a migration file (as a Python module) is a subclass of
django.db.migrations.Migration called Migration. It then inspects this object for four attributes, only
two of which are used most of the time:
• dependencies, a list of migrations this one depends on.
• operations, a list of Operation classes that define what this migration does.
296 Chapter 3. Using Django](https://image.slidesharecdn.com/20160225-django-documentation-160225091707/85/Django-Documentation-300-320.jpg)


![Django Documentation, Release 1.9.3.dev20160224120324
# -*- coding: utf-8 -*-
# Generated by Django A.B on YYYY-MM-DD HH:MM
from __future__ import unicode_literals
from django.db import migrations, models
class Migration(migrations.Migration):
initial = True
dependencies = [
('yourappname', '0001_initial'),
]
operations = [
]
Now, all you need to do is create a new function and have RunPython use it. RunPython expects a callable as its
argument which takes two arguments - the first is an app registry that has the historical versions of all your models
loaded into it to match where in your history the migration sits, and the second is a SchemaEditor, which you can use
to manually effect database schema changes (but beware, doing this can confuse the migration autodetector!)
Let’s write a simple migration that populates our new name field with the combined values of first_name and
last_name (we’ve come to our senses and realized that not everyone has first and last names). All we need to do is
use the historical model and iterate over the rows:
# -*- coding: utf-8 -*-
from __future__ import unicode_literals
from django.db import migrations, models
def combine_names(apps, schema_editor):
# We can't import the Person model directly as it may be a newer
# version than this migration expects. We use the historical version.
Person = apps.get_model("yourappname", "Person")
for person in Person.objects.all():
person.name = "%s %s" % (person.first_name, person.last_name)
person.save()
class Migration(migrations.Migration):
initial = True
dependencies = [
('yourappname', '0001_initial'),
]
operations = [
migrations.RunPython(combine_names),
]
Once that’s done, we can just run python manage.py migrate as normal and the data migration will run in
place alongside other migrations.
You can pass a second callable to RunPython to run whatever logic you want executed when migrating backwards.
If this callable is omitted, migrating backwards will raise an exception.
300 Chapter 3. Using Django](https://image.slidesharecdn.com/20160225-django-documentation-160225091707/85/Django-Documentation-304-320.jpg)
![Django Documentation, Release 1.9.3.dev20160224120324
Accessing models from other apps
When writing a RunPython function that uses models from apps other than the one in which the migration is located,
the migration’s dependencies attribute should include the latest migration of each app that is involved, otherwise
you may get an error similar to: LookupError: No installed app with label ’myappname’ when
you try to retrieve the model in the RunPython function using apps.get_model().
In the following example, we have a migration in app1 which needs to use models in app2. We aren’t concerned
with the details of move_m1 other than the fact it will need to access models from both apps. Therefore we’ve added
a dependency that specifies the last migration of app2:
class Migration(migrations.Migration):
dependencies = [
('app1', '0001_initial'),
# added dependency to enable using models from app2 in move_m1
('app2', '0004_foobar'),
]
operations = [
migrations.RunPython(move_m1),
]
More advanced migrations
If you’re interested in the more advanced migration operations, or want to be able to write your own, see the migration
operations reference and the “how-to” on writing migrations.
3.7.10 Squashing migrations
You are encouraged to make migrations freely and not worry about how many you have; the migration code is opti-
mized to deal with hundreds at a time without much slowdown. However, eventually you will want to move back from
having several hundred migrations to just a few, and that’s where squashing comes in.
Squashing is the act of reducing an existing set of many migrations down to one (or sometimes a few) migrations
which still represent the same changes.
Django does this by taking all of your existing migrations, extracting their Operations and putting them all in
sequence, and then running an optimizer over them to try and reduce the length of the list - for example, it knows
that CreateModel and DeleteModel cancel each other out, and it knows that AddField can be rolled into
CreateModel.
Once the operation sequence has been reduced as much as possible - the amount possible depends on how closely
intertwined your models are and if you have any RunSQL or RunPython operations (which can’t be optimized
through) - Django will then write it back out into a new set of migration files.
These files are marked to say they replace the previously-squashed migrations, so they can coexist with the old mi-
gration files, and Django will intelligently switch between them depending where you are in the history. If you’re still
part-way through the set of migrations that you squashed, it will keep using them until it hits the end and then switch
to the squashed history, while new installs will just use the new squashed migration and skip all the old ones.
This enables you to squash and not mess up systems currently in production that aren’t fully up-to-date yet. The
recommended process is to squash, keeping the old files, commit and release, wait until all systems are upgraded with
the new release (or if you’re a third-party project, just ensure your users upgrade releases in order without skipping
any), and then remove the old files, commit and do a second release.
3.7. Migrations 301](https://image.slidesharecdn.com/20160225-django-documentation-160225091707/85/Django-Documentation-305-320.jpg)
![Django Documentation, Release 1.9.3.dev20160224120324
The command that backs all this is squashmigrations - just pass it the app label and migration name you want
to squash up to, and it’ll get to work:
$ ./manage.py squashmigrations myapp 0004
Will squash the following migrations:
- 0001_initial
- 0002_some_change
- 0003_another_change
- 0004_undo_something
Do you wish to proceed? [yN] y
Optimizing...
Optimized from 12 operations to 7 operations.
Created new squashed migration /home/andrew/Programs/DjangoTest/test/migrations/0001_squashed_0004_un
You should commit this migration but leave the old ones in place;
the new migration will be used for new installs. Once you are sure
all instances of the codebase have applied the migrations you squashed,
you can delete them.
Note that model interdependencies in Django can get very complex, and squashing may result in migrations that do
not run; either mis-optimized (in which case you can try again with --no-optimize, though you should also report
an issue), or with a CircularDependencyError, in which case you can manually resolve it.
To manually resolve a CircularDependencyError, break out one of the ForeignKeys in the circular dependency
loop into a separate migration, and move the dependency on the other app with it. If you’re unsure, see how makem-
igrations deals with the problem when asked to create brand new migrations from your models. In a future release of
Django, squashmigrations will be updated to attempt to resolve these errors itself.
Once you’ve squashed your migration, you should then commit it alongside the migrations it replaces and distribute
this change to all running instances of your application, making sure that they run migrate to store the change in
their database.
You must then transition the squashed migration to a normal migration by:
• Deleting all the migration files it replaces.
• Updating all migrations that depend on the deleted migrations to depend on the squashed migration instead.
• Removing the replaces attribute in the Migration class of the squashed migration (this is how Django
tells that it is a squashed migration).
Note: Once you’ve squashed a migration, you should not then re-squash that squashed migration until you have fully
transitioned it to a normal migration.
3.7.11 Serializing values
Migrations are just Python files containing the old definitions of your models - thus, to write them, Django must take
the current state of your models and serialize them out into a file.
While Django can serialize most things, there are some things that we just can’t serialize out into a valid Python
representation - there’s no Python standard for how a value can be turned back into code (repr() only works for
basic values, and doesn’t specify import paths).
Django can serialize the following:
• int, long, float, bool, str, unicode, bytes, None
• list, set, tuple, dict
302 Chapter 3. Using Django](https://image.slidesharecdn.com/20160225-django-documentation-160225091707/85/Django-Documentation-306-320.jpg)


![Django Documentation, Release 1.9.3.dev20160224120324
Now you can use any of the documented attributes and methods of the File class.
Be aware that files created in this way are not automatically closed. The following approach may be used to close files
automatically:
>>> from django.core.files import File
# Create a Python file object using open() and the with statement
>>> with open('/path/to/hello.world', 'w') as f:
... myfile = File(f)
... myfile.write('Hello World')
...
>>> myfile.closed
True
>>> f.closed
True
Closing files is especially important when accessing file fields in a loop over a large number of objects. If files are
not manually closed after accessing them, the risk of running out of file descriptors may arise. This may lead to the
following error:
IOError: [Errno 24] Too many open files
3.8.3 File storage
Behind the scenes, Django delegates decisions about how and where to store files to a file storage system. This is the
object that actually understands things like file systems, opening and reading files, etc.
Django’s default file storage is given by the DEFAULT_FILE_STORAGE setting; if you don’t explicitly provide a
storage system, this is the one that will be used.
See below for details of the built-in default file storage system, and see Writing a custom storage system for information
on writing your own file storage system.
Storage objects
Though most of the time you’ll want to use a File object (which delegates to the proper storage for that file), you can
use file storage systems directly. You can create an instance of some custom file storage class, or – often more useful
– you can use the global default storage system:
>>> from django.core.files.storage import default_storage
>>> from django.core.files.base import ContentFile
>>> path = default_storage.save('/path/to/file', ContentFile('new content'))
>>> path
'/path/to/file'
>>> default_storage.size(path)
11
>>> default_storage.open(path).read()
'new content'
>>> default_storage.delete(path)
>>> default_storage.exists(path)
False
See File storage API for the file storage API.
3.8. Managing files 307](https://image.slidesharecdn.com/20160225-django-documentation-160225091707/85/Django-Documentation-311-320.jpg)


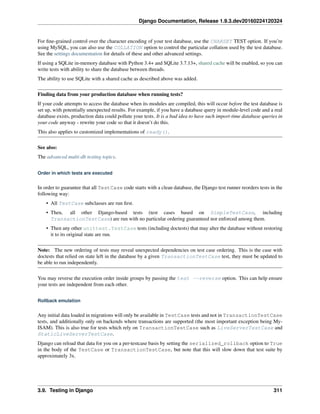
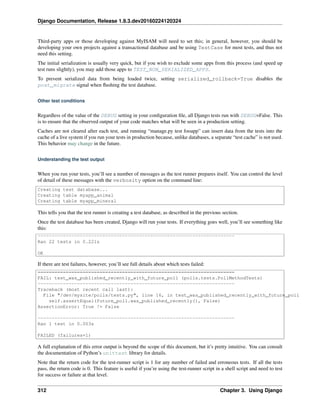
![Django Documentation, Release 1.9.3.dev20160224120324
Speeding up the tests
In recent versions of Django, the default password hasher is rather slow by design. If during your tests you are
authenticating many users, you may want to use a custom settings file and set the PASSWORD_HASHERS setting to a
faster hashing algorithm:
PASSWORD_HASHERS = [
'django.contrib.auth.hashers.MD5PasswordHasher',
]
Don’t forget to also include in PASSWORD_HASHERS any hashing algorithm used in fixtures, if any.
3.9.2 Testing tools
Django provides a small set of tools that come in handy when writing tests.
The test client
The test client is a Python class that acts as a dummy Web browser, allowing you to test your views and interact with
your Django-powered application programmatically.
Some of the things you can do with the test client are:
• Simulate GET and POST requests on a URL and observe the response – everything from low-level HTTP (result
headers and status codes) to page content.
• See the chain of redirects (if any) and check the URL and status code at each step.
• Test that a given request is rendered by a given Django template, with a template context that contains certain
values.
Note that the test client is not intended to be a replacement for Selenium or other “in-browser” frameworks. Django’s
test client has a different focus. In short:
• Use Django’s test client to establish that the correct template is being rendered and that the template is passed
the correct context data.
• Use in-browser frameworks like Selenium to test rendered HTML and the behavior of Web pages, namely
JavaScript functionality. Django also provides special support for those frameworks; see the section on
LiveServerTestCase for more details.
A comprehensive test suite should use a combination of both test types.
Overview and a quick example
To use the test client, instantiate django.test.Client and retrieve Web pages:
>>> from django.test import Client
>>> c = Client()
>>> response = c.post('/login/', {'username': 'john', 'password': 'smith'})
>>> response.status_code
200
>>> response = c.get('/customer/details/')
>>> response.content
b'<!DOCTYPE html...'
3.9. Testing in Django 313](https://image.slidesharecdn.com/20160225-django-documentation-160225091707/85/Django-Documentation-317-320.jpg)

![Django Documentation, Release 1.9.3.dev20160224120324
...will result in the evaluation of a GET request equivalent to:
/customers/details/?name=fred&age=7
The extra keyword arguments parameter can be used to specify headers to be sent in the request. For
example:
>>> c = Client()
>>> c.get('/customers/details/', {'name': 'fred', 'age': 7},
... HTTP_X_REQUESTED_WITH='XMLHttpRequest')
...will send the HTTP header HTTP_X_REQUESTED_WITH to the details view, which is a good way to
test code paths that use the django.http.HttpRequest.is_ajax() method.
CGI specification
The headers sent via **extra should follow CGI specification. For example, emulating a different
“Host” header as sent in the HTTP request from the browser to the server should be passed as HTTP_HOST.
If you already have the GET arguments in URL-encoded form, you can use that encoding instead of using
the data argument. For example, the previous GET request could also be posed as:
>>> c = Client()
>>> c.get('/customers/details/?name=fred&age=7')
If you provide a URL with both an encoded GET data and a data argument, the data argument will take
precedence.
If you set follow to True the client will follow any redirects and a redirect_chain attribute will
be set in the response object containing tuples of the intermediate urls and status codes.
If you had a URL /redirect_me/ that redirected to /next/, that redirected to /final/, this is what
you’d see:
>>> response = c.get('/redirect_me/', follow=True)
>>> response.redirect_chain
[('http://testserver/next/', 302), ('http://testserver/final/', 302)]
If you set secure to True the client will emulate an HTTPS request.
post(path, data=None, content_type=MULTIPART_CONTENT, follow=False, secure=False, **extra)
Makes a POST request on the provided path and returns a Response object, which is documented
below.
The key-value pairs in the data dictionary are used to submit POST data. For example:
>>> c = Client()
>>> c.post('/login/', {'name': 'fred', 'passwd': 'secret'})
...will result in the evaluation of a POST request to this URL:
/login/
...with this POST data:
name=fred&passwd=secret
If you provide content_type (e.g. text/xml for an XML payload), the contents of data will be
sent as-is in the POST request, using content_type in the HTTP Content-Type header.
3.9. Testing in Django 315](https://image.slidesharecdn.com/20160225-django-documentation-160225091707/85/Django-Documentation-319-320.jpg)


![Django Documentation, Release 1.9.3.dev20160224120324
password. Alternatively, you can use the create_user() helper method to create a new user with a
correctly hashed password.
force_login(user, backend=None)
If your site uses Django’s authentication system, you can use the force_login() method to simulate
the effect of a user logging into the site. Use this method instead of login() when a test requires a user
be logged in and the details of how a user logged in aren’t important.
Unlike login(), this method skips the authentication and verification steps: inactive users
(is_active=False) are permitted to login and the user’s credentials don’t need to be provided.
The user will have its backend attribute set to the value of the backend argument (which should be
a dotted Python path string), or to settings.AUTHENTICATION_BACKENDS[0] if a value isn’t
provided. The authenticate() function called by login() normally annotates the user like this.
This method is faster than login() since the expensive password hashing algorithms are bypassed. Also,
you can speed up login() by using a weaker hasher while testing.
logout()
If your site uses Django’s authentication system, the logout() method can be used to simulate the effect
of a user logging out of your site.
After you call this method, the test client will have all the cookies and session data cleared to defaults.
Subsequent requests will appear to come from an AnonymousUser.
Testing responses
The get() and post() methods both return a Response object. This Response object is not the same as the
HttpResponse object returned by Django views; the test response object has some additional data useful for test
code to verify.
Specifically, a Response object has the following attributes:
class Response
client
The test client that was used to make the request that resulted in the response.
content
The body of the response, as a bytestring. This is the final page content as rendered by the view, or any
error message.
context
The template Context instance that was used to render the template that produced the response content.
If the rendered page used multiple templates, then context will be a list of Context objects, in the
order in which they were rendered.
Regardless of the number of templates used during rendering, you can retrieve context values using the []
operator. For example, the context variable name could be retrieved using:
>>> response = client.get('/foo/')
>>> response.context['name']
'Arthur'
Not using Django templates?
318 Chapter 3. Using Django](https://image.slidesharecdn.com/20160225-django-documentation-160225091707/85/Django-Documentation-322-320.jpg)
![Django Documentation, Release 1.9.3.dev20160224120324
This attribute is only populated when using the DjangoTemplates backend. If you’re using another
template engine, context_data may be a suitable alternative on responses with that attribute.
json(**kwargs)
The body of the response, parsed as JSON. Extra keyword arguments are passed to json.loads(). For
example:
>>> response = client.get('/foo/')
>>> response.json()['name']
'Arthur'
If the Content-Type header is not "application/json", then a ValueError will be raised
when trying to parse the response.
request
The request data that stimulated the response.
wsgi_request
The WSGIRequest instance generated by the test handler that generated the response.
status_code
The HTTP status of the response, as an integer. See RFC 2616#section-10 for a full list of HTTP status
codes.
templates
A list of Template instances used to render the final content, in the order they were rendered. For each
template in the list, use template.name to get the template’s file name, if the template was loaded from
a file. (The name is a string such as ’admin/index.html’.)
Not using Django templates?
This attribute is only populated when using the DjangoTemplates backend. If you’re using another
template engine, template_name may be a suitable alternative if you only need the name of the tem-
plate used for rendering.
resolver_match
An instance of ResolverMatch for the response. You can use the func attribute, for example, to verify
the view that served the response:
# my_view here is a function based view
self.assertEqual(response.resolver_match.func, my_view)
# class-based views need to be compared by name, as the functions
# generated by as_view() won't be equal
self.assertEqual(response.resolver_match.func.__name__, MyView.as_view().__name__)
If the given URL is not found, accessing this attribute will raise a Resolver404 exception.
You can also use dictionary syntax on the response object to query the value of any settings in the HTTP headers. For
example, you could determine the content type of a response using response[’Content-Type’].
Exceptions
If you point the test client at a view that raises an exception, that exception will be visible in the test case. You can
then use a standard try ... except block or assertRaises() to test for exceptions.
3.9. Testing in Django 319](https://image.slidesharecdn.com/20160225-django-documentation-160225091707/85/Django-Documentation-323-320.jpg)
![Django Documentation, Release 1.9.3.dev20160224120324
The only exceptions that are not visible to the test client are Http404, PermissionDenied, SystemExit, and
SuspiciousOperation. Django catches these exceptions internally and converts them into the appropriate HTTP
response codes. In these cases, you can check response.status_code in your test.
Persistent state
The test client is stateful. If a response returns a cookie, then that cookie will be stored in the test client and sent with
all subsequent get() and post() requests.
Expiration policies for these cookies are not followed. If you want a cookie to expire, either delete it manually or
create a new Client instance (which will effectively delete all cookies).
A test client has two attributes that store persistent state information. You can access these properties as part of a test
condition.
Client.cookies
A Python SimpleCookie object, containing the current values of all the client cookies. See the documentation
of the http.cookies module for more.
Client.session
A dictionary-like object containing session information. See the session documentation for full details.
To modify the session and then save it, it must be stored in a variable first (because a new SessionStore is
created every time this property is accessed):
def test_something(self):
session = self.client.session
session['somekey'] = 'test'
session.save()
Example
The following is a simple unit test using the test client:
import unittest
from django.test import Client
class SimpleTest(unittest.TestCase):
def setUp(self):
# Every test needs a client.
self.client = Client()
def test_details(self):
# Issue a GET request.
response = self.client.get('/customer/details/')
# Check that the response is 200 OK.
self.assertEqual(response.status_code, 200)
# Check that the rendered context contains 5 customers.
self.assertEqual(len(response.context['customers']), 5)
See also:
django.test.RequestFactory
320 Chapter 3. Using Django](https://image.slidesharecdn.com/20160225-django-documentation-160225091707/85/Django-Documentation-324-320.jpg)


![Django Documentation, Release 1.9.3.dev20160224120324
# Some other test using self.foo
...
Note that if the tests are run on a database with no transaction support (for instance, MySQL with the MyISAM
engine), setUpTestData() will be called before each test, negating the speed benefits.
Be careful not to modify any objects created in setUpTestData() in your test methods. Modifications to
in-memory objects from setup work done at the class level will persist between test methods. If you do need to
modify them, you could reload them in the setUp() method with refresh_from_db(), for example.
Warning: If you want to test some specific database transaction behavior, you should use
TransactionTestCase, as TestCase wraps test execution within an atomic() block.
TestCase inherits from TransactionTestCase.
LiveServerTestCase
class LiveServerTestCase
LiveServerTestCase does basically the same as TransactionTestCase with one extra feature: it launches
a live Django server in the background on setup, and shuts it down on teardown. This allows the use of automated test
clients other than the Django dummy client such as, for example, the Selenium client, to execute a series of functional
tests inside a browser and simulate a real user’s actions.
By default the live server listens on localhost and picks the first available port in the 8081-8179 range. Its full
URL can be accessed with self.live_server_url during the tests.
In earlier versions, the live server’s default address was always ’localhost:8081’.
If you’d like to select another address, you may pass a different one using the test --liveserver option, for
example:
$ ./manage.py test --liveserver=localhost:8082
In older versions live_server_url could only be accessed from an instance. It now is a class property and can
be accessed from class methods like setUpClass().
Another way of changing the default server address is by setting the DJANGO_LIVE_TEST_SERVER_ADDRESS
environment variable somewhere in your code (for example, in a custom test runner):
import os
os.environ['DJANGO_LIVE_TEST_SERVER_ADDRESS'] = 'localhost:8082'
In the case where the tests are run by multiple processes in parallel (for example, in the context of several simulta-
neous continuous integration builds), the processes will compete for the same address, and therefore your tests might
randomly fail with an “Address already in use” error. To avoid this problem, you can pass a comma-separated list of
ports or ranges of ports (at least as many as the number of potential parallel processes). For example:
$ ./manage.py test --liveserver=localhost:8082,8090-8100,9000-9200,7041
Then, during test execution, each new live test server will try every specified port until it finds one that is free and
takes it.
To demonstrate how to use LiveServerTestCase, let’s write a simple Selenium test. First of all, you need to
install the selenium package into your Python path:
$ pip install selenium
324 Chapter 3. Using Django](https://image.slidesharecdn.com/20160225-django-documentation-160225091707/85/Django-Documentation-328-320.jpg)
![Django Documentation, Release 1.9.3.dev20160224120324
Then, add a LiveServerTestCase-based test to your app’s tests module (for example: myapp/tests.py).
For this example, we’ll assume you’re using the staticfiles app and want to have static files served during
the execution of your tests similar to what we get at development time with DEBUG=True, i.e. without having to
collect them using collectstatic. We’ll use the StaticLiveServerTestCase subclass which provides
that functionality. Replace it with django.test.LiveServerTestCase if you don’t need that.
The code for this test may look as follows:
from django.contrib.staticfiles.testing import StaticLiveServerTestCase
from selenium.webdriver.firefox.webdriver import WebDriver
class MySeleniumTests(StaticLiveServerTestCase):
fixtures = ['user-data.json']
@classmethod
def setUpClass(cls):
super(MySeleniumTests, cls).setUpClass()
cls.selenium = WebDriver()
@classmethod
def tearDownClass(cls):
cls.selenium.quit()
super(MySeleniumTests, cls).tearDownClass()
def test_login(self):
self.selenium.get('%s%s' % (self.live_server_url, '/login/'))
username_input = self.selenium.find_element_by_name("username")
username_input.send_keys('myuser')
password_input = self.selenium.find_element_by_name("password")
password_input.send_keys('secret')
self.selenium.find_element_by_xpath('//input[@value="Log in"]').click()
Finally, you may run the test as follows:
$ ./manage.py test myapp.tests.MySeleniumTests.test_login
This example will automatically open Firefox then go to the login page, enter the credentials and press the “Log in”
button. Selenium offers other drivers in case you do not have Firefox installed or wish to use another browser. The
example above is just a tiny fraction of what the Selenium client can do; check out the full reference for more details.
Note: When using an in-memory SQLite database to run the tests, the same database connection will be shared
by two threads in parallel: the thread in which the live server is run and the thread in which the test case is run.
It’s important to prevent simultaneous database queries via this shared connection by the two threads, as that may
sometimes randomly cause the tests to fail. So you need to ensure that the two threads don’t access the database at the
same time. In particular, this means that in some cases (for example, just after clicking a link or submitting a form),
you might need to check that a response is received by Selenium and that the next page is loaded before proceeding
with further test execution. Do this, for example, by making Selenium wait until the <body> HTML tag is found in
the response (requires Selenium > 2.13):
def test_login(self):
from selenium.webdriver.support.wait import WebDriverWait
timeout = 2
...
self.selenium.find_element_by_xpath('//input[@value="Log in"]').click()
# Wait until the response is received
WebDriverWait(self.selenium, timeout).until(
lambda driver: driver.find_element_by_tag_name('body'))
3.9. Testing in Django 325](https://image.slidesharecdn.com/20160225-django-documentation-160225091707/85/Django-Documentation-329-320.jpg)

![Django Documentation, Release 1.9.3.dev20160224120324
...
class MyTest(TestCase):
client_class = MyTestClient
def test_my_stuff(self):
# Here self.client is an instance of MyTestClient...
call_some_test_code()
Fixture loading
TransactionTestCase.fixtures
A test case for a database-backed website isn’t much use if there isn’t any data in the database. Tests are more readable
and it’s more maintainable to create objects using the ORM, for example in TestCase.setUpTestData(),
however, you can also use fixtures.
A fixture is a collection of data that Django knows how to import into a database. For example, if your site has user
accounts, you might set up a fixture of fake user accounts in order to populate your database during tests.
The most straightforward way of creating a fixture is to use the manage.py dumpdata command. This assumes
you already have some data in your database. See the dumpdata documentation for more details.
Once you’ve created a fixture and placed it in a fixtures directory in one of your INSTALLED_APPS, you can
use it in your unit tests by specifying a fixtures class attribute on your django.test.TestCase subclass:
from django.test import TestCase
from myapp.models import Animal
class AnimalTestCase(TestCase):
fixtures = ['mammals.json', 'birds']
def setUp(self):
# Test definitions as before.
call_setup_methods()
def testFluffyAnimals(self):
# A test that uses the fixtures.
call_some_test_code()
Here’s specifically what will happen:
• At the start of each test, before setUp() is run, Django will flush the database, returning the database to the
state it was in directly after migrate was called.
• Then, all the named fixtures are installed. In this example, Django will install any JSON fixture named
mammals, followed by any fixture named birds. See the loaddata documentation for more details on
defining and installing fixtures.
For performance reasons, TestCase loads fixtures once for the entire test class, before setUpTestData(), in-
stead of before each test, and it uses transactions to clean the database before each test. In any case, you can be certain
that the outcome of a test will not be affected by another test or by the order of test execution.
By default, fixtures are only loaded into the default database. If you are using multiple databases and set
multi_db=True, fixtures will be loaded into all databases.
3.9. Testing in Django 327](https://image.slidesharecdn.com/20160225-django-documentation-160225091707/85/Django-Documentation-331-320.jpg)

![Django Documentation, Release 1.9.3.dev20160224120324
Overriding settings
Warning: Use the functions below to temporarily alter the value of settings in tests. Don’t manipulate
django.conf.settings directly as Django won’t restore the original values after such manipulations.
SimpleTestCase.settings()
For testing purposes it’s often useful to change a setting temporarily and revert to the original value after run-
ning the testing code. For this use case Django provides a standard Python context manager (see PEP 343) called
settings(), which can be used like this:
from django.test import TestCase
class LoginTestCase(TestCase):
def test_login(self):
# First check for the default behavior
response = self.client.get('/sekrit/')
self.assertRedirects(response, '/accounts/login/?next=/sekrit/')
# Then override the LOGIN_URL setting
with self.settings(LOGIN_URL='/other/login/'):
response = self.client.get('/sekrit/')
self.assertRedirects(response, '/other/login/?next=/sekrit/')
This example will override the LOGIN_URL setting for the code in the with block and reset its value to the previous
state afterwards.
SimpleTestCase.modify_settings()
It can prove unwieldy to redefine settings that contain a list of values. In practice, adding or removing values is often
sufficient. The modify_settings() context manager makes it easy:
from django.test import TestCase
class MiddlewareTestCase(TestCase):
def test_cache_middleware(self):
with self.modify_settings(MIDDLEWARE_CLASSES={
'append': 'django.middleware.cache.FetchFromCacheMiddleware',
'prepend': 'django.middleware.cache.UpdateCacheMiddleware',
'remove': [
'django.contrib.sessions.middleware.SessionMiddleware',
'django.contrib.auth.middleware.AuthenticationMiddleware',
'django.contrib.messages.middleware.MessageMiddleware',
],
}):
response = self.client.get('/')
# ...
For each action, you can supply either a list of values or a string. When the value already exists in the list, append
and prepend have no effect; neither does remove when the value doesn’t exist.
override_settings()
In case you want to override a setting for a test method, Django provides the override_settings() decorator
(see PEP 318). It’s used like this:
3.9. Testing in Django 329](https://image.slidesharecdn.com/20160225-django-documentation-160225091707/85/Django-Documentation-333-320.jpg)


![Django Documentation, Release 1.9.3.dev20160224120324
The comparison of the contents of qs and values is performed using the function transform; by default,
this means that the repr() of each value is compared. Any other callable can be used if repr() doesn’t
provide a unique or helpful comparison.
By default, the comparison is also ordering dependent. If qs doesn’t provide an implicit ordering, you can set the
ordered parameter to False, which turns the comparison into a collections.Counter comparison. If
the order is undefined (if the given qs isn’t ordered and the comparison is against more than one ordered values),
a ValueError is raised.
Output in case of error can be customized with the msg argument.
TransactionTestCase.assertNumQueries(num, func, *args, **kwargs)
Asserts that when func is called with *args and **kwargs that num database queries are executed.
If a "using" key is present in kwargs it is used as the database alias for which to check the number of queries.
If you wish to call a function with a using parameter you can do it by wrapping the call with a lambda to add
an extra parameter:
self.assertNumQueries(7, lambda: my_function(using=7))
You can also use this as a context manager:
with self.assertNumQueries(2):
Person.objects.create(name="Aaron")
Person.objects.create(name="Daniel")
Email services
If any of your Django views send email using Django’s email functionality, you probably don’t want to send email
each time you run a test using that view. For this reason, Django’s test runner automatically redirects all Django-sent
email to a dummy outbox. This lets you test every aspect of sending email – from the number of messages sent to the
contents of each message – without actually sending the messages.
The test runner accomplishes this by transparently replacing the normal email backend with a testing backend. (Don’t
worry – this has no effect on any other email senders outside of Django, such as your machine’s mail server, if you’re
running one.)
django.core.mail.outbox
During test running, each outgoing email is saved in django.core.mail.outbox. This is a simple list of all
EmailMessage instances that have been sent. The outbox attribute is a special attribute that is created only when
the locmem email backend is used. It doesn’t normally exist as part of the django.core.mail module and you
can’t import it directly. The code below shows how to access this attribute correctly.
Here’s an example test that examines django.core.mail.outbox for length and contents:
from django.core import mail
from django.test import TestCase
class EmailTest(TestCase):
def test_send_email(self):
# Send message.
mail.send_mail('Subject here', 'Here is the message.',
'from@example.com', ['to@example.com'],
fail_silently=False)
# Test that one message has been sent.
self.assertEqual(len(mail.outbox), 1)
3.9. Testing in Django 335](https://image.slidesharecdn.com/20160225-django-documentation-160225091707/85/Django-Documentation-339-320.jpg)
![Django Documentation, Release 1.9.3.dev20160224120324
# Verify that the subject of the first message is correct.
self.assertEqual(mail.outbox[0].subject, 'Subject here')
As noted previously, the test outbox is emptied at the start of every test in a Django *TestCase. To empty the outbox
manually, assign the empty list to mail.outbox:
from django.core import mail
# Empty the test outbox
mail.outbox = []
Management Commands
Management commands can be tested with the call_command() function. The output can be redirected into a
StringIO instance:
from django.core.management import call_command
from django.test import TestCase
from django.utils.six import StringIO
class ClosepollTest(TestCase):
def test_command_output(self):
out = StringIO()
call_command('closepoll', stdout=out)
self.assertIn('Expected output', out.getvalue())
Skipping tests
The unittest library provides the @skipIf and @skipUnless decorators to allow you to skip tests if you know
ahead of time that those tests are going to fail under certain conditions.
For example, if your test requires a particular optional library in order to succeed, you could decorate the test case
with @skipIf. Then, the test runner will report that the test wasn’t executed and why, instead of failing the test or
omitting the test altogether.
To supplement these test skipping behaviors, Django provides two additional skip decorators. Instead of testing a
generic boolean, these decorators check the capabilities of the database, and skip the test if the database doesn’t
support a specific named feature.
The decorators use a string identifier to describe database features. This string corresponds to attributes of the
database connection features class. See django.db.backends.BaseDatabaseFeatures class for a full list
of database features that can be used as a basis for skipping tests.
skipIfDBFeature(*feature_name_strings)
Skip the decorated test or TestCase if all of the named database features are supported.
For example, the following test will not be executed if the database supports transactions (e.g., it would not run under
PostgreSQL, but it would under MySQL with MyISAM tables):
class MyTests(TestCase):
@skipIfDBFeature('supports_transactions')
def test_transaction_behavior(self):
# ... conditional test code
pass
skipIfDBFeature can accept multiple feature strings.
336 Chapter 3. Using Django](https://image.slidesharecdn.com/20160225-django-documentation-160225091707/85/Django-Documentation-340-320.jpg)


![Django Documentation, Release 1.9.3.dev20160224120324
Controlling creation order for test databases
By default, Django will assume all databases depend on the default database and therefore always create the
default database first. However, no guarantees are made on the creation order of any other databases in your test
setup.
If your database configuration requires a specific creation order, you can specify the dependencies that exist using the
DEPENDENCIES test setting. Consider the following (simplified) example database configuration:
DATABASES = {
'default': {
# ... db settings
'TEST': {
'DEPENDENCIES': ['diamonds'],
},
},
'diamonds': {
... db settings
'TEST': {
'DEPENDENCIES': [],
},
},
'clubs': {
# ... db settings
'TEST': {
'DEPENDENCIES': ['diamonds'],
},
},
'spades': {
# ... db settings
'TEST': {
'DEPENDENCIES': ['diamonds', 'hearts'],
},
},
'hearts': {
# ... db settings
'TEST': {
'DEPENDENCIES': ['diamonds', 'clubs'],
},
}
}
Under this configuration, the diamonds database will be created first, as it is the only database alias without de-
pendencies. The default and clubs alias will be created next (although the order of creation of this pair is not
guaranteed), then hearts, and finally spades.
If there are any circular dependencies in the DEPENDENCIES definition, an ImproperlyConfigured exception
will be raised.
Advanced features of TransactionTestCase
TransactionTestCase.available_apps
Warning: This attribute is a private API. It may be changed or removed without a deprecation period in the
future, for instance to accommodate changes in application loading.
It’s used to optimize Django’s own test suite, which contains hundreds of models but no relations between
models in different applications.
3.9. Testing in Django 339](https://image.slidesharecdn.com/20160225-django-documentation-160225091707/85/Django-Documentation-343-320.jpg)

![Django Documentation, Release 1.9.3.dev20160224120324
test_settings.py
tests.py
Let’s take a look inside a couple of those files:
runtests.py
#!/usr/bin/env python
import os
import sys
import django
from django.conf import settings
from django.test.utils import get_runner
if __name__ == "__main__":
os.environ['DJANGO_SETTINGS_MODULE'] = 'tests.test_settings'
django.setup()
TestRunner = get_runner(settings)
test_runner = TestRunner()
failures = test_runner.run_tests(["tests"])
sys.exit(bool(failures))
This is the script that you invoke to run the test suite. It sets up the Django environment, creates the test database and
runs the tests.
For the sake of clarity, this example contains only the bare minimum necessary to use the Django test runner. You may
want to add command-line options for controlling verbosity, passing in specific test labels to run, etc.
tests/test_settings.py
SECRET_KEY = 'fake-key'
INSTALLED_APPS = [
"tests",
]
This file contains the Django settings required to run your app’s tests.
Again, this is a minimal example; your tests may require additional settings to run.
Since the tests package is included in INSTALLED_APPS when running your tests, you can define test-only models
in its models.py file.
Using different testing frameworks
Clearly, unittest is not the only Python testing framework. While Django doesn’t provide explicit support for
alternative frameworks, it does provide a way to invoke tests constructed for an alternative framework as if they were
normal Django tests.
When you run ./manage.py test, Django looks at the TEST_RUNNER setting to determine what to do. By
default, TEST_RUNNER points to ’django.test.runner.DiscoverRunner’. This class defines the default
Django testing behavior. This behavior involves:
1. Performing global pre-test setup.
2. Looking for tests in any file below the current directory whose name matches the pattern test*.py.
3. Creating the test databases.
4. Running migrate to install models and initial data into the test databases.
3.9. Testing in Django 341](https://image.slidesharecdn.com/20160225-django-documentation-160225091707/85/Django-Documentation-345-320.jpg)


![Django Documentation, Release 1.9.3.dev20160224120324
Permissions can be set not only per type of object, but also per specific object instance. By using the
has_add_permission(), has_change_permission() and has_delete_permission() methods
provided by the ModelAdmin class, it is possible to customize permissions for different object instances of the
same type.
User objects have two many-to-many fields: groups and user_permissions. User objects can access their
related objects in the same way as any other Django model:
myuser.groups = [group_list]
myuser.groups.add(group, group, ...)
myuser.groups.remove(group, group, ...)
myuser.groups.clear()
myuser.user_permissions = [permission_list]
myuser.user_permissions.add(permission, permission, ...)
myuser.user_permissions.remove(permission, permission, ...)
myuser.user_permissions.clear()
Default permissions
When django.contrib.auth is listed in your INSTALLED_APPS setting, it will ensure that three default per-
missions – add, change and delete – are created for each Django model defined in one of your installed applications.
These permissions will be created when you run manage.py migrate; the first time you run migrate after
adding django.contrib.auth to INSTALLED_APPS, the default permissions will be created for all previously-
installed models, as well as for any new models being installed at that time. Afterward, it will create default permis-
sions for new models each time you run manage.py migrate (the function that creates permissions is connected
to the post_migrate signal).
Assuming you have an application with an app_label foo and a model named Bar, to test for basic permissions
you should use:
• add: user.has_perm(’foo.add_bar’)
• change: user.has_perm(’foo.change_bar’)
• delete: user.has_perm(’foo.delete_bar’)
The Permission model is rarely accessed directly.
Groups
django.contrib.auth.models.Group models are a generic way of categorizing users so you can apply
permissions, or some other label, to those users. A user can belong to any number of groups.
A user in a group automatically has the permissions granted to that group. For example, if the group Site editors
has the permission can_edit_home_page, any user in that group will have that permission.
Beyond permissions, groups are a convenient way to categorize users to give them some label, or extended functional-
ity. For example, you could create a group ’Special users’, and you could write code that could, say, give them
access to a members-only portion of your site, or send them members-only email messages.
Programmatically creating permissions
While custom permissions can be defined within a model’s Meta class, you can also create permissions directly. For
example, you can create the can_publish permission for a BlogPost model in myapp:
348 Chapter 3. Using Django](https://image.slidesharecdn.com/20160225-django-documentation-160225091707/85/Django-Documentation-352-320.jpg)

![Django Documentation, Release 1.9.3.dev20160224120324
# Do something for anonymous users.
...
How to log a user in
If you have an authenticated user you want to attach to the current session - this is done with a login() function.
login(request, user)
To log a user in, from a view, use login(). It takes an HttpRequest object and a User object. login()
saves the user’s ID in the session, using Django’s session framework.
Note that any data set during the anonymous session is retained in the session after a user logs in.
This example shows how you might use both authenticate() and login():
from django.contrib.auth import authenticate, login
def my_view(request):
username = request.POST['username']
password = request.POST['password']
user = authenticate(username=username, password=password)
if user is not None:
if user.is_active:
login(request, user)
# Redirect to a success page.
else:
# Return a 'disabled account' error message
...
else:
# Return an 'invalid login' error message.
...
Calling authenticate() first
When you’re manually logging a user in, you must successfully authenticate the user with authenticate() before
you call login(). authenticate() sets an attribute on the User noting which authentication backend success-
fully authenticated that user (see the backends documentation for details), and this information is needed later during
the login process. An error will be raised if you try to login a user object retrieved from the database directly.
Selecting the authentication backend When a user logs in, the user’s ID and the backend that was used for authen-
tication are saved in the user’s session. This allows the same authentication backend to fetch the user’s details on a
future request. The authentication backend to save in the session is selected as follows:
1. Use the value of the optional backend argument, if provided.
2. Use the value of the user.backend attribute, if present. This allows pairing authenticate() and
login(): authenticate() sets the user.backend attribute on the User object it returns.
3. Use the backend in AUTHENTICATION_BACKENDS, if there is only one.
4. Otherwise, raise an exception.
In cases 1 and 2, the value of the backend argument or the user.backend attribute should be a dotted import path
string (like that found in AUTHENTICATION_BACKENDS), not the actual backend class.
350 Chapter 3. Using Django](https://image.slidesharecdn.com/20160225-django-documentation-160225091707/85/Django-Documentation-354-320.jpg)


![Django Documentation, Release 1.9.3.dev20160224120324
If you are upgrading an existing site and wish to enable this middleware without requiring all your users to re-
login afterward, you should first upgrade to Django 1.7 and run it for a while so that as sessions are naturally
recreated as users login, they include the session hash as described above. Once you start running your site with
SessionAuthenticationMiddleware, any users who have not logged in and had their session updated with
the verification hash will have their existing session invalidated and be required to login.
Note: Since get_session_auth_hash() is based on SECRET_KEY, updating your site to use a new secret
will invalidate all existing sessions.
Authentication Views
Django provides several views that you can use for handling login, logout, and password management. These make
use of the stock auth forms but you can pass in your own forms as well.
Django provides no default template for the authentication views. You should create your own templates for the views
you want to use. The template context is documented in each view, see All authentication views.
Using the views There are different methods to implement these views in your project. The easiest way is to include
the provided URLconf in django.contrib.auth.urls in your own URLconf, for example:
urlpatterns = [
url('^', include('django.contrib.auth.urls'))
]
This will include the following URL patterns:
^login/$ [name='login']
^logout/$ [name='logout']
^password_change/$ [name='password_change']
^password_change/done/$ [name='password_change_done']
^password_reset/$ [name='password_reset']
^password_reset/done/$ [name='password_reset_done']
^reset/(?P<uidb64>[0-9A-Za-z_-]+)/(?P<token>[0-9A-Za-z]{1,13}-[0-9A-Za-z]{1,20})/$ [name='password_r
^reset/done/$ [name='password_reset_complete']
The views provide a URL name for easier reference. See the URL documentation for details on using named URL
patterns.
If you want more control over your URLs, you can reference a specific view in your URLconf:
from django.contrib.auth import views as auth_views
urlpatterns = [
url('^change-password/', auth_views.password_change)
]
The views have optional arguments you can use to alter the behavior of the view. For example, if you want to change
the template name a view uses, you can provide the template_name argument. A way to do this is to provide
keyword arguments in the URLconf, these will be passed on to the view. For example:
urlpatterns = [
url(
'^change-password/',
auth_views.password_change,
{'template_name': 'change-password.html'}
3.10. User authentication in Django 357](https://image.slidesharecdn.com/20160225-django-documentation-160225091707/85/Django-Documentation-361-320.jpg)
![Django Documentation, Release 1.9.3.dev20160224120324
)
]
All views return a TemplateResponse instance, which allows you to easily customize the response data before
rendering. A way to do this is to wrap a view in your own view:
from django.contrib.auth import views
def change_password(request):
template_response = views.password_change(request)
# Do something with `template_response`
return template_response
For more details, see the TemplateResponse documentation.
All authentication views This is a list with all the views django.contrib.auth provides. For implementation
details see Using the views.
login(request, template_name=‘registration/login.html‘, redirect_field_name=, authentication_form, cur-
rent_app, extra_context)
URL name: login
See the URL documentation for details on using named URL patterns.
Optional arguments:
•template_name: The name of a template to display for the view used to log the user in. Defaults to
registration/login.html.
•redirect_field_name: The name of a GET field containing the URL to redirect to after login. De-
faults to next.
•authentication_form: A callable (typically just a form class) to use for authentication. Defaults to
AuthenticationForm.
•current_app: A hint indicating which application contains the current view. See the namespaced URL
resolution strategy for more information.
•extra_context: A dictionary of context data that will be added to the default context data passed to
the template.
Deprecated since version 1.9: The current_app parameter is deprecated and will be removed in Django 2.0.
Callers should set request.current_app instead.
Here’s what django.contrib.auth.views.login does:
•If called via GET, it displays a login form that POSTs to the same URL. More on this in a bit.
•If called via POST with user submitted credentials, it tries to log the user in. If login is suc-
cessful, the view redirects to the URL specified in next. If next isn’t provided, it redirects to
settings.LOGIN_REDIRECT_URL (which defaults to /accounts/profile/). If login isn’t suc-
cessful, it redisplays the login form.
It’s your responsibility to provide the html for the login template , called registration/login.html by
default. This template gets passed four template context variables:
•form: A Form object representing the AuthenticationForm.
•next: The URL to redirect to after successful login. This may contain a query string, too.
358 Chapter 3. Using Django](https://image.slidesharecdn.com/20160225-django-documentation-160225091707/85/Django-Documentation-362-320.jpg)
![Django Documentation, Release 1.9.3.dev20160224120324
•site: The current Site, according to the SITE_ID setting. If you don’t have the site framework
installed, this will be set to an instance of RequestSite, which derives the site name and domain from
the current HttpRequest.
•site_name: An alias for site.name. If you don’t have the site framework installed, this will be set to
the value of request.META[’SERVER_NAME’]. For more on sites, see The “sites” framework.
If you’d prefer not to call the template registration/login.html, you can pass the template_name
parameter via the extra arguments to the view in your URLconf. For example, this URLconf line would use
myapp/login.html instead:
url(r'^accounts/login/$', auth_views.login, {'template_name': 'myapp/login.html'}),
You can also specify the name of the GET field which contains the URL to redirect to after login by passing
redirect_field_name to the view. By default, the field is called next.
Here’s a sample registration/login.html template you can use as a starting point. It assumes you
have a base.html template that defines a content block:
{% extends "base.html" %}
{% block content %}
{% if form.errors %}
<p>Your username and password didn't match. Please try again.</p>
{% endif %}
{% if next %}
{% if user.is_authenticated %}
<p>Your account doesn't have access to this page. To proceed,
please login with an account that has access.</p>
{% else %}
<p>Please login to see this page.</p>
{% endif %}
{% endif %}
<form method="post" action="{% url 'login' %}">
{% csrf_token %}
<table>
<tr>
<td>{{ form.username.label_tag }}</td>
<td>{{ form.username }}</td>
</tr>
<tr>
<td>{{ form.password.label_tag }}</td>
<td>{{ form.password }}</td>
</tr>
</table>
<input type="submit" value="login" />
<input type="hidden" name="next" value="{{ next }}" />
</form>
{# Assumes you setup the password_reset view in your URLconf #}
<p><a href="{% url 'password_reset' %}">Lost password?</a></p>
{% endblock %}
If you have customized authentication (see Customizing Authentication) you can pass a custom authentication
form to the login view via the authentication_form parameter. This form must accept a request key-
3.10. User authentication in Django 359](https://image.slidesharecdn.com/20160225-django-documentation-160225091707/85/Django-Documentation-363-320.jpg)
![Django Documentation, Release 1.9.3.dev20160224120324
word argument in its __init__ method, and provide a get_user() method which returns the authenticated
user object (this method is only ever called after successful form validation).
logout(request, next_page=None, template_name=’registration/logged_out.html’, redi-
rect_field_name=’next’, current_app=None, extra_context=None)
Logs a user out.
URL name: logout
Optional arguments:
•next_page: The URL to redirect to after logout.
•template_name: The full name of a template to display after logging the user out. Defaults to
registration/logged_out.html if no argument is supplied.
•redirect_field_name: The name of a GET field containing the URL to redirect to after log out.
Defaults to next. Overrides the next_page URL if the given GET parameter is passed.
•current_app: A hint indicating which application contains the current view. See the namespaced URL
resolution strategy for more information.
•extra_context: A dictionary of context data that will be added to the default context data passed to
the template.
Deprecated since version 1.9: The current_app parameter is deprecated and will be removed in Django 2.0.
Callers should set request.current_app instead.
Template context:
•title: The string “Logged out”, localized.
•site: The current Site, according to the SITE_ID setting. If you don’t have the site framework
installed, this will be set to an instance of RequestSite, which derives the site name and domain from
the current HttpRequest.
•site_name: An alias for site.name. If you don’t have the site framework installed, this will be set to
the value of request.META[’SERVER_NAME’]. For more on sites, see The “sites” framework.
•current_app: A hint indicating which application contains the current view. See the namespaced URL
resolution strategy for more information.
•extra_context: A dictionary of context data that will be added to the default context data passed to
the template.
logout_then_login(request, login_url=None, current_app=None, extra_context=None)
Logs a user out, then redirects to the login page.
URL name: No default URL provided
Optional arguments:
•login_url: The URL of the login page to redirect to. Defaults to settings.LOGIN_URL if not
supplied.
•current_app: A hint indicating which application contains the current view. See the namespaced URL
resolution strategy for more information.
•extra_context: A dictionary of context data that will be added to the default context data passed to
the template.
Deprecated since version 1.9: The current_app parameter is deprecated and will be removed in Django 2.0.
Callers should set request.current_app instead.
360 Chapter 3. Using Django](https://image.slidesharecdn.com/20160225-django-documentation-160225091707/85/Django-Documentation-364-320.jpg)

![Django Documentation, Release 1.9.3.dev20160224120324
Users flagged with an unusable password (see set_unusable_password() aren’t allowed to request a
password reset to prevent misuse when using an external authentication source like LDAP. Note that they won’t
receive any error message since this would expose their account’s existence but no mail will be sent either.
URL name: password_reset
Optional arguments:
•template_name: The full name of a template to use for displaying the password reset form. Defaults
to registration/password_reset_form.html if not supplied.
•email_template_name: The full name of a template to use for generating the email with the reset
password link. Defaults to registration/password_reset_email.html if not supplied.
•subject_template_name: The full name of a template to use for the subject of the email with the
reset password link. Defaults to registration/password_reset_subject.txt if not supplied.
•password_reset_form: Form that will be used to get the email of the user to reset the password for.
Defaults to PasswordResetForm.
•token_generator: Instance of the class to check the one time link.
This will default to default_token_generator, it’s an instance of
django.contrib.auth.tokens.PasswordResetTokenGenerator.
•post_reset_redirect: The URL to redirect to after a successful password reset request.
•from_email: A valid email address. By default Django uses the DEFAULT_FROM_EMAIL.
•current_app: A hint indicating which application contains the current view. See the namespaced URL
resolution strategy for more information.
•extra_context: A dictionary of context data that will be added to the default context data passed to
the template.
•html_email_template_name: The full name of a template to use for generating a text/html
multipart email with the password reset link. By default, HTML email is not sent.
•extra_email_context: A dictionary of context data that will available in the email template.
Deprecated since version 1.8: The is_admin_site argument is deprecated and will be removed in Django
1.10.
Deprecated since version 1.9: The current_app parameter is deprecated and will be removed in Django 2.0.
Callers should set request.current_app instead.
The extra_email_context parameter was added.
Template context:
•form: The form (see password_reset_form above) for resetting the user’s password.
Email template context:
•email: An alias for user.email
•user: The current User, according to the email form field. Only active users are able to reset their
passwords (User.is_active is True).
•site_name: An alias for site.name. If you don’t have the site framework installed, this will be set to
the value of request.META[’SERVER_NAME’]. For more on sites, see The “sites” framework.
•domain: An alias for site.domain. If you don’t have the site framework installed, this will be set to
the value of request.get_host().
•protocol: http or https
362 Chapter 3. Using Django](https://image.slidesharecdn.com/20160225-django-documentation-160225091707/85/Django-Documentation-366-320.jpg)


![Django Documentation, Release 1.9.3.dev20160224120324
passwords, how the storage hashing can be configured, and some utilities to work with hashed passwords.
See also:
Even though users may use strong passwords, attackers might be able to eavesdrop on their connections. Use HTTPS
to avoid sending passwords (or any other sensitive data) over plain HTTP connections because they will be vulnerable
to password sniffing.
How Django stores passwords
Django provides a flexible password storage system and uses PBKDF2 by default.
The password attribute of a User object is a string in this format:
<algorithm>$<iterations>$<salt>$<hash>
Those are the components used for storing a User’s password, separated by the dollar-sign character and consist of: the
hashing algorithm, the number of algorithm iterations (work factor), the random salt, and the resulting password hash.
The algorithm is one of a number of one-way hashing or password storage algorithms Django can use; see below.
Iterations describe the number of times the algorithm is run over the hash. Salt is the random seed used and the hash
is the result of the one-way function.
By default, Django uses the PBKDF2 algorithm with a SHA256 hash, a password stretching mechanism recommended
by NIST. This should be sufficient for most users: it’s quite secure, requiring massive amounts of computing time to
break.
However, depending on your requirements, you may choose a different algorithm, or even use a custom algorithm to
match your specific security situation. Again, most users shouldn’t need to do this – if you’re not sure, you probably
don’t. If you do, please read on:
Django chooses the algorithm to use by consulting the PASSWORD_HASHERS setting. This is a list
of hashing algorithm classes that this Django installation supports. The first entry in this list (that is,
settings.PASSWORD_HASHERS[0]) will be used to store passwords, and all the other entries are valid hash-
ers that can be used to check existing passwords. This means that if you want to use a different algorithm, you’ll need
to modify PASSWORD_HASHERS to list your preferred algorithm first in the list.
The default for PASSWORD_HASHERS is:
PASSWORD_HASHERS = [
'django.contrib.auth.hashers.PBKDF2PasswordHasher',
'django.contrib.auth.hashers.PBKDF2SHA1PasswordHasher',
'django.contrib.auth.hashers.BCryptSHA256PasswordHasher',
'django.contrib.auth.hashers.BCryptPasswordHasher',
'django.contrib.auth.hashers.SHA1PasswordHasher',
'django.contrib.auth.hashers.MD5PasswordHasher',
'django.contrib.auth.hashers.CryptPasswordHasher',
]
This means that Django will use PBKDF2 to store all passwords, but will support checking passwords stored with
PBKDF2SHA1, bcrypt, SHA1, etc. The next few sections describe a couple of common ways advanced users may
want to modify this setting.
Using bcrypt with Django
Bcrypt is a popular password storage algorithm that’s specifically designed for long-term password storage. It’s not
the default used by Django since it requires the use of third-party libraries, but since many people may want to use it
Django supports bcrypt with minimal effort.
368 Chapter 3. Using Django](https://image.slidesharecdn.com/20160225-django-documentation-160225091707/85/Django-Documentation-372-320.jpg)
![Django Documentation, Release 1.9.3.dev20160224120324
To use Bcrypt as your default storage algorithm, do the following:
1. Install the bcrypt library. This can be done by running pip install django[bcrypt], or by download-
ing the library and installing it with python setup.py install.
2. Modify PASSWORD_HASHERS to list BCryptSHA256PasswordHasher first. That is, in your settings file,
you’d put:
PASSWORD_HASHERS = [
'django.contrib.auth.hashers.BCryptSHA256PasswordHasher',
'django.contrib.auth.hashers.BCryptPasswordHasher',
'django.contrib.auth.hashers.PBKDF2PasswordHasher',
'django.contrib.auth.hashers.PBKDF2SHA1PasswordHasher',
'django.contrib.auth.hashers.SHA1PasswordHasher',
'django.contrib.auth.hashers.MD5PasswordHasher',
'django.contrib.auth.hashers.CryptPasswordHasher',
]
(You need to keep the other entries in this list, or else Django won’t be able to upgrade passwords; see below).
That’s it – now your Django install will use Bcrypt as the default storage algorithm.
Password truncation with BCryptPasswordHasher
The designers of bcrypt truncate all passwords at 72 characters which means that
bcrypt(password_with_100_chars) == bcrypt(password_with_100_chars[:72]). The
original BCryptPasswordHasher does not have any special handling and thus is also subject to this hidden
password length limit. BCryptSHA256PasswordHasher fixes this by first first hashing the password using
sha256. This prevents the password truncation and so should be preferred over the BCryptPasswordHasher. The
practical ramification of this truncation is pretty marginal as the average user does not have a password greater than 72
characters in length and even being truncated at 72 the compute powered required to brute force bcrypt in any useful
amount of time is still astronomical. Nonetheless, we recommend you use BCryptSHA256PasswordHasher
anyway on the principle of “better safe than sorry”.
Other bcrypt implementations
There are several other implementations that allow bcrypt to be used with Django. Django’s
bcrypt support is NOT directly compatible with these. To upgrade, you will need to modify the
hashes in your database to be in the form bcrypt$(raw bcrypt output). For example:
bcrypt$$2a$12$NT0I31Sa7ihGEWpka9ASYrEFkhuTNeBQ2xfZskIiiJeyFXhRgS.Sy.
Increasing the work factor
The PBKDF2 and bcrypt algorithms use a number of iterations or rounds of hashing. This deliberately slows down
attackers, making attacks against hashed passwords harder. However, as computing power increases, the number of
iterations needs to be increased. We’ve chosen a reasonable default (and will increase it with each release of Django),
but you may wish to tune it up or down, depending on your security needs and available processing power. To do so,
you’ll subclass the appropriate algorithm and override the iterations parameters. For example, to increase the
number of iterations used by the default PBKDF2 algorithm:
1. Create a subclass of django.contrib.auth.hashers.PBKDF2PasswordHasher:
from django.contrib.auth.hashers import PBKDF2PasswordHasher
class MyPBKDF2PasswordHasher(PBKDF2PasswordHasher):
3.10. User authentication in Django 369](https://image.slidesharecdn.com/20160225-django-documentation-160225091707/85/Django-Documentation-373-320.jpg)
![Django Documentation, Release 1.9.3.dev20160224120324
"""
A subclass of PBKDF2PasswordHasher that uses 100 times more iterations.
"""
iterations = PBKDF2PasswordHasher.iterations * 100
Save this somewhere in your project. For example, you might put this in a file like myproject/hashers.py.
2. Add your new hasher as the first entry in PASSWORD_HASHERS:
PASSWORD_HASHERS = [
'myproject.hashers.MyPBKDF2PasswordHasher',
'django.contrib.auth.hashers.PBKDF2PasswordHasher',
'django.contrib.auth.hashers.PBKDF2SHA1PasswordHasher',
'django.contrib.auth.hashers.BCryptSHA256PasswordHasher',
'django.contrib.auth.hashers.BCryptPasswordHasher',
'django.contrib.auth.hashers.SHA1PasswordHasher',
'django.contrib.auth.hashers.MD5PasswordHasher',
'django.contrib.auth.hashers.CryptPasswordHasher',
]
That’s it – now your Django install will use more iterations when it stores passwords using PBKDF2.
Password upgrading
When users log in, if their passwords are stored with anything other than the preferred algorithm, Django will auto-
matically upgrade the algorithm to the preferred one. This means that old installs of Django will get automatically
more secure as users log in, and it also means that you can switch to new (and better) storage algorithms as they get
invented.
However, Django can only upgrade passwords that use algorithms mentioned in PASSWORD_HASHERS, so as you
upgrade to new systems you should make sure never to remove entries from this list. If you do, users using unmentioned
algorithms won’t be able to upgrade. Hashed passwords will be updated when increasing (or decreasing) the number
of PBKDF2 iterations or bcrypt rounds.
Passwords updates when changing the number of bcrypt rounds was added.
Password upgrading without requiring a login
If you have an existing database with an older, weak hash such as MD5 or SHA1, you might want to upgrade those
hashes yourself instead of waiting for the upgrade to happen when a user logs in (which may never happen if a user
doesn’t return to your site). In this case, you can use a “wrapped” password hasher.
For this example, we’ll migrate a collection of SHA1 hashes to use PBKDF2(SHA1(password)) and add the cor-
responding password hasher for checking if a user entered the correct password on login. We assume we’re using
the built-in User model and that our project has an accounts app. You can modify the pattern to work with any
algorithm or with a custom user model.
First, we’ll add the custom hasher:
accounts/hashers.py
from django.contrib.auth.hashers import (
PBKDF2PasswordHasher, SHA1PasswordHasher,
)
class PBKDF2WrappedSHA1PasswordHasher(PBKDF2PasswordHasher):
370 Chapter 3. Using Django](https://image.slidesharecdn.com/20160225-django-documentation-160225091707/85/Django-Documentation-374-320.jpg)
![Django Documentation, Release 1.9.3.dev20160224120324
algorithm = 'pbkdf2_wrapped_sha1'
def encode_sha1_hash(self, sha1_hash, salt, iterations=None):
return super(PBKDF2WrappedSHA1PasswordHasher, self).encode(sha1_hash, salt, iterations)
def encode(self, password, salt, iterations=None):
_, _, sha1_hash = SHA1PasswordHasher().encode(password, salt).split('$', 2)
return self.encode_sha1_hash(sha1_hash, salt, iterations)
The data migration might look something like:
accounts/migrations/0002_migrate_sha1_passwords.py
from django.db import migrations
from ..hashers import PBKDF2WrappedSHA1PasswordHasher
def forwards_func(apps, schema_editor):
User = apps.get_model('auth', 'User')
users = User.objects.filter(password__startswith='sha1$')
hasher = PBKDF2WrappedSHA1PasswordHasher()
for user in users:
algorithm, salt, sha1_hash = user.password.split('$', 2)
user.password = hasher.encode_sha1_hash(sha1_hash, salt)
user.save(update_fields=['password'])
class Migration(migrations.Migration):
dependencies = [
('accounts', '0001_initial'),
# replace this with the latest migration in contrib.auth
('auth', '####_migration_name'),
]
operations = [
migrations.RunPython(forwards_func),
]
Be aware that this migration will take on the order of several minutes for several thousand users, depending on the
speed of your hardware.
Finally, we’ll add a PASSWORD_HASHERS setting:
mysite/settings.py
PASSWORD_HASHERS = [
'django.contrib.auth.hashers.PBKDF2PasswordHasher',
'accounts.hashers.PBKDF2WrappedSHA1PasswordHasher',
]
Include any other hashers that your site uses in this list.
Manually managing a user’s password
The django.contrib.auth.hashers module provides a set of functions to create and validate hashed pass-
word. You can use them independently from the User model.
3.10. User authentication in Django 371](https://image.slidesharecdn.com/20160225-django-documentation-160225091707/85/Django-Documentation-375-320.jpg)

![Django Documentation, Release 1.9.3.dev20160224120324
{
'NAME': 'django.contrib.auth.password_validation.NumericPasswordValidator',
},
]
This example enables all four included validators:
• UserAttributeSimilarityValidator, which checks the similarity between the password and a set of
attributes of the user.
• MinimumLengthValidator, which simply checks whether the password meets a minimum length. This
validator is configured with a custom option: it now requires the minimum length to be nine characters, instead
of the default eight.
• CommonPasswordValidator, which checks whether the password occurs in a list of common passwords.
By default, it compares to an included list of 1000 common passwords.
• NumericPasswordValidator, which checks whether the password isn’t entirely numeric.
For UserAttributeSimilarityValidator and CommonPasswordValidator, we’re simply using the
default settings in this example. NumericPasswordValidator has no settings.
The help texts and any errors from password validators are always returned in the order they are listed in
AUTH_PASSWORD_VALIDATORS.
Included validators
Django includes four validators:
class MinimumLengthValidator(min_length=8)
Validates whether the password meets a minimum length. The minimum length can be customized with the
min_length parameter.
class UserAttributeSimilarityValidator(user_attributes=DEFAULT_USER_ATTRIBUTES,
max_similarity=0.7)
Validates whether the password is sufficiently different from certain attributes of the user.
The user_attributes parameter should be an iterable of names of user attributes to compare to. If
this argument is not provided, the default is used: ’username’, ’first_name’, ’last_name’,
’email’. Attributes that don’t exist are ignored.
The maximum similarity the password can have, before it is rejected, can be set with the max_similarity
parameter, on a scale of 0 to 1. A setting of 0 will cause all passwords to be rejected, whereas a setting of 1 will
cause it to only reject passwords that are identical to an attribute’s value.
class CommonPasswordValidator(password_list_path=DEFAULT_PASSWORD_LIST_PATH)
Validates whether the password is not a common password. By default, this checks against a list of 1000
common password created by Mark Burnett.
The password_list_path can be set to the path of a custom file of common passwords. This file should
contain one password per line and may be plain text or gzipped.
class NumericPasswordValidator
Validates whether the password is not entirely numeric.
Integrating validation
There are a few functions in django.contrib.auth.password_validation that you can call from your
own forms or other code to integrate password validation. This can be useful if you use custom forms for password
3.10. User authentication in Django 373](https://image.slidesharecdn.com/20160225-django-documentation-160225091707/85/Django-Documentation-377-320.jpg)


![Django Documentation, Release 1.9.3.dev20160224120324
The list of authentication backends to use is specified in the AUTHENTICATION_BACKENDS setting. This should be
a list of Python path names that point to Python classes that know how to authenticate. These classes can be anywhere
on your Python path.
By default, AUTHENTICATION_BACKENDS is set to:
['django.contrib.auth.backends.ModelBackend']
That’s the basic authentication backend that checks the Django users database and queries the built-in permissions. It
does not provide protection against brute force attacks via any rate limiting mechanism. You may either implement
your own rate limiting mechanism in a custom auth backend, or use the mechanisms provided by most Web servers.
The order of AUTHENTICATION_BACKENDS matters, so if the same username and password is valid in multiple
backends, Django will stop processing at the first positive match.
If a backend raises a PermissionDenied exception, authentication will immediately fail. Django won’t check the
backends that follow.
Note: Once a user has authenticated, Django stores which backend was used to authenticate the user in the user’s
session, and re-uses the same backend for the duration of that session whenever access to the currently authenticated
user is needed. This effectively means that authentication sources are cached on a per-session basis, so if you change
AUTHENTICATION_BACKENDS, you’ll need to clear out session data if you need to force users to re-authenticate
using different methods. A simple way to do that is simply to execute Session.objects.all().delete().
Writing an authentication backend
An authentication backend is a class that implements two required methods: get_user(user_id) and
authenticate(**credentials), as well as a set of optional permission related authorization methods.
The get_user method takes a user_id – which could be a username, database ID or whatever, but has to be the
primary key of your User object – and returns a User object.
The authenticate method takes credentials as keyword arguments. Most of the time, it’ll just look like this:
class MyBackend(object):
def authenticate(self, username=None, password=None):
# Check the username/password and return a User.
...
But it could also authenticate a token, like so:
class MyBackend(object):
def authenticate(self, token=None):
# Check the token and return a User.
...
Either way, authenticate should check the credentials it gets, and it should return a User object that matches
those credentials, if the credentials are valid. If they’re not valid, it should return None.
The Django admin is tightly coupled to the Django User object. The best way to deal with this is to create a Django
User object for each user that exists for your backend (e.g., in your LDAP directory, your external SQL database,
etc.) You can either write a script to do this in advance, or your authenticate method can do it the first time a
user logs in.
Here’s an example backend that authenticates against a username and password variable defined in your
settings.py file and creates a Django User object the first time a user authenticates:
376 Chapter 3. Using Django](https://image.slidesharecdn.com/20160225-django-documentation-160225091707/85/Django-Documentation-380-320.jpg)


![Django Documentation, Release 1.9.3.dev20160224120324
usually be a username of some kind, but it can also be an email address, or any other unique identifier. The
field must be unique (i.e., have unique=True set in its definition), unless you use a custom authentication
backend that can support non-unique usernames.
In the following example, the field identifier is used as the identifying field:
class MyUser(AbstractBaseUser):
identifier = models.CharField(max_length=40, unique=True)
...
USERNAME_FIELD = 'identifier'
USERNAME_FIELD now supports ForeignKeys. Since there is no way to pass model instances
during the createsuperuser prompt, expect the user to enter the value of to_field value (the
primary_key by default) of an existing instance.
REQUIRED_FIELDS
A list of the field names that will be prompted for when creating a user via the createsuperuser
management command. The user will be prompted to supply a value for each of these fields. It must
include any field for which blank is False or undefined and may include additional fields you want
prompted for when a user is created interactively. REQUIRED_FIELDS has no effect in other parts of
Django, like creating a user in the admin.
For example, here is the partial definition for a User model that defines two required fields - a date of
birth and height:
class MyUser(AbstractBaseUser):
...
date_of_birth = models.DateField()
height = models.FloatField()
...
REQUIRED_FIELDS = ['date_of_birth', 'height']
Note: REQUIRED_FIELDS must contain all required fields on your User model, but should not contain
the USERNAME_FIELD or password as these fields will always be prompted for.
REQUIRED_FIELDS now supports ForeignKeys. Since there is no way to pass model instances
during the createsuperuser prompt, expect the user to enter the value of to_field value (the
primary_key by default) of an existing instance.
is_active
A boolean attribute that indicates whether the user is considered “active”. This attribute is provided as an
attribute on AbstractBaseUser defaulting to True. How you choose to implement it will depend on
the details of your chosen auth backends. See the documentation of the is_active attribute on
the built-in user model for details.
get_full_name()
A longer formal identifier for the user. A common interpretation would be the full name of the user, but it
can be any string that identifies the user.
get_short_name()
A short, informal identifier for the user. A common interpretation would be the first name of the user,
but it can be any string that identifies the user in an informal way. It may also return the same value as
django.contrib.auth.models.User.get_full_name().
Importing AbstractBaseUser
AbstractBaseUser and BaseUserManager are importable from
382 Chapter 3. Using Django](https://image.slidesharecdn.com/20160225-django-documentation-160225091707/85/Django-Documentation-386-320.jpg)


![Django Documentation, Release 1.9.3.dev20160224120324
class MyUserManager(BaseUserManager):
def create_user(self, email, date_of_birth, password=None):
"""
Creates and saves a User with the given email, date of
birth and password.
"""
if not email:
raise ValueError('Users must have an email address')
user = self.model(
email=self.normalize_email(email),
date_of_birth=date_of_birth,
)
user.set_password(password)
user.save(using=self._db)
return user
def create_superuser(self, email, date_of_birth, password):
"""
Creates and saves a superuser with the given email, date of
birth and password.
"""
user = self.create_user(email,
password=password,
date_of_birth=date_of_birth
)
user.is_admin = True
user.save(using=self._db)
return user
class MyUser(AbstractBaseUser):
email = models.EmailField(
verbose_name='email address',
max_length=255,
unique=True,
)
date_of_birth = models.DateField()
is_active = models.BooleanField(default=True)
is_admin = models.BooleanField(default=False)
objects = MyUserManager()
USERNAME_FIELD = 'email'
REQUIRED_FIELDS = ['date_of_birth']
def get_full_name(self):
# The user is identified by their email address
return self.email
def get_short_name(self):
# The user is identified by their email address
return self.email
def __str__(self): # __unicode__ on Python 2
return self.email
3.10. User authentication in Django 387](https://image.slidesharecdn.com/20160225-django-documentation-160225091707/85/Django-Documentation-391-320.jpg)
![Django Documentation, Release 1.9.3.dev20160224120324
def has_perm(self, perm, obj=None):
"Does the user have a specific permission?"
# Simplest possible answer: Yes, always
return True
def has_module_perms(self, app_label):
"Does the user have permissions to view the app `app_label`?"
# Simplest possible answer: Yes, always
return True
@property
def is_staff(self):
"Is the user a member of staff?"
# Simplest possible answer: All admins are staff
return self.is_admin
Then, to register this custom User model with Django’s admin, the following code would be required in the app’s
admin.py file:
from django import forms
from django.contrib import admin
from django.contrib.auth.models import Group
from django.contrib.auth.admin import UserAdmin as BaseUserAdmin
from django.contrib.auth.forms import ReadOnlyPasswordHashField
from customauth.models import MyUser
class UserCreationForm(forms.ModelForm):
"""A form for creating new users. Includes all the required
fields, plus a repeated password."""
password1 = forms.CharField(label='Password', widget=forms.PasswordInput)
password2 = forms.CharField(label='Password confirmation', widget=forms.PasswordInput)
class Meta:
model = MyUser
fields = ('email', 'date_of_birth')
def clean_password2(self):
# Check that the two password entries match
password1 = self.cleaned_data.get("password1")
password2 = self.cleaned_data.get("password2")
if password1 and password2 and password1 != password2:
raise forms.ValidationError("Passwords don't match")
return password2
def save(self, commit=True):
# Save the provided password in hashed format
user = super(UserCreationForm, self).save(commit=False)
user.set_password(self.cleaned_data["password1"])
if commit:
user.save()
return user
class UserChangeForm(forms.ModelForm):
"""A form for updating users. Includes all the fields on
the user, but replaces the password field with admin's
388 Chapter 3. Using Django](https://image.slidesharecdn.com/20160225-django-documentation-160225091707/85/Django-Documentation-392-320.jpg)
![Django Documentation, Release 1.9.3.dev20160224120324
password hash display field.
"""
password = ReadOnlyPasswordHashField()
class Meta:
model = MyUser
fields = ('email', 'password', 'date_of_birth', 'is_active', 'is_admin')
def clean_password(self):
# Regardless of what the user provides, return the initial value.
# This is done here, rather than on the field, because the
# field does not have access to the initial value
return self.initial["password"]
class UserAdmin(BaseUserAdmin):
# The forms to add and change user instances
form = UserChangeForm
add_form = UserCreationForm
# The fields to be used in displaying the User model.
# These override the definitions on the base UserAdmin
# that reference specific fields on auth.User.
list_display = ('email', 'date_of_birth', 'is_admin')
list_filter = ('is_admin',)
fieldsets = (
(None, {'fields': ('email', 'password')}),
('Personal info', {'fields': ('date_of_birth',)}),
('Permissions', {'fields': ('is_admin',)}),
)
# add_fieldsets is not a standard ModelAdmin attribute. UserAdmin
# overrides get_fieldsets to use this attribute when creating a user.
add_fieldsets = (
(None, {
'classes': ('wide',),
'fields': ('email', 'date_of_birth', 'password1', 'password2')}
),
)
search_fields = ('email',)
ordering = ('email',)
filter_horizontal = ()
# Now register the new UserAdmin...
admin.site.register(MyUser, UserAdmin)
# ... and, since we're not using Django's built-in permissions,
# unregister the Group model from admin.
admin.site.unregister(Group)
Finally, specify the custom model as the default user model for your project using the AUTH_USER_MODEL setting
in your settings.py:
AUTH_USER_MODEL = 'customauth.MyUser'
Django comes with a user authentication system. It handles user accounts, groups, permissions and cookie-based user
sessions. This section of the documentation explains how the default implementation works out of the box, as well as
how to extend and customize it to suit your project’s needs.
3.10. User authentication in Django 389](https://image.slidesharecdn.com/20160225-django-documentation-160225091707/85/Django-Documentation-393-320.jpg)


![Django Documentation, Release 1.9.3.dev20160224120324
'172.19.26.242:11211',
]
}
}
In the following example, the cache is shared over Memcached instances running on the IP addresses 172.19.26.240
(port 11211), 172.19.26.242 (port 11212), and 172.19.26.244 (port 11213):
CACHES = {
'default': {
'BACKEND': 'django.core.cache.backends.memcached.MemcachedCache',
'LOCATION': [
'172.19.26.240:11211',
'172.19.26.242:11212',
'172.19.26.244:11213',
]
}
}
A final point about Memcached is that memory-based caching has a disadvantage: because the cached data is stored
in memory, the data will be lost if your server crashes. Clearly, memory isn’t intended for permanent data storage, so
don’t rely on memory-based caching as your only data storage. Without a doubt, none of the Django caching backends
should be used for permanent storage – they’re all intended to be solutions for caching, not storage – but we point this
out here because memory-based caching is particularly temporary.
Database caching
Django can store its cached data in your database. This works best if you’ve got a fast, well-indexed database server.
To use a database table as your cache backend:
• Set BACKEND to django.core.cache.backends.db.DatabaseCache
• Set LOCATION to tablename, the name of the database table. This name can be whatever you want, as long
as it’s a valid table name that’s not already being used in your database.
In this example, the cache table’s name is my_cache_table:
CACHES = {
'default': {
'BACKEND': 'django.core.cache.backends.db.DatabaseCache',
'LOCATION': 'my_cache_table',
}
}
Creating the cache table
Before using the database cache, you must create the cache table with this command:
python manage.py createcachetable
This creates a table in your database that is in the proper format that Django’s database-cache system expects. The
name of the table is taken from LOCATION.
If you are using multiple database caches, createcachetable creates one table for each cache.
If you are using multiple databases, createcachetable observes the allow_migrate() method of your
database routers (see below).
3.11. Django’s cache framework 393](https://image.slidesharecdn.com/20160225-django-documentation-160225091707/85/Django-Documentation-397-320.jpg)
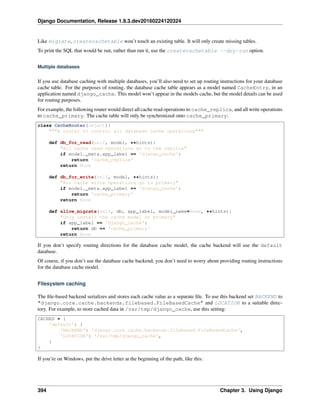


![Django Documentation, Release 1.9.3.dev20160224120324
'TIMEOUT': 60,
'OPTIONS': {
'MAX_ENTRIES': 1000
}
}
}
Invalid arguments are silently ignored, as are invalid values of known arguments.
3.11.2 The per-site cache
Once the cache is set up, the simplest way to use caching is to cache your entire site.
You’ll need to add ’django.middleware.cache.UpdateCacheMiddleware’ and
’django.middleware.cache.FetchFromCacheMiddleware’ to your MIDDLEWARE_CLASSES
setting, as in this example:
MIDDLEWARE_CLASSES = [
'django.middleware.cache.UpdateCacheMiddleware',
'django.middleware.common.CommonMiddleware',
'django.middleware.cache.FetchFromCacheMiddleware',
]
Note: No, that’s not a typo: the “update” middleware must be first in the list, and the “fetch” middleware must be
last. The details are a bit obscure, but see Order of MIDDLEWARE_CLASSES below if you’d like the full story.
Then, add the following required settings to your Django settings file:
• CACHE_MIDDLEWARE_ALIAS – The cache alias to use for storage.
• CACHE_MIDDLEWARE_SECONDS – The number of seconds each page should be cached.
• CACHE_MIDDLEWARE_KEY_PREFIX – If the cache is shared across multiple sites using the same Django
installation, set this to the name of the site, or some other string that is unique to this Django instance, to prevent
key collisions. Use an empty string if you don’t care.
FetchFromCacheMiddleware caches GET and HEAD responses with status 200, where the request and response
headers allow. Responses to requests for the same URL with different query parameters are considered to be unique
pages and are cached separately. This middleware expects that a HEAD request is answered with the same response
headers as the corresponding GET request; in which case it can return a cached GET response for HEAD request.
Additionally, UpdateCacheMiddleware automatically sets a few headers in each HttpResponse:
• Sets the Last-Modified header to the current date/time when a fresh (not cached) version of the page is
requested.
• Sets the Expires header to the current date/time plus the defined CACHE_MIDDLEWARE_SECONDS.
• Sets the Cache-Control header to give a max age for the page – again, from the
CACHE_MIDDLEWARE_SECONDS setting.
See Middleware for more on middleware.
If a view sets its own cache expiry time (i.e. it has a max-age section in its Cache-Control header) then the
page will be cached until the expiry time, rather than CACHE_MIDDLEWARE_SECONDS. Using the decorators in
django.views.decorators.cache you can easily set a view’s expiry time (using the cache_control
decorator) or disable caching for a view (using the never_cache decorator). See the using other headers section
for more on these decorators. If USE_I18N is set to True then the generated cache key will include the name of the
3.11. Django’s cache framework 397](https://image.slidesharecdn.com/20160225-django-documentation-160225091707/85/Django-Documentation-401-320.jpg)
![Django Documentation, Release 1.9.3.dev20160224120324
active language – see also How Django discovers language preference). This allows you to easily cache multilingual
sites without having to create the cache key yourself.
Cache keys also include the active language when USE_L10N is set to True and the current time zone when USE_TZ
is set to True.
3.11.3 The per-view cache
django.views.decorators.cache.cache_page()
A more granular way to use the caching framework is by caching the output of individual views.
django.views.decorators.cache defines a cache_page decorator that will automatically cache the view’s
response for you. It’s easy to use:
from django.views.decorators.cache import cache_page
@cache_page(60 * 15)
def my_view(request):
...
cache_page takes a single argument: the cache timeout, in seconds. In the above example, the result of the
my_view() view will be cached for 15 minutes. (Note that we’ve written it as 60 * 15 for the purpose of read-
ability. 60 * 15 will be evaluated to 900 – that is, 15 minutes multiplied by 60 seconds per minute.)
The per-view cache, like the per-site cache, is keyed off of the URL. If multiple URLs point at the same view, each
URL will be cached separately. Continuing the my_view example, if your URLconf looks like this:
urlpatterns = [
url(r'^foo/([0-9]{1,2})/$', my_view),
]
then requests to /foo/1/ and /foo/23/ will be cached separately, as you may expect. But once a particular URL
(e.g., /foo/23/) has been requested, subsequent requests to that URL will use the cache.
cache_page can also take an optional keyword argument, cache, which directs the decorator to use a specific
cache (from your CACHES setting) when caching view results. By default, the default cache will be used, but you
can specify any cache you want:
@cache_page(60 * 15, cache="special_cache")
def my_view(request):
...
You can also override the cache prefix on a per-view basis. cache_page takes an optional keyword argument,
key_prefix, which works in the same way as the CACHE_MIDDLEWARE_KEY_PREFIX setting for the middle-
ware. It can be used like this:
@cache_page(60 * 15, key_prefix="site1")
def my_view(request):
...
The key_prefix and cache arguments may be specified together. The key_prefix argument and the
KEY_PREFIX specified under CACHES will be concatenated.
Specifying per-view cache in the URLconf
The examples in the previous section have hard-coded the fact that the view is cached, because cache_page alters
the my_view function in place. This approach couples your view to the cache system, which is not ideal for several
reasons. For instance, you might want to reuse the view functions on another, cache-less site, or you might want to
398 Chapter 3. Using Django](https://image.slidesharecdn.com/20160225-django-documentation-160225091707/85/Django-Documentation-402-320.jpg)
![Django Documentation, Release 1.9.3.dev20160224120324
distribute the views to people who might want to use them without being cached. The solution to these problems is to
specify the per-view cache in the URLconf rather than next to the view functions themselves.
Doing so is easy: simply wrap the view function with cache_page when you refer to it in the URLconf. Here’s the
old URLconf from earlier:
urlpatterns = [
url(r'^foo/([0-9]{1,2})/$', my_view),
]
Here’s the same thing, with my_view wrapped in cache_page:
from django.views.decorators.cache import cache_page
urlpatterns = [
url(r'^foo/([0-9]{1,2})/$', cache_page(60 * 15)(my_view)),
]
3.11.4 Template fragment caching
If you’re after even more control, you can also cache template fragments using the cache template tag. To give your
template access to this tag, put {% load cache %} near the top of your template.
The {% cache %} template tag caches the contents of the block for a given amount of time. It takes at least two
arguments: the cache timeout, in seconds, and the name to give the cache fragment. The name will be taken as is, do
not use a variable. For example:
{% load cache %}
{% cache 500 sidebar %}
.. sidebar ..
{% endcache %}
Sometimes you might want to cache multiple copies of a fragment depending on some dynamic data that appears
inside the fragment. For example, you might want a separate cached copy of the sidebar used in the previous example
for every user of your site. Do this by passing additional arguments to the {% cache %} template tag to uniquely
identify the cache fragment:
{% load cache %}
{% cache 500 sidebar request.user.username %}
.. sidebar for logged in user ..
{% endcache %}
It’s perfectly fine to specify more than one argument to identify the fragment. Simply pass as many arguments to {%
cache %} as you need.
If USE_I18N is set to True the per-site middleware cache will respect the active language. For the cache template
tag you could use one of the translation-specific variables available in templates to achieve the same result:
{% load i18n %}
{% load cache %}
{% get_current_language as LANGUAGE_CODE %}
{% cache 600 welcome LANGUAGE_CODE %}
{% trans "Welcome to example.com" %}
{% endcache %}
The cache timeout can be a template variable, as long as the template variable resolves to an integer value. For example,
if the template variable my_timeout is set to the value 600, then the following two examples are equivalent:
3.11. Django’s cache framework 399](https://image.slidesharecdn.com/20160225-django-documentation-160225091707/85/Django-Documentation-403-320.jpg)
![Django Documentation, Release 1.9.3.dev20160224120324
{% cache 600 sidebar %} ... {% endcache %}
{% cache my_timeout sidebar %} ... {% endcache %}
This feature is useful in avoiding repetition in templates. You can set the timeout in a variable, in one place, and just
reuse that value.
By default, the cache tag will try to use the cache called “template_fragments”. If no such cache exists, it will fall
back to using the default cache. You may select an alternate cache backend to use with the using keyword argument,
which must be the last argument to the tag.
{% cache 300 local-thing ... using="localcache" %}
It is considered an error to specify a cache name that is not configured.
django.core.cache.utils.make_template_fragment_key(fragment_name, vary_on=None)
If you want to obtain the cache key used for a cached fragment, you can use make_template_fragment_key.
fragment_name is the same as second argument to the cache template tag; vary_on is a list of all additional
arguments passed to the tag. This function can be useful for invalidating or overwriting a cached item, for example:
>>> from django.core.cache import cache
>>> from django.core.cache.utils import make_template_fragment_key
# cache key for {% cache 500 sidebar username %}
>>> key = make_template_fragment_key('sidebar', [username])
>>> cache.delete(key) # invalidates cached template fragment
3.11.5 The low-level cache API
Sometimes, caching an entire rendered page doesn’t gain you very much and is, in fact, inconvenient overkill.
Perhaps, for instance, your site includes a view whose results depend on several expensive queries, the results of which
change at different intervals. In this case, it would not be ideal to use the full-page caching that the per-site or per-view
cache strategies offer, because you wouldn’t want to cache the entire result (since some of the data changes often), but
you’d still want to cache the results that rarely change.
For cases like this, Django exposes a simple, low-level cache API. You can use this API to store objects in the cache
with any level of granularity you like. You can cache any Python object that can be pickled safely: strings, dictionaries,
lists of model objects, and so forth. (Most common Python objects can be pickled; refer to the Python documentation
for more information about pickling.)
Accessing the cache
django.core.cache.caches
You can access the caches configured in the CACHES setting through a dict-like object:
django.core.cache.caches. Repeated requests for the same alias in the same thread will return
the same object.
>>> from django.core.cache import caches
>>> cache1 = caches['myalias']
>>> cache2 = caches['myalias']
>>> cache1 is cache2
True
If the named key does not exist, InvalidCacheBackendError will be raised.
To provide thread-safety, a different instance of the cache backend will be returned for each thread.
400 Chapter 3. Using Django](https://image.slidesharecdn.com/20160225-django-documentation-160225091707/85/Django-Documentation-404-320.jpg)
![Django Documentation, Release 1.9.3.dev20160224120324
django.core.cache.cache
As a shortcut, the default cache is available as django.core.cache.cache:
>>> from django.core.cache import cache
This object is equivalent to caches[’default’].
Basic usage
The basic interface is set(key, value, timeout) and get(key):
>>> cache.set('my_key', 'hello, world!', 30)
>>> cache.get('my_key')
'hello, world!'
The timeout argument is optional and defaults to the timeout argument of the appropriate backend in the CACHES
setting (explained above). It’s the number of seconds the value should be stored in the cache. Passing in None for
timeout will cache the value forever. A timeout of 0 won’t cache the value.
If the object doesn’t exist in the cache, cache.get() returns None:
# Wait 30 seconds for 'my_key' to expire...
>>> cache.get('my_key')
None
We advise against storing the literal value None in the cache, because you won’t be able to distinguish between your
stored None value and a cache miss signified by a return value of None.
cache.get() can take a default argument. This specifies which value to return if the object doesn’t exist in the
cache:
>>> cache.get('my_key', 'has expired')
'has expired'
To add a key only if it doesn’t already exist, use the add() method. It takes the same parameters as set(), but it
will not attempt to update the cache if the key specified is already present:
>>> cache.set('add_key', 'Initial value')
>>> cache.add('add_key', 'New value')
>>> cache.get('add_key')
'Initial value'
If you need to know whether add() stored a value in the cache, you can check the return value. It will return True
if the value was stored, False otherwise.
If you want to get a key’s value or set a value if the key isn’t in the cache, there is the get_or_set() method.
It takes the same parameters as get() but the default is set as the new cache value for that key, rather than simply
returned:
>>> cache.get('my_new_key') # returns None
>>> cache.get_or_set('my_new_key', 'my new value', 100)
'my new value'
You can also pass any callable as a default value:
>>> import datetime
>>> cache.get_or_set('some-timestamp-key', datetime.datetime.now)
datetime.datetime(2014, 12, 11, 0, 15, 49, 457920)
3.11. Django’s cache framework 401](https://image.slidesharecdn.com/20160225-django-documentation-160225091707/85/Django-Documentation-405-320.jpg)
![Django Documentation, Release 1.9.3.dev20160224120324
The get_or_set() method was added.
There’s also a get_many() interface that only hits the cache once. get_many() returns a dictionary with all the
keys you asked for that actually exist in the cache (and haven’t expired):
>>> cache.set('a', 1)
>>> cache.set('b', 2)
>>> cache.set('c', 3)
>>> cache.get_many(['a', 'b', 'c'])
{'a': 1, 'b': 2, 'c': 3}
To set multiple values more efficiently, use set_many() to pass a dictionary of key-value pairs:
>>> cache.set_many({'a': 1, 'b': 2, 'c': 3})
>>> cache.get_many(['a', 'b', 'c'])
{'a': 1, 'b': 2, 'c': 3}
Like cache.set(), set_many() takes an optional timeout parameter.
You can delete keys explicitly with delete(). This is an easy way of clearing the cache for a particular object:
>>> cache.delete('a')
If you want to clear a bunch of keys at once, delete_many() can take a list of keys to be cleared:
>>> cache.delete_many(['a', 'b', 'c'])
Finally, if you want to delete all the keys in the cache, use cache.clear(). Be careful with this; clear() will
remove everything from the cache, not just the keys set by your application.
>>> cache.clear()
You can also increment or decrement a key that already exists using the incr() or decr() methods, respectively.
By default, the existing cache value will incremented or decremented by 1. Other increment/decrement values can
be specified by providing an argument to the increment/decrement call. A ValueError will be raised if you attempt to
increment or decrement a nonexistent cache key.:
>>> cache.set('num', 1)
>>> cache.incr('num')
2
>>> cache.incr('num', 10)
12
>>> cache.decr('num')
11
>>> cache.decr('num', 5)
6
Note: incr()/decr() methods are not guaranteed to be atomic. On those backends that support atomic in-
crement/decrement (most notably, the memcached backend), increment and decrement operations will be atomic.
However, if the backend doesn’t natively provide an increment/decrement operation, it will be implemented using a
two-step retrieve/update.
You can close the connection to your cache with close() if implemented by the cache backend.
>>> cache.close()
Note: For caches that don’t implement close methods it is a no-op.
402 Chapter 3. Using Django](https://image.slidesharecdn.com/20160225-django-documentation-160225091707/85/Django-Documentation-406-320.jpg)

![Django Documentation, Release 1.9.3.dev20160224120324
def make_key(key, key_prefix, version):
return ':'.join([key_prefix, str(version), key])
If you want to combine the parts in different ways, or apply other processing to the final key (e.g., taking a hash digest
of the key parts), you can provide a custom key function.
The KEY_FUNCTION cache setting specifies a dotted-path to a function matching the prototype of make_key()
above. If provided, this custom key function will be used instead of the default key combining function.
Cache key warnings
Memcached, the most commonly-used production cache backend, does not allow cache keys longer than 250 char-
acters or containing whitespace or control characters, and using such keys will cause an exception. To encour-
age cache-portable code and minimize unpleasant surprises, the other built-in cache backends issue a warning
(django.core.cache.backends.base.CacheKeyWarning) if a key is used that would cause an error on
memcached.
If you are using a production backend that can accept a wider range of keys (a custom backend, or one of
the non-memcached built-in backends), and want to use this wider range without warnings, you can silence
CacheKeyWarning with this code in the management module of one of your INSTALLED_APPS:
import warnings
from django.core.cache import CacheKeyWarning
warnings.simplefilter("ignore", CacheKeyWarning)
If you want to instead provide custom key validation logic for one of the built-in backends, you can subclass it, override
just the validate_key method, and follow the instructions for using a custom cache backend. For instance, to do
this for the locmem backend, put this code in a module:
from django.core.cache.backends.locmem import LocMemCache
class CustomLocMemCache(LocMemCache):
def validate_key(self, key):
"""Custom validation, raising exceptions or warnings as needed."""
# ...
...and use the dotted Python path to this class in the BACKEND portion of your CACHES setting.
3.11.6 Downstream caches
So far, this document has focused on caching your own data. But another type of caching is relevant to Web develop-
ment, too: caching performed by “downstream” caches. These are systems that cache pages for users even before the
request reaches your website.
Here are a few examples of downstream caches:
• Your ISP may cache certain pages, so if you requested a page from https://example.com/, your ISP would
send you the page without having to access example.com directly. The maintainers of example.com have no
knowledge of this caching; the ISP sits between example.com and your Web browser, handling all of the caching
transparently.
• Your Django website may sit behind a proxy cache, such as Squid Web Proxy Cache (http://www.squid-
cache.org/), that caches pages for performance. In this case, each request first would be handled by the proxy,
and it would be passed to your application only if needed.
404 Chapter 3. Using Django](https://image.slidesharecdn.com/20160225-django-documentation-160225091707/85/Django-Documentation-408-320.jpg)
![Django Documentation, Release 1.9.3.dev20160224120324
• Your Web browser caches pages, too. If a Web page sends out the appropriate headers, your browser will use
the local cached copy for subsequent requests to that page, without even contacting the Web page again to see
whether it has changed.
Downstream caching is a nice efficiency boost, but there’s a danger to it: Many Web pages’ contents differ based on
authentication and a host of other variables, and cache systems that blindly save pages based purely on URLs could
expose incorrect or sensitive data to subsequent visitors to those pages.
For example, say you operate a Web email system, and the contents of the “inbox” page obviously depend on which
user is logged in. If an ISP blindly cached your site, then the first user who logged in through that ISP would have
their user-specific inbox page cached for subsequent visitors to the site. That’s not cool.
Fortunately, HTTP provides a solution to this problem. A number of HTTP headers exist to instruct downstream
caches to differ their cache contents depending on designated variables, and to tell caching mechanisms not to cache
particular pages. We’ll look at some of these headers in the sections that follow.
3.11.7 Using Vary headers
The Vary header defines which request headers a cache mechanism should take into account when building its cache
key. For example, if the contents of a Web page depend on a user’s language preference, the page is said to “vary on
language.”
By default, Django’s cache system creates its cache keys using the requested fully-qualified URL – e.g.,
"https://www.example.com/stories/2005/?order_by=author". This means every request to that
URL will use the same cached version, regardless of user-agent differences such as cookies or language preferences.
However, if this page produces different content based on some difference in request headers – such as a cookie, or
a language, or a user-agent – you’ll need to use the Vary header to tell caching mechanisms that the page output
depends on those things.
To do this in Django, use the convenient django.views.decorators.vary.vary_on_headers() view
decorator, like so:
from django.views.decorators.vary import vary_on_headers
@vary_on_headers('User-Agent')
def my_view(request):
# ...
In this case, a caching mechanism (such as Django’s own cache middleware) will cache a separate version of the page
for each unique user-agent.
The advantage to using the vary_on_headers decorator rather than manually setting the Vary header (using
something like response[’Vary’] = ’user-agent’) is that the decorator adds to the Vary header (which
may already exist), rather than setting it from scratch and potentially overriding anything that was already in there.
You can pass multiple headers to vary_on_headers():
@vary_on_headers('User-Agent', 'Cookie')
def my_view(request):
# ...
This tells downstream caches to vary on both, which means each combination of user-agent and cookie will get its own
cache value. For example, a request with the user-agent Mozilla and the cookie value foo=bar will be considered
different from a request with the user-agent Mozilla and the cookie value foo=ham.
Because varying on cookie is so common, there’s a django.views.decorators.vary.vary_on_cookie()
decorator. These two views are equivalent:
3.11. Django’s cache framework 405](https://image.slidesharecdn.com/20160225-django-documentation-160225091707/85/Django-Documentation-409-320.jpg)
![Django Documentation, Release 1.9.3.dev20160224120324
@vary_on_cookie
def my_view(request):
# ...
@vary_on_headers('Cookie')
def my_view(request):
# ...
The headers you pass to vary_on_headers are not case sensitive; "User-Agent" is the same thing as
"user-agent".
You can also use a helper function, django.utils.cache.patch_vary_headers(), directly. This function
sets, or adds to, the Vary header. For example:
from django.shortcuts import render
from django.utils.cache import patch_vary_headers
def my_view(request):
# ...
response = render(request, 'template_name', context)
patch_vary_headers(response, ['Cookie'])
return response
patch_vary_headers takes an HttpResponse instance as its first argument and a list/tuple of case-insensitive
header names as its second argument.
For more on Vary headers, see the official Vary spec.
3.11.8 Controlling cache: Using other headers
Other problems with caching are the privacy of data and the question of where data should be stored in a cascade of
caches.
A user usually faces two kinds of caches: their own browser cache (a private cache) and their provider’s cache (a
public cache). A public cache is used by multiple users and controlled by someone else. This poses problems with
sensitive data–you don’t want, say, your bank account number stored in a public cache. So Web applications need a
way to tell caches which data is private and which is public.
The solution is to indicate a page’s cache should be “private.” To do this in Django, use the cache_control view
decorator. Example:
from django.views.decorators.cache import cache_control
@cache_control(private=True)
def my_view(request):
# ...
This decorator takes care of sending out the appropriate HTTP header behind the scenes.
Note that the cache control settings “private” and “public” are mutually exclusive. The decorator ensures that the
“public” directive is removed if “private” should be set (and vice versa). An example use of the two directives would
be a blog site that offers both private and public entries. Public entries may be cached on any shared cache. The
following code uses django.utils.cache.patch_cache_control(), the manual way to modify the cache
control header (it is internally called by the cache_control decorator):
from django.views.decorators.cache import patch_cache_control
from django.views.decorators.vary import vary_on_cookie
@vary_on_cookie
406 Chapter 3. Using Django](https://image.slidesharecdn.com/20160225-django-documentation-160225091707/85/Django-Documentation-410-320.jpg)


![Django Documentation, Release 1.9.3.dev20160224120324
SignatureExpired: Signature age 15.5289158821 > 10 seconds
>>> signer.unsign(value, max_age=20)
'hello'
>>> signer.unsign(value, max_age=timedelta(seconds=20))
'hello'
class TimestampSigner(key=None, sep=’:’, salt=None)
sign(value)
Sign value and append current timestamp to it.
unsign(value, max_age=None)
Checks if value was signed less than max_age seconds ago, otherwise raises SignatureExpired.
The max_age parameter can accept an integer or a datetime.timedelta object.
Previously, the max_age parameter only accepted an integer.
Protecting complex data structures
If you wish to protect a list, tuple or dictionary you can do so using the signing module’s dumps and loads functions.
These imitate Python’s pickle module, but use JSON serialization under the hood. JSON ensures that even if your
SECRET_KEY is stolen an attacker will not be able to execute arbitrary commands by exploiting the pickle format:
>>> from django.core import signing
>>> value = signing.dumps({"foo": "bar"})
>>> value
'eyJmb28iOiJiYXIifQ:1NMg1b:zGcDE4-TCkaeGzLeW9UQwZesciI'
>>> signing.loads(value)
{'foo': 'bar'}
Because of the nature of JSON (there is no native distinction between lists and tuples) if you pass in a tuple, you will
get a list from signing.loads(object):
>>> from django.core import signing
>>> value = signing.dumps(('a','b','c'))
>>> signing.loads(value)
['a', 'b', 'c']
dumps(obj, key=None, salt=’django.core.signing’, compress=False)
Returns URL-safe, sha1 signed base64 compressed JSON string. Serialized object is signed using
TimestampSigner.
loads(string, key=None, salt=’django.core.signing’, max_age=None)
Reverse of dumps(), raises BadSignature if signature fails. Checks max_age (in seconds) if given.
3.14 Sending email
Although Python makes sending email relatively easy via the smtplib module, Django provides a couple of light
wrappers over it. These wrappers are provided to make sending email extra quick, to make it easy to test email sending
during development, and to provide support for platforms that can’t use SMTP.
The code lives in the django.core.mail module.
3.14. Sending email 413](https://image.slidesharecdn.com/20160225-django-documentation-160225091707/85/Django-Documentation-417-320.jpg)
![Django Documentation, Release 1.9.3.dev20160224120324
3.14.1 Quick example
In two lines:
from django.core.mail import send_mail
send_mail('Subject here', 'Here is the message.', 'from@example.com',
['to@example.com'], fail_silently=False)
Mail is sent using the SMTP host and port specified in the EMAIL_HOST and EMAIL_PORT settings. The
EMAIL_HOST_USER and EMAIL_HOST_PASSWORD settings, if set, are used to authenticate to the SMTP server,
and the EMAIL_USE_TLS and EMAIL_USE_SSL settings control whether a secure connection is used.
Note: The character set of email sent with django.core.mail will be set to the value of your
DEFAULT_CHARSET setting.
3.14.2 send_mail()
send_mail(subject, message, from_email, recipient_list, fail_silently=False, auth_user=None,
auth_password=None, connection=None, html_message=None)
The simplest way to send email is using django.core.mail.send_mail().
The subject, message, from_email and recipient_list parameters are required.
• subject: A string.
• message: A string.
• from_email: A string.
• recipient_list: A list of strings, each an email address. Each member of recipient_list will see
the other recipients in the “To:” field of the email message.
• fail_silently: A boolean. If it’s False, send_mail will raise an smtplib.SMTPException. See
the smtplib docs for a list of possible exceptions, all of which are subclasses of SMTPException.
• auth_user: The optional username to use to authenticate to the SMTP server. If this isn’t provided, Django
will use the value of the EMAIL_HOST_USER setting.
• auth_password: The optional password to use to authenticate to the SMTP server. If this isn’t provided,
Django will use the value of the EMAIL_HOST_PASSWORD setting.
• connection: The optional email backend to use to send the mail. If unspecified, an instance of the default
backend will be used. See the documentation on Email backends for more details.
• html_message: If html_message is provided, the resulting email will be a
multipart/alternative email with message as the text/plain content type and html_message
as the text/html content type.
The return value will be the number of successfully delivered messages (which can be 0 or 1 since it can only send
one message).
3.14.3 send_mass_mail()
send_mass_mail(datatuple, fail_silently=False, auth_user=None, auth_password=None, connec-
tion=None)
414 Chapter 3. Using Django](https://image.slidesharecdn.com/20160225-django-documentation-160225091707/85/Django-Documentation-418-320.jpg)
![Django Documentation, Release 1.9.3.dev20160224120324
django.core.mail.send_mass_mail() is intended to handle mass emailing.
datatuple is a tuple in which each element is in this format:
(subject, message, from_email, recipient_list)
fail_silently, auth_user and auth_password have the same functions as in send_mail().
Each separate element of datatuple results in a separate email message. As in send_mail(), recipients in the
same recipient_list will all see the other addresses in the email messages’ “To:” field.
For example, the following code would send two different messages to two different sets of recipients; however, only
one connection to the mail server would be opened:
message1 = ('Subject here', 'Here is the message', 'from@example.com', ['first@example.com', 'other@e
message2 = ('Another Subject', 'Here is another message', 'from@example.com', ['second@test.com'])
send_mass_mail((message1, message2), fail_silently=False)
The return value will be the number of successfully delivered messages.
send_mass_mail() vs. send_mail()
The main difference between send_mass_mail() and send_mail() is that send_mail() opens a connec-
tion to the mail server each time it’s executed, while send_mass_mail() uses a single connection for all of its
messages. This makes send_mass_mail() slightly more efficient.
3.14.4 mail_admins()
mail_admins(subject, message, fail_silently=False, connection=None, html_message=None)
django.core.mail.mail_admins() is a shortcut for sending an email to the site admins, as defined in the
ADMINS setting.
mail_admins() prefixes the subject with the value of the EMAIL_SUBJECT_PREFIX setting, which is
"[Django] " by default.
The “From:” header of the email will be the value of the SERVER_EMAIL setting.
This method exists for convenience and readability.
If html_message is provided, the resulting email will be a multipart/alternative email with message
as the text/plain content type and html_message as the text/html content type.
3.14.5 mail_managers()
mail_managers(subject, message, fail_silently=False, connection=None, html_message=None)
django.core.mail.mail_managers() is just like mail_admins(), except it sends an email to the site
managers, as defined in the MANAGERS setting.
3.14.6 Examples
This sends a single email to john@example.com and jane@example.com, with them both appearing in the “To:”:
send_mail('Subject', 'Message.', 'from@example.com',
['john@example.com', 'jane@example.com'])
3.14. Sending email 415](https://image.slidesharecdn.com/20160225-django-documentation-160225091707/85/Django-Documentation-419-320.jpg)
![Django Documentation, Release 1.9.3.dev20160224120324
This sends a message to john@example.com and jane@example.com, with them both receiving a separate email:
datatuple = (
('Subject', 'Message.', 'from@example.com', ['john@example.com']),
('Subject', 'Message.', 'from@example.com', ['jane@example.com']),
)
send_mass_mail(datatuple)
3.14.7 Preventing header injection
Header injection is a security exploit in which an attacker inserts extra email headers to control the “To:” and “From:”
in email messages that your scripts generate.
The Django email functions outlined above all protect against header injection by forbidding newlines in header
values. If any subject, from_email or recipient_list contains a newline (in either Unix, Windows or Mac
style), the email function (e.g. send_mail()) will raise django.core.mail.BadHeaderError (a subclass
of ValueError) and, hence, will not send the email. It’s your responsibility to validate all data before passing it to
the email functions.
If a message contains headers at the start of the string, the headers will simply be printed as the first bit of the email
message.
Here’s an example view that takes a subject, message and from_email from the request’s POST data, sends
that to admin@example.com and redirects to “/contact/thanks/” when it’s done:
from django.core.mail import send_mail, BadHeaderError
from django.http import HttpResponse, HttpResponseRedirect
def send_email(request):
subject = request.POST.get('subject', '')
message = request.POST.get('message', '')
from_email = request.POST.get('from_email', '')
if subject and message and from_email:
try:
send_mail(subject, message, from_email, ['admin@example.com'])
except BadHeaderError:
return HttpResponse('Invalid header found.')
return HttpResponseRedirect('/contact/thanks/')
else:
# In reality we'd use a form class
# to get proper validation errors.
return HttpResponse('Make sure all fields are entered and valid.')
3.14.8 The EmailMessage class
Django’s send_mail() and send_mass_mail() functions are actually thin wrappers that make use of the
EmailMessage class.
Not all features of the EmailMessage class are available through the send_mail() and related wrapper functions.
If you wish to use advanced features, such as BCC’ed recipients, file attachments, or multi-part email, you’ll need to
create EmailMessage instances directly.
Note: This is a design feature. send_mail() and related functions were originally the only interface Django
provided. However, the list of parameters they accepted was slowly growing over time. It made sense to move to a
more object-oriented design for email messages and retain the original functions only for backwards compatibility.
416 Chapter 3. Using Django](https://image.slidesharecdn.com/20160225-django-documentation-160225091707/85/Django-Documentation-420-320.jpg)
![Django Documentation, Release 1.9.3.dev20160224120324
EmailMessage is responsible for creating the email message itself. The email backend is then responsible for
sending the email.
For convenience, EmailMessage provides a simple send() method for sending a single email. If you need to send
multiple messages, the email backend API provides an alternative.
EmailMessage Objects
class EmailMessage
The EmailMessage class is initialized with the following parameters (in the given order, if positional arguments are
used). All parameters are optional and can be set at any time prior to calling the send() method.
• subject: The subject line of the email.
• body: The body text. This should be a plain text message.
• from_email: The sender’s address. Both fred@example.com and Fred <fred@example.com>
forms are legal. If omitted, the DEFAULT_FROM_EMAIL setting is used.
• to: A list or tuple of recipient addresses.
• bcc: A list or tuple of addresses used in the “Bcc” header when sending the email.
• connection: An email backend instance. Use this parameter if you want to use the same connection for
multiple messages. If omitted, a new connection is created when send() is called.
• attachments: A list of attachments to put on the message. These can be either
email.MIMEBase.MIMEBase instances, or (filename, content, mimetype) triples.
• headers: A dictionary of extra headers to put on the message. The keys are the header name, values are the
header values. It’s up to the caller to ensure header names and values are in the correct format for an email
message. The corresponding attribute is extra_headers.
• cc: A list or tuple of recipient addresses used in the “Cc” header when sending the email.
• reply_to: A list or tuple of recipient addresses used in the “Reply-To” header when sending the email.
The reply_to parameter was added.
For example:
from django.core.mail import EmailMessage
email = EmailMessage('Hello', 'Body goes here', 'from@example.com',
['to1@example.com', 'to2@example.com'], ['bcc@example.com'],
reply_to=['another@example.com'], headers={'Message-ID': 'foo'})
The class has the following methods:
• send(fail_silently=False) sends the message. If a connection was specified when the email was
constructed, that connection will be used. Otherwise, an instance of the default backend will be instantiated and
used. If the keyword argument fail_silently is True, exceptions raised while sending the message will
be quashed. An empty list of recipients will not raise an exception.
• message() constructs a django.core.mail.SafeMIMEText object (a subclass of Python’s
email.MIMEText.MIMEText class) or a django.core.mail.SafeMIMEMultipart object hold-
ing the message to be sent. If you ever need to extend the EmailMessage class, you’ll probably want to
override this method to put the content you want into the MIME object.
• recipients() returns a list of all the recipients of the message, whether they’re recorded in the to, cc or
bcc attributes. This is another method you might need to override when subclassing, because the SMTP server
3.14. Sending email 417](https://image.slidesharecdn.com/20160225-django-documentation-160225091707/85/Django-Documentation-421-320.jpg)
![Django Documentation, Release 1.9.3.dev20160224120324
needs to be told the full list of recipients when the message is sent. If you add another way to specify recipients
in your class, they need to be returned from this method as well.
• attach() creates a new file attachment and adds it to the message. There are two ways to call attach():
– You can pass it a single argument that is an email.MIMEBase.MIMEBase instance. This will be
inserted directly into the resulting message.
– Alternatively, you can pass attach() three arguments: filename, content and mimetype.
filename is the name of the file attachment as it will appear in the email, content is the data that
will be contained inside the attachment and mimetype is the optional MIME type for the attachment. If
you omit mimetype, the MIME content type will be guessed from the filename of the attachment.
For example:
message.attach('design.png', img_data, 'image/png')
If you specify a mimetype of message/rfc822, it will also accept
django.core.mail.EmailMessage and email.message.Message.
In addition, message/rfc822 attachments will no longer be base64-encoded in violation of RFC
2046#section-5.2.1, which can cause issues with displaying the attachments in Evolution and Thunder-
bird.
• attach_file() creates a new attachment using a file from your filesystem. Call it with the path of the file to
attach and, optionally, the MIME type to use for the attachment. If the MIME type is omitted, it will be guessed
from the filename. The simplest use would be:
message.attach_file('/images/weather_map.png')
Sending alternative content types
It can be useful to include multiple versions of the content in an email; the classic example is to send both text and
HTML versions of a message. With Django’s email library, you can do this using the EmailMultiAlternatives
class. This subclass of EmailMessage has an attach_alternative() method for including extra versions of
the message body in the email. All the other methods (including the class initialization) are inherited directly from
EmailMessage.
To send a text and HTML combination, you could write:
from django.core.mail import EmailMultiAlternatives
subject, from_email, to = 'hello', 'from@example.com', 'to@example.com'
text_content = 'This is an important message.'
html_content = '<p>This is an <strong>important</strong> message.</p>'
msg = EmailMultiAlternatives(subject, text_content, from_email, [to])
msg.attach_alternative(html_content, "text/html")
msg.send()
By default, the MIME type of the body parameter in an EmailMessage is "text/plain". It is good practice
to leave this alone, because it guarantees that any recipient will be able to read the email, regardless of their mail
client. However, if you are confident that your recipients can handle an alternative content type, you can use the
content_subtype attribute on the EmailMessage class to change the main content type. The major type will
always be "text", but you can change the subtype. For example:
msg = EmailMessage(subject, html_content, from_email, [to])
msg.content_subtype = "html" # Main content is now text/html
msg.send()
418 Chapter 3. Using Django](https://image.slidesharecdn.com/20160225-django-documentation-160225091707/85/Django-Documentation-422-320.jpg)
![Django Documentation, Release 1.9.3.dev20160224120324
3.14.9 Email backends
The actual sending of an email is handled by the email backend.
The email backend class has the following methods:
• open() instantiates a long-lived email-sending connection.
• close() closes the current email-sending connection.
• send_messages(email_messages) sends a list of EmailMessage objects. If the connection is not
open, this call will implicitly open the connection, and close the connection afterwards. If the connection is
already open, it will be left open after mail has been sent.
It can also be used as a context manager, which will automatically call open() and close() as needed:
from django.core import mail
with mail.get_connection() as connection:
mail.EmailMessage(subject1, body1, from1, [to1],
connection=connection).send()
mail.EmailMessage(subject2, body2, from2, [to2],
connection=connection).send()
The context manager protocol was added.
Obtaining an instance of an email backend
The get_connection() function in django.core.mail returns an instance of the email backend that you can
use.
get_connection(backend=None, fail_silently=False, *args, **kwargs)
By default, a call to get_connection() will return an instance of the email backend specified in
EMAIL_BACKEND. If you specify the backend argument, an instance of that backend will be instantiated.
The fail_silently argument controls how the backend should handle errors. If fail_silently is True,
exceptions during the email sending process will be silently ignored.
All other arguments are passed directly to the constructor of the email backend.
Django ships with several email sending backends. With the exception of the SMTP backend (which is the default),
these backends are only useful during testing and development. If you have special email sending requirements, you
can write your own email backend.
SMTP backend
class backends.smtp.EmailBackend(host=None, port=None, username=None, password=None,
use_tls=None, fail_silently=False, use_ssl=None, time-
out=None, ssl_keyfile=None, ssl_certfile=None, **kwargs)
This is the default backend. Email will be sent through a SMTP server.
The value for each argument is retrieved from the matching setting if the argument is None:
•host: EMAIL_HOST
•port: EMAIL_PORT
•username: EMAIL_HOST_USER
•password: EMAIL_HOST_PASSWORD
3.14. Sending email 419](https://image.slidesharecdn.com/20160225-django-documentation-160225091707/85/Django-Documentation-423-320.jpg)


![Django Documentation, Release 1.9.3.dev20160224120324
connection.open()
# Construct an email message that uses the connection
email1 = mail.EmailMessage('Hello', 'Body goes here', 'from@example.com',
['to1@example.com'], connection=connection)
email1.send() # Send the email
# Construct two more messages
email2 = mail.EmailMessage('Hello', 'Body goes here', 'from@example.com',
['to2@example.com'])
email3 = mail.EmailMessage('Hello', 'Body goes here', 'from@example.com',
['to3@example.com'])
# Send the two emails in a single call -
connection.send_messages([email2, email3])
# The connection was already open so send_messages() doesn't close it.
# We need to manually close the connection.
connection.close()
3.14.10 Configuring email for development
There are times when you do not want Django to send emails at all. For example, while developing a website, you
probably don’t want to send out thousands of emails – but you may want to validate that emails will be sent to the
right people under the right conditions, and that those emails will contain the correct content.
The easiest way to configure email for local development is to use the console email backend. This backend redirects
all email to stdout, allowing you to inspect the content of mail.
The file email backend can also be useful during development – this backend dumps the contents of every SMTP
connection to a file that can be inspected at your leisure.
Another approach is to use a “dumb” SMTP server that receives the emails locally and displays them to the terminal,
but does not actually send anything. Python has a built-in way to accomplish this with a single command:
python -m smtpd -n -c DebuggingServer localhost:1025
This command will start a simple SMTP server listening on port 1025 of localhost. This server simply prints to
standard output all email headers and the email body. You then only need to set the EMAIL_HOST and EMAIL_PORT
accordingly. For a more detailed discussion of SMTP server options, see the Python documentation for the smtpd
module.
For information about unit-testing the sending of emails in your application, see the Email services section of the
testing documentation.
3.15 Internationalization and localization
3.15.1 Translation
Overview
In order to make a Django project translatable, you have to add a minimal number of hooks to your Python code and
templates. These hooks are called translation strings. They tell Django: “This text should be translated into the end
user’s language, if a translation for this text is available in that language.” It’s your responsibility to mark translatable
strings; the system can only translate strings it knows about.
422 Chapter 3. Using Django](https://image.slidesharecdn.com/20160225-django-documentation-160225091707/85/Django-Documentation-426-320.jpg)

![Django Documentation, Release 1.9.3.dev20160224120324
output = ugettext("Welcome to my site.")
return HttpResponse(output)
Translation works on computed values. This example is identical to the previous two:
def my_view(request):
words = ['Welcome', 'to', 'my', 'site.']
output = _(' '.join(words))
return HttpResponse(output)
Translation works on variables. Again, here’s an identical example:
def my_view(request):
sentence = 'Welcome to my site.'
output = _(sentence)
return HttpResponse(output)
(The caveat with using variables or computed values, as in the previous two examples, is that Django’s translation-
string-detecting utility, django-admin makemessages, won’t be able to find these strings. More on
makemessages later.)
The strings you pass to _() or ugettext() can take placeholders, specified with Python’s standard named-string
interpolation syntax. Example:
def my_view(request, m, d):
output = _('Today is %(month)s %(day)s.') % {'month': m, 'day': d}
return HttpResponse(output)
This technique lets language-specific translations reorder the placeholder text. For example, an English translation
may be "Today is November 26.", while a Spanish translation may be "Hoy es 26 de Noviembre."
– with the month and the day placeholders swapped.
For this reason, you should use named-string interpolation (e.g., %(day)s) instead of positional interpolation (e.g.,
%s or %d) whenever you have more than a single parameter. If you used positional interpolation, translations wouldn’t
be able to reorder placeholder text.
Comments for translators
If you would like to give translators hints about a translatable string, you can add a comment prefixed with the
Translators keyword on the line preceding the string, e.g.:
def my_view(request):
# Translators: This message appears on the home page only
output = ugettext("Welcome to my site.")
The comment will then appear in the resulting .po file associated with the translatable construct located below it and
should also be displayed by most translation tools.
Note: Just for completeness, this is the corresponding fragment of the resulting .po file:
#. Translators: This message appears on the home page only
# path/to/python/file.py:123
msgid "Welcome to my site."
msgstr ""
This also works in templates. See Comments for translators in templates for more details.
424 Chapter 3. Using Django](https://image.slidesharecdn.com/20160225-django-documentation-160225091707/85/Django-Documentation-428-320.jpg)

![Django Documentation, Release 1.9.3.dev20160224120324
text = ungettext(
'There is %(count)d %(name)s object available.',
'There are %(count)d %(name)s objects available.',
count
) % {
'count': count,
'name': Report._meta.verbose_name,
}
Note: When using ungettext(), make sure you use a single name for every extrapolated variable included in the
literal. In the examples above, note how we used the name Python variable in both translation strings. This example,
besides being incorrect in some languages as noted above, would fail:
text = ungettext(
'There is %(count)d %(name)s available.',
'There are %(count)d %(plural_name)s available.',
count
) % {
'count': Report.objects.count(),
'name': Report._meta.verbose_name,
'plural_name': Report._meta.verbose_name_plural
}
You would get an error when running django-admin compilemessages:
a format specification for argument 'name', as in 'msgstr[0]', doesn't exist in 'msgid'
Note: Plural form and po files
Django does not support custom plural equations in po files. As all translation catalogs are merged, only the plural
form for the main Django po file (in django/conf/locale/<lang_code>/LC_MESSAGES/django.po) is
considered. Plural forms in all other po files are ignored. Therefore, you should not use different plural equations in
your project or application po files.
Contextual markers
Sometimes words have several meanings, such as "May" in English, which refers to a month
name and to a verb. To enable translators to translate these words correctly in different
contexts, you can use the django.utils.translation.pgettext() function, or the
django.utils.translation.npgettext() function if the string needs pluralization. Both take a
context string as the first variable.
In the resulting .po file, the string will then appear as often as there are different contextual markers for the same
string (the context will appear on the msgctxt line), allowing the translator to give a different translation for each of
them.
For example:
from django.utils.translation import pgettext
month = pgettext("month name", "May")
or:
426 Chapter 3. Using Django](https://image.slidesharecdn.com/20160225-django-documentation-160225091707/85/Django-Documentation-430-320.jpg)


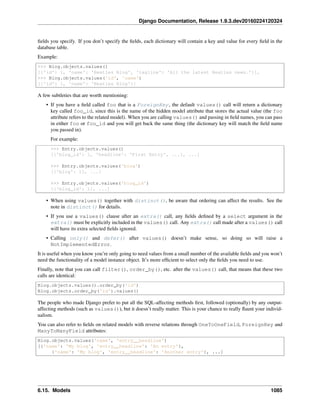


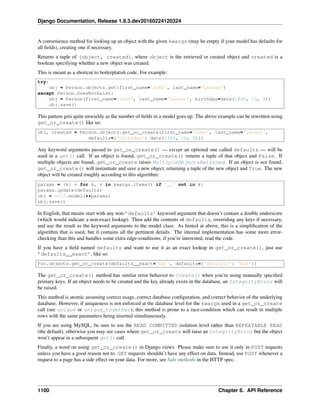


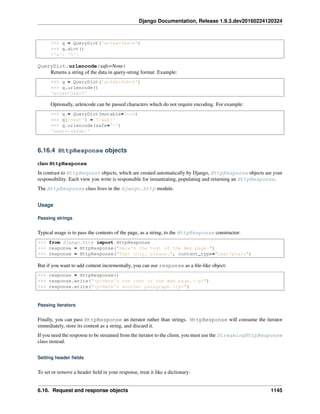


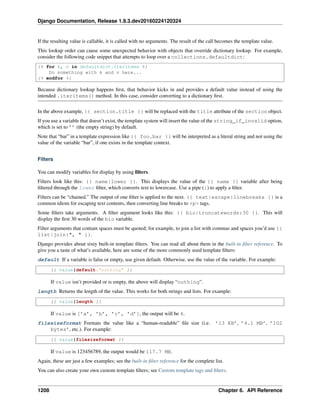


More Related Content
What's hot (20)
Similar to Django Documentation (20)


More from Ying wei (Joe) Chou (20)


Recently uploaded (20)


Django Documentation
- 1. Django Documentation Release 1.9.3.dev20160224120324 Django Software Foundation February 24, 2016
- 3. Contents i
- 4. ii
- 5. CHAPTER 1 Django documentation Everything you need to know about Django. 1.1 Getting help Having trouble? We’d like to help! • Try the FAQ – it’s got answers to many common questions. • Looking for specific information? Try the genindex, modindex or the detailed table of contents. • Search for information in the archives of the django-users mailing list, or post a question. • Ask a question in the #django IRC channel, or search the IRC logs to see if it’s been asked before. • Report bugs with Django in our ticket tracker. 1.2 How the documentation is organized Django has a lot of documentation. A high-level overview of how it’s organized will help you know where to look for certain things: • Tutorials take you by the hand through a series of steps to create a Web application. Start here if you’re new to Django or Web application development. Also look at the “First steps” below. • Topic guides discuss key topics and concepts at a fairly high level and provide useful background information and explanation. • Reference guides contain technical reference for APIs and other aspects of Django’s machinery. They describe how it works and how to use it but assume that you have a basic understanding of key concepts. • How-to guides are recipes. They guide you through the steps involved in addressing key problems and use-cases. They are more advanced than tutorials and assume some knowledge of how Django works. 1.3 First steps Are you new to Django or to programming? This is the place to start! • From scratch: Overview | Installation 1
- 6. Django Documentation, Release 1.9.3.dev20160224120324 • Tutorial: Part 1: Requests and responses | Part 2: Models and the admin site | Part 3: Views and templates | Part 4: Forms and generic views | Part 5: Testing | Part 6: Static files | Part 7: Customizing the admin site • Advanced Tutorials: How to write reusable apps | Writing your first patch for Django 1.4 The model layer Django provides an abstraction layer (the “models”) for structuring and manipulating the data of your Web application. Learn more about it below: • Models: Introduction to models | Field types | Meta options | Model class • QuerySets: Executing queries | QuerySet method reference | Lookup expressions • Model instances: Instance methods | Accessing related objects • Migrations: Introduction to Migrations | Operations reference | SchemaEditor | Writing migrations • Advanced: Managers | Raw SQL | Transactions | Aggregation | Custom fields | Multiple databases | Custom lookups | Query Expressions | Conditional Expressions | Database Functions • Other: Supported databases | Legacy databases | Providing initial data | Optimize database access | PostgreSQL specific features 1.5 The view layer Django has the concept of “views” to encapsulate the logic responsible for processing a user’s request and for returning the response. Find all you need to know about views via the links below: • The basics: URLconfs | View functions | Shortcuts | Decorators • Reference: Built-in Views | Request/response objects | TemplateResponse objects • File uploads: Overview | File objects | Storage API | Managing files | Custom storage • Class-based views: Overview | Built-in display views | Built-in editing views | Using mixins | API reference | Flattened index • Advanced: Generating CSV | Generating PDF • Middleware: Overview | Built-in middleware classes 1.6 The template layer The template layer provides a designer-friendly syntax for rendering the information to be presented to the user. Learn how this syntax can be used by designers and how it can be extended by programmers: • The basics: Overview • For designers: Language overview | Built-in tags and filters | Humanization • For programmers: Template API | Custom tags and filters 2 Chapter 1. Django documentation
- 7. Django Documentation, Release 1.9.3.dev20160224120324 1.7 Forms Django provides a rich framework to facilitate the creation of forms and the manipulation of form data. • The basics: Overview | Form API | Built-in fields | Built-in widgets • Advanced: Forms for models | Integrating media | Formsets | Customizing validation 1.8 The development process Learn about the various components and tools to help you in the development and testing of Django applications: • Settings: Overview | Full list of settings • Applications: Overview • Exceptions: Overview • django-admin and manage.py: Overview | Adding custom commands • Testing: Introduction | Writing and running tests | Included testing tools | Advanced topics • Deployment: Overview | WSGI servers | Deploying static files | Tracking code errors by email 1.9 The admin Find all you need to know about the automated admin interface, one of Django’s most popular features: • Admin site • Admin actions • Admin documentation generator 1.10 Security Security is a topic of paramount importance in the development of Web applications and Django provides multiple protection tools and mechanisms: • Security overview • Disclosed security issues in Django • Clickjacking protection • Cross Site Request Forgery protection • Cryptographic signing • Security Middleware 1.7. Forms 3
- 8. Django Documentation, Release 1.9.3.dev20160224120324 1.11 Internationalization and localization Django offers a robust internationalization and localization framework to assist you in the development of applications for multiple languages and world regions: • Overview | Internationalization | Localization | Localized Web UI formatting and form input • Time zones 1.12 Performance and optimization There are a variety of techniques and tools that can help get your code running more efficiently - faster, and using fewer system resources. • Performance and optimization overview 1.13 Python compatibility Django aims to be compatible with multiple different flavors and versions of Python: • Jython support • Python 3 compatibility 1.14 Geographic framework GeoDjango intends to be a world-class geographic Web framework. Its goal is to make it as easy as possible to build GIS Web applications and harness the power of spatially enabled data. 1.15 Common Web application tools Django offers multiple tools commonly needed in the development of Web applications: • Authentication: Overview | Using the authentication system | Password management | Customizing authenti- cation | API Reference • Caching • Logging • Sending emails • Syndication feeds (RSS/Atom) • Pagination • Messages framework • Serialization • Sessions • Sitemaps • Static files management 4 Chapter 1. Django documentation
- 9. Django Documentation, Release 1.9.3.dev20160224120324 • Data validation 1.16 Other core functionalities Learn about some other core functionalities of the Django framework: • Conditional content processing • Content types and generic relations • Flatpages • Redirects • Signals • System check framework • The sites framework • Unicode in Django 1.17 The Django open-source project Learn about the development process for the Django project itself and about how you can contribute: • Community: How to get involved | The release process | Team organization | Meet the team | Current roles | The Django source code repository | Security policies | Mailing lists • Design philosophies: Overview • Documentation: About this documentation • Third-party distributions: Overview • Django over time: API stability | Release notes and upgrading instructions | Deprecation Timeline 1.16. Other core functionalities 5
- 10. Django Documentation, Release 1.9.3.dev20160224120324 6 Chapter 1. Django documentation
- 11. CHAPTER 2 Getting started New to Django? Or to Web development in general? Well, you came to the right place: read this material to quickly get up and running. 2.1 Django at a glance Because Django was developed in a fast-paced newsroom environment, it was designed to make common Web- development tasks fast and easy. Here’s an informal overview of how to write a database-driven Web app with Django. The goal of this document is to give you enough technical specifics to understand how Django works, but this isn’t intended to be a tutorial or reference – but we’ve got both! When you’re ready to start a project, you can start with the tutorial or dive right into more detailed documentation. 2.1.1 Design your model Although you can use Django without a database, it comes with an object-relational mapper in which you describe your database layout in Python code. The data-model syntax offers many rich ways of representing your models – so far, it’s been solving many years’ worth of database-schema problems. Here’s a quick example: mysite/news/models.py from django.db import models class Reporter(models.Model): full_name = models.CharField(max_length=70) def __str__(self): # __unicode__ on Python 2 return self.full_name class Article(models.Model): pub_date = models.DateField() headline = models.CharField(max_length=200) content = models.TextField() reporter = models.ForeignKey(Reporter, on_delete=models.CASCADE) def __str__(self): # __unicode__ on Python 2 return self.headline 7
- 12. Django Documentation, Release 1.9.3.dev20160224120324 2.1.2 Install it Next, run the Django command-line utility to create the database tables automatically: $ python manage.py migrate The migrate command looks at all your available models and creates tables in your database for whichever tables don’t already exist, as well as optionally providing much richer schema control. 2.1.3 Enjoy the free API With that, you’ve got a free, and rich, Python API to access your data. The API is created on the fly, no code generation necessary: # Import the models we created from our "news" app >>> from news.models import Reporter, Article # No reporters are in the system yet. >>> Reporter.objects.all() [] # Create a new Reporter. >>> r = Reporter(full_name='John Smith') # Save the object into the database. You have to call save() explicitly. >>> r.save() # Now it has an ID. >>> r.id 1 # Now the new reporter is in the database. >>> Reporter.objects.all() [<Reporter: John Smith>] # Fields are represented as attributes on the Python object. >>> r.full_name 'John Smith' # Django provides a rich database lookup API. >>> Reporter.objects.get(id=1) <Reporter: John Smith> >>> Reporter.objects.get(full_name__startswith='John') <Reporter: John Smith> >>> Reporter.objects.get(full_name__contains='mith') <Reporter: John Smith> >>> Reporter.objects.get(id=2) Traceback (most recent call last): ... DoesNotExist: Reporter matching query does not exist. # Create an article. >>> from datetime import date >>> a = Article(pub_date=date.today(), headline='Django is cool', ... content='Yeah.', reporter=r) >>> a.save() 8 Chapter 2. Getting started
- 13. Django Documentation, Release 1.9.3.dev20160224120324 # Now the article is in the database. >>> Article.objects.all() [<Article: Django is cool>] # Article objects get API access to related Reporter objects. >>> r = a.reporter >>> r.full_name 'John Smith' # And vice versa: Reporter objects get API access to Article objects. >>> r.article_set.all() [<Article: Django is cool>] # The API follows relationships as far as you need, performing efficient # JOINs for you behind the scenes. # This finds all articles by a reporter whose name starts with "John". >>> Article.objects.filter(reporter__full_name__startswith='John') [<Article: Django is cool>] # Change an object by altering its attributes and calling save(). >>> r.full_name = 'Billy Goat' >>> r.save() # Delete an object with delete(). >>> r.delete() 2.1.4 A dynamic admin interface: it’s not just scaffolding – it’s the whole house Once your models are defined, Django can automatically create a professional, production ready administrative inter- face – a website that lets authenticated users add, change and delete objects. It’s as easy as registering your model in the admin site: mysite/news/models.py from django.db import models class Article(models.Model): pub_date = models.DateField() headline = models.CharField(max_length=200) content = models.TextField() reporter = models.ForeignKey(Reporter, on_delete=models.CASCADE) mysite/news/admin.py from django.contrib import admin from . import models admin.site.register(models.Article) The philosophy here is that your site is edited by a staff, or a client, or maybe just you – and you don’t want to have to deal with creating backend interfaces just to manage content. One typical workflow in creating Django apps is to create models and get the admin sites up and running as fast as possible, so your staff (or clients) can start populating data. Then, develop the way data is presented to the public. 2.1. Django at a glance 9
- 14. Django Documentation, Release 1.9.3.dev20160224120324 2.1.5 Design your URLs A clean, elegant URL scheme is an important detail in a high-quality Web application. Django encourages beautiful URL design and doesn’t put any cruft in URLs, like .php or .asp. To design URLs for an app, you create a Python module called a URLconf. A table of contents for your app, it contains a simple mapping between URL patterns and Python callback functions. URLconfs also serve to decouple URLs from Python code. Here’s what a URLconf might look like for the Reporter/Article example above: mysite/news/urls.py from django.conf.urls import url from . import views urlpatterns = [ url(r'^articles/([0-9]{4})/$', views.year_archive), url(r'^articles/([0-9]{4})/([0-9]{2})/$', views.month_archive), url(r'^articles/([0-9]{4})/([0-9]{2})/([0-9]+)/$', views.article_detail), ] The code above maps URLs, as simple regular expressions, to the location of Python callback functions (“views”). The regular expressions use parenthesis to “capture” values from the URLs. When a user requests a page, Django runs through each pattern, in order, and stops at the first one that matches the requested URL. (If none of them matches, Django calls a special-case 404 view.) This is blazingly fast, because the regular expressions are compiled at load time. Once one of the regexes matches, Django imports and calls the given view, which is a simple Python function. Each view gets passed a request object – which contains request metadata – and the values captured in the regex. For example, if a user requested the URL “/articles/2005/05/39323/”, Django would call the function news.views.article_detail(request, ’2005’, ’05’, ’39323’). 2.1.6 Write your views Each view is responsible for doing one of two things: Returning an HttpResponse object containing the content for the requested page, or raising an exception such as Http404. The rest is up to you. Generally, a view retrieves data according to the parameters, loads a template and renders the template with the retrieved data. Here’s an example view for year_archive from above: mysite/news/views.py from django.shortcuts import render from .models import Article def year_archive(request, year): a_list = Article.objects.filter(pub_date__year=year) context = {'year': year, 'article_list': a_list} return render(request, 'news/year_archive.html', context) This example uses Django’s template system, which has several powerful features but strives to stay simple enough for non-programmers to use. 10 Chapter 2. Getting started
- 15. Django Documentation, Release 1.9.3.dev20160224120324 2.1.7 Design your templates The code above loads the news/year_archive.html template. Django has a template search path, which allows you to minimize redundancy among templates. In your Django settings, you specify a list of directories to check for templates with DIRS. If a template doesn’t exist in the first directory, it checks the second, and so on. Let’s say the news/year_archive.html template was found. Here’s what that might look like: mysite/news/templates/news/year_archive.html {% extends "base.html" %} {% block title %}Articles for {{ year }}{% endblock %} {% block content %} <h1>Articles for {{ year }}</h1> {% for article in article_list %} <p>{{ article.headline }}</p> <p>By {{ article.reporter.full_name }}</p> <p>Published {{ article.pub_date|date:"F j, Y" }}</p> {% endfor %} {% endblock %} Variables are surrounded by double-curly braces. {{ article.headline }} means “Output the value of the article’s headline attribute.” But dots aren’t used only for attribute lookup. They also can do dictionary-key lookup, index lookup and function calls. Note {{ article.pub_date|date:"F j, Y" }} uses a Unix-style “pipe” (the “|” character). This is called a template filter, and it’s a way to filter the value of a variable. In this case, the date filter formats a Python datetime object in the given format (as found in PHP’s date function). You can chain together as many filters as you’d like. You can write custom template filters. You can write custom template tags, which run custom Python code behind the scenes. Finally, Django uses the concept of “template inheritance”. That’s what the {% extends "base.html" %} does. It means “First load the template called ‘base’, which has defined a bunch of blocks, and fill the blocks with the following blocks.” In short, that lets you dramatically cut down on redundancy in templates: each template has to define only what’s unique to that template. Here’s what the “base.html” template, including the use of static files, might look like: mysite/templates/base.html {% load staticfiles %} <html> <head> <title>{% block title %}{% endblock %}</title> </head> <body> <img src="{% static "images/sitelogo.png" %}" alt="Logo" /> {% block content %}{% endblock %} </body> </html> Simplistically, it defines the look-and-feel of the site (with the site’s logo), and provides “holes” for child templates to fill. This makes a site redesign as easy as changing a single file – the base template. 2.1. Django at a glance 11
- 16. Django Documentation, Release 1.9.3.dev20160224120324 It also lets you create multiple versions of a site, with different base templates, while reusing child templates. Django’s creators have used this technique to create strikingly different mobile versions of sites – simply by creating a new base template. Note that you don’t have to use Django’s template system if you prefer another system. While Django’s template system is particularly well-integrated with Django’s model layer, nothing forces you to use it. For that matter, you don’t have to use Django’s database API, either. You can use another database abstraction layer, you can read XML files, you can read files off disk, or anything you want. Each piece of Django – models, views, templates – is decoupled from the next. 2.1.8 This is just the surface This has been only a quick overview of Django’s functionality. Some more useful features: • A caching framework that integrates with memcached or other backends. • A syndication framework that makes creating RSS and Atom feeds as easy as writing a small Python class. • More sexy automatically-generated admin features – this overview barely scratched the surface. The next obvious steps are for you to download Django, read the tutorial and join the community. Thanks for your interest! 2.2 Quick install guide Before you can use Django, you’ll need to get it installed. We have a complete installation guide that covers all the possibilities; this guide will guide you to a simple, minimal installation that’ll work while you walk through the introduction. 2.2.1 Install Python Being a Python Web framework, Django requires Python. See What Python version can I use with Django? for details. Python includes a lightweight database called SQLite so you won’t need to set up a database just yet. Get the latest version of Python at https://www.python.org/download/ or with your operating system’s package man- ager. Django on Jython If you use Jython (a Python implementation for the Java platform), you’ll need to follow a few additional steps. See Running Django on Jython for details. You can verify that Python is installed by typing python from your shell; you should see something like: Python 3.4.x [GCC 4.x] on linux Type "help", "copyright", "credits" or "license" for more information. >>> 2.2.2 Set up a database This step is only necessary if you’d like to work with a “large” database engine like PostgreSQL, MySQL, or Oracle. To install such a database, consult the database installation information. 12 Chapter 2. Getting started
- 17. Django Documentation, Release 1.9.3.dev20160224120324 2.2.3 Remove any old versions of Django If you are upgrading your installation of Django from a previous version, you will need to uninstall the old Django version before installing the new version. 2.2.4 Install Django You’ve got three easy options to install Django: • Install a version of Django provided by your operating system distribution. This is the quickest option for those who have operating systems that distribute Django. • Install an official release. This is the best approach for most users. • Install the latest development version. This option is for enthusiasts who want the latest-and-greatest features and aren’t afraid of running brand new code. You might encounter new bugs in the development version, but reporting them helps the development of Django. Also, releases of third-party packages are less likely to be compatible with the development version than with the latest stable release. Always refer to the documentation that corresponds to the version of Django you’re using! If you do either of the first two steps, keep an eye out for parts of the documentation marked new in development version. That phrase flags features that are only available in development versions of Django, and they likely won’t work with an official release. 2.2.5 Verifying To verify that Django can be seen by Python, type python from your shell. Then at the Python prompt, try to import Django: >>> import django >>> print(django.get_version()) 1.9 You may have another version of Django installed. 2.2.6 That’s it! That’s it – you can now move onto the tutorial. 2.3 Writing your first Django app, part 1 Let’s learn by example. Throughout this tutorial, we’ll walk you through the creation of a basic poll application. It’ll consist of two parts: • A public site that lets people view polls and vote in them. • An admin site that lets you add, change, and delete polls. 2.3. Writing your first Django app, part 1 13
- 18. Django Documentation, Release 1.9.3.dev20160224120324 We’ll assume you have Django installed already. You can tell Django is installed and which version by running the following command: $ python -c "import django; print(django.get_version())" If Django is installed, you should see the version of your installation. If it isn’t, you’ll get an error telling “No module named django”. This tutorial is written for Django 1.9 and Python 3.4 or later. If the Django version doesn’t match, you can refer to the tutorial for your version of Django by using the version switcher at the bottom right corner of this page, or update Django to the newest version. If you are still using Python 2.7, you will need to adjust the code samples slightly, as described in comments. See How to install Django for advice on how to remove older versions of Django and install a newer one. Where to get help: If you’re having trouble going through this tutorial, please post a message to django-users or drop by #django on irc.freenode.net to chat with other Django users who might be able to help. 2.3.1 Creating a project If this is your first time using Django, you’ll have to take care of some initial setup. Namely, you’ll need to auto- generate some code that establishes a Django project – a collection of settings for an instance of Django, including database configuration, Django-specific options and application-specific settings. From the command line, cd into a directory where you’d like to store your code, then run the following command: $ django-admin startproject mysite This will create a mysite directory in your current directory. If it didn’t work, see Problems running django-admin. Note: You’ll need to avoid naming projects after built-in Python or Django components. In particular, this means you should avoid using names like django (which will conflict with Django itself) or test (which conflicts with a built-in Python package). Where should this code live? If your background is in plain old PHP (with no use of modern frameworks), you’re probably used to putting code under the Web server’s document root (in a place such as /var/www). With Django, you don’t do that. It’s not a good idea to put any of this Python code within your Web server’s document root, because it risks the possibility that people may be able to view your code over the Web. That’s not good for security. Put your code in some directory outside of the document root, such as /home/mycode. Let’s look at what startproject created: mysite/ manage.py mysite/ __init__.py settings.py urls.py wsgi.py 14 Chapter 2. Getting started
- 19. Django Documentation, Release 1.9.3.dev20160224120324 These files are: • The outer mysite/ root directory is just a container for your project. Its name doesn’t matter to Django; you can rename it to anything you like. • manage.py: A command-line utility that lets you interact with this Django project in various ways. You can read all the details about manage.py in django-admin and manage.py. • The inner mysite/ directory is the actual Python package for your project. Its name is the Python package name you’ll need to use to import anything inside it (e.g. mysite.urls). • mysite/__init__.py: An empty file that tells Python that this directory should be considered a Python package. (Read more about packages in the official Python docs if you’re a Python beginner.) • mysite/settings.py: Settings/configuration for this Django project. Django settings will tell you all about how settings work. • mysite/urls.py: The URL declarations for this Django project; a “table of contents” of your Django- powered site. You can read more about URLs in URL dispatcher. • mysite/wsgi.py: An entry-point for WSGI-compatible web servers to serve your project. See How to deploy with WSGI for more details. 2.3.2 The development server Let’s verify your Django project works. Change into the outer mysite directory, if you haven’t already, and run the following commands: $ python manage.py runserver You’ll see the following output on the command line: Performing system checks... System check identified no issues (0 silenced). You have unapplied migrations; your app may not work properly until they are applied. Run `python manage.py migrate' to apply them. February 24, 2016 - 15:50:53 Django version 1.9, using settings `mysite.settings' Starting development server at http://127.0.0.1:8000/ Quit the server with CONTROL-C. Note: Ignore the warning about unapplied database migrations for now; we’ll deal with the database shortly. You’ve started the Django development server, a lightweight Web server written purely in Python. We’ve included this with Django so you can develop things rapidly, without having to deal with configuring a production server – such as Apache – until you’re ready for production. Now’s a good time to note: don’t use this server in anything resembling a production environment. It’s intended only for use while developing. (We’re in the business of making Web frameworks, not Web servers.) Now that the server’s running, visit http://127.0.0.1:8000/ with your Web browser. You’ll see a “Welcome to Django” page, in pleasant, light-blue pastel. It worked! Changing the port 2.3. Writing your first Django app, part 1 15
- 20. Django Documentation, Release 1.9.3.dev20160224120324 By default, the runserver command starts the development server on the internal IP at port 8000. If you want to change the server’s port, pass it as a command-line argument. For instance, this command starts the server on port 8080: $ python manage.py runserver 8080 If you want to change the server’s IP, pass it along with the port. So to listen on all public IPs (useful if you want to show off your work on other computers on your network), use: $ python manage.py runserver 0.0.0.0:8000 Full docs for the development server can be found in the runserver reference. Automatic reloading of runserver The development server automatically reloads Python code for each request as needed. You don’t need to restart the server for code changes to take effect. However, some actions like adding files don’t trigger a restart, so you’ll have to restart the server in these cases. 2.3.3 Creating the Polls app Now that your environment – a “project” – is set up, you’re set to start doing work. Each application you write in Django consists of a Python package that follows a certain convention. Django comes with a utility that automatically generates the basic directory structure of an app, so you can focus on writing code rather than creating directories. Projects vs. apps What’s the difference between a project and an app? An app is a Web application that does something – e.g., a Weblog system, a database of public records or a simple poll app. A project is a collection of configuration and apps for a particular website. A project can contain multiple apps. An app can be in multiple projects. Your apps can live anywhere on your Python path. In this tutorial, we’ll create our poll app right next to your manage.py file so that it can be imported as its own top-level module, rather than a submodule of mysite. To create your app, make sure you’re in the same directory as manage.py and type this command: $ python manage.py startapp polls That’ll create a directory polls, which is laid out like this: polls/ __init__.py admin.py apps.py migrations/ __init__.py models.py tests.py views.py This directory structure will house the poll application. 16 Chapter 2. Getting started
- 21. Django Documentation, Release 1.9.3.dev20160224120324 2.3.4 Write your first view Let’s write the first view. Open the file polls/views.py and put the following Python code in it: polls/views.py from django.http import HttpResponse def index(request): return HttpResponse("Hello, world. You're at the polls index.") This is the simplest view possible in Django. To call the view, we need to map it to a URL - and for this we need a URLconf. To create a URLconf in the polls directory, create a file called urls.py. Your app directory should now look like: polls/ __init__.py admin.py apps.py migrations/ __init__.py models.py tests.py urls.py views.py In the polls/urls.py file include the following code: polls/urls.py from django.conf.urls import url from . import views urlpatterns = [ url(r'^$', views.index, name='index'), ] The next step is to point the root URLconf at the polls.urls module. In mysite/urls.py, add an import for django.conf.urls.include and insert an include() in the urlpatterns list, so you have: mysite/urls.py from django.conf.urls import include, url from django.contrib import admin urlpatterns = [ url(r'^polls/', include('polls.urls')), url(r'^admin/', admin.site.urls), ] When to use include() You should always use include() when you include other URL patterns. admin.site.urls is the only excep- tion to this. Doesn’t match what you see? 2.3. Writing your first Django app, part 1 17
- 22. Django Documentation, Release 1.9.3.dev20160224120324 If you’re seeing include(admin.site.urls) instead of just admin.site.urls, you’re probably using a version of Django that doesn’t match this tutorial version. You’ll want to either switch to the older tutorial or the newer Django version. You have now wired an index view into the URLconf. Lets verify it’s working, run the following command: $ python manage.py runserver Go to http://localhost:8000/polls/ in your browser, and you should see the text “Hello, world. You’re at the polls index.”, which you defined in the index view. The url() function is passed four arguments, two required: regex and view, and two optional: kwargs, and name. At this point, it’s worth reviewing what these arguments are for. url() argument: regex The term “regex” is a commonly used short form meaning “regular expression”, which is a syntax for matching patterns in strings, or in this case, url patterns. Django starts at the first regular expression and makes its way down the list, comparing the requested URL against each regular expression until it finds one that matches. Note that these regular expressions do not search GET and POST parameters, or the domain name. For example, in a request to https://www.example.com/myapp/, the URLconf will look for myapp/. In a request to https://www.example.com/myapp/?page=3, the URLconf will also look for myapp/. If you need help with regular expressions, see Wikipedia’s entry and the documentation of the re module. Also, the O’Reilly book “Mastering Regular Expressions” by Jeffrey Friedl is fantastic. In practice, however, you don’t need to be an expert on regular expressions, as you really only need to know how to capture simple patterns. In fact, complex regexes can have poor lookup performance, so you probably shouldn’t rely on the full power of regexes. Finally, a performance note: these regular expressions are compiled the first time the URLconf module is loaded. They’re super fast (as long as the lookups aren’t too complex as noted above). url() argument: view When Django finds a regular expression match, Django calls the specified view function, with an HttpRequest object as the first argument and any “captured” values from the regular expression as other arguments. If the regex uses simple captures, values are passed as positional arguments; if it uses named captures, values are passed as keyword arguments. We’ll give an example of this in a bit. url() argument: kwargs Arbitrary keyword arguments can be passed in a dictionary to the target view. We aren’t going to use this feature of Django in the tutorial. url() argument: name Naming your URL lets you refer to it unambiguously from elsewhere in Django especially templates. This powerful feature allows you to make global changes to the url patterns of your project while only touching a single file. When you’re comfortable with the basic request and response flow, read part 2 of this tutorial to start working with the database. 18 Chapter 2. Getting started
- 23. Django Documentation, Release 1.9.3.dev20160224120324 2.4 Writing your first Django app, part 2 This tutorial begins where Tutorial 1 left off. We’ll setup the database, create your first model, and get a quick introduction to Django’s automatically-generated admin site. 2.4.1 Database setup Now, open up mysite/settings.py. It’s a normal Python module with module-level variables representing Django settings. By default, the configuration uses SQLite. If you’re new to databases, or you’re just interested in trying Django, this is the easiest choice. SQLite is included in Python, so you won’t need to install anything else to support your database. When starting your first real project, however, you may want to use a more robust database like PostgreSQL, to avoid database-switching headaches down the road. If you wish to use another database, install the appropriate database bindings and change the following keys in the DATABASES ’default’ item to match your database connection settings: • ENGINE – Either ’django.db.backends.sqlite3’, ’django.db.backends.postgresql’, ’django.db.backends.mysql’, or ’django.db.backends.oracle’. Other backends are also available. • NAME – The name of your database. If you’re using SQLite, the database will be a file on your computer; in that case, NAME should be the full absolute path, including filename, of that file. The default value, os.path.join(BASE_DIR, ’db.sqlite3’), will store the file in your project directory. If you are not using SQLite as your database, additional settings such as USER, PASSWORD, and HOST must be added. For more details, see the reference documentation for DATABASES. Note: If you’re using PostgreSQL or MySQL, make sure you’ve created a database by this point. Do that with “CREATE DATABASE database_name;” within your database’s interactive prompt. If you’re using SQLite, you don’t need to create anything beforehand - the database file will be created automatically when it is needed. While you’re editing mysite/settings.py, set TIME_ZONE to your time zone. Also, note the INSTALLED_APPS setting at the top of the file. That holds the names of all Django applications that are activated in this Django instance. Apps can be used in multiple projects, and you can package and distribute them for use by others in their projects. By default, INSTALLED_APPS contains the following apps, all of which come with Django: • django.contrib.admin – The admin site. You’ll use it shortly. • django.contrib.auth – An authentication system. • django.contrib.contenttypes – A framework for content types. • django.contrib.sessions – A session framework. • django.contrib.messages – A messaging framework. • django.contrib.staticfiles – A framework for managing static files. These applications are included by default as a convenience for the common case. Some of these applications make use of at least one database table, though, so we need to create the tables in the database before we can use them. To do that, run the following command: 2.4. Writing your first Django app, part 2 19
- 24. Django Documentation, Release 1.9.3.dev20160224120324 $ python manage.py migrate The migrate command looks at the INSTALLED_APPS setting and creates any necessary database tables according to the database settings in your mysite/settings.py file and the database migrations shipped with the app (we’ll cover those later). You’ll see a message for each migration it applies. If you’re interested, run the command-line client for your database and type dt (PostgreSQL), SHOW TABLES; (MySQL), .schema (SQLite), or SELECT TABLE_NAME FROM USER_TABLES; (Oracle) to display the tables Django created. For the minimalists Like we said above, the default applications are included for the common case, but not everybody needs them. If you don’t need any or all of them, feel free to comment-out or delete the appropriate line(s) from INSTALLED_APPS before running migrate. The migrate command will only run migrations for apps in INSTALLED_APPS. 2.4.2 Creating models Now we’ll define your models – essentially, your database layout, with additional metadata. Philosophy A model is the single, definitive source of truth about your data. It contains the essential fields and behaviors of the data you’re storing. Django follows the DRY Principle. The goal is to define your data model in one place and automatically derive things from it. This includes the migrations - unlike in Ruby On Rails, for example, migrations are entirely derived from your models file, and are essentially just a history that Django can roll through to update your database schema to match your current models. In our simple poll app, we’ll create two models: Question and Choice. A Question has a question and a publication date. A Choice has two fields: the text of the choice and a vote tally. Each Choice is associated with a Question. These concepts are represented by simple Python classes. Edit the polls/models.py file so it looks like this: polls/models.py from django.db import models class Question(models.Model): question_text = models.CharField(max_length=200) pub_date = models.DateTimeField('date published') class Choice(models.Model): question = models.ForeignKey(Question, on_delete=models.CASCADE) choice_text = models.CharField(max_length=200) votes = models.IntegerField(default=0) The code is straightforward. Each model is represented by a class that subclasses django.db.models.Model. Each model has a number of class variables, each of which represents a database field in the model. Each field is represented by an instance of a Field class – e.g., CharField for character fields and DateTimeField for datetimes. This tells Django what type of data each field holds. 20 Chapter 2. Getting started
- 25. Django Documentation, Release 1.9.3.dev20160224120324 The name of each Field instance (e.g. question_text or pub_date) is the field’s name, in machine-friendly format. You’ll use this value in your Python code, and your database will use it as the column name. You can use an optional first positional argument to a Field to designate a human-readable name. That’s used in a couple of introspective parts of Django, and it doubles as documentation. If this field isn’t provided, Django will use the machine-readable name. In this example, we’ve only defined a human-readable name for Question.pub_date. For all other fields in this model, the field’s machine-readable name will suffice as its human-readable name. Some Field classes have required arguments. CharField, for example, requires that you give it a max_length. That’s used not only in the database schema, but in validation, as we’ll soon see. A Field can also have various optional arguments; in this case, we’ve set the default value of votes to 0. Finally, note a relationship is defined, using ForeignKey. That tells Django each Choice is related to a single Question. Django supports all the common database relationships: many-to-one, many-to-many, and one-to-one. 2.4.3 Activating models That small bit of model code gives Django a lot of information. With it, Django is able to: • Create a database schema (CREATE TABLE statements) for this app. • Create a Python database-access API for accessing Question and Choice objects. But first we need to tell our project that the polls app is installed. Philosophy Django apps are “pluggable”: You can use an app in multiple projects, and you can distribute apps, because they don’t have to be tied to a given Django installation. Edit the mysite/settings.py file again, and change the INSTALLED_APPS setting to include the string ’polls.apps.PollsConfig’. It’ll look like this: mysite/settings.py INSTALLED_APPS = [ 'polls.apps.PollsConfig', 'django.contrib.admin', 'django.contrib.auth', 'django.contrib.contenttypes', 'django.contrib.sessions', 'django.contrib.messages', 'django.contrib.staticfiles', ] Now Django knows to include the polls app. Let’s run another command: $ python manage.py makemigrations polls You should see something similar to the following: Migrations for 'polls': 0001_initial.py: - Create model Choice - Create model Question - Add field question to choice 2.4. Writing your first Django app, part 2 21
- 26. Django Documentation, Release 1.9.3.dev20160224120324 By running makemigrations, you’re telling Django that you’ve made some changes to your models (in this case, you’ve made new ones) and that you’d like the changes to be stored as a migration. Migrations are how Django stores changes to your models (and thus your database schema) - they’re just files on disk. You can read the migration for your new model if you like; it’s the file polls/migrations/0001_initial.py. Don’t worry, you’re not expected to read them every time Django makes one, but they’re designed to be human-editable in case you want to manually tweak how Django changes things. There’s a command that will run the migrations for you and manage your database schema automatically - that’s called migrate, and we’ll come to it in a moment - but first, let’s see what SQL that migration would run. The sqlmigrate command takes migration names and returns their SQL: $ python manage.py sqlmigrate polls 0001 You should see something similar to the following (we’ve reformatted it for readability): BEGIN; -- -- Create model Choice -- CREATE TABLE "polls_choice" ( "id" serial NOT NULL PRIMARY KEY, "choice_text" varchar(200) NOT NULL, "votes" integer NOT NULL ); -- -- Create model Question -- CREATE TABLE "polls_question" ( "id" serial NOT NULL PRIMARY KEY, "question_text" varchar(200) NOT NULL, "pub_date" timestamp with time zone NOT NULL ); -- -- Add field question to choice -- ALTER TABLE "polls_choice" ADD COLUMN "question_id" integer NOT NULL; ALTER TABLE "polls_choice" ALTER COLUMN "question_id" DROP DEFAULT; CREATE INDEX "polls_choice_7aa0f6ee" ON "polls_choice" ("question_id"); ALTER TABLE "polls_choice" ADD CONSTRAINT "polls_choice_question_id_246c99a640fbbd72_fk_polls_question_id" FOREIGN KEY ("question_id") REFERENCES "polls_question" ("id") DEFERRABLE INITIALLY DEFERRED; COMMIT; Note the following: • The exact output will vary depending on the database you are using. The example above is generated for PostgreSQL. • Table names are automatically generated by combining the name of the app (polls) and the lowercase name of the model – question and choice. (You can override this behavior.) • Primary keys (IDs) are added automatically. (You can override this, too.) • By convention, Django appends "_id" to the foreign key field name. (Yes, you can override this, as well.) • The foreign key relationship is made explicit by a FOREIGN KEY constraint. Don’t worry about the 22 Chapter 2. Getting started
- 27. Django Documentation, Release 1.9.3.dev20160224120324 DEFERRABLE parts; that’s just telling PostgreSQL to not enforce the foreign key until the end of the trans- action. • It’s tailored to the database you’re using, so database-specific field types such as auto_increment (MySQL), serial (PostgreSQL), or integer primary key autoincrement (SQLite) are handled for you au- tomatically. Same goes for the quoting of field names – e.g., using double quotes or single quotes. • The sqlmigrate command doesn’t actually run the migration on your database - it just prints it to the screen so that you can see what SQL Django thinks is required. It’s useful for checking what Django is going to do or if you have database administrators who require SQL scripts for changes. If you’re interested, you can also run python manage.py check; this checks for any problems in your project without making migrations or touching the database. Now, run migrate again to create those model tables in your database: $ python manage.py migrate Operations to perform: Apply all migrations: admin, contenttypes, polls, auth, sessions Running migrations: Rendering model states... DONE Applying polls.0001_initial... OK The migrate command takes all the migrations that haven’t been applied (Django tracks which ones are applied us- ing a special table in your database called django_migrations) and runs them against your database - essentially, synchronizing the changes you made to your models with the schema in the database. Migrations are very powerful and let you change your models over time, as you develop your project, without the need to delete your database or tables and make new ones - it specializes in upgrading your database live, without losing data. We’ll cover them in more depth in a later part of the tutorial, but for now, remember the three-step guide to making model changes: • Change your models (in models.py). • Run python manage.py makemigrations to create migrations for those changes • Run python manage.py migrate to apply those changes to the database. The reason that there are separate commands to make and apply migrations is because you’ll commit migrations to your version control system and ship them with your app; they not only make your development easier, they’re also useable by other developers and in production. Read the django-admin documentation for full information on what the manage.py utility can do. 2.4.4 Playing with the API Now, let’s hop into the interactive Python shell and play around with the free API Django gives you. To invoke the Python shell, use this command: $ python manage.py shell We’re using this instead of simply typing “python”, because manage.py sets the DJANGO_SETTINGS_MODULE environment variable, which gives Django the Python import path to your mysite/settings.py file. Bypassing manage.py If you’d rather not use manage.py, no problem. Just set the DJANGO_SETTINGS_MODULE environment variable to mysite.settings, start a plain Python shell, and set up Django: 2.4. Writing your first Django app, part 2 23
- 28. Django Documentation, Release 1.9.3.dev20160224120324 >>> import django >>> django.setup() If this raises an AttributeError, you’re probably using a version of Django that doesn’t match this tutorial version. You’ll want to either switch to the older tutorial or the newer Django version. You must run python from the same directory manage.py is in, or ensure that directory is on the Python path, so that import mysite works. For more information on all of this, see the django-admin documentation. Once you’re in the shell, explore the database API: >>> from polls.models import Question, Choice # Import the model classes we just wrote. # No questions are in the system yet. >>> Question.objects.all() [] # Create a new Question. # Support for time zones is enabled in the default settings file, so # Django expects a datetime with tzinfo for pub_date. Use timezone.now() # instead of datetime.datetime.now() and it will do the right thing. >>> from django.utils import timezone >>> q = Question(question_text="What's new?", pub_date=timezone.now()) # Save the object into the database. You have to call save() explicitly. >>> q.save() # Now it has an ID. Note that this might say "1L" instead of "1", depending # on which database you're using. That's no biggie; it just means your # database backend prefers to return integers as Python long integer # objects. >>> q.id 1 # Access model field values via Python attributes. >>> q.question_text "What's new?" >>> q.pub_date datetime.datetime(2012, 2, 26, 13, 0, 0, 775217, tzinfo=<UTC>) # Change values by changing the attributes, then calling save(). >>> q.question_text = "What's up?" >>> q.save() # objects.all() displays all the questions in the database. >>> Question.objects.all() [<Question: Question object>] Wait a minute. <Question: Question object> is, utterly, an unhelpful representation of this object. Let’s fix that by editing the Question model (in the polls/models.py file) and adding a __str__() method to both Question and Choice: polls/models.py from django.db import models from django.utils.encoding import python_2_unicode_compatible 24 Chapter 2. Getting started
- 29. Django Documentation, Release 1.9.3.dev20160224120324 @python_2_unicode_compatible # only if you need to support Python 2 class Question(models.Model): # ... def __str__(self): return self.question_text @python_2_unicode_compatible # only if you need to support Python 2 class Choice(models.Model): # ... def __str__(self): return self.choice_text It’s important to add __str__() methods to your models, not only for your own convenience when dealing with the interactive prompt, but also because objects’ representations are used throughout Django’s automatically-generated admin. Note these are normal Python methods. Let’s add a custom method, just for demonstration: polls/models.py import datetime from django.db import models from django.utils import timezone class Question(models.Model): # ... def was_published_recently(self): return self.pub_date >= timezone.now() - datetime.timedelta(days=1) Note the addition of import datetime and from django.utils import timezone, to reference Python’s standard datetime module and Django’s time-zone-related utilities in django.utils.timezone, respectively. If you aren’t familiar with time zone handling in Python, you can learn more in the time zone support docs. Save these changes and start a new Python interactive shell by running python manage.py shell again: >>> from polls.models import Question, Choice # Make sure our __str__() addition worked. >>> Question.objects.all() [<Question: What's up?>] # Django provides a rich database lookup API that's entirely driven by # keyword arguments. >>> Question.objects.filter(id=1) [<Question: What's up?>] >>> Question.objects.filter(question_text__startswith='What') [<Question: What's up?>] # Get the question that was published this year. >>> from django.utils import timezone >>> current_year = timezone.now().year >>> Question.objects.get(pub_date__year=current_year) <Question: What's up?> # Request an ID that doesn't exist, this will raise an exception. >>> Question.objects.get(id=2) 2.4. Writing your first Django app, part 2 25
- 30. Django Documentation, Release 1.9.3.dev20160224120324 Traceback (most recent call last): ... DoesNotExist: Question matching query does not exist. # Lookup by a primary key is the most common case, so Django provides a # shortcut for primary-key exact lookups. # The following is identical to Question.objects.get(id=1). >>> Question.objects.get(pk=1) <Question: What's up?> # Make sure our custom method worked. >>> q = Question.objects.get(pk=1) >>> q.was_published_recently() True # Give the Question a couple of Choices. The create call constructs a new # Choice object, does the INSERT statement, adds the choice to the set # of available choices and returns the new Choice object. Django creates # a set to hold the "other side" of a ForeignKey relation # (e.g. a question's choice) which can be accessed via the API. >>> q = Question.objects.get(pk=1) # Display any choices from the related object set -- none so far. >>> q.choice_set.all() [] # Create three choices. >>> q.choice_set.create(choice_text='Not much', votes=0) <Choice: Not much> >>> q.choice_set.create(choice_text='The sky', votes=0) <Choice: The sky> >>> c = q.choice_set.create(choice_text='Just hacking again', votes=0) # Choice objects have API access to their related Question objects. >>> c.question <Question: What's up?> # And vice versa: Question objects get access to Choice objects. >>> q.choice_set.all() [<Choice: Not much>, <Choice: The sky>, <Choice: Just hacking again>] >>> q.choice_set.count() 3 # The API automatically follows relationships as far as you need. # Use double underscores to separate relationships. # This works as many levels deep as you want; there's no limit. # Find all Choices for any question whose pub_date is in this year # (reusing the 'current_year' variable we created above). >>> Choice.objects.filter(question__pub_date__year=current_year) [<Choice: Not much>, <Choice: The sky>, <Choice: Just hacking again>] # Let's delete one of the choices. Use delete() for that. >>> c = q.choice_set.filter(choice_text__startswith='Just hacking') >>> c.delete() For more information on model relations, see Accessing related objects. For more on how to use double underscores to perform field lookups via the API, see Field lookups. For full details on the database API, see our Database API reference. 26 Chapter 2. Getting started
- 31. Django Documentation, Release 1.9.3.dev20160224120324 2.4.5 Introducing the Django Admin Philosophy Generating admin sites for your staff or clients to add, change, and delete content is tedious work that doesn’t require much creativity. For that reason, Django entirely automates creation of admin interfaces for models. Django was written in a newsroom environment, with a very clear separation between “content publishers” and the “public” site. Site managers use the system to add news stories, events, sports scores, etc., and that content is displayed on the public site. Django solves the problem of creating a unified interface for site administrators to edit content. The admin isn’t intended to be used by site visitors. It’s for site managers. Creating an admin user First we’ll need to create a user who can login to the admin site. Run the following command: $ python manage.py createsuperuser Enter your desired username and press enter. Username: admin You will then be prompted for your desired email address: Email address: [email protected] The final step is to enter your password. You will be asked to enter your password twice, the second time as a confirmation of the first. Password: ********** Password (again): ********* Superuser created successfully. Start the development server The Django admin site is activated by default. Let’s start the development server and explore it. If the server is not running start it like so: $ python manage.py runserver Now, open a Web browser and go to “/admin/” on your local domain – e.g., http://127.0.0.1:8000/admin/. You should see the admin’s login screen: 2.4. Writing your first Django app, part 2 27
- 32. Django Documentation, Release 1.9.3.dev20160224120324 Since translation is turned on by default, the login screen may be displayed in your own language, depending on your browser’s settings and if Django has a translation for this language. Enter the admin site Now, try logging in with the superuser account you created in the previous step. You should see the Django admin index page: You should see a few types of editable content: groups and users. They are provided by django.contrib.auth, the authentication framework shipped by Django. Make the poll app modifiable in the admin But where’s our poll app? It’s not displayed on the admin index page. 28 Chapter 2. Getting started
- 33. Django Documentation, Release 1.9.3.dev20160224120324 Just one thing to do: we need to tell the admin that Question objects have an admin interface. To do this, open the polls/admin.py file, and edit it to look like this: polls/admin.py from django.contrib import admin from .models import Question admin.site.register(Question) Explore the free admin functionality Now that we’ve registered Question, Django knows that it should be displayed on the admin index page: Click “Questions”. Now you’re at the “change list” page for questions. This page displays all the questions in the database and lets you choose one to change it. There’s the “What’s up?” question we created earlier: Click the “What’s up?” question to edit it: 2.4. Writing your first Django app, part 2 29
- 34. Django Documentation, Release 1.9.3.dev20160224120324 Things to note here: • The form is automatically generated from the Question model. • The different model field types (DateTimeField, CharField) correspond to the appropriate HTML input widget. Each type of field knows how to display itself in the Django admin. • Each DateTimeField gets free JavaScript shortcuts. Dates get a “Today” shortcut and calendar popup, and times get a “Now” shortcut and a convenient popup that lists commonly entered times. The bottom part of the page gives you a couple of options: • Save – Saves changes and returns to the change-list page for this type of object. • Save and continue editing – Saves changes and reloads the admin page for this object. • Save and add another – Saves changes and loads a new, blank form for this type of object. • Delete – Displays a delete confirmation page. If the value of “Date published” doesn’t match the time when you created the question in Tutorial 1, it probably means you forgot to set the correct value for the TIME_ZONE setting. Change it, reload the page and check that the correct value appears. Change the “Date published” by clicking the “Today” and “Now” shortcuts. Then click “Save and continue editing.” Then click “History” in the upper right. You’ll see a page listing all changes made to this object via the Django admin, with the timestamp and username of the person who made the change: When you’re comfortable with the models API and have familiarized yourself with the admin site, read part 3 of this tutorial to learn about how to add more views to our polls app. 30 Chapter 2. Getting started
- 35. Django Documentation, Release 1.9.3.dev20160224120324 2.5 Writing your first Django app, part 3 This tutorial begins where Tutorial 2 left off. We’re continuing the Web-poll application and will focus on creating the public interface – “views.” 2.5.1 Overview A view is a “type” of Web page in your Django application that generally serves a specific function and has a specific template. For example, in a blog application, you might have the following views: • Blog homepage – displays the latest few entries. • Entry “detail” page – permalink page for a single entry. • Year-based archive page – displays all months with entries in the given year. • Month-based archive page – displays all days with entries in the given month. • Day-based archive page – displays all entries in the given day. • Comment action – handles posting comments to a given entry. In our poll application, we’ll have the following four views: • Question “index” page – displays the latest few questions. • Question “detail” page – displays a question text, with no results but with a form to vote. • Question “results” page – displays results for a particular question. • Vote action – handles voting for a particular choice in a particular question. In Django, web pages and other content are delivered by views. Each view is represented by a simple Python function (or method, in the case of class-based views). Django will choose a view by examining the URL that’s requested (to be precise, the part of the URL after the domain name). Now in your time on the web you may have come across such beauties as “ME2/Sites/dirmod.asp?sid=&type=gen&mod=Core+Pages&gid=A6CD4967199A42D9B65B1B”. You will be pleased to know that Django allows us much more elegant URL patterns than that. A URL pattern is simply the general form of a URL - for example: /newsarchive/<year>/<month>/. To get from a URL to a view, Django uses what are known as ‘URLconfs’. A URLconf maps URL patterns (described as regular expressions) to views. This tutorial provides basic instruction in the use of URLconfs, and you can refer to django.core.urlresolvers for more information. 2.5.2 Writing more views Now let’s add a few more views to polls/views.py. These views are slightly different, because they take an argument: polls/views.py def detail(request, question_id): return HttpResponse("You're looking at question %s." % question_id) def results(request, question_id): response = "You're looking at the results of question %s." return HttpResponse(response % question_id) 2.5. Writing your first Django app, part 3 31
- 36. Django Documentation, Release 1.9.3.dev20160224120324 def vote(request, question_id): return HttpResponse("You're voting on question %s." % question_id) Wire these new views into the polls.urls module by adding the following url() calls: polls/urls.py from django.conf.urls import url from . import views urlpatterns = [ # ex: /polls/ url(r'^$', views.index, name='index'), # ex: /polls/5/ url(r'^(?P<question_id>[0-9]+)/$', views.detail, name='detail'), # ex: /polls/5/results/ url(r'^(?P<question_id>[0-9]+)/results/$', views.results, name='results'), # ex: /polls/5/vote/ url(r'^(?P<question_id>[0-9]+)/vote/$', views.vote, name='vote'), ] Take a look in your browser, at “/polls/34/”. It’ll run the detail() method and display whatever ID you provide in the URL. Try “/polls/34/results/” and “/polls/34/vote/” too – these will display the placeholder results and voting pages. When somebody requests a page from your website – say, “/polls/34/”, Django will load the mysite.urls Python module because it’s pointed to by the ROOT_URLCONF setting. It finds the variable named urlpatterns and traverses the regular expressions in order. The include() functions we are using simply reference other URLconfs. Note that the regular expressions for the include() functions don’t have a $ (end-of-string match character) but rather a trailing slash. Whenever Django encounters include(), it chops off whatever part of the URL matched up to that point and sends the remaining string to the included URLconf for further processing. The idea behind include() is to make it easy to plug-and-play URLs. Since polls are in their own URLconf (polls/urls.py), they can be placed under “/polls/”, or under “/fun_polls/”, or under “/content/polls/”, or any other path root, and the app will still work. Here’s what happens if a user goes to “/polls/34/” in this system: • Django will find the match at ’^polls/’ • Then, Django will strip off the matching text ("polls/") and send the remaining text – "34/" – to the ‘polls.urls’ URLconf for further processing which matches r’^(?P<question_id>[0-9]+)/$’ resulting in a call to the detail() view like so: detail(request=<HttpRequest object>, question_id='34') The question_id=’34’ part comes from (?P<question_id>[0-9]+). Using parentheses around a pattern “captures” the text matched by that pattern and sends it as an argument to the view function; ?P<question_id> defines the name that will be used to identify the matched pattern; and [0-9]+ is a regular expression to match a sequence of digits (i.e., a number). Because the URL patterns are regular expressions, there really is no limit on what you can do with them. And there’s no need to add URL cruft such as .html – unless you want to, in which case you can do something like this: url(r'^polls/latest.html$', views.index), But, don’t do that. It’s silly. 32 Chapter 2. Getting started
- 37. Django Documentation, Release 1.9.3.dev20160224120324 2.5.3 Write views that actually do something Each view is responsible for doing one of two things: returning an HttpResponse object containing the content for the requested page, or raising an exception such as Http404. The rest is up to you. Your view can read records from a database, or not. It can use a template system such as Django’s – or a third-party Python template system – or not. It can generate a PDF file, output XML, create a ZIP file on the fly, anything you want, using whatever Python libraries you want. All Django wants is that HttpResponse. Or an exception. Because it’s convenient, let’s use Django’s own database API, which we covered in Tutorial 2. Here’s one stab at a new index() view, which displays the latest 5 poll questions in the system, separated by commas, according to publication date: polls/views.py from django.http import HttpResponse from .models import Question def index(request): latest_question_list = Question.objects.order_by('-pub_date')[:5] output = ', '.join([q.question_text for q in latest_question_list]) return HttpResponse(output) # Leave the rest of the views (detail, results, vote) unchanged There’s a problem here, though: the page’s design is hard-coded in the view. If you want to change the way the page looks, you’ll have to edit this Python code. So let’s use Django’s template system to separate the design from Python by creating a template that the view can use. First, create a directory called templates in your polls directory. Django will look for templates in there. Your project’s TEMPLATES setting describes how Django will load and render templates. The default set- tings file configures a DjangoTemplates backend whose APP_DIRS option is set to True. By convention DjangoTemplates looks for a “templates” subdirectory in each of the INSTALLED_APPS. Within the templates directory you have just created, create another directory called polls, and within that create a file called index.html. In other words, your template should be at polls/templates/polls/index.html. Because of how the app_directories template loader works as described above, you can refer to this template within Django simply as polls/index.html. Template namespacing Now we might be able to get away with putting our templates directly in polls/templates (rather than creating another polls subdirectory), but it would actually be a bad idea. Django will choose the first template it finds whose name matches, and if you had a template with the same name in a different application, Django would be unable to distinguish between them. We need to be able to point Django at the right one, and the easiest way to ensure this is by namespacing them. That is, by putting those templates inside another directory named for the application itself. Put the following code in that template: polls/templates/polls/index.html {% if latest_question_list %} <ul> {% for question in latest_question_list %} 2.5. Writing your first Django app, part 3 33
- 38. Django Documentation, Release 1.9.3.dev20160224120324 <li><a href="/polls/{{ question.id }}/">{{ question.question_text }}</a></li> {% endfor %} </ul> {% else %} <p>No polls are available.</p> {% endif %} Now let’s update our index view in polls/views.py to use the template: polls/views.py from django.http import HttpResponse from django.template import loader from .models import Question def index(request): latest_question_list = Question.objects.order_by('-pub_date')[:5] template = loader.get_template('polls/index.html') context = { 'latest_question_list': latest_question_list, } return HttpResponse(template.render(context, request)) That code loads the template called polls/index.html and passes it a context. The context is a dictionary mapping template variable names to Python objects. Load the page by pointing your browser at “/polls/”, and you should see a bulleted-list containing the “What’s up” question from Tutorial 2. The link points to the question’s detail page. A shortcut: render() It’s a very common idiom to load a template, fill a context and return an HttpResponse object with the result of the rendered template. Django provides a shortcut. Here’s the full index() view, rewritten: polls/views.py from django.shortcuts import render from .models import Question def index(request): latest_question_list = Question.objects.order_by('-pub_date')[:5] context = {'latest_question_list': latest_question_list} return render(request, 'polls/index.html', context) Note that once we’ve done this in all these views, we no longer need to import loader and HttpResponse (you’ll want to keep HttpResponse if you still have the stub methods for detail, results, and vote). The render() function takes the request object as its first argument, a template name as its second argument and a dictionary as its optional third argument. It returns an HttpResponse object of the given template rendered with the given context. 2.5.4 Raising a 404 error Now, let’s tackle the question detail view – the page that displays the question text for a given poll. Here’s the view: 34 Chapter 2. Getting started
- 39. Django Documentation, Release 1.9.3.dev20160224120324 polls/views.py from django.http import Http404 from django.shortcuts import render from .models import Question # ... def detail(request, question_id): try: question = Question.objects.get(pk=question_id) except Question.DoesNotExist: raise Http404("Question does not exist") return render(request, 'polls/detail.html', {'question': question}) The new concept here: The view raises the Http404 exception if a question with the requested ID doesn’t exist. We’ll discuss what you could put in that polls/detail.html template a bit later, but if you’d like to quickly get the above example working, a file containing just: polls/templates/polls/detail.html {{ question }} will get you started for now. A shortcut: get_object_or_404() It’s a very common idiom to use get() and raise Http404 if the object doesn’t exist. Django provides a shortcut. Here’s the detail() view, rewritten: polls/views.py from django.shortcuts import get_object_or_404, render from .models import Question # ... def detail(request, question_id): question = get_object_or_404(Question, pk=question_id) return render(request, 'polls/detail.html', {'question': question}) The get_object_or_404() function takes a Django model as its first argument and an arbitrary number of keyword arguments, which it passes to the get() function of the model’s manager. It raises Http404 if the object doesn’t exist. Philosophy Why do we use a helper function get_object_or_404() instead of automatically catching the ObjectDoesNotExist exceptions at a higher level, or having the model API raise Http404 instead of ObjectDoesNotExist? Because that would couple the model layer to the view layer. One of the foremost design goals of Django is to maintain loose coupling. Some controlled coupling is introduced in the django.shortcuts module. There’s also a get_list_or_404() function, which works just as get_object_or_404() – except using filter() instead of get(). It raises Http404 if the list is empty. 2.5. Writing your first Django app, part 3 35
- 40. Django Documentation, Release 1.9.3.dev20160224120324 2.5.5 Use the template system Back to the detail() view for our poll application. Given the context variable question, here’s what the polls/detail.html template might look like: polls/templates/polls/detail.html <h1>{{ question.question_text }}</h1> <ul> {% for choice in question.choice_set.all %} <li>{{ choice.choice_text }}</li> {% endfor %} </ul> The template system uses dot-lookup syntax to access variable attributes. In the example of {{ question.question_text }}, first Django does a dictionary lookup on the object question. Failing that, it tries an attribute lookup – which works, in this case. If attribute lookup had failed, it would’ve tried a list-index lookup. Method-calling happens in the {% for %} loop: question.choice_set.all is interpreted as the Python code question.choice_set.all(), which returns an iterable of Choice objects and is suitable for use in the {% for %} tag. See the template guide for more about templates. 2.5.6 Removing hardcoded URLs in templates Remember, when we wrote the link to a question in the polls/index.html template, the link was partially hardcoded like this: <li><a href="/polls/{{ question.id }}/">{{ question.question_text }}</a></li> The problem with this hardcoded, tightly-coupled approach is that it becomes challenging to change URLs on projects with a lot of templates. However, since you defined the name argument in the url() functions in the polls.urls module, you can remove a reliance on specific URL paths defined in your url configurations by using the {% url %} template tag: <li><a href="{% url 'detail' question.id %}">{{ question.question_text }}</a></li> The way this works is by looking up the URL definition as specified in the polls.urls module. You can see exactly where the URL name of ‘detail’ is defined below: ... # the 'name' value as called by the {% url %} template tag url(r'^(?P<question_id>[0-9]+)/$', views.detail, name='detail'), ... If you want to change the URL of the polls detail view to something else, perhaps to something like polls/specifics/12/ instead of doing it in the template (or templates) you would change it in polls/urls.py: ... # added the word 'specifics' url(r'^specifics/(?P<question_id>[0-9]+)/$', views.detail, name='detail'), ... 36 Chapter 2. Getting started
- 41. Django Documentation, Release 1.9.3.dev20160224120324 2.5.7 Namespacing URL names The tutorial project has just one app, polls. In real Django projects, there might be five, ten, twenty apps or more. How does Django differentiate the URL names between them? For example, the polls app has a detail view, and so might an app on the same project that is for a blog. How does one make it so that Django knows which app view to create for a url when using the {% url %} template tag? The answer is to add namespaces to your URLconf. In the polls/urls.py file, go ahead and add an app_name to set the application namespace: polls/urls.py from django.conf.urls import url from . import views app_name = 'polls' urlpatterns = [ url(r'^$', views.index, name='index'), url(r'^(?P<question_id>[0-9]+)/$', views.detail, name='detail'), url(r'^(?P<question_id>[0-9]+)/results/$', views.results, name='results'), url(r'^(?P<question_id>[0-9]+)/vote/$', views.vote, name='vote'), ] Now change your polls/index.html template from: polls/templates/polls/index.html <li><a href="{% url 'detail' question.id %}">{{ question.question_text }}</a></li> to point at the namespaced detail view: polls/templates/polls/index.html <li><a href="{% url 'polls:detail' question.id %}">{{ question.question_text }}</a></li> When you’re comfortable with writing views, read part 4 of this tutorial to learn about simple form processing and generic views. 2.6 Writing your first Django app, part 4 This tutorial begins where Tutorial 3 left off. We’re continuing the Web-poll application and will focus on simple form processing and cutting down our code. 2.6.1 Write a simple form Let’s update our poll detail template (“polls/detail.html”) from the last tutorial, so that the template contains an HTML <form> element: polls/templates/polls/detail.html <h1>{{ question.question_text }}</h1> {% if error_message %}<p><strong>{{ error_message }}</strong></p>{% endif %} <form action="{% url 'polls:vote' question.id %}" method="post"> {% csrf_token %} 2.6. Writing your first Django app, part 4 37
- 42. Django Documentation, Release 1.9.3.dev20160224120324 {% for choice in question.choice_set.all %} <input type="radio" name="choice" id="choice{{ forloop.counter }}" value="{{ choice.id }}" /> <label for="choice{{ forloop.counter }}">{{ choice.choice_text }}</label><br /> {% endfor %} <input type="submit" value="Vote" /> </form> A quick rundown: • The above template displays a radio button for each question choice. The value of each radio button is the associated question choice’s ID. The name of each radio button is "choice". That means, when somebody selects one of the radio buttons and submits the form, it’ll send the POST data choice=# where # is the ID of the selected choice. This is the basic concept of HTML forms. • We set the form’s action to {% url ’polls:vote’ question.id %}, and we set method="post". Using method="post" (as opposed to method="get") is very important, be- cause the act of submitting this form will alter data server-side. Whenever you create a form that alters data server-side, use method="post". This tip isn’t specific to Django; it’s just good Web development practice. • forloop.counter indicates how many times the for tag has gone through its loop • Since we’re creating a POST form (which can have the effect of modifying data), we need to worry about Cross Site Request Forgeries. Thankfully, you don’t have to worry too hard, because Django comes with a very easy- to-use system for protecting against it. In short, all POST forms that are targeted at internal URLs should use the {% csrf_token %} template tag. Now, let’s create a Django view that handles the submitted data and does something with it. Remember, in Tutorial 3, we created a URLconf for the polls application that includes this line: polls/urls.py url(r'^(?P<question_id>[0-9]+)/vote/$', views.vote, name='vote'), We also created a dummy implementation of the vote() function. Let’s create a real version. Add the following to polls/views.py: polls/views.py from django.shortcuts import get_object_or_404, render from django.http import HttpResponseRedirect, HttpResponse from django.core.urlresolvers import reverse from .models import Choice, Question # ... def vote(request, question_id): question = get_object_or_404(Question, pk=question_id) try: selected_choice = question.choice_set.get(pk=request.POST['choice']) except (KeyError, Choice.DoesNotExist): # Redisplay the question voting form. return render(request, 'polls/detail.html', { 'question': question, 'error_message': "You didn't select a choice.", }) else: selected_choice.votes += 1 selected_choice.save() # Always return an HttpResponseRedirect after successfully dealing # with POST data. This prevents data from being posted twice if a 38 Chapter 2. Getting started
- 43. Django Documentation, Release 1.9.3.dev20160224120324 # user hits the Back button. return HttpResponseRedirect(reverse('polls:results', args=(question.id,))) This code includes a few things we haven’t covered yet in this tutorial: • request.POST is a dictionary-like object that lets you access submitted data by key name. In this case, request.POST[’choice’] returns the ID of the selected choice, as a string. request.POST values are always strings. Note that Django also provides request.GET for accessing GET data in the same way – but we’re explicitly using request.POST in our code, to ensure that data is only altered via a POST call. • request.POST[’choice’] will raise KeyError if choice wasn’t provided in POST data. The above code checks for KeyError and redisplays the question form with an error message if choice isn’t given. • After incrementing the choice count, the code returns an HttpResponseRedirect rather than a normal HttpResponse. HttpResponseRedirect takes a single argument: the URL to which the user will be redirected (see the following point for how we construct the URL in this case). As the Python comment above points out, you should always return an HttpResponseRedirect after successfully dealing with POST data. This tip isn’t specific to Django; it’s just good Web development practice. • We are using the reverse() function in the HttpResponseRedirect constructor in this example. This function helps avoid having to hardcode a URL in the view function. It is given the name of the view that we want to pass control to and the variable portion of the URL pattern that points to that view. In this case, using the URLconf we set up in Tutorial 3, this reverse() call will return a string like '/polls/3/results/' where the 3 is the value of question.id. This redirected URL will then call the ’results’ view to display the final page. As mentioned in Tutorial 3, request is an HttpRequest object. For more on HttpRequest objects, see the request and response documentation. After somebody votes in a question, the vote() view redirects to the results page for the question. Let’s write that view: polls/views.py from django.shortcuts import get_object_or_404, render def results(request, question_id): question = get_object_or_404(Question, pk=question_id) return render(request, 'polls/results.html', {'question': question}) This is almost exactly the same as the detail() view from Tutorial 3. The only difference is the template name. We’ll fix this redundancy later. Now, create a polls/results.html template: polls/templates/polls/results.html <h1>{{ question.question_text }}</h1> <ul> {% for choice in question.choice_set.all %} <li>{{ choice.choice_text }} -- {{ choice.votes }} vote{{ choice.votes|pluralize }}</li> {% endfor %} </ul> 2.6. Writing your first Django app, part 4 39
- 44. Django Documentation, Release 1.9.3.dev20160224120324 <a href="{% url 'polls:detail' question.id %}">Vote again?</a> Now, go to /polls/1/ in your browser and vote in the question. You should see a results page that gets updated each time you vote. If you submit the form without having chosen a choice, you should see the error message. Note: The code for our vote() view does have a small problem. It first gets the selected_choice object from the database, then computes the new value of votes, and then saves it back to the database. If two users of your website try to vote at exactly the same time, this might go wrong: The same value, let’s say 42, will be retrieved for votes. Then, for both users the new value of 43 is computed and saved, but 44 would be the expected value. This is called a race condition. If you are interested, you can read Avoiding race conditions using F() to learn how you can solve this issue. 2.6.2 Use generic views: Less code is better The detail() (from Tutorial 3) and results() views are very simple – and, as mentioned above, redundant. The index() view, which displays a list of polls, is similar. These views represent a common case of basic Web development: getting data from the database according to a parameter passed in the URL, loading a template and returning the rendered template. Because this is so common, Django provides a shortcut, called the “generic views” system. Generic views abstract common patterns to the point where you don’t even need to write Python code to write an app. Let’s convert our poll app to use the generic views system, so we can delete a bunch of our own code. We’ll just have to take a few steps to make the conversion. We will: 1. Convert the URLconf. 2. Delete some of the old, unneeded views. 3. Introduce new views based on Django’s generic views. Read on for details. Why the code-shuffle? Generally, when writing a Django app, you’ll evaluate whether generic views are a good fit for your problem, and you’ll use them from the beginning, rather than refactoring your code halfway through. But this tutorial intentionally has focused on writing the views “the hard way” until now, to focus on core concepts. You should know basic math before you start using a calculator. Amend URLconf First, open the polls/urls.py URLconf and change it like so: polls/urls.py from django.conf.urls import url from . import views app_name = 'polls' urlpatterns = [ 40 Chapter 2. Getting started
- 45. Django Documentation, Release 1.9.3.dev20160224120324 url(r'^$', views.IndexView.as_view(), name='index'), url(r'^(?P<pk>[0-9]+)/$', views.DetailView.as_view(), name='detail'), url(r'^(?P<pk>[0-9]+)/results/$', views.ResultsView.as_view(), name='results'), url(r'^(?P<question_id>[0-9]+)/vote/$', views.vote, name='vote'), ] Note that the name of the matched pattern in the regexes of the second and third patterns has changed from <question_id> to <pk>. Amend views Next, we’re going to remove our old index, detail, and results views and use Django’s generic views instead. To do so, open the polls/views.py file and change it like so: polls/views.py from django.shortcuts import get_object_or_404, render from django.http import HttpResponseRedirect from django.core.urlresolvers import reverse from django.views import generic from .models import Choice, Question class IndexView(generic.ListView): template_name = 'polls/index.html' context_object_name = 'latest_question_list' def get_queryset(self): """Return the last five published questions.""" return Question.objects.order_by('-pub_date')[:5] class DetailView(generic.DetailView): model = Question template_name = 'polls/detail.html' class ResultsView(generic.DetailView): model = Question template_name = 'polls/results.html' def vote(request, question_id): ... # same as above, no changes needed. We’re using two generic views here: ListView and DetailView. Respectively, those two views abstract the concepts of “display a list of objects” and “display a detail page for a particular type of object.” • Each generic view needs to know what model it will be acting upon. This is provided using the model attribute. • The DetailView generic view expects the primary key value captured from the URL to be called "pk", so we’ve changed question_id to pk for the generic views. By default, the DetailView generic view uses a template called <app name>/<model name>_detail.html. In our case, it would use the template "polls/question_detail.html". The template_name attribute is used to tell Django to use a specific template name instead of the autogenerated default template name. We also specify the template_name for the results list view – this ensures that the 2.6. Writing your first Django app, part 4 41
- 46. Django Documentation, Release 1.9.3.dev20160224120324 results view and the detail view have a different appearance when rendered, even though they’re both a DetailView behind the scenes. Similarly, the ListView generic view uses a default template called <app name>/<model name>_list.html; we use template_name to tell ListView to use our existing "polls/index.html" template. In previous parts of the tutorial, the templates have been provided with a context that contains the question and latest_question_list context variables. For DetailView the question variable is provided automatically – since we’re using a Django model (Question), Django is able to determine an appropri- ate name for the context variable. However, for ListView, the automatically generated context variable is question_list. To override this we provide the context_object_name attribute, specifying that we want to use latest_question_list instead. As an alternative approach, you could change your templates to match the new default context variables – but it’s a lot easier to just tell Django to use the variable you want. Run the server, and use your new polling app based on generic views. For full details on generic views, see the generic views documentation. When you’re comfortable with forms and generic views, read part 5 of this tutorial to learn about testing our polls app. 2.7 Writing your first Django app, part 5 This tutorial begins where Tutorial 4 left off. We’ve built a Web-poll application, and we’ll now create some automated tests for it. 2.7.1 Introducing automated testing What are automated tests? Tests are simple routines that check the operation of your code. Testing operates at different levels. Some tests might apply to a tiny detail (does a particular model method return values as expected?) while others examine the overall operation of the software (does a sequence of user inputs on the site produce the desired result?). That’s no different from the kind of testing you did earlier in Tutorial 2, using the shell to examine the behavior of a method, or running the application and entering data to check how it behaves. What’s different in automated tests is that the testing work is done for you by the system. You create a set of tests once, and then as you make changes to your app, you can check that your code still works as you originally intended, without having to perform time consuming manual testing. Why you need to create tests So why create tests, and why now? You may feel that you have quite enough on your plate just learning Python/Django, and having yet another thing to learn and do may seem overwhelming and perhaps unnecessary. After all, our polls application is working quite happily now; going through the trouble of creating automated tests is not going to make it work any better. If creating the polls application is the last bit of Django programming you will ever do, then true, you don’t need to know how to create automated tests. But, if that’s not the case, now is an excellent time to learn. 42 Chapter 2. Getting started
- 47. Django Documentation, Release 1.9.3.dev20160224120324 Tests will save you time Up to a certain point, ‘checking that it seems to work’ will be a satisfactory test. In a more sophisticated application, you might have dozens of complex interactions between components. A change in any of those components could have unexpected consequences on the application’s behavior. Checking that it still ‘seems to work’ could mean running through your code’s functionality with twenty different variations of your test data just to make sure you haven’t broken something - not a good use of your time. That’s especially true when automated tests could do this for you in seconds. If something’s gone wrong, tests will also assist in identifying the code that’s causing the unexpected behavior. Sometimes it may seem a chore to tear yourself away from your productive, creative programming work to face the unglamorous and unexciting business of writing tests, particularly when you know your code is working properly. However, the task of writing tests is a lot more fulfilling than spending hours testing your application manually or trying to identify the cause of a newly-introduced problem. Tests don’t just identify problems, they prevent them It’s a mistake to think of tests merely as a negative aspect of development. Without tests, the purpose or intended behavior of an application might be rather opaque. Even when it’s your own code, you will sometimes find yourself poking around in it trying to find out what exactly it’s doing. Tests change that; they light up your code from the inside, and when something goes wrong, they focus light on the part that has gone wrong - even if you hadn’t even realized it had gone wrong. Tests make your code more attractive You might have created a brilliant piece of software, but you will find that many other developers will simply refuse to look at it because it lacks tests; without tests, they won’t trust it. Jacob Kaplan-Moss, one of Django’s original developers, says “Code without tests is broken by design.” That other developers want to see tests in your software before they take it seriously is yet another reason for you to start writing tests. Tests help teams work together The previous points are written from the point of view of a single developer maintaining an application. Complex applications will be maintained by teams. Tests guarantee that colleagues don’t inadvertently break your code (and that you don’t break theirs without knowing). If you want to make a living as a Django programmer, you must be good at writing tests! 2.7.2 Basic testing strategies There are many ways to approach writing tests. Some programmers follow a discipline called “test-driven development”; they actually write their tests before they write their code. This might seem counter-intuitive, but in fact it’s similar to what most people will often do anyway: they describe a problem, then create some code to solve it. Test-driven development simply formalizes the problem in a Python test case. More often, a newcomer to testing will create some code and later decide that it should have some tests. Perhaps it would have been better to write some tests earlier, but it’s never too late to get started. 2.7. Writing your first Django app, part 5 43
- 48. Django Documentation, Release 1.9.3.dev20160224120324 Sometimes it’s difficult to figure out where to get started with writing tests. If you have written several thousand lines of Python, choosing something to test might not be easy. In such a case, it’s fruitful to write your first test the next time you make a change, either when you add a new feature or fix a bug. So let’s do that right away. 2.7.3 Writing our first test We identify a bug Fortunately, there’s a little bug in the polls application for us to fix right away: the Question.was_published_recently() method returns True if the Question was published within the last day (which is correct) but also if the Question’s pub_date field is in the future (which certainly isn’t). To check if the bug really exists, using the Admin create a question whose date lies in the future and check the method using the shell: >>> import datetime >>> from django.utils import timezone >>> from polls.models import Question >>> # create a Question instance with pub_date 30 days in the future >>> future_question = Question(pub_date=timezone.now() + datetime.timedelta(days=30)) >>> # was it published recently? >>> future_question.was_published_recently() True Since things in the future are not ‘recent’, this is clearly wrong. Create a test to expose the bug What we’ve just done in the shell to test for the problem is exactly what we can do in an automated test, so let’s turn that into an automated test. A conventional place for an application’s tests is in the application’s tests.py file; the testing system will automat- ically find tests in any file whose name begins with test. Put the following in the tests.py file in the polls application: polls/tests.py import datetime from django.utils import timezone from django.test import TestCase from .models import Question class QuestionMethodTests(TestCase): def test_was_published_recently_with_future_question(self): """ was_published_recently() should return False for questions whose pub_date is in the future. """ time = timezone.now() + datetime.timedelta(days=30) future_question = Question(pub_date=time) self.assertEqual(future_question.was_published_recently(), False) 44 Chapter 2. Getting started
- 49. Django Documentation, Release 1.9.3.dev20160224120324 What we have done here is created a django.test.TestCase subclass with a method that creates a Question instance with a pub_date in the future. We then check the output of was_published_recently() - which ought to be False. Running tests In the terminal, we can run our test: $ python manage.py test polls and you’ll see something like: Creating test database for alias 'default'... F ====================================================================== FAIL: test_was_published_recently_with_future_question (polls.tests.QuestionMethodTests) ---------------------------------------------------------------------- Traceback (most recent call last): File "/path/to/mysite/polls/tests.py", line 16, in test_was_published_recently_with_future_question self.assertEqual(future_question.was_published_recently(), False) AssertionError: True != False ---------------------------------------------------------------------- Ran 1 test in 0.001s FAILED (failures=1) Destroying test database for alias 'default'... What happened is this: • python manage.py test polls looked for tests in the polls application • it found a subclass of the django.test.TestCase class • it created a special database for the purpose of testing • it looked for test methods - ones whose names begin with test • in test_was_published_recently_with_future_question it created a Question instance whose pub_date field is 30 days in the future • ... and using the assertEqual() method, it discovered that its was_published_recently() returns True, though we wanted it to return False The test informs us which test failed and even the line on which the failure occurred. Fixing the bug We already know what the problem is: Question.was_published_recently() should return False if its pub_date is in the future. Amend the method in models.py, so that it will only return True if the date is also in the past: polls/models.py def was_published_recently(self): now = timezone.now() return now - datetime.timedelta(days=1) <= self.pub_date <= now and run the test again: 2.7. Writing your first Django app, part 5 45
- 50. Django Documentation, Release 1.9.3.dev20160224120324 Creating test database for alias 'default'... . ---------------------------------------------------------------------- Ran 1 test in 0.001s OK Destroying test database for alias 'default'... After identifying a bug, we wrote a test that exposes it and corrected the bug in the code so our test passes. Many other things might go wrong with our application in the future, but we can be sure that we won’t inadvertently reintroduce this bug, because simply running the test will warn us immediately. We can consider this little portion of the application pinned down safely forever. More comprehensive tests While we’re here, we can further pin down the was_published_recently() method; in fact, it would be posi- tively embarrassing if in fixing one bug we had introduced another. Add two more test methods to the same class, to test the behavior of the method more comprehensively: polls/tests.py def test_was_published_recently_with_old_question(self): """ was_published_recently() should return False for questions whose pub_date is older than 1 day. """ time = timezone.now() - datetime.timedelta(days=30) old_question = Question(pub_date=time) self.assertEqual(old_question.was_published_recently(), False) def test_was_published_recently_with_recent_question(self): """ was_published_recently() should return True for questions whose pub_date is within the last day. """ time = timezone.now() - datetime.timedelta(hours=1) recent_question = Question(pub_date=time) self.assertEqual(recent_question.was_published_recently(), True) And now we have three tests that confirm that Question.was_published_recently() returns sensible values for past, recent, and future questions. Again, polls is a simple application, but however complex it grows in the future and whatever other code it interacts with, we now have some guarantee that the method we have written tests for will behave in expected ways. 2.7.4 Test a view The polls application is fairly undiscriminating: it will publish any question, including ones whose pub_date field lies in the future. We should improve this. Setting a pub_date in the future should mean that the Question is published at that moment, but invisible until then. 46 Chapter 2. Getting started
- 51. Django Documentation, Release 1.9.3.dev20160224120324 A test for a view When we fixed the bug above, we wrote the test first and then the code to fix it. In fact that was a simple example of test-driven development, but it doesn’t really matter in which order we do the work. In our first test, we focused closely on the internal behavior of the code. For this test, we want to check its behavior as it would be experienced by a user through a web browser. Before we try to fix anything, let’s have a look at the tools at our disposal. The Django test client Django provides a test Client to simulate a user interacting with the code at the view level. We can use it in tests.py or even in the shell. We will start again with the shell, where we need to do a couple of things that won’t be necessary in tests.py. The first is to set up the test environment in the shell: >>> from django.test.utils import setup_test_environment >>> setup_test_environment() setup_test_environment() installs a template renderer which will allow us to examine some additional at- tributes on responses such as response.context that otherwise wouldn’t be available. Note that this method does not setup a test database, so the following will be run against the existing database and the output may differ slightly depending on what questions you already created. Next we need to import the test client class (later in tests.py we will use the django.test.TestCase class, which comes with its own client, so this won’t be required): >>> from django.test import Client >>> # create an instance of the client for our use >>> client = Client() With that ready, we can ask the client to do some work for us: >>> # get a response from '/' >>> response = client.get('/') >>> # we should expect a 404 from that address >>> response.status_code 404 >>> # on the other hand we should expect to find something at '/polls/' >>> # we'll use 'reverse()' rather than a hardcoded URL >>> from django.core.urlresolvers import reverse >>> response = client.get(reverse('polls:index')) >>> response.status_code 200 >>> response.content b'nnn <p>No polls are available.</p>nn' >>> # note - you might get unexpected results if your ``TIME_ZONE`` >>> # in ``settings.py`` is not correct. If you need to change it, >>> # you will also need to restart your shell session >>> from polls.models import Question >>> from django.utils import timezone >>> # create a Question and save it >>> q = Question(question_text="Who is your favorite Beatle?", pub_date=timezone.now()) >>> q.save() >>> # check the response once again >>> response = client.get('/polls/') >>> response.content 2.7. Writing your first Django app, part 5 47
- 52. Django Documentation, Release 1.9.3.dev20160224120324 b'nnn <ul>n n <li><a href="/polls/1/">Who is your favorite Beatle?</a></li>n n >>> # If the following doesn't work, you probably omitted the call to >>> # setup_test_environment() described above >>> response.context['latest_question_list'] [<Question: Who is your favorite Beatle?>] Improving our view The list of polls shows polls that aren’t published yet (i.e. those that have a pub_date in the future). Let’s fix that. In Tutorial 4 we introduced a class-based view, based on ListView: polls/views.py class IndexView(generic.ListView): template_name = 'polls/index.html' context_object_name = 'latest_question_list' def get_queryset(self): """Return the last five published questions.""" return Question.objects.order_by('-pub_date')[:5] We need to amend the get_queryset() method and change it so that it also checks the date by comparing it with timezone.now(). First we need to add an import: polls/views.py from django.utils import timezone and then we must amend the get_queryset method like so: polls/views.py def get_queryset(self): """ Return the last five published questions (not including those set to be published in the future). """ return Question.objects.filter( pub_date__lte=timezone.now() ).order_by('-pub_date')[:5] Question.objects.filter(pub_date__lte=timezone.now()) returns a queryset containing Questions whose pub_date is less than or equal to - that is, earlier than or equal to - timezone.now. Testing our new view Now you can satisfy yourself that this behaves as expected by firing up the runserver, loading the site in your browser, creating Questions with dates in the past and future, and checking that only those that have been published are listed. You don’t want to have to do that every single time you make any change that might affect this - so let’s also create a test, based on our shell session above. Add the following to polls/tests.py: polls/tests.py from django.core.urlresolvers import reverse 48 Chapter 2. Getting started
- 53. Django Documentation, Release 1.9.3.dev20160224120324 and we’ll create a shortcut function to create questions as well as a new test class: polls/tests.py def create_question(question_text, days): """ Creates a question with the given `question_text` and published the given number of `days` offset to now (negative for questions published in the past, positive for questions that have yet to be published). """ time = timezone.now() + datetime.timedelta(days=days) return Question.objects.create(question_text=question_text, pub_date=time) class QuestionViewTests(TestCase): def test_index_view_with_no_questions(self): """ If no questions exist, an appropriate message should be displayed. """ response = self.client.get(reverse('polls:index')) self.assertEqual(response.status_code, 200) self.assertContains(response, "No polls are available.") self.assertQuerysetEqual(response.context['latest_question_list'], []) def test_index_view_with_a_past_question(self): """ Questions with a pub_date in the past should be displayed on the index page. """ create_question(question_text="Past question.", days=-30) response = self.client.get(reverse('polls:index')) self.assertQuerysetEqual( response.context['latest_question_list'], ['<Question: Past question.>'] ) def test_index_view_with_a_future_question(self): """ Questions with a pub_date in the future should not be displayed on the index page. """ create_question(question_text="Future question.", days=30) response = self.client.get(reverse('polls:index')) self.assertContains(response, "No polls are available.", status_code=200) self.assertQuerysetEqual(response.context['latest_question_list'], []) def test_index_view_with_future_question_and_past_question(self): """ Even if both past and future questions exist, only past questions should be displayed. """ create_question(question_text="Past question.", days=-30) create_question(question_text="Future question.", days=30) response = self.client.get(reverse('polls:index')) self.assertQuerysetEqual( response.context['latest_question_list'], ['<Question: Past question.>'] 2.7. Writing your first Django app, part 5 49
- 54. Django Documentation, Release 1.9.3.dev20160224120324 ) def test_index_view_with_two_past_questions(self): """ The questions index page may display multiple questions. """ create_question(question_text="Past question 1.", days=-30) create_question(question_text="Past question 2.", days=-5) response = self.client.get(reverse('polls:index')) self.assertQuerysetEqual( response.context['latest_question_list'], ['<Question: Past question 2.>', '<Question: Past question 1.>'] ) Let’s look at some of these more closely. First is a question shortcut function, create_question, to take some repetition out of the process of creating questions. test_index_view_with_no_questions doesn’t create any questions, but checks the message: “No polls are available.” and verifies the latest_question_list is empty. Note that the django.test.TestCase class provides some additional assertion methods. In these examples, we use assertContains() and assertQuerysetEqual(). In test_index_view_with_a_past_question, we create a question and verify that it appears in the list. In test_index_view_with_a_future_question, we create a question with a pub_date in the future. The database is reset for each test method, so the first question is no longer there, and so again the index shouldn’t have any questions in it. And so on. In effect, we are using the tests to tell a story of admin input and user experience on the site, and checking that at every state and for every new change in the state of the system, the expected results are published. Testing the DetailView What we have works well; however, even though future questions don’t appear in the index, users can still reach them if they know or guess the right URL. So we need to add a similar constraint to DetailView: polls/views.py class DetailView(generic.DetailView): ... def get_queryset(self): """ Excludes any questions that aren't published yet. """ return Question.objects.filter(pub_date__lte=timezone.now()) And of course, we will add some tests, to check that a Question whose pub_date is in the past can be displayed, and that one with a pub_date in the future is not: polls/tests.py class QuestionIndexDetailTests(TestCase): def test_detail_view_with_a_future_question(self): """ The detail view of a question with a pub_date in the future should return a 404 not found. """ 50 Chapter 2. Getting started
- 55. Django Documentation, Release 1.9.3.dev20160224120324 future_question = create_question(question_text='Future question.', days=5) response = self.client.get(reverse('polls:detail', args=(future_question.id,))) self.assertEqual(response.status_code, 404) def test_detail_view_with_a_past_question(self): """ The detail view of a question with a pub_date in the past should display the question's text. """ past_question = create_question(question_text='Past Question.', days=-5) response = self.client.get(reverse('polls:detail', args=(past_question.id,))) self.assertContains(response, past_question.question_text, status_code=200) Ideas for more tests We ought to add a similar get_queryset method to ResultsView and create a new test class for that view. It’ll be very similar to what we have just created; in fact there will be a lot of repetition. We could also improve our application in other ways, adding tests along the way. For example, it’s silly that Questions can be published on the site that have no Choices. So, our views could check for this, and exclude such Questions. Our tests would create a Question without Choices and then test that it’s not published, as well as create a similar Question with Choices, and test that it is published. Perhaps logged-in admin users should be allowed to see unpublished Questions, but not ordinary visitors. Again: whatever needs to be added to the software to accomplish this should be accompanied by a test, whether you write the test first and then make the code pass the test, or work out the logic in your code first and then write a test to prove it. At a certain point you are bound to look at your tests and wonder whether your code is suffering from test bloat, which brings us to: 2.7.5 When testing, more is better It might seem that our tests are growing out of control. At this rate there will soon be more code in our tests than in our application, and the repetition is unaesthetic, compared to the elegant conciseness of the rest of our code. It doesn’t matter. Let them grow. For the most part, you can write a test once and then forget about it. It will continue performing its useful function as you continue to develop your program. Sometimes tests will need to be updated. Suppose that we amend our views so that only Questions with Choices are published. In that case, many of our existing tests will fail - telling us exactly which tests need to be amended to bring them up to date, so to that extent tests help look after themselves. At worst, as you continue developing, you might find that you have some tests that are now redundant. Even that’s not a problem; in testing redundancy is a good thing. As long as your tests are sensibly arranged, they won’t become unmanageable. Good rules-of-thumb include having: • a separate TestClass for each model or view • a separate test method for each set of conditions you want to test • test method names that describe their function 2.7. Writing your first Django app, part 5 51
- 56. Django Documentation, Release 1.9.3.dev20160224120324 2.7.6 Further testing This tutorial only introduces some of the basics of testing. There’s a great deal more you can do, and a number of very useful tools at your disposal to achieve some very clever things. For example, while our tests here have covered some of the internal logic of a model and the way our views publish information, you can use an “in-browser” framework such as Selenium to test the way your HTML actually renders in a browser. These tools allow you to check not just the behavior of your Django code, but also, for example, of your JavaScript. It’s quite something to see the tests launch a browser, and start interacting with your site, as if a human being were driving it! Django includes LiveServerTestCase to facilitate integration with tools like Selenium. If you have a complex application, you may want to run tests automatically with every commit for the purposes of continuous integration, so that quality control is itself - at least partially - automated. A good way to spot untested parts of your application is to check code coverage. This also helps identify fragile or even dead code. If you can’t test a piece of code, it usually means that code should be refactored or removed. Coverage will help to identify dead code. See Integration with coverage.py for details. Testing in Django has comprehensive information about testing. 2.7.7 What’s next? For full details on testing, see Testing in Django. When you’re comfortable with testing Django views, read part 6 of this tutorial to learn about static files management. 2.8 Writing your first Django app, part 6 This tutorial begins where Tutorial 5 left off. We’ve built a tested Web-poll application, and we’ll now add a stylesheet and an image. Aside from the HTML generated by the server, web applications generally need to serve additional files — such as images, JavaScript, or CSS — necessary to render the complete web page. In Django, we refer to these files as “static files”. For small projects, this isn’t a big deal, because you can just keep the static files somewhere your web server can find it. However, in bigger projects – especially those comprised of multiple apps – dealing with the multiple sets of static files provided by each application starts to get tricky. That’s what django.contrib.staticfiles is for: it collects static files from each of your applications (and any other places you specify) into a single location that can easily be served in production. 2.8.1 Customize your app’s look and feel First, create a directory called static in your polls directory. Django will look for static files there, similarly to how Django finds templates inside polls/templates/. Django’s STATICFILES_FINDERS setting contains a list of finders that know how to discover static files from various sources. One of the defaults is AppDirectoriesFinder which looks for a “static” subdirectory in each of the INSTALLED_APPS, like the one in polls we just created. The admin site uses the same directory structure for its static files. Within the static directory you have just created, create another directory called polls and within that create a file called style.css. In other words, your stylesheet should be at polls/static/polls/style.css. Because of how the AppDirectoriesFinder staticfile finder works, you can refer to this static file in Django simply as polls/style.css, similar to how you reference the path for templates. 52 Chapter 2. Getting started
- 57. Django Documentation, Release 1.9.3.dev20160224120324 Static file namespacing Just like templates, we might be able to get away with putting our static files directly in polls/static (rather than creating another polls subdirectory), but it would actually be a bad idea. Django will choose the first static file it finds whose name matches, and if you had a static file with the same name in a different application, Django would be unable to distinguish between them. We need to be able to point Django at the right one, and the easiest way to ensure this is by namespacing them. That is, by putting those static files inside another directory named for the application itself. Put the following code in that stylesheet (polls/static/polls/style.css): polls/static/polls/style.css li a { color: green; } Next, add the following at the top of polls/templates/polls/index.html: polls/templates/polls/index.html {% load staticfiles %} <link rel="stylesheet" type="text/css" href="{% static 'polls/style.css' %}" /> {% load staticfiles %} loads the {% static %} template tag from the staticfiles template library. The {% static %} template tag generates the absolute URL of the static file. That’s all you need to do for development. Reload http://localhost:8000/polls/ and you should see that the question links are green (Django style!) which means that your stylesheet was properly loaded. 2.8.2 Adding a background-image Next, we’ll create a subdirectory for images. Create an images subdirectory in the polls/static/polls/ directory. Inside this directory, put an image called background.gif. In other words, put your image in polls/static/polls/images/background.gif. Then, add to your stylesheet (polls/static/polls/style.css): polls/static/polls/style.css body { background: white url("images/background.gif") no-repeat right bottom; } Reload http://localhost:8000/polls/ and you should see the background loaded in the bottom right of the screen. Warning: Of course the {% static %} template tag is not available for use in static files like your stylesheet which aren’t generated by Django. You should always use relative paths to link your static files between each other, because then you can change STATIC_URL (used by the static template tag to generate its URLs) without having to modify a bunch of paths in your static files as well. These are the basics. For more details on settings and other bits included with the framework see the static files howto and the staticfiles reference. Deploying static files discusses how to use static files on a real server. When you’re comfortable with the static files, read part 7 of this tutorial to learn how to customize Django’s automatically-generated admin site. 2.8. Writing your first Django app, part 6 53
- 58. Django Documentation, Release 1.9.3.dev20160224120324 2.9 Writing your first Django app, part 7 This tutorial begins where Tutorial 6 left off. We’re continuing the Web-poll application and will focus on customizing the Django’s automatically-generated admin site that we first explored in Tutorial 2. 2.9.1 Customize the admin form By registering the Question model with admin.site.register(Question), Django was able to construct a default form representation. Often, you’ll want to customize how the admin form looks and works. You’ll do this by telling Django the options you want when you register the object. Let’s see how this works by reordering the fields on the edit form. Replace the admin.site.register(Question) line with: polls/admin.py from django.contrib import admin from .models import Question class QuestionAdmin(admin.ModelAdmin): fields = ['pub_date', 'question_text'] admin.site.register(Question, QuestionAdmin) You’ll follow this pattern – create a model admin class, then pass it as the second argument to admin.site.register() – any time you need to change the admin options for an model. This particular change above makes the “Publication date” come before the “Question” field: This isn’t impressive with only two fields, but for admin forms with dozens of fields, choosing an intuitive order is an important usability detail. And speaking of forms with dozens of fields, you might want to split the form up into fieldsets: polls/admin.py 54 Chapter 2. Getting started
- 59. Django Documentation, Release 1.9.3.dev20160224120324 from django.contrib import admin from .models import Question class QuestionAdmin(admin.ModelAdmin): fieldsets = [ (None, {'fields': ['question_text']}), ('Date information', {'fields': ['pub_date']}), ] admin.site.register(Question, QuestionAdmin) The first element of each tuple in fieldsets is the title of the fieldset. Here’s what our form looks like now: 2.9.2 Adding related objects OK, we have our Question admin page, but a Question has multiple Choices, and the admin page doesn’t display choices. Yet. There are two ways to solve this problem. The first is to register Choice with the admin just as we did with Question. That’s easy: polls/admin.py from django.contrib import admin from .models import Choice, Question # ... admin.site.register(Choice) 2.9. Writing your first Django app, part 7 55
- 60. Django Documentation, Release 1.9.3.dev20160224120324 Now “Choices” is an available option in the Django admin. The “Add choice” form looks like this: In that form, the “Question” field is a select box containing every question in the database. Django knows that a ForeignKey should be represented in the admin as a <select> box. In our case, only one question exists at this point. Also note the “Add Another” link next to “Question.” Every object with a ForeignKey relationship to another gets this for free. When you click “Add Another”, you’ll get a popup window with the “Add question” form. If you add a question in that window and click “Save”, Django will save the question to the database and dynamically add it as the selected choice on the “Add choice” form you’re looking at. But, really, this is an inefficient way of adding Choice objects to the system. It’d be better if you could add a bunch of Choices directly when you create the Question object. Let’s make that happen. Remove the register() call for the Choice model. Then, edit the Question registration code to read: polls/admin.py from django.contrib import admin from .models import Choice, Question class ChoiceInline(admin.StackedInline): model = Choice extra = 3 class QuestionAdmin(admin.ModelAdmin): fieldsets = [ (None, {'fields': ['question_text']}), ('Date information', {'fields': ['pub_date'], 'classes': ['collapse']}), ] inlines = [ChoiceInline] admin.site.register(Question, QuestionAdmin) This tells Django: “Choice objects are edited on the Question admin page. By default, provide enough fields for 56 Chapter 2. Getting started
- 61. Django Documentation, Release 1.9.3.dev20160224120324 3 choices.” Load the “Add question” page to see how that looks: It works like this: There are three slots for related Choices – as specified by extra – and each time you come back to the “Change” page for an already-created object, you get another three extra slots. At the end of the three current slots you will find an “Add another Choice” link. If you click on it, a new slot will be added. If you want to remove the added slot, you can click on the X to the top right of the added slot. Note that you can’t remove the original three slots. This image shows an added slot: 2.9. Writing your first Django app, part 7 57
- 62. Django Documentation, Release 1.9.3.dev20160224120324 One small problem, though. It takes a lot of screen space to display all the fields for entering related Choice objects. For that reason, Django offers a tabular way of displaying inline related objects; you just need to change the ChoiceInline declaration to read: polls/admin.py class ChoiceInline(admin.TabularInline): #... With that TabularInline (instead of StackedInline), the related objects are displayed in a more compact, table-based format: Note that there is an extra “Delete?” column that allows removing rows added using the “Add Another Choice” button and rows that have already been saved. 58 Chapter 2. Getting started
- 63. Django Documentation, Release 1.9.3.dev20160224120324 2.9.3 Customize the admin change list Now that the Question admin page is looking good, let’s make some tweaks to the “change list” page – the one that displays all the questions in the system. Here’s what it looks like at this point: By default, Django displays the str() of each object. But sometimes it’d be more helpful if we could display individual fields. To do that, use the list_display admin option, which is a tuple of field names to display, as columns, on the change list page for the object: polls/admin.py class QuestionAdmin(admin.ModelAdmin): # ... list_display = ('question_text', 'pub_date') Just for good measure, let’s also include the was_published_recently() method from Tutorial 2: polls/admin.py class QuestionAdmin(admin.ModelAdmin): # ... list_display = ('question_text', 'pub_date', 'was_published_recently') Now the question change list page looks like this: You can click on the column headers to sort by those values – except in the case of the was_published_recently header, because sorting by the output of an arbitrary method is not supported. Also note that the column header for was_published_recently is, by default, the name of the method (with underscores replaced with spaces), and that each line contains the string representation of the output. 2.9. Writing your first Django app, part 7 59
- 64. Django Documentation, Release 1.9.3.dev20160224120324 You can improve that by giving that method (in polls/models.py) a few attributes, as follows: polls/models.py class Question(models.Model): # ... def was_published_recently(self): return self.pub_date >= timezone.now() - datetime.timedelta(days=1) was_published_recently.admin_order_field = 'pub_date' was_published_recently.boolean = True was_published_recently.short_description = 'Published recently?' For more information on these method properties, see list_display. Edit your polls/admin.py file again and add an improvement to the Question change list page: filters using the list_filter. Add the following line to QuestionAdmin: list_filter = ['pub_date'] That adds a “Filter” sidebar that lets people filter the change list by the pub_date field: The type of filter displayed depends on the type of field you’re filtering on. Because pub_date is a DateTimeField, Django knows to give appropriate filter options: “Any date”, “Today”, “Past 7 days”, “This month”, “This year”. This is shaping up well. Let’s add some search capability: search_fields = ['question_text'] That adds a search box at the top of the change list. When somebody enters search terms, Django will search the question_text field. You can use as many fields as you’d like – although because it uses a LIKE query behind the scenes, limiting the number of search fields to a reasonable number will make it easier for your database to do the search. Now’s also a good time to note that change lists give you free pagination. The default is to display 100 items per page. Change list pagination, search boxes, filters, date-hierarchies, and column-header-ordering all work together like you think they should. 2.9.4 Customize the admin look and feel Clearly, having “Django administration” at the top of each admin page is ridiculous. It’s just placeholder text. That’s easy to change, though, using Django’s template system. The Django admin is powered by Django itself, and its interfaces use Django’s own template system. 60 Chapter 2. Getting started
- 65. Django Documentation, Release 1.9.3.dev20160224120324 Customizing your project’s templates Create a templates directory in your project directory (the one that contains manage.py). Templates can live anywhere on your filesystem that Django can access. (Django runs as whatever user your server runs.) However, keeping your templates within the project is a good convention to follow. Open your settings file (mysite/settings.py, remember) and add a DIRS option in the TEMPLATES setting: mysite/settings.py TEMPLATES = [ { 'BACKEND': 'django.template.backends.django.DjangoTemplates', 'DIRS': [os.path.join(BASE_DIR, 'templates')], 'APP_DIRS': True, 'OPTIONS': { 'context_processors': [ 'django.template.context_processors.debug', 'django.template.context_processors.request', 'django.contrib.auth.context_processors.auth', 'django.contrib.messages.context_processors.messages', ], }, }, ] DIRS is a list of filesystem directories to check when loading Django templates; it’s a search path. Organizing templates Just like the static files, we could have all our templates together, in one big templates directory, and it would work perfectly well. However, templates that belongs to a particular application, we should put in the application’s template directory (e.g. polls/templates) rather than the project’s (templates). We’ll discuss in more detail in the reusable apps tutorial why we do this. Now create a directory called admin inside templates, and copy the template admin/base_site.html from within the default Django admin template directory in the source code of Django itself (django/contrib/admin/templates) into that directory. Where are the Django source files? If you have difficulty finding where the Django source files are located on your system, run the following command: $ python -c "import django; print(django.__path__)" Then, just edit the file and replace {{ site_header|default:_(’Django administration’) }} (in- cluding the curly braces) with your own site’s name as you see fit. You should end up with a section of code like: {% block branding %} <h1 id="site-name"><a href="{% url 'admin:index' %}">Polls Administration</a></h1> {% endblock %} We use this approach to teach you how to override templates. In an actual project, you would probably use the django.contrib.admin.AdminSite.site_header attribute to more easily make this particular cus- tomization. 2.9. Writing your first Django app, part 7 61
- 66. Django Documentation, Release 1.9.3.dev20160224120324 This template file contains lots of text like {% block branding %} and {{ title }}. The {% and {{ tags are part of Django’s template language. When Django renders admin/base_site.html, this template language will be evaluated to produce the final HTML page, just like we saw in Tutorial 3. Note that any of Django’s default admin templates can be overridden. To override a template, just do the same thing you did with base_site.html – copy it from the default directory into your custom directory, and make changes. Customizing your application’s templates Astute readers will ask: But if DIRS was empty by default, how was Django finding the default admin templates? The answer is that, since APP_DIRS is set to True, Django automatically looks for a templates/ subdirectory within each application package, for use as a fallback (don’t forget that django.contrib.admin is an application). Our poll application is not very complex and doesn’t need custom admin templates. But if it grew more sophisticated and required modification of Django’s standard admin templates for some of its functionality, it would be more sensible to modify the application’s templates, rather than those in the project. That way, you could include the polls application in any new project and be assured that it would find the custom templates it needed. See the template loading documentation for more information about how Django finds its templates. 2.9.5 Customize the admin index page On a similar note, you might want to customize the look and feel of the Django admin index page. By default, it displays all the apps in INSTALLED_APPS that have been registered with the admin application, in alphabetical order. You may want to make significant changes to the layout. After all, the index is probably the most important page of the admin, and it should be easy to use. The template to customize is admin/index.html. (Do the same as with admin/base_site.html in the previous section – copy it from the default directory to your custom template directory). Edit the file, and you’ll see it uses a template variable called app_list. That variable contains every installed Django app. Instead of using that, you can hard-code links to object-specific admin pages in whatever way you think is best. 2.9.6 What’s next? The beginner tutorial ends here. In the meantime, you might want to check out some pointers on where to go from here. If you are familiar with Python packaging and interested in learning how to turn polls into a “reusable app”, check out Advanced tutorial: How to write reusable apps. 2.10 Advanced tutorial: How to write reusable apps This advanced tutorial begins where Tutorial 6 left off. We’ll be turning our Web-poll into a standalone Python package you can reuse in new projects and share with other people. If you haven’t recently completed Tutorials 1–6, we encourage you to review these so that your example project matches the one described below. 62 Chapter 2. Getting started
- 67. Django Documentation, Release 1.9.3.dev20160224120324 2.10.1 Reusability matters It’s a lot of work to design, build, test and maintain a web application. Many Python and Django projects share common problems. Wouldn’t it be great if we could save some of this repeated work? Reusability is the way of life in Python. The Python Package Index (PyPI) has a vast range of packages you can use in your own Python programs. Check out Django Packages for existing reusable apps you could incorporate in your project. Django itself is also just a Python package. This means that you can take existing Python packages or Django apps and compose them into your own web project. You only need to write the parts that make your project unique. Let’s say you were starting a new project that needed a polls app like the one we’ve been working on. How do you make this app reusable? Luckily, you’re well on the way already. In Tutorial 3, we saw how we could decouple polls from the project-level URLconf using an include. In this tutorial, we’ll take further steps to make the app easy to use in new projects and ready to publish for others to install and use. Package? App? A Python package provides a way of grouping related Python code for easy reuse. A package contains one or more files of Python code (also known as “modules”). A package can be imported with import foo.bar or from foo import bar. For a directory (like polls) to form a package, it must contain a special file __init__.py, even if this file is empty. A Django application is just a Python package that is specifically intended for use in a Django project. An application may use common Django conventions, such as having models, tests, urls, and views submodules. Later on we use the term packaging to describe the process of making a Python package easy for others to install. It can be a little confusing, we know. 2.10.2 Your project and your reusable app After the previous tutorials, our project should look like this: mysite/ manage.py mysite/ __init__.py settings.py urls.py wsgi.py polls/ __init__.py admin.py migrations/ __init__.py 0001_initial.py models.py static/ polls/ images/ background.gif style.css templates/ polls/ detail.html index.html results.html 2.10. Advanced tutorial: How to write reusable apps 63
- 68. Django Documentation, Release 1.9.3.dev20160224120324 tests.py urls.py views.py templates/ admin/ base_site.html You created mysite/templates in Tutorial 7, and polls/templates in Tutorial 3. Now perhaps it is clearer why we chose to have separate template directories for the project and application: everything that is part of the polls application is in polls. It makes the application self-contained and easier to drop into a new project. The polls directory could now be copied into a new Django project and immediately reused. It’s not quite ready to be published though. For that, we need to package the app to make it easy for others to install. 2.10.3 Installing some prerequisites The current state of Python packaging is a bit muddled with various tools. For this tutorial, we’re going to use setuptools to build our package. It’s the recommended packaging tool (merged with the distribute fork). We’ll also be using pip to install and uninstall it. You should install these two packages now. If you need help, you can refer to how to install Django with pip. You can install setuptools the same way. 2.10.4 Packaging your app Python packaging refers to preparing your app in a specific format that can be easily installed and used. Django itself is packaged very much like this. For a small app like polls, this process isn’t too difficult. 1. First, create a parent directory for polls, outside of your Django project. Call this directory django-polls. Choosing a name for your app When choosing a name for your package, check resources like PyPI to avoid naming conflicts with existing packages. It’s often useful to prepend django- to your module name when creating a package to distribute. This helps others looking for Django apps identify your app as Django specific. Application labels (that is, the final part of the dotted path to application packages) must be unique in INSTALLED_APPS. Avoid using the same label as any of the Django contrib packages, for example auth, admin, or messages. 2. Move the polls directory into the django-polls directory. 3. Create a file django-polls/README.rst with the following contents: django-polls/README.rst ===== Polls ===== Polls is a simple Django app to conduct Web-based polls. For each question, visitors can choose between a fixed number of answers. Detailed documentation is in the "docs" directory. Quick start ----------- 64 Chapter 2. Getting started
- 69. Django Documentation, Release 1.9.3.dev20160224120324 1. Add "polls" to your INSTALLED_APPS setting like this:: INSTALLED_APPS = [ ... 'polls', ] 2. Include the polls URLconf in your project urls.py like this:: url(r'^polls/', include('polls.urls')), 3. Run `python manage.py migrate` to create the polls models. 4. Start the development server and visit http://127.0.0.1:8000/admin/ to create a poll (you'll need the Admin app enabled). 5. Visit http://127.0.0.1:8000/polls/ to participate in the poll. 4. Create a django-polls/LICENSE file. Choosing a license is beyond the scope of this tutorial, but suffice it to say that code released publicly without a license is useless. Django and many Django-compatible apps are distributed under the BSD license; however, you’re free to pick your own license. Just be aware that your licensing choice will affect who is able to use your code. 5. Next we’ll create a setup.py file which provides details about how to build and install the app. A full explanation of this file is beyond the scope of this tutorial, but the setuptools docs have a good explanation. Create a file django-polls/setup.py with the following contents: django-polls/setup.py import os from setuptools import find_packages, setup with open(os.path.join(os.path.dirname(__file__), 'README.rst')) as readme: README = readme.read() # allow setup.py to be run from any path os.chdir(os.path.normpath(os.path.join(os.path.abspath(__file__), os.pardir))) setup( name='django-polls', version='0.1', packages=find_packages(), include_package_data=True, license='BSD License', # example license description='A simple Django app to conduct Web-based polls.', long_description=README, url='https://www.example.com/', author='Your Name', author_email='[email protected]', classifiers=[ 'Environment :: Web Environment', 'Framework :: Django', 'Framework :: Django :: X.Y', # replace "X.Y" as appropriate 'Intended Audience :: Developers', 'License :: OSI Approved :: BSD License', # example license 'Operating System :: OS Independent', 'Programming Language :: Python', # Replace these appropriately if you are stuck on Python 2. 'Programming Language :: Python :: 3', 2.10. Advanced tutorial: How to write reusable apps 65
- 70. Django Documentation, Release 1.9.3.dev20160224120324 'Programming Language :: Python :: 3.4', 'Programming Language :: Python :: 3.5', 'Topic :: Internet :: WWW/HTTP', 'Topic :: Internet :: WWW/HTTP :: Dynamic Content', ], ) 6. Only Python modules and packages are included in the package by default. To include additional files, we’ll need to create a MANIFEST.in file. The setuptools docs referred to in the previous step discuss this file in more details. To include the templates, the README.rst and our LICENSE file, create a file django-polls/MANIFEST.in with the following contents: django-polls/MANIFEST.in include LICENSE include README.rst recursive-include polls/static * recursive-include polls/templates * 7. It’s optional, but recommended, to include detailed documentation with your app. Create an empty directory django-polls/docs for future documentation. Add an additional line to django-polls/MANIFEST.in: recursive-include docs * Note that the docs directory won’t be included in your package unless you add some files to it. Many Django apps also provide their documentation online through sites like readthedocs.org. 8. Try building your package with python setup.py sdist (run from inside django-polls). This cre- ates a directory called dist and builds your new package, django-polls-0.1.tar.gz. For more information on packaging, see Python’s Tutorial on Packaging and Distributing Projects. 2.10.5 Using your own package Since we moved the polls directory out of the project, it’s no longer working. We’ll now fix this by installing our new django-polls package. Installing as a user library The following steps install django-polls as a user library. Per-user installs have a lot of advantages over installing the package system-wide, such as being usable on systems where you don’t have administrator access as well as preventing the package from affecting system services and other users of the machine. Note that per-user installations can still affect the behavior of system tools that run as that user, so virtualenv is a more robust solution (see below). 1. To install the package, use pip (you already installed it, right?): pip install --user django-polls/dist/django-polls-0.1.tar.gz 2. With luck, your Django project should now work correctly again. Run the server again to confirm this. 3. To uninstall the package, use pip: pip uninstall django-polls 66 Chapter 2. Getting started
- 71. Django Documentation, Release 1.9.3.dev20160224120324 2.10.6 Publishing your app Now that we’ve packaged and tested django-polls, it’s ready to share with the world! If this wasn’t just an example, you could now: • Email the package to a friend. • Upload the package on your website. • Post the package on a public repository, such as the Python Package Index (PyPI). packaging.python.org has a good tutorial for doing this. 2.10.7 Installing Python packages with virtualenv Earlier, we installed the polls app as a user library. This has some disadvantages: • Modifying the user libraries can affect other Python software on your system. • You won’t be able to run multiple versions of this package (or others with the same name). Typically, these situations only arise once you’re maintaining several Django projects. When they do, the best solution is to use virtualenv. This tool allows you to maintain multiple isolated Python environments, each with its own copy of the libraries and package namespace. 2.11 What to read next So you’ve read all the introductory material and have decided you’d like to keep using Django. We’ve only just scratched the surface with this intro (in fact, if you’ve read every single word, you’ve read about 5% of the overall documentation). So what’s next? Well, we’ve always been big fans of learning by doing. At this point you should know enough to start a project of your own and start fooling around. As you need to learn new tricks, come back to the documentation. We’ve put a lot of effort into making Django’s documentation useful, easy to read and as complete as possible. The rest of this document explains more about how the documentation works so that you can get the most out of it. (Yes, this is documentation about documentation. Rest assured we have no plans to write a document about how to read the document about documentation.) 2.11.1 Finding documentation Django’s got a lot of documentation – almost 450,000 words and counting – so finding what you need can sometimes be tricky. A few good places to start are the search and the genindex. Or you can just browse around! 2.11.2 How the documentation is organized Django’s main documentation is broken up into “chunks” designed to fill different needs: • The introductory material is designed for people new to Django – or to Web development in general. It doesn’t cover anything in depth, but instead gives a high-level overview of how developing in Django “feels”. 2.11. What to read next 67
- 72. Django Documentation, Release 1.9.3.dev20160224120324 • The topic guides, on the other hand, dive deep into individual parts of Django. There are complete guides to Django’s model system, template engine, forms framework, and much more. This is probably where you’ll want to spend most of your time; if you work your way through these guides you should come out knowing pretty much everything there is to know about Django. • Web development is often broad, not deep – problems span many domains. We’ve written a set of how-to guides that answer common “How do I ...?” questions. Here you’ll find information about generating PDFs with Django, writing custom template tags, and more. Answers to really common questions can also be found in the FAQ. • The guides and how-to’s don’t cover every single class, function, and method available in Django – that would be overwhelming when you’re trying to learn. Instead, details about individual classes, functions, methods, and modules are kept in the reference. This is where you’ll turn to find the details of a particular function or whatever you need. • If you are interested in deploying a project for public use, our docs have several guides for various deployment setups as well as a deployment checklist for some things you’ll need to think about. • Finally, there’s some “specialized” documentation not usually relevant to most developers. This includes the release notes and internals documentation for those who want to add code to Django itself, and a few other things that simply don’t fit elsewhere. 2.11.3 How documentation is updated Just as the Django code base is developed and improved on a daily basis, our documentation is consistently improving. We improve documentation for several reasons: • To make content fixes, such as grammar/typo corrections. • To add information and/or examples to existing sections that need to be expanded. • To document Django features that aren’t yet documented. (The list of such features is shrinking but exists nonetheless.) • To add documentation for new features as new features get added, or as Django APIs or behaviors change. Django’s documentation is kept in the same source control system as its code. It lives in the docs directory of our Git repository. Each document online is a separate text file in the repository. 2.11.4 Where to get it You can read Django documentation in several ways. They are, in order of preference: On the Web The most recent version of the Django documentation lives at https://docs.djangoproject.com/en/dev/. These HTML pages are generated automatically from the text files in source control. That means they reflect the “latest and greatest” in Django – they include the very latest corrections and additions, and they discuss the latest Django features, which may only be available to users of the Django development version. (See “Differences between versions” below.) We encourage you to help improve the docs by submitting changes, corrections and suggestions in the ticket system. The Django developers actively monitor the ticket system and use your feedback to improve the documentation for everybody. 68 Chapter 2. Getting started
- 73. Django Documentation, Release 1.9.3.dev20160224120324 Note, however, that tickets should explicitly relate to the documentation, rather than asking broad tech-support ques- tions. If you need help with your particular Django setup, try the django-users mailing list or the #django IRC channel instead. In plain text For offline reading, or just for convenience, you can read the Django documentation in plain text. If you’re using an official release of Django, note that the zipped package (tarball) of the code includes a docs/ directory, which contains all the documentation for that release. If you’re using the development version of Django (aka “trunk”), note that the docs/ directory contains all of the documentation. You can update your Git checkout to get the latest changes. One low-tech way of taking advantage of the text documentation is by using the Unix grep utility to search for a phrase in all of the documentation. For example, this will show you each mention of the phrase “max_length” in any Django document: $ grep -r max_length /path/to/django/docs/ As HTML, locally You can get a local copy of the HTML documentation following a few easy steps: • Django’s documentation uses a system called Sphinx to convert from plain text to HTML. You’ll need to install Sphinx by either downloading and installing the package from the Sphinx website, or with pip: $ pip install Sphinx • Then, just use the included Makefile to turn the documentation into HTML: $ cd path/to/django/docs $ make html You’ll need GNU Make installed for this. If you’re on Windows you can alternatively use the included batch file: cd pathtodjangodocs make.bat html • The HTML documentation will be placed in docs/_build/html. Note: Generation of the Django documentation will work with Sphinx version 0.6 or newer, but we recommend going straight to Sphinx 1.0.2 or newer. 2.11.5 Differences between versions As previously mentioned, the text documentation in our Git repository contains the “latest and greatest” changes and additions. These changes often include documentation of new features added in the Django development version – the Git (“trunk”) version of Django. For that reason, it’s worth pointing out our policy on keeping straight the documentation for various versions of the framework. We follow this policy: 2.11. What to read next 69
- 74. Django Documentation, Release 1.9.3.dev20160224120324 • The primary documentation on djangoproject.com is an HTML version of the latest docs in Git. These docs always correspond to the latest official Django release, plus whatever features we’ve added/changed in the framework since the latest release. • As we add features to Django’s development version, we try to update the documentation in the same Git commit transaction. • To distinguish feature changes/additions in the docs, we use the phrase: “New in version X.Y”, being X.Y the next release version (hence, the one being developed). • Documentation fixes and improvements may be backported to the last release branch, at the discretion of the committer, however, once a version of Django is no longer supported, that version of the docs won’t get any further updates. • The main documentation Web page includes links to documentation for all previous versions. Be sure you are using the version of the docs corresponding to the version of Django you are using! 2.12 Writing your first patch for Django 2.12.1 Introduction Interested in giving back to the community a little? Maybe you’ve found a bug in Django that you’d like to see fixed, or maybe there’s a small feature you want added. Contributing back to Django itself is the best way to see your own concerns addressed. This may seem daunting at first, but it’s really pretty simple. We’ll walk you through the entire process, so you can learn by example. Who’s this tutorial for? See also: If you are looking for a reference on how to submit patches, see the Submitting patches documentation. For this tutorial, we expect that you have at least a basic understanding of how Django works. This means you should be comfortable going through the existing tutorials on writing your first Django app. In addition, you should have a good understanding of Python itself. But if you don’t, Dive Into Python is a fantastic (and free) online book for beginning Python programmers. Those of you who are unfamiliar with version control systems and Trac will find that this tutorial and its links include just enough information to get started. However, you’ll probably want to read some more about these different tools if you plan on contributing to Django regularly. For the most part though, this tutorial tries to explain as much as possible, so that it can be of use to the widest audience. Where to get help: If you’re having trouble going through this tutorial, please post a message to django-developers or drop by #django-dev on irc.freenode.net to chat with other Django users who might be able to help. What does this tutorial cover? We’ll be walking you through contributing a patch to Django for the first time. By the end of this tutorial, you should have a basic understanding of both the tools and the processes involved. Specifically, we’ll be covering the following: 70 Chapter 2. Getting started
- 75. Django Documentation, Release 1.9.3.dev20160224120324 • Installing Git. • How to download a development copy of Django. • Running Django’s test suite. • Writing a test for your patch. • Writing the code for your patch. • Testing your patch. • Generating a patch file for your changes. • Where to look for more information. Once you’re done with the tutorial, you can look through the rest of Django’s documentation on contributing. It contains lots of great information and is a must read for anyone who’d like to become a regular contributor to Django. If you’ve got questions, it’s probably got the answers. Python 3 required! This tutorial assumes you are using Python 3. Get the latest version at Python’s download page or with your operating system’s package manager. For Windows users When installing Python on Windows, make sure you check the option “Add python.exe to Path”, so that it is always available on the command line. 2.12.2 Code of Conduct As a contributor, you can help us keep the Django community open and inclusive. Please read and follow our Code of Conduct. 2.12.3 Installing Git For this tutorial, you’ll need Git installed to download the current development version of Django and to generate patch files for the changes you make. To check whether or not you have Git installed, enter git into the command line. If you get messages saying that this command could not be found, you’ll have to download and install it, see Git’s download page. For Windows users When installing Git on Windows, it is recommended that you pick the “Git Bash” option so that Git runs in its own shell. This tutorial assumes that’s how you have installed it. If you’re not that familiar with Git, you can always find out more about its commands (once it’s installed) by typing git help into the command line. 2.12. Writing your first patch for Django 71
- 76. Django Documentation, Release 1.9.3.dev20160224120324 2.12.4 Getting a copy of Django’s development version The first step to contributing to Django is to get a copy of the source code. From the command line, use the cd command to navigate to the directory where you’ll want your local copy of Django to live. Download the Django source code repository using the following command: $ git clone https://github.com/django/django.git Now that you have a local copy of Django, you can install it just like you would install any package using pip. The most convenient way to do so is by using a virtual environment (or virtualenv) which is a feature built into Python that allows you to keep a separate directory of installed packages for each of your projects so that they don’t interfere with each other. It’s a good idea to keep all your virtualenvs in one place, for example in .virtualenvs/ in your home directory. Create it if it doesn’t exist yet: $ mkdir ~/.virtualenvs Now create a new virtualenv by running: $ python3 -m venv ~/.virtualenvs/djangodev The path is where the new environment will be saved on your computer. For Windows users Using the built-in venv module will not work if you are also using the Git Bash shell on Windows, since activation scripts are only created for the system shell (.bat) and PowerShell (.ps1). Use the virtualenv package instead: $ pip install virtualenv $ virtualenv ~/.virtualenvs/djangodev For Ubuntu users On some versions of Ubuntu the above command might fail. Use the virtualenv package instead, first making sure you have pip3: $ sudo apt-get install python3-pip $ # Prefix the next command with sudo if it gives a permission denied error $ pip3 install virtualenv $ virtualenv --python=`which python3` ~/.virtualenvs/djangodev The final step in setting up your virtualenv is to activate it: $ source ~/.virtualenvs/djangodev/bin/activate If the source command is not available, you can try using a dot instead: $ . ~/.virtualenvs/djangodev/bin/activate For Windows users To activate your virtualenv on Windows, run: 72 Chapter 2. Getting started
- 77. Django Documentation, Release 1.9.3.dev20160224120324 $ source ~/virtualenvs/djangodev/Scripts/activate You have to activate the virtualenv whenever you open a new terminal window. virtualenvwrapper is a useful tool for making this more convenient. Anything you install through pip from now on will be installed in your new virtualenv, isolated from other environ- ments and system-wide packages. Also, the name of the currently activated virtualenv is displayed on the command line to help you keep track of which one you are using. Go ahead and install the previously cloned copy of Django: $ pip install -e /path/to/your/local/clone/django/ The installed version of Django is now pointing at your local copy. You will immediately see any changes you make to it, which is of great help when writing your first patch. 2.12.5 Rolling back to a previous revision of Django For this tutorial, we’ll be using ticket #24788 as a case study, so we’ll rewind Django’s version history in git to before that ticket’s patch was applied. This will allow us to go through all of the steps involved in writing that patch from scratch, including running Django’s test suite. Keep in mind that while we’ll be using an older revision of Django’s trunk for the purposes of the tutorial below, you should always use the current development revision of Django when working on your own patch for a ticket! Note: The patch for this ticket was written by Paweł Marczewski, and it was applied to Django as commit 4df7e8483b2679fc1cba3410f08960bac6f51115. Consequently, we’ll be using the revision of Django just prior to that, commit 4ccfc4439a7add24f8db4ef3960d02ef8ae09887. Navigate into Django’s root directory (that’s the one that contains django, docs, tests, AUTHORS, etc.). You can then check out the older revision of Django that we’ll be using in the tutorial below: $ git checkout 4ccfc4439a7add24f8db4ef3960d02ef8ae09887 2.12.6 Running Django’s test suite for the first time When contributing to Django it’s very important that your code changes don’t introduce bugs into other areas of Django. One way to check that Django still works after you make your changes is by running Django’s test suite. If all the tests still pass, then you can be reasonably sure that your changes haven’t completely broken Django. If you’ve never run Django’s test suite before, it’s a good idea to run it once beforehand just to get familiar with what its output is supposed to look like. Before running the test suite, install its dependencies by first cd-ing into the Django tests/ directory and then running: $ pip install -r requirements/py3.txt Now we are ready to run the test suite. If you’re using GNU/Linux, Mac OS X or some other flavor of Unix, run: $ ./runtests.py Now sit back and relax. Django’s entire test suite has over 9,600 different tests, so it can take anywhere from 5 to 15 minutes to run, depending on the speed of your computer. 2.12. Writing your first patch for Django 73
- 78. Django Documentation, Release 1.9.3.dev20160224120324 While Django’s test suite is running, you’ll see a stream of characters representing the status of each test as it’s run. E indicates that an error was raised during a test, and F indicates that a test’s assertions failed. Both of these are considered to be test failures. Meanwhile, x and s indicated expected failures and skipped tests, respectively. Dots indicate passing tests. Skipped tests are typically due to missing external libraries required to run the test; see Running all the tests for a list of dependencies and be sure to install any for tests related to the changes you are making (we won’t need any for this tutorial). Once the tests complete, you should be greeted with a message informing you whether the test suite passed or failed. Since you haven’t yet made any changes to Django’s code, the entire test suite should pass. If you get failures or errors make sure you’ve followed all of the previous steps properly. See Running the unit tests for more information. Note that the latest Django trunk may not always be stable. When developing against trunk, you can check Django’s continuous integration builds to determine if the failures are specific to your machine or if they are also present in Django’s official builds. If you click to view a particular build, you can view the “Configuration Matrix” which shows failures broken down by Python version and database backend. Note: For this tutorial and the ticket we’re working on, testing against SQLite is sufficient, however, it’s possible (and sometimes necessary) to run the tests using a different database. 2.12.7 Writing some tests for your ticket In most cases, for a patch to be accepted into Django it has to include tests. For bug fix patches, this means writing a regression test to ensure that the bug is never reintroduced into Django later on. A regression test should be written in such a way that it will fail while the bug still exists and pass once the bug has been fixed. For patches containing new features, you’ll need to include tests which ensure that the new features are working correctly. They too should fail when the new feature is not present, and then pass once it has been implemented. A good way to do this is to write your new tests first, before making any changes to the code. This style of development is called test-driven development and can be applied to both entire projects and single patches. After writing your tests, you then run them to make sure that they do indeed fail (since you haven’t fixed that bug or added that feature yet). If your new tests don’t fail, you’ll need to fix them so that they do. After all, a regression test that passes regardless of whether a bug is present is not very helpful at preventing that bug from reoccurring down the road. Now for our hands-on example. Writing some tests for ticket #24788 Ticket #24788 proposes a small feature addition: the ability to specify the class level attribute prefix on Form classes, so that: [...] forms which ship with apps could effectively namespace themselves such that N overlapping form fields could be POSTed at once and resolved to the correct form. In order to resolve this ticket, we’ll add a prefix attribute to the BaseForm class. When creating instances of this class, passing a prefix to the __init__() method will still set that prefix on the created instance. But not passing a prefix (or passing None) will use the class-level prefix. Before we make those changes though, we’re going to write a couple tests to verify that our modification functions correctly and continues to function correctly in the future. Navigate to Django’s tests/forms_tests/tests/ folder and open the test_forms.py file. Add the fol- lowing code on line 1674 right before the test_forms_with_null_boolean function: 74 Chapter 2. Getting started
- 79. Django Documentation, Release 1.9.3.dev20160224120324 def test_class_prefix(self): # Prefix can be also specified at the class level. class Person(Form): first_name = CharField() prefix = 'foo' p = Person() self.assertEqual(p.prefix, 'foo') p = Person(prefix='bar') self.assertEqual(p.prefix, 'bar') This new test checks that setting a class level prefix works as expected, and that passing a prefix parameter when creating an instance still works too. But this testing thing looks kinda hard... If you’ve never had to deal with tests before, they can look a little hard to write at first glance. Fortunately, testing is a very big subject in computer programming, so there’s lots of information out there: • A good first look at writing tests for Django can be found in the documentation on Writing and running tests. • Dive Into Python (a free online book for beginning Python developers) includes a great introduction to Unit Testing. • After reading those, if you want something a little meatier to sink your teeth into, there’s always the Python unittest documentation. Running your new test Remember that we haven’t actually made any modifications to BaseForm yet, so our tests are going to fail. Let’s run all the tests in the forms_tests folder to make sure that’s really what happens. From the command line, cd into the Django tests/ directory and run: $ ./runtests.py forms_tests If the tests ran correctly, you should see one failure corresponding to the test method we added. If all of the tests passed, then you’ll want to make sure that you added the new test shown above to the appropriate folder and class. 2.12.8 Writing the code for your ticket Next we’ll be adding the functionality described in ticket #24788 to Django. Writing the code for ticket #24788 Navigate to the django/django/forms/ folder and open the forms.py file. Find the BaseForm class on line 72 and add the prefix class attribute right after the field_order attribute: class BaseForm(object): # This is the main implementation of all the Form logic. Note that this # class is different than Form. See the comments by the Form class for # more information. Any improvements to the form API should be made to # *this* class, not to the Form class. 2.12. Writing your first patch for Django 75
- 80. Django Documentation, Release 1.9.3.dev20160224120324 field_order = None prefix = None Verifying your test now passes Once you’re done modifying Django, we need to make sure that the tests we wrote earlier pass, so we can see whether the code we wrote above is working correctly. To run the tests in the forms_tests folder, cd into the Django tests/ directory and run: $ ./runtests.py forms_tests Oops, good thing we wrote those tests! You should still see one failure with the following exception: AssertionError: None != 'foo' We forgot to add the conditional statement in the __init__ method. Go ahead and change self.prefix = prefix that is now on line 87 of django/forms/forms.py, adding a conditional statement: if prefix is not None: self.prefix = prefix Re-run the tests and everything should pass. If it doesn’t, make sure you correctly modified the BaseForm class as shown above and copied the new test correctly. 2.12.9 Running Django’s test suite for the second time Once you’ve verified that your patch and your test are working correctly, it’s a good idea to run the entire Django test suite just to verify that your change hasn’t introduced any bugs into other areas of Django. While successfully passing the entire test suite doesn’t guarantee your code is bug free, it does help identify many bugs and regressions that might otherwise go unnoticed. To run the entire Django test suite, cd into the Django tests/ directory and run: $ ./runtests.py As long as you don’t see any failures, you’re good to go. 2.12.10 Writing Documentation This is a new feature, so it should be documented. Add the following section on line 1068 (at the end of the file) of django/docs/ref/forms/api.txt: The prefix can also be specified on the form class:: >>> class PersonForm(forms.Form): ... ... ... prefix = 'person' .. versionadded:: 1.9 The ability to specify ``prefix`` on the form class was added. Since this new feature will be in an upcoming release it is also added to the release notes for Django 1.9, on line 164 under the “Forms” section in the file docs/releases/1.9.txt: 76 Chapter 2. Getting started
- 81. Django Documentation, Release 1.9.3.dev20160224120324 * A form prefix can be specified inside a form class, not only when instantiating a form. See :ref:`form-prefix` for details. For more information on writing documentation, including an explanation of what the versionadded bit is all about, see Writing documentation. That page also includes an explanation of how to build a copy of the documentation locally, so you can preview the HTML that will be generated. 2.12.11 Generating a patch for your changes Now it’s time to generate a patch file that can be uploaded to Trac or applied to another copy of Django. To get a look at the content of your patch, run the following command: $ git diff This will display the differences between your current copy of Django (with your changes) and the revision that you initially checked out earlier in the tutorial. Once you’re done looking at the patch, hit the q key to exit back to the command line. If the patch’s content looked okay, you can run the following command to save the patch file to your current working directory: $ git diff > 24788.diff You should now have a file in the root Django directory called 24788.diff. This patch file contains all your changes and should look this: diff --git a/django/forms/forms.py b/django/forms/forms.py index 509709f..d1370de 100644 --- a/django/forms/forms.py +++ b/django/forms/forms.py @@ -75,6 +75,7 @@ class BaseForm(object): # information. Any improvements to the form API should be made to *this* # class, not to the Form class. field_order = None + prefix = None def __init__(self, data=None, files=None, auto_id='id_%s', prefix=None, initial=None, error_class=ErrorList, label_suffix=None, @@ -83,7 +84,8 @@ class BaseForm(object): self.data = data or {} self.files = files or {} self.auto_id = auto_id - self.prefix = prefix + if prefix is not None: + self.prefix = prefix self.initial = initial or {} self.error_class = error_class # Translators: This is the default suffix added to form field labels diff --git a/docs/ref/forms/api.txt b/docs/ref/forms/api.txt index 3bc39cd..008170d 100644 --- a/docs/ref/forms/api.txt +++ b/docs/ref/forms/api.txt @@ -1065,3 +1065,13 @@ You can put several Django forms inside one ``<form>`` tag. To give each >>> print(father.as_ul()) <li><label for="id_father-first_name">First name:</label> <input type="text" name="father-first_ <li><label for="id_father-last_name">Last name:</label> <input type="text" name="father-last_nam + +The prefix can also be specified on the form class:: + 2.12. Writing your first patch for Django 77
- 82. Django Documentation, Release 1.9.3.dev20160224120324 + >>> class PersonForm(forms.Form): + ... ... + ... prefix = 'person' + +.. versionadded:: 1.9 + + The ability to specify ``prefix`` on the form class was added. diff --git a/docs/releases/1.9.txt b/docs/releases/1.9.txt index 5b58f79..f9bb9de 100644 --- a/docs/releases/1.9.txt +++ b/docs/releases/1.9.txt @@ -161,6 +161,9 @@ Forms :attr:`~django.forms.Form.field_order` attribute, the ``field_order`` constructor argument , or the :meth:`~django.forms.Form.order_fields` method. +* A form prefix can be specified inside a form class, not only when + instantiating a form. See :ref:`form-prefix` for details. + Generic Views ^^^^^^^^^^^^^ diff --git a/tests/forms_tests/tests/test_forms.py b/tests/forms_tests/tests/test_forms.py index 690f205..e07fae2 100644 --- a/tests/forms_tests/tests/test_forms.py +++ b/tests/forms_tests/tests/test_forms.py @@ -1671,6 +1671,18 @@ class FormsTestCase(SimpleTestCase): self.assertEqual(p.cleaned_data['last_name'], 'Lennon') self.assertEqual(p.cleaned_data['birthday'], datetime.date(1940, 10, 9)) + def test_class_prefix(self): + # Prefix can be also specified at the class level. + class Person(Form): + first_name = CharField() + prefix = 'foo' + + p = Person() + self.assertEqual(p.prefix, 'foo') + + p = Person(prefix='bar') + self.assertEqual(p.prefix, 'bar') + def test_forms_with_null_boolean(self): # NullBooleanField is a bit of a special case because its presentation (widget) # is different than its data. This is handled transparently, though. 2.12.12 So what do I do next? Congratulations, you’ve generated your very first Django patch! Now that you’ve got that under your belt, you can put those skills to good use by helping to improve Django’s codebase. Generating patches and attaching them to Trac tickets is useful, however, since we are using git - adopting a more git oriented workflow is recommended. Since we never committed our changes locally, perform the following to get your git branch back to a good starting point: $ git reset --hard HEAD $ git checkout master 78 Chapter 2. Getting started
- 83. Django Documentation, Release 1.9.3.dev20160224120324 More information for new contributors Before you get too into writing patches for Django, there’s a little more information on contributing that you should probably take a look at: • You should make sure to read Django’s documentation on claiming tickets and submitting patches. It covers Trac etiquette, how to claim tickets for yourself, expected coding style for patches, and many other important details. • First time contributors should also read Django’s documentation for first time contributors. It has lots of good advice for those of us who are new to helping out with Django. • After those, if you’re still hungry for more information about contributing, you can always browse through the rest of Django’s documentation on contributing. It contains a ton of useful information and should be your first source for answering any questions you might have. Finding your first real ticket Once you’ve looked through some of that information, you’ll be ready to go out and find a ticket of your own to write a patch for. Pay special attention to tickets with the “easy pickings” criterion. These tickets are often much simpler in nature and are great for first time contributors. Once you’re familiar with contributing to Django, you can move on to writing patches for more difficult and complicated tickets. If you just want to get started already (and nobody would blame you!), try taking a look at the list of easy tickets that need patches and the easy tickets that have patches which need improvement. If you’re familiar with writing tests, you can also look at the list of easy tickets that need tests. Just remember to follow the guidelines about claiming tickets that were mentioned in the link to Django’s documentation on claiming tickets and submitting patches. What’s next? After a ticket has a patch, it needs to be reviewed by a second set of eyes. After uploading a patch or submitting a pull request, be sure to update the ticket metadata by setting the flags on the ticket to say “has patch”, “doesn’t need tests”, etc, so others can find it for review. Contributing doesn’t necessarily always mean writing a patch from scratch. Reviewing existing patches is also a very helpful contribution. See Triaging tickets for details. See also: If you’re new to Python, you might want to start by getting an idea of what the language is like. Django is 100% Python, so if you’ve got minimal comfort with Python you’ll probably get a lot more out of Django. If you’re new to programming entirely, you might want to start with this list of Python resources for non-programmers If you already know a few other languages and want to get up to speed with Python quickly, we recommend Dive Into Python. If that’s not quite your style, there are many other books about Python. 2.12. Writing your first patch for Django 79
- 84. Django Documentation, Release 1.9.3.dev20160224120324 80 Chapter 2. Getting started
- 85. CHAPTER 3 Using Django Introductions to all the key parts of Django you’ll need to know: 3.1 How to install Django This document will get you up and running with Django. 3.1.1 Install Python Being a Python Web framework, Django requires Python. See What Python version can I use with Django? for details. Get the latest version of Python at https://www.python.org/download/ or with your operating system’s package man- ager. Django on Jython If you use Jython (a Python implementation for the Java platform), you’ll need to follow a few additional steps. See Running Django on Jython for details. Python on Windows If you are just starting with Django and using Windows, you may find How to install Django on Windows useful. 3.1.2 Install Apache and mod_wsgi If you just want to experiment with Django, skip ahead to the next section; Django includes a lightweight web server you can use for testing, so you won’t need to set up Apache until you’re ready to deploy Django in production. If you want to use Django on a production site, use Apache with mod_wsgi. mod_wsgi can operate in one of two modes: an embedded mode and a daemon mode. In embedded mode, mod_wsgi is similar to mod_perl – it embeds Python within Apache and loads Python code into memory when the server starts. Code stays in memory throughout the life of an Apache process, which leads to significant performance gains over other server arrangements. In daemon mode, mod_wsgi spawns an independent daemon process that handles requests. The daemon process can run as a different user than the Web server, possibly leading to improved security, and the daemon process can be restarted without restarting the entire Apache Web server, possibly making refreshing your codebase more seamless. Consult 81
- 86. Django Documentation, Release 1.9.3.dev20160224120324 the mod_wsgi documentation to determine which mode is right for your setup. Make sure you have Apache installed, with the mod_wsgi module activated. Django will work with any version of Apache that supports mod_wsgi. See How to use Django with mod_wsgi for information on how to configure mod_wsgi once you have it installed. If you can’t use mod_wsgi for some reason, fear not: Django supports many other deployment options. One is uWSGI; it works very well with nginx. Additionally, Django follows the WSGI spec (PEP 3333), which allows it to run on a variety of server platforms. 3.1.3 Get your database running If you plan to use Django’s database API functionality, you’ll need to make sure a database server is running. Django supports many different database servers and is officially supported with PostgreSQL, MySQL, Oracle and SQLite. If you are developing a simple project or something you don’t plan to deploy in a production environment, SQLite is generally the simplest option as it doesn’t require running a separate server. However, SQLite has many differences from other databases, so if you are working on something substantial, it’s recommended to develop with the same database as you plan on using in production. In addition to the officially supported databases, there are backends provided by 3rd parties that allow you to use other databases with Django. In addition to a database backend, you’ll need to make sure your Python database bindings are installed. • If you’re using PostgreSQL, you’ll need the psycopg2 package. Refer to the PostgreSQL notes for further details. • If you’re using MySQL, you’ll need a DB API driver like mysqlclient. See notes for the MySQL backend for details. • If you’re using SQLite you might want to read the SQLite backend notes. • If you’re using Oracle, you’ll need a copy of cx_Oracle, but please read the notes for the Oracle backend for details regarding supported versions of both Oracle and cx_Oracle. • If you’re using an unofficial 3rd party backend, please consult the documentation provided for any additional requirements. If you plan to use Django’s manage.py migrate command to automatically create database tables for your models (after first installing Django and creating a project), you’ll need to ensure that Django has permission to create and alter tables in the database you’re using; if you plan to manually create the tables, you can simply grant Django SELECT, INSERT, UPDATE and DELETE permissions. After creating a database user with these permissions, you’ll specify the details in your project’s settings file, see DATABASES for details. If you’re using Django’s testing framework to test database queries, Django will need permission to create a test database. 3.1.4 Remove any old versions of Django If you are upgrading your installation of Django from a previous version, you will need to uninstall the old Django version before installing the new version. If you installed Django using pip or easy_install previously, installing with pip or easy_install again will automatically take care of the old version, so you don’t need to do it yourself. If you previously installed Django using python setup.py install, uninstalling is as simple as deleting the django directory from your Python site-packages. To find the directory you need to remove, you can run the following at your shell prompt (not the interactive Python prompt): 82 Chapter 3. Using Django
- 87. Django Documentation, Release 1.9.3.dev20160224120324 $ python -c "import django; print(django.__path__)" 3.1.5 Install the Django code Installation instructions are slightly different depending on whether you’re installing a distribution-specific package, downloading the latest official release, or fetching the latest development version. It’s easy, no matter which way you choose. Installing an official release with pip This is the recommended way to install Django. 1. Install pip. The easiest is to use the standalone pip installer. If your distribution already has pip installed, you might need to update it if it’s outdated. If it’s outdated, you’ll know because installation won’t work. 2. Take a look at virtualenv and virtualenvwrapper. These tools provide isolated Python environments, which are more practical than installing packages systemwide. They also allow installing packages without administrator privileges. The contributing tutorial walks through how to create a virtualenv on Python 3. 3. After you’ve created and activated a virtual environment, enter the command pip install Django at the shell prompt. Installing a distribution-specific package Check the distribution specific notes to see if your platform/distribution provides official Django packages/installers. Distribution-provided packages will typically allow for automatic installation of dependencies and easy upgrade paths; however, these packages will rarely contain the latest release of Django. Installing the development version Tracking Django development If you decide to use the latest development version of Django, you’ll want to pay close attention to the development timeline, and you’ll want to keep an eye on the release notes for the upcoming release. This will help you stay on top of any new features you might want to use, as well as any changes you’ll need to make to your code when updating your copy of Django. (For stable releases, any necessary changes are documented in the release notes.) If you’d like to be able to update your Django code occasionally with the latest bug fixes and improvements, follow these instructions: 1. Make sure that you have Git installed and that you can run its commands from a shell. (Enter git help at a shell prompt to test this.) 2. Check out Django’s main development branch like so: $ git clone git://github.com/django/django.git This will create a directory django in your current directory. 3. Make sure that the Python interpreter can load Django’s code. The most convenient way to do this is to use virtualenv, virtualenvwrapper, and pip. The contributing tutorial walks through how to create a virtualenv on Python 3. 3.1. How to install Django 83
- 88. Django Documentation, Release 1.9.3.dev20160224120324 4. After setting up and activating the virtualenv, run the following command: $ pip install -e django/ This will make Django’s code importable, and will also make the django-admin utility command available. In other words, you’re all set! When you want to update your copy of the Django source code, just run the command git pull from within the django directory. When you do this, Git will automatically download any changes. 3.2 Models and databases A model is the single, definitive source of data about your data. It contains the essential fields and behaviors of the data you’re storing. Generally, each model maps to a single database table. 3.2.1 Models A model is the single, definitive source of information about your data. It contains the essential fields and behaviors of the data you’re storing. Generally, each model maps to a single database table. The basics: • Each model is a Python class that subclasses django.db.models.Model. • Each attribute of the model represents a database field. • With all of this, Django gives you an automatically-generated database-access API; see Making queries. Quick example This example model defines a Person, which has a first_name and last_name: from django.db import models class Person(models.Model): first_name = models.CharField(max_length=30) last_name = models.CharField(max_length=30) first_name and last_name are fields of the model. Each field is specified as a class attribute, and each attribute maps to a database column. The above Person model would create a database table like this: CREATE TABLE myapp_person ( "id" serial NOT NULL PRIMARY KEY, "first_name" varchar(30) NOT NULL, "last_name" varchar(30) NOT NULL ); Some technical notes: • The name of the table, myapp_person, is automatically derived from some model metadata but can be over- ridden. See Table names for more details. • An id field is added automatically, but this behavior can be overridden. See Automatic primary key fields. • The CREATE TABLE SQL in this example is formatted using PostgreSQL syntax, but it’s worth noting Django uses SQL tailored to the database backend specified in your settings file. 84 Chapter 3. Using Django
- 89. Django Documentation, Release 1.9.3.dev20160224120324 Using models Once you have defined your models, you need to tell Django you’re going to use those models. Do this by editing your settings file and changing the INSTALLED_APPS setting to add the name of the module that contains your models.py. For example, if the models for your application live in the module myapp.models (the package structure that is created for an application by the manage.py startapp script), INSTALLED_APPS should read, in part: INSTALLED_APPS = [ #... 'myapp', #... ] When you add new apps to INSTALLED_APPS, be sure to run manage.py migrate, optionally making migra- tions for them first with manage.py makemigrations. Fields The most important part of a model – and the only required part of a model – is the list of database fields it defines. Fields are specified by class attributes. Be careful not to choose field names that conflict with the models API like clean, save, or delete. Example: from django.db import models class Musician(models.Model): first_name = models.CharField(max_length=50) last_name = models.CharField(max_length=50) instrument = models.CharField(max_length=100) class Album(models.Model): artist = models.ForeignKey(Musician, on_delete=models.CASCADE) name = models.CharField(max_length=100) release_date = models.DateField() num_stars = models.IntegerField() Field types Each field in your model should be an instance of the appropriate Field class. Django uses the field class types to determine a few things: • The column type, which tells the database what kind of data to store (e.g. INTEGER, VARCHAR, TEXT). • The default HTML widget to use when rendering a form field (e.g. <input type="text">, <select>). • The minimal validation requirements, used in Django’s admin and in automatically-generated forms. Django ships with dozens of built-in field types; you can find the complete list in the model field reference. You can easily write your own fields if Django’s built-in ones don’t do the trick; see Writing custom model fields. Field options Each field takes a certain set of field-specific arguments (documented in the model field reference). For example, CharField (and its subclasses) require a max_length argument which specifies the size of the VARCHAR database 3.2. Models and databases 85
- 90. Django Documentation, Release 1.9.3.dev20160224120324 field used to store the data. There’s also a set of common arguments available to all field types. All are optional. They’re fully explained in the reference, but here’s a quick summary of the most often-used ones: null If True, Django will store empty values as NULL in the database. Default is False. blank If True, the field is allowed to be blank. Default is False. Note that this is different than null. null is purely database-related, whereas blank is validation-related. If a field has blank=True, form validation will allow entry of an empty value. If a field has blank=False, the field will be required. choices An iterable (e.g., a list or tuple) of 2-tuples to use as choices for this field. If this is given, the default form widget will be a select box instead of the standard text field and will limit choices to the choices given. A choices list looks like this: YEAR_IN_SCHOOL_CHOICES = ( ('FR', 'Freshman'), ('SO', 'Sophomore'), ('JR', 'Junior'), ('SR', 'Senior'), ('GR', 'Graduate'), ) The first element in each tuple is the value that will be stored in the database, the second element will be displayed by the default form widget or in a ModelChoiceField. Given an instance of a model object, the display value for a choices field can be accessed using the get_FOO_display method. For example: from django.db import models class Person(models.Model): SHIRT_SIZES = ( ('S', 'Small'), ('M', 'Medium'), ('L', 'Large'), ) name = models.CharField(max_length=60) shirt_size = models.CharField(max_length=1, choices=SHIRT_SIZES) >>> p = Person(name="Fred Flintstone", shirt_size="L") >>> p.save() >>> p.shirt_size 'L' >>> p.get_shirt_size_display() 'Large' default The default value for the field. This can be a value or a callable object. If callable it will be called every time a new object is created. help_text Extra “help” text to be displayed with the form widget. It’s useful for documentation even if your field isn’t used on a form. primary_key If True, this field is the primary key for the model. If you don’t specify primary_key=True for any fields in your model, Django will automatically add an IntegerField to hold the primary key, so you don’t need to set primary_key=True on any of your fields unless you want to override the default primary-key behavior. For more, see Automatic primary key fields. The primary key field is read-only. If you change the value of the primary key on an existing object and then save it, a new object will be created alongside the old one. For example: 86 Chapter 3. Using Django
- 91. Django Documentation, Release 1.9.3.dev20160224120324 from django.db import models class Fruit(models.Model): name = models.CharField(max_length=100, primary_key=True) >>> fruit = Fruit.objects.create(name='Apple') >>> fruit.name = 'Pear' >>> fruit.save() >>> Fruit.objects.values_list('name', flat=True) ['Apple', 'Pear'] unique If True, this field must be unique throughout the table. Again, these are just short descriptions of the most common field options. Full details can be found in the common model field option reference. Automatic primary key fields By default, Django gives each model the following field: id = models.AutoField(primary_key=True) This is an auto-incrementing primary key. If you’d like to specify a custom primary key, just specify primary_key=True on one of your fields. If Django sees you’ve explicitly set Field.primary_key, it won’t add the automatic id column. Each model requires exactly one field to have primary_key=True (either explicitly declared or automatically added). Verbose field names Each field type, except for ForeignKey, ManyToManyField and OneToOneField, takes an optional first positional argument – a verbose name. If the verbose name isn’t given, Django will automatically create it using the field’s attribute name, converting underscores to spaces. In this example, the verbose name is "person’s first name": first_name = models.CharField("person's first name", max_length=30) In this example, the verbose name is "first name": first_name = models.CharField(max_length=30) ForeignKey, ManyToManyField and OneToOneField require the first argument to be a model class, so use the verbose_name keyword argument: poll = models.ForeignKey( Poll, on_delete=models.CASCADE, verbose_name="the related poll", ) sites = models.ManyToManyField(Site, verbose_name="list of sites") place = models.OneToOneField( Place, on_delete=models.CASCADE, verbose_name="related place", ) 3.2. Models and databases 87
- 92. Django Documentation, Release 1.9.3.dev20160224120324 The convention is not to capitalize the first letter of the verbose_name. Django will automatically capitalize the first letter where it needs to. Relationships Clearly, the power of relational databases lies in relating tables to each other. Django offers ways to define the three most common types of database relationships: many-to-one, many-to-many and one-to-one. Many-to-one relationships To define a many-to-one relationship, use django.db.models.ForeignKey. You use it just like any other Field type: by including it as a class attribute of your model. ForeignKey requires a positional argument: the class to which the model is related. For example, if a Car model has a Manufacturer – that is, a Manufacturer makes multiple cars but each Car only has one Manufacturer – use the following definitions: from django.db import models class Manufacturer(models.Model): # ... pass class Car(models.Model): manufacturer = models.ForeignKey(Manufacturer, on_delete=models.CASCADE) # ... You can also create recursive relationships (an object with a many-to-one relationship to itself) and relationships to models not yet defined; see the model field reference for details. It’s suggested, but not required, that the name of a ForeignKey field (manufacturer in the example above) be the name of the model, lowercase. You can, of course, call the field whatever you want. For example: class Car(models.Model): company_that_makes_it = models.ForeignKey( Manufacturer, on_delete=models.CASCADE, ) # ... See also: ForeignKey fields accept a number of extra arguments which are explained in the model field reference. These options help define how the relationship should work; all are optional. For details on accessing backwards-related objects, see the Following relationships backward example. For sample code, see the Many-to-one relationship model example. Many-to-many relationships To define a many-to-many relationship, use ManyToManyField. You use it just like any other Field type: by including it as a class attribute of your model. ManyToManyField requires a positional argument: the class to which the model is related. For example, if a Pizza has multiple Topping objects – that is, a Topping can be on multiple pizzas and each Pizza has multiple toppings – here’s how you’d represent that: 88 Chapter 3. Using Django
- 93. Django Documentation, Release 1.9.3.dev20160224120324 from django.db import models class Topping(models.Model): # ... pass class Pizza(models.Model): # ... toppings = models.ManyToManyField(Topping) As with ForeignKey, you can also create recursive relationships (an object with a many-to-many relationship to itself) and relationships to models not yet defined. It’s suggested, but not required, that the name of a ManyToManyField (toppings in the example above) be a plural describing the set of related model objects. It doesn’t matter which model has the ManyToManyField, but you should only put it in one of the models – not both. Generally, ManyToManyField instances should go in the object that’s going to be edited on a form. In the above example, toppings is in Pizza (rather than Topping having a pizzas ManyToManyField ) because it’s more natural to think about a pizza having toppings than a topping being on multiple pizzas. The way it’s set up above, the Pizza form would let users select the toppings. See also: See the Many-to-many relationship model example for a full example. ManyToManyField fields also accept a number of extra arguments which are explained in the model field reference. These options help define how the relationship should work; all are optional. Extra fields on many-to-many relationships When you’re only dealing with simple many-to-many relationships such as mixing and matching pizzas and toppings, a standard ManyToManyField is all you need. However, some- times you may need to associate data with the relationship between two models. For example, consider the case of an application tracking the musical groups which musicians belong to. There is a many-to-many relationship between a person and the groups of which they are a member, so you could use a ManyToManyField to represent this relationship. However, there is a lot of detail about the membership that you might want to collect, such as the date at which the person joined the group. For these situations, Django allows you to specify the model that will be used to govern the many-to-many rela- tionship. You can then put extra fields on the intermediate model. The intermediate model is associated with the ManyToManyField using the through argument to point to the model that will act as an intermediary. For our musician example, the code would look something like this: from django.db import models class Person(models.Model): name = models.CharField(max_length=128) def __str__(self): # __unicode__ on Python 2 return self.name class Group(models.Model): name = models.CharField(max_length=128) members = models.ManyToManyField(Person, through='Membership') def __str__(self): # __unicode__ on Python 2 return self.name 3.2. Models and databases 89
- 94. Django Documentation, Release 1.9.3.dev20160224120324 class Membership(models.Model): person = models.ForeignKey(Person, on_delete=models.CASCADE) group = models.ForeignKey(Group, on_delete=models.CASCADE) date_joined = models.DateField() invite_reason = models.CharField(max_length=64) When you set up the intermediary model, you explicitly specify foreign keys to the models that are involved in the many-to-many relationship. This explicit declaration defines how the two models are related. There are a few restrictions on the intermediate model: • Your intermediate model must contain one - and only one - foreign key to the source model (this would be Group in our example), or you must explicitly specify the foreign keys Django should use for the re- lationship using ManyToManyField.through_fields. If you have more than one foreign key and through_fields is not specified, a validation error will be raised. A similar restriction applies to the foreign key to the target model (this would be Person in our example). • For a model which has a many-to-many relationship to itself through an intermediary model, two foreign keys to the same model are permitted, but they will be treated as the two (different) sides of the many-to-many relationship. If there are more than two foreign keys though, you must also specify through_fields as above, or a validation error will be raised. • When defining a many-to-many relationship from a model to itself, using an intermediary model, you must use symmetrical=False (see the model field reference). Now that you have set up your ManyToManyField to use your intermediary model (Membership, in this case), you’re ready to start creating some many-to-many relationships. You do this by creating instances of the intermediate model: >>> ringo = Person.objects.create(name="Ringo Starr") >>> paul = Person.objects.create(name="Paul McCartney") >>> beatles = Group.objects.create(name="The Beatles") >>> m1 = Membership(person=ringo, group=beatles, ... date_joined=date(1962, 8, 16), ... invite_reason="Needed a new drummer.") >>> m1.save() >>> beatles.members.all() [<Person: Ringo Starr>] >>> ringo.group_set.all() [<Group: The Beatles>] >>> m2 = Membership.objects.create(person=paul, group=beatles, ... date_joined=date(1960, 8, 1), ... invite_reason="Wanted to form a band.") >>> beatles.members.all() [<Person: Ringo Starr>, <Person: Paul McCartney>] Unlike normal many-to-many fields, you can’t use add, create, or assignment (i.e., beatles.members = [...]) to create relationships: # THIS WILL NOT WORK >>> beatles.members.add(john) # NEITHER WILL THIS >>> beatles.members.create(name="George Harrison") # AND NEITHER WILL THIS >>> beatles.members = [john, paul, ringo, george] Why? You can’t just create a relationship between a Person and a Group - you need to specify all the detail for the relationship required by the Membership model. The simple add, create and assignment calls don’t provide a 90 Chapter 3. Using Django
- 95. Django Documentation, Release 1.9.3.dev20160224120324 way to specify this extra detail. As a result, they are disabled for many-to-many relationships that use an intermediate model. The only way to create this type of relationship is to create instances of the intermediate model. The remove() method is disabled for similar reasons. However, the clear() method can be used to remove all many-to-many relationships for an instance: >>> # Beatles have broken up >>> beatles.members.clear() >>> # Note that this deletes the intermediate model instances >>> Membership.objects.all() [] Once you have established the many-to-many relationships by creating instances of your intermediate model, you can issue queries. Just as with normal many-to-many relationships, you can query using the attributes of the many-to- many-related model: # Find all the groups with a member whose name starts with 'Paul' >>> Group.objects.filter(members__name__startswith='Paul') [<Group: The Beatles>] As you are using an intermediate model, you can also query on its attributes: # Find all the members of the Beatles that joined after 1 Jan 1961 >>> Person.objects.filter( ... group__name='The Beatles', ... membership__date_joined__gt=date(1961,1,1)) [<Person: Ringo Starr] If you need to access a membership’s information you may do so by directly querying the Membership model: >>> ringos_membership = Membership.objects.get(group=beatles, person=ringo) >>> ringos_membership.date_joined datetime.date(1962, 8, 16) >>> ringos_membership.invite_reason 'Needed a new drummer.' Another way to access the same information is by querying the many-to-many reverse relationship from a Person object: >>> ringos_membership = ringo.membership_set.get(group=beatles) >>> ringos_membership.date_joined datetime.date(1962, 8, 16) >>> ringos_membership.invite_reason 'Needed a new drummer.' One-to-one relationships To define a one-to-one relationship, use OneToOneField. You use it just like any other Field type: by including it as a class attribute of your model. This is most useful on the primary key of an object when that object “extends” another object in some way. OneToOneField requires a positional argument: the class to which the model is related. For example, if you were building a database of “places”, you would build pretty standard stuff such as address, phone number, etc. in the database. Then, if you wanted to build a database of restaurants on top of the places, instead of repeating yourself and replicating those fields in the Restaurant model, you could make Restaurant have a OneToOneField to Place (because a restaurant “is a” place; in fact, to handle this you’d typically use inheritance, which involves an implicit one-to-one relation). As with ForeignKey, a recursive relationship can be defined and references to as-yet undefined models can be made. 3.2. Models and databases 91
- 96. Django Documentation, Release 1.9.3.dev20160224120324 See also: See the One-to-one relationship model example for a full example. OneToOneField fields also accept an optional parent_link argument. OneToOneField classes used to automatically become the primary key on a model. This is no longer true (although you can manually pass in the primary_key argument if you like). Thus, it’s now possible to have multiple fields of type OneToOneField on a single model. Models across files It’s perfectly OK to relate a model to one from another app. To do this, import the related model at the top of the file where your model is defined. Then, just refer to the other model class wherever needed. For example: from django.db import models from geography.models import ZipCode class Restaurant(models.Model): # ... zip_code = models.ForeignKey( ZipCode, on_delete=models.SET_NULL, blank=True, null=True, ) Field name restrictions Django places only two restrictions on model field names: 1. A field name cannot be a Python reserved word, because that would result in a Python syntax error. For example: class Example(models.Model): pass = models.IntegerField() # 'pass' is a reserved word! 2. A field name cannot contain more than one underscore in a row, due to the way Django’s query lookup syntax works. For example: class Example(models.Model): foo__bar = models.IntegerField() # 'foo__bar' has two underscores! These limitations can be worked around, though, because your field name doesn’t necessarily have to match your database column name. See the db_column option. SQL reserved words, such as join, where or select, are allowed as model field names, because Django escapes all database table names and column names in every underlying SQL query. It uses the quoting syntax of your particular database engine. Custom field types If one of the existing model fields cannot be used to fit your purposes, or if you wish to take advantage of some less common database column types, you can create your own field class. Full coverage of creating your own fields is provided in Writing custom model fields. 92 Chapter 3. Using Django
- 97. Django Documentation, Release 1.9.3.dev20160224120324 Meta options Give your model metadata by using an inner class Meta, like so: from django.db import models class Ox(models.Model): horn_length = models.IntegerField() class Meta: ordering = ["horn_length"] verbose_name_plural = "oxen" Model metadata is “anything that’s not a field”, such as ordering options (ordering), database table name (db_table), or human-readable singular and plural names (verbose_name and verbose_name_plural). None are required, and adding class Meta to a model is completely optional. A complete list of all possible Meta options can be found in the model option reference. Model attributes objects The most important attribute of a model is the Manager. It’s the interface through which database query operations are provided to Django models and is used to retrieve the instances from the database. If no custom Manager is defined, the default name is objects. Managers are only accessible via model classes, not the model instances. Model methods Define custom methods on a model to add custom “row-level” functionality to your objects. Whereas Manager methods are intended to do “table-wide” things, model methods should act on a particular model instance. This is a valuable technique for keeping business logic in one place – the model. For example, this model has a few custom methods: from django.db import models class Person(models.Model): first_name = models.CharField(max_length=50) last_name = models.CharField(max_length=50) birth_date = models.DateField() def baby_boomer_status(self): "Returns the person's baby-boomer status." import datetime if self.birth_date < datetime.date(1945, 8, 1): return "Pre-boomer" elif self.birth_date < datetime.date(1965, 1, 1): return "Baby boomer" else: return "Post-boomer" def _get_full_name(self): "Returns the person's full name." return '%s %s' % (self.first_name, self.last_name) full_name = property(_get_full_name) 3.2. Models and databases 93
- 98. Django Documentation, Release 1.9.3.dev20160224120324 The last method in this example is a property. The model instance reference has a complete list of methods automatically given to each model. You can override most of these – see overriding predefined model methods, below – but there are a couple that you’ll almost always want to define: __str__() (Python 3) A Python “magic method” that returns a unicode “representation” of any object. This is what Python and Django will use whenever a model instance needs to be coerced and displayed as a plain string. Most notably, this happens when you display an object in an interactive console or in the admin. You’ll always want to define this method; the default isn’t very helpful at all. __unicode__() (Python 2) Python 2 equivalent of __str__(). get_absolute_url() This tells Django how to calculate the URL for an object. Django uses this in its admin interface, and any time it needs to figure out a URL for an object. Any object that has a URL that uniquely identifies it should define this method. Overriding predefined model methods There’s another set of model methods that encapsulate a bunch of database behavior that you’ll want to customize. In particular you’ll often want to change the way save() and delete() work. You’re free to override these methods (and any other model method) to alter behavior. A classic use-case for overriding the built-in methods is if you want something to happen whenever you save an object. For example (see save() for documentation of the parameters it accepts): from django.db import models class Blog(models.Model): name = models.CharField(max_length=100) tagline = models.TextField() def save(self, *args, **kwargs): do_something() super(Blog, self).save(*args, **kwargs) # Call the "real" save() method. do_something_else() You can also prevent saving: from django.db import models class Blog(models.Model): name = models.CharField(max_length=100) tagline = models.TextField() def save(self, *args, **kwargs): if self.name == "Yoko Ono's blog": return # Yoko shall never have her own blog! else: super(Blog, self).save(*args, **kwargs) # Call the "real" save() method. It’s important to remember to call the superclass method – that’s that super(Blog, self).save(*args, **kwargs) business – to ensure that the object still gets saved into the database. If you forget to call the super- class method, the default behavior won’t happen and the database won’t get touched. It’s also important that you pass through the arguments that can be passed to the model method – that’s what the *args, **kwargs bit does. Django will, from time to time, extend the capabilities of built-in model methods, 94 Chapter 3. Using Django
- 99. Django Documentation, Release 1.9.3.dev20160224120324 adding new arguments. If you use *args, **kwargs in your method definitions, you are guaranteed that your code will automatically support those arguments when they are added. Overridden model methods are not called on bulk operations Note that the delete() method for an object is not necessarily called when deleting objects in bulk using a QuerySet or as a result of a cascading delete. To ensure customized delete logic gets executed, you can use pre_delete and/or post_delete signals. Unfortunately, there isn’t a workaround when creating or updating objects in bulk, since none of save(), pre_save, and post_save are called. Executing custom SQL Another common pattern is writing custom SQL statements in model methods and module-level methods. For more details on using raw SQL, see the documentation on using raw SQL. Model inheritance Model inheritance in Django works almost identically to the way normal class inheritance works in Python, but the basics at the beginning of the page should still be followed. That means the base class should subclass django.db.models.Model. The only decision you have to make is whether you want the parent models to be models in their own right (with their own database tables), or if the parents are just holders of common information that will only be visible through the child models. There are three styles of inheritance that are possible in Django. 1. Often, you will just want to use the parent class to hold information that you don’t want to have to type out for each child model. This class isn’t going to ever be used in isolation, so Abstract base classes are what you’re after. 2. If you’re subclassing an existing model (perhaps something from another application entirely) and want each model to have its own database table, Multi-table inheritance is the way to go. 3. Finally, if you only want to modify the Python-level behavior of a model, without changing the models fields in any way, you can use Proxy models. Abstract base classes Abstract base classes are useful when you want to put some common information into a number of other models. You write your base class and put abstract=True in the Meta class. This model will then not be used to create any database table. Instead, when it is used as a base class for other models, its fields will be added to those of the child class. It is an error to have fields in the abstract base class with the same name as those in the child (and Django will raise an exception). An example: from django.db import models class CommonInfo(models.Model): name = models.CharField(max_length=100) age = models.PositiveIntegerField() 3.2. Models and databases 95
- 100. Django Documentation, Release 1.9.3.dev20160224120324 class Meta: abstract = True class Student(CommonInfo): home_group = models.CharField(max_length=5) The Student model will have three fields: name, age and home_group. The CommonInfo model cannot be used as a normal Django model, since it is an abstract base class. It does not generate a database table or have a manager, and cannot be instantiated or saved directly. For many uses, this type of model inheritance will be exactly what you want. It provides a way to factor out common information at the Python level, while still only creating one database table per child model at the database level. Meta inheritance When an abstract base class is created, Django makes any Meta inner class you declared in the base class available as an attribute. If a child class does not declare its own Meta class, it will inherit the parent’s Meta. If the child wants to extend the parent’s Meta class, it can subclass it. For example: from django.db import models class CommonInfo(models.Model): # ... class Meta: abstract = True ordering = ['name'] class Student(CommonInfo): # ... class Meta(CommonInfo.Meta): db_table = 'student_info' Django does make one adjustment to the Meta class of an abstract base class: before installing the Meta attribute, it sets abstract=False. This means that children of abstract base classes don’t automatically become abstract classes themselves. Of course, you can make an abstract base class that inherits from another abstract base class. You just need to remember to explicitly set abstract=True each time. Some attributes won’t make sense to include in the Meta class of an abstract base class. For example, including db_table would mean that all the child classes (the ones that don’t specify their own Meta) would use the same database table, which is almost certainly not what you want. Be careful with related_name If you are using the related_name attribute on a ForeignKey or ManyToManyField, you must always specify a unique reverse name for the field. This would normally cause a problem in abstract base classes, since the fields on this class are included into each of the child classes, with exactly the same values for the attributes (including related_name) each time. To work around this problem, when you are using related_name in an abstract base class (only), part of the name should contain ’%(app_label)s’ and ’%(class)s’. • ’%(class)s’ is replaced by the lower-cased name of the child class that the field is used in. • ’%(app_label)s’ is replaced by the lower-cased name of the app the child class is contained within. Each installed application name must be unique and the model class names within each app must also be unique, therefore the resulting name will end up being different. For example, given an app common/models.py: from django.db import models 96 Chapter 3. Using Django
- 101. Django Documentation, Release 1.9.3.dev20160224120324 class Base(models.Model): m2m = models.ManyToManyField(OtherModel, related_name="%(app_label)s_%(class)s_related") class Meta: abstract = True class ChildA(Base): pass class ChildB(Base): pass Along with another app rare/models.py: from common.models import Base class ChildB(Base): pass The reverse name of the common.ChildA.m2m field will be common_childa_related, while the reverse name of the common.ChildB.m2m field will be common_childb_related, and finally the reverse name of the rare.ChildB.m2m field will be rare_childb_related. It is up to you how you use the ’%(class)s’ and ’%(app_label)s portion to construct your related name, but if you forget to use it, Django will raise errors when you perform system checks (or run migrate). If you don’t specify a related_name attribute for a field in an abstract base class, the default reverse name will be the name of the child class followed by ’_set’, just as it normally would be if you’d declared the field directly on the child class. For example, in the above code, if the related_name attribute was omitted, the reverse name for the m2m field would be childa_set in the ChildA case and childb_set for the ChildB field. Multi-table inheritance The second type of model inheritance supported by Django is when each model in the hierarchy is a model all by itself. Each model corresponds to its own database table and can be queried and created individually. The inher- itance relationship introduces links between the child model and each of its parents (via an automatically-created OneToOneField). For example: from django.db import models class Place(models.Model): name = models.CharField(max_length=50) address = models.CharField(max_length=80) class Restaurant(Place): serves_hot_dogs = models.BooleanField(default=False) serves_pizza = models.BooleanField(default=False) All of the fields of Place will also be available in Restaurant, although the data will reside in a different database table. So these are both possible: >>> Place.objects.filter(name="Bob's Cafe") >>> Restaurant.objects.filter(name="Bob's Cafe") If you have a Place that is also a Restaurant, you can get from the Place object to the Restaurant object by using the lower-case version of the model name: 3.2. Models and databases 97
- 102. Django Documentation, Release 1.9.3.dev20160224120324 >>> p = Place.objects.get(id=12) # If p is a Restaurant object, this will give the child class: >>> p.restaurant <Restaurant: ...> However, if p in the above example was not a Restaurant (it had been created directly as a Place object or was the parent of some other class), referring to p.restaurant would raise a Restaurant.DoesNotExist exception. Meta and multi-table inheritance In the multi-table inheritance situation, it doesn’t make sense for a child class to inherit from its parent’s Meta class. All the Meta options have already been applied to the parent class and applying them again would normally only lead to contradictory behavior (this is in contrast with the abstract base class case, where the base class doesn’t exist in its own right). So a child model does not have access to its parent’s Meta class. However, there are a few limited cases where the child inherits behavior from the parent: if the child does not specify an ordering attribute or a get_latest_by attribute, it will inherit these from its parent. If the parent has an ordering and you don’t want the child to have any natural ordering, you can explicitly disable it: class ChildModel(ParentModel): # ... class Meta: # Remove parent's ordering effect ordering = [] Inheritance and reverse relations Because multi-table inheritance uses an implicit OneToOneField to link the child and the parent, it’s possible to move from the parent down to the child, as in the above example. However, this uses up the name that is the default related_name value for ForeignKey and ManyToManyField relations. If you are putting those types of relations on a subclass of the parent model, you must specify the related_name attribute on each such field. If you forget, Django will raise a validation error. For example, using the above Place class again, let’s create another subclass with a ManyToManyField: class Supplier(Place): customers = models.ManyToManyField(Place) This results in the error: Reverse query name for 'Supplier.customers' clashes with reverse query name for 'Supplier.place_ptr'. HINT: Add or change a related_name argument to the definition for 'Supplier.customers' or 'Supplier.place_ptr'. Adding related_name to the customers field as follows would resolve the error: models.ManyToManyField(Place, related_name=’provider’). Specifying the parent link field As mentioned, Django will automatically create a OneToOneField linking your child class back to any non-abstract parent models. If you want to control the name of the attribute linking back to the parent, you can create your own OneToOneField and set parent_link=True to indicate that your field is the link back to the parent class. 98 Chapter 3. Using Django
- 103. Django Documentation, Release 1.9.3.dev20160224120324 Proxy models When using multi-table inheritance, a new database table is created for each subclass of a model. This is usually the desired behavior, since the subclass needs a place to store any additional data fields that are not present on the base class. Sometimes, however, you only want to change the Python behavior of a model – perhaps to change the default manager, or add a new method. This is what proxy model inheritance is for: creating a proxy for the original model. You can create, delete and update instances of the proxy model and all the data will be saved as if you were using the original (non-proxied) model. The difference is that you can change things like the default model ordering or the default manager in the proxy, without having to alter the original. Proxy models are declared like normal models. You tell Django that it’s a proxy model by setting the proxy attribute of the Meta class to True. For example, suppose you want to add a method to the Person model. You can do it like this: from django.db import models class Person(models.Model): first_name = models.CharField(max_length=30) last_name = models.CharField(max_length=30) class MyPerson(Person): class Meta: proxy = True def do_something(self): # ... pass The MyPerson class operates on the same database table as its parent Person class. In particular, any new instances of Person will also be accessible through MyPerson, and vice-versa: >>> p = Person.objects.create(first_name="foobar") >>> MyPerson.objects.get(first_name="foobar") <MyPerson: foobar> You could also use a proxy model to define a different default ordering on a model. You might not always want to order the Person model, but regularly order by the last_name attribute when you use the proxy. This is easy: class OrderedPerson(Person): class Meta: ordering = ["last_name"] proxy = True Now normal Person queries will be unordered and OrderedPerson queries will be ordered by last_name. QuerySets still return the model that was requested There is no way to have Django return, say, a MyPerson object whenever you query for Person objects. A queryset for Person objects will return those types of objects. The whole point of proxy objects is that code relying on the original Person will use those and your own code can use the extensions you included (that no other code is relying on anyway). It is not a way to replace the Person (or any other) model everywhere with something of your own creation. Base class restrictions A proxy model must inherit from exactly one non-abstract model class. You can’t inherit from multiple non-abstract models as the proxy model doesn’t provide any connection between the rows in the different 3.2. Models and databases 99
- 104. Django Documentation, Release 1.9.3.dev20160224120324 database tables. A proxy model can inherit from any number of abstract model classes, providing they do not define any model fields. Proxy model managers If you don’t specify any model managers on a proxy model, it inherits the managers from its model parents. If you define a manager on the proxy model, it will become the default, although any managers defined on the parent classes will still be available. Continuing our example from above, you could change the default manager used when you query the Person model like this: from django.db import models class NewManager(models.Manager): # ... pass class MyPerson(Person): objects = NewManager() class Meta: proxy = True If you wanted to add a new manager to the Proxy, without replacing the existing default, you can use the techniques described in the custom manager documentation: create a base class containing the new managers and inherit that after the primary base class: # Create an abstract class for the new manager. class ExtraManagers(models.Model): secondary = NewManager() class Meta: abstract = True class MyPerson(Person, ExtraManagers): class Meta: proxy = True You probably won’t need to do this very often, but, when you do, it’s possible. Differences between proxy inheritance and unmanaged models Proxy model inheritance might look fairly similar to creating an unmanaged model, using the managed attribute on a model’s Meta class. The two alternatives are not quite the same and it’s worth considering which one you should use. One difference is that you can (and, in fact, must unless you want an empty model) specify model fields on models with Meta.managed=False. You could, with careful setting of Meta.db_table create an unmanaged model that shadowed an existing model and add Python methods to it. However, that would be very repetitive and fragile as you need to keep both copies synchronized if you make any changes. The other difference that is more important for proxy models, is how model managers are handled. Proxy models are intended to behave exactly like the model they are proxying for. So they inherit the parent model’s managers, including the default manager. In the normal multi-table model inheritance case, children do not inherit managers from their parents as the custom managers aren’t always appropriate when extra fields are involved. The manager documentation has more details about this latter case. When these two features were implemented, attempts were made to squash them into a single option. It turned out that interactions with inheritance, in general, and managers, in particular, made the API very complicated and potentially difficult to understand and use. It turned out that two options were needed in any case, so the current separation arose. 100 Chapter 3. Using Django
- 105. Django Documentation, Release 1.9.3.dev20160224120324 So, the general rules are: 1. If you are mirroring an existing model or database table and don’t want all the original database table columns, use Meta.managed=False. That option is normally useful for modeling database views and tables not under the control of Django. 2. If you are wanting to change the Python-only behavior of a model, but keep all the same fields as in the original, use Meta.proxy=True. This sets things up so that the proxy model is an exact copy of the storage structure of the original model when data is saved. Multiple inheritance Just as with Python’s subclassing, it’s possible for a Django model to inherit from multiple parent models. Keep in mind that normal Python name resolution rules apply. The first base class that a particular name (e.g. Meta) appears in will be the one that is used; for example, this means that if multiple parents contain a Meta class, only the first one is going to be used, and all others will be ignored. Generally, you won’t need to inherit from multiple parents. The main use-case where this is useful is for “mix-in” classes: adding a particular extra field or method to every class that inherits the mix-in. Try to keep your inheritance hierarchies as simple and straightforward as possible so that you won’t have to struggle to work out where a particular piece of information is coming from. Note that inheriting from multiple models that have a common id primary key field will raise an error. To properly use multiple inheritance, you can use an explicit AutoField in the base models: class Article(models.Model): article_id = models.AutoField(primary_key=True) ... class Book(models.Model): book_id = models.AutoField(primary_key=True) ... class BookReview(Book, Article): pass Or use a common ancestor to hold the AutoField: class Piece(models.Model): pass class Article(Piece): ... class Book(Piece): ... class BookReview(Book, Article): pass Field name “hiding” is not permitted In normal Python class inheritance, it is permissible for a child class to override any attribute from the parent class. In Django, this is not permitted for attributes that are Field instances (at least, not at the moment). If a base class has a field called author, you cannot create another model field called author in any class that inherits from that base class. 3.2. Models and databases 101
- 106. Django Documentation, Release 1.9.3.dev20160224120324 Overriding fields in a parent model leads to difficulties in areas such as initializing new instances (specifying which field is being initialized in Model.__init__) and serialization. These are features which normal Python class inheritance doesn’t have to deal with in quite the same way, so the difference between Django model inheritance and Python class inheritance isn’t arbitrary. This restriction only applies to attributes which are Field instances. Normal Python attributes can be overridden if you wish. It also only applies to the name of the attribute as Python sees it: if you are manually specifying the database column name, you can have the same column name appearing in both a child and an ancestor model for multi-table inheritance (they are columns in two different database tables). Django will raise a FieldError if you override any model field in any ancestor model. See also: The Models Reference Covers all the model related APIs including model fields, related objects, and QuerySet. 3.2.2 Making queries Once you’ve created your data models, Django automatically gives you a database-abstraction API that lets you create, retrieve, update and delete objects. This document explains how to use this API. Refer to the data model reference for full details of all the various model lookup options. Throughout this guide (and in the reference), we’ll refer to the following models, which comprise a Weblog applica- tion: from django.db import models class Blog(models.Model): name = models.CharField(max_length=100) tagline = models.TextField() def __str__(self): # __unicode__ on Python 2 return self.name class Author(models.Model): name = models.CharField(max_length=50) email = models.EmailField() def __str__(self): # __unicode__ on Python 2 return self.name class Entry(models.Model): blog = models.ForeignKey(Blog) headline = models.CharField(max_length=255) body_text = models.TextField() pub_date = models.DateField() mod_date = models.DateField() authors = models.ManyToManyField(Author) n_comments = models.IntegerField() n_pingbacks = models.IntegerField() rating = models.IntegerField() def __str__(self): # __unicode__ on Python 2 return self.headline 102 Chapter 3. Using Django
- 107. Django Documentation, Release 1.9.3.dev20160224120324 Creating objects To represent database-table data in Python objects, Django uses an intuitive system: A model class represents a database table, and an instance of that class represents a particular record in the database table. To create an object, instantiate it using keyword arguments to the model class, then call save() to save it to the database. Assuming models live in a file mysite/blog/models.py, here’s an example: >>> from blog.models import Blog >>> b = Blog(name='Beatles Blog', tagline='All the latest Beatles news.') >>> b.save() This performs an INSERT SQL statement behind the scenes. Django doesn’t hit the database until you explicitly call save(). The save() method has no return value. See also: save() takes a number of advanced options not described here. See the documentation for save() for complete details. To create and save an object in a single step, use the create() method. Saving changes to objects To save changes to an object that’s already in the database, use save(). Given a Blog instance b5 that has already been saved to the database, this example changes its name and updates its record in the database: >>> b5.name = 'New name' >>> b5.save() This performs an UPDATE SQL statement behind the scenes. Django doesn’t hit the database until you explicitly call save(). Saving ForeignKey and ManyToManyField fields Updating a ForeignKey field works exactly the same way as saving a normal field – simply assign an object of the right type to the field in question. This example updates the blog attribute of an Entry instance entry, assuming appropriate instances of Entry and Blog are already saved to the database (so we can retrieve them below): >>> from blog.models import Entry >>> entry = Entry.objects.get(pk=1) >>> cheese_blog = Blog.objects.get(name="Cheddar Talk") >>> entry.blog = cheese_blog >>> entry.save() Updating a ManyToManyField works a little differently – use the add() method on the field to add a record to the relation. This example adds the Author instance joe to the entry object: >>> from blog.models import Author >>> joe = Author.objects.create(name="Joe") >>> entry.authors.add(joe) 3.2. Models and databases 103
- 108. Django Documentation, Release 1.9.3.dev20160224120324 To add multiple records to a ManyToManyField in one go, include multiple arguments in the call to add(), like this: >>> john = Author.objects.create(name="John") >>> paul = Author.objects.create(name="Paul") >>> george = Author.objects.create(name="George") >>> ringo = Author.objects.create(name="Ringo") >>> entry.authors.add(john, paul, george, ringo) Django will complain if you try to assign or add an object of the wrong type. Retrieving objects To retrieve objects from your database, construct a QuerySet via a Manager on your model class. A QuerySet represents a collection of objects from your database. It can have zero, one or many filters. Filters narrow down the query results based on the given parameters. In SQL terms, a QuerySet equates to a SELECT statement, and a filter is a limiting clause such as WHERE or LIMIT. You get a QuerySet by using your model’s Manager. Each model has at least one Manager, and it’s called objects by default. Access it directly via the model class, like so: >>> Blog.objects <django.db.models.manager.Manager object at ...> >>> b = Blog(name='Foo', tagline='Bar') >>> b.objects Traceback: ... AttributeError: "Manager isn't accessible via Blog instances." Note: Managers are accessible only via model classes, rather than from model instances, to enforce a separation between “table-level” operations and “record-level” operations. The Manager is the main source of QuerySets for a model. For example, Blog.objects.all() returns a QuerySet that contains all Blog objects in the database. Retrieving all objects The simplest way to retrieve objects from a table is to get all of them. To do this, use the all() method on a Manager: >>> all_entries = Entry.objects.all() The all() method returns a QuerySet of all the objects in the database. Retrieving specific objects with filters The QuerySet returned by all() describes all objects in the database table. Usually, though, you’ll need to select only a subset of the complete set of objects. To create such a subset, you refine the initial QuerySet, adding filter conditions. The two most common ways to refine a QuerySet are: filter(**kwargs) Returns a new QuerySet containing objects that match the given lookup parameters. 104 Chapter 3. Using Django
- 109. Django Documentation, Release 1.9.3.dev20160224120324 exclude(**kwargs) Returns a new QuerySet containing objects that do not match the given lookup parame- ters. The lookup parameters (**kwargs in the above function definitions) should be in the format described in Field lookups below. For example, to get a QuerySet of blog entries from the year 2006, use filter() like so: Entry.objects.filter(pub_date__year=2006) With the default manager class, it is the same as: Entry.objects.all().filter(pub_date__year=2006) Chaining filters The result of refining a QuerySet is itself a QuerySet, so it’s possible to chain refinements together. For example: >>> Entry.objects.filter( ... headline__startswith='What' ... ).exclude( ... pub_date__gte=datetime.date.today() ... ).filter( ... pub_date__gte=datetime(2005, 1, 30) ... ) This takes the initial QuerySet of all entries in the database, adds a filter, then an exclusion, then another filter. The final result is a QuerySet containing all entries with a headline that starts with “What”, that were published between January 30, 2005, and the current day. Filtered QuerySets are unique Each time you refine a QuerySet, you get a brand-new QuerySet that is in no way bound to the previous QuerySet. Each refinement creates a separate and distinct QuerySet that can be stored, used and reused. Example: >>> q1 = Entry.objects.filter(headline__startswith="What") >>> q2 = q1.exclude(pub_date__gte=datetime.date.today()) >>> q3 = q1.filter(pub_date__gte=datetime.date.today()) These three QuerySets are separate. The first is a base QuerySet containing all entries that contain a headline starting with “What”. The second is a subset of the first, with an additional criteria that excludes records whose pub_date is today or in the future. The third is a subset of the first, with an additional criteria that selects only the records whose pub_date is today or in the future. The initial QuerySet (q1) is unaffected by the refinement process. QuerySets are lazy QuerySets are lazy – the act of creating a QuerySet doesn’t involve any database activity. You can stack filters together all day long, and Django won’t actually run the query until the QuerySet is evaluated. Take a look at this example: >>> q = Entry.objects.filter(headline__startswith="What") >>> q = q.filter(pub_date__lte=datetime.date.today()) >>> q = q.exclude(body_text__icontains="food") >>> print(q) Though this looks like three database hits, in fact it hits the database only once, at the last line (print(q)). In general, the results of a QuerySet aren’t fetched from the database until you “ask” for them. When you do, the 3.2. Models and databases 105
- 110. Django Documentation, Release 1.9.3.dev20160224120324 QuerySet is evaluated by accessing the database. For more details on exactly when evaluation takes place, see When QuerySets are evaluated. Retrieving a single object with get() filter() will always give you a QuerySet, even if only a single object matches the query - in this case, it will be a QuerySet containing a single element. If you know there is only one object that matches your query, you can use the get() method on a Manager which returns the object directly: >>> one_entry = Entry.objects.get(pk=1) You can use any query expression with get(), just like with filter() - again, see Field lookups below. Note that there is a difference between using get(), and using filter() with a slice of [0]. If there are no results that match the query, get() will raise a DoesNotExist exception. This exception is an attribute of the model class that the query is being performed on - so in the code above, if there is no Entry object with a primary key of 1, Django will raise Entry.DoesNotExist. Similarly, Django will complain if more than one item matches the get() query. In this case, it will raise MultipleObjectsReturned, which again is an attribute of the model class itself. Other QuerySet methods Most of the time you’ll use all(), get(), filter() and exclude() when you need to look up objects from the database. However, that’s far from all there is; see the QuerySet API Reference for a complete list of all the various QuerySet methods. Limiting QuerySets Use a subset of Python’s array-slicing syntax to limit your QuerySet to a certain number of results. This is the equivalent of SQL’s LIMIT and OFFSET clauses. For example, this returns the first 5 objects (LIMIT 5): >>> Entry.objects.all()[:5] This returns the sixth through tenth objects (OFFSET 5 LIMIT 5): >>> Entry.objects.all()[5:10] Negative indexing (i.e. Entry.objects.all()[-1]) is not supported. Generally, slicing a QuerySet returns a new QuerySet – it doesn’t evaluate the query. An exception is if you use the “step” parameter of Python slice syntax. For example, this would actually execute the query in order to return a list of every second object of the first 10: >>> Entry.objects.all()[:10:2] To retrieve a single object rather than a list (e.g. SELECT foo FROM bar LIMIT 1), use a simple index instead of a slice. For example, this returns the first Entry in the database, after ordering entries alphabetically by headline: >>> Entry.objects.order_by('headline')[0] This is roughly equivalent to: 106 Chapter 3. Using Django
- 111. Django Documentation, Release 1.9.3.dev20160224120324 >>> Entry.objects.order_by('headline')[0:1].get() Note, however, that the first of these will raise IndexError while the second will raise DoesNotExist if no objects match the given criteria. See get() for more details. Field lookups Field lookups are how you specify the meat of an SQL WHERE clause. They’re specified as keyword arguments to the QuerySet methods filter(), exclude() and get(). Basic lookups keyword arguments take the form field__lookuptype=value. (That’s a double-underscore). For example: >>> Entry.objects.filter(pub_date__lte='2006-01-01') translates (roughly) into the following SQL: SELECT * FROM blog_entry WHERE pub_date <= '2006-01-01'; How this is possible Python has the ability to define functions that accept arbitrary name-value arguments whose names and values are evaluated at runtime. For more information, see Keyword Arguments in the official Python tutorial. The field specified in a lookup has to be the name of a model field. There’s one exception though, in case of a ForeignKey you can specify the field name suffixed with _id. In this case, the value parameter is expected to contain the raw value of the foreign model’s primary key. For example: >>> Entry.objects.filter(blog_id=4) If you pass an invalid keyword argument, a lookup function will raise TypeError. The database API supports about two dozen lookup types; a complete reference can be found in the field lookup reference. To give you a taste of what’s available, here’s some of the more common lookups you’ll probably use: exact An “exact” match. For example: >>> Entry.objects.get(headline__exact="Cat bites dog") Would generate SQL along these lines: SELECT ... WHERE headline = 'Cat bites dog'; If you don’t provide a lookup type – that is, if your keyword argument doesn’t contain a double underscore – the lookup type is assumed to be exact. For example, the following two statements are equivalent: >>> Blog.objects.get(id__exact=14) # Explicit form >>> Blog.objects.get(id=14) # __exact is implied This is for convenience, because exact lookups are the common case. iexact A case-insensitive match. So, the query: >>> Blog.objects.get(name__iexact="beatles blog") Would match a Blog titled "Beatles Blog", "beatles blog", or even "BeAtlES blOG". 3.2. Models and databases 107
- 112. Django Documentation, Release 1.9.3.dev20160224120324 contains Case-sensitive containment test. For example: Entry.objects.get(headline__contains='Lennon') Roughly translates to this SQL: SELECT ... WHERE headline LIKE '%Lennon%'; Note this will match the headline ’Today Lennon honored’ but not ’today lennon honored’. There’s also a case-insensitive version, icontains. startswith, endswith Starts-with and ends-with search, respectively. There are also case-insensitive versions called istartswith and iendswith. Again, this only scratches the surface. A complete reference can be found in the field lookup reference. Lookups that span relationships Django offers a powerful and intuitive way to “follow” relationships in lookups, taking care of the SQL JOINs for you automatically, behind the scenes. To span a relationship, just use the field name of related fields across models, separated by double underscores, until you get to the field you want. This example retrieves all Entry objects with a Blog whose name is ’Beatles Blog’: >>> Entry.objects.filter(blog__name='Beatles Blog') This spanning can be as deep as you’d like. It works backwards, too. To refer to a “reverse” relationship, just use the lowercase name of the model. This example retrieves all Blog objects which have at least one Entry whose headline contains ’Lennon’: >>> Blog.objects.filter(entry__headline__contains='Lennon') If you are filtering across multiple relationships and one of the intermediate models doesn’t have a value that meets the filter condition, Django will treat it as if there is an empty (all values are NULL), but valid, object there. All this means is that no error will be raised. For example, in this filter: Blog.objects.filter(entry__authors__name='Lennon') (if there was a related Author model), if there was no author associated with an entry, it would be treated as if there was also no name attached, rather than raising an error because of the missing author. Usually this is exactly what you want to have happen. The only case where it might be confusing is if you are using isnull. Thus: Blog.objects.filter(entry__authors__name__isnull=True) will return Blog objects that have an empty name on the author and also those which have an empty author on the entry. If you don’t want those latter objects, you could write: Blog.objects.filter(entry__authors__isnull=False, entry__authors__name__isnull=True) Spanning multi-valued relationships When you are filtering an object based on a ManyToManyField or a re- verse ForeignKey, there are two different sorts of filter you may be interested in. Consider the Blog/Entry relationship (Blog to Entry is a one-to-many relation). We might be interested in finding blogs that have an entry which has both “Lennon” in the headline and was published in 2008. Or we might want to find blogs that have an entry with “Lennon” in the headline as well as an entry that was published in 2008. Since there are multiple entries associated with a single Blog, both of these queries are possible and make sense in some situations. 108 Chapter 3. Using Django
- 113. Django Documentation, Release 1.9.3.dev20160224120324 The same type of situation arises with a ManyToManyField. For example, if an Entry has a ManyToManyField called tags, we might want to find entries linked to tags called “music” and “bands” or we might want an entry that contains a tag with a name of “music” and a status of “public”. To handle both of these situations, Django has a consistent way of processing filter() calls. Everything inside a single filter() call is applied simultaneously to filter out items matching all those requirements. Successive filter() calls further restrict the set of objects, but for multi-valued relations, they apply to any object linked to the primary model, not necessarily those objects that were selected by an earlier filter() call. That may sound a bit confusing, so hopefully an example will clarify. To select all blogs that contain entries with both “Lennon” in the headline and that were published in 2008 (the same entry satisfying both conditions), we would write: Blog.objects.filter(entry__headline__contains='Lennon', entry__pub_date__year=2008) To select all blogs that contain an entry with “Lennon” in the headline as well as an entry that was published in 2008, we would write: Blog.objects.filter(entry__headline__contains='Lennon').filter( entry__pub_date__year=2008) Suppose there is only one blog that had both entries containing “Lennon” and entries from 2008, but that none of the entries from 2008 contained “Lennon”. The first query would not return any blogs, but the second query would return that one blog. In the second example, the first filter restricts the queryset to all those blogs linked to entries with “Lennon” in the headline. The second filter restricts the set of blogs further to those that are also linked to entries that were published in 2008. The entries selected by the second filter may or may not be the same as the entries in the first filter. We are filtering the Blog items with each filter statement, not the Entry items. Note: The behavior of filter() for queries that span multi-value relationships, as described above, is not imple- mented equivalently for exclude(). Instead, the conditions in a single exclude() call will not necessarily refer to the same item. For example, the following query would exclude blogs that contain both entries with “Lennon” in the headline and entries published in 2008: Blog.objects.exclude( entry__headline__contains='Lennon', entry__pub_date__year=2008, ) However, unlike the behavior when using filter(), this will not limit blogs based on entries that satisfy both conditions. In order to do that, i.e. to select all blogs that do not contain entries published with “Lennon” that were published in 2008, you need to make two queries: Blog.objects.exclude( entry=Entry.objects.filter( headline__contains='Lennon', pub_date__year=2008, ), ) 3.2. Models and databases 109
- 114. Django Documentation, Release 1.9.3.dev20160224120324 Filters can reference fields on the model In the examples given so far, we have constructed filters that compare the value of a model field with a constant. But what if you want to compare the value of a model field with another field on the same model? Django provides F expressions to allow such comparisons. Instances of F() act as a reference to a model field within a query. These references can then be used in query filters to compare the values of two different fields on the same model instance. For example, to find a list of all blog entries that have had more comments than pingbacks, we construct an F() object to reference the pingback count, and use that F() object in the query: >>> from django.db.models import F >>> Entry.objects.filter(n_comments__gt=F('n_pingbacks')) Django supports the use of addition, subtraction, multiplication, division, modulo, and power arithmetic with F() objects, both with constants and with other F() objects. To find all the blog entries with more than twice as many comments as pingbacks, we modify the query: >>> Entry.objects.filter(n_comments__gt=F('n_pingbacks') * 2) To find all the entries where the rating of the entry is less than the sum of the pingback count and comment count, we would issue the query: >>> Entry.objects.filter(rating__lt=F('n_comments') + F('n_pingbacks')) You can also use the double underscore notation to span relationships in an F() object. An F() object with a double underscore will introduce any joins needed to access the related object. For example, to retrieve all the entries where the author’s name is the same as the blog name, we could issue the query: >>> Entry.objects.filter(authors__name=F('blog__name')) For date and date/time fields, you can add or subtract a timedelta object. The following would return all entries that were modified more than 3 days after they were published: >>> from datetime import timedelta >>> Entry.objects.filter(mod_date__gt=F('pub_date') + timedelta(days=3)) The F() objects support bitwise operations by .bitand() and .bitor(), for example: >>> F('somefield').bitand(16) The pk lookup shortcut For convenience, Django provides a pk lookup shortcut, which stands for “primary key”. In the example Blog model, the primary key is the id field, so these three statements are equivalent: >>> Blog.objects.get(id__exact=14) # Explicit form >>> Blog.objects.get(id=14) # __exact is implied >>> Blog.objects.get(pk=14) # pk implies id__exact The use of pk isn’t limited to __exact queries – any query term can be combined with pk to perform a query on the primary key of a model: # Get blogs entries with id 1, 4 and 7 >>> Blog.objects.filter(pk__in=[1,4,7]) 110 Chapter 3. Using Django
- 115. Django Documentation, Release 1.9.3.dev20160224120324 # Get all blog entries with id > 14 >>> Blog.objects.filter(pk__gt=14) pk lookups also work across joins. For example, these three statements are equivalent: >>> Entry.objects.filter(blog__id__exact=3) # Explicit form >>> Entry.objects.filter(blog__id=3) # __exact is implied >>> Entry.objects.filter(blog__pk=3) # __pk implies __id__exact Escaping percent signs and underscores in LIKE statements The field lookups that equate to LIKE SQL statements (iexact, contains, icontains, startswith, istartswith, endswith and iendswith) will automatically escape the two special characters used in LIKE statements – the percent sign and the underscore. (In a LIKE statement, the percent sign signifies a multiple-character wildcard and the underscore signifies a single-character wildcard.) This means things should work intuitively, so the abstraction doesn’t leak. For example, to retrieve all the entries that contain a percent sign, just use the percent sign as any other character: >>> Entry.objects.filter(headline__contains='%') Django takes care of the quoting for you; the resulting SQL will look something like this: SELECT ... WHERE headline LIKE '%%%'; Same goes for underscores. Both percentage signs and underscores are handled for you transparently. Caching and QuerySets Each QuerySet contains a cache to minimize database access. Understanding how it works will allow you to write the most efficient code. In a newly created QuerySet, the cache is empty. The first time a QuerySet is evaluated – and, hence, a database query happens – Django saves the query results in the QuerySet’s cache and returns the results that have been explicitly requested (e.g., the next element, if the QuerySet is being iterated over). Subsequent evaluations of the QuerySet reuse the cached results. Keep this caching behavior in mind, because it may bite you if you don’t use your QuerySets correctly. For example, the following will create two QuerySets, evaluate them, and throw them away: >>> print([e.headline for e in Entry.objects.all()]) >>> print([e.pub_date for e in Entry.objects.all()]) That means the same database query will be executed twice, effectively doubling your database load. Also, there’s a possibility the two lists may not include the same database records, because an Entry may have been added or deleted in the split second between the two requests. To avoid this problem, simply save the QuerySet and reuse it: >>> queryset = Entry.objects.all() >>> print([p.headline for p in queryset]) # Evaluate the query set. >>> print([p.pub_date for p in queryset]) # Re-use the cache from the evaluation. When QuerySets are not cached Querysets do not always cache their results. When evaluating only part of the queryset, the cache is checked, but if it is not populated then the items returned by the subsequent query are not cached. Specifically, this means that limiting the queryset using an array slice or an index will not populate the cache. 3.2. Models and databases 111
- 116. Django Documentation, Release 1.9.3.dev20160224120324 For example, repeatedly getting a certain index in a queryset object will query the database each time: >>> queryset = Entry.objects.all() >>> print queryset[5] # Queries the database >>> print queryset[5] # Queries the database again However, if the entire queryset has already been evaluated, the cache will be checked instead: >>> queryset = Entry.objects.all() >>> [entry for entry in queryset] # Queries the database >>> print queryset[5] # Uses cache >>> print queryset[5] # Uses cache Here are some examples of other actions that will result in the entire queryset being evaluated and therefore populate the cache: >>> [entry for entry in queryset] >>> bool(queryset) >>> entry in queryset >>> list(queryset) Note: Simply printing the queryset will not populate the cache. This is because the call to __repr__() only returns a slice of the entire queryset. Complex lookups with Q objects Keyword argument queries – in filter(), etc. – are “AND”ed together. If you need to execute more complex queries (for example, queries with OR statements), you can use Q objects. A Q object (django.db.models.Q) is an object used to encapsulate a collection of keyword arguments. These keyword arguments are specified as in “Field lookups” above. For example, this Q object encapsulates a single LIKE query: from django.db.models import Q Q(question__startswith='What') Q objects can be combined using the & and | operators. When an operator is used on two Q objects, it yields a new Q object. For example, this statement yields a single Q object that represents the “OR” of two "question__startswith" queries: Q(question__startswith='Who') | Q(question__startswith='What') This is equivalent to the following SQL WHERE clause: WHERE question LIKE 'Who%' OR question LIKE 'What%' You can compose statements of arbitrary complexity by combining Q objects with the & and | operators and use parenthetical grouping. Also, Q objects can be negated using the ~ operator, allowing for combined lookups that combine both a normal query and a negated (NOT) query: Q(question__startswith='Who') | ~Q(pub_date__year=2005) Each lookup function that takes keyword-arguments (e.g. filter(), exclude(), get()) can also be passed one or more Q objects as positional (not-named) arguments. If you provide multiple Q object arguments to a lookup function, the arguments will be “AND”ed together. For example: 112 Chapter 3. Using Django
- 117. Django Documentation, Release 1.9.3.dev20160224120324 Poll.objects.get( Q(question__startswith='Who'), Q(pub_date=date(2005, 5, 2)) | Q(pub_date=date(2005, 5, 6)) ) ... roughly translates into the SQL: SELECT * from polls WHERE question LIKE 'Who%' AND (pub_date = '2005-05-02' OR pub_date = '2005-05-06') Lookup functions can mix the use of Q objects and keyword arguments. All arguments provided to a lookup function (be they keyword arguments or Q objects) are “AND”ed together. However, if a Q object is provided, it must precede the definition of any keyword arguments. For example: Poll.objects.get( Q(pub_date=date(2005, 5, 2)) | Q(pub_date=date(2005, 5, 6)), question__startswith='Who') ... would be a valid query, equivalent to the previous example; but: # INVALID QUERY Poll.objects.get( question__startswith='Who', Q(pub_date=date(2005, 5, 2)) | Q(pub_date=date(2005, 5, 6))) ... would not be valid. See also: The OR lookups examples in the Django unit tests show some possible uses of Q. Comparing objects To compare two model instances, just use the standard Python comparison operator, the double equals sign: ==. Behind the scenes, that compares the primary key values of two models. Using the Entry example above, the following two statements are equivalent: >>> some_entry == other_entry >>> some_entry.id == other_entry.id If a model’s primary key isn’t called id, no problem. Comparisons will always use the primary key, whatever it’s called. For example, if a model’s primary key field is called name, these two statements are equivalent: >>> some_obj == other_obj >>> some_obj.name == other_obj.name Deleting objects The delete method, conveniently, is named delete(). This method immediately deletes the object and returns the number of objects deleted and a dictionary with the number of deletions per object type. Example: >>> e.delete() (1, {'weblog.Entry': 1}) The return value describing the number of objects deleted was added. You can also delete objects in bulk. Every QuerySet has a delete() method, which deletes all members of that QuerySet. 3.2. Models and databases 113
- 118. Django Documentation, Release 1.9.3.dev20160224120324 For example, this deletes all Entry objects with a pub_date year of 2005: >>> Entry.objects.filter(pub_date__year=2005).delete() (5, {'webapp.Entry': 5}) Keep in mind that this will, whenever possible, be executed purely in SQL, and so the delete() methods of in- dividual object instances will not necessarily be called during the process. If you’ve provided a custom delete() method on a model class and want to ensure that it is called, you will need to “manually” delete instances of that model (e.g., by iterating over a QuerySet and calling delete() on each object individually) rather than using the bulk delete() method of a QuerySet. The return value describing the number of objects deleted was added. When Django deletes an object, by default it emulates the behavior of the SQL constraint ON DELETE CASCADE – in other words, any objects which had foreign keys pointing at the object to be deleted will be deleted along with it. For example: b = Blog.objects.get(pk=1) # This will delete the Blog and all of its Entry objects. b.delete() This cascade behavior is customizable via the on_delete argument to the ForeignKey. Note that delete() is the only QuerySet method that is not exposed on a Manager itself. This is a safety mechanism to prevent you from accidentally requesting Entry.objects.delete(), and deleting all the entries. If you do want to delete all the objects, then you have to explicitly request a complete query set: Entry.objects.all().delete() Copying model instances Although there is no built-in method for copying model instances, it is possible to easily create new instance with all fields’ values copied. In the simplest case, you can just set pk to None. Using our blog example: blog = Blog(name='My blog', tagline='Blogging is easy') blog.save() # blog.pk == 1 blog.pk = None blog.save() # blog.pk == 2 Things get more complicated if you use inheritance. Consider a subclass of Blog: class ThemeBlog(Blog): theme = models.CharField(max_length=200) django_blog = ThemeBlog(name='Django', tagline='Django is easy', theme='python') django_blog.save() # django_blog.pk == 3 Due to how inheritance works, you have to set both pk and id to None: django_blog.pk = None django_blog.id = None django_blog.save() # django_blog.pk == 4 This process does not copy related objects. If you want to copy relations, you have to write a little bit more code. In our example, Entry has a many to many field to Author: entry = Entry.objects.all()[0] # some previous entry old_authors = entry.authors.all() 114 Chapter 3. Using Django
- 119. Django Documentation, Release 1.9.3.dev20160224120324 entry.pk = None entry.save() entry.authors = old_authors # saves new many2many relations Updating multiple objects at once Sometimes you want to set a field to a particular value for all the objects in a QuerySet. You can do this with the update() method. For example: # Update all the headlines with pub_date in 2007. Entry.objects.filter(pub_date__year=2007).update(headline='Everything is the same') You can only set non-relation fields and ForeignKey fields using this method. To update a non-relation field, provide the new value as a constant. To update ForeignKey fields, set the new value to be the new model instance you want to point to. For example: >>> b = Blog.objects.get(pk=1) # Change every Entry so that it belongs to this Blog. >>> Entry.objects.all().update(blog=b) The update() method is applied instantly and returns the number of rows matched by the query (which may not be equal to the number of rows updated if some rows already have the new value). The only restriction on the QuerySet being updated is that it can only access one database table: the model’s main table. You can filter based on related fields, but you can only update columns in the model’s main table. Example: >>> b = Blog.objects.get(pk=1) # Update all the headlines belonging to this Blog. >>> Entry.objects.select_related().filter(blog=b).update(headline='Everything is the same') Be aware that the update() method is converted directly to an SQL statement. It is a bulk operation for direct updates. It doesn’t run any save() methods on your models, or emit the pre_save or post_save signals (which are a consequence of calling save()), or honor the auto_now field option. If you want to save every item in a QuerySet and make sure that the save() method is called on each instance, you don’t need any special function to handle that. Just loop over them and call save(): for item in my_queryset: item.save() Calls to update can also use F expressions to update one field based on the value of another field in the model. This is especially useful for incrementing counters based upon their current value. For example, to increment the pingback count for every entry in the blog: >>> Entry.objects.all().update(n_pingbacks=F('n_pingbacks') + 1) However, unlike F() objects in filter and exclude clauses, you can’t introduce joins when you use F() objects in an update – you can only reference fields local to the model being updated. If you attempt to introduce a join with an F() object, a FieldError will be raised: # THIS WILL RAISE A FieldError >>> Entry.objects.update(headline=F('blog__name')) 3.2. Models and databases 115
- 120. Django Documentation, Release 1.9.3.dev20160224120324 Related objects When you define a relationship in a model (i.e., a ForeignKey, OneToOneField, or ManyToManyField), instances of that model will have a convenient API to access the related object(s). Using the models at the top of this page, for example, an Entry object e can get its associated Blog object by accessing the blog attribute: e.blog. (Behind the scenes, this functionality is implemented by Python descriptors. This shouldn’t really matter to you, but we point it out here for the curious.) Django also creates API accessors for the “other” side of the relationship – the link from the related model to the model that defines the relationship. For example, a Blog object b has access to a list of all related Entry objects via the entry_set attribute: b.entry_set.all(). All examples in this section use the sample Blog, Author and Entry models defined at the top of this page. One-to-many relationships Forward If a model has a ForeignKey, instances of that model will have access to the related (foreign) object via a simple attribute of the model. Example: >>> e = Entry.objects.get(id=2) >>> e.blog # Returns the related Blog object. You can get and set via a foreign-key attribute. As you may expect, changes to the foreign key aren’t saved to the database until you call save(). Example: >>> e = Entry.objects.get(id=2) >>> e.blog = some_blog >>> e.save() If a ForeignKey field has null=True set (i.e., it allows NULL values), you can assign None to remove the relation. Example: >>> e = Entry.objects.get(id=2) >>> e.blog = None >>> e.save() # "UPDATE blog_entry SET blog_id = NULL ...;" Forward access to one-to-many relationships is cached the first time the related object is accessed. Subsequent accesses to the foreign key on the same object instance are cached. Example: >>> e = Entry.objects.get(id=2) >>> print(e.blog) # Hits the database to retrieve the associated Blog. >>> print(e.blog) # Doesn't hit the database; uses cached version. Note that the select_related() QuerySet method recursively prepopulates the cache of all one-to-many rela- tionships ahead of time. Example: >>> e = Entry.objects.select_related().get(id=2) >>> print(e.blog) # Doesn't hit the database; uses cached version. >>> print(e.blog) # Doesn't hit the database; uses cached version. Following relationships “backward” If a model has a ForeignKey, instances of the foreign-key model will have access to a Manager that returns all instances of the first model. By default, this Manager is named FOO_set, 116 Chapter 3. Using Django
- 121. Django Documentation, Release 1.9.3.dev20160224120324 where FOO is the source model name, lowercased. This Manager returns QuerySets, which can be filtered and manipulated as described in the “Retrieving objects” section above. Example: >>> b = Blog.objects.get(id=1) >>> b.entry_set.all() # Returns all Entry objects related to Blog. # b.entry_set is a Manager that returns QuerySets. >>> b.entry_set.filter(headline__contains='Lennon') >>> b.entry_set.count() You can override the FOO_set name by setting the related_name parameter in the ForeignKey definition. For example, if the Entry model was altered to blog = ForeignKey(Blog, on_delete=models.CASCADE, related_name=’entries’), the above example code would look like this: >>> b = Blog.objects.get(id=1) >>> b.entries.all() # Returns all Entry objects related to Blog. # b.entries is a Manager that returns QuerySets. >>> b.entries.filter(headline__contains='Lennon') >>> b.entries.count() Using a custom reverse manager By default the RelatedManager used for reverse relations is a subclass of the default manager for that model. If you would like to specify a different manager for a given query you can use the following syntax: from django.db import models class Entry(models.Model): #... objects = models.Manager() # Default Manager entries = EntryManager() # Custom Manager b = Blog.objects.get(id=1) b.entry_set(manager='entries').all() If EntryManager performed default filtering in its get_queryset() method, that filtering would apply to the all() call. Of course, specifying a custom reverse manager also enables you to call its custom methods: b.entry_set(manager='entries').is_published() Additional methods to handle related objects In addition to the QuerySet methods defined in “Retrieving ob- jects” above, the ForeignKey Manager has additional methods used to handle the set of related objects. A synopsis of each is below, and complete details can be found in the related objects reference. add(obj1, obj2, ...) Adds the specified model objects to the related object set. create(**kwargs) Creates a new object, saves it and puts it in the related object set. Returns the newly created object. remove(obj1, obj2, ...) Removes the specified model objects from the related object set. clear() Removes all objects from the related object set. set(objs) Replace the set of related objects. 3.2. Models and databases 117
- 122. Django Documentation, Release 1.9.3.dev20160224120324 To assign the members of a related set in one fell swoop, just assign to it from any iterable object. The iterable can contain object instances, or just a list of primary key values. For example: b = Blog.objects.get(id=1) b.entry_set = [e1, e2] In this example, e1 and e2 can be full Entry instances, or integer primary key values. If the clear() method is available, any pre-existing objects will be removed from the entry_set before all objects in the iterable (in this case, a list) are added to the set. If the clear() method is not available, all objects in the iterable will be added without removing any existing elements. Each “reverse” operation described in this section has an immediate effect on the database. Every addition, creation and deletion is immediately and automatically saved to the database. Many-to-many relationships Both ends of a many-to-many relationship get automatic API access to the other end. The API works just as a “backward” one-to-many relationship, above. The only difference is in the attribute naming: The model that defines the ManyToManyField uses the attribute name of that field itself, whereas the “reverse” model uses the lowercased model name of the original model, plus ’_set’ (just like reverse one-to-many relationships). An example makes this easier to understand: e = Entry.objects.get(id=3) e.authors.all() # Returns all Author objects for this Entry. e.authors.count() e.authors.filter(name__contains='John') a = Author.objects.get(id=5) a.entry_set.all() # Returns all Entry objects for this Author. Like ForeignKey, ManyToManyField can specify related_name. In the above example, if the ManyToManyField in Entry had specified related_name=’entries’, then each Author instance would have an entries attribute instead of entry_set. One-to-one relationships One-to-one relationships are very similar to many-to-one relationships. If you define a OneToOneField on your model, instances of that model will have access to the related object via a simple attribute of the model. For example: class EntryDetail(models.Model): entry = models.OneToOneField(Entry, on_delete=models.CASCADE) details = models.TextField() ed = EntryDetail.objects.get(id=2) ed.entry # Returns the related Entry object. The difference comes in “reverse” queries. The related model in a one-to-one relationship also has access to a Manager object, but that Manager represents a single object, rather than a collection of objects: e = Entry.objects.get(id=2) e.entrydetail # returns the related EntryDetail object 118 Chapter 3. Using Django
- 123. Django Documentation, Release 1.9.3.dev20160224120324 If no object has been assigned to this relationship, Django will raise a DoesNotExist exception. Instances can be assigned to the reverse relationship in the same way as you would assign the forward relationship: e.entrydetail = ed How are the backward relationships possible? Other object-relational mappers require you to define relationships on both sides. The Django developers believe this is a violation of the DRY (Don’t Repeat Yourself) principle, so Django only requires you to define the relationship on one end. But how is this possible, given that a model class doesn’t know which other model classes are related to it until those other model classes are loaded? The answer lies in the app registry. When Django starts, it imports each application listed in INSTALLED_APPS, and then the models module inside each application. Whenever a new model class is cre- ated, Django adds backward-relationships to any related models. If the related models haven’t been imported yet, Django keeps tracks of the relationships and adds them when the related models eventually are imported. For this reason, it’s particularly important that all the models you’re using be defined in applications listed in INSTALLED_APPS. Otherwise, backwards relations may not work properly. Queries over related objects Queries involving related objects follow the same rules as queries involving normal value fields. When specifying the value for a query to match, you may use either an object instance itself, or the primary key value for the object. For example, if you have a Blog object b with id=5, the following three queries would be identical: Entry.objects.filter(blog=b) # Query using object instance Entry.objects.filter(blog=b.id) # Query using id from instance Entry.objects.filter(blog=5) # Query using id directly Falling back to raw SQL If you find yourself needing to write an SQL query that is too complex for Django’s database-mapper to handle, you can fall back on writing SQL by hand. Django has a couple of options for writing raw SQL queries; see Performing raw SQL queries. Finally, it’s important to note that the Django database layer is merely an interface to your database. You can access your database via other tools, programming languages or database frameworks; there’s nothing Django-specific about your database. 3.2.3 Aggregation The topic guide on Django’s database-abstraction API described the way that you can use Django queries that create, retrieve, update and delete individual objects. However, sometimes you will need to retrieve values that are derived by summarizing or aggregating a collection of objects. This topic guide describes the ways that aggregate values can be generated and returned using Django queries. Throughout this guide, we’ll refer to the following models. These models are used to track the inventory for a series of online bookstores: 3.2. Models and databases 119
- 124. Django Documentation, Release 1.9.3.dev20160224120324 from django.db import models class Author(models.Model): name = models.CharField(max_length=100) age = models.IntegerField() class Publisher(models.Model): name = models.CharField(max_length=300) num_awards = models.IntegerField() class Book(models.Model): name = models.CharField(max_length=300) pages = models.IntegerField() price = models.DecimalField(max_digits=10, decimal_places=2) rating = models.FloatField() authors = models.ManyToManyField(Author) publisher = models.ForeignKey(Publisher) pubdate = models.DateField() class Store(models.Model): name = models.CharField(max_length=300) books = models.ManyToManyField(Book) registered_users = models.PositiveIntegerField() Cheat sheet In a hurry? Here’s how to do common aggregate queries, assuming the models above: # Total number of books. >>> Book.objects.count() 2452 # Total number of books with publisher=BaloneyPress >>> Book.objects.filter(publisher__name='BaloneyPress').count() 73 # Average price across all books. >>> from django.db.models import Avg >>> Book.objects.all().aggregate(Avg('price')) {'price__avg': 34.35} # Max price across all books. >>> from django.db.models import Max >>> Book.objects.all().aggregate(Max('price')) {'price__max': Decimal('81.20')} # Cost per page >>> Book.objects.all().aggregate( ... price_per_page=Sum(F('price')/F('pages'), output_field=FloatField())) {'price_per_page': 0.4470664529184653} # All the following queries involve traversing the Book<->Publisher # foreign key relationship backwards. # Each publisher, each with a count of books as a "num_books" attribute. >>> from django.db.models import Count >>> pubs = Publisher.objects.annotate(num_books=Count('book')) 120 Chapter 3. Using Django
- 125. Django Documentation, Release 1.9.3.dev20160224120324 >>> pubs [<Publisher BaloneyPress>, <Publisher SalamiPress>, ...] >>> pubs[0].num_books 73 # The top 5 publishers, in order by number of books. >>> pubs = Publisher.objects.annotate(num_books=Count('book')).order_by('-num_books')[:5] >>> pubs[0].num_books 1323 Generating aggregates over a QuerySet Django provides two ways to generate aggregates. The first way is to generate summary values over an entire QuerySet. For example, say you wanted to calculate the average price of all books available for sale. Django’s query syntax provides a means for describing the set of all books: >>> Book.objects.all() What we need is a way to calculate summary values over the objects that belong to this QuerySet. This is done by appending an aggregate() clause onto the QuerySet: >>> from django.db.models import Avg >>> Book.objects.all().aggregate(Avg('price')) {'price__avg': 34.35} The all() is redundant in this example, so this could be simplified to: >>> Book.objects.aggregate(Avg('price')) {'price__avg': 34.35} The argument to the aggregate() clause describes the aggregate value that we want to compute - in this case, the average of the price field on the Book model. A list of the aggregate functions that are available can be found in the QuerySet reference. aggregate() is a terminal clause for a QuerySet that, when invoked, returns a dictionary of name-value pairs. The name is an identifier for the aggregate value; the value is the computed aggregate. The name is automatically generated from the name of the field and the aggregate function. If you want to manually specify a name for the aggregate value, you can do so by providing that name when you specify the aggregate clause: >>> Book.objects.aggregate(average_price=Avg('price')) {'average_price': 34.35} If you want to generate more than one aggregate, you just add another argument to the aggregate() clause. So, if we also wanted to know the maximum and minimum price of all books, we would issue the query: >>> from django.db.models import Avg, Max, Min >>> Book.objects.aggregate(Avg('price'), Max('price'), Min('price')) {'price__avg': 34.35, 'price__max': Decimal('81.20'), 'price__min': Decimal('12.99')} Generating aggregates for each item in a QuerySet The second way to generate summary values is to generate an independent summary for each object in a QuerySet. For example, if you are retrieving a list of books, you may want to know how many authors contributed to each book. Each Book has a many-to-many relationship with the Author; we want to summarize this relationship for each book in the QuerySet. 3.2. Models and databases 121
- 126. Django Documentation, Release 1.9.3.dev20160224120324 Per-object summaries can be generated using the annotate() clause. When an annotate() clause is specified, each object in the QuerySet will be annotated with the specified values. The syntax for these annotations is identical to that used for the aggregate() clause. Each argument to annotate() describes an aggregate that is to be calculated. For example, to annotate books with the number of authors: # Build an annotated queryset >>> from django.db.models import Count >>> q = Book.objects.annotate(Count('authors')) # Interrogate the first object in the queryset >>> q[0] <Book: The Definitive Guide to Django> >>> q[0].authors__count 2 # Interrogate the second object in the queryset >>> q[1] <Book: Practical Django Projects> >>> q[1].authors__count 1 As with aggregate(), the name for the annotation is automatically derived from the name of the aggregate function and the name of the field being aggregated. You can override this default name by providing an alias when you specify the annotation: >>> q = Book.objects.annotate(num_authors=Count('authors')) >>> q[0].num_authors 2 >>> q[1].num_authors 1 Unlike aggregate(), annotate() is not a terminal clause. The output of the annotate() clause is a QuerySet; this QuerySet can be modified using any other QuerySet operation, including filter(), order_by(), or even additional calls to annotate(). Combining multiple aggregations Combining multiple aggregations with annotate() will yield the wrong results because joins are used instead of subqueries: >>> Book.objects.first().authors.count() 2 >>> Book.objects.first().chapters.count() 3 >>> q = Book.objects.annotate(Count('authors'), Count('chapters')) >>> q[0].authors__count 6 >>> q[0].chapters__count 6 For most aggregates, there is no way to avoid this problem, however, the Count aggregate has a distinct parameter that may help: >>> q = Book.objects.annotate(Count('authors', distinct=True), Count('chapters', distinct=True)) >>> q[0].authors__count 2 >>> q[0].chapters__count 3 122 Chapter 3. Using Django
- 127. Django Documentation, Release 1.9.3.dev20160224120324 If in doubt, inspect the SQL query! In order to understand what happens in your query, consider inspecting the query property of your QuerySet. Joins and aggregates So far, we have dealt with aggregates over fields that belong to the model being queried. However, sometimes the value you want to aggregate will belong to a model that is related to the model you are querying. When specifying the field to be aggregated in an aggregate function, Django will allow you to use the same double underscore notation that is used when referring to related fields in filters. Django will then handle any table joins that are required to retrieve and aggregate the related value. For example, to find the price range of books offered in each store, you could use the annotation: >>> from django.db.models import Max, Min >>> Store.objects.annotate(min_price=Min('books__price'), max_price=Max('books__price')) This tells Django to retrieve the Store model, join (through the many-to-many relationship) with the Book model, and aggregate on the price field of the book model to produce a minimum and maximum value. The same rules apply to the aggregate() clause. If you wanted to know the lowest and highest price of any book that is available for sale in any of the stores, you could use the aggregate: >>> Store.objects.aggregate(min_price=Min('books__price'), max_price=Max('books__price')) Join chains can be as deep as you require. For example, to extract the age of the youngest author of any book available for sale, you could issue the query: >>> Store.objects.aggregate(youngest_age=Min('books__authors__age')) Following relationships backwards In a way similar to Lookups that span relationships, aggregations and annotations on fields of models or models that are related to the one you are querying can include traversing “reverse” relationships. The lowercase name of related models and double-underscores are used here too. For example, we can ask for all publishers, annotated with their respective total book stock counters (note how we use ’book’ to specify the Publisher -> Book reverse foreign key hop): >>> from django.db.models import Count, Min, Sum, Avg >>> Publisher.objects.annotate(Count('book')) (Every Publisher in the resulting QuerySet will have an extra attribute called book__count.) We can also ask for the oldest book of any of those managed by every publisher: >>> Publisher.objects.aggregate(oldest_pubdate=Min('book__pubdate')) (The resulting dictionary will have a key called ’oldest_pubdate’. If no such alias were specified, it would be the rather long ’book__pubdate__min’.) This doesn’t apply just to foreign keys. It also works with many-to-many relations. For example, we can ask for every author, annotated with the total number of pages considering all the books the author has (co-)authored (note how we use ’book’ to specify the Author -> Book reverse many-to-many hop): 3.2. Models and databases 123
- 128. Django Documentation, Release 1.9.3.dev20160224120324 >>> Author.objects.annotate(total_pages=Sum('book__pages')) (Every Author in the resulting QuerySet will have an extra attribute called total_pages. If no such alias were specified, it would be the rather long book__pages__sum.) Or ask for the average rating of all the books written by author(s) we have on file: >>> Author.objects.aggregate(average_rating=Avg('book__rating')) (The resulting dictionary will have a key called ’average__rating’. If no such alias were specified, it would be the rather long ’book__rating__avg’.) Aggregations and other QuerySet clauses filter() and exclude() Aggregates can also participate in filters. Any filter() (or exclude()) applied to normal model fields will have the effect of constraining the objects that are considered for aggregation. When used with an annotate() clause, a filter has the effect of constraining the objects for which an annotation is calculated. For example, you can generate an annotated list of all books that have a title starting with “Django” using the query: >>> from django.db.models import Count, Avg >>> Book.objects.filter(name__startswith="Django").annotate(num_authors=Count('authors')) When used with an aggregate() clause, a filter has the effect of constraining the objects over which the aggregate is calculated. For example, you can generate the average price of all books with a title that starts with “Django” using the query: >>> Book.objects.filter(name__startswith="Django").aggregate(Avg('price')) Filtering on annotations Annotated values can also be filtered. The alias for the annotation can be used in filter() and exclude() clauses in the same way as any other model field. For example, to generate a list of books that have more than one author, you can issue the query: >>> Book.objects.annotate(num_authors=Count('authors')).filter(num_authors__gt=1) This query generates an annotated result set, and then generates a filter based upon that annotation. Order of annotate() and filter() clauses When developing a complex query that involves both annotate() and filter() clauses, pay particular attention to the order in which the clauses are applied to the QuerySet. When an annotate() clause is applied to a query, the annotation is computed over the state of the query up to the point where the annotation is requested. The practical implication of this is that filter() and annotate() are not commutative operations. Given: • Publisher A has two books with ratings 4 and 5. • Publisher B has two books with ratings 1 and 4. • Publisher C has one book with rating 1. Here’s an example with the Count aggregate: 124 Chapter 3. Using Django
- 129. Django Documentation, Release 1.9.3.dev20160224120324 >>> a, b = Publisher.objects.annotate(num_books=Count('book', distinct=True)).filter(book__rating__gt >>> a, a.num_books (<Publisher: A>, 2) >>> b, b.num_books (<Publisher: B>, 2) >>> a, b = Publisher.objects.filter(book__rating__gt=3.0).annotate(num_books=Count('book')) >>> a, a.num_books (<Publisher: A>, 2) >>> b, b.num_books (<Publisher: B>, 1) Both queries return a list of publishers that have at least one book with a rating exceeding 3.0, hence publisher C is excluded. In the first query, the annotation precedes the filter, so the filter has no effect on the annotation. distinct=True is required to avoid a query bug. The second query counts the number of books that have a rating exceeding 3.0 for each publisher. The filter precedes the annotation, so the filter constrains the objects considered when calculating the annotation. Here’s another example with the Avg aggregate: >>> a, b = Publisher.objects.annotate(avg_rating=Avg('book__rating')).filter(book__rating__gt=3.0) >>> a, a.avg_rating (<Publisher: A>, 4.5) # (5+4)/2 >>> b, b.avg_rating (<Publisher: B>, 2.5) # (1+4)/2 >>> a, b = Publisher.objects.filter(book__rating__gt=3.0).annotate(avg_rating=Avg('book__rating')) >>> a, a.avg_rating (<Publisher: A>, 4.5) # (5+4)/2 >>> b, b.avg_rating (<Publisher: B>, 4.0) # 4/1 (book with rating 1 excluded) The first query asks for the average rating of all a publisher’s books for publisher’s that have at least one book with a rating exceeding 3.0. The second query asks for the average of a publisher’s book’s ratings for only those ratings exceeding 3.0. It’s difficult to intuit how the ORM will translate complex querysets into SQL queries so when in doubt, inspect the SQL with str(queryset.query) and write plenty of tests. order_by() Annotations can be used as a basis for ordering. When you define an order_by() clause, the aggregates you provide can reference any alias defined as part of an annotate() clause in the query. For example, to order a QuerySet of books by the number of authors that have contributed to the book, you could use the following query: >>> Book.objects.annotate(num_authors=Count('authors')).order_by('num_authors') values() Ordinarily, annotations are generated on a per-object basis - an annotated QuerySet will return one result for each object in the original QuerySet. However, when a values() clause is used to constrain the columns that are returned in the result set, the method for evaluating annotations is slightly different. Instead of returning an annotated 3.2. Models and databases 125
- 130. Django Documentation, Release 1.9.3.dev20160224120324 result for each result in the original QuerySet, the original results are grouped according to the unique combinations of the fields specified in the values() clause. An annotation is then provided for each unique group; the annotation is computed over all members of the group. For example, consider an author query that attempts to find out the average rating of books written by each author: >>> Author.objects.annotate(average_rating=Avg('book__rating')) This will return one result for each author in the database, annotated with their average book rating. However, the result will be slightly different if you use a values() clause: >>> Author.objects.values('name').annotate(average_rating=Avg('book__rating')) In this example, the authors will be grouped by name, so you will only get an annotated result for each unique author name. This means if you have two authors with the same name, their results will be merged into a single result in the output of the query; the average will be computed as the average over the books written by both authors. Order of annotate() and values() clauses As with the filter() clause, the order in which annotate() and values() clauses are applied to a query is significant. If the values() clause precedes the annotate(), the annotation will be computed using the grouping described by the values() clause. However, if the annotate() clause precedes the values() clause, the annotations will be generated over the entire query set. In this case, the values() clause only constrains the fields that are generated on output. For example, if we reverse the order of the values() and annotate() clause from our previous example: >>> Author.objects.annotate(average_rating=Avg('book__rating')).values('name', 'average_rating') This will now yield one unique result for each author; however, only the author’s name and the average_rating annotation will be returned in the output data. You should also note that average_rating has been explicitly included in the list of values to be returned. This is required because of the ordering of the values() and annotate() clause. If the values() clause precedes the annotate() clause, any annotations will be automatically added to the result set. However, if the values() clause is applied after the annotate() clause, you need to explicitly include the aggregate column. Interaction with default ordering or order_by() Fields that are mentioned in the order_by() part of a queryset (or which are used in the default ordering on a model) are used when selecting the output data, even if they are not otherwise specified in the values() call. These extra fields are used to group “like” results together and they can make otherwise identical result rows appear to be separate. This shows up, particularly, when counting things. By way of example, suppose you have a model like this: from django.db import models class Item(models.Model): name = models.CharField(max_length=10) data = models.IntegerField() class Meta: ordering = ["name"] The important part here is the default ordering on the name field. If you want to count how many times each distinct data value appears, you might try this: 126 Chapter 3. Using Django
- 131. Django Documentation, Release 1.9.3.dev20160224120324 # Warning: not quite correct! Item.objects.values("data").annotate(Count("id")) ...which will group the Item objects by their common data values and then count the number of id values in each group. Except that it won’t quite work. The default ordering by name will also play a part in the grouping, so this query will group by distinct (data, name) pairs, which isn’t what you want. Instead, you should construct this queryset: Item.objects.values("data").annotate(Count("id")).order_by() ...clearing any ordering in the query. You could also order by, say, data without any harmful effects, since that is already playing a role in the query. This behavior is the same as that noted in the queryset documentation for distinct() and the general rule is the same: normally you won’t want extra columns playing a part in the result, so clear out the ordering, or at least make sure it’s restricted only to those fields you also select in a values() call. Note: You might reasonably ask why Django doesn’t remove the extraneous columns for you. The main reason is consistency with distinct() and other places: Django never removes ordering constraints that you have specified (and we can’t change those other methods’ behavior, as that would violate our API stability policy). Aggregating annotations You can also generate an aggregate on the result of an annotation. When you define an aggregate() clause, the aggregates you provide can reference any alias defined as part of an annotate() clause in the query. For example, if you wanted to calculate the average number of authors per book you first annotate the set of books with the author count, then aggregate that author count, referencing the annotation field: >>> from django.db.models import Count, Avg >>> Book.objects.annotate(num_authors=Count('authors')).aggregate(Avg('num_authors')) {'num_authors__avg': 1.66} 3.2.4 Managers class Manager A Manager is the interface through which database query operations are provided to Django models. At least one Manager exists for every model in a Django application. The way Manager classes work is documented in Making queries; this document specifically touches on model options that customize Manager behavior. Manager names By default, Django adds a Manager with the name objects to every Django model class. However, if you want to use objects as a field name, or if you want to use a name other than objects for the Manager, you can rename it on a per-model basis. To rename the Manager for a given class, define a class attribute of type models.Manager() on that model. For example: from django.db import models class Person(models.Model): 3.2. Models and databases 127
- 132. Django Documentation, Release 1.9.3.dev20160224120324 #... people = models.Manager() Using this example model, Person.objects will generate an AttributeError exception, but Person.people.all() will provide a list of all Person objects. Custom managers You can use a custom Manager in a particular model by extending the base Manager class and instantiating your custom Manager in your model. There are two reasons you might want to customize a Manager: to add extra Manager methods, and/or to modify the initial QuerySet the Manager returns. Adding extra manager methods Adding extra Manager methods is the preferred way to add “table-level” functionality to your models. (For “row- level” functionality – i.e., functions that act on a single instance of a model object – use Model methods, not custom Manager methods.) A custom Manager method can return anything you want. It doesn’t have to return a QuerySet. For example, this custom Manager offers a method with_counts(), which returns a list of all OpinionPoll objects, each with an extra num_responses attribute that is the result of an aggregate query: from django.db import models class PollManager(models.Manager): def with_counts(self): from django.db import connection cursor = connection.cursor() cursor.execute(""" SELECT p.id, p.question, p.poll_date, COUNT(*) FROM polls_opinionpoll p, polls_response r WHERE p.id = r.poll_id GROUP BY p.id, p.question, p.poll_date ORDER BY p.poll_date DESC""") result_list = [] for row in cursor.fetchall(): p = self.model(id=row[0], question=row[1], poll_date=row[2]) p.num_responses = row[3] result_list.append(p) return result_list class OpinionPoll(models.Model): question = models.CharField(max_length=200) poll_date = models.DateField() objects = PollManager() class Response(models.Model): poll = models.ForeignKey(OpinionPoll, on_delete=models.CASCADE) person_name = models.CharField(max_length=50) response = models.TextField() With this example, you’d use OpinionPoll.objects.with_counts() to return that list of OpinionPoll objects with num_responses attributes. 128 Chapter 3. Using Django
- 133. Django Documentation, Release 1.9.3.dev20160224120324 Another thing to note about this example is that Manager methods can access self.model to get the model class to which they’re attached. Modifying a manager’s initial QuerySet A Manager’s base QuerySet returns all objects in the system. For example, using this model: from django.db import models class Book(models.Model): title = models.CharField(max_length=100) author = models.CharField(max_length=50) ...the statement Book.objects.all() will return all books in the database. You can override a Manager’s base QuerySet by overriding the Manager.get_queryset() method. get_queryset() should return a QuerySet with the properties you require. For example, the following model has two Managers – one that returns all objects, and one that returns only the books by Roald Dahl: # First, define the Manager subclass. class DahlBookManager(models.Manager): def get_queryset(self): return super(DahlBookManager, self).get_queryset().filter(author='Roald Dahl') # Then hook it into the Book model explicitly. class Book(models.Model): title = models.CharField(max_length=100) author = models.CharField(max_length=50) objects = models.Manager() # The default manager. dahl_objects = DahlBookManager() # The Dahl-specific manager. With this sample model, Book.objects.all() will return all books in the database, but Book.dahl_objects.all() will only return the ones written by Roald Dahl. Of course, because get_queryset() returns a QuerySet object, you can use filter(), exclude() and all the other QuerySet methods on it. So these statements are all legal: Book.dahl_objects.all() Book.dahl_objects.filter(title='Matilda') Book.dahl_objects.count() This example also pointed out another interesting technique: using multiple managers on the same model. You can attach as many Manager() instances to a model as you’d like. This is an easy way to define common “filters” for your models. For example: class AuthorManager(models.Manager): def get_queryset(self): return super(AuthorManager, self).get_queryset().filter(role='A') class EditorManager(models.Manager): def get_queryset(self): return super(EditorManager, self).get_queryset().filter(role='E') class Person(models.Model): 3.2. Models and databases 129
- 134. Django Documentation, Release 1.9.3.dev20160224120324 first_name = models.CharField(max_length=50) last_name = models.CharField(max_length=50) role = models.CharField(max_length=1, choices=(('A', _('Author')), ('E', _('Editor')))) people = models.Manager() authors = AuthorManager() editors = EditorManager() This example allows you to request Person.authors.all(), Person.editors.all(), and Person.people.all(), yielding predictable results. Default managers If you use custom Manager objects, take note that the first Manager Django encounters (in the order in which they’re defined in the model) has a special status. Django interprets the first Manager defined in a class as the “default” Manager, and several parts of Django (including dumpdata) will use that Manager exclusively for that model. As a result, it’s a good idea to be careful in your choice of default manager in order to avoid a situation where overriding get_queryset() results in an inability to retrieve objects you’d like to work with. Using managers for related object access By default, Django uses an instance of a “plain” manager class when accessing related objects (i.e. choice.poll), not the default manager on the related object. This is because Django needs to be able to retrieve the related object, even if it would otherwise be filtered out (and hence be inaccessible) by the default manager. If the normal plain manager class (django.db.models.Manager) is not appropriate for your circum- stances, you can force Django to use the same class as the default manager for your model by setting the use_for_related_fields attribute on the manager class. This is documented fully below. Calling custom QuerySet methods from the manager While most methods from the standard QuerySet are accessible directly from the Manager, this is only the case for the extra methods defined on a custom QuerySet if you also implement them on the Manager: class PersonQuerySet(models.QuerySet): def authors(self): return self.filter(role='A') def editors(self): return self.filter(role='E') class PersonManager(models.Manager): def get_queryset(self): return PersonQuerySet(self.model, using=self._db) def authors(self): return self.get_queryset().authors() def editors(self): return self.get_queryset().editors() class Person(models.Model): first_name = models.CharField(max_length=50) last_name = models.CharField(max_length=50) role = models.CharField(max_length=1, choices=(('A', _('Author')), ('E', _('Editor')))) people = PersonManager() This example allows you to call both authors() and editors() directly from the manager Person.people. 130 Chapter 3. Using Django
- 135. Django Documentation, Release 1.9.3.dev20160224120324 Creating a manager with QuerySet methods In lieu of the above approach which requires duplicating methods on both the QuerySet and the Manager, QuerySet.as_manager() can be used to create an instance of Manager with a copy of a custom QuerySet’s methods: class Person(models.Model): ... people = PersonQuerySet.as_manager() The Manager instance created by QuerySet.as_manager() will be virtually identical to the PersonManager from the previous example. Not every QuerySet method makes sense at the Manager level; for instance we intentionally prevent the QuerySet.delete() method from being copied onto the Manager class. Methods are copied according to the following rules: • Public methods are copied by default. • Private methods (starting with an underscore) are not copied by default. • Methods with a queryset_only attribute set to False are always copied. • Methods with a queryset_only attribute set to True are never copied. For example: class CustomQuerySet(models.QuerySet): # Available on both Manager and QuerySet. def public_method(self): return # Available only on QuerySet. def _private_method(self): return # Available only on QuerySet. def opted_out_public_method(self): return opted_out_public_method.queryset_only = True # Available on both Manager and QuerySet. def _opted_in_private_method(self): return _opted_in_private_method.queryset_only = False from_queryset() classmethod from_queryset(queryset_class) For advanced usage you might want both a custom Manager and a custom QuerySet. You can do that by call- ing Manager.from_queryset() which returns a subclass of your base Manager with a copy of the custom QuerySet methods: class BaseManager(models.Manager): def manager_only_method(self): return class CustomQuerySet(models.QuerySet): def manager_and_queryset_method(self): 3.2. Models and databases 131
- 136. Django Documentation, Release 1.9.3.dev20160224120324 return class MyModel(models.Model): objects = BaseManager.from_queryset(CustomQuerySet)() You may also store the generated class into a variable: CustomManager = BaseManager.from_queryset(CustomQuerySet) class MyModel(models.Model): objects = CustomManager() Custom managers and model inheritance Class inheritance and model managers aren’t quite a perfect match for each other. Managers are often specific to the classes they are defined on and inheriting them in subclasses isn’t necessarily a good idea. Also, because the first manager declared is the default manager, it is important to allow that to be controlled. So here’s how Django handles custom managers and model inheritance: 1. Managers defined on non-abstract base classes are not inherited by child classes. If you want to reuse a manager from a non-abstract base, redeclare it explicitly on the child class. These sorts of managers are likely to be fairly specific to the class they are defined on, so inheriting them can often lead to unexpected results (particularly as far as the default manager goes). Therefore, they aren’t passed onto child classes. 2. Managers from abstract base classes are always inherited by the child class, using Python’s normal name reso- lution order (names on the child class override all others; then come names on the first parent class, and so on). Abstract base classes are designed to capture information and behavior that is common to their child classes. Defining common managers is an appropriate part of this common information. 3. The default manager on a class is either the first manager declared on the class, if that exists, or the default manager of the first abstract base class in the parent hierarchy, if that exists. If no default manager is explicitly declared, Django’s normal default manager is used. These rules provide the necessary flexibility if you want to install a collection of custom managers on a group of models, via an abstract base class, but still customize the default manager. For example, suppose you have this base class: class AbstractBase(models.Model): # ... objects = CustomManager() class Meta: abstract = True If you use this directly in a subclass, objects will be the default manager if you declare no managers in the base class: class ChildA(AbstractBase): # ... # This class has CustomManager as the default manager. pass If you want to inherit from AbstractBase, but provide a different default manager, you can provide the default manager on the child class: class ChildB(AbstractBase): # ... 132 Chapter 3. Using Django
- 137. Django Documentation, Release 1.9.3.dev20160224120324 # An explicit default manager. default_manager = OtherManager() Here, default_manager is the default. The objects manager is still available, since it’s inherited. It just isn’t used as the default. Finally for this example, suppose you want to add extra managers to the child class, but still use the default from AbstractBase. You can’t add the new manager directly in the child class, as that would override the default and you would have to also explicitly include all the managers from the abstract base class. The solution is to put the extra managers in another base class and introduce it into the inheritance hierarchy after the defaults: class ExtraManager(models.Model): extra_manager = OtherManager() class Meta: abstract = True class ChildC(AbstractBase, ExtraManager): # ... # Default manager is CustomManager, but OtherManager is # also available via the "extra_manager" attribute. pass Note that while you can define a custom manager on the abstract model, you can’t invoke any methods using the abstract model. That is: ClassA.objects.do_something() is legal, but: AbstractBase.objects.do_something() will raise an exception. This is because managers are intended to encapsulate logic for managing collections of objects. Since you can’t have a collection of abstract objects, it doesn’t make sense to be managing them. If you have function- ality that applies to the abstract model, you should put that functionality in a staticmethod or classmethod on the abstract model. Implementation concerns Whatever features you add to your custom Manager, it must be possible to make a shallow copy of a Manager instance; i.e., the following code must work: >>> import copy >>> manager = MyManager() >>> my_copy = copy.copy(manager) Django makes shallow copies of manager objects during certain queries; if your Manager cannot be copied, those queries will fail. This won’t be an issue for most custom managers. If you are just adding simple methods to your Manager, it is unlikely that you will inadvertently make instances of your Manager uncopyable. However, if you’re overriding __getattr__ or some other private method of your Manager object that controls object state, you should ensure that you don’t affect the ability of your Manager to be copied. 3.2. Models and databases 133
- 138. Django Documentation, Release 1.9.3.dev20160224120324 Controlling automatic manager types This document has already mentioned a couple of places where Django creates a manager class for you: default managers and the “plain” manager used to access related objects. There are other places in the implementation of Django where temporary plain managers are needed. Those automatically created managers will normally be instances of the django.db.models.Manager class. Throughout this section, we will use the term “automatic manager” to mean a manager that Django creates for you – either as a default manager on a model with no managers, or to use temporarily when accessing related objects. Sometimes this default class won’t be the right choice. The default manager may not have all the methods you need to work with your data. A custom manager class of your own will allow you to create custom QuerySet objects to give you the information you need. Django provides a way for custom manager developers to say that their manager class should be used for automatic managers whenever it is the default manager on a model. This is done by setting the use_for_related_fields attribute on the manager class: class MyManager(models.Manager): use_for_related_fields = True # ... If this attribute is set on the default manager for a model (only the default manager is considered in these situations), Django will use that class whenever it needs to automatically create a manager for the class. Otherwise, it will use django.db.models.Manager. Historical Note Given the purpose for which it’s used, the name of this attribute (use_for_related_fields) might seem a little odd. Originally, the attribute only controlled the type of manager used for related field access, which is where the name came from. As it became clear the concept was more broadly useful, the name hasn’t been changed. This is primarily so that existing code will continue to work in future Django versions. Writing correct managers for use in automatic manager instances The use_for_related_fields feature is primarily for managers that need to return a custom QuerySet sub- class. In providing this functionality in your manager, there are a couple of things to remember. Do not filter away any results in this type of manager subclass One reason an automatic manager is used is to access objects that are related to from some other model. In those situations, Django has to be able to see all the objects for the model it is fetching, so that anything which is referred to can be retrieved. If you override the get_queryset() method and filter out any rows, Django will return incorrect results. Don’t do that. A manager that filters results in get_queryset() is not appropriate for use as an automatic manager. Set use_for_related_fields when you define the class The use_for_related_fields attribute must be set on the manager class, not on an instance of the class. The earlier example shows the correct way to set it, whereas the following will not work: # BAD: Incorrect code class MyManager(models.Manager): # ... pass # Sets the attribute on an instance of MyManager. Django will 134 Chapter 3. Using Django
- 139. Django Documentation, Release 1.9.3.dev20160224120324 # ignore this setting. mgr = MyManager() mgr.use_for_related_fields = True class MyModel(models.Model): # ... objects = mgr # End of incorrect code. You also shouldn’t change the attribute on the class object after it has been used in a model, since the attribute’s value is processed when the model class is created and not subsequently reread. Set the attribute on the manager class when it is first defined, as in the initial example of this section and everything will work smoothly. 3.2.5 Performing raw SQL queries When the model query APIs don’t go far enough, you can fall back to writing raw SQL. Django gives you two ways of performing raw SQL queries: you can use Manager.raw() to perform raw queries and return model instances, or you can avoid the model layer entirely and execute custom SQL directly. Warning: You should be very careful whenever you write raw SQL. Every time you use it, you should properly escape any parameters that the user can control by using params in order to protect against SQL injection attacks. Please read more about SQL injection protection. Performing raw queries The raw() manager method can be used to perform raw SQL queries that return model instances: Manager.raw(raw_query, params=None, translations=None) This method takes a raw SQL query, executes it, and returns a django.db.models.query.RawQuerySet instance. This RawQuerySet instance can be iterated over just like a normal QuerySet to provide object instances. This is best illustrated with an example. Suppose you have the following model: class Person(models.Model): first_name = models.CharField(...) last_name = models.CharField(...) birth_date = models.DateField(...) You could then execute custom SQL like so: >>> for p in Person.objects.raw('SELECT * FROM myapp_person'): ... print(p) John Smith Jane Jones Of course, this example isn’t very exciting – it’s exactly the same as running Person.objects.all(). However, raw() has a bunch of other options that make it very powerful. Model table names Where did the name of the Person table come from in that example? By default, Django figures out a database table name by joining the model’s “app label” – the name you used in manage.py startapp – to the model’s class name, with an underscore between them. In the example we’ve assumed that the Person model lives in an app named myapp, so its table would be myapp_person. 3.2. Models and databases 135
- 140. Django Documentation, Release 1.9.3.dev20160224120324 For more details check out the documentation for the db_table option, which also lets you manually set the database table name. Warning: No checking is done on the SQL statement that is passed in to .raw(). Django expects that the statement will return a set of rows from the database, but does nothing to enforce that. If the query does not return rows, a (possibly cryptic) error will result. Warning: If you are performing queries on MySQL, note that MySQL’s silent type coercion may cause unex- pected results when mixing types. If you query on a string type column, but with an integer value, MySQL will coerce the types of all values in the table to an integer before performing the comparison. For example, if your table contains the values ’abc’, ’def’ and you query for WHERE mycolumn=0, both rows will match. To prevent this, perform the correct typecasting before using the value in a query. Warning: While a RawQuerySet instance can be iterated over like a normal QuerySet, RawQuerySet doesn’t implement all methods you can use with QuerySet. For example, __bool__() and __len__() are not defined in RawQuerySet, and thus all RawQuerySet instances are considered True. The reason these methods are not implemented in RawQuerySet is that implementing them without internal caching would be a performance drawback and adding such caching would be backward incompatible. Mapping query fields to model fields raw() automatically maps fields in the query to fields on the model. The order of fields in your query doesn’t matter. In other words, both of the following queries work identically: >>> Person.objects.raw('SELECT id, first_name, last_name, birth_date FROM myapp_person') ... >>> Person.objects.raw('SELECT last_name, birth_date, first_name, id FROM myapp_person') ... Matching is done by name. This means that you can use SQL’s AS clauses to map fields in the query to model fields. So if you had some other table that had Person data in it, you could easily map it into Person instances: >>> Person.objects.raw('''SELECT first AS first_name, ... last AS last_name, ... bd AS birth_date, ... pk AS id, ... FROM some_other_table''') As long as the names match, the model instances will be created correctly. Alternatively, you can map fields in the query to model fields using the translations argument to raw(). This is a dictionary mapping names of fields in the query to names of fields on the model. For example, the above query could also be written: >>> name_map = {'first': 'first_name', 'last': 'last_name', 'bd': 'birth_date', 'pk': 'id'} >>> Person.objects.raw('SELECT * FROM some_other_table', translations=name_map) Index lookups raw() supports indexing, so if you need only the first result you can write: 136 Chapter 3. Using Django
- 141. Django Documentation, Release 1.9.3.dev20160224120324 >>> first_person = Person.objects.raw('SELECT * FROM myapp_person')[0] However, the indexing and slicing are not performed at the database level. If you have a large number of Person objects in your database, it is more efficient to limit the query at the SQL level: >>> first_person = Person.objects.raw('SELECT * FROM myapp_person LIMIT 1')[0] Deferring model fields Fields may also be left out: >>> people = Person.objects.raw('SELECT id, first_name FROM myapp_person') The Person objects returned by this query will be deferred model instances (see defer()). This means that the fields that are omitted from the query will be loaded on demand. For example: >>> for p in Person.objects.raw('SELECT id, first_name FROM myapp_person'): ... print(p.first_name, # This will be retrieved by the original query ... p.last_name) # This will be retrieved on demand ... John Smith Jane Jones From outward appearances, this looks like the query has retrieved both the first name and last name. However, this example actually issued 3 queries. Only the first names were retrieved by the raw() query – the last names were both retrieved on demand when they were printed. There is only one field that you can’t leave out - the primary key field. Django uses the primary key to identify model instances, so it must always be included in a raw query. An InvalidQuery exception will be raised if you forget to include the primary key. Adding annotations You can also execute queries containing fields that aren’t defined on the model. For example, we could use Post- greSQL’s age() function to get a list of people with their ages calculated by the database: >>> people = Person.objects.raw('SELECT *, age(birth_date) AS age FROM myapp_person') >>> for p in people: ... print("%s is %s." % (p.first_name, p.age)) John is 37. Jane is 42. ... Passing parameters into raw() If you need to perform parameterized queries, you can use the params argument to raw(): >>> lname = 'Doe' >>> Person.objects.raw('SELECT * FROM myapp_person WHERE last_name = %s', [lname]) params is a list or dictionary of parameters. You’ll use %s placeholders in the query string for a list, or %(key)s placeholders for a dictionary (where key is replaced by a dictionary key, of course), regardless of your database engine. Such placeholders will be replaced with parameters from the params argument. 3.2. Models and databases 137
- 142. Django Documentation, Release 1.9.3.dev20160224120324 Note: Dictionary params are not supported with the SQLite backend; with this backend, you must pass parameters as a list. Warning: Do not use string formatting on raw queries! It’s tempting to write the above query as: >>> query = 'SELECT * FROM myapp_person WHERE last_name = %s' % lname >>> Person.objects.raw(query) Don’t. Using the params argument completely protects you from SQL injection attacks, a common exploit where at- tackers inject arbitrary SQL into your database. If you use string interpolation, sooner or later you’ll fall victim to SQL injection. As long as you remember to always use the params argument you’ll be protected. Executing custom SQL directly Sometimes even Manager.raw() isn’t quite enough: you might need to perform queries that don’t map cleanly to models, or directly execute UPDATE, INSERT, or DELETE queries. In these cases, you can always access the database directly, routing around the model layer entirely. The object django.db.connection represents the default database connection. To use the database connec- tion, call connection.cursor() to get a cursor object. Then, call cursor.execute(sql, [params]) to execute the SQL and cursor.fetchone() or cursor.fetchall() to return the resulting rows. For example: from django.db import connection def my_custom_sql(self): cursor = connection.cursor() cursor.execute("UPDATE bar SET foo = 1 WHERE baz = %s", [self.baz]) cursor.execute("SELECT foo FROM bar WHERE baz = %s", [self.baz]) row = cursor.fetchone() return row Note that if you want to include literal percent signs in the query, you have to double them in the case you are passing parameters: cursor.execute("SELECT foo FROM bar WHERE baz = '30%'") cursor.execute("SELECT foo FROM bar WHERE baz = '30%%' AND id = %s", [self.id]) If you are using more than one database, you can use django.db.connections to obtain the connection (and cursor) for a specific database. django.db.connections is a dictionary-like object that allows you to retrieve a specific connection using its alias: from django.db import connections cursor = connections['my_db_alias'].cursor() # Your code here... By default, the Python DB API will return results without their field names, which means you end up with a list of values, rather than a dict. At a small performance and memory cost, you can return results as a dict by using something like this: 138 Chapter 3. Using Django
- 143. Django Documentation, Release 1.9.3.dev20160224120324 def dictfetchall(cursor): "Return all rows from a cursor as a dict" columns = [col[0] for col in cursor.description] return [ dict(zip(columns, row)) for row in cursor.fetchall() ] Another option is to use collections.namedtuple() from the Python standard library. A namedtuple is a tuple-like object that has fields accessible by attribute lookup; it’s also indexable and iterable. Results are immutable and accessible by field names or indices, which might be useful: from collections import namedtuple def namedtuplefetchall(cursor): "Return all rows from a cursor as a namedtuple" desc = cursor.description nt_result = namedtuple('Result', [col[0] for col in desc]) return [nt_result(*row) for row in cursor.fetchall()] Here is an example of the difference between the three: >>> cursor.execute("SELECT id, parent_id FROM test LIMIT 2"); >>> cursor.fetchall() ((54360982, None), (54360880, None)) >>> cursor.execute("SELECT id, parent_id FROM test LIMIT 2"); >>> dictfetchall(cursor) [{'parent_id': None, 'id': 54360982}, {'parent_id': None, 'id': 54360880}] >>> cursor.execute("SELECT id, parent_id FROM test LIMIT 2"); >>> results = namedtuplefetchall(cursor) >>> results [Result(id=54360982, parent_id=None), Result(id=54360880, parent_id=None)] >>> results[0].id 54360982 >>> results[0][0] 54360982 Connections and cursors connection and cursor mostly implement the standard Python DB-API described in PEP 249 — except when it comes to transaction handling. If you’re not familiar with the Python DB-API, note that the SQL statement in cursor.execute() uses placehold- ers, "%s", rather than adding parameters directly within the SQL. If you use this technique, the underlying database library will automatically escape your parameters as necessary. Also note that Django expects the "%s" placeholder, not the "?" placeholder, which is used by the SQLite Python bindings. This is for the sake of consistency and sanity. Using a cursor as a context manager: with connection.cursor() as c: c.execute(...) is equivalent to: 3.2. Models and databases 139
- 144. Django Documentation, Release 1.9.3.dev20160224120324 c = connection.cursor() try: c.execute(...) finally: c.close() 3.2.6 Database transactions Django gives you a few ways to control how database transactions are managed. Managing database transactions Django’s default transaction behavior Django’s default behavior is to run in autocommit mode. Each query is immediately committed to the database, unless a transaction is active. See below for details. Django uses transactions or savepoints automatically to guarantee the integrity of ORM operations that require multiple queries, especially delete() and update() queries. Django’s TestCase class also wraps each test in a transaction for performance reasons. Tying transactions to HTTP requests A common way to handle transactions on the web is to wrap each request in a transaction. Set ATOMIC_REQUESTS to True in the configuration of each database for which you want to enable this behavior. It works like this. Before calling a view function, Django starts a transaction. If the response is produced without problems, Django commits the transaction. If the view produces an exception, Django rolls back the transaction. You may perform subtransactions using savepoints in your view code, typically with the atomic() context manager. However, at the end of the view, either all or none of the changes will be committed. Warning: While the simplicity of this transaction model is appealing, it also makes it inefficient when traffic increases. Opening a transaction for every view has some overhead. The impact on performance depends on the query patterns of your application and on how well your database handles locking. Per-request transactions and streaming responses When a view returns a StreamingHttpResponse, reading the contents of the response will often execute code to generate the content. Since the view has already returned, such code runs outside of the transaction. Generally speaking, it isn’t advisable to write to the database while generating a streaming response, since there’s no sensible way to handle errors after starting to send the response. In practice, this feature simply wraps every view function in the atomic() decorator described below. Note that only the execution of your view is enclosed in the transactions. Middleware runs outside of the transaction, and so does the rendering of template responses. When ATOMIC_REQUESTS is enabled, it’s still possible to prevent views from running in a transaction. 140 Chapter 3. Using Django
- 145. Django Documentation, Release 1.9.3.dev20160224120324 non_atomic_requests(using=None) This decorator will negate the effect of ATOMIC_REQUESTS for a given view: from django.db import transaction @transaction.non_atomic_requests def my_view(request): do_stuff() @transaction.non_atomic_requests(using='other') def my_other_view(request): do_stuff_on_the_other_database() It only works if it’s applied to the view itself. Controlling transactions explicitly Django provides a single API to control database transactions. atomic(using=None, savepoint=True) Atomicity is the defining property of database transactions. atomic allows us to create a block of code within which the atomicity on the database is guaranteed. If the block of code is successfully completed, the changes are committed to the database. If there is an exception, the changes are rolled back. atomic blocks can be nested. In this case, when an inner block completes successfully, its effects can still be rolled back if an exception is raised in the outer block at a later point. atomic is usable both as a decorator: from django.db import transaction @transaction.atomic def viewfunc(request): # This code executes inside a transaction. do_stuff() and as a context manager: from django.db import transaction def viewfunc(request): # This code executes in autocommit mode (Django's default). do_stuff() with transaction.atomic(): # This code executes inside a transaction. do_more_stuff() Wrapping atomic in a try/except block allows for natural handling of integrity errors: from django.db import IntegrityError, transaction @transaction.atomic def viewfunc(request): create_parent() try: with transaction.atomic(): generate_relationships() 3.2. Models and databases 141
- 146. Django Documentation, Release 1.9.3.dev20160224120324 except IntegrityError: handle_exception() add_children() In this example, even if generate_relationships() causes a database error by breaking an integrity constraint, you can execute queries in add_children(), and the changes from create_parent() are still there. Note that any operations attempted in generate_relationships() will already have been rolled back safely when handle_exception() is called, so the exception handler can also operate on the database if necessary. Avoid catching exceptions inside atomic! When exiting an atomic block, Django looks at whether it’s exited normally or with an exception to determine whether to commit or roll back. If you catch and handle exceptions inside an atomic block, you may hide from Django the fact that a problem has happened. This can result in unexpected behavior. This is mostly a concern for DatabaseError and its subclasses such as IntegrityError. Af- ter such an error, the transaction is broken and Django will perform a rollback at the end of the atomic block. If you attempt to run database queries before the rollback happens, Django will raise a TransactionManagementError. You may also encounter this behavior when an ORM-related signal handler raises an exception. The correct way to catch database errors is around an atomic block as shown above. If necessary, add an extra atomic block for this purpose. This pattern has another advantage: it delimits explicitly which operations will be rolled back if an exception occurs. If you catch exceptions raised by raw SQL queries, Django’s behavior is unspecified and database-dependent. In order to guarantee atomicity, atomic disables some APIs. Attempting to commit, roll back, or change the autocommit state of the database connection within an atomic block will raise an exception. atomic takes a using argument which should be the name of a database. If this argument isn’t provided, Django uses the "default" database. Under the hood, Django’s transaction management code: •opens a transaction when entering the outermost atomic block; •creates a savepoint when entering an inner atomic block; •releases or rolls back to the savepoint when exiting an inner block; •commits or rolls back the transaction when exiting the outermost block. You can disable the creation of savepoints for inner blocks by setting the savepoint argument to False. If an exception occurs, Django will perform the rollback when exiting the first parent block with a savepoint if there is one, and the outermost block otherwise. Atomicity is still guaranteed by the outer transaction. This option should only be used if the overhead of savepoints is noticeable. It has the drawback of breaking the error handling described above. You may use atomic when autocommit is turned off. It will only use savepoints, even for the outermost block. Previously the outermost atomic block couldn’t be declared with savepoint=False when autocommit was turned off. Performance considerations 142 Chapter 3. Using Django
- 147. Django Documentation, Release 1.9.3.dev20160224120324 Open transactions have a performance cost for your database server. To minimize this overhead, keep your transactions as short as possible. This is especially important if you’re using atomic() in long-running processes, outside of Django’s request / response cycle. Autocommit Why Django uses autocommit In the SQL standards, each SQL query starts a transaction, unless one is already active. Such transactions must then be explicitly committed or rolled back. This isn’t always convenient for application developers. To alleviate this problem, most databases provide an auto- commit mode. When autocommit is turned on and no transaction is active, each SQL query gets wrapped in its own transaction. In other words, not only does each such query start a transaction, but the transaction also gets automati- cally committed or rolled back, depending on whether the query succeeded. PEP 249, the Python Database API Specification v2.0, requires autocommit to be initially turned off. Django overrides this default and turns autocommit on. To avoid this, you can deactivate the transaction management, but it isn’t recommended. Deactivating transaction management You can totally disable Django’s transaction management for a given database by setting AUTOCOMMIT to False in its configuration. If you do this, Django won’t enable autocommit, and won’t perform any commits. You’ll get the regular behavior of the underlying database library. This requires you to commit explicitly every transaction, even those started by Django or by third-party libraries. Thus, this is best used in situations where you want to run your own transaction-controlling middleware or do something really strange. Performing actions after commit Sometimes you need to perform an action related to the current database transaction, but only if the transaction suc- cessfully commits. Examples might include a Celery task, an email notification, or a cache invalidation. Django provides the on_commit() function to register callback functions that should be executed after a transaction is successfully committed: on_commit(func, using=None) Pass any function (that takes no arguments) to on_commit(): from django.db import transaction def do_something(): pass # send a mail, invalidate a cache, fire off a Celery task, etc. transaction.on_commit(do_something) You can also wrap your function in a lambda: transaction.on_commit(lambda: some_celery_task.delay('arg1')) 3.2. Models and databases 143
- 148. Django Documentation, Release 1.9.3.dev20160224120324 The function you pass in will be called immediately after a hypothetical database write made where on_commit() is called would be successfully committed. If you call on_commit() while there isn’t an active transaction, the callback will be executed immediately. If that hypothetical database write is instead rolled back (typically when an unhandled exception is raised in an atomic() block), your function will be discarded and never called. Savepoints Savepoints (i.e. nested atomic() blocks) are handled correctly. That is, an on_commit() callable registered after a savepoint (in a nested atomic() block) will be called after the outer transaction is committed, but not if a rollback to that savepoint or any previous savepoint occurred during the transaction: with transaction.atomic(): # Outer atomic, start a new transaction transaction.on_commit(foo) with transaction.atomic(): # Inner atomic block, create a savepoint transaction.on_commit(bar) # foo() and then bar() will be called when leaving the outermost block On the other hand, when a savepoint is rolled back (due to an exception being raised), the inner callable will not be called: with transaction.atomic(): # Outer atomic, start a new transaction transaction.on_commit(foo) try: with transaction.atomic(): # Inner atomic block, create a savepoint transaction.on_commit(bar) raise SomeError() # Raising an exception - abort the savepoint except SomeError: pass # foo() will be called, but not bar() Order of execution On-commit functions for a given transaction are executed in the order they were registered. Exception handling If one on-commit function within a given transaction raises an uncaught exception, no later registered functions in that same transaction will run. This is, of course, the same behavior as if you’d executed the functions sequentially yourself without on_commit(). Timing of execution Your callbacks are executed after a successful commit, so a failure in a callback will not cause the transaction to roll back. They are executed conditionally upon the success of the transaction, but they are not part of the transaction. For the intended use cases (mail notifications, Celery tasks, etc.), this should be fine. If it’s not (if your follow-up action is so critical that its failure should mean the failure of the transaction itself), then you don’t want to use the 144 Chapter 3. Using Django
- 149. Django Documentation, Release 1.9.3.dev20160224120324 on_commit() hook. Instead, you may want two-phase commit such as the psycopg Two-Phase Commit protocol support and the optional Two-Phase Commit Extensions in the Python DB-API specification. Callbacks are not run until autocommit is restored on the connection following the commit (because otherwise any queries done in a callback would open an implicit transaction, preventing the connection from going back into auto- commit mode). When in autocommit mode and outside of an atomic() block, the function will run immediately, not on commit. On-commit functions only work with autocommit mode and the atomic() (or ATOMIC_REQUESTS) transaction API. Calling on_commit() when autocommit is disabled and you are not within an atomic block will result in an error. Use in tests Django’s TestCase class wraps each test in a transaction and rolls back that transaction after each test, in order to provide test isolation. This means that no transaction is ever actually committed, thus your on_commit() callbacks will never be run. If you need to test the results of an on_commit() callback, use a TransactionTestCase instead. Why no rollback hook? A rollback hook is harder to implement robustly than a commit hook, since a variety of things can cause an implicit rollback. For instance, if your database connection is dropped because your process was killed without a chance to shut down gracefully, your rollback hook will never run. The solution is simple: instead of doing something during the atomic block (transaction) and then undoing it if the transaction fails, use on_commit() to delay doing it in the first place until after the transaction succeeds. It’s a lot easier to undo something you never did in the first place! Low-level APIs Warning: Always prefer atomic() if possible at all. It accounts for the idiosyncrasies of each database and prevents invalid operations. The low level APIs are only useful if you’re implementing your own transaction management. Autocommit Django provides a straightforward API in the django.db.transaction module to manage the autocommit state of each database connection. get_autocommit(using=None) set_autocommit(autocommit, using=None) These functions take a using argument which should be the name of a database. If it isn’t provided, Django uses the "default" database. Autocommit is initially turned on. If you turn it off, it’s your responsibility to restore it. 3.2. Models and databases 145
- 150. Django Documentation, Release 1.9.3.dev20160224120324 Once you turn autocommit off, you get the default behavior of your database adapter, and Django won’t help you. Although that behavior is specified in PEP 249, implementations of adapters aren’t always consistent with one another. Review the documentation of the adapter you’re using carefully. You must ensure that no transaction is active, usually by issuing a commit() or a rollback(), before turning autocommit back on. Django will refuse to turn autocommit off when an atomic() block is active, because that would break atomicity. Transactions A transaction is an atomic set of database queries. Even if your program crashes, the database guarantees that either all the changes will be applied, or none of them. Django doesn’t provide an API to start a transaction. The expected way to start a transaction is to disable autocommit with set_autocommit(). Once you’re in a transaction, you can choose either to apply the changes you’ve performed until this point with commit(), or to cancel them with rollback(). These functions are defined in django.db.transaction. commit(using=None) rollback(using=None) These functions take a using argument which should be the name of a database. If it isn’t provided, Django uses the "default" database. Django will refuse to commit or to rollback when an atomic() block is active, because that would break atomicity. Savepoints A savepoint is a marker within a transaction that enables you to roll back part of a transaction, rather than the full transaction. Savepoints are available with the SQLite (≥ 3.6.8), PostgreSQL, Oracle and MySQL (when using the InnoDB storage engine) backends. Other backends provide the savepoint functions, but they’re empty operations – they don’t actually do anything. Savepoints aren’t especially useful if you are using autocommit, the default behavior of Django. However, once you open a transaction with atomic(), you build up a series of database operations awaiting a commit or rollback. If you issue a rollback, the entire transaction is rolled back. Savepoints provide the ability to perform a fine-grained rollback, rather than the full rollback that would be performed by transaction.rollback(). When the atomic() decorator is nested, it creates a savepoint to allow partial commit or rollback. You’re strongly encouraged to use atomic() rather than the functions described below, but they’re still part of the public API, and there’s no plan to deprecate them. Each of these functions takes a using argument which should be the name of a database for which the behavior applies. If no using argument is provided then the "default" database is used. Savepoints are controlled by three functions in django.db.transaction: savepoint(using=None) Creates a new savepoint. This marks a point in the transaction that is known to be in a “good” state. Returns the savepoint ID (sid). savepoint_commit(sid, using=None) Releases savepoint sid. The changes performed since the savepoint was created become part of the transaction. savepoint_rollback(sid, using=None) Rolls back the transaction to savepoint sid. 146 Chapter 3. Using Django
- 151. Django Documentation, Release 1.9.3.dev20160224120324 These functions do nothing if savepoints aren’t supported or if the database is in autocommit mode. In addition, there’s a utility function: clean_savepoints(using=None) Resets the counter used to generate unique savepoint IDs. The following example demonstrates the use of savepoints: from django.db import transaction # open a transaction @transaction.atomic def viewfunc(request): a.save() # transaction now contains a.save() sid = transaction.savepoint() b.save() # transaction now contains a.save() and b.save() if want_to_keep_b: transaction.savepoint_commit(sid) # open transaction still contains a.save() and b.save() else: transaction.savepoint_rollback(sid) # open transaction now contains only a.save() Savepoints may be used to recover from a database error by performing a partial rollback. If you’re doing this inside an atomic() block, the entire block will still be rolled back, because it doesn’t know you’ve handled the situation at a lower level! To prevent this, you can control the rollback behavior with the following functions. get_rollback(using=None) set_rollback(rollback, using=None) Setting the rollback flag to True forces a rollback when exiting the innermost atomic block. This may be useful to trigger a rollback without raising an exception. Setting it to False prevents such a rollback. Before doing that, make sure you’ve rolled back the transaction to a known-good savepoint within the current atomic block! Otherwise you’re breaking atomicity and data corruption may occur. Database-specific notes Savepoints in SQLite While SQLite ≥ 3.6.8 supports savepoints, a flaw in the design of the sqlite3 module makes them hardly usable. When autocommit is enabled, savepoints don’t make sense. When it’s disabled, sqlite3 commits implicitly before savepoint statements. (In fact, it commits before any statement other than SELECT, INSERT, UPDATE, DELETE and REPLACE.) This bug has two consequences: • The low level APIs for savepoints are only usable inside a transaction ie. inside an atomic() block. • It’s impossible to use atomic() when autocommit is turned off. 3.2. Models and databases 147
- 152. Django Documentation, Release 1.9.3.dev20160224120324 Transactions in MySQL If you’re using MySQL, your tables may or may not support transactions; it depends on your MySQL version and the table types you’re using. (By “table types,” we mean something like “InnoDB” or “MyISAM”.) MySQL transaction peculiarities are outside the scope of this article, but the MySQL site has information on MySQL transactions. If your MySQL setup does not support transactions, then Django will always function in autocommit mode: statements will be executed and committed as soon as they’re called. If your MySQL setup does support transactions, Django will handle transactions as explained in this document. Handling exceptions within PostgreSQL transactions Note: This section is relevant only if you’re implementing your own transaction management. This problem cannot occur in Django’s default mode and atomic() handles it automatically. Inside a transaction, when a call to a PostgreSQL cursor raises an exception (typically IntegrityError), all subsequent SQL in the same transaction will fail with the error “current transaction is aborted, queries ignored until end of transaction block”. While simple use of save() is unlikely to raise an exception in PostgreSQL, there are more advanced usage patterns which might, such as saving objects with unique fields, saving using the force_insert/force_update flag, or invoking custom SQL. There are several ways to recover from this sort of error. Transaction rollback The first option is to roll back the entire transaction. For example: a.save() # Succeeds, but may be undone by transaction rollback try: b.save() # Could throw exception except IntegrityError: transaction.rollback() c.save() # Succeeds, but a.save() may have been undone Calling transaction.rollback() rolls back the entire transaction. Any uncommitted database operations will be lost. In this example, the changes made by a.save() would be lost, even though that operation raised no error itself. Savepoint rollback You can use savepoints to control the extent of a rollback. Before performing a database oper- ation that could fail, you can set or update the savepoint; that way, if the operation fails, you can roll back the single offending operation, rather than the entire transaction. For example: a.save() # Succeeds, and never undone by savepoint rollback sid = transaction.savepoint() try: b.save() # Could throw exception transaction.savepoint_commit(sid) except IntegrityError: transaction.savepoint_rollback(sid) c.save() # Succeeds, and a.save() is never undone In this example, a.save() will not be undone in the case where b.save() raises an exception. 148 Chapter 3. Using Django
- 153. Django Documentation, Release 1.9.3.dev20160224120324 3.2.7 Multiple databases This topic guide describes Django’s support for interacting with multiple databases. Most of the rest of Django’s documentation assumes you are interacting with a single database. If you want to interact with multiple databases, you’ll need to take some additional steps. Defining your databases The first step to using more than one database with Django is to tell Django about the database servers you’ll be using. This is done using the DATABASES setting. This setting maps database aliases, which are a way to refer to a specific database throughout Django, to a dictionary of settings for that specific connection. The settings in the inner dictionaries are described fully in the DATABASES documentation. Databases can have any alias you choose. However, the alias default has special significance. Django uses the database with the alias of default when no other database has been selected. The following is an example settings.py snippet defining two databases – a default PostgreSQL database and a MySQL database called users: DATABASES = { 'default': { 'NAME': 'app_data', 'ENGINE': 'django.db.backends.postgresql', 'USER': 'postgres_user', 'PASSWORD': 's3krit' }, 'users': { 'NAME': 'user_data', 'ENGINE': 'django.db.backends.mysql', 'USER': 'mysql_user', 'PASSWORD': 'priv4te' } } If the concept of a default database doesn’t make sense in the context of your project, you need to be careful to always specify the database that you want to use. Django requires that a default database entry be defined, but the parameters dictionary can be left blank if it will not be used. You must setup DATABASE_ROUTERS for all of your apps’ models, including those in any contrib and third-party apps you are using, so that no queries are routed to the default database in order to do this. The following is an example settings.py snippet defining two non-default databases, with the default entry intentionally left empty: DATABASES = { 'default': {}, 'users': { 'NAME': 'user_data', 'ENGINE': 'django.db.backends.mysql', 'USER': 'mysql_user', 'PASSWORD': 'superS3cret' }, 'customers': { 'NAME': 'customer_data', 'ENGINE': 'django.db.backends.mysql', 'USER': 'mysql_cust', 'PASSWORD': 'veryPriv@ate' } } 3.2. Models and databases 149
- 154. Django Documentation, Release 1.9.3.dev20160224120324 If you attempt to access a database that you haven’t defined in your DATABASES setting, Django will raise a django.db.utils.ConnectionDoesNotExist exception. Synchronizing your databases The migrate management command operates on one database at a time. By default, it operates on the default database, but by providing the --database option, you can tell it to synchronize a different database. So, to synchronize all models onto all databases in our example, you would need to call: $ ./manage.py migrate $ ./manage.py migrate --database=users If you don’t want every application to be synchronized onto a particular database, you can define a database router that implements a policy constraining the availability of particular models. Using other management commands The other django-admin commands that interact with the database operate in the same way as migrate – they only ever operate on one database at a time, using --database to control the database used. Automatic database routing The easiest way to use multiple databases is to set up a database routing scheme. The default routing scheme ensures that objects remain ‘sticky’ to their original database (i.e., an object retrieved from the foo database will be saved on the same database). The default routing scheme ensures that if a database isn’t specified, all queries fall back to the default database. You don’t have to do anything to activate the default routing scheme – it is provided ‘out of the box’ on every Django project. However, if you want to implement more interesting database allocation behaviors, you can define and install your own database routers. Database routers A database Router is a class that provides up to four methods: db_for_read(model, **hints) Suggest the database that should be used for read operations for objects of type model. If a database operation is able to provide any additional information that might assist in selecting a database, it will be provided in the hints dictionary. Details on valid hints are provided below. Returns None if there is no suggestion. db_for_write(model, **hints) Suggest the database that should be used for writes of objects of type Model. If a database operation is able to provide any additional information that might assist in selecting a database, it will be provided in the hints dictionary. Details on valid hints are provided below. Returns None if there is no suggestion. allow_relation(obj1, obj2, **hints) Return True if a relation between obj1 and obj2 should be allowed, False if the relation should be pre- vented, or None if the router has no opinion. This is purely a validation operation, used by foreign key and many to many operations to determine if a relation should be allowed between two objects. 150 Chapter 3. Using Django
- 155. Django Documentation, Release 1.9.3.dev20160224120324 allow_migrate(db, app_label, model_name=None, **hints) Determine if the migration operation is allowed to run on the database with alias db. Return True if the operation should run, False if it shouldn’t run, or None if the router has no opinion. The app_label positional argument is the label of the application being migrated. model_name is set by most migration operations to the value of model._meta.model_name (the lower- cased version of the model __name__) of the model being migrated. Its value is None for the RunPython and RunSQL operations unless they provide it using hints. hints are used by certain operations to communicate additional information to the router. When model_name is set, hints normally contains the model class under the key ’model’. Note that it may be a historical model, and thus not have any custom attributes, methods, or managers. You should only rely on _meta. This method can also be used to determine the availability of a model on a given database. Note that migrations will just silently not perform any operations on a model for which this returns False. This may result in broken foreign keys, extra tables, or missing tables if you change it once you have applied some migrations. The signature of allow_migrate has changed significantly from previous versions. See the deprecation notes for more details. A router doesn’t have to provide all these methods – it may omit one or more of them. If one of the methods is omitted, Django will skip that router when performing the relevant check. Hints The hints received by the database router can be used to decide which database should receive a given request. At present, the only hint that will be provided is instance, an object instance that is related to the read or write operation that is underway. This might be the instance that is being saved, or it might be an instance that is being added in a many-to-many relation. In some cases, no instance hint will be provided at all. The router checks for the existence of an instance hint, and determine if that hint should be used to alter routing behavior. Using routers Database routers are installed using the DATABASE_ROUTERS setting. This setting defines a list of class names, each specifying a router that should be used by the master router (django.db.router). The master router is used by Django’s database operations to allocate database usage. Whenever a query needs to know which database to use, it calls the master router, providing a model and a hint (if available). Django then tries each router in turn until a database suggestion can be found. If no suggestion can be found, it tries the current _state.db of the hint instance. If a hint instance wasn’t provided, or the instance doesn’t currently have database state, the master router will allocate the default database. An example Example purposes only! This example is intended as a demonstration of how the router infrastructure can be used to alter database usage. It intentionally ignores some complex issues in order to demonstrate how routers are used. This example won’t work if any of the models in myapp contain relationships to models outside of the other database. Cross-database relationships introduce referential integrity problems that Django can’t currently handle. 3.2. Models and databases 151
- 156. Django Documentation, Release 1.9.3.dev20160224120324 The primary/replica (referred to as master/slave by some databases) configuration described is also flawed – it doesn’t provide any solution for handling replication lag (i.e., query inconsistencies introduced because of the time taken for a write to propagate to the replicas). It also doesn’t consider the interaction of transactions with the database utilization strategy. So - what does this mean in practice? Let’s consider another sample configuration. This one will have several databases: one for the auth application, and all other apps using a primary/replica setup with two read replicas. Here are the settings specifying these databases: DATABASES = { 'default': {}, 'auth_db': { 'NAME': 'auth_db', 'ENGINE': 'django.db.backends.mysql', 'USER': 'mysql_user', 'PASSWORD': 'swordfish', }, 'primary': { 'NAME': 'primary', 'ENGINE': 'django.db.backends.mysql', 'USER': 'mysql_user', 'PASSWORD': 'spam', }, 'replica1': { 'NAME': 'replica1', 'ENGINE': 'django.db.backends.mysql', 'USER': 'mysql_user', 'PASSWORD': 'eggs', }, 'replica2': { 'NAME': 'replica2', 'ENGINE': 'django.db.backends.mysql', 'USER': 'mysql_user', 'PASSWORD': 'bacon', }, } Now we’ll need to handle routing. First we want a router that knows to send queries for the auth app to auth_db: class AuthRouter(object): """ A router to control all database operations on models in the auth application. """ def db_for_read(self, model, **hints): """ Attempts to read auth models go to auth_db. """ if model._meta.app_label == 'auth': return 'auth_db' return None def db_for_write(self, model, **hints): """ Attempts to write auth models go to auth_db. """ if model._meta.app_label == 'auth': return 'auth_db' 152 Chapter 3. Using Django
- 157. Django Documentation, Release 1.9.3.dev20160224120324 return None def allow_relation(self, obj1, obj2, **hints): """ Allow relations if a model in the auth app is involved. """ if obj1._meta.app_label == 'auth' or obj2._meta.app_label == 'auth': return True return None def allow_migrate(self, db, app_label, model_name=None, **hints): """ Make sure the auth app only appears in the 'auth_db' database. """ if app_label == 'auth': return db == 'auth_db' return None And we also want a router that sends all other apps to the primary/replica configuration, and randomly chooses a replica to read from: import random class PrimaryReplicaRouter(object): def db_for_read(self, model, **hints): """ Reads go to a randomly-chosen replica. """ return random.choice(['replica1', 'replica2']) def db_for_write(self, model, **hints): """ Writes always go to primary. """ return 'primary' def allow_relation(self, obj1, obj2, **hints): """ Relations between objects are allowed if both objects are in the primary/replica pool. """ db_list = ('primary', 'replica1', 'replica2') if obj1._state.db in db_list and obj2._state.db in db_list: return True return None def allow_migrate(self, db, app_label, model_name=None, **hints): """ All non-auth models end up in this pool. """ return True Finally, in the settings file, we add the following (substituting path.to. with the actual Python path to the module(s) where the routers are defined): DATABASE_ROUTERS = ['path.to.AuthRouter', 'path.to.PrimaryReplicaRouter'] 3.2. Models and databases 153
- 158. Django Documentation, Release 1.9.3.dev20160224120324 The order in which routers are processed is significant. Routers will be queried in the order the are listed in the DATABASE_ROUTERS setting . In this example, the AuthRouter is processed before the PrimaryReplicaRouter, and as a result, decisions concerning the models in auth are processed before any other decision is made. If the DATABASE_ROUTERS setting listed the two routers in the other order, PrimaryReplicaRouter.allow_migrate() would be processed first. The catch-all nature of the Prima- ryReplicaRouter implementation would mean that all models would be available on all databases. With this setup installed, lets run some Django code: >>> # This retrieval will be performed on the 'auth_db' database >>> fred = User.objects.get(username='fred') >>> fred.first_name = 'Frederick' >>> # This save will also be directed to 'auth_db' >>> fred.save() >>> # These retrieval will be randomly allocated to a replica database >>> dna = Person.objects.get(name='Douglas Adams') >>> # A new object has no database allocation when created >>> mh = Book(title='Mostly Harmless') >>> # This assignment will consult the router, and set mh onto >>> # the same database as the author object >>> mh.author = dna >>> # This save will force the 'mh' instance onto the primary database... >>> mh.save() >>> # ... but if we re-retrieve the object, it will come back on a replica >>> mh = Book.objects.get(title='Mostly Harmless') Manually selecting a database Django also provides an API that allows you to maintain complete control over database usage in your code. A manually specified database allocation will take priority over a database allocated by a router. Manually selecting a database for a QuerySet You can select the database for a QuerySet at any point in the QuerySet “chain.” Just call using() on the QuerySet to get another QuerySet that uses the specified database. using() takes a single argument: the alias of the database on which you want to run the query. For example: >>> # This will run on the 'default' database. >>> Author.objects.all() >>> # So will this. >>> Author.objects.using('default').all() >>> # This will run on the 'other' database. >>> Author.objects.using('other').all() 154 Chapter 3. Using Django
- 159. Django Documentation, Release 1.9.3.dev20160224120324 Selecting a database for save() Use the using keyword to Model.save() to specify to which database the data should be saved. For example, to save an object to the legacy_users database, you’d use this: >>> my_object.save(using='legacy_users') If you don’t specify using, the save() method will save into the default database allocated by the routers. Moving an object from one database to another If you’ve saved an instance to one database, it might be tempt- ing to use save(using=...) as a way to migrate the instance to a new database. However, if you don’t take appropriate steps, this could have some unexpected consequences. Consider the following example: >>> p = Person(name='Fred') >>> p.save(using='first') # (statement 1) >>> p.save(using='second') # (statement 2) In statement 1, a new Person object is saved to the first database. At this time, p doesn’t have a primary key, so Django issues an SQL INSERT statement. This creates a primary key, and Django assigns that primary key to p. When the save occurs in statement 2, p already has a primary key value, and Django will attempt to use that primary key on the new database. If the primary key value isn’t in use in the second database, then you won’t have any problems – the object will be copied to the new database. However, if the primary key of p is already in use on the second database, the existing object in the second database will be overridden when p is saved. You can avoid this in two ways. First, you can clear the primary key of the instance. If an object has no primary key, Django will treat it as a new object, avoiding any loss of data on the second database: >>> p = Person(name='Fred') >>> p.save(using='first') >>> p.pk = None # Clear the primary key. >>> p.save(using='second') # Write a completely new object. The second option is to use the force_insert option to save() to ensure that Django does an SQL INSERT: >>> p = Person(name='Fred') >>> p.save(using='first') >>> p.save(using='second', force_insert=True) This will ensure that the person named Fred will have the same primary key on both databases. If that primary key is already in use when you try to save onto the second database, an error will be raised. Selecting a database to delete from By default, a call to delete an existing object will be executed on the same database that was used to retrieve the object in the first place: >>> u = User.objects.using('legacy_users').get(username='fred') >>> u.delete() # will delete from the `legacy_users` database To specify the database from which a model will be deleted, pass a using keyword argument to the Model.delete() method. This argument works just like the using keyword argument to save(). 3.2. Models and databases 155
- 160. Django Documentation, Release 1.9.3.dev20160224120324 For example, if you’re migrating a user from the legacy_users database to the new_users database, you might use these commands: >>> user_obj.save(using='new_users') >>> user_obj.delete(using='legacy_users') Using managers with multiple databases Use the db_manager() method on managers to give managers access to a non-default database. For example, say you have a custom manager method that touches the database – User.objects.create_user(). Because create_user() is a manager method, not a QuerySet method, you can’t do User.objects.using(’new_users’).create_user(). (The create_user() method is only available on User.objects, the manager, not on QuerySet objects derived from the manager.) The solution is to use db_manager(), like this: User.objects.db_manager('new_users').create_user(...) db_manager() returns a copy of the manager bound to the database you specify. Using get_queryset() with multiple databases If you’re overriding get_queryset() on your manager, be sure to either call the method on the parent (using super()) or do the appropriate handling of the _db attribute on the manager (a string containing the name of the database to use). For example, if you want to return a custom QuerySet class from the get_queryset method, you could do this: class MyManager(models.Manager): def get_queryset(self): qs = CustomQuerySet(self.model) if self._db is not None: qs = qs.using(self._db) return qs Exposing multiple databases in Django’s admin interface Django’s admin doesn’t have any explicit support for multiple databases. If you want to provide an admin interface for a model on a database other than that specified by your router chain, you’ll need to write custom ModelAdmin classes that will direct the admin to use a specific database for content. ModelAdmin objects have five methods that require customization for multiple-database support: class MultiDBModelAdmin(admin.ModelAdmin): # A handy constant for the name of the alternate database. using = 'other' def save_model(self, request, obj, form, change): # Tell Django to save objects to the 'other' database. obj.save(using=self.using) def delete_model(self, request, obj): # Tell Django to delete objects from the 'other' database obj.delete(using=self.using) def get_queryset(self, request): # Tell Django to look for objects on the 'other' database. return super(MultiDBModelAdmin, self).get_queryset(request).using(self.using) 156 Chapter 3. Using Django
- 161. Django Documentation, Release 1.9.3.dev20160224120324 def formfield_for_foreignkey(self, db_field, request=None, **kwargs): # Tell Django to populate ForeignKey widgets using a query # on the 'other' database. return super(MultiDBModelAdmin, self).formfield_for_foreignkey(db_field, request=request, usi def formfield_for_manytomany(self, db_field, request=None, **kwargs): # Tell Django to populate ManyToMany widgets using a query # on the 'other' database. return super(MultiDBModelAdmin, self).formfield_for_manytomany(db_field, request=request, usi The implementation provided here implements a multi-database strategy where all objects of a given type are stored on a specific database (e.g., all User objects are in the other database). If your usage of multiple databases is more complex, your ModelAdmin will need to reflect that strategy. Inlines can be handled in a similar fashion. They require three customized methods: class MultiDBTabularInline(admin.TabularInline): using = 'other' def get_queryset(self, request): # Tell Django to look for inline objects on the 'other' database. return super(MultiDBTabularInline, self).get_queryset(request).using(self.using) def formfield_for_foreignkey(self, db_field, request=None, **kwargs): # Tell Django to populate ForeignKey widgets using a query # on the 'other' database. return super(MultiDBTabularInline, self).formfield_for_foreignkey(db_field, request=request, def formfield_for_manytomany(self, db_field, request=None, **kwargs): # Tell Django to populate ManyToMany widgets using a query # on the 'other' database. return super(MultiDBTabularInline, self).formfield_for_manytomany(db_field, request=request, Once you’ve written your model admin definitions, they can be registered with any Admin instance: from django.contrib import admin # Specialize the multi-db admin objects for use with specific models. class BookInline(MultiDBTabularInline): model = Book class PublisherAdmin(MultiDBModelAdmin): inlines = [BookInline] admin.site.register(Author, MultiDBModelAdmin) admin.site.register(Publisher, PublisherAdmin) othersite = admin.AdminSite('othersite') othersite.register(Publisher, MultiDBModelAdmin) This example sets up two admin sites. On the first site, the Author and Publisher objects are exposed; Publisher objects have an tabular inline showing books published by that publisher. The second site exposes just publishers, without the inlines. 3.2. Models and databases 157
- 162. Django Documentation, Release 1.9.3.dev20160224120324 Using raw cursors with multiple databases If you are using more than one database you can use django.db.connections to obtain the connection (and cursor) for a specific database. django.db.connections is a dictionary-like object that allows you to retrieve a specific connection using its alias: from django.db import connections cursor = connections['my_db_alias'].cursor() Limitations of multiple databases Cross-database relations Django doesn’t currently provide any support for foreign key or many-to-many relationships spanning multiple databases. If you have used a router to partition models to different databases, any foreign key and many-to-many relationships defined by those models must be internal to a single database. This is because of referential integrity. In order to maintain a relationship between two objects, Django needs to know that the primary key of the related object is valid. If the primary key is stored on a separate database, it’s not possible to easily evaluate the validity of a primary key. If you’re using Postgres, Oracle, or MySQL with InnoDB, this is enforced at the database integrity level – database level key constraints prevent the creation of relations that can’t be validated. However, if you’re using SQLite or MySQL with MyISAM tables, there is no enforced referential integrity; as a result, you may be able to ‘fake’ cross database foreign keys. However, this configuration is not officially supported by Django. Behavior of contrib apps Several contrib apps include models, and some apps depend on others. Since cross-database relationships are impos- sible, this creates some restrictions on how you can split these models across databases: • each one of contenttypes.ContentType, sessions.Session and sites.Site can be stored in any database, given a suitable router. • auth models — User, Group and Permission — are linked together and linked to ContentType, so they must be stored in the same database as ContentType. • admin depends on auth, so their models must be in the same database as auth. • flatpages and redirects depend on sites, so their models must be in the same database as sites. In addition, some objects are automatically created just after migrate creates a table to hold them in a database: • a default Site, • a ContentType for each model (including those not stored in that database), • three Permission for each model (including those not stored in that database). For common setups with multiple databases, it isn’t useful to have these objects in more than one database. Common setups include primary/replica and connecting to external databases. Therefore, it’s recommended to write a database router that allows synchronizing these three models to only one database. Use the same approach for contrib and third-party apps that don’t need their tables in multiple databases. 158 Chapter 3. Using Django
- 163. Django Documentation, Release 1.9.3.dev20160224120324 Warning: If you’re synchronizing content types to more than one database, be aware that their primary keys may not match across databases. This may result in data corruption or data loss. 3.2.8 Tablespaces A common paradigm for optimizing performance in database systems is the use of tablespaces to organize disk layout. Warning: Django does not create the tablespaces for you. Please refer to your database engine’s documentation for details on creating and managing tablespaces. Declaring tablespaces for tables A tablespace can be specified for the table generated by a model by supplying the db_tablespace option inside the model’s class Meta. This option also affects tables automatically created for ManyToManyFields in the model. You can use the DEFAULT_TABLESPACE setting to specify a default value for db_tablespace. This is useful for setting a tablespace for the built-in Django apps and other applications whose code you cannot control. Declaring tablespaces for indexes You can pass the db_tablespace option to a Field constructor to specify an alternate tablespace for the Field’s column index. If no index would be created for the column, the option is ignored. You can use the DEFAULT_INDEX_TABLESPACE setting to specify a default value for db_tablespace. If db_tablespace isn’t specified and you didn’t set DEFAULT_INDEX_TABLESPACE, the index is created in the same tablespace as the tables. An example class TablespaceExample(models.Model): name = models.CharField(max_length=30, db_index=True, db_tablespace="indexes") data = models.CharField(max_length=255, db_index=True) edges = models.ManyToManyField(to="self", db_tablespace="indexes") class Meta: db_tablespace = "tables" In this example, the tables generated by the TablespaceExample model (i.e. the model table and the many- to-many table) would be stored in the tables tablespace. The index for the name field and the indexes on the many-to-many table would be stored in the indexes tablespace. The data field would also generate an index, but no tablespace for it is specified, so it would be stored in the model tablespace tables by default. Database support PostgreSQL and Oracle support tablespaces. SQLite and MySQL don’t. When you use a backend that lacks support for tablespaces, Django ignores all tablespace-related options. 3.2. Models and databases 159
- 164. Django Documentation, Release 1.9.3.dev20160224120324 3.2.9 Database access optimization Django’s database layer provides various ways to help developers get the most out of their databases. This document gathers together links to the relevant documentation, and adds various tips, organized under a number of headings that outline the steps to take when attempting to optimize your database usage. Profile first As general programming practice, this goes without saying. Find out what queries you are doing and what they are costing you. You may also want to use an external project like django-debug-toolbar, or a tool that monitors your database directly. Remember that you may be optimizing for speed or memory or both, depending on your requirements. Sometimes optimizing for one will be detrimental to the other, but sometimes they will help each other. Also, work that is done by the database process might not have the same cost (to you) as the same amount of work done in your Python process. It is up to you to decide what your priorities are, where the balance must lie, and profile all of these as required since this will depend on your application and server. With everything that follows, remember to profile after every change to ensure that the change is a benefit, and a big enough benefit given the decrease in readability of your code. All of the suggestions below come with the caveat that in your circumstances the general principle might not apply, or might even be reversed. Use standard DB optimization techniques ...including: • Indexes. This is a number one priority, after you have determined from profiling what indexes should be added. Use Field.db_index or Meta.index_together to add these from Django. Consider adding indexes to fields that you frequently query using filter(), exclude(), order_by(), etc. as indexes may help to speed up lookups. Note that determining the best indexes is a complex database-dependent topic that will depend on your particular application. The overhead of maintaining an index may outweigh any gains in query speed. • Appropriate use of field types. We will assume you have done the obvious things above. The rest of this document focuses on how to use Django in such a way that you are not doing unnecessary work. This document also does not address other optimization techniques that apply to all expensive operations, such as general purpose caching. Understand QuerySets Understanding QuerySets is vital to getting good performance with simple code. In particular: Understand QuerySet evaluation To avoid performance problems, it is important to understand: • that QuerySets are lazy. • when they are evaluated. • how the data is held in memory. 160 Chapter 3. Using Django
- 165. Django Documentation, Release 1.9.3.dev20160224120324 Understand cached attributes As well as caching of the whole QuerySet, there is caching of the result of attributes on ORM objects. In general, attributes that are not callable will be cached. For example, assuming the example Weblog models: >>> entry = Entry.objects.get(id=1) >>> entry.blog # Blog object is retrieved at this point >>> entry.blog # cached version, no DB access But in general, callable attributes cause DB lookups every time: >>> entry = Entry.objects.get(id=1) >>> entry.authors.all() # query performed >>> entry.authors.all() # query performed again Be careful when reading template code - the template system does not allow use of parentheses, but will call callables automatically, hiding the above distinction. Be careful with your own custom properties - it is up to you to implement caching when required, for example using the cached_property decorator. Use the with template tag To make use of the caching behavior of QuerySet, you may need to use the with template tag. Use iterator() When you have a lot of objects, the caching behavior of the QuerySet can cause a large amount of memory to be used. In this case, iterator() may help. Do database work in the database rather than in Python For instance: • At the most basic level, use filter and exclude to do filtering in the database. • Use F expressions to filter based on other fields within the same model. • Use annotate to do aggregation in the database. If these aren’t enough to generate the SQL you need: Use RawSQL A less portable but more powerful method is the RawSQL expression, which allows some SQL to be explicitly added to the query. If that still isn’t powerful enough: Use raw SQL Write your own custom SQL to retrieve data or populate models. Use django.db.connection.queries to find out what Django is writing for you and start from there. 3.2. Models and databases 161
- 166. Django Documentation, Release 1.9.3.dev20160224120324 Retrieve individual objects using a unique, indexed column There are two reasons to use a column with unique or db_index when using get() to retrieve individual objects. First, the query will be quicker because of the underlying database index. Also, the query could run much slower if multiple objects match the lookup; having a unique constraint on the column guarantees this will never happen. So using the example Weblog models: >>> entry = Entry.objects.get(id=10) will be quicker than: >>> entry = Entry.object.get(headline="News Item Title") because id is indexed by the database and is guaranteed to be unique. Doing the following is potentially quite slow: >>> entry = Entry.objects.get(headline__startswith="News") First of all, headline is not indexed, which will make the underlying database fetch slower. Second, the lookup doesn’t guarantee that only one object will be returned. If the query matches more than one object, it will retrieve and transfer all of them from the database. This penalty could be substantial if hundreds or thousands of records are returned. The penalty will be compounded if the database lives on a separate server, where network overhead and latency also play a factor. Retrieve everything at once if you know you will need it Hitting the database multiple times for different parts of a single ‘set’ of data that you will need all parts of is, in general, less efficient than retrieving it all in one query. This is particularly important if you have a query that is executed in a loop, and could therefore end up doing many database queries, when only one was needed. So: Use QuerySet.select_related() and prefetch_related() Understand select_related() and prefetch_related() thoroughly, and use them: • in view code, • and in managers and default managers where appropriate. Be aware when your manager is and is not used; sometimes this is tricky so don’t make assumptions. Don’t retrieve things you don’t need Use QuerySet.values() and values_list() When you just want a dict or list of values, and don’t need ORM model objects, make appropriate usage of values(). These can be useful for replacing model objects in template code - as long as the dicts you supply have the same attributes as those used in the template, you are fine. Use QuerySet.defer() and only() Use defer() and only() if there are database columns you know that you won’t need (or won’t need in most cases) to avoid loading them. Note that if you do use them, the ORM will have to go and get them in a separate query, making this a pessimization if you use it inappropriately. 162 Chapter 3. Using Django
- 167. Django Documentation, Release 1.9.3.dev20160224120324 Also, be aware that there is some (small extra) overhead incurred inside Django when constructing a model with deferred fields. Don’t be too aggressive in deferring fields without profiling as the database has to read most of the non-text, non-VARCHAR data from the disk for a single row in the results, even if it ends up only using a few columns. The defer() and only() methods are most useful when you can avoid loading a lot of text data or for fields that might take a lot of processing to convert back to Python. As always, profile first, then optimize. Use QuerySet.count() ...if you only want the count, rather than doing len(queryset). Use QuerySet.exists() ...if you only want to find out if at least one result exists, rather than if queryset. But: Don’t overuse count() and exists() If you are going to need other data from the QuerySet, just evaluate it. For example, assuming an Email model that has a body attribute and a many-to-many relation to User, the following template code is optimal: {% if display_inbox %} {% with emails=user.emails.all %} {% if emails %} <p>You have {{ emails|length }} email(s)</p> {% for email in emails %} <p>{{ email.body }}</p> {% endfor %} {% else %} <p>No messages today.</p> {% endif %} {% endwith %} {% endif %} It is optimal because: 1. Since QuerySets are lazy, this does no database queries if ‘display_inbox’ is False. 2. Use of with means that we store user.emails.all in a variable for later use, allowing its cache to be re-used. 3. The line {% if emails %} causes QuerySet.__bool__() to be called, which causes the user.emails.all() query to be run on the database, and at the least the first line to be turned into an ORM object. If there aren’t any results, it will return False, otherwise True. 4. The use of {{ emails|length }} calls QuerySet.__len__(), filling out the rest of the cache without doing another query. 5. The for loop iterates over the already filled cache. In total, this code does either one or zero database queries. The only deliberate optimization performed is the use of the with tag. Using QuerySet.exists() or QuerySet.count() at any point would cause additional queries. 3.2. Models and databases 163
- 168. Django Documentation, Release 1.9.3.dev20160224120324 Use QuerySet.update() and delete() Rather than retrieve a load of objects, set some values, and save them individual, use a bulk SQL UPDATE statement, via QuerySet.update(). Similarly, do bulk deletes where possible. Note, however, that these bulk update methods cannot call the save() or delete() methods of individual instances, which means that any custom behavior you have added for these methods will not be executed, including anything driven from the normal database object signals. Use foreign key values directly If you only need a foreign key value, use the foreign key value that is already on the object you’ve got, rather than getting the whole related object and taking its primary key. i.e. do: entry.blog_id instead of: entry.blog.id Don’t order results if you don’t care Ordering is not free; each field to order by is an operation the database must perform. If a model has a default ordering (Meta.ordering) and you don’t need it, remove it on a QuerySet by calling order_by() with no parameters. Adding an index to your database may help to improve ordering performance. Insert in bulk When creating objects, where possible, use the bulk_create() method to reduce the number of SQL queries. For example: Entry.objects.bulk_create([ Entry(headline="Python 3.0 Released"), Entry(headline="Python 3.1 Planned") ]) ...is preferable to: Entry.objects.create(headline="Python 3.0 Released") Entry.objects.create(headline="Python 3.1 Planned") Note that there are a number of caveats to this method, so make sure it’s appropriate for your use case. This also applies to ManyToManyFields, so doing: my_band.members.add(me, my_friend) ...is preferable to: my_band.members.add(me) my_band.members.add(my_friend) ...where Bands and Artists have a many-to-many relationship. 164 Chapter 3. Using Django
- 169. Django Documentation, Release 1.9.3.dev20160224120324 3.2.10 Examples of model relationship API usage Many-to-many relationships To define a many-to-many relationship, use ManyToManyField. In this example, an Article can be published in multiple Publication objects, and a Publication has mul- tiple Article objects: from django.db import models class Publication(models.Model): title = models.CharField(max_length=30) def __str__(self): # __unicode__ on Python 2 return self.title class Meta: ordering = ('title',) class Article(models.Model): headline = models.CharField(max_length=100) publications = models.ManyToManyField(Publication) def __str__(self): # __unicode__ on Python 2 return self.headline class Meta: ordering = ('headline',) What follows are examples of operations that can be performed using the Python API facilities. Note that if you are using an intermediate model for a many-to-many relationship, some of the related manager’s methods are disabled, so some of these examples won’t work with such models. Create a couple of Publications: >>> p1 = Publication(title='The Python Journal') >>> p1.save() >>> p2 = Publication(title='Science News') >>> p2.save() >>> p3 = Publication(title='Science Weekly') >>> p3.save() Create an Article: >>> a1 = Article(headline='Django lets you build Web apps easily') You can’t associate it with a Publication until it’s been saved: >>> a1.publications.add(p1) Traceback (most recent call last): ... ValueError: 'Article' instance needs to have a primary key value before a many-to-many relationship c Save it! >>> a1.save() Associate the Article with a Publication: 3.2. Models and databases 165
- 170. Django Documentation, Release 1.9.3.dev20160224120324 >>> a1.publications.add(p1) Create another Article, and set it to appear in both Publications: >>> a2 = Article(headline='NASA uses Python') >>> a2.save() >>> a2.publications.add(p1, p2) >>> a2.publications.add(p3) Adding a second time is OK: >>> a2.publications.add(p3) Adding an object of the wrong type raises TypeError: >>> a2.publications.add(a1) Traceback (most recent call last): ... TypeError: 'Publication' instance expected Create and add a Publication to an Article in one step using create(): >>> new_publication = a2.publications.create(title='Highlights for Children') Article objects have access to their related Publication objects: >>> a1.publications.all() [<Publication: The Python Journal>] >>> a2.publications.all() [<Publication: Highlights for Children>, <Publication: Science News>, <Publication: Science Weekly>, Publication objects have access to their related Article objects: >>> p2.article_set.all() [<Article: NASA uses Python>] >>> p1.article_set.all() [<Article: Django lets you build Web apps easily>, <Article: NASA uses Python>] >>> Publication.objects.get(id=4).article_set.all() [<Article: NASA uses Python>] Many-to-many relationships can be queried using lookups across relationships: >>> Article.objects.filter(publications__id=1) [<Article: Django lets you build Web apps easily>, <Article: NASA uses Python>] >>> Article.objects.filter(publications__pk=1) [<Article: Django lets you build Web apps easily>, <Article: NASA uses Python>] >>> Article.objects.filter(publications=1) [<Article: Django lets you build Web apps easily>, <Article: NASA uses Python>] >>> Article.objects.filter(publications=p1) [<Article: Django lets you build Web apps easily>, <Article: NASA uses Python>] >>> Article.objects.filter(publications__title__startswith="Science") [<Article: NASA uses Python>, <Article: NASA uses Python>] >>> Article.objects.filter(publications__title__startswith="Science").distinct() [<Article: NASA uses Python>] The count() function respects distinct() as well: 166 Chapter 3. Using Django
- 171. Django Documentation, Release 1.9.3.dev20160224120324 >>> Article.objects.filter(publications__title__startswith="Science").count() 2 >>> Article.objects.filter(publications__title__startswith="Science").distinct().count() 1 >>> Article.objects.filter(publications__in=[1,2]).distinct() [<Article: Django lets you build Web apps easily>, <Article: NASA uses Python>] >>> Article.objects.filter(publications__in=[p1,p2]).distinct() [<Article: Django lets you build Web apps easily>, <Article: NASA uses Python>] Reverse m2m queries are supported (i.e., starting at the table that doesn’t have a ManyToManyField): >>> Publication.objects.filter(id=1) [<Publication: The Python Journal>] >>> Publication.objects.filter(pk=1) [<Publication: The Python Journal>] >>> Publication.objects.filter(article__headline__startswith="NASA") [<Publication: Highlights for Children>, <Publication: Science News>, <Publication: Science Weekly>, >>> Publication.objects.filter(article__id=1) [<Publication: The Python Journal>] >>> Publication.objects.filter(article__pk=1) [<Publication: The Python Journal>] >>> Publication.objects.filter(article=1) [<Publication: The Python Journal>] >>> Publication.objects.filter(article=a1) [<Publication: The Python Journal>] >>> Publication.objects.filter(article__in=[1,2]).distinct() [<Publication: Highlights for Children>, <Publication: Science News>, <Publication: Science Weekly>, >>> Publication.objects.filter(article__in=[a1,a2]).distinct() [<Publication: Highlights for Children>, <Publication: Science News>, <Publication: Science Weekly>, Excluding a related item works as you would expect, too (although the SQL involved is a little complex): >>> Article.objects.exclude(publications=p2) [<Article: Django lets you build Web apps easily>] If we delete a Publication, its Articles won’t be able to access it: >>> p1.delete() >>> Publication.objects.all() [<Publication: Highlights for Children>, <Publication: Science News>, <Publication: Science Weekly>] >>> a1 = Article.objects.get(pk=1) >>> a1.publications.all() [] If we delete an Article, its Publications won’t be able to access it: >>> a2.delete() >>> Article.objects.all() [<Article: Django lets you build Web apps easily>] >>> p2.article_set.all() [] Adding via the ‘other’ end of an m2m: 3.2. Models and databases 167
- 172. Django Documentation, Release 1.9.3.dev20160224120324 >>> a4 = Article(headline='NASA finds intelligent life on Earth') >>> a4.save() >>> p2.article_set.add(a4) >>> p2.article_set.all() [<Article: NASA finds intelligent life on Earth>] >>> a4.publications.all() [<Publication: Science News>] Adding via the other end using keywords: >>> new_article = p2.article_set.create(headline='Oxygen-free diet works wonders') >>> p2.article_set.all() [<Article: NASA finds intelligent life on Earth>, <Article: Oxygen-free diet works wonders>] >>> a5 = p2.article_set.all()[1] >>> a5.publications.all() [<Publication: Science News>] Removing Publication from an Article: >>> a4.publications.remove(p2) >>> p2.article_set.all() [<Article: Oxygen-free diet works wonders>] >>> a4.publications.all() [] And from the other end: >>> p2.article_set.remove(a5) >>> p2.article_set.all() [] >>> a5.publications.all() [] Relation sets can be assigned. Assignment clears any existing set members: >>> a4.publications.all() [<Publication: Science News>] >>> a4.publications = [p3] >>> a4.publications.all() [<Publication: Science Weekly>] Relation sets can be cleared: >>> p2.article_set.clear() >>> p2.article_set.all() [] And you can clear from the other end: >>> p2.article_set.add(a4, a5) >>> p2.article_set.all() [<Article: NASA finds intelligent life on Earth>, <Article: Oxygen-free diet works wonders>] >>> a4.publications.all() [<Publication: Science News>, <Publication: Science Weekly>] >>> a4.publications.clear() >>> a4.publications.all() [] >>> p2.article_set.all() [<Article: Oxygen-free diet works wonders>] 168 Chapter 3. Using Django
- 173. Django Documentation, Release 1.9.3.dev20160224120324 Recreate the Article and Publication we have deleted: >>> p1 = Publication(title='The Python Journal') >>> p1.save() >>> a2 = Article(headline='NASA uses Python') >>> a2.save() >>> a2.publications.add(p1, p2, p3) Bulk delete some Publications - references to deleted publications should go: >>> Publication.objects.filter(title__startswith='Science').delete() >>> Publication.objects.all() [<Publication: Highlights for Children>, <Publication: The Python Journal>] >>> Article.objects.all() [<Article: Django lets you build Web apps easily>, <Article: NASA finds intelligent life on Earth>, < >>> a2.publications.all() [<Publication: The Python Journal>] Bulk delete some articles - references to deleted objects should go: >>> q = Article.objects.filter(headline__startswith='Django') >>> print(q) [<Article: Django lets you build Web apps easily>] >>> q.delete() After the delete(), the QuerySet cache needs to be cleared, and the referenced objects should be gone: >>> print(q) [] >>> p1.article_set.all() [<Article: NASA uses Python>] An alternate to calling clear() is to assign the empty set: >>> p1.article_set = [] >>> p1.article_set.all() [] >>> a2.publications = [p1, new_publication] >>> a2.publications.all() [<Publication: Highlights for Children>, <Publication: The Python Journal>] >>> a2.publications = [] >>> a2.publications.all() [] Many-to-one relationships To define a many-to-one relationship, use ForeignKey: from django.db import models class Reporter(models.Model): first_name = models.CharField(max_length=30) last_name = models.CharField(max_length=30) email = models.EmailField() def __str__(self): # __unicode__ on Python 2 return "%s %s" % (self.first_name, self.last_name) 3.2. Models and databases 169
- 174. Django Documentation, Release 1.9.3.dev20160224120324 class Article(models.Model): headline = models.CharField(max_length=100) pub_date = models.DateField() reporter = models.ForeignKey(Reporter, on_delete=models.CASCADE) def __str__(self): # __unicode__ on Python 2 return self.headline class Meta: ordering = ('headline',) What follows are examples of operations that can be performed using the Python API facilities. Create a few Reporters: >>> r = Reporter(first_name='John', last_name='Smith', email='[email protected]') >>> r.save() >>> r2 = Reporter(first_name='Paul', last_name='Jones', email='[email protected]') >>> r2.save() Create an Article: >>> from datetime import date >>> a = Article(id=None, headline="This is a test", pub_date=date(2005, 7, 27), reporter=r) >>> a.save() >>> a.reporter.id 1 >>> a.reporter <Reporter: John Smith> Note that you must save an object before it can be assigned to a foreign key relationship. For example, creating an Article with unsaved Reporter raises ValueError: >>> r3 = Reporter(first_name='John', last_name='Smith', email='[email protected]') >>> Article.objects.create(headline="This is a test", pub_date=date(2005, 7, 27), reporter=r3) Traceback (most recent call last): ... ValueError: save() prohibited to prevent data loss due to unsaved related object 'reporter'. Previously, saving an object with unsaved related objects did not raise an error and could result in silent data loss. In 1.8-1.8.3, unsaved model instances couldn’t be assigned to related fields, but this restriction was removed to allow easier usage of in-memory models. Article objects have access to their related Reporter objects: >>> r = a.reporter On Python 2, these are strings of type str instead of unicode strings because that’s what was used in the creation of this reporter (and we haven’t refreshed the data from the database, which always returns unicode strings): >>> r.first_name, r.last_name ('John', 'Smith') Create an Article via the Reporter object: >>> new_article = r.article_set.create(headline="John's second story", pub_date=date(2005, 7, 29)) >>> new_article 170 Chapter 3. Using Django
- 175. Django Documentation, Release 1.9.3.dev20160224120324 <Article: John's second story> >>> new_article.reporter <Reporter: John Smith> >>> new_article.reporter.id 1 Create a new article, and add it to the article set: >>> new_article2 = Article(headline="Paul's story", pub_date=date(2006, 1, 17)) >>> r.article_set.add(new_article2) >>> new_article2.reporter <Reporter: John Smith> >>> new_article2.reporter.id 1 >>> r.article_set.all() [<Article: John's second story>, <Article: Paul's story>, <Article: This is a test>] Add the same article to a different article set - check that it moves: >>> r2.article_set.add(new_article2) >>> new_article2.reporter.id 2 >>> new_article2.reporter <Reporter: Paul Jones> Adding an object of the wrong type raises TypeError: >>> r.article_set.add(r2) Traceback (most recent call last): ... TypeError: 'Article' instance expected >>> r.article_set.all() [<Article: John's second story>, <Article: This is a test>] >>> r2.article_set.all() [<Article: Paul's story>] >>> r.article_set.count() 2 >>> r2.article_set.count() 1 Note that in the last example the article has moved from John to Paul. Related managers support field lookups as well. The API automatically follows relationships as far as you need. Use double underscores to separate relationships. This works as many levels deep as you want. There’s no limit. For example: >>> r.article_set.filter(headline__startswith='This') [<Article: This is a test>] # Find all Articles for any Reporter whose first name is "John". >>> Article.objects.filter(reporter__first_name='John') [<Article: John's second story>, <Article: This is a test>] Exact match is implied here: >>> Article.objects.filter(reporter__first_name='John') [<Article: John's second story>, <Article: This is a test>] 3.2. Models and databases 171
- 176. Django Documentation, Release 1.9.3.dev20160224120324 Query twice over the related field. This translates to an AND condition in the WHERE clause: >>> Article.objects.filter(reporter__first_name='John', reporter__last_name='Smith') [<Article: John's second story>, <Article: This is a test>] For the related lookup you can supply a primary key value or pass the related object explicitly: >>> Article.objects.filter(reporter__pk=1) [<Article: John's second story>, <Article: This is a test>] >>> Article.objects.filter(reporter=1) [<Article: John's second story>, <Article: This is a test>] >>> Article.objects.filter(reporter=r) [<Article: John's second story>, <Article: This is a test>] >>> Article.objects.filter(reporter__in=[1,2]).distinct() [<Article: John's second story>, <Article: Paul's story>, <Article: This is a test>] >>> Article.objects.filter(reporter__in=[r,r2]).distinct() [<Article: John's second story>, <Article: Paul's story>, <Article: This is a test>] You can also use a queryset instead of a literal list of instances: >>> Article.objects.filter(reporter__in=Reporter.objects.filter(first_name='John')).distinct() [<Article: John's second story>, <Article: This is a test>] Querying in the opposite direction: >>> Reporter.objects.filter(article__pk=1) [<Reporter: John Smith>] >>> Reporter.objects.filter(article=1) [<Reporter: John Smith>] >>> Reporter.objects.filter(article=a) [<Reporter: John Smith>] >>> Reporter.objects.filter(article__headline__startswith='This') [<Reporter: John Smith>, <Reporter: John Smith>, <Reporter: John Smith>] >>> Reporter.objects.filter(article__headline__startswith='This').distinct() [<Reporter: John Smith>] Counting in the opposite direction works in conjunction with distinct(): >>> Reporter.objects.filter(article__headline__startswith='This').count() 3 >>> Reporter.objects.filter(article__headline__startswith='This').distinct().count() 1 Queries can go round in circles: >>> Reporter.objects.filter(article__reporter__first_name__startswith='John') [<Reporter: John Smith>, <Reporter: John Smith>, <Reporter: John Smith>, <Reporter: John Smith>] >>> Reporter.objects.filter(article__reporter__first_name__startswith='John').distinct() [<Reporter: John Smith>] >>> Reporter.objects.filter(article__reporter=r).distinct() [<Reporter: John Smith>] If you delete a reporter, his articles will be deleted (assuming that the ForeignKey was defined with django.db.models.ForeignKey.on_delete set to CASCADE, which is the default): >>> Article.objects.all() [<Article: John's second story>, <Article: Paul's story>, <Article: This is a test>] >>> Reporter.objects.order_by('first_name') [<Reporter: John Smith>, <Reporter: Paul Jones>] 172 Chapter 3. Using Django
- 177. Django Documentation, Release 1.9.3.dev20160224120324 >>> r2.delete() >>> Article.objects.all() [<Article: John's second story>, <Article: This is a test>] >>> Reporter.objects.order_by('first_name') [<Reporter: John Smith>] You can delete using a JOIN in the query: >>> Reporter.objects.filter(article__headline__startswith='This').delete() >>> Reporter.objects.all() [] >>> Article.objects.all() [] One-to-one relationships To define a one-to-one relationship, use OneToOneField. In this example, a Place optionally can be a Restaurant: from django.db import models class Place(models.Model): name = models.CharField(max_length=50) address = models.CharField(max_length=80) def __str__(self): # __unicode__ on Python 2 return "%s the place" % self.name class Restaurant(models.Model): place = models.OneToOneField( Place, on_delete=models.CASCADE, primary_key=True, ) serves_hot_dogs = models.BooleanField(default=False) serves_pizza = models.BooleanField(default=False) def __str__(self): # __unicode__ on Python 2 return "%s the restaurant" % self.place.name class Waiter(models.Model): restaurant = models.ForeignKey(Restaurant, on_delete=models.CASCADE) name = models.CharField(max_length=50) def __str__(self): # __unicode__ on Python 2 return "%s the waiter at %s" % (self.name, self.restaurant) What follows are examples of operations that can be performed using the Python API facilities. Create a couple of Places: >>> p1 = Place(name='Demon Dogs', address='944 W. Fullerton') >>> p1.save() >>> p2 = Place(name='Ace Hardware', address='1013 N. Ashland') >>> p2.save() Create a Restaurant. Pass the ID of the “parent” object as this object’s ID: 3.2. Models and databases 173
- 178. Django Documentation, Release 1.9.3.dev20160224120324 >>> r = Restaurant(place=p1, serves_hot_dogs=True, serves_pizza=False) >>> r.save() A Restaurant can access its place: >>> r.place <Place: Demon Dogs the place> A Place can access its restaurant, if available: >>> p1.restaurant <Restaurant: Demon Dogs the restaurant> p2 doesn’t have an associated restaurant: >>> from django.core.exceptions import ObjectDoesNotExist >>> try: >>> p2.restaurant >>> except ObjectDoesNotExist: >>> print("There is no restaurant here.") There is no restaurant here. You can also use hasattr to avoid the need for exception catching: >>> hasattr(p2, 'restaurant') False Set the place using assignment notation. Because place is the primary key on Restaurant, the save will create a new restaurant: >>> r.place = p2 >>> r.save() >>> p2.restaurant <Restaurant: Ace Hardware the restaurant> >>> r.place <Place: Ace Hardware the place> Set the place back again, using assignment in the reverse direction: >>> p1.restaurant = r >>> p1.restaurant <Restaurant: Demon Dogs the restaurant> Note that you must save an object before it can be assigned to a one-to-one relationship. For example, creating a Restaurant with unsaved Place raises ValueError: >>> p3 = Place(name='Demon Dogs', address='944 W. Fullerton') >>> Restaurant.objects.create(place=p3, serves_hot_dogs=True, serves_pizza=False) Traceback (most recent call last): ... ValueError: save() prohibited to prevent data loss due to unsaved related object 'place'. Previously, saving an object with unsaved related objects did not raise an error and could result in silent data loss. In 1.8-1.8.3, unsaved model instances couldn’t be assigned to related fields, but this restriction was removed to allow easier usage of in-memory models. Restaurant.objects.all() just returns the Restaurants, not the Places. Note that there are two restaurants - Ace Hardware the Restaurant was created in the call to r.place = p2: 174 Chapter 3. Using Django
- 179. Django Documentation, Release 1.9.3.dev20160224120324 >>> Restaurant.objects.all() [<Restaurant: Demon Dogs the restaurant>, <Restaurant: Ace Hardware the restaurant>] Place.objects.all() returns all Places, regardless of whether they have Restaurants: >>> Place.objects.order_by('name') [<Place: Ace Hardware the place>, <Place: Demon Dogs the place>] You can query the models using lookups across relationships: >>> Restaurant.objects.get(place=p1) <Restaurant: Demon Dogs the restaurant> >>> Restaurant.objects.get(place__pk=1) <Restaurant: Demon Dogs the restaurant> >>> Restaurant.objects.filter(place__name__startswith="Demon") [<Restaurant: Demon Dogs the restaurant>] >>> Restaurant.objects.exclude(place__address__contains="Ashland") [<Restaurant: Demon Dogs the restaurant>] This of course works in reverse: >>> Place.objects.get(pk=1) <Place: Demon Dogs the place> >>> Place.objects.get(restaurant__place=p1) <Place: Demon Dogs the place> >>> Place.objects.get(restaurant=r) <Place: Demon Dogs the place> >>> Place.objects.get(restaurant__place__name__startswith="Demon") <Place: Demon Dogs the place> Add a Waiter to the Restaurant: >>> w = r.waiter_set.create(name='Joe') >>> w.save() >>> w <Waiter: Joe the waiter at Demon Dogs the restaurant> Query the waiters: >>> Waiter.objects.filter(restaurant__place=p1) [<Waiter: Joe the waiter at Demon Dogs the restaurant>] >>> Waiter.objects.filter(restaurant__place__name__startswith="Demon") [<Waiter: Joe the waiter at Demon Dogs the restaurant>] 3.3 Handling HTTP requests Information on handling HTTP requests in Django: 3.3.1 URL dispatcher A clean, elegant URL scheme is an important detail in a high-quality Web application. Django lets you design URLs however you want, with no framework limitations. There’s no .php or .cgi required, and certainly none of that 0,2097,1-1-1928,00 nonsense. See Cool URIs don’t change, by World Wide Web creator Tim Berners-Lee, for excellent arguments on why URLs should be clean and usable. 3.3. Handling HTTP requests 175
- 180. Django Documentation, Release 1.9.3.dev20160224120324 Overview To design URLs for an app, you create a Python module informally called a URLconf (URL configuration). This module is pure Python code and is a simple mapping between URL patterns (simple regular expressions) to Python functions (your views). This mapping can be as short or as long as needed. It can reference other mappings. And, because it’s pure Python code, it can be constructed dynamically. Django also provides a way to translate URLs according to the active language. See the internationalization documen- tation for more information. How Django processes a request When a user requests a page from your Django-powered site, this is the algorithm the system follows to determine which Python code to execute: 1. Django determines the root URLconf module to use. Ordinarily, this is the value of the ROOT_URLCONF setting, but if the incoming HttpRequest object has a urlconf attribute (set by middleware request pro- cessing), its value will be used in place of the ROOT_URLCONF setting. 2. Django loads that Python module and looks for the variable urlpatterns. This should be a Python list of django.conf.urls.url() instances. 3. Django runs through each URL pattern, in order, and stops at the first one that matches the requested URL. 4. Once one of the regexes matches, Django imports and calls the given view, which is a simple Python function (or a class-based view). The view gets passed the following arguments: • An instance of HttpRequest. • If the matched regular expression returned no named groups, then the matches from the regular expression are provided as positional arguments. • The keyword arguments are made up of any named groups matched by the regular expression, overridden by any arguments specified in the optional kwargs argument to django.conf.urls.url(). 5. If no regex matches, or if an exception is raised during any point in this process, Django invokes an appropriate error-handling view. See Error handling below. Example Here’s a sample URLconf: from django.conf.urls import url from . import views urlpatterns = [ url(r'^articles/2003/$', views.special_case_2003), url(r'^articles/([0-9]{4})/$', views.year_archive), url(r'^articles/([0-9]{4})/([0-9]{2})/$', views.month_archive), url(r'^articles/([0-9]{4})/([0-9]{2})/([0-9]+)/$', views.article_detail), ] Notes: • To capture a value from the URL, just put parenthesis around it. 176 Chapter 3. Using Django
- 181. Django Documentation, Release 1.9.3.dev20160224120324 • There’s no need to add a leading slash, because every URL has that. For example, it’s ^articles, not ^/articles. • The ’r’ in front of each regular expression string is optional but recommended. It tells Python that a string is “raw” – that nothing in the string should be escaped. See Dive Into Python’s explanation. Example requests: • A request to /articles/2005/03/ would match the third entry in the list. Django would call the function views.month_archive(request, ’2005’, ’03’). • /articles/2005/3/ would not match any URL patterns, because the third entry in the list requires two digits for the month. • /articles/2003/ would match the first pattern in the list, not the second one, because the patterns are tested in order, and the first one is the first test to pass. Feel free to exploit the ordering to insert special cases like this. Here, Django would call the function views.special_case_2003(request) • /articles/2003 would not match any of these patterns, because each pattern requires that the URL end with a slash. • /articles/2003/03/03/ would match the final pattern. Django would call the function views.article_detail(request, ’2003’, ’03’, ’03’). Named groups The above example used simple, non-named regular-expression groups (via parenthesis) to capture bits of the URL and pass them as positional arguments to a view. In more advanced usage, it’s possible to use named regular-expression groups to capture URL bits and pass them as keyword arguments to a view. In Python regular expressions, the syntax for named regular-expression groups is (?P<name>pattern), where name is the name of the group and pattern is some pattern to match. Here’s the above example URLconf, rewritten to use named groups: from django.conf.urls import url from . import views urlpatterns = [ url(r'^articles/2003/$', views.special_case_2003), url(r'^articles/(?P<year>[0-9]{4})/$', views.year_archive), url(r'^articles/(?P<year>[0-9]{4})/(?P<month>[0-9]{2})/$', views.month_archive), url(r'^articles/(?P<year>[0-9]{4})/(?P<month>[0-9]{2})/(?P<day>[0-9]{2})/$', views.article_detail ] This accomplishes exactly the same thing as the previous example, with one subtle difference: The captured values are passed to view functions as keyword arguments rather than positional arguments. For example: • A request to /articles/2005/03/ would call the function views.month_archive(request, year=’2005’, month=’03’), instead of views.month_archive(request, ’2005’, ’03’). • A request to /articles/2003/03/03/ would call the function views.article_detail(request, year=’2003’, month=’03’, day=’03’). In practice, this means your URLconfs are slightly more explicit and less prone to argument-order bugs – and you can reorder the arguments in your views’ function definitions. Of course, these benefits come at the cost of brevity; some developers find the named-group syntax ugly and too verbose. 3.3. Handling HTTP requests 177
- 182. Django Documentation, Release 1.9.3.dev20160224120324 The matching/grouping algorithm Here’s the algorithm the URLconf parser follows, with respect to named groups vs. non-named groups in a regular expression: 1. If there are any named arguments, it will use those, ignoring non-named arguments. 2. Otherwise, it will pass all non-named arguments as positional arguments. In both cases, any extra keyword arguments that have been given as per Passing extra options to view functions (below) will also be passed to the view. What the URLconf searches against The URLconf searches against the requested URL, as a normal Python string. This does not include GET or POST parameters, or the domain name. For example, in a request to https://www.example.com/myapp/, the URLconf will look for myapp/. In a request to https://www.example.com/myapp/?page=3, the URLconf will look for myapp/. The URLconf doesn’t look at the request method. In other words, all request methods – POST, GET, HEAD, etc. – will be routed to the same function for the same URL. Captured arguments are always strings Each captured argument is sent to the view as a plain Python string, regardless of what sort of match the regular expression makes. For example, in this URLconf line: url(r'^articles/(?P<year>[0-9]{4})/$', views.year_archive), ...the year argument passed to views.year_archive() will be a string, not an integer, even though the [0-9]{4} will only match integer strings. Specifying defaults for view arguments A convenient trick is to specify default parameters for your views’ arguments. Here’s an example URLconf and view: # URLconf from django.conf.urls import url from . import views urlpatterns = [ url(r'^blog/$', views.page), url(r'^blog/page(?P<num>[0-9]+)/$', views.page), ] # View (in blog/views.py) def page(request, num="1"): # Output the appropriate page of blog entries, according to num. ... In the above example, both URL patterns point to the same view – views.page – but the first pattern doesn’t capture anything from the URL. If the first pattern matches, the page() function will use its default argument for num, "1". If the second pattern matches, page() will use whatever num value was captured by the regex. 178 Chapter 3. Using Django
- 183. Django Documentation, Release 1.9.3.dev20160224120324 Performance Each regular expression in a urlpatterns is compiled the first time it’s accessed. This makes the system blazingly fast. Syntax of the urlpatterns variable urlpatterns should be a Python list of url() instances. Error handling When Django can’t find a regex matching the requested URL, or when an exception is raised, Django will invoke an error-handling view. The views to use for these cases are specified by four variables. Their default values should suffice for most projects, but further customization is possible by overriding their default values. See the documentation on customizing error views for the full details. Such values can be set in your root URLconf. Setting these variables in any other URLconf will have no effect. Values must be callables, or strings representing the full Python import path to the view that should be called to handle the error condition at hand. The variables are: • handler400 – See django.conf.urls.handler400. • handler403 – See django.conf.urls.handler403. • handler404 – See django.conf.urls.handler404. • handler500 – See django.conf.urls.handler500. Including other URLconfs At any point, your urlpatterns can “include” other URLconf modules. This essentially “roots” a set of URLs below other ones. For example, here’s an excerpt of the URLconf for the Django website itself. It includes a number of other URLconfs: from django.conf.urls import include, url urlpatterns = [ # ... snip ... url(r'^community/', include('django_website.aggregator.urls')), url(r'^contact/', include('django_website.contact.urls')), # ... snip ... ] Note that the regular expressions in this example don’t have a $ (end-of-string match character) but do include a trailing slash. Whenever Django encounters include() (django.conf.urls.include()), it chops off whatever part of the URL matched up to that point and sends the remaining string to the included URLconf for further processing. Another possibility is to include additional URL patterns by using a list of url() instances. For example, consider this URLconf: 3.3. Handling HTTP requests 179
- 184. Django Documentation, Release 1.9.3.dev20160224120324 from django.conf.urls import include, url from apps.main import views as main_views from credit import views as credit_views extra_patterns = [ url(r'^reports/$', credit_views.report), url(r'^reports/(?P<id>[0-9]+)/$', credit_views.report), url(r'^charge/$', credit_views.charge), ] urlpatterns = [ url(r'^$', main_views.homepage), url(r'^help/', include('apps.help.urls')), url(r'^credit/', include(extra_patterns)), ] In this example, the /credit/reports/ URL will be handled by the credit_views.report() Django view. This can be used to remove redundancy from URLconfs where a single pattern prefix is used repeatedly. For example, consider this URLconf: from django.conf.urls import url from . import views urlpatterns = [ url(r'^(?P<page_slug>[w-]+)-(?P<page_id>w+)/history/$', views.history), url(r'^(?P<page_slug>[w-]+)-(?P<page_id>w+)/edit/$', views.edit), url(r'^(?P<page_slug>[w-]+)-(?P<page_id>w+)/discuss/$', views.discuss), url(r'^(?P<page_slug>[w-]+)-(?P<page_id>w+)/permissions/$', views.permissions), ] We can improve this by stating the common path prefix only once and grouping the suffixes that differ: from django.conf.urls import include, url from . import views urlpatterns = [ url(r'^(?P<page_slug>[w-]+)-(?P<page_id>w+)/', include([ url(r'^history/$', views.history), url(r'^edit/$', views.edit), url(r'^discuss/$', views.discuss), url(r'^permissions/$', views.permissions), ])), ] Captured parameters An included URLconf receives any captured parameters from parent URLconfs, so the following example is valid: # In settings/urls/main.py from django.conf.urls import include, url urlpatterns = [ url(r'^(?P<username>w+)/blog/', include('foo.urls.blog')), ] # In foo/urls/blog.py 180 Chapter 3. Using Django
- 185. Django Documentation, Release 1.9.3.dev20160224120324 from django.conf.urls import url from . import views urlpatterns = [ url(r'^$', views.blog.index), url(r'^archive/$', views.blog.archive), ] In the above example, the captured "username" variable is passed to the included URLconf, as expected. Nested arguments Regular expressions allow nested arguments, and Django will resolve them and pass them to the view. When reversing, Django will try to fill in all outer captured arguments, ignoring any nested captured arguments. Consider the following URL patterns which optionally take a page argument: from django.conf.urls import url urlpatterns = [ url(r'blog/(page-(d+)/)?$', blog_articles), # bad url(r'comments/(?:page-(?P<page_number>d+)/)?$', comments), # good ] Both patterns use nested arguments and will resolve: for example, blog/page-2/ will result in a match to blog_articles with two positional arguments: page-2/ and 2. The second pattern for comments will match comments/page-2/ with keyword argument page_number set to 2. The outer argument in this case is a non- capturing argument (?:...). The blog_articles view needs the outermost captured argument to be reversed, page-2/ or no arguments in this case, while comments can be reversed with either no arguments or a value for page_number. Nested captured arguments create a strong coupling between the view arguments and the URL as illustrated by blog_articles: the view receives part of the URL (page-2/) instead of only the value the view is interested in. This coupling is even more pronounced when reversing, since to reverse the view we need to pass the piece of URL instead of the page number. As a rule of thumb, only capture the values the view needs to work with and use non-capturing arguments when the regular expression needs an argument but the view ignores it. Passing extra options to view functions URLconfs have a hook that lets you pass extra arguments to your view functions, as a Python dictionary. The django.conf.urls.url() function can take an optional third argument which should be a dictionary of extra keyword arguments to pass to the view function. For example: from django.conf.urls import url from . import views urlpatterns = [ url(r'^blog/(?P<year>[0-9]{4})/$', views.year_archive, {'foo': 'bar'}), ] In this example, for a request to /blog/2005/, Django will call views.year_archive(request, year=’2005’, foo=’bar’). 3.3. Handling HTTP requests 181
- 186. Django Documentation, Release 1.9.3.dev20160224120324 This technique is used in the syndication framework to pass metadata and options to views. Dealing with conflicts It’s possible to have a URL pattern which captures named keyword arguments, and also passes arguments with the same names in its dictionary of extra arguments. When this happens, the arguments in the dictionary will be used instead of the arguments captured in the URL. Passing extra options to include() Similarly, you can pass extra options to include(). When you pass extra options to include(), each line in the included URLconf will be passed the extra options. For example, these two URLconf sets are functionally identical: Set one: # main.py from django.conf.urls import include, url urlpatterns = [ url(r'^blog/', include('inner'), {'blogid': 3}), ] # inner.py from django.conf.urls import url from mysite import views urlpatterns = [ url(r'^archive/$', views.archive), url(r'^about/$', views.about), ] Set two: # main.py from django.conf.urls import include, url from mysite import views urlpatterns = [ url(r'^blog/', include('inner')), ] # inner.py from django.conf.urls import url urlpatterns = [ url(r'^archive/$', views.archive, {'blogid': 3}), url(r'^about/$', views.about, {'blogid': 3}), ] Note that extra options will always be passed to every line in the included URLconf, regardless of whether the line’s view actually accepts those options as valid. For this reason, this technique is only useful if you’re certain that every view in the included URLconf accepts the extra options you’re passing. 182 Chapter 3. Using Django
- 187. Django Documentation, Release 1.9.3.dev20160224120324 Reverse resolution of URLs A common need when working on a Django project is the possibility to obtain URLs in their final forms either for embedding in generated content (views and assets URLs, URLs shown to the user, etc.) or for handling of the navigation flow on the server side (redirections, etc.) It is strongly desirable to avoid hard-coding these URLs (a laborious, non-scalable and error-prone strategy). Equally dangerous is devising ad-hoc mechanisms to generate URLs that are parallel to the design described by the URLconf, which can result in the production of URLs that become stale over time. In other words, what’s needed is a DRY mechanism. Among other advantages it would allow evolution of the URL design without having to go over all the project source code to search and replace outdated URLs. The primary piece of information we have available to get a URL is an identification (e.g. the name) of the view in charge of handling it. Other pieces of information that necessarily must participate in the lookup of the right URL are the types (positional, keyword) and values of the view arguments. Django provides a solution such that the URL mapper is the only repository of the URL design. You feed it with your URLconf and then it can be used in both directions: • Starting with a URL requested by the user/browser, it calls the right Django view providing any arguments it might need with their values as extracted from the URL. • Starting with the identification of the corresponding Django view plus the values of arguments that would be passed to it, obtain the associated URL. The first one is the usage we’ve been discussing in the previous sections. The second one is what is known as reverse resolution of URLs, reverse URL matching, reverse URL lookup, or simply URL reversing. Django provides tools for performing URL reversing that match the different layers where URLs are needed: • In templates: Using the url template tag. • In Python code: Using the django.core.urlresolvers.reverse() function. • In higher level code related to handling of URLs of Django model instances: The get_absolute_url() method. Examples Consider again this URLconf entry: from django.conf.urls import url from . import views urlpatterns = [ #... url(r'^articles/([0-9]{4})/$', views.year_archive, name='news-year-archive'), #... ] According to this design, the URL for the archive corresponding to year nnnn is /articles/nnnn/. You can obtain these in template code by using: <a href="{% url 'news-year-archive' 2012 %}">2012 Archive</a> {# Or with the year in a template context variable: #} <ul> {% for yearvar in year_list %} <li><a href="{% url 'news-year-archive' yearvar %}">{{ yearvar }} Archive</a></li> 3.3. Handling HTTP requests 183
- 188. Django Documentation, Release 1.9.3.dev20160224120324 {% endfor %} </ul> Or in Python code: from django.core.urlresolvers import reverse from django.http import HttpResponseRedirect def redirect_to_year(request): # ... year = 2006 # ... return HttpResponseRedirect(reverse('news-year-archive', args=(year,))) If, for some reason, it was decided that the URLs where content for yearly article archives are published at should be changed then you would only need to change the entry in the URLconf. In some scenarios where views are of a generic nature, a many-to-one relationship might exist between URLs and views. For these cases the view name isn’t a good enough identifier for it when comes the time of reversing URLs. Read the next section to know about the solution Django provides for this. Naming URL patterns In order to perform URL reversing, you’ll need to use named URL patterns as done in the examples above. The string used for the URL name can contain any characters you like. You are not restricted to valid Python names. When you name your URL patterns, make sure you use names that are unlikely to clash with any other application’s choice of names. If you call your URL pattern comment, and another application does the same thing, there’s no guarantee which URL will be inserted into your template when you use this name. Putting a prefix on your URL names, perhaps derived from the application name, will decrease the chances of collision. We recommend something like myapp-comment instead of comment. URL namespaces Introduction URL namespaces allow you to uniquely reverse named URL patterns even if different applications use the same URL names. It’s a good practice for third-party apps to always use namespaced URLs (as we did in the tutorial). Similarly, it also allows you to reverse URLs if multiple instances of an application are deployed. In other words, since multiple instances of a single application will share named URLs, namespaces provide a way to tell these named URLs apart. Django applications that make proper use of URL namespacing can be deployed more than once for a particular site. For example django.contrib.admin has an AdminSite class which allows you to easily deploy more than once instance of the admin. In a later example, we’ll discuss the idea of deploying the polls application from the tutorial in two different locations so we can serve the same functionality to two different audiences (authors and publishers). A URL namespace comes in two parts, both of which are strings: application namespace This describes the name of the application that is being deployed. Every instance of a single application will have the same application namespace. For example, Django’s admin application has the somewhat predictable application namespace of ’admin’. instance namespace This identifies a specific instance of an application. Instance namespaces should be unique across your entire project. However, an instance namespace can be the same as the application namespace. This 184 Chapter 3. Using Django
- 189. Django Documentation, Release 1.9.3.dev20160224120324 is used to specify a default instance of an application. For example, the default Django admin instance has an instance namespace of ’admin’. Namespaced URLs are specified using the ’:’ operator. For example, the main index page of the admin application is referenced using ’admin:index’. This indicates a namespace of ’admin’, and a named URL of ’index’. Namespaces can also be nested. The named URL ’sports:polls:index’ would look for a pattern named ’index’ in the namespace ’polls’ that is itself defined within the top-level namespace ’sports’. Reversing namespaced URLs When given a namespaced URL (e.g. ’polls:index’) to resolve, Django splits the fully qualified name into parts and then tries the following lookup: 1. First, Django looks for a matching application namespace (in this example, ’polls’). This will yield a list of instances of that application. 2. If there is a current application defined, Django finds and returns the URL resolver for that instance. The current application can be specified with the current_app argument to the reverse() function. The url template tag uses the namespace of the currently resolved view as the current application in a RequestContext. You can override this default by setting the current application on the request.current_app attribute. In previous versions of Django, you had to set the current_app attribute on any Context or RequestContext that is used to render a template. Previously, the url template tag did not use the namespace of the currently resolved view and you had to set the current_app attribute on the request. 3. If there is no current application. Django looks for a default application instance. The default application instance is the instance that has an instance namespace matching the application namespace (in this example, an instance of polls called ’polls’). 4. If there is no default application instance, Django will pick the last deployed instance of the application, whatever its instance name may be. 5. If the provided namespace doesn’t match an application namespace in step 1, Django will attempt a direct lookup of the namespace as an instance namespace. If there are nested namespaces, these steps are repeated for each part of the namespace until only the view name is unresolved. The view name will then be resolved into a URL in the namespace that has been found. Example To show this resolution strategy in action, consider an example of two instances of the polls application from the tutorial: one called ’author-polls’ and one called ’publisher-polls’. Assume we have enhanced that application so that it takes the instance namespace into consideration when creating and displaying polls. urls.py from django.conf.urls import include, url urlpatterns = [ url(r'^author-polls/', include('polls.urls', namespace='author-polls')), url(r'^publisher-polls/', include('polls.urls', namespace='publisher-polls')), ] polls/urls.py 3.3. Handling HTTP requests 185
- 190. Django Documentation, Release 1.9.3.dev20160224120324 from django.conf.urls import url from . import views app_name = 'polls' urlpatterns = [ url(r'^$', views.IndexView.as_view(), name='index'), url(r'^(?P<pk>d+)/$', views.DetailView.as_view(), name='detail'), ... ] Using this setup, the following lookups are possible: • If one of the instances is current - say, if we were rendering the detail page in the instance ’author-polls’ - ’polls:index’ will resolve to the index page of the ’author-polls’ instance; i.e. both of the following will result in "/author-polls/". In the method of a class-based view: reverse('polls:index', current_app=self.request.resolver_match.namespace) and in the template: {% url 'polls:index' %} • If there is no current instance - say, if we were rendering a page somewhere else on the site - ’polls:index’ will resolve to the last registered instance of polls. Since there is no default instance (instance namespace of ’polls’), the last instance of polls that is registered will be used. This would be ’publisher-polls’ since it’s declared last in the urlpatterns. • ’author-polls:index’ will always resolve to the index page of the instance ’author-polls’ (and likewise for ’publisher-polls’) . If there were also a default instance - i.e., an instance named ’polls’ - the only change from above would be in the case where there is no current instance (the second item in the list above). In this case ’polls:index’ would resolve to the index page of the default instance instead of the instance declared last in urlpatterns. URL namespaces and included URLconfs Application namespaces of included URLconfs can be specified in two ways. Firstly, you can set an app_name attribute in the included URLconf module, at the same level as the urlpatterns attribute. You have to pass the actual module, or a string reference to the module, to include(), not the list of urlpatterns itself. polls/urls.py from django.conf.urls import url from . import views app_name = 'polls' urlpatterns = [ url(r'^$', views.IndexView.as_view(), name='index'), url(r'^(?P<pk>d+)/$', views.DetailView.as_view(), name='detail'), ... ] urls.py 186 Chapter 3. Using Django
- 191. Django Documentation, Release 1.9.3.dev20160224120324 from django.conf.urls import include, url urlpatterns = [ url(r'^polls/', include('polls.urls')), ] The URLs defined in polls.urls will have an application namespace polls. Secondly, you can include an object that contains embedded namespace data. If you include() a list of url() in- stances, the URLs contained in that object will be added to the global namespace. However, you can also include() a 2-tuple containing: (<list of url() instances>, <application namespace>) For example: from django.conf.urls import include, url from . import views polls_patterns = ([ url(r'^$', views.IndexView.as_view(), name='index'), url(r'^(?P<pk>d+)/$', views.DetailView.as_view(), name='detail'), ], 'polls') url(r'^polls/', include(polls_patterns)), This will include the nominated URL patterns into the given application namespace. The instance namespace can be specified using the namespace argument to include(). If the instance namespace is not specified, it will default to the included URLconf’s application namespace. This means it will also be the default instance for that namespace. In previous versions, you had to specify both the application namespace and the instance namespace in a single place, either by passing them as parameters to include() or by including a 3-tuple containing (<list of url() instances>, <application namespace>, <instance namespace>). 3.3.2 Writing views A view function, or view for short, is simply a Python function that takes a Web request and returns a Web response. This response can be the HTML contents of a Web page, or a redirect, or a 404 error, or an XML document, or an image . . . or anything, really. The view itself contains whatever arbitrary logic is necessary to return that response. This code can live anywhere you want, as long as it’s on your Python path. There’s no other requirement–no “magic,” so to speak. For the sake of putting the code somewhere, the convention is to put views in a file called views.py, placed in your project or application directory. A simple view Here’s a view that returns the current date and time, as an HTML document: from django.http import HttpResponse import datetime def current_datetime(request): now = datetime.datetime.now() html = "<html><body>It is now %s.</body></html>" % now return HttpResponse(html) 3.3. Handling HTTP requests 187
- 192. Django Documentation, Release 1.9.3.dev20160224120324 Let’s step through this code one line at a time: • First, we import the class HttpResponse from the django.http module, along with Python’s datetime library. • Next, we define a function called current_datetime. This is the view function. Each view function takes an HttpRequest object as its first parameter, which is typically named request. Note that the name of the view function doesn’t matter; it doesn’t have to be named in a certain way in order for Django to recognize it. We’re calling it current_datetime here, because that name clearly indicates what it does. • The view returns an HttpResponse object that contains the generated response. Each view function is re- sponsible for returning an HttpResponse object. (There are exceptions, but we’ll get to those later.) Django’s Time Zone Django includes a TIME_ZONE setting that defaults to America/Chicago. This probably isn’t where you live, so you might want to change it in your settings file. Mapping URLs to views So, to recap, this view function returns an HTML page that includes the current date and time. To display this view at a particular URL, you’ll need to create a URLconf; see URL dispatcher for instructions. Returning errors Returning HTTP error codes in Django is easy. There are subclasses of HttpResponse for a number of common HTTP status codes other than 200 (which means “OK”). You can find the full list of available subclasses in the re- quest/response documentation. Just return an instance of one of those subclasses instead of a normal HttpResponse in order to signify an error. For example: from django.http import HttpResponse, HttpResponseNotFound def my_view(request): # ... if foo: return HttpResponseNotFound('<h1>Page not found</h1>') else: return HttpResponse('<h1>Page was found</h1>') There isn’t a specialized subclass for every possible HTTP response code, since many of them aren’t going to be that common. However, as documented in the HttpResponse documentation, you can also pass the HTTP status code into the constructor for HttpResponse to create a return class for any status code you like. For example: from django.http import HttpResponse def my_view(request): # ... # Return a "created" (201) response code. return HttpResponse(status=201) Because 404 errors are by far the most common HTTP error, there’s an easier way to handle those errors. 188 Chapter 3. Using Django
- 193. Django Documentation, Release 1.9.3.dev20160224120324 The Http404 exception class django.http.Http404 When you return an error such as HttpResponseNotFound, you’re responsible for defining the HTML of the resulting error page: return HttpResponseNotFound('<h1>Page not found</h1>') For convenience, and because it’s a good idea to have a consistent 404 error page across your site, Django provides an Http404 exception. If you raise Http404 at any point in a view function, Django will catch it and return the standard error page for your application, along with an HTTP error code 404. Example usage: from django.http import Http404 from django.shortcuts import render from polls.models import Poll def detail(request, poll_id): try: p = Poll.objects.get(pk=poll_id) except Poll.DoesNotExist: raise Http404("Poll does not exist") return render(request, 'polls/detail.html', {'poll': p}) In order to show customized HTML when Django returns a 404, you can create an HTML template named 404.html and place it in the top level of your template tree. This template will then be served when DEBUG is set to False. When DEBUG is True, you can provide a message to Http404 and it will appear in the standard 404 debug template. Use these messages for debugging purposes; they generally aren’t suitable for use in a production 404 template. Customizing error views The default error views in Django should suffice for most Web applications, but can easily be overridden if you need any custom behavior. Simply specify the handlers as seen below in your URLconf (setting them anywhere else will have no effect). The page_not_found() view is overridden by handler404: handler404 = 'mysite.views.my_custom_page_not_found_view' The server_error() view is overridden by handler500: handler500 = 'mysite.views.my_custom_error_view' The permission_denied() view is overridden by handler403: handler403 = 'mysite.views.my_custom_permission_denied_view' The bad_request() view is overridden by handler400: handler400 = 'mysite.views.my_custom_bad_request_view' 3.3.3 View decorators Django provides several decorators that can be applied to views to support various HTTP features. 3.3. Handling HTTP requests 189
- 194. Django Documentation, Release 1.9.3.dev20160224120324 Allowed HTTP methods The decorators in django.views.decorators.http can be used to restrict access to views based on the request method. These decorators will return a django.http.HttpResponseNotAllowed if the conditions are not met. require_http_methods(request_method_list) Decorator to require that a view only accepts particular request methods. Usage: from django.views.decorators.http import require_http_methods @require_http_methods(["GET", "POST"]) def my_view(request): # I can assume now that only GET or POST requests make it this far # ... pass Note that request methods should be in uppercase. require_GET() Decorator to require that a view only accepts the GET method. require_POST() Decorator to require that a view only accepts the POST method. require_safe() Decorator to require that a view only accepts the GET and HEAD methods. These methods are commonly considered “safe” because they should not have the significance of taking an action other than retrieving the requested resource. Note: Django will automatically strip the content of responses to HEAD requests while leaving the headers un- changed, so you may handle HEAD requests exactly like GET requests in your views. Since some software, such as link checkers, rely on HEAD requests, you might prefer using require_safe instead of require_GET. Conditional view processing The following decorators in django.views.decorators.http can be used to control caching behavior on particular views. condition(etag_func=None, last_modified_func=None) etag(etag_func) last_modified(last_modified_func) These decorators can be used to generate ETag and Last-Modified headers; see conditional view process- ing. GZip compression The decorators in django.views.decorators.gzip control content compression on a per-view basis. gzip_page() This decorator compresses content if the browser allows gzip compression. It sets the Vary header accordingly, so that caches will base their storage on the Accept-Encoding header. 190 Chapter 3. Using Django
- 195. Django Documentation, Release 1.9.3.dev20160224120324 Vary headers The decorators in django.views.decorators.vary can be used to control caching based on specific request headers. vary_on_cookie(func) vary_on_headers(*headers) The Vary header defines which request headers a cache mechanism should take into account when building its cache key. See using vary headers. Caching The decorators in django.views.decorators.cache control server and client-side caching. never_cache(view_func) This decorator adds a Cache-Control: max-age=0, no-cache, no-store, must-revalidate header to a response to indicate that a page should never be cached. Before Django 1.9, Cache-Control: max-age=0 was sent. This didn’t reliably prevent caching in all browsers. 3.3.4 File Uploads When Django handles a file upload, the file data ends up placed in request.FILES (for more on the request object see the documentation for request and response objects). This document explains how files are stored on disk and in memory, and how to customize the default behavior. Warning: There are security risks if you are accepting uploaded content from untrusted users! See the security guide’s topic on User-uploaded content for mitigation details. Basic file uploads Consider a simple form containing a FileField: # In forms.py... from django import forms class UploadFileForm(forms.Form): title = forms.CharField(max_length=50) file = forms.FileField() A view handling this form will receive the file data in request.FILES, which is a dictionary containing a key for each FileField (or ImageField, or other FileField subclass) in the form. So the data from the above form would be accessible as request.FILES[’file’]. Note that request.FILES will only contain data if the request method was POST and the <form> that posted the request has the attribute enctype="multipart/form-data". Otherwise, request.FILES will be empty. Most of the time, you’ll simply pass the file data from request into the form as described in Binding uploaded files to a form. This would look something like: 3.3. Handling HTTP requests 191
- 196. Django Documentation, Release 1.9.3.dev20160224120324 from django.http import HttpResponseRedirect from django.shortcuts import render from .forms import UploadFileForm # Imaginary function to handle an uploaded file. from somewhere import handle_uploaded_file def upload_file(request): if request.method == 'POST': form = UploadFileForm(request.POST, request.FILES) if form.is_valid(): handle_uploaded_file(request.FILES['file']) return HttpResponseRedirect('/success/url/') else: form = UploadFileForm() return render(request, 'upload.html', {'form': form}) Notice that we have to pass request.FILES into the form’s constructor; this is how file data gets bound into a form. Here’s a common way you might handle an uploaded file: def handle_uploaded_file(f): with open('some/file/name.txt', 'wb+') as destination: for chunk in f.chunks(): destination.write(chunk) Looping over UploadedFile.chunks() instead of using read() ensures that large files don’t overwhelm your system’s memory. There are a few other methods and attributes available on UploadedFile objects; see UploadedFile for a complete reference. Handling uploaded files with a model If you’re saving a file on a Model with a FileField, using a ModelForm makes this process much easier. The file object will be saved to the location specified by the upload_to argument of the corresponding FileField when calling form.save(): from django.http import HttpResponseRedirect from django.shortcuts import render from .forms import ModelFormWithFileField def upload_file(request): if request.method == 'POST': form = ModelFormWithFileField(request.POST, request.FILES) if form.is_valid(): # file is saved form.save() return HttpResponseRedirect('/success/url/') else: form = ModelFormWithFileField() return render(request, 'upload.html', {'form': form}) If you are constructing an object manually, you can simply assign the file object from request.FILES to the file field in the model: 192 Chapter 3. Using Django
- 197. Django Documentation, Release 1.9.3.dev20160224120324 from django.http import HttpResponseRedirect from django.shortcuts import render from .forms import UploadFileForm from .models import ModelWithFileField def upload_file(request): if request.method == 'POST': form = UploadFileForm(request.POST, request.FILES) if form.is_valid(): instance = ModelWithFileField(file_field=request.FILES['file']) instance.save() return HttpResponseRedirect('/success/url/') else: form = UploadFileForm() return render(request, 'upload.html', {'form': form}) Upload Handlers When a user uploads a file, Django passes off the file data to an upload handler – a small class that handles file data as it gets uploaded. Upload handlers are initially defined in the FILE_UPLOAD_HANDLERS setting, which defaults to: ["django.core.files.uploadhandler.MemoryFileUploadHandler", "django.core.files.uploadhandler.TemporaryFileUploadHandler"] Together MemoryFileUploadHandler and TemporaryFileUploadHandler provide Django’s default file upload behavior of reading small files into memory and large ones onto disk. You can write custom handlers that customize how Django handles files. You could, for example, use custom handlers to enforce user-level quotas, compress data on the fly, render progress bars, and even send data to another storage location directly without storing it locally. See Writing custom upload handlers for details on how you can customize or completely replace upload behavior. Where uploaded data is stored Before you save uploaded files, the data needs to be stored somewhere. By default, if an uploaded file is smaller than 2.5 megabytes, Django will hold the entire contents of the upload in memory. This means that saving the file involves only a read from memory and a write to disk and thus is very fast. However, if an uploaded file is too large, Django will write the uploaded file to a temporary file stored in your system’s temporary directory. On a Unix-like platform this means you can expect Django to generate a file called something like /tmp/tmpzfp6I6.upload. If an upload is large enough, you can watch this file grow in size as Django streams the data onto disk. These specifics – 2.5 megabytes; /tmp; etc. – are simply “reasonable defaults” which can be customized as described in the next section. Changing upload handler behavior There are a few settings which control Django’s file upload behavior. See File Upload Settings for details. 3.3. Handling HTTP requests 193
- 198. Django Documentation, Release 1.9.3.dev20160224120324 Modifying upload handlers on the fly Sometimes particular views require different upload behavior. In these cases, you can override upload handlers on a per-request basis by modifying request.upload_handlers. By default, this list will contain the upload handlers given by FILE_UPLOAD_HANDLERS, but you can modify the list as you would any other list. For instance, suppose you’ve written a ProgressBarUploadHandler that provides feedback on upload progress to some sort of AJAX widget. You’d add this handler to your upload handlers like this: request.upload_handlers.insert(0, ProgressBarUploadHandler()) You’d probably want to use list.insert() in this case (instead of append()) because a progress bar handler would need to run before any other handlers. Remember, the upload handlers are processed in order. If you want to replace the upload handlers completely, you can just assign a new list: request.upload_handlers = [ProgressBarUploadHandler()] Note: You can only modify upload handlers before accessing request.POST or request.FILES – it doesn’t make sense to change upload handlers after upload handling has already started. If you try to modify request.upload_handlers after reading from request.POST or request.FILES Django will throw an error. Thus, you should always modify uploading handlers as early in your view as possible. Also, request.POST is accessed by CsrfViewMiddleware which is enabled by default. This means you will need to use csrf_exempt() on your view to allow you to change the upload handlers. You will then need to use csrf_protect() on the function that actually processes the request. Note that this means that the handlers may start receiving the file upload before the CSRF checks have been done. Example code: from django.views.decorators.csrf import csrf_exempt, csrf_protect @csrf_exempt def upload_file_view(request): request.upload_handlers.insert(0, ProgressBarUploadHandler()) return _upload_file_view(request) @csrf_protect def _upload_file_view(request): ... # Process request 3.3.5 Django shortcut functions The package django.shortcuts collects helper functions and classes that “span” multiple levels of MVC. In other words, these functions/classes introduce controlled coupling for convenience’s sake. render() render(request, template_name, context=None, context_instance=_context_instance_undefined, con- tent_type=None, status=None, current_app=_current_app_undefined, dirs=_dirs_undefined, us- ing=None) Combines a given template with a given context dictionary and returns an HttpResponse object with that rendered text. 194 Chapter 3. Using Django
- 199. Django Documentation, Release 1.9.3.dev20160224120324 Django does not provide a shortcut function which returns a TemplateResponse because the constructor of TemplateResponse offers the same level of convenience as render(). Required arguments request The request object used to generate this response. template_name The full name of a template to use or sequence of template names. If a sequence is given, the first template that exists will be used. See the template loading documentation for more information on how templates are found. Optional arguments context A dictionary of values to add to the template context. By default, this is an empty dictionary. If a value in the dictionary is callable, the view will call it just before rendering the template. The context argument used to be called dictionary. That name is deprecated in Django 1.8 and will be removed in Django 1.10. context_instance The context instance to render the template with. By default, the template will be rendered with a RequestContext instance (filled with values from request and context). Deprecated since version 1.8: The context_instance argument is deprecated. Simply use context. content_type The MIME type to use for the resulting document. Defaults to the value of the DEFAULT_CONTENT_TYPE setting. status The status code for the response. Defaults to 200. current_app A hint indicating which application contains the current view. See the namespaced URL resolution strategy for more information. Deprecated since version 1.8: The current_app argument is deprecated. Instead you should set request.current_app. using The NAME of a template engine to use for loading the template. The using parameter was added. Deprecated since version 1.8: The dirs parameter was deprecated. Example The following example renders the template myapp/index.html with the MIME type application/xhtml+xml: from django.shortcuts import render def my_view(request): # View code here... return render(request, 'myapp/index.html', {"foo": "bar"}, content_type="application/xhtml+xml") This example is equivalent to: 3.3. Handling HTTP requests 195
- 200. Django Documentation, Release 1.9.3.dev20160224120324 from django.http import HttpResponse from django.template import loader def my_view(request): # View code here... t = loader.get_template('myapp/index.html') c = {'foo': 'bar'} return HttpResponse(t.render(c, request), content_type="application/xhtml+xml") render_to_response() render_to_response(template_name, context=None, context_instance=_context_instance_undefined, content_type=None, status=None, dirs=_dirs_undefined, using=None) This function preceded the introduction of render() and works similarly except that it doesn’t make the request available in the response. It’s not recommended and is likely to be deprecated in the future. Required arguments template_name The full name of a template to use or sequence of template names. If a sequence is given, the first template that exists will be used. See the template loading documentation for more information on how templates are found. Optional arguments context A dictionary of values to add to the template context. By default, this is an empty dictionary. If a value in the dictionary is callable, the view will call it just before rendering the template. The context argument used to be called dictionary. That name is deprecated in Django 1.8 and will be removed in Django 1.10. context_instance The context instance to render the template with. By default, the template will be rendered with a Context instance (filled with values from context). If you need to use context processors, render the template with a RequestContext instance instead. Your code might look something like this: return render_to_response('my_template.html', my_context, context_instance=RequestContext(request)) Deprecated since version 1.8: The context_instance argument is deprecated. Use the render() func- tion instead which always makes RequestContext available. content_type The MIME type to use for the resulting document. Defaults to the value of the DEFAULT_CONTENT_TYPE setting. status The status code for the response. Defaults to 200. using The NAME of a template engine to use for loading the template. The status and using parameters were added. Deprecated since version 1.8: The dirs parameter was deprecated. 196 Chapter 3. Using Django
- 201. Django Documentation, Release 1.9.3.dev20160224120324 redirect() redirect(to, permanent=False, *args, **kwargs) Returns an HttpResponseRedirect to the appropriate URL for the arguments passed. The arguments could be: •A model: the model’s get_absolute_url() function will be called. •A view name, possibly with arguments: urlresolvers.reverse will be used to reverse-resolve the name. •An absolute or relative URL, which will be used as-is for the redirect location. By default issues a temporary redirect; pass permanent=True to issue a permanent redirect. Examples You can use the redirect() function in a number of ways. 1. By passing some object; that object’s get_absolute_url() method will be called to figure out the redirect URL: from django.shortcuts import redirect def my_view(request): ... object = MyModel.objects.get(...) return redirect(object) 2. By passing the name of a view and optionally some positional or keyword arguments; the URL will be reverse resolved using the reverse() method: def my_view(request): ... return redirect('some-view-name', foo='bar') 3. By passing a hardcoded URL to redirect to: def my_view(request): ... return redirect('/some/url/') This also works with full URLs: def my_view(request): ... return redirect('https://example.com/') By default, redirect() returns a temporary redirect. All of the above forms accept a permanent argument; if set to True a permanent redirect will be returned: def my_view(request): ... object = MyModel.objects.get(...) return redirect(object, permanent=True) 3.3. Handling HTTP requests 197
- 202. Django Documentation, Release 1.9.3.dev20160224120324 get_object_or_404() get_object_or_404(klass, *args, **kwargs) Calls get() on a given model manager, but it raises Http404 instead of the model’s DoesNotExist ex- ception. Required arguments klass A Model class, a Manager, or a QuerySet instance from which to get the object. **kwargs Lookup parameters, which should be in the format accepted by get() and filter(). Example The following example gets the object with the primary key of 1 from MyModel: from django.shortcuts import get_object_or_404 def my_view(request): my_object = get_object_or_404(MyModel, pk=1) This example is equivalent to: from django.http import Http404 def my_view(request): try: my_object = MyModel.objects.get(pk=1) except MyModel.DoesNotExist: raise Http404("No MyModel matches the given query.") The most common use case is to pass a Model, as shown above. However, you can also pass a QuerySet instance: queryset = Book.objects.filter(title__startswith='M') get_object_or_404(queryset, pk=1) The above example is a bit contrived since it’s equivalent to doing: get_object_or_404(Book, title__startswith='M', pk=1) but it can be useful if you are passed the queryset variable from somewhere else. Finally, you can also use a Manager. This is useful for example if you have a custom manager: get_object_or_404(Book.dahl_objects, title='Matilda') You can also use related managers: author = Author.objects.get(name='Roald Dahl') get_object_or_404(author.book_set, title='Matilda') Note: As with get(), a MultipleObjectsReturned exception will be raised if more than one object is found. get_list_or_404() get_list_or_404(klass, *args, **kwargs) Returns the result of filter() on a given model manager cast to a list, raising Http404 if the resulting list 198 Chapter 3. Using Django
- 203. Django Documentation, Release 1.9.3.dev20160224120324 is empty. Required arguments klass A Model, Manager or QuerySet instance from which to get the list. **kwargs Lookup parameters, which should be in the format accepted by get() and filter(). Example The following example gets all published objects from MyModel: from django.shortcuts import get_list_or_404 def my_view(request): my_objects = get_list_or_404(MyModel, published=True) This example is equivalent to: from django.http import Http404 def my_view(request): my_objects = list(MyModel.objects.filter(published=True)) if not my_objects: raise Http404("No MyModel matches the given query.") 3.3.6 Generic views See Built-in class-based views API. 3.3.7 Middleware Middleware is a framework of hooks into Django’s request/response processing. It’s a light, low-level “plugin” system for globally altering Django’s input or output. Each middleware component is responsible for doing some specific function. For example, Django includes a middle- ware component, AuthenticationMiddleware, that associates users with requests using sessions. This document explains how middleware works, how you activate middleware, and how to write your own middleware. Django ships with some built-in middleware you can use right out of the box. They’re documented in the built-in middleware reference. Activating middleware To activate a middleware component, add it to the MIDDLEWARE_CLASSES list in your Django settings. In MIDDLEWARE_CLASSES, each middleware component is represented by a string: the full Python path to the middleware’s class name. For example, here’s the default value created by django-admin startproject: MIDDLEWARE_CLASSES = [ 'django.middleware.security.SecurityMiddleware', 'django.contrib.sessions.middleware.SessionMiddleware', 'django.middleware.common.CommonMiddleware', 'django.middleware.csrf.CsrfViewMiddleware', 3.3. Handling HTTP requests 199
- 204. Django Documentation, Release 1.9.3.dev20160224120324 'django.contrib.auth.middleware.AuthenticationMiddleware', 'django.contrib.auth.middleware.SessionAuthenticationMiddleware', 'django.contrib.messages.middleware.MessageMiddleware', 'django.middleware.clickjacking.XFrameOptionsMiddleware', ] A Django installation doesn’t require any middleware — MIDDLEWARE_CLASSES can be empty, if you’d like — but it’s strongly suggested that you at least use CommonMiddleware. The order in MIDDLEWARE_CLASSES matters because a middleware can depend on other middleware. For in- stance, AuthenticationMiddleware stores the authenticated user in the session; therefore, it must run after SessionMiddleware. See Middleware ordering for some common hints about ordering of Django middleware classes. Hooks and application order During the request phase, before calling the view, Django applies middleware in the order it’s defined in MIDDLEWARE_CLASSES, top-down. Two hooks are available: • process_request() • process_view() During the response phase, after calling the view, middleware are applied in reverse order, from the bottom up. Three hooks are available: • process_exception() (only if the view raised an exception) • process_template_response() (only for template responses) • process_response() 200 Chapter 3. Using Django
- 205. Django Documentation, Release 1.9.3.dev20160224120324 CommonMiddleware SessionMiddleware CsrfViewMiddleware AuthenticationMiddleware MessageMiddleware HttpRequest HttpResponse process_request process_view process_template_response process_response process_exception view function If you prefer, you can also think of it like an onion: each middleware class is a “layer” that wraps the view. The behavior of each hook is described below. Writing your own middleware Writing your own middleware is easy. Each middleware component is a single Python class that defines one or more of the following methods: process_request() process_request(request) request is an HttpRequest object. process_request() is called on each request, before Django decides which view to execute. It should return either None or an HttpResponse object. If it returns None, Django will continue processing this request, executing any other process_request() middleware, then, process_view() middleware, and finally, the appropriate view. If it returns an HttpResponse object, Django won’t bother calling any other request, 3.3. Handling HTTP requests 201
- 206. Django Documentation, Release 1.9.3.dev20160224120324 view or exception middleware, or the appropriate view; it’ll apply response middleware to that HttpResponse, and return the result. process_view() process_view(request, view_func, view_args, view_kwargs) request is an HttpRequest object. view_func is the Python function that Django is about to use. (It’s the actual function object, not the name of the function as a string.) view_args is a list of positional arguments that will be passed to the view, and view_kwargs is a dictionary of keyword arguments that will be passed to the view. Neither view_args nor view_kwargs include the first view argument (request). process_view() is called just before Django calls the view. It should return either None or an HttpResponse object. If it returns None, Django will continue processing this request, executing any other process_view() middleware and, then, the appropriate view. If it returns an HttpResponse object, Django won’t bother calling any other view or exception middleware, or the appropriate view; it’ll apply response middleware to that HttpResponse, and return the result. Note: Accessing request.POST inside middleware from process_request or process_view will prevent any view running after the middleware from being able to modify the upload handlers for the request, and should normally be avoided. The CsrfViewMiddleware class can be considered an exception, as it provides the csrf_exempt() and csrf_protect() decorators which allow views to explicitly control at what point the CSRF validation should occur. process_template_response() process_template_response(request, response) request is an HttpRequest object. response is the TemplateResponse object (or equivalent) returned by a Django view or by a middleware. process_template_response() is called just after the view has finished executing, if the response instance has a render() method, indicating that it is a TemplateResponse or equivalent. It must return a response object that implements a render method. It could alter the given response by chang- ing response.template_name and response.context_data, or it could create and return a brand-new TemplateResponse or equivalent. You don’t need to explicitly render responses – responses will be automatically rendered once all template response middleware has been called. Middleware are run in reverse order during the response phase, which includes process_template_response(). process_response() process_response(request, response) request is an HttpRequest object. response is the HttpResponse or StreamingHttpResponse ob- ject returned by a Django view or by a middleware. process_response() is called on all responses before they’re returned to the browser. 202 Chapter 3. Using Django
- 207. Django Documentation, Release 1.9.3.dev20160224120324 It must return an HttpResponse or StreamingHttpResponse object. It could alter the given response, or it could create and return a brand-new HttpResponse or StreamingHttpResponse. Unlike the process_request() and process_view() methods, the process_response() method is al- ways called, even if the process_request() and process_view() methods of the same middleware class were skipped (because an earlier middleware method returned an HttpResponse). In particular, this means that your process_response() method cannot rely on setup done in process_request(). Finally, remember that during the response phase, middleware are applied in reverse order, from the bottom up. This means classes defined at the end of MIDDLEWARE_CLASSES will be run first. Dealing with streaming responses Unlike HttpResponse, StreamingHttpResponse does not have a content attribute. As a result, middleware can no longer assume that all responses will have a content attribute. If they need access to the content, they must test for streaming responses and adjust their behavior accordingly: if response.streaming: response.streaming_content = wrap_streaming_content(response.streaming_content) else: response.content = alter_content(response.content) Note: streaming_content should be assumed to be too large to hold in memory. Response middleware may wrap it in a new generator, but must not consume it. Wrapping is typically implemented as follows: def wrap_streaming_content(content): for chunk in content: yield alter_content(chunk) process_exception() process_exception(request, exception) request is an HttpRequest object. exception is an Exception object raised by the view function. Django calls process_exception() when a view raises an exception. process_exception() should return either None or an HttpResponse object. If it returns an HttpResponse object, the template response and response middleware will be applied, and the resulting response returned to the browser. Otherwise, default exception handling kicks in. Again, middleware are run in reverse order during the response phase, which includes process_exception. If an exception middleware returns a response, the middleware classes above that middleware will not be called at all. __init__() Most middleware classes won’t need an initializer since middleware classes are essentially placeholders for the process_* methods. If you do need some global state you may use __init__ to set up. However, keep in mind a couple of caveats: • Django initializes your middleware without any arguments, so you can’t define __init__ as requiring any arguments. • Unlike the process_* methods which get called once per request, __init__ gets called only once, when the Web server responds to the first request. 3.3. Handling HTTP requests 203
- 208. Django Documentation, Release 1.9.3.dev20160224120324 Marking middleware as unused It’s sometimes useful to determine at run-time whether a piece of middleware should be used. In these cases, your middleware’s __init__ method may raise django.core.exceptions.MiddlewareNotUsed. Django will then remove that piece of middleware from the middleware process and a debug message will be logged to the django.request logger when DEBUG is set to True. Previously, MiddlewareNotUsed exceptions weren’t logged. Guidelines • Middleware classes don’t have to subclass anything. • The middleware class can live anywhere on your Python path. All Django cares about is that the MIDDLEWARE_CLASSES setting includes the path to it. • Feel free to look at Django’s available middleware for examples. • If you write a middleware component that you think would be useful to other people, contribute to the commu- nity! Let us know, and we’ll consider adding it to Django. 3.3.8 How to use sessions Django provides full support for anonymous sessions. The session framework lets you store and retrieve arbitrary data on a per-site-visitor basis. It stores data on the server side and abstracts the sending and receiving of cookies. Cookies contain a session ID – not the data itself (unless you’re using the cookie based backend). Enabling sessions Sessions are implemented via a piece of middleware. To enable session functionality, do the following: • Edit the MIDDLEWARE_CLASSES setting and make sure it contains ’django.contrib.sessions.middleware.SessionMiddleware’. The default settings.py created by django-admin startproject has SessionMiddleware activated. If you don’t want to use sessions, you might as well remove the SessionMiddleware line from MIDDLEWARE_CLASSES and ’django.contrib.sessions’ from your INSTALLED_APPS. It’ll save you a small bit of overhead. Configuring the session engine By default, Django stores sessions in your database (using the model django.contrib.sessions.models.Session). Though this is convenient, in some setups it’s faster to store session data elsewhere, so Django can be configured to store session data on your filesystem or in your cache. Using database-backed sessions If you want to use a database-backed session, you need to add ’django.contrib.sessions’ to your INSTALLED_APPS setting. Once you have configured your installation, run manage.py migrate to install the single database table that stores session data. 204 Chapter 3. Using Django
- 209. Django Documentation, Release 1.9.3.dev20160224120324 Using cached sessions For better performance, you may want to use a cache-based session backend. To store session data using Django’s cache system, you’ll first need to make sure you’ve configured your cache; see the cache documentation for details. Warning: You should only use cache-based sessions if you’re using the Memcached cache backend. The local- memory cache backend doesn’t retain data long enough to be a good choice, and it’ll be faster to use file or database sessions directly instead of sending everything through the file or database cache backends. Additionally, the local-memory cache backend is NOT multi-process safe, therefore probably not a good choice for production environments. If you have multiple caches defined in CACHES, Django will use the default cache. To use another cache, set SESSION_CACHE_ALIAS to the name of that cache. Once your cache is configured, you’ve got two choices for how to store data in the cache: • Set SESSION_ENGINE to "django.contrib.sessions.backends.cache" for a simple caching session store. Session data will be stored directly in your cache. However, session data may not be persistent: cached data can be evicted if the cache fills up or if the cache server is restarted. • For persistent, cached data, set SESSION_ENGINE to "django.contrib.sessions.backends.cached_db". This uses a write-through cache – every write to the cache will also be written to the database. Session reads only use the database if the data is not already in the cache. Both session stores are quite fast, but the simple cache is faster because it disregards persistence. In most cases, the cached_db backend will be fast enough, but if you need that last bit of performance, and are willing to let session data be expunged from time to time, the cache backend is for you. If you use the cached_db session backend, you also need to follow the configuration instructions for the using database-backed sessions. Using file-based sessions To use file-based sessions, set the SESSION_ENGINE setting to "django.contrib.sessions.backends.file". You might also want to set the SESSION_FILE_PATH setting (which defaults to output from tempfile.gettempdir(), most likely /tmp) to control where Django stores session files. Be sure to check that your Web server has permissions to read and write to this location. Using cookie-based sessions To use cookies-based sessions, set the SESSION_ENGINE setting to "django.contrib.sessions.backends.signed_cook The session data will be stored using Django’s tools for cryptographic signing and the SECRET_KEY setting. Note: It’s recommended to leave the SESSION_COOKIE_HTTPONLY setting on True to prevent access to the stored data from JavaScript. 3.3. Handling HTTP requests 205
- 210. Django Documentation, Release 1.9.3.dev20160224120324 Warning: If the SECRET_KEY is not kept secret and you are using the PickleSerializer, this can lead to arbitrary remote code execution. An attacker in possession of the SECRET_KEY can not only generate falsified session data, which your site will trust, but also remotely execute arbitrary code, as the data is serialized using pickle. If you use cookie-based sessions, pay extra care that your secret key is always kept completely secret, for any system which might be remotely accessible. The session data is signed but not encrypted When using the cookies backend the session data can be read by the client. A MAC (Message Authentication Code) is used to protect the data against changes by the client, so that the session data will be invalidated when being tampered with. The same invalidation happens if the client storing the cookie (e.g. your user’s browser) can’t store all of the session cookie and drops data. Even though Django compresses the data, it’s still entirely possible to exceed the common limit of 4096 bytes per cookie. No freshness guarantee Note also that while the MAC can guarantee the authenticity of the data (that it was generated by your site, and not someone else), and the integrity of the data (that it is all there and correct), it cannot guarantee freshness i.e. that you are being sent back the last thing you sent to the client. This means that for some uses of session data, the cookie backend might open you up to replay attacks. Unlike other session backends which keep a server-side record of each session and invalidate it when a user logs out, cookie-based sessions are not invalidated when a user logs out. Thus if an attacker steals a user’s cookie, they can use that cookie to login as that user even if the user logs out. Cookies will only be detected as ‘stale’ if they are older than your SESSION_COOKIE_AGE. Performance Finally, the size of a cookie can have an impact on the speed of your site. Using sessions in views When SessionMiddleware is activated, each HttpRequest object – the first argument to any Django view function – will have a session attribute, which is a dictionary-like object. You can read it and write to request.session at any point in your view. You can edit it multiple times. class backends.base.SessionBase This is the base class for all session objects. It has the following standard dictionary methods: __getitem__(key) Example: fav_color = request.session[’fav_color’] __setitem__(key, value) Example: request.session[’fav_color’] = ’blue’ __delitem__(key) Example: del request.session[’fav_color’]. This raises KeyError if the given key isn’t already in the session. __contains__(key) Example: ’fav_color’ in request.session get(key, default=None) Example: fav_color = request.session.get(’fav_color’, ’red’) pop(key, default=None) Example: fav_color = request.session.pop(’fav_color’, ’blue’) keys() items() setdefault() 206 Chapter 3. Using Django
- 211. Django Documentation, Release 1.9.3.dev20160224120324 clear() It also has these methods: flush() Deletes the current session data from the session and deletes the session cookie. This is used if you want to ensure that the previous session data can’t be accessed again from the user’s browser (for example, the django.contrib.auth.logout() function calls it). Deletion of the session cookie is a behavior new in Django 1.8. Previously, the behavior was to regenerate the session key value that was sent back to the user in the cookie. set_test_cookie() Sets a test cookie to determine whether the user’s browser supports cookies. Due to the way cookies work, you won’t be able to test this until the user’s next page request. See Setting test cookies below for more information. test_cookie_worked() Returns either True or False, depending on whether the user’s browser accepted the test cookie. Due to the way cookies work, you’ll have to call set_test_cookie() on a previous, separate page request. See Setting test cookies below for more information. delete_test_cookie() Deletes the test cookie. Use this to clean up after yourself. set_expiry(value) Sets the expiration time for the session. You can pass a number of different values: •If value is an integer, the session will expire after that many seconds of inactivity. For example, calling request.session.set_expiry(300) would make the session expire in 5 minutes. •If value is a datetime or timedelta object, the session will expire at that specific date/time. Note that datetime and timedelta values are only serializable if you are using the PickleSerializer. •If value is 0, the user’s session cookie will expire when the user’s Web browser is closed. •If value is None, the session reverts to using the global session expiry policy. Reading a session is not considered activity for expiration purposes. Session expiration is computed from the last time the session was modified. get_expiry_age() Returns the number of seconds until this session expires. For sessions with no custom expiration (or those set to expire at browser close), this will equal SESSION_COOKIE_AGE. This function accepts two optional keyword arguments: •modification: last modification of the session, as a datetime object. Defaults to the current time. •expiry: expiry information for the session, as a datetime object, an int (in seconds), or None. Defaults to the value stored in the session by set_expiry(), if there is one, or None. get_expiry_date() Returns the date this session will expire. For sessions with no custom expiration (or those set to expire at browser close), this will equal the date SESSION_COOKIE_AGE seconds from now. This function accepts the same keyword arguments as get_expiry_age(). get_expire_at_browser_close() Returns either True or False, depending on whether the user’s session cookie will expire when the user’s Web browser is closed. 3.3. Handling HTTP requests 207
- 212. Django Documentation, Release 1.9.3.dev20160224120324 clear_expired() Removes expired sessions from the session store. This class method is called by clearsessions. cycle_key() Creates a new session key while retaining the current session data. django.contrib.auth.login() calls this method to mitigate against session fixation. Session serialization By default, Django serializes session data using JSON. You can use the SESSION_SERIALIZER setting to customize the session serialization format. Even with the caveats described in Write your own serializer, we highly recommend sticking with JSON serialization especially if you are using the cookie backend. For example, here’s an attack scenario if you use pickle to serialize session data. If you’re using the signed cookie session backend and SECRET_KEY is known by an attacker (there isn’t an inherent vulnerability in Django that would cause it to leak), the attacker could insert a string into their session which, when unpickled, executes arbitrary code on the server. The technique for doing so is simple and easily available on the internet. Although the cookie session storage signs the cookie-stored data to prevent tampering, a SECRET_KEY leak immediately escalates to a remote code execution vulnerability. Bundled serializers class serializers.JSONSerializer A wrapper around the JSON serializer from django.core.signing. Can only serialize basic data types. In addition, as JSON supports only string keys, note that using non-string keys in request.session won’t work as expected: >>> # initial assignment >>> request.session[0] = 'bar' >>> # subsequent requests following serialization & deserialization >>> # of session data >>> request.session[0] # KeyError >>> request.session['0'] 'bar' See the Write your own serializer section for more details on limitations of JSON serialization. class serializers.PickleSerializer Supports arbitrary Python objects, but, as described above, can lead to a remote code execution vulnerability if SECRET_KEY becomes known by an attacker. Write your own serializer Note that unlike PickleSerializer, the JSONSerializer cannot han- dle arbitrary Python data types. As is often the case, there is a trade-off between convenience and secu- rity. If you wish to store more advanced data types including datetime and Decimal in JSON backed sessions, you will need to write a custom serializer (or convert such values to a JSON serializable ob- ject before storing them in request.session). While serializing these values is fairly straightforward (django.core.serializers.json.DateTimeAwareJSONEncoder may be helpful), writing a decoder that can reliably get back the same thing that you put in is more fragile. For example, you run the risk of returning a datetime that was actually a string that just happened to be in the same format chosen for datetimes). Your serializer class must implement two methods, dumps(self, obj) and loads(self, data), to serialize and deserialize the dictionary of session data, respectively. 208 Chapter 3. Using Django
- 213. Django Documentation, Release 1.9.3.dev20160224120324 Session object guidelines • Use normal Python strings as dictionary keys on request.session. This is more of a convention than a hard-and-fast rule. • Session dictionary keys that begin with an underscore are reserved for internal use by Django. • Don’t override request.session with a new object, and don’t access or set its attributes. Use it like a Python dictionary. Examples This simplistic view sets a has_commented variable to True after a user posts a comment. It doesn’t let a user post a comment more than once: def post_comment(request, new_comment): if request.session.get('has_commented', False): return HttpResponse("You've already commented.") c = comments.Comment(comment=new_comment) c.save() request.session['has_commented'] = True return HttpResponse('Thanks for your comment!') This simplistic view logs in a “member” of the site: def login(request): m = Member.objects.get(username=request.POST['username']) if m.password == request.POST['password']: request.session['member_id'] = m.id return HttpResponse("You're logged in.") else: return HttpResponse("Your username and password didn't match.") ...And this one logs a member out, according to login() above: def logout(request): try: del request.session['member_id'] except KeyError: pass return HttpResponse("You're logged out.") The standard django.contrib.auth.logout() function actually does a bit more than this to prevent inadver- tent data leakage. It calls the flush() method of request.session. We are using this example as a demonstra- tion of how to work with session objects, not as a full logout() implementation. Setting test cookies As a convenience, Django provides an easy way to test whether the user’s browser accepts cookies. Just call the set_test_cookie() method of request.session in a view, and call test_cookie_worked() in a sub- sequent view – not in the same view call. This awkward split between set_test_cookie() and test_cookie_worked() is necessary due to the way cookies work. When you set a cookie, you can’t actually tell whether a browser accepted it until the browser’s next request. 3.3. Handling HTTP requests 209
- 214. Django Documentation, Release 1.9.3.dev20160224120324 It’s good practice to use delete_test_cookie() to clean up after yourself. Do this after you’ve verified that the test cookie worked. Here’s a typical usage example: from django.http import HttpResponse from django.shortcuts import render def login(request): if request.method == 'POST': if request.session.test_cookie_worked(): request.session.delete_test_cookie() return HttpResponse("You're logged in.") else: return HttpResponse("Please enable cookies and try again.") request.session.set_test_cookie() return render(request, 'foo/login_form.html') Using sessions out of views Note: The examples in this section import the SessionStore object directly from the django.contrib.sessions.backends.db backend. In your own code, you should consider import- ing SessionStore from the session engine designated by SESSION_ENGINE, as below: >>> from importlib import import_module >>> from django.conf import settings >>> SessionStore = import_module(settings.SESSION_ENGINE).SessionStore An API is available to manipulate session data outside of a view: >>> from django.contrib.sessions.backends.db import SessionStore >>> s = SessionStore() >>> # stored as seconds since epoch since datetimes are not serializable in JSON. >>> s['last_login'] = 1376587691 >>> s.save() >>> s.session_key '2b1189a188b44ad18c35e113ac6ceead' >>> s = SessionStore(session_key='2b1189a188b44ad18c35e113ac6ceead') >>> s['last_login'] 1376587691 In order to mitigate session fixation attacks, sessions keys that don’t exist are regenerated: >>> from django.contrib.sessions.backends.db import SessionStore >>> s = SessionStore(session_key='no-such-session-here') >>> s.save() >>> s.session_key 'ff882814010ccbc3c870523934fee5a2' If you’re using the django.contrib.sessions.backends.db backend, each session is just a normal Django model. The Session model is defined in django/contrib/sessions/models.py. Because it’s a normal model, you can access sessions using the normal Django database API: >>> from django.contrib.sessions.models import Session >>> s = Session.objects.get(pk='2b1189a188b44ad18c35e113ac6ceead') 210 Chapter 3. Using Django
- 215. Django Documentation, Release 1.9.3.dev20160224120324 >>> s.expire_date datetime.datetime(2005, 8, 20, 13, 35, 12) Note that you’ll need to call get_decoded() to get the session dictionary. This is necessary because the dictionary is stored in an encoded format: >>> s.session_data 'KGRwMQpTJ19hdXRoX3VzZXJfaWQnCnAyCkkxCnMuMTExY2ZjODI2Yj...' >>> s.get_decoded() {'user_id': 42} When sessions are saved By default, Django only saves to the session database when the session has been modified – that is if any of its dictionary values have been assigned or deleted: # Session is modified. request.session['foo'] = 'bar' # Session is modified. del request.session['foo'] # Session is modified. request.session['foo'] = {} # Gotcha: Session is NOT modified, because this alters # request.session['foo'] instead of request.session. request.session['foo']['bar'] = 'baz' In the last case of the above example, we can tell the session object explicitly that it has been modified by setting the modified attribute on the session object: request.session.modified = True To change this default behavior, set the SESSION_SAVE_EVERY_REQUEST setting to True. When set to True, Django will save the session to the database on every single request. Note that the session cookie is only sent when a session has been created or modified. If SESSION_SAVE_EVERY_REQUEST is True, the session cookie will be sent on every request. Similarly, the expires part of a session cookie is updated each time the session cookie is sent. The session is not saved if the response’s status code is 500. Browser-length sessions vs. persistent sessions You can control whether the session framework uses browser-length sessions vs. persistent sessions with the SESSION_EXPIRE_AT_BROWSER_CLOSE setting. By default, SESSION_EXPIRE_AT_BROWSER_CLOSE is set to False, which means session cookies will be stored in users’ browsers for as long as SESSION_COOKIE_AGE. Use this if you don’t want people to have to log in every time they open a browser. If SESSION_EXPIRE_AT_BROWSER_CLOSE is set to True, Django will use browser-length cookies – cookies that expire as soon as the user closes their browser. Use this if you want people to have to log in every time they open a browser. 3.3. Handling HTTP requests 211
- 216. Django Documentation, Release 1.9.3.dev20160224120324 This setting is a global default and can be overwritten at a per-session level by explicitly calling the set_expiry() method of request.session as described above in using sessions in views. Note: Some browsers (Chrome, for example) provide settings that allow users to continue brows- ing sessions after closing and re-opening the browser. In some cases, this can interfere with the SESSION_EXPIRE_AT_BROWSER_CLOSE setting and prevent sessions from expiring on browser close. Please be aware of this while testing Django applications which have the SESSION_EXPIRE_AT_BROWSER_CLOSE set- ting enabled. Clearing the session store As users create new sessions on your website, session data can accumulate in your session store. If you’re using the database backend, the django_session database table will grow. If you’re using the file backend, your temporary directory will contain an increasing number of files. To understand this problem, consider what happens with the database backend. When a user logs in, Django adds a row to the django_session database table. Django updates this row each time the session data changes. If the user logs out manually, Django deletes the row. But if the user does not log out, the row never gets deleted. A similar process happens with the file backend. Django does not provide automatic purging of expired sessions. Therefore, it’s your job to purge expired sessions on a regular basis. Django provides a clean-up management command for this purpose: clearsessions. It’s recommended to call this command on a regular basis, for example as a daily cron job. Note that the cache backend isn’t vulnerable to this problem, because caches automatically delete stale data. Neither is the cookie backend, because the session data is stored by the users’ browsers. Settings A few Django settings give you control over session behavior: • SESSION_CACHE_ALIAS • SESSION_COOKIE_AGE • SESSION_COOKIE_DOMAIN • SESSION_COOKIE_HTTPONLY • SESSION_COOKIE_NAME • SESSION_COOKIE_PATH • SESSION_COOKIE_SECURE • SESSION_ENGINE • SESSION_EXPIRE_AT_BROWSER_CLOSE • SESSION_FILE_PATH • SESSION_SAVE_EVERY_REQUEST • SESSION_SERIALIZER 212 Chapter 3. Using Django
- 217. Django Documentation, Release 1.9.3.dev20160224120324 Session security Subdomains within a site are able to set cookies on the client for the whole domain. This makes session fixation possible if cookies are permitted from subdomains not controlled by trusted users. For example, an attacker could log into good.example.com and get a valid session for their account. If the attacker has control over bad.example.com, they can use it to send their session key to you since a subdomain is permitted to set cookies on *.example.com. When you visit good.example.com, you’ll be logged in as the attacker and might inadvertently enter your sensitive personal data (e.g. credit card info) into the attackers account. Another possible attack would be if good.example.com sets its SESSION_COOKIE_DOMAIN to ".example.com" which would cause session cookies from that site to be sent to bad.example.com. Technical details • The session dictionary accepts any json serializable value when using JSONSerializer or any picklable Python object when using PickleSerializer. See the pickle module for more information. • Session data is stored in a database table named django_session . • Django only sends a cookie if it needs to. If you don’t set any session data, it won’t send a session cookie. The SessionStore object When working with sessions internally, Django uses a session store object from the corresponding session engine. By convention, the session store object class is named SessionStore and is located in the module designated by SESSION_ENGINE. All SessionStore classes available in Django inherit from SessionBase and implement data manipulation methods, namely: • exists() • create() • save() • delete() • load() • clear_expired() In order to build a custom session engine or to customize an existing one, you may create a new class inheriting from SessionBase or any other existing SessionStore class. Extending most of the session engines is quite straightforward, but doing so with database-backed session engines generally requires some extra effort (see the next section for details). Extending database-backed session engines Creating a custom database-backed session engine built upon those included in Django (namely db and cached_db) may be done by inheriting AbstractBaseSession and either SessionStore class. AbstractBaseSession and BaseSessionManager are importable from django.contrib.sessions.base_session so that they can be imported without including django.contrib.sessions in INSTALLED_APPS. 3.3. Handling HTTP requests 213
- 218. Django Documentation, Release 1.9.3.dev20160224120324 class base_session.AbstractBaseSession The abstract base session model. session_key Primary key. The field itself may contain up to 40 characters. The current implementation generates a 32-character string (a random sequence of digits and lowercase ASCII letters). session_data A string containing an encoded and serialized session dictionary. expire_date A datetime designating when the session expires. Expired sessions are not available to a user, however, they may still be stored in the database until the clearsessions management command is run. classmethod get_session_store_class() Returns a session store class to be used with this session model. get_decoded() Returns decoded session data. Decoding is performed by the session store class. You can also customize the model manager by subclassing BaseSessionManager: class base_session.BaseSessionManager encode(session_dict) Returns the given session dictionary serialized and encoded as a string. Encoding is performed by the session store class tied to a model class. save(session_key, session_dict, expire_date) Saves session data for a provided session key, or deletes the session in case the data is empty. Customization of SessionStore classes is achieved by overriding methods and properties described below: class backends.db.SessionStore Implements database-backed session store. classmethod get_model_class() Override this method to return a custom session model if you need one. create_model_instance(data) Returns a new instance of the session model object, which represents the current session state. Overriding this method provides the ability to modify session model data before it’s saved to database. class backends.cached_db.SessionStore Implements cached database-backed session store. cache_key_prefix A prefix added to a session key to build a cache key string. Example The example below shows a custom database-backed session engine that includes an additional database column to store an account ID (thus providing an option to query the database for all active sessions for an account): 214 Chapter 3. Using Django
- 219. Django Documentation, Release 1.9.3.dev20160224120324 from django.contrib.sessions.backends.db import SessionStore as DBStore from django.contrib.sessions.base_session import AbstractBaseSession from django.db import models class CustomSession(AbstractBaseSession): account_id = models.IntegerField(null=True, db_index=True) class Meta: app_label = 'mysessions' @classmethod def get_session_store_class(cls): return SessionStore class SessionStore(DBStore): @classmethod def get_model_class(cls): return CustomSession def create_model_instance(self, data): obj = super(SessionStore, self).create_model_instance(data) try: account_id = int(data.get('_auth_user_id')) except (ValueError, TypeError): account_id = None obj.account_id = account_id return obj If you are migrating from the Django’s built-in cached_db session store to a custom one based on cached_db, you should override the cache key prefix in order to prevent a namespace clash: class SessionStore(CachedDBStore): cache_key_prefix = 'mysessions.custom_cached_db_backend' # ... Session IDs in URLs The Django sessions framework is entirely, and solely, cookie-based. It does not fall back to putting session IDs in URLs as a last resort, as PHP does. This is an intentional design decision. Not only does that behavior make URLs ugly, it makes your site vulnerable to session-ID theft via the “Referer” header. 3.4 Working with forms About this document This document provides an introduction to the basics of web forms and how they are handled in Django. For a more detailed look at specific areas of the forms API, see The Forms API, Form fields, and Form and field validation. Unless you’re planning to build websites and applications that do nothing but publish content, and don’t accept input from your visitors, you’re going to need to understand and use forms. Django provides a range of tools and libraries to help you build forms to accept input from site visitors, and then process and respond to the input. 3.4. Working with forms 215
- 220. Django Documentation, Release 1.9.3.dev20160224120324 3.4.1 HTML forms In HTML, a form is a collection of elements inside <form>...</form> that allow a visitor to do things like enter text, select options, manipulate objects or controls, and so on, and then send that information back to the server. Some of these form interface elements - text input or checkboxes - are fairly simple and are built into HTML itself. Others are much more complex; an interface that pops up a date picker or allows you to move a slider or manipulate controls will typically use JavaScript and CSS as well as HTML form <input> elements to achieve these effects. As well as its <input> elements, a form must specify two things: • where: the URL to which the data corresponding to the user’s input should be returned • how: the HTTP method the data should be returned by As an example, the login form for the Django admin contains several <input> elements: one of type="text" for the username, one of type="password" for the password, and one of type="submit" for the “Log in” button. It also contains some hidden text fields that the user doesn’t see, which Django uses to determine what to do next. It also tells the browser that the form data should be sent to the URL specified in the <form>’s action attribute - /admin/ - and that it should be sent using the HTTP mechanism specified by the method attribute - post. When the <input type="submit" value="Log in"> element is triggered, the data is returned to /admin/. GET and POST GET and POST are the only HTTP methods to use when dealing with forms. Django’s login form is returned using the POST method, in which the browser bundles up the form data, encodes it for transmission, sends it to the server, and then receives back its response. GET, by contrast, bundles the submitted data into a string, and uses this to compose a URL. The URL contains the address where the data must be sent, as well as the data keys and values. You can see this in action if you do a search in the Django documentation, which will produce a URL of the form https://docs.djangoproject.com/search/?q=forms&release=1. GET and POST are typically used for different purposes. Any request that could be used to change the state of the system - for example, a request that makes changes in the database - should use POST. GET should be used only for requests that do not affect the state of the system. GET would also be unsuitable for a password form, because the password would appear in the URL, and thus, also in browser history and server logs, all in plain text. Neither would it be suitable for large quantities of data, or for binary data, such as an image. A Web application that uses GET requests for admin forms is a security risk: it can be easy for an attacker to mimic a form’s request to gain access to sensitive parts of the system. POST, coupled with other protections like Django’s CSRF protection offers more control over access. On the other hand, GET is suitable for things like a web search form, because the URLs that represent a GET request can easily be bookmarked, shared, or resubmitted. 3.4.2 Django’s role in forms Handling forms is a complex business. Consider Django’s admin, where numerous items of data of several different types may need to be prepared for display in a form, rendered as HTML, edited using a convenient interface, returned to the server, validated and cleaned up, and then saved or passed on for further processing. Django’s form functionality can simplify and automate vast portions of this work, and can also do it more securely than most programmers would be able to do in code they wrote themselves. 216 Chapter 3. Using Django
- 221. Django Documentation, Release 1.9.3.dev20160224120324 Django handles three distinct parts of the work involved in forms: • preparing and restructuring data to make it ready for rendering • creating HTML forms for the data • receiving and processing submitted forms and data from the client It is possible to write code that does all of this manually, but Django can take care of it all for you. 3.4.3 Forms in Django We’ve described HTML forms briefly, but an HTML <form> is just one part of the machinery required. In the context of a Web application, ‘form’ might refer to that HTML <form>, or to the Django Form that produces it, or to the structured data returned when it is submitted, or to the end-to-end working collection of these parts. The Django Form class At the heart of this system of components is Django’s Form class. In much the same way that a Django model describes the logical structure of an object, its behavior, and the way its parts are represented to us, a Form class describes a form and determines how it works and appears. In a similar way that a model class’s fields map to database fields, a form class’s fields map to HTML form <input> elements. (A ModelForm maps a model class’s fields to HTML form <input> elements via a Form; this is what the Django admin is based upon.) A form’s fields are themselves classes; they manage form data and perform validation when a form is submitted. A DateField and a FileField handle very different kinds of data and have to do different things with it. A form field is represented to a user in the browser as an HTML “widget” - a piece of user interface machinery. Each field type has an appropriate default Widget class, but these can be overridden as required. Instantiating, processing, and rendering forms When rendering an object in Django, we generally: 1. get hold of it in the view (fetch it from the database, for example) 2. pass it to the template context 3. expand it to HTML markup using template variables Rendering a form in a template involves nearly the same work as rendering any other kind of object, but there are some key differences. In the case of a model instance that contained no data, it would rarely if ever be useful to do anything with it in a template. On the other hand, it makes perfect sense to render an unpopulated form - that’s what we do when we want the user to populate it. So when we handle a model instance in a view, we typically retrieve it from the database. When we’re dealing with a form we typically instantiate it in the view. When we instantiate a form, we can opt to leave it empty or pre-populate it, for example with: • data from a saved model instance (as in the case of admin forms for editing) • data that we have collated from other sources • data received from a previous HTML form submission 3.4. Working with forms 217
- 222. Django Documentation, Release 1.9.3.dev20160224120324 The last of these cases is the most interesting, because it’s what makes it possible for users not just to read a website, but to send information back to it too. 3.4.4 Building a form The work that needs to be done Suppose you want to create a simple form on your website, in order to obtain the user’s name. You’d need something like this in your template: <form action="/your-name/" method="post"> <label for="your_name">Your name: </label> <input id="your_name" type="text" name="your_name" value="{{ current_name }}"> <input type="submit" value="OK"> </form> This tells the browser to return the form data to the URL /your-name/, using the POST method. It will display a text field, labeled “Your name:”, and a button marked “OK”. If the template context contains a current_name variable, that will be used to pre-fill the your_name field. You’ll need a view that renders the template containing the HTML form, and that can supply the current_name field as appropriate. When the form is submitted, the POST request which is sent to the server will contain the form data. Now you’ll also need a view corresponding to that /your-name/ URL which will find the appropriate key/value pairs in the request, and then process them. This is a very simple form. In practice, a form might contain dozens or hundreds of fields, many of which might need to be pre-populated, and we might expect the user to work through the edit-submit cycle several times before concluding the operation. We might require some validation to occur in the browser, even before the form is submitted; we might want to use much more complex fields, that allow the user to do things like pick dates from a calendar and so on. At this point it’s much easier to get Django to do most of this work for us. Building a form in Django The Form class We already know what we want our HTML form to look like. Our starting point for it in Django is this: forms.py from django import forms class NameForm(forms.Form): your_name = forms.CharField(label='Your name', max_length=100) This defines a Form class with a single field (your_name). We’ve applied a human-friendly label to the field, which will appear in the <label> when it’s rendered (although in this case, the label we specified is actually the same one that would be generated automatically if we had omitted it). The field’s maximum allowable length is defined by max_length. This does two things. It puts a maxlength="100" on the HTML <input> (so the browser should prevent the user from entering more than that number of characters in the first place). It also means that when Django receives the form back from the browser, it will validate the length of the data. 218 Chapter 3. Using Django
- 223. Django Documentation, Release 1.9.3.dev20160224120324 A Form instance has an is_valid() method, which runs validation routines for all its fields. When this method is called, if all fields contain valid data, it will: • return True • place the form’s data in its cleaned_data attribute. The whole form, when rendered for the first time, will look like: <label for="your_name">Your name: </label> <input id="your_name" type="text" name="your_name" maxlength="100"> Note that it does not include the <form> tags, or a submit button. We’ll have to provide those ourselves in the template. The view Form data sent back to a Django website is processed by a view, generally the same view which published the form. This allows us to reuse some of the same logic. To handle the form we need to instantiate it in the view for the URL where we want it to be published: views.py from django.shortcuts import render from django.http import HttpResponseRedirect from .forms import NameForm def get_name(request): # if this is a POST request we need to process the form data if request.method == 'POST': # create a form instance and populate it with data from the request: form = NameForm(request.POST) # check whether it's valid: if form.is_valid(): # process the data in form.cleaned_data as required # ... # redirect to a new URL: return HttpResponseRedirect('/thanks/') # if a GET (or any other method) we'll create a blank form else: form = NameForm() return render(request, 'name.html', {'form': form}) If we arrive at this view with a GET request, it will create an empty form instance and place it in the template context to be rendered. This is what we can expect to happen the first time we visit the URL. If the form is submitted using a POST request, the view will once again create a form instance and populate it with data from the request: form = NameForm(request.POST) This is called “binding data to the form” (it is now a bound form). We call the form’s is_valid() method; if it’s not True, we go back to the template with the form. This time the form is no longer empty (unbound) so the HTML form will be populated with the data previously submitted, where it can be edited and corrected as required. If is_valid() is True, we’ll now be able to find all the validated form data in its cleaned_data attribute. We can use this data to update the database or do other processing before sending an HTTP redirect to the browser telling 3.4. Working with forms 219
- 224. Django Documentation, Release 1.9.3.dev20160224120324 it where to go next. The template We don’t need to do much in our name.html template. The simplest example is: <form action="/your-name/" method="post"> {% csrf_token %} {{ form }} <input type="submit" value="Submit" /> </form> All the form’s fields and their attributes will be unpacked into HTML markup from that {{ form }} by Django’s template language. Forms and Cross Site Request Forgery protection Django ships with an easy-to-use protection against Cross Site Request Forgeries. When submitting a form via POST with CSRF protection enabled you must use the csrf_token template tag as in the preceding example. However, since CSRF protection is not directly tied to forms in templates, this tag is omitted from the following examples in this document. HTML5 input types and browser validation If your form includes a URLField, an EmailField or any integer field type, Django will use the url, email and number HTML5 input types. By default, browsers may apply their own validation on these fields, which may be stricter than Django’s validation. If you would like to disable this behavior, set the novalidate attribute on the form tag, or specify a different widget on the field, like TextInput. We now have a working web form, described by a Django Form, processed by a view, and rendered as an HTML <form>. That’s all you need to get started, but the forms framework puts a lot more at your fingertips. Once you understand the basics of the process described above, you should be prepared to understand other features of the forms system and ready to learn a bit more about the underlying machinery. 3.4.5 More about Django Form classes All form classes are created as subclasses of django.forms.Form, including the ModelForm, which you en- counter in Django’s admin. Models and Forms In fact if your form is going to be used to directly add or edit a Django model, a ModelForm can save you a great deal of time, effort, and code, because it will build a form, along with the appropriate fields and their attributes, from a Model class. Bound and unbound form instances The distinction between Bound and unbound forms is important: 220 Chapter 3. Using Django
- 225. Django Documentation, Release 1.9.3.dev20160224120324 • An unbound form has no data associated with it. When rendered to the user, it will be empty or will contain default values. • A bound form has submitted data, and hence can be used to tell if that data is valid. If an invalid bound form is rendered, it can include inline error messages telling the user what data to correct. The form’s is_bound attribute will tell you whether a form has data bound to it or not. More on fields Consider a more useful form than our minimal example above, which we could use to implement “contact me” func- tionality on a personal website: forms.py from django import forms class ContactForm(forms.Form): subject = forms.CharField(max_length=100) message = forms.CharField(widget=forms.Textarea) sender = forms.EmailField() cc_myself = forms.BooleanField(required=False) Our earlier form used a single field, your_name, a CharField. In this case, our form has four fields: subject, message, sender and cc_myself. CharField, EmailField and BooleanField are just three of the available field types; a full list can be found in Form fields. Widgets Each form field has a corresponding Widget class, which in turn corresponds to an HTML form widget such as <input type="text">. In most cases, the field will have a sensible default widget. For example, by default, a CharField will have a TextInput widget, that produces an <input type="text"> in the HTML. If you needed <textarea> in- stead, you’d specify the appropriate widget when defining your form field, as we have done for the message field. Field data Whatever the data submitted with a form, once it has been successfully validated by calling is_valid() (and is_valid() has returned True), the validated form data will be in the form.cleaned_data dictionary. This data will have been nicely converted into Python types for you. Note: You can still access the unvalidated data directly from request.POST at this point, but the validated data is better. In the contact form example above, cc_myself will be a boolean value. Likewise, fields such as IntegerField and FloatField convert values to a Python int and float respectively. Here’s how the form data could be processed in the view that handles this form: views.py from django.core.mail import send_mail if form.is_valid(): 3.4. Working with forms 221
- 226. Django Documentation, Release 1.9.3.dev20160224120324 subject = form.cleaned_data['subject'] message = form.cleaned_data['message'] sender = form.cleaned_data['sender'] cc_myself = form.cleaned_data['cc_myself'] recipients = ['[email protected]'] if cc_myself: recipients.append(sender) send_mail(subject, message, sender, recipients) return HttpResponseRedirect('/thanks/') Tip: For more on sending email from Django, see Sending email. Some field types need some extra handling. For example, files that are uploaded using a form need to be handled differently (they can be retrieved from request.FILES, rather than request.POST). For details of how to handle file uploads with your form, see Binding uploaded files to a form. 3.4.6 Working with form templates All you need to do to get your form into a template is to place the form instance into the template context. So if your form is called form in the context, {{ form }} will render its <label> and <input> elements appropriately. Form rendering options Additional form template furniture Don’t forget that a form’s output does not include the surrounding <form> tags, or the form’s submit control. You will have to provide these yourself. There are other output options though for the <label>/<input> pairs: • {{ form.as_table }} will render them as table cells wrapped in <tr> tags • {{ form.as_p }} will render them wrapped in <p> tags • {{ form.as_ul }} will render them wrapped in <li> tags Note that you’ll have to provide the surrounding <table> or <ul> elements yourself. Here’s the output of {{ form.as_p }} for our ContactForm instance: <p><label for="id_subject">Subject:</label> <input id="id_subject" type="text" name="subject" maxlength="100" /></p> <p><label for="id_message">Message:</label> <input type="text" name="message" id="id_message" /></p> <p><label for="id_sender">Sender:</label> <input type="email" name="sender" id="id_sender" /></p> <p><label for="id_cc_myself">Cc myself:</label> <input type="checkbox" name="cc_myself" id="id_cc_myself" /></p> Note that each form field has an ID attribute set to id_<field-name>, which is referenced by the accompanying label tag. This is important in ensuring that forms are accessible to assistive technology such as screen reader software. You can also customize the way in which labels and ids are generated. 222 Chapter 3. Using Django
- 227. Django Documentation, Release 1.9.3.dev20160224120324 See Outputting forms as HTML for more on this. Rendering fields manually We don’t have to let Django unpack the form’s fields; we can do it manually if we like (allowing us to reorder the fields, for example). Each field is available as an attribute of the form using {{ form.name_of_field }}, and in a Django template, will be rendered appropriately. For example: {{ form.non_field_errors }} <div class="fieldWrapper"> {{ form.subject.errors }} <label for="{{ form.subject.id_for_label }}">Email subject:</label> {{ form.subject }} </div> <div class="fieldWrapper"> {{ form.message.errors }} <label for="{{ form.message.id_for_label }}">Your message:</label> {{ form.message }} </div> <div class="fieldWrapper"> {{ form.sender.errors }} <label for="{{ form.sender.id_for_label }}">Your email address:</label> {{ form.sender }} </div> <div class="fieldWrapper"> {{ form.cc_myself.errors }} <label for="{{ form.cc_myself.id_for_label }}">CC yourself?</label> {{ form.cc_myself }} </div> Complete <label> elements can also be generated using the label_tag(). For example: <div class="fieldWrapper"> {{ form.subject.errors }} {{ form.subject.label_tag }} {{ form.subject }} </div> Rendering form error messages Of course, the price of this flexibility is more work. Until now we haven’t had to worry about how to display form errors, because that’s taken care of for us. In this example we have had to make sure we take care of any errors for each field and any errors for the form as a whole. Note {{ form.non_field_errors }} at the top of the form and the template lookup for errors on each field. Using {{ form.name_of_field.errors }} displays a list of form errors, rendered as an unordered list. This might look like: <ul class="errorlist"> <li>Sender is required.</li> </ul> The list has a CSS class of errorlist to allow you to style its appearance. If you wish to further customize the display of errors you can do so by looping over them: {% if form.subject.errors %} <ol> 3.4. Working with forms 223
- 228. Django Documentation, Release 1.9.3.dev20160224120324 {% for error in form.subject.errors %} <li><strong>{{ error|escape }}</strong></li> {% endfor %} </ol> {% endif %} Non-field errors (and/or hidden field errors that are rendered at the top of the form when using helpers like form.as_p()) will be rendered with an additional class of nonfield to help distinguish them from field-specific errors. For example, {{ form.non_field_errors }} would look like: <ul class="errorlist nonfield"> <li>Generic validation error</li> </ul> The nonfield class as described in the example above was added. See The Forms API for more on errors, styling, and working with form attributes in templates. Looping over the form’s fields If you’re using the same HTML for each of your form fields, you can reduce duplicate code by looping through each field in turn using a {% for %} loop: {% for field in form %} <div class="fieldWrapper"> {{ field.errors }} {{ field.label_tag }} {{ field }} {% if field.help_text %} <p class="help">{{ field.help_text|safe }}</p> {% endif %} </div> {% endfor %} Useful attributes on {{ field }} include: {{ field.label }} The label of the field, e.g. Email address. {{ field.label_tag }} The field’s label wrapped in the appropriate HTML <label> tag. This includes the form’s label_suffix. For example, the default label_suffix is a colon: <label for="id_email">Email address:</label> {{ field.id_for_label }} The ID that will be used for this field (id_email in the example above). If you are constructing the label manually, you may want to use this in lieu of label_tag. It’s also useful, for example, if you have some inline JavaScript and want to avoid hardcoding the field’s ID. {{ field.value }} The value of the field. e.g [email protected]. {{ field.html_name }} The name of the field that will be used in the input element’s name field. This takes the form prefix into account, if it has been set. {{ field.help_text }} Any help text that has been associated with the field. {{ field.errors }} Outputs a <ul class="errorlist"> containing any validation errors corre- sponding to this field. You can customize the presentation of the errors with a {% for error in field.errors %} loop. In this case, each object in the loop is a simple string containing the error message. {{ field.is_hidden }} This attribute is True if the form field is a hidden field and False otherwise. It’s not particularly useful as a template variable, but could be useful in conditional tests such as: 224 Chapter 3. Using Django
- 229. Django Documentation, Release 1.9.3.dev20160224120324 {% if field.is_hidden %} {# Do something special #} {% endif %} {{ field.field }} The Field instance from the form class that this BoundField wraps. You can use it to access Field attributes, e.g. {{ char_field.field.max_length }}. See also: For a complete list of attributes and methods, see BoundField. Looping over hidden and visible fields If you’re manually laying out a form in a template, as opposed to relying on Django’s default form layout, you might want to treat <input type="hidden"> fields differently from non-hidden fields. For example, because hidden fields don’t display anything, putting error messages “next to” the field could cause confusion for your users – so errors for those fields should be handled differently. Django provides two methods on a form that allow you to loop over the hidden and visible fields independently: hidden_fields() and visible_fields(). Here’s a modification of an earlier example that uses these two methods: {# Include the hidden fields #} {% for hidden in form.hidden_fields %} {{ hidden }} {% endfor %} {# Include the visible fields #} {% for field in form.visible_fields %} <div class="fieldWrapper"> {{ field.errors }} {{ field.label_tag }} {{ field }} </div> {% endfor %} This example does not handle any errors in the hidden fields. Usually, an error in a hidden field is a sign of form tampering, since normal form interaction won’t alter them. However, you could easily insert some error displays for those form errors, as well. Reusable form templates If your site uses the same rendering logic for forms in multiple places, you can reduce duplication by saving the form’s loop in a standalone template and using the include tag to reuse it in other templates: # In your form template: {% include "form_snippet.html" %} # In form_snippet.html: {% for field in form %} <div class="fieldWrapper"> {{ field.errors }} {{ field.label_tag }} {{ field }} </div> {% endfor %} If the form object passed to a template has a different name within the context, you can alias it using the with argument of the include tag: 3.4. Working with forms 225
- 230. Django Documentation, Release 1.9.3.dev20160224120324 {% include "form_snippet.html" with form=comment_form %} If you find yourself doing this often, you might consider creating a custom inclusion tag. 3.4.7 Further topics This covers the basics, but forms can do a whole lot more: Formsets class BaseFormSet A formset is a layer of abstraction to work with multiple forms on the same page. It can be best compared to a data grid. Let’s say you have the following form: >>> from django import forms >>> class ArticleForm(forms.Form): ... title = forms.CharField() ... pub_date = forms.DateField() You might want to allow the user to create several articles at once. To create a formset out of an ArticleForm you would do: >>> from django.forms import formset_factory >>> ArticleFormSet = formset_factory(ArticleForm) You now have created a formset named ArticleFormSet. The formset gives you the ability to iterate over the forms in the formset and display them as you would with a regular form: >>> formset = ArticleFormSet() >>> for form in formset: ... print(form.as_table()) <tr><th><label for="id_form-0-title">Title:</label></th><td><input type="text" name="form-0-title" id <tr><th><label for="id_form-0-pub_date">Pub date:</label></th><td><input type="text" name="form-0-pub As you can see it only displayed one empty form. The number of empty forms that is displayed is controlled by the extra parameter. By default, formset_factory() defines one extra form; the following example will display two blank forms: >>> ArticleFormSet = formset_factory(ArticleForm, extra=2) Iterating over the formset will render the forms in the order they were created. You can change this order by providing an alternate implementation for the __iter__() method. Formsets can also be indexed into, which returns the corresponding form. If you override __iter__, you will need to also override __getitem__ to have matching behavior. Using initial data with a formset Initial data is what drives the main usability of a formset. As shown above you can define the number of extra forms. What this means is that you are telling the formset how many additional forms to show in addition to the number of forms it generates from the initial data. Let’s take a look at an example: 226 Chapter 3. Using Django
- 231. Django Documentation, Release 1.9.3.dev20160224120324 >>> import datetime >>> from django.forms import formset_factory >>> from myapp.forms import ArticleForm >>> ArticleFormSet = formset_factory(ArticleForm, extra=2) >>> formset = ArticleFormSet(initial=[ ... {'title': 'Django is now open source', ... 'pub_date': datetime.date.today(),} ... ]) >>> for form in formset: ... print(form.as_table()) <tr><th><label for="id_form-0-title">Title:</label></th><td><input type="text" name="form-0-title" va <tr><th><label for="id_form-0-pub_date">Pub date:</label></th><td><input type="text" name="form-0-pub <tr><th><label for="id_form-1-title">Title:</label></th><td><input type="text" name="form-1-title" id <tr><th><label for="id_form-1-pub_date">Pub date:</label></th><td><input type="text" name="form-1-pub <tr><th><label for="id_form-2-title">Title:</label></th><td><input type="text" name="form-2-title" id <tr><th><label for="id_form-2-pub_date">Pub date:</label></th><td><input type="text" name="form-2-pub There are now a total of three forms showing above. One for the initial data that was passed in and two extra forms. Also note that we are passing in a list of dictionaries as the initial data. See also: Creating formsets from models with model formsets. Limiting the maximum number of forms The max_num parameter to formset_factory() gives you the ability to limit the number of forms the formset will display: >>> from django.forms import formset_factory >>> from myapp.forms import ArticleForm >>> ArticleFormSet = formset_factory(ArticleForm, extra=2, max_num=1) >>> formset = ArticleFormSet() >>> for form in formset: ... print(form.as_table()) <tr><th><label for="id_form-0-title">Title:</label></th><td><input type="text" name="form-0-title" id <tr><th><label for="id_form-0-pub_date">Pub date:</label></th><td><input type="text" name="form-0-pub If the value of max_num is greater than the number of existing items in the initial data, up to extra additional blank forms will be added to the formset, so long as the total number of forms does not exceed max_num. For example, if extra=2 and max_num=2 and the formset is initialized with one initial item, a form for the initial item and one blank form will be displayed. If the number of items in the initial data exceeds max_num, all initial data forms will be displayed regardless of the value of max_num and no extra forms will be displayed. For example, if extra=3 and max_num=1 and the formset is initialized with two initial items, two forms with the initial data will be displayed. A max_num value of None (the default) puts a high limit on the number of forms displayed (1000). In practice this is equivalent to no limit. By default, max_num only affects how many forms are displayed and does not affect validation. If validate_max=True is passed to the formset_factory(), then max_num will affect validation. See Vali- dating the number of forms in a formset. 3.4. Working with forms 227
- 232. Django Documentation, Release 1.9.3.dev20160224120324 Formset validation Validation with a formset is almost identical to a regular Form. There is an is_valid method on the formset to provide a convenient way to validate all forms in the formset: >>> from django.forms import formset_factory >>> from myapp.forms import ArticleForm >>> ArticleFormSet = formset_factory(ArticleForm) >>> data = { ... 'form-TOTAL_FORMS': '1', ... 'form-INITIAL_FORMS': '0', ... 'form-MAX_NUM_FORMS': '', ... } >>> formset = ArticleFormSet(data) >>> formset.is_valid() True We passed in no data to the formset which is resulting in a valid form. The formset is smart enough to ignore extra forms that were not changed. If we provide an invalid article: >>> data = { ... 'form-TOTAL_FORMS': '2', ... 'form-INITIAL_FORMS': '0', ... 'form-MAX_NUM_FORMS': '', ... 'form-0-title': 'Test', ... 'form-0-pub_date': '1904-06-16', ... 'form-1-title': 'Test', ... 'form-1-pub_date': '', # <-- this date is missing but required ... } >>> formset = ArticleFormSet(data) >>> formset.is_valid() False >>> formset.errors [{}, {'pub_date': ['This field is required.']}] As we can see, formset.errors is a list whose entries correspond to the forms in the formset. Validation was performed for each of the two forms, and the expected error message appears for the second item. BaseFormSet.total_error_count() To check how many errors there are in the formset, we can use the total_error_count method: >>> # Using the previous example >>> formset.errors [{}, {'pub_date': ['This field is required.']}] >>> len(formset.errors) 2 >>> formset.total_error_count() 1 We can also check if form data differs from the initial data (i.e. the form was sent without any data): >>> data = { ... 'form-TOTAL_FORMS': '1', ... 'form-INITIAL_FORMS': '0', ... 'form-MAX_NUM_FORMS': '', ... 'form-0-title': '', ... 'form-0-pub_date': '', ... } >>> formset = ArticleFormSet(data) 228 Chapter 3. Using Django
- 233. Django Documentation, Release 1.9.3.dev20160224120324 >>> formset.has_changed() False Understanding the ManagementForm You may have noticed the additional data (form-TOTAL_FORMS, form-INITIAL_FORMS and form-MAX_NUM_FORMS) that was required in the formset’s data above. This data is required for the ManagementForm. This form is used by the formset to manage the collection of forms contained in the formset. If you don’t provide this management data, an exception will be raised: >>> data = { ... 'form-0-title': 'Test', ... 'form-0-pub_date': '', ... } >>> formset = ArticleFormSet(data) >>> formset.is_valid() Traceback (most recent call last): ... django.forms.utils.ValidationError: ['ManagementForm data is missing or has been tampered with'] It is used to keep track of how many form instances are being displayed. If you are adding new forms via JavaScript, you should increment the count fields in this form as well. On the other hand, if you are using JavaScript to allow deletion of existing objects, then you need to ensure the ones being removed are properly marked for deletion by including form-#-DELETE in the POST data. It is expected that all forms are present in the POST data regardless. The management form is available as an attribute of the formset itself. When rendering a formset in a template, you can include all the management data by rendering {{ my_formset.management_form }} (substituting the name of your formset as appropriate). total_form_count and initial_form_count BaseFormSet has a couple of methods that are closely related to the ManagementForm, total_form_count and initial_form_count. total_form_count returns the total number of forms in this formset. initial_form_count returns the number of forms in the formset that were pre-filled, and is also used to determine how many forms are required. You will probably never need to override either of these methods, so please be sure you understand what they do before doing so. empty_form BaseFormSet provides an additional attribute empty_form which returns a form instance with a prefix of __prefix__ for easier use in dynamic forms with JavaScript. Custom formset validation A formset has a clean method similar to the one on a Form class. This is where you define your own validation that works at the formset level: >>> from django.forms import BaseFormSet >>> from django.forms import formset_factory >>> from myapp.forms import ArticleForm >>> class BaseArticleFormSet(BaseFormSet): ... def clean(self): ... """Checks that no two articles have the same title.""" ... if any(self.errors): ... # Don't bother validating the formset unless each form is valid on its own ... return ... titles = [] ... for form in self.forms: ... title = form.cleaned_data['title'] 3.4. Working with forms 229
- 234. Django Documentation, Release 1.9.3.dev20160224120324 ... if title in titles: ... raise forms.ValidationError("Articles in a set must have distinct titles.") ... titles.append(title) >>> ArticleFormSet = formset_factory(ArticleForm, formset=BaseArticleFormSet) >>> data = { ... 'form-TOTAL_FORMS': '2', ... 'form-INITIAL_FORMS': '0', ... 'form-MAX_NUM_FORMS': '', ... 'form-0-title': 'Test', ... 'form-0-pub_date': '1904-06-16', ... 'form-1-title': 'Test', ... 'form-1-pub_date': '1912-06-23', ... } >>> formset = ArticleFormSet(data) >>> formset.is_valid() False >>> formset.errors [{}, {}] >>> formset.non_form_errors() ['Articles in a set must have distinct titles.'] The formset clean method is called after all the Form.clean methods have been called. The errors will be found using the non_form_errors() method on the formset. Validating the number of forms in a formset Django provides a couple ways to validate the minimum or maximum number of submitted forms. Applications which need more customizable validation of the number of forms should use custom formset validation. validate_max If validate_max=True is passed to formset_factory(), validation will also check that the number of forms in the data set, minus those marked for deletion, is less than or equal to max_num. >>> from django.forms import formset_factory >>> from myapp.forms import ArticleForm >>> ArticleFormSet = formset_factory(ArticleForm, max_num=1, validate_max=True) >>> data = { ... 'form-TOTAL_FORMS': '2', ... 'form-INITIAL_FORMS': '0', ... 'form-MIN_NUM_FORMS': '', ... 'form-MAX_NUM_FORMS': '', ... 'form-0-title': 'Test', ... 'form-0-pub_date': '1904-06-16', ... 'form-1-title': 'Test 2', ... 'form-1-pub_date': '1912-06-23', ... } >>> formset = ArticleFormSet(data) >>> formset.is_valid() False >>> formset.errors [{}, {}] >>> formset.non_form_errors() ['Please submit 1 or fewer forms.'] validate_max=True validates against max_num strictly even if max_num was exceeded because the amount of initial data supplied was excessive. 230 Chapter 3. Using Django
- 235. Django Documentation, Release 1.9.3.dev20160224120324 Note: Regardless of validate_max, if the number of forms in a data set exceeds max_num by more than 1000, then the form will fail to validate as if validate_max were set, and additionally only the first 1000 forms above max_num will be validated. The remainder will be truncated entirely. This is to protect against memory exhaustion attacks using forged POST requests. validate_min If validate_min=True is passed to formset_factory(), validation will also check that the number of forms in the data set, minus those marked for deletion, is greater than or equal to min_num. >>> from django.forms import formset_factory >>> from myapp.forms import ArticleForm >>> ArticleFormSet = formset_factory(ArticleForm, min_num=3, validate_min=True) >>> data = { ... 'form-TOTAL_FORMS': '2', ... 'form-INITIAL_FORMS': '0', ... 'form-MIN_NUM_FORMS': '', ... 'form-MAX_NUM_FORMS': '', ... 'form-0-title': 'Test', ... 'form-0-pub_date': '1904-06-16', ... 'form-1-title': 'Test 2', ... 'form-1-pub_date': '1912-06-23', ... } >>> formset = ArticleFormSet(data) >>> formset.is_valid() False >>> formset.errors [{}, {}] >>> formset.non_form_errors() ['Please submit 3 or more forms.'] Dealing with ordering and deletion of forms The formset_factory() provides two optional parameters can_order and can_delete to help with order- ing of forms in formsets and deletion of forms from a formset. can_order BaseFormSet.can_order Default: False Lets you create a formset with the ability to order: >>> from django.forms import formset_factory >>> from myapp.forms import ArticleForm >>> ArticleFormSet = formset_factory(ArticleForm, can_order=True) >>> formset = ArticleFormSet(initial=[ ... {'title': 'Article #1', 'pub_date': datetime.date(2008, 5, 10)}, ... {'title': 'Article #2', 'pub_date': datetime.date(2008, 5, 11)}, ... ]) >>> for form in formset: ... print(form.as_table()) <tr><th><label for="id_form-0-title">Title:</label></th><td><input type="text" name="form-0-title" va <tr><th><label for="id_form-0-pub_date">Pub date:</label></th><td><input type="text" name="form-0-pub <tr><th><label for="id_form-0-ORDER">Order:</label></th><td><input type="number" name="form-0-ORDER" <tr><th><label for="id_form-1-title">Title:</label></th><td><input type="text" name="form-1-title" va 3.4. Working with forms 231
- 236. Django Documentation, Release 1.9.3.dev20160224120324 <tr><th><label for="id_form-1-pub_date">Pub date:</label></th><td><input type="text" name="form-1-pub <tr><th><label for="id_form-1-ORDER">Order:</label></th><td><input type="number" name="form-1-ORDER" <tr><th><label for="id_form-2-title">Title:</label></th><td><input type="text" name="form-2-title" id <tr><th><label for="id_form-2-pub_date">Pub date:</label></th><td><input type="text" name="form-2-pub <tr><th><label for="id_form-2-ORDER">Order:</label></th><td><input type="number" name="form-2-ORDER" This adds an additional field to each form. This new field is named ORDER and is an forms.IntegerField. For the forms that came from the initial data it automatically assigned them a numeric value. Let’s look at what will happen when the user changes these values: >>> data = { ... 'form-TOTAL_FORMS': '3', ... 'form-INITIAL_FORMS': '2', ... 'form-MAX_NUM_FORMS': '', ... 'form-0-title': 'Article #1', ... 'form-0-pub_date': '2008-05-10', ... 'form-0-ORDER': '2', ... 'form-1-title': 'Article #2', ... 'form-1-pub_date': '2008-05-11', ... 'form-1-ORDER': '1', ... 'form-2-title': 'Article #3', ... 'form-2-pub_date': '2008-05-01', ... 'form-2-ORDER': '0', ... } >>> formset = ArticleFormSet(data, initial=[ ... {'title': 'Article #1', 'pub_date': datetime.date(2008, 5, 10)}, ... {'title': 'Article #2', 'pub_date': datetime.date(2008, 5, 11)}, ... ]) >>> formset.is_valid() True >>> for form in formset.ordered_forms: ... print(form.cleaned_data) {'pub_date': datetime.date(2008, 5, 1), 'ORDER': 0, 'title': 'Article #3'} {'pub_date': datetime.date(2008, 5, 11), 'ORDER': 1, 'title': 'Article #2'} {'pub_date': datetime.date(2008, 5, 10), 'ORDER': 2, 'title': 'Article #1'} can_delete BaseFormSet.can_delete Default: False Lets you create a formset with the ability to select forms for deletion: >>> from django.forms import formset_factory >>> from myapp.forms import ArticleForm >>> ArticleFormSet = formset_factory(ArticleForm, can_delete=True) >>> formset = ArticleFormSet(initial=[ ... {'title': 'Article #1', 'pub_date': datetime.date(2008, 5, 10)}, ... {'title': 'Article #2', 'pub_date': datetime.date(2008, 5, 11)}, ... ]) >>> for form in formset: ... print(form.as_table()) <tr><th><label for="id_form-0-title">Title:</label></th><td><input type="text" name="form-0-title" va <tr><th><label for="id_form-0-pub_date">Pub date:</label></th><td><input type="text" name="form-0-pub <tr><th><label for="id_form-0-DELETE">Delete:</label></th><td><input type="checkbox" name="form-0-DEL <tr><th><label for="id_form-1-title">Title:</label></th><td><input type="text" name="form-1-title" va <tr><th><label for="id_form-1-pub_date">Pub date:</label></th><td><input type="text" name="form-1-pub <tr><th><label for="id_form-1-DELETE">Delete:</label></th><td><input type="checkbox" name="form-1-DEL 232 Chapter 3. Using Django
- 237. Django Documentation, Release 1.9.3.dev20160224120324 <tr><th><label for="id_form-2-title">Title:</label></th><td><input type="text" name="form-2-title" id <tr><th><label for="id_form-2-pub_date">Pub date:</label></th><td><input type="text" name="form-2-pub <tr><th><label for="id_form-2-DELETE">Delete:</label></th><td><input type="checkbox" name="form-2-DEL Similar to can_order this adds a new field to each form named DELETE and is a forms.BooleanField. When data comes through marking any of the delete fields you can access them with deleted_forms: >>> data = { ... 'form-TOTAL_FORMS': '3', ... 'form-INITIAL_FORMS': '2', ... 'form-MAX_NUM_FORMS': '', ... 'form-0-title': 'Article #1', ... 'form-0-pub_date': '2008-05-10', ... 'form-0-DELETE': 'on', ... 'form-1-title': 'Article #2', ... 'form-1-pub_date': '2008-05-11', ... 'form-1-DELETE': '', ... 'form-2-title': '', ... 'form-2-pub_date': '', ... 'form-2-DELETE': '', ... } >>> formset = ArticleFormSet(data, initial=[ ... {'title': 'Article #1', 'pub_date': datetime.date(2008, 5, 10)}, ... {'title': 'Article #2', 'pub_date': datetime.date(2008, 5, 11)}, ... ]) >>> [form.cleaned_data for form in formset.deleted_forms] [{'DELETE': True, 'pub_date': datetime.date(2008, 5, 10), 'title': 'Article #1'}] If you are using a ModelFormSet, model instances for deleted forms will be deleted when you call formset.save(). If you call formset.save(commit=False), objects will not be deleted automatically. You’ll need to call delete() on each of the formset.deleted_objects to actually delete them: >>> instances = formset.save(commit=False) >>> for obj in formset.deleted_objects: ... obj.delete() On the other hand, if you are using a plain FormSet, it’s up to you to handle formset.deleted_forms, perhaps in your formset’s save() method, as there’s no general notion of what it means to delete a form. Adding additional fields to a formset If you need to add additional fields to the formset this can be easily accomplished. The formset base class provides an add_fields method. You can simply override this method to add your own fields or even redefine the default fields/attributes of the order and deletion fields: >>> from django.forms import BaseFormSet >>> from django.forms import formset_factory >>> from myapp.forms import ArticleForm >>> class BaseArticleFormSet(BaseFormSet): ... def add_fields(self, form, index): ... super(BaseArticleFormSet, self).add_fields(form, index) ... form.fields["my_field"] = forms.CharField() >>> ArticleFormSet = formset_factory(ArticleForm, formset=BaseArticleFormSet) >>> formset = ArticleFormSet() 3.4. Working with forms 233
- 238. Django Documentation, Release 1.9.3.dev20160224120324 >>> for form in formset: ... print(form.as_table()) <tr><th><label for="id_form-0-title">Title:</label></th><td><input type="text" name="form-0-title" id <tr><th><label for="id_form-0-pub_date">Pub date:</label></th><td><input type="text" name="form-0-pub <tr><th><label for="id_form-0-my_field">My field:</label></th><td><input type="text" name="form-0-my_ Passing custom parameters to formset forms Sometimes your form class takes custom parameters, like MyArticleForm. You can pass this parameter when instantiating the formset: >>> from django.forms import BaseFormSet >>> from django.forms import formset_factory >>> from myapp.forms import ArticleForm >>> class MyArticleForm(ArticleForm): ... def __init__(self, *args, **kwargs): ... self.user = kwargs.pop('user') ... super(MyArticleForm, self).__init__(*args, **kwargs) >>> ArticleFormSet = formset_factory(MyArticleForm) >>> formset = ArticleFormSet(form_kwargs={'user': request.user}) The form_kwargs may also depend on the specific form instance. The formset base class provides a get_form_kwargs method. The method takes a single argument - the index of the form in the formset. The index is None for the empty_form: >>> from django.forms import BaseFormSet >>> from django.forms import formset_factory >>> class BaseArticleFormSet(BaseFormSet): ... def get_form_kwargs(self, index): ... kwargs = super(BaseArticleFormSet, self).get_form_kwargs(index) ... kwargs['custom_kwarg'] = index ... return kwargs The form_kwargs argument was added. Using a formset in views and templates Using a formset inside a view is as easy as using a regular Form class. The only thing you will want to be aware of is making sure to use the management form inside the template. Let’s look at a sample view: from django.forms import formset_factory from django.shortcuts import render from myapp.forms import ArticleForm def manage_articles(request): ArticleFormSet = formset_factory(ArticleForm) if request.method == 'POST': formset = ArticleFormSet(request.POST, request.FILES) if formset.is_valid(): # do something with the formset.cleaned_data pass else: 234 Chapter 3. Using Django
- 239. Django Documentation, Release 1.9.3.dev20160224120324 formset = ArticleFormSet() return render(request, 'manage_articles.html', {'formset': formset}) The manage_articles.html template might look like this: <form method="post" action=""> {{ formset.management_form }} <table> {% for form in formset %} {{ form }} {% endfor %} </table> </form> However there’s a slight shortcut for the above by letting the formset itself deal with the management form: <form method="post" action=""> <table> {{ formset }} </table> </form> The above ends up calling the as_table method on the formset class. Manually rendered can_delete and can_order If you manually render fields in the template, you can render can_delete parameter with {{ form.DELETE }}: <form method="post" action=""> {{ formset.management_form }} {% for form in formset %} <ul> <li>{{ form.title }}</li> <li>{{ form.pub_date }}</li> {% if formset.can_delete %} <li>{{ form.DELETE }}</li> {% endif %} </ul> {% endfor %} </form> Similarly, if the formset has the ability to order (can_order=True), it is possible to render it with {{ form.ORDER }}. Using more than one formset in a view You are able to use more than one formset in a view if you like. Formsets borrow much of its behavior from forms. With that said you are able to use prefix to prefix formset form field names with a given value to allow more than one formset to be sent to a view without name clashing. Lets take a look at how this might be accomplished: from django.forms import formset_factory from django.shortcuts import render from myapp.forms import ArticleForm, BookForm def manage_articles(request): ArticleFormSet = formset_factory(ArticleForm) BookFormSet = formset_factory(BookForm) if request.method == 'POST': article_formset = ArticleFormSet(request.POST, request.FILES, prefix='articles') 3.4. Working with forms 235
- 240. Django Documentation, Release 1.9.3.dev20160224120324 book_formset = BookFormSet(request.POST, request.FILES, prefix='books') if article_formset.is_valid() and book_formset.is_valid(): # do something with the cleaned_data on the formsets. pass else: article_formset = ArticleFormSet(prefix='articles') book_formset = BookFormSet(prefix='books') return render(request, 'manage_articles.html', { 'article_formset': article_formset, 'book_formset': book_formset, }) You would then render the formsets as normal. It is important to point out that you need to pass prefix on both the POST and non-POST cases so that it is rendered and processed correctly. Creating forms from models ModelForm class ModelForm If you’re building a database-driven app, chances are you’ll have forms that map closely to Django models. For instance, you might have a BlogComment model, and you want to create a form that lets people submit comments. In this case, it would be redundant to define the field types in your form, because you’ve already defined the fields in your model. For this reason, Django provides a helper class that lets you create a Form class from a Django model. For example: >>> from django.forms import ModelForm >>> from myapp.models import Article # Create the form class. >>> class ArticleForm(ModelForm): ... class Meta: ... model = Article ... fields = ['pub_date', 'headline', 'content', 'reporter'] # Creating a form to add an article. >>> form = ArticleForm() # Creating a form to change an existing article. >>> article = Article.objects.get(pk=1) >>> form = ArticleForm(instance=article) Field types The generated Form class will have a form field for every model field specified, in the order specified in the fields attribute. Each model field has a corresponding default form field. For example, a CharField on a model is represented as a CharField on a form. A model ManyToManyField is represented as a MultipleChoiceField. Here is the full list of conversions: 236 Chapter 3. Using Django
- 241. Django Documentation, Release 1.9.3.dev20160224120324 Model field Form field AutoField Not represented in the form BigIntegerField IntegerField with min_value set to -9223372036854775808 and max_value set to 9223372036854775807. BooleanField BooleanField CharField CharField with max_length set to the model field’s max_length CommaSeparatedIntegerFieldCharField DateField DateField DateTimeField DateTimeField DecimalField DecimalField EmailField EmailField FileField FileField FilePathField FilePathField FloatField FloatField ForeignKey ModelChoiceField (see below) ImageField ImageField IntegerField IntegerField IPAddressField IPAddressField GenericIPAddressFieldGenericIPAddressField ManyToManyField ModelMultipleChoiceField (see below) NullBooleanField NullBooleanField PositiveIntegerField IntegerField PositiveSmallIntegerFieldIntegerField SlugField SlugField SmallIntegerField IntegerField TextField CharField with widget=forms.Textarea TimeField TimeField URLField URLField As you might expect, the ForeignKey and ManyToManyField model field types are special cases: • ForeignKey is represented by django.forms.ModelChoiceField, which is a ChoiceField whose choices are a model QuerySet. • ManyToManyField is represented by django.forms.ModelMultipleChoiceField, which is a MultipleChoiceField whose choices are a model QuerySet. In addition, each generated form field has attributes set as follows: • If the model field has blank=True, then required is set to False on the form field. Otherwise, required=True. • The form field’s label is set to the verbose_name of the model field, with the first character capitalized. • The form field’s help_text is set to the help_text of the model field. • If the model field has choices set, then the form field’s widget will be set to Select, with choices coming from the model field’s choices. The choices will normally include the blank choice which is selected by default. If the field is required, this forces the user to make a selection. The blank choice will not be included if the model field has blank=False and an explicit default value (the default value will be initially selected instead). Finally, note that you can override the form field used for a given model field. See Overriding the default fields below. A full example Consider this set of models: 3.4. Working with forms 237
- 242. Django Documentation, Release 1.9.3.dev20160224120324 from django.db import models from django.forms import ModelForm TITLE_CHOICES = ( ('MR', 'Mr.'), ('MRS', 'Mrs.'), ('MS', 'Ms.'), ) class Author(models.Model): name = models.CharField(max_length=100) title = models.CharField(max_length=3, choices=TITLE_CHOICES) birth_date = models.DateField(blank=True, null=True) def __str__(self): # __unicode__ on Python 2 return self.name class Book(models.Model): name = models.CharField(max_length=100) authors = models.ManyToManyField(Author) class AuthorForm(ModelForm): class Meta: model = Author fields = ['name', 'title', 'birth_date'] class BookForm(ModelForm): class Meta: model = Book fields = ['name', 'authors'] With these models, the ModelForm subclasses above would be roughly equivalent to this (the only difference being the save() method, which we’ll discuss in a moment.): from django import forms class AuthorForm(forms.Form): name = forms.CharField(max_length=100) title = forms.CharField(max_length=3, widget=forms.Select(choices=TITLE_CHOICES)) birth_date = forms.DateField(required=False) class BookForm(forms.Form): name = forms.CharField(max_length=100) authors = forms.ModelMultipleChoiceField(queryset=Author.objects.all()) Validation on a ModelForm There are two main steps involved in validating a ModelForm: 1. Validating the form 2. Validating the model instance Just like normal form validation, model form validation is triggered implicitly when calling is_valid() or access- ing the errors attribute and explicitly when calling full_clean(), although you will typically not use the latter method in practice. Model validation (Model.full_clean()) is triggered from within the form validation step, right after the form’s clean() method is called. 238 Chapter 3. Using Django
- 243. Django Documentation, Release 1.9.3.dev20160224120324 Warning: The cleaning process modifies the model instance passed to the ModelForm constructor in various ways. For instance, any date fields on the model are converted into actual date objects. Failed validation may leave the underlying model instance in an inconsistent state and therefore it’s not recommended to reuse it. Overriding the clean() method You can override the clean() method on a model form to provide additional validation in the same way you can on a normal form. A model form instance attached to a model object will contain an instance attribute that gives its methods access to that specific model instance. Warning: The ModelForm.clean() method sets a flag that makes the model validation step validate the uniqueness of model fields that are marked as unique, unique_together or unique_for_date|month|year. If you would like to override the clean() method and maintain this validation, you must call the parent class’s clean() method. Interaction with model validation As part of the validation process, ModelForm will call the clean() method of each field on your model that has a corresponding field on your form. If you have excluded any model fields, validation will not be run on those fields. See the form validation documentation for more on how field cleaning and validation work. The model’s clean() method will be called before any uniqueness checks are made. See Validating objects for more information on the model’s clean() hook. Considerations regarding model’s error_messages Error messages defined at the form field level or at the form Meta level always take precedence over the error messages defined at the model field level. Error messages defined on model fields are only used when the ValidationError is raised during the model validation step and no corresponding error messages are defined at the form level. You can override the error messages from NON_FIELD_ERRORS raised by model validation by adding the NON_FIELD_ERRORS key to the error_messages dictionary of the ModelForm’s inner Meta class: from django.forms import ModelForm from django.core.exceptions import NON_FIELD_ERRORS class ArticleForm(ModelForm): class Meta: error_messages = { NON_FIELD_ERRORS: { 'unique_together': "%(model_name)s's %(field_labels)s are not unique.", } } The save() method Every ModelForm also has a save() method. This method creates and saves a database object from the data bound to the form. A subclass of ModelForm can accept an existing model instance as the keyword argument instance; if this is supplied, save() will update that instance. If it’s not supplied, save() will create a new instance of the specified model: >>> from myapp.models import Article >>> from myapp.forms import ArticleForm # Create a form instance from POST data. 3.4. Working with forms 239
- 244. Django Documentation, Release 1.9.3.dev20160224120324 >>> f = ArticleForm(request.POST) # Save a new Article object from the form's data. >>> new_article = f.save() # Create a form to edit an existing Article, but use # POST data to populate the form. >>> a = Article.objects.get(pk=1) >>> f = ArticleForm(request.POST, instance=a) >>> f.save() Note that if the form hasn’t been validated, calling save() will do so by checking form.errors. A ValueError will be raised if the data in the form doesn’t validate – i.e., if form.errors evaluates to True. This save() method accepts an optional commit keyword argument, which accepts either True or False. If you call save() with commit=False, then it will return an object that hasn’t yet been saved to the database. In this case, it’s up to you to call save() on the resulting model instance. This is useful if you want to do custom processing on the object before saving it, or if you want to use one of the specialized model saving options. commit is True by default. Another side effect of using commit=False is seen when your model has a many-to-many relation with another model. If your model has a many-to-many relation and you specify commit=False when you save a form, Django cannot immediately save the form data for the many-to-many relation. This is because it isn’t possible to save many- to-many data for an instance until the instance exists in the database. To work around this problem, every time you save a form using commit=False, Django adds a save_m2m() method to your ModelForm subclass. After you’ve manually saved the instance produced by the form, you can invoke save_m2m() to save the many-to-many form data. For example: # Create a form instance with POST data. >>> f = AuthorForm(request.POST) # Create, but don't save the new author instance. >>> new_author = f.save(commit=False) # Modify the author in some way. >>> new_author.some_field = 'some_value' # Save the new instance. >>> new_author.save() # Now, save the many-to-many data for the form. >>> f.save_m2m() Calling save_m2m() is only required if you use save(commit=False). When you use a simple save() on a form, all data – including many-to-many data – is saved without the need for any additional method calls. For example: # Create a form instance with POST data. >>> a = Author() >>> f = AuthorForm(request.POST, instance=a) # Create and save the new author instance. There's no need to do anything else. >>> new_author = f.save() Other than the save() and save_m2m() methods, a ModelForm works exactly the same way as any other forms form. For example, the is_valid() method is used to check for validity, the is_multipart() method is used to determine whether a form requires multipart file upload (and hence whether request.FILES must be passed to the form), etc. See Binding uploaded files to a form for more information. 240 Chapter 3. Using Django
- 245. Django Documentation, Release 1.9.3.dev20160224120324 Selecting the fields to use It is strongly recommended that you explicitly set all fields that should be edited in the form using the fields attribute. Failure to do so can easily lead to security problems when a form unexpectedly allows a user to set certain fields, especially when new fields are added to a model. Depending on how the form is rendered, the problem may not even be visible on the web page. The alternative approach would be to include all fields automatically, or blacklist only some. This fundamental ap- proach is known to be much less secure and has led to serious exploits on major websites (e.g. GitHub). There are, however, two shortcuts available for cases where you can guarantee these security concerns do not apply to you: 1. Set the fields attribute to the special value ’__all__’ to indicate that all fields in the model should be used. For example: from django.forms import ModelForm class AuthorForm(ModelForm): class Meta: model = Author fields = '__all__' 2. Set the exclude attribute of the ModelForm’s inner Meta class to a list of fields to be excluded from the form. For example: class PartialAuthorForm(ModelForm): class Meta: model = Author exclude = ['title'] Since the Author model has the 3 fields name, title and birth_date, this will result in the fields name and birth_date being present on the form. If either of these are used, the order the fields appear in the form will be the order the fields are defined in the model, with ManyToManyField instances appearing last. In addition, Django applies the following rule: if you set editable=False on the model field, any form created from the model via ModelForm will not include that field. In older versions, omitting both fields and exclude resulted in a form with all the model’s fields. Doing this now raises an ImproperlyConfigured exception. Note: Any fields not included in a form by the above logic will not be set by the form’s save() method. Also, if you manually add the excluded fields back to the form, they will not be initialized from the model instance. Django will prevent any attempt to save an incomplete model, so if the model does not allow the missing fields to be empty, and does not provide a default value for the missing fields, any attempt to save() a ModelForm with missing fields will fail. To avoid this failure, you must instantiate your model with initial values for the missing, but required fields: author = Author(title='Mr') form = PartialAuthorForm(request.POST, instance=author) form.save() Alternatively, you can use save(commit=False) and manually set any extra required fields: form = PartialAuthorForm(request.POST) author = form.save(commit=False) author.title = 'Mr' author.save() 3.4. Working with forms 241
- 246. Django Documentation, Release 1.9.3.dev20160224120324 See the section on saving forms for more details on using save(commit=False). Overriding the default fields The default field types, as described in the Field types table above, are sensible defaults. If you have a DateField in your model, chances are you’d want that to be represented as a DateField in your form. But ModelForm gives you the flexibility of changing the form field for a given model. To specify a custom widget for a field, use the widgets attribute of the inner Meta class. This should be a dictionary mapping field names to widget classes or instances. For example, if you want the CharField for the name attribute of Author to be represented by a <textarea> instead of its default <input type="text">, you can override the field’s widget: from django.forms import ModelForm, Textarea from myapp.models import Author class AuthorForm(ModelForm): class Meta: model = Author fields = ('name', 'title', 'birth_date') widgets = { 'name': Textarea(attrs={'cols': 80, 'rows': 20}), } The widgets dictionary accepts either widget instances (e.g., Textarea(...)) or classes (e.g., Textarea). Similarly, you can specify the labels, help_texts and error_messages attributes of the inner Meta class if you want to further customize a field. For example if you wanted to customize the wording of all user facing strings for the name field: from django.utils.translation import ugettext_lazy as _ class AuthorForm(ModelForm): class Meta: model = Author fields = ('name', 'title', 'birth_date') labels = { 'name': _('Writer'), } help_texts = { 'name': _('Some useful help text.'), } error_messages = { 'name': { 'max_length': _("This writer's name is too long."), }, } You can also specify field_classes to customize the type of fields instantiated by the form. For example, if you wanted to use MySlugFormField for the slug field, you could do the following: from django.forms import ModelForm from myapp.models import Article class ArticleForm(ModelForm): class Meta: model = Article fields = ['pub_date', 'headline', 'content', 'reporter', 'slug'] 242 Chapter 3. Using Django
- 247. Django Documentation, Release 1.9.3.dev20160224120324 field_classes = { 'slug': MySlugFormField, } Finally, if you want complete control over of a field – including its type, validators, required, etc. – you can do this by declaratively specifying fields like you would in a regular Form. If you want to specify a field’s validators, you can do so by defining the field declaratively and setting its validators parameter: from django.forms import ModelForm, CharField from myapp.models import Article class ArticleForm(ModelForm): slug = CharField(validators=[validate_slug]) class Meta: model = Article fields = ['pub_date', 'headline', 'content', 'reporter', 'slug'] The Meta.field_classes attribute was added. Note: When you explicitly instantiate a form field like this, it is important to understand how ModelForm and regular Form are related. ModelForm is a regular Form which can automatically generate certain fields. The fields that are automatically generated depend on the content of the Meta class and on which fields have already been defined declaratively. Basically, ModelForm will only generate fields that are missing from the form, or in other words, fields that weren’t defined declaratively. Fields defined declaratively are left as-is, therefore any customizations made to Meta attributes such as widgets, labels, help_texts, or error_messages are ignored; these only apply to fields that are generated automati- cally. Similarly, fields defined declaratively do not draw their attributes like max_length or required from the corre- sponding model. If you want to maintain the behavior specified in the model, you must set the relevant arguments explicitly when declaring the form field. For example, if the Article model looks like this: class Article(models.Model): headline = models.CharField(max_length=200, null=True, blank=True, help_text="Use puns liberally") content = models.TextField() and you want to do some custom validation for headline, while keeping the blank and help_text values as specified, you might define ArticleForm like this: class ArticleForm(ModelForm): headline = MyFormField(max_length=200, required=False, help_text="Use puns liberally") class Meta: model = Article fields = ['headline', 'content'] You must ensure that the type of the form field can be used to set the contents of the corresponding model field. When they are not compatible, you will get a ValueError as no implicit conversion takes place. 3.4. Working with forms 243
- 248. Django Documentation, Release 1.9.3.dev20160224120324 See the form field documentation for more information on fields and their arguments. Enabling localization of fields By default, the fields in a ModelForm will not localize their data. To enable localization for fields, you can use the localized_fields attribute on the Meta class. >>> from django.forms import ModelForm >>> from myapp.models import Author >>> class AuthorForm(ModelForm): ... class Meta: ... model = Author ... localized_fields = ('birth_date',) If localized_fields is set to the special value ’__all__’, all fields will be localized. Form inheritance As with basic forms, you can extend and reuse ModelForms by inheriting them. This is useful if you need to declare extra fields or extra methods on a parent class for use in a number of forms derived from models. For example, using the previous ArticleForm class: >>> class EnhancedArticleForm(ArticleForm): ... def clean_pub_date(self): ... ... This creates a form that behaves identically to ArticleForm, except there’s some extra validation and cleaning for the pub_date field. You can also subclass the parent’s Meta inner class if you want to change the Meta.fields or Meta.excludes lists: >>> class RestrictedArticleForm(EnhancedArticleForm): ... class Meta(ArticleForm.Meta): ... exclude = ('body',) This adds the extra method from the EnhancedArticleForm and modifies the original ArticleForm.Meta to remove one field. There are a couple of things to note, however. • Normal Python name resolution rules apply. If you have multiple base classes that declare a Meta inner class, only the first one will be used. This means the child’s Meta, if it exists, otherwise the Meta of the first parent, etc. • It’s possible to inherit from both Form and ModelForm simultaneously, however, you must ensure that ModelForm appears first in the MRO. This is because these classes rely on different metaclasses and a class can only have one metaclass. • It’s possible to declaratively remove a Field inherited from a parent class by setting the name to be None on the subclass. You can only use this technique to opt out from a field defined declaratively by a parent class; it won’t prevent the ModelForm metaclass from generating a default field. To opt-out from default fields, see Selecting the fields to use. Providing initial values As with regular forms, it’s possible to specify initial data for forms by specifying an initial parameter when instantiating the form. Initial values provided this way will override both initial values from the form field and values from an attached model instance. For example: 244 Chapter 3. Using Django
- 249. Django Documentation, Release 1.9.3.dev20160224120324 >>> article = Article.objects.get(pk=1) >>> article.headline 'My headline' >>> form = ArticleForm(initial={'headline': 'Initial headline'}, instance=article) >>> form['headline'].value() 'Initial headline' ModelForm factory function You can create forms from a given model using the standalone function modelform_factory(), instead of using a class definition. This may be more convenient if you do not have many customizations to make: >>> from django.forms import modelform_factory >>> from myapp.models import Book >>> BookForm = modelform_factory(Book, fields=("author", "title")) This can also be used to make simple modifications to existing forms, for example by specifying the widgets to be used for a given field: >>> from django.forms import Textarea >>> Form = modelform_factory(Book, form=BookForm, ... widgets={"title": Textarea()}) The fields to include can be specified using the fields and exclude keyword arguments, or the corresponding attributes on the ModelForm inner Meta class. Please see the ModelForm Selecting the fields to use documentation. ... or enable localization for specific fields: >>> Form = modelform_factory(Author, form=AuthorForm, localized_fields=("birth_date",)) Model formsets class models.BaseModelFormSet Like regular formsets, Django provides a couple of enhanced formset classes that make it easy to work with Django models. Let’s reuse the Author model from above: >>> from django.forms import modelformset_factory >>> from myapp.models import Author >>> AuthorFormSet = modelformset_factory(Author, fields=('name', 'title')) Using fields restricts the formset to use only the given fields. Alternatively, you can take an “opt-out” approach, specifying which fields to exclude: >>> AuthorFormSet = modelformset_factory(Author, exclude=('birth_date',)) In older versions, omitting both fields and exclude resulted in a formset with all the model’s fields. Doing this now raises an ImproperlyConfigured exception. This will create a formset that is capable of working with the data associated with the Author model. It works just like a regular formset: >>> formset = AuthorFormSet() >>> print(formset) <input type="hidden" name="form-TOTAL_FORMS" value="1" id="id_form-TOTAL_FORMS" /><input type="hidden <tr><th><label for="id_form-0-name">Name:</label></th><td><input id="id_form-0-name" type="text" name <tr><th><label for="id_form-0-title">Title:</label></th><td><select name="form-0-title" id="id_form-0 <option value="" selected="selected">---------</option> 3.4. Working with forms 245
- 250. Django Documentation, Release 1.9.3.dev20160224120324 <option value="MR">Mr.</option> <option value="MRS">Mrs.</option> <option value="MS">Ms.</option> </select><input type="hidden" name="form-0-id" id="id_form-0-id" /></td></tr> Note: modelformset_factory() uses formset_factory() to generate formsets. This means that a model formset is just an extension of a basic formset that knows how to interact with a particular model. Changing the queryset By default, when you create a formset from a model, the formset will use a queryset that includes all objects in the model (e.g., Author.objects.all()). You can override this behavior by using the queryset argument: >>> formset = AuthorFormSet(queryset=Author.objects.filter(name__startswith='O')) Alternatively, you can create a subclass that sets self.queryset in __init__: from django.forms import BaseModelFormSet from myapp.models import Author class BaseAuthorFormSet(BaseModelFormSet): def __init__(self, *args, **kwargs): super(BaseAuthorFormSet, self).__init__(*args, **kwargs) self.queryset = Author.objects.filter(name__startswith='O') Then, pass your BaseAuthorFormSet class to the factory function: >>> AuthorFormSet = modelformset_factory( ... Author, fields=('name', 'title'), formset=BaseAuthorFormSet) If you want to return a formset that doesn’t include any pre-existing instances of the model, you can specify an empty QuerySet: >>> AuthorFormSet(queryset=Author.objects.none()) Changing the form By default, when you use modelformset_factory, a model form will be created using modelform_factory(). Often, it can be useful to specify a custom model form. For example, you can create a custom model form that has custom validation: class AuthorForm(forms.ModelForm): class Meta: model = Author fields = ('name', 'title') def clean_name(self): # custom validation for the name field ... Then, pass your model form to the factory function: AuthorFormSet = modelformset_factory(Author, form=AuthorForm) It is not always necessary to define a custom model form. The modelformset_factory function has several arguments which are passed through to modelform_factory, which are described below. 246 Chapter 3. Using Django
- 251. Django Documentation, Release 1.9.3.dev20160224120324 Specifying widgets to use in the form with widgets Using the widgets parameter, you can specify a dictionary of values to customize the ModelForm’s widget class for a particular field. This works the same way as the widgets dictionary on the inner Meta class of a ModelForm works: >>> AuthorFormSet = modelformset_factory( ... Author, fields=('name', 'title'), ... widgets={'name': Textarea(attrs={'cols': 80, 'rows': 20})}) Enabling localization for fields with localized_fields Using the localized_fields parameter, you can enable localization for fields in the form. >>> AuthorFormSet = modelformset_factory( ... Author, fields=('name', 'title', 'birth_date'), ... localized_fields=('birth_date',)) If localized_fields is set to the special value ’__all__’, all fields will be localized. Providing initial values As with regular formsets, it’s possible to specify initial data for forms in the formset by specifying an initial parameter when instantiating the model formset class returned by modelformset_factory(). However, with model formsets, the initial values only apply to extra forms, those that aren’t attached to an existing model instance. If the extra forms with initial data aren’t changed by the user, they won’t be validated or saved. Saving objects in the formset As with a ModelForm, you can save the data as a model object. This is done with the formset’s save() method: # Create a formset instance with POST data. >>> formset = AuthorFormSet(request.POST) # Assuming all is valid, save the data. >>> instances = formset.save() The save() method returns the instances that have been saved to the database. If a given instance’s data didn’t change in the bound data, the instance won’t be saved to the database and won’t be included in the return value (instances, in the above example). When fields are missing from the form (for example because they have been excluded), these fields will not be set by the save() method. You can find more information about this restriction, which also holds for regular ModelForms, in Selecting the fields to use. Pass commit=False to return the unsaved model instances: # don't save to the database >>> instances = formset.save(commit=False) >>> for instance in instances: ... # do something with instance ... instance.save() This gives you the ability to attach data to the instances before saving them to the database. If your formset contains a ManyToManyField, you’ll also need to call formset.save_m2m() to ensure the many-to-many relationships are saved properly. After calling save(), your model formset will have three new attributes containing the formset’s changes: models.BaseModelFormSet.changed_objects models.BaseModelFormSet.deleted_objects 3.4. Working with forms 247
- 252. Django Documentation, Release 1.9.3.dev20160224120324 models.BaseModelFormSet.new_objects Limiting the number of editable objects As with regular formsets, you can use the max_num and extra param- eters to modelformset_factory() to limit the number of extra forms displayed. max_num does not prevent existing objects from being displayed: >>> Author.objects.order_by('name') [<Author: Charles Baudelaire>, <Author: Paul Verlaine>, <Author: Walt Whitman>] >>> AuthorFormSet = modelformset_factory(Author, fields=('name',), max_num=1) >>> formset = AuthorFormSet(queryset=Author.objects.order_by('name')) >>> [x.name for x in formset.get_queryset()] ['Charles Baudelaire', 'Paul Verlaine', 'Walt Whitman'] Also, extra=0 doesn’t prevent creation of new model instances as you can add additional forms with JavaScript or just send additional POST data. Formsets don’t yet provide functionality for an “edit only” view that prevents creation of new instances. If the value of max_num is greater than the number of existing related objects, up to extra additional blank forms will be added to the formset, so long as the total number of forms does not exceed max_num: >>> AuthorFormSet = modelformset_factory(Author, fields=('name',), max_num=4, extra=2) >>> formset = AuthorFormSet(queryset=Author.objects.order_by('name')) >>> for form in formset: ... print(form.as_table()) <tr><th><label for="id_form-0-name">Name:</label></th><td><input id="id_form-0-name" type="text" name <tr><th><label for="id_form-1-name">Name:</label></th><td><input id="id_form-1-name" type="text" name <tr><th><label for="id_form-2-name">Name:</label></th><td><input id="id_form-2-name" type="text" name <tr><th><label for="id_form-3-name">Name:</label></th><td><input id="id_form-3-name" type="text" name A max_num value of None (the default) puts a high limit on the number of forms displayed (1000). In practice this is equivalent to no limit. Using a model formset in a view Model formsets are very similar to formsets. Let’s say we want to present a formset to edit Author model instances: from django.forms import modelformset_factory from django.shortcuts import render from myapp.models import Author def manage_authors(request): AuthorFormSet = modelformset_factory(Author, fields=('name', 'title')) if request.method == 'POST': formset = AuthorFormSet(request.POST, request.FILES) if formset.is_valid(): formset.save() # do something. else: formset = AuthorFormSet() return render(request, 'manage_authors.html', {'formset': formset}) As you can see, the view logic of a model formset isn’t drastically different than that of a “normal” formset. The only difference is that we call formset.save() to save the data into the database. (This was described above, in Saving objects in the formset.) 248 Chapter 3. Using Django
- 253. Django Documentation, Release 1.9.3.dev20160224120324 Overriding clean() on a ModelFormSet Just like with ModelForms, by default the clean() method of a ModelFormSet will validate that none of the items in the formset violate the unique constraints on your model (either unique, unique_together or unique_for_date|month|year). If you want to override the clean() method on a ModelFormSet and maintain this validation, you must call the parent class’s clean method: from django.forms import BaseModelFormSet class MyModelFormSet(BaseModelFormSet): def clean(self): super(MyModelFormSet, self).clean() # example custom validation across forms in the formset for form in self.forms: # your custom formset validation ... Also note that by the time you reach this step, individual model instances have already been created for each Form. Modifying a value in form.cleaned_data is not sufficient to affect the saved value. If you wish to modify a value in ModelFormSet.clean() you must modify form.instance: from django.forms import BaseModelFormSet class MyModelFormSet(BaseModelFormSet): def clean(self): super(MyModelFormSet, self).clean() for form in self.forms: name = form.cleaned_data['name'].upper() form.cleaned_data['name'] = name # update the instance value. form.instance.name = name Using a custom queryset As stated earlier, you can override the default queryset used by the model formset: from django.forms import modelformset_factory from django.shortcuts import render from myapp.models import Author def manage_authors(request): AuthorFormSet = modelformset_factory(Author, fields=('name', 'title')) if request.method == "POST": formset = AuthorFormSet(request.POST, request.FILES, queryset=Author.objects.filter(name__startswith='O')) if formset.is_valid(): formset.save() # Do something. else: formset = AuthorFormSet(queryset=Author.objects.filter(name__startswith='O')) return render(request, 'manage_authors.html', {'formset': formset}) Note that we pass the queryset argument in both the POST and GET cases in this example. Using the formset in the template There are three ways to render a formset in a Django template. First, you can let the formset do most of the work: 3.4. Working with forms 249
- 254. Django Documentation, Release 1.9.3.dev20160224120324 <form method="post" action=""> {{ formset }} </form> Second, you can manually render the formset, but let the form deal with itself: <form method="post" action=""> {{ formset.management_form }} {% for form in formset %} {{ form }} {% endfor %} </form> When you manually render the forms yourself, be sure to render the management form as shown above. See the management form documentation. Third, you can manually render each field: <form method="post" action=""> {{ formset.management_form }} {% for form in formset %} {% for field in form %} {{ field.label_tag }} {{ field }} {% endfor %} {% endfor %} </form> If you opt to use this third method and you don’t iterate over the fields with a {% for %} loop, you’ll need to render the primary key field. For example, if you were rendering the name and age fields of a model: <form method="post" action=""> {{ formset.management_form }} {% for form in formset %} {{ form.id }} <ul> <li>{{ form.name }}</li> <li>{{ form.age }}</li> </ul> {% endfor %} </form> Notice how we need to explicitly render {{ form.id }}. This ensures that the model formset, in the POST case, will work correctly. (This example assumes a primary key named id. If you’ve explicitly defined your own primary key that isn’t called id, make sure it gets rendered.) Inline formsets class models.BaseInlineFormSet Inline formsets is a small abstraction layer on top of model formsets. These simplify the case of working with related objects via a foreign key. Suppose you have these two models: from django.db import models class Author(models.Model): name = models.CharField(max_length=100) class Book(models.Model): 250 Chapter 3. Using Django
- 255. Django Documentation, Release 1.9.3.dev20160224120324 author = models.ForeignKey(Author, on_delete=models.CASCADE) title = models.CharField(max_length=100) If you want to create a formset that allows you to edit books belonging to a particular author, you could do this: >>> from django.forms import inlineformset_factory >>> BookFormSet = inlineformset_factory(Author, Book, fields=('title',)) >>> author = Author.objects.get(name='Mike Royko') >>> formset = BookFormSet(instance=author) Note: inlineformset_factory() uses modelformset_factory() and marks can_delete=True. See also: Manually rendered can_delete and can_order. Overriding methods on an InlineFormSet When overriding methods on InlineFormSet, you should sub- class BaseInlineFormSet rather than BaseModelFormSet. For example, if you want to override clean(): from django.forms import BaseInlineFormSet class CustomInlineFormSet(BaseInlineFormSet): def clean(self): super(CustomInlineFormSet, self).clean() # example custom validation across forms in the formset for form in self.forms: # your custom formset validation ... See also Overriding clean() on a ModelFormSet. Then when you create your inline formset, pass in the optional argument formset: >>> from django.forms import inlineformset_factory >>> BookFormSet = inlineformset_factory(Author, Book, fields=('title',), ... formset=CustomInlineFormSet) >>> author = Author.objects.get(name='Mike Royko') >>> formset = BookFormSet(instance=author) More than one foreign key to the same model If your model contains more than one foreign key to the same model, you’ll need to resolve the ambiguity manually using fk_name. For example, consider the following model: class Friendship(models.Model): from_friend = models.ForeignKey( Friend, on_delete=models.CASCADE, related_name='from_friends', ) to_friend = models.ForeignKey( Friend, on_delete=models.CASCADE, related_name='friends', ) length_in_months = models.IntegerField() 3.4. Working with forms 251
- 256. Django Documentation, Release 1.9.3.dev20160224120324 To resolve this, you can use fk_name to inlineformset_factory(): >>> FriendshipFormSet = inlineformset_factory(Friend, Friendship, fk_name='from_friend', ... fields=('to_friend', 'length_in_months')) Using an inline formset in a view You may want to provide a view that allows a user to edit the related objects of a model. Here’s how you can do that: def manage_books(request, author_id): author = Author.objects.get(pk=author_id) BookInlineFormSet = inlineformset_factory(Author, Book, fields=('title',)) if request.method == "POST": formset = BookInlineFormSet(request.POST, request.FILES, instance=author) if formset.is_valid(): formset.save() # Do something. Should generally end with a redirect. For example: return HttpResponseRedirect(author.get_absolute_url()) else: formset = BookInlineFormSet(instance=author) return render(request, 'manage_books.html', {'formset': formset}) Notice how we pass instance in both the POST and GET cases. Specifying widgets to use in the inline form inlineformset_factory uses modelformset_factory and passes most of its arguments to modelformset_factory. This means you can use the widgets parameter in much the same way as passing it to modelformset_factory. See Specifying widgets to use in the form with widgets above. Form Assets (the Media class) Rendering an attractive and easy-to-use Web form requires more than just HTML - it also requires CSS stylesheets, and if you want to use fancy “Web2.0” widgets, you may also need to include some JavaScript on each page. The exact combination of CSS and JavaScript that is required for any given page will depend upon the widgets that are in use on that page. This is where asset definitions come in. Django allows you to associate different files – like stylesheets and scripts – with the forms and widgets that require those assets. For example, if you want to use a calendar to render DateFields, you can define a custom Calendar widget. This widget can then be associated with the CSS and JavaScript that is required to render the calendar. When the Calendar widget is used on a form, Django is able to identify the CSS and JavaScript files that are required, and provide the list of file names in a form suitable for easy inclusion on your Web page. Assets and Django Admin The Django Admin application defines a number of customized widgets for calendars, filtered selections, and so on. These widgets define asset requirements, and the Django Admin uses the custom widgets in place of the Django defaults. The Admin templates will only include those files that are required to render the widgets on any given page. If you like the widgets that the Django Admin application uses, feel free to use them in your own application! They’re all stored in django.contrib.admin.widgets. Which JavaScript toolkit? 252 Chapter 3. Using Django
- 257. Django Documentation, Release 1.9.3.dev20160224120324 Many JavaScript toolkits exist, and many of them include widgets (such as calendar widgets) that can be used to enhance your application. Django has deliberately avoided blessing any one JavaScript toolkit. Each toolkit has its own relative strengths and weaknesses - use whichever toolkit suits your requirements. Django is able to integrate with any JavaScript toolkit. Assets as a static definition The easiest way to define assets is as a static definition. Using this method, the declaration is an inner Media class. The properties of the inner class define the requirements. Here’s a simple example: from django import forms class CalendarWidget(forms.TextInput): class Media: css = { 'all': ('pretty.css',) } js = ('animations.js', 'actions.js') This code defines a CalendarWidget, which will be based on TextInput. Every time the CalendarWid- get is used on a form, that form will be directed to include the CSS file pretty.css, and the JavaScript files animations.js and actions.js. This static definition is converted at runtime into a widget property named media. The list of assets for a CalendarWidget instance can be retrieved through this property: >>> w = CalendarWidget() >>> print(w.media) <link href="http://static.example.com/pretty.css" type="text/css" media="all" rel="stylesheet" /> <script type="text/javascript" src="http://static.example.com/animations.js"></script> <script type="text/javascript" src="http://static.example.com/actions.js"></script> Here’s a list of all possible Media options. There are no required options. css A dictionary describing the CSS files required for various forms of output media. The values in the dictionary should be a tuple/list of file names. See the section on paths for details of how to specify paths to these files. The keys in the dictionary are the output media types. These are the same types accepted by CSS files in media declarations: ‘all’, ‘aural’, ‘braille’, ‘embossed’, ‘handheld’, ‘print’, ‘projection’, ‘screen’, ‘tty’ and ‘tv’. If you need to have different stylesheets for different media types, provide a list of CSS files for each output medium. The following example would provide two CSS options – one for the screen, and one for print: class Media: css = { 'screen': ('pretty.css',), 'print': ('newspaper.css',) } If a group of CSS files are appropriate for multiple output media types, the dictionary key can be a comma separated list of output media types. In the following example, TV’s and projectors will have the same media requirements: 3.4. Working with forms 253
- 258. Django Documentation, Release 1.9.3.dev20160224120324 class Media: css = { 'screen': ('pretty.css',), 'tv,projector': ('lo_res.css',), 'print': ('newspaper.css',) } If this last CSS definition were to be rendered, it would become the following HTML: <link href="http://static.example.com/pretty.css" type="text/css" media="screen" rel="stylesheet" /> <link href="http://static.example.com/lo_res.css" type="text/css" media="tv,projector" rel="styleshee <link href="http://static.example.com/newspaper.css" type="text/css" media="print" rel="stylesheet" / js A tuple describing the required JavaScript files. See the section on paths for details of how to specify paths to these files. extend A boolean defining inheritance behavior for Media declarations. By default, any object using a static Media definition will inherit all the assets associated with the parent widget. This occurs regardless of how the parent defines its own requirements. For example, if we were to extend our basic Calendar widget from the example above: >>> class FancyCalendarWidget(CalendarWidget): ... class Media: ... css = { ... 'all': ('fancy.css',) ... } ... js = ('whizbang.js',) >>> w = FancyCalendarWidget() >>> print(w.media) <link href="http://static.example.com/pretty.css" type="text/css" media="all" rel="stylesheet" /> <link href="http://static.example.com/fancy.css" type="text/css" media="all" rel="stylesheet" /> <script type="text/javascript" src="http://static.example.com/animations.js"></script> <script type="text/javascript" src="http://static.example.com/actions.js"></script> <script type="text/javascript" src="http://static.example.com/whizbang.js"></script> The FancyCalendar widget inherits all the assets from its parent widget. If you don’t want Media to be inherited in this way, add an extend=False declaration to the Media declaration: >>> class FancyCalendarWidget(CalendarWidget): ... class Media: ... extend = False ... css = { ... 'all': ('fancy.css',) ... } ... js = ('whizbang.js',) >>> w = FancyCalendarWidget() >>> print(w.media) <link href="http://static.example.com/fancy.css" type="text/css" media="all" rel="stylesheet" /> <script type="text/javascript" src="http://static.example.com/whizbang.js"></script> If you require even more control over inheritance, define your assets using a dynamic property. Dynamic properties give you complete control over which files are inherited, and which are not. 254 Chapter 3. Using Django
- 259. Django Documentation, Release 1.9.3.dev20160224120324 Media as a dynamic property If you need to perform some more sophisticated manipulation of asset requirements, you can define the media prop- erty directly. This is done by defining a widget property that returns an instance of forms.Media. The constructor for forms.Media accepts css and js keyword arguments in the same format as that used in a static media defini- tion. For example, the static definition for our Calendar Widget could also be defined in a dynamic fashion: class CalendarWidget(forms.TextInput): def _media(self): return forms.Media(css={'all': ('pretty.css',)}, js=('animations.js', 'actions.js')) media = property(_media) See the section on Media objects for more details on how to construct return values for dynamic media properties. Paths in asset definitions Paths used to specify assets can be either relative or absolute. If a path starts with /, http:// or https://, it will be interpreted as an absolute path, and left as-is. All other paths will be prepended with the value of the appropriate prefix. As part of the introduction of the staticfiles app two new settings were added to refer to “static files” (images, CSS, JavaScript, etc.) that are needed to render a complete web page: STATIC_URL and STATIC_ROOT. To find the appropriate prefix to use, Django will check if the STATIC_URL setting is not None and automatically fall back to using MEDIA_URL. For example, if the MEDIA_URL for your site was ’http://uploads.example.com/’ and STATIC_URL was None: >>> from django import forms >>> class CalendarWidget(forms.TextInput): ... class Media: ... css = { ... 'all': ('/css/pretty.css',), ... } ... js = ('animations.js', 'http://othersite.com/actions.js') >>> w = CalendarWidget() >>> print(w.media) <link href="/css/pretty.css" type="text/css" media="all" rel="stylesheet" /> <script type="text/javascript" src="http://uploads.example.com/animations.js"></script> <script type="text/javascript" src="http://othersite.com/actions.js"></script> But if STATIC_URL is ’http://static.example.com/’: >>> w = CalendarWidget() >>> print(w.media) <link href="/css/pretty.css" type="text/css" media="all" rel="stylesheet" /> <script type="text/javascript" src="http://static.example.com/animations.js"></script> <script type="text/javascript" src="http://othersite.com/actions.js"></script> Media objects When you interrogate the media attribute of a widget or form, the value that is returned is a forms.Media object. As we have already seen, the string representation of a Media object is the HTML required to include the relevant 3.4. Working with forms 255
- 260. Django Documentation, Release 1.9.3.dev20160224120324 files in the <head> block of your HTML page. However, Media objects have some other interesting properties. Subsets of assets If you only want files of a particular type, you can use the subscript operator to filter out a medium of interest. For example: >>> w = CalendarWidget() >>> print(w.media) <link href="http://static.example.com/pretty.css" type="text/css" media="all" rel="stylesheet" /> <script type="text/javascript" src="http://static.example.com/animations.js"></script> <script type="text/javascript" src="http://static.example.com/actions.js"></script> >>> print(w.media['css']) <link href="http://static.example.com/pretty.css" type="text/css" media="all" rel="stylesheet" /> When you use the subscript operator, the value that is returned is a new Media object – but one that only contains the media of interest. Combining Media objects Media objects can also be added together. When two Media objects are added, the resulting Media object contains the union of the assets specified by both: >>> from django import forms >>> class CalendarWidget(forms.TextInput): ... class Media: ... css = { ... 'all': ('pretty.css',) ... } ... js = ('animations.js', 'actions.js') >>> class OtherWidget(forms.TextInput): ... class Media: ... js = ('whizbang.js',) >>> w1 = CalendarWidget() >>> w2 = OtherWidget() >>> print(w1.media + w2.media) <link href="http://static.example.com/pretty.css" type="text/css" media="all" rel="stylesheet" /> <script type="text/javascript" src="http://static.example.com/animations.js"></script> <script type="text/javascript" src="http://static.example.com/actions.js"></script> <script type="text/javascript" src="http://static.example.com/whizbang.js"></script> Media on Forms Widgets aren’t the only objects that can have media definitions – forms can also define media. The rules for media definitions on forms are the same as the rules for widgets: declarations can be static or dynamic; path and inheritance rules for those declarations are exactly the same. Regardless of whether you define a media declaration, all Form objects have a media property. The default value for this property is the result of adding the media definitions for all widgets that are part of the form: >>> from django import forms >>> class ContactForm(forms.Form): ... date = DateField(widget=CalendarWidget) ... name = CharField(max_length=40, widget=OtherWidget) 256 Chapter 3. Using Django
- 261. Django Documentation, Release 1.9.3.dev20160224120324 >>> f = ContactForm() >>> f.media <link href="http://static.example.com/pretty.css" type="text/css" media="all" rel="stylesheet" /> <script type="text/javascript" src="http://static.example.com/animations.js"></script> <script type="text/javascript" src="http://static.example.com/actions.js"></script> <script type="text/javascript" src="http://static.example.com/whizbang.js"></script> If you want to associate additional assets with a form – for example, CSS for form layout – simply add a Media declaration to the form: >>> class ContactForm(forms.Form): ... date = DateField(widget=CalendarWidget) ... name = CharField(max_length=40, widget=OtherWidget) ... ... class Media: ... css = { ... 'all': ('layout.css',) ... } >>> f = ContactForm() >>> f.media <link href="http://static.example.com/pretty.css" type="text/css" media="all" rel="stylesheet" /> <link href="http://static.example.com/layout.css" type="text/css" media="all" rel="stylesheet" /> <script type="text/javascript" src="http://static.example.com/animations.js"></script> <script type="text/javascript" src="http://static.example.com/actions.js"></script> <script type="text/javascript" src="http://static.example.com/whizbang.js"></script> See also: The Forms Reference Covers the full API reference, including form fields, form widgets, and form and field valida- tion. 3.5 Templates Being a web framework, Django needs a convenient way to generate HTML dynamically. The most common approach relies on templates. A template contains the static parts of the desired HTML output as well as some special syntax describing how dynamic content will be inserted. For a hands-on example of creating HTML pages with templates, see Tutorial 3. A Django project can be configured with one or several template engines (or even zero if you don’t use templates). Django ships built-in backends for its own template system, creatively called the Django template language (DTL), and for the popular alternative Jinja2. Backends for other template languages may be available from third-parties. Django defines a standard API for loading and rendering templates regardless of the backend. Loading consists of finding the template for a given identifier and preprocessing it, usually compiling it to an in-memory representation. Rendering means interpolating the template with context data and returning the resulting string. The Django template language is Django’s own template system. Until Django 1.8 it was the only built-in option avail- able. It’s a good template library even though it’s fairly opinionated and sports a few idiosyncrasies. If you don’t have a pressing reason to choose another backend, you should use the DTL, especially if you’re writing a pluggable appli- cation and you intend to distribute templates. Django’s contrib apps that include templates, like django.contrib.admin, use the DTL. For historical reasons, both the generic support for template engines and the implementation of the Django template language live in the django.template namespace. 3.5. Templates 257
- 262. Django Documentation, Release 1.9.3.dev20160224120324 3.5.1 Support for template engines Support for multiple template engines and the TEMPLATES setting were added in Django 1.8. Configuration Templates engines are configured with the TEMPLATES setting. It’s a list of configurations, one for each engine. The default value is empty. The settings.py generated by the startproject command defines a more useful value: TEMPLATES = [ { 'BACKEND': 'django.template.backends.django.DjangoTemplates', 'DIRS': [], 'APP_DIRS': True, 'OPTIONS': { # ... some options here ... }, }, ] BACKEND is a dotted Python path to a template engine class implementing Django’s template back- end API. The built-in backends are django.template.backends.django.DjangoTemplates and django.template.backends.jinja2.Jinja2. Since most engines load templates from files, the top-level configuration for each engine contains two common set- tings: • DIRS defines a list of directories where the engine should look for template source files, in search order. • APP_DIRS tells whether the engine should look for templates inside installed applications. Each backend defines a conventional name for the subdirectory inside applications where its templates should be stored. While uncommon, it’s possible to configure several instances of the same backend with different options. In that case you should define a unique NAME for each engine. OPTIONS contains backend-specific settings. Usage The django.template.loader module defines two functions to load templates. get_template(template_name, dirs=_dirs_undefined, using=None) This function loads the template with the given name and returns a Template object. The exact type of the return value depends on the backend that loaded the template. Each backend has its own Template class. get_template() tries each template engine in order until one succeeds. If the template cannot be found, it raises TemplateDoesNotExist. If the template is found but contains invalid syntax, it raises TemplateSyntaxError. How templates are searched and loaded depends on each engine’s backend and configuration. If you want to restrict the search to a particular template engine, pass the engine’s NAME in the using argument. Deprecated since version 1.8: The dirs parameter was deprecated. The using parameter was added. 258 Chapter 3. Using Django
- 263. Django Documentation, Release 1.9.3.dev20160224120324 get_template() returns a backend-dependent Template instead of a django.template.Template. select_template(template_name_list, dirs=_dirs_undefined, using=None) select_template() is just like get_template(), except it takes a list of template names. It tries each name in order and returns the first template that exists. Deprecated since version 1.8: The dirs parameter was deprecated. The using parameter was added. select_template() returns a backend-dependent Template instead of a django.template.Template. If loading a template fails, the following two exceptions, defined in django.template, may be raised: exception TemplateDoesNotExist(msg, tried=None, backend=None, chain=None) This exception is raised when a template cannot be found. It accepts the following optional arguments for populating the template postmortem on the debug page: backend The template backend instance from which the exception originated. tried A list of sources that were tried when finding the template. This is formatted as a list of tuples containing (origin, status), where origin is an origin-like object and status is a string with the reason the template wasn’t found. chain A list of intermediate TemplateDoesNotExist exceptions raised when trying to load a template. This is used by functions, such as get_template(), that try to load a given template from multiple engines. The backend, tried, and chain arguments were added. exception TemplateSyntaxError(msg) This exception is raised when a template was found but contains errors. Template objects returned by get_template() and select_template() must provide a render() method with the following signature: Template.render(context=None, request=None) Renders this template with a given context. If context is provided, it must be a dict. If it isn’t provided, the engine will render the template with an empty context. If request is provided, it must be an HttpRequest. Then the engine must make it, as well as the CSRF token, available in the template. How this is achieved is up to each backend. Here’s an example of the search algorithm. For this example the TEMPLATES setting is: TEMPLATES = [ { 'BACKEND': 'django.template.backends.django.DjangoTemplates', 'DIRS': [ '/home/html/example.com', '/home/html/default', ], }, { 'BACKEND': 'django.template.backends.jinja2.Jinja2', 'DIRS': [ '/home/html/jinja2', ], }, ] 3.5. Templates 259
- 264. Django Documentation, Release 1.9.3.dev20160224120324 If you call get_template(’story_detail.html’), here are the files Django will look for, in order: • /home/html/example.com/story_detail.html (’django’ engine) • /home/html/default/story_detail.html (’django’ engine) • /home/html/jinja2/story_detail.html (’jinja2’ engine) If you call select_template([’story_253_detail.html’, ’story_detail.html’]), here’s what Django will look for: • /home/html/example.com/story_253_detail.html (’django’ engine) • /home/html/default/story_253_detail.html (’django’ engine) • /home/html/jinja2/story_253_detail.html (’jinja2’ engine) • /home/html/example.com/story_detail.html (’django’ engine) • /home/html/default/story_detail.html (’django’ engine) • /home/html/jinja2/story_detail.html (’jinja2’ engine) When Django finds a template that exists, it stops looking. Tip You can use select_template() for flexible template loading. For example, if you’ve written a news story and want some stories to have custom templates, use something like select_template([’story_%s_detail.html’ % story.id, ’story_detail.html’]). That’ll allow you to use a custom template for an individual story, with a fallback template for stories that don’t have custom templates. It’s possible – and preferable – to organize templates in subdirectories inside each directory containing templates. The convention is to make a subdirectory for each Django app, with subdirectories within those subdirectories as needed. Do this for your own sanity. Storing all templates in the root level of a single directory gets messy. To load a template that’s within a subdirectory, just use a slash, like so: get_template('news/story_detail.html') Using the same TEMPLATES option as above, this will attempt to load the following templates: • /home/html/example.com/news/story_detail.html (’django’ engine) • /home/html/default/news/story_detail.html (’django’ engine) • /home/html/jinja2/news/story_detail.html (’jinja2’ engine) In addition, to cut down on the repetitive nature of loading and rendering templates, Django provides a shortcut function which automates the process. render_to_string(template_name, context=None, context_instance=_context_instance_undefined, re- quest=None, using=None) render_to_string() loads a template like get_template() and calls its render() method imme- diately. It takes the following arguments. template_name The name of the template to load and render. If it’s a list of template names, Django uses select_template() instead of get_template() to find the template. context A dict to be used as the template’s context for rendering. The context argument used to be called dictionary. That name is deprecated in Django 1.8 and will be removed in Django 1.10. 260 Chapter 3. Using Django
- 265. Django Documentation, Release 1.9.3.dev20160224120324 context is now optional. An empty context will be used if it isn’t provided. context_instance An instance of Context or a subclass (e.g., an instance of RequestContext) to use as the template’s context. Deprecated since version 1.8: The context_instance argument is deprecated. Use context and if needed request. request An optional HttpRequest that will be available during the template’s rendering process. The request argument was added. See also the render() shortcut which calls render_to_string() and feeds the result into an HttpResponse suitable for returning from a view. Finally, you can use configured engines directly: engines Template engines are available in django.template.engines: from django.template import engines django_engine = engines['django'] template = django_engine.from_string("Hello {{ name }}!") The lookup key — ’django’ in this example — is the engine’s NAME. Built-in backends class DjangoTemplates Set BACKEND to ’django.template.backends.django.DjangoTemplates’ to configure a Django template engine. When APP_DIRS is True, DjangoTemplates engines look for templates in the templates subdirectory of installed applications. This generic name was kept for backwards-compatibility. DjangoTemplates engines accept the following OPTIONS: • ’allowed_include_roots’: a list of strings representing allowed prefixes for the {% ssi %} template tag. This is a security measure, so that template authors can’t access files that they shouldn’t be accessing. For example, if ’allowed_include_roots’ is [’/home/html’, ’/var/www’], then {% ssi /home/html/foo.txt %} would work, but {% ssi /etc/passwd %} wouldn’t. It defaults to an empty list. Deprecated since version 1.8: allowed_include_roots is deprecated because the {% ssi %} tag is dep- recated. • ’context_processors’: a list of dotted Python paths to callables that are used to populate the context when a template is rendered with a request. These callables take a request object as their argument and return a dict of items to be merged into the context. It defaults to an empty list. See RequestContext for more information. • ’debug’: a boolean that turns on/off template debug mode. If it is True, the fancy error page will display a detailed report for any exception raised during template rendering. This report contains the relevant snippet of the template with the appropriate line highlighted. It defaults to the value of the DEBUG setting. 3.5. Templates 261
- 266. Django Documentation, Release 1.9.3.dev20160224120324 • ’loaders’: a list of dotted Python paths to template loader classes. Each Loader class knows how to import templates from a particular source. Optionally, a tuple can be used instead of a string. The first item in the tuple should be the Loader class name, and subsequent items are passed to the Loader during initialization. The default depends on the values of DIRS and APP_DIRS. See Loader types for details. • ’string_if_invalid’: the output, as a string, that the template system should use for invalid (e.g. mis- spelled) variables. It defaults to an empty string. See How invalid variables are handled for details. • ’file_charset’: the charset used to read template files on disk. It defaults to the value of FILE_CHARSET. • ’libraries’: A dictionary of labels and dotted Python paths of template tag modules to register with the template engine. This can be used to add new libraries or provide alternate labels for existing ones. For example: OPTIONS={ 'libraries': { 'myapp_tags': 'path.to.myapp.tags', 'admin.urls': 'django.contrib.admin.templatetags.admin_urls', }, } Libraries can be loaded by passing the corresponding dictionary key to the {% load %} tag. • ’builtins’: A list of dotted Python paths of template tag modules to add to built-ins. For example: OPTIONS={ 'builtins': ['myapp.builtins'], } Tags and filters from built-in libraries can be used without first calling the {% load %} tag. The libraries and builtins arguments were added. class Jinja2 Requires Jinja2 to be installed: $ pip install Jinja2 Set BACKEND to ’django.template.backends.jinja2.Jinja2’ to configure a Jinja2 engine. When APP_DIRS is True, Jinja2 engines look for templates in the jinja2 subdirectory of installed applications. The most important entry in OPTIONS is ’environment’. It’s a dotted Python path to a callable returning a Jinja2 environment. It defaults to ’jinja2.Environment’. Django invokes that callable and passes other options as keyword arguments. Furthermore, Django adds defaults that differ from Jinja2’s for a few options: • ’autoescape’: True • ’loader’: a loader configured for DIRS and APP_DIRS • ’auto_reload’: settings.DEBUG • ’undefined’: DebugUndefined if settings.DEBUG else Undefined The default configuration is purposefully kept to a minimum. The Jinja2 backend doesn’t create a Django-flavored environment. It doesn’t know about Django context processors, filters, and tags. In order to use Django-specific APIs, you must configure them into the environment. 262 Chapter 3. Using Django
- 267. Django Documentation, Release 1.9.3.dev20160224120324 For example, you can create myproject/jinja2.py with this content: from __future__ import absolute_import # Python 2 only from django.contrib.staticfiles.storage import staticfiles_storage from django.core.urlresolvers import reverse from jinja2 import Environment def environment(**options): env = Environment(**options) env.globals.update({ 'static': staticfiles_storage.url, 'url': reverse, }) return env and set the ’environment’ option to ’myproject.jinja2.environment’. Then you could use the following constructs in Jinja2 templates: <img src="{{ static('path/to/company-logo.png') }}" alt="Company Logo"> <a href="{{ url('admin:index') }}">Administration</a> The concepts of tags and filters exist both in the Django template language and in Jinja2 but they’re used differently. Since Jinja2 supports passing arguments to callables in templates, many features that require a template tag or filter in Django templates can be achieved simply by calling a function in Jinja2 templates, as shown in the example above. Jinja2’s global namespace removes the need for template context processors. The Django template language doesn’t have an equivalent of Jinja2 tests. Custom backends Here’s how to implement a custom template backend in order to use another template system. A template backend is a class that inherits django.template.backends.base.BaseEngine. It must implement get_template() and optionally from_string(). Here’s an example for a fictional foobar template library: from django.template import TemplateDoesNotExist, TemplateSyntaxError from django.template.backends.base import BaseEngine from django.template.backends.utils import csrf_input_lazy, csrf_token_lazy import foobar class FooBar(BaseEngine): # Name of the subdirectory containing the templates for this engine # inside an installed application. app_dirname = 'foobar' def __init__(self, params): params = params.copy() options = params.pop('OPTIONS').copy() super(FooBar, self).__init__(params) self.engine = foobar.Engine(**options) 3.5. Templates 263
- 268. Django Documentation, Release 1.9.3.dev20160224120324 def from_string(self, template_code): try: return Template(self.engine.from_string(template_code)) except foobar.TemplateCompilationFailed as exc: raise TemplateSyntaxError(exc.args) def get_template(self, template_name): try: return Template(self.engine.get_template(template_name)) except foobar.TemplateNotFound as exc: raise TemplateDoesNotExist(exc.args, backend=self) except foobar.TemplateCompilationFailed as exc: raise TemplateSyntaxError(exc.args) class Template(object): def __init__(self, template): self.template = template def render(self, context=None, request=None): if context is None: context = {} if request is not None: context['request'] = request context['csrf_input'] = csrf_input_lazy(request) context['csrf_token'] = csrf_token_lazy(request) return self.template.render(context) See DEP 182 for more information. Debug integration for custom engines Debug page integration for non-Django template engines was added. The Django debug page has hooks to provide detailed information when a template error arises. Custom template engines can use these hooks to enhance the traceback information that appears to users. The following hooks are available: Template postmortem The postmortem appears when TemplateDoesNotExist is raised. It lists the template engines and loaders that were used when trying to find a given template. For example, if two Django engines are configured, the postmortem will appear like: 264 Chapter 3. Using Django
- 269. Django Documentation, Release 1.9.3.dev20160224120324 Custom engines can populate the postmortem by passing the backend and tried arguments when raising TemplateDoesNotExist. Backends that use the postmortem should specify an origin on the template object. Contextual line information If an error happens during template parsing or rendering, Django can display the line the error happened on. For example: Custom engines can populate this information by setting a template_debug attribute on exceptions raised during parsing and rendering. This attribute is a dict with the following values: • ’name’: The name of the template in which the exception occurred. • ’message’: The exception message. • ’source_lines’: The lines before, after, and including the line the exception occurred on. This is for context, so it shouldn’t contain more than 20 lines or so. • ’line’: The line number on which the exception occurred. • ’before’: The content on the error line before the token that raised the error. • ’during’: The token that raised the error. • ’after’: The content on the error line after the token that raised the error. • ’total’: The number of lines in source_lines. • ’top’: The line number where source_lines starts. • ’bottom’: The line number where source_lines ends. Given the above template error, template_debug would look like: { 'name': '/path/to/template.html', 'message': "Invalid block tag: 'syntax'", 'source_lines': [ (1, 'somen'), (2, 'linesn'), (3, 'beforen'), (4, 'Hello {% syntax error %} {{ world }}n'), (5, 'somen'), (6, 'linesn'), (7, 'aftern'), (8, ''), 3.5. Templates 265
- 270. Django Documentation, Release 1.9.3.dev20160224120324 ], 'line': 4, 'before': 'Hello ', 'during': '{% syntax error %}', 'after': ' {{ world }}n', 'total': 9, 'bottom': 9, 'top': 1, } Origin API and 3rd-party integration Django templates have an Origin object available through the template.origin attribute. This enables debug information to be displayed in the template postmortem, as well as in 3rd-party libraries, like the Django Debug Toolbar. Custom engines can provide their own template.origin information by creating an object that specifies the following attributes: • ’name’: The full path to the template. • ’template_name’: The relative path to the template as passed into the the template loading methods. • ’loader_name’: An optional string identifying the function or class used to load the template, e.g. django.template.loaders.filesystem.Loader. 3.5.2 The Django template language Syntax About this section This is an overview of the Django template language’s syntax. For details see the language syntax reference. A Django template is simply a text document or a Python string marked-up using the Django template language. Some constructs are recognized and interpreted by the template engine. The main ones are variables and tags. A template is rendered with a context. Rendering replaces variables with their values, which are looked up in the context, and executes tags. Everything else is output as is. The syntax of the Django template language involves four constructs. Variables A variable outputs a value from the context, which is a dict-like object mapping keys to values. Variables are surrounded by {{ and }} like this: My first name is {{ first_name }}. My last name is {{ last_name }}. With a context of {’first_name’: ’John’, ’last_name’: ’Doe’}, this template renders to: My first name is John. My last name is Doe. 266 Chapter 3. Using Django
- 271. Django Documentation, Release 1.9.3.dev20160224120324 Dictionary lookup, attribute lookup and list-index lookups are implemented with a dot notation: {{ my_dict.key }} {{ my_object.attribute }} {{ my_list.0 }} If a variable resolves to a callable, the template system will call it with no arguments and use its result instead of the callable. Tags Tags provide arbitrary logic in the rendering process. This definition is deliberately vague. For example, a tag can output content, serve as a control structure e.g. an “if” statement or a “for” loop, grab content from a database, or even enable access to other template tags. Tags are surrounded by {% and %} like this: {% csrf_token %} Most tags accept arguments: {% cycle 'odd' 'even' %} Some tags require beginning and ending tags: {% if user.is_authenticated %}Hello, {{ user.username }}.{% endif %} A reference of built-in tags is available as well as instructions for writing custom tags. Filters Filters transform the values of variables and tag arguments. They look like this: {{ django|title }} With a context of {’django’: ’the web framework for perfectionists with deadlines’}, this template renders to: The Web Framework For Perfectionists With Deadlines Some filters take an argument: {{ my_date|date:"Y-m-d" }} A reference of built-in filters is available as well as instructions for writing custom filters. Comments Comments look like this: {# this won't be rendered #} A {% comment %} tag provides multi-line comments. 3.5. Templates 267
- 272. Django Documentation, Release 1.9.3.dev20160224120324 Components About this section This is an overview of the Django template language’s APIs. For details see the API reference. Engine django.template.Engine encapsulates an instance of the Django template system. The main reason for instan- tiating an Engine directly is to use the Django template language outside of a Django project. django.template.backends.django.DjangoTemplates is a thin wrapper adapting django.template.Engine to Django’s template backend API. Template django.template.Template represents a compiled template. Templates are obtained with Engine.get_template() or Engine.from_string() Likewise django.template.backends.django.Template is a thin wrapper adapting django.template.Template to the common template API. Context django.template.Context holds some metadata in addition to the context data. It is passed to Template.render() for rendering a template. django.template.RequestContext is a subclass of Context that stores the current HttpRequest and runs template context processors. The common API doesn’t have an equivalent concept. Context data is passed in a plain dict and the current HttpRequest is passed separately if needed. Loaders Template loaders are responsible for locating templates, loading them, and returning Template objects. Django provides several built-in template loaders and supports custom template loaders. Context processors Context processors are functions that receive the current HttpRequest as an argument and return a dict of data to be added to the rendering context. Their main use is to add common data shared by all templates to the context without repeating code in every view. Django provides many built-in context processors. Implementing a custom context processor is as simple as defining a function. 268 Chapter 3. Using Django
- 273. Django Documentation, Release 1.9.3.dev20160224120324 3.6 Class-based views A view is a callable which takes a request and returns a response. This can be more than just a function, and Django provides an example of some classes which can be used as views. These allow you to structure your views and reuse code by harnessing inheritance and mixins. There are also some generic views for simple tasks which we’ll get to later, but you may want to design your own structure of reusable views which suits your use case. For full details, see the class-based views reference documentation. 3.6.1 Introduction to class-based views Class-based views provide an alternative way to implement views as Python objects instead of functions. They do not replace function-based views, but have certain differences and advantages when compared to function-based views: • Organization of code related to specific HTTP methods (GET, POST, etc.) can be addressed by separate methods instead of conditional branching. • Object oriented techniques such as mixins (multiple inheritance) can be used to factor code into reusable com- ponents. The relationship and history of generic views, class-based views, and class-based generic views In the beginning there was only the view function contract, Django passed your function an HttpRequest and expected back an HttpResponse. This was the extent of what Django provided. Early on it was recognized that there were common idioms and patterns found in view development. Function-based generic views were introduced to abstract these patterns and ease view development for the common cases. The problem with function-based generic views is that while they covered the simple cases well, there was no way to extend or customize them beyond some simple configuration options, limiting their usefulness in many real-world applications. Class-based generic views were created with the same objective as function-based generic views, to make view devel- opment easier. However, the way the solution is implemented, through the use of mixins, provides a toolkit that results in class-based generic views being more extensible and flexible than their function-based counterparts. If you have tried function based generic views in the past and found them lacking, you should not think of class-based generic views as simply a class-based equivalent, but rather as a fresh approach to solving the original problems that generic views were meant to solve. The toolkit of base classes and mixins that Django uses to build class-based generic views are built for maximum flexibility, and as such have many hooks in the form of default method implementations and attributes that you are unlikely to be concerned with in the simplest use cases. For example, instead of limiting you to a class-based attribute for form_class, the implementation uses a get_form method, which calls a get_form_class method, which in its default implementation just returns the form_class attribute of the class. This gives you several options for specifying what form to use, from a simple attribute, to a fully dynamic, callable hook. These options seem to add hollow complexity for simple situations, but without them, more advanced designs would be limited. Using class-based views At its core, a class-based view allows you to respond to different HTTP request methods with different class instance methods, instead of with conditionally branching code inside a single view function. So where the code to handle HTTP GET in a view function would look something like: 3.6. Class-based views 269
- 274. Django Documentation, Release 1.9.3.dev20160224120324 from django.http import HttpResponse def my_view(request): if request.method == 'GET': # <view logic> return HttpResponse('result') In a class-based view, this would become: from django.http import HttpResponse from django.views.generic import View class MyView(View): def get(self, request): # <view logic> return HttpResponse('result') Because Django’s URL resolver expects to send the request and associated arguments to a callable function, not a class, class-based views have an as_view() class method which serves as the callable entry point to your class. The as_view entry point creates an instance of your class and calls its dispatch() method. dispatch looks at the request to determine whether it is a GET, POST, etc, and relays the request to a matching method if one is defined, or raises HttpResponseNotAllowed if not: # urls.py from django.conf.urls import url from myapp.views import MyView urlpatterns = [ url(r'^about/', MyView.as_view()), ] It is worth noting that what your method returns is identical to what you return from a function-based view, namely some form of HttpResponse. This means that http shortcuts or TemplateResponse objects are valid to use inside a class-based view. While a minimal class-based view does not require any class attributes to perform its job, class attributes are useful in many class-based designs, and there are two ways to configure or set class attributes. The first is the standard Python way of subclassing and overriding attributes and methods in the subclass. So that if your parent class had an attribute greeting like this: from django.http import HttpResponse from django.views.generic import View class GreetingView(View): greeting = "Good Day" def get(self, request): return HttpResponse(self.greeting) You can override that in a subclass: class MorningGreetingView(GreetingView): greeting = "Morning to ya" Another option is to configure class attributes as keyword arguments to the as_view() call in the URLconf: urlpatterns = [ url(r'^about/', GreetingView.as_view(greeting="G'day")), ] 270 Chapter 3. Using Django
- 275. Django Documentation, Release 1.9.3.dev20160224120324 Note: While your class is instantiated for each request dispatched to it, class attributes set through the as_view() entry point are configured only once at the time your URLs are imported. Using mixins Mixins are a form of multiple inheritance where behaviors and attributes of multiple parent classes can be combined. For example, in the generic class-based views there is a mixin called TemplateResponseMixin whose primary purpose is to define the method render_to_response(). When combined with the behavior of the View base class, the result is a TemplateView class that will dispatch requests to the appropriate matching methods (a behavior defined in the View base class), and that has a render_to_response() method that uses a template_name attribute to return a TemplateResponse object (a behavior defined in the TemplateResponseMixin). Mixins are an excellent way of reusing code across multiple classes, but they come with some cost. The more your code is scattered among mixins, the harder it will be to read a child class and know what exactly it is doing, and the harder it will be to know which methods from which mixins to override if you are subclassing something that has a deep inheritance tree. Note also that you can only inherit from one generic view - that is, only one parent class may inherit from View and the rest (if any) should be mixins. Trying to inherit from more than one class that inherits from View - for example, trying to use a form at the top of a list and combining ProcessFormView and ListView - won’t work as expected. Handling forms with class-based views A basic function-based view that handles forms may look something like this: from django.http import HttpResponseRedirect from django.shortcuts import render from .forms import MyForm def myview(request): if request.method == "POST": form = MyForm(request.POST) if form.is_valid(): # <process form cleaned data> return HttpResponseRedirect('/success/') else: form = MyForm(initial={'key': 'value'}) return render(request, 'form_template.html', {'form': form}) A similar class-based view might look like: from django.http import HttpResponseRedirect from django.shortcuts import render from django.views.generic import View from .forms import MyForm class MyFormView(View): form_class = MyForm initial = {'key': 'value'} template_name = 'form_template.html' 3.6. Class-based views 271
- 276. Django Documentation, Release 1.9.3.dev20160224120324 def get(self, request, *args, **kwargs): form = self.form_class(initial=self.initial) return render(request, self.template_name, {'form': form}) def post(self, request, *args, **kwargs): form = self.form_class(request.POST) if form.is_valid(): # <process form cleaned data> return HttpResponseRedirect('/success/') return render(request, self.template_name, {'form': form}) This is a very simple case, but you can see that you would then have the option of customizing this view by overriding any of the class attributes, e.g. form_class, via URLconf configuration, or subclassing and overriding one or more of the methods (or both!). Decorating class-based views The extension of class-based views isn’t limited to using mixins. You can also use decorators. Since class-based views aren’t functions, decorating them works differently depending on if you’re using as_view() or creating a subclass. Decorating in URLconf The simplest way of decorating class-based views is to decorate the result of the as_view() method. The easiest place to do this is in the URLconf where you deploy your view: from django.contrib.auth.decorators import login_required, permission_required from django.views.generic import TemplateView from .views import VoteView urlpatterns = [ url(r'^about/', login_required(TemplateView.as_view(template_name="secret.html"))), url(r'^vote/', permission_required('polls.can_vote')(VoteView.as_view())), ] This approach applies the decorator on a per-instance basis. If you want every instance of a view to be decorated, you need to take a different approach. Decorating the class To decorate every instance of a class-based view, you need to decorate the class definition itself. To do this you apply the decorator to the dispatch() method of the class. A method on a class isn’t quite the same as a standalone function, so you can’t just apply a function decorator to the method – you need to transform it into a method decorator first. The method_decorator decorator transforms a function decorator into a method decorator so that it can be used on an instance method. For example: from django.contrib.auth.decorators import login_required from django.utils.decorators import method_decorator from django.views.generic import TemplateView class ProtectedView(TemplateView): template_name = 'secret.html' 272 Chapter 3. Using Django
- 277. Django Documentation, Release 1.9.3.dev20160224120324 @method_decorator(login_required) def dispatch(self, *args, **kwargs): return super(ProtectedView, self).dispatch(*args, **kwargs) Or, more succinctly, you can decorate the class instead and pass the name of the method to be decorated as the keyword argument name: @method_decorator(login_required, name='dispatch') class ProtectedView(TemplateView): template_name = 'secret.html' If you have a set of common decorators used in several places, you can define a list or tuple of decorators and use this instead of invoking method_decorator() multiple times. These two classes are equivalent: decorators = [never_cache, login_required] @method_decorator(decorators, name='dispatch') class ProtectedView(TemplateView): template_name = 'secret.html' @method_decorator(never_cache, name='dispatch') @method_decorator(login_required, name='dispatch') class ProtectedView(TemplateView): template_name = 'secret.html' The decorators will process a request in the order they are passed to the decorator. In the example, never_cache() will process the request before login_required(). The ability to use method_decorator() on a class and the ability for it to accept a list or tuple of decorators were added. In this example, every instance of ProtectedView will have login protection. Note: method_decorator passes *args and **kwargs as parameters to the decorated method on the class. If your method does not accept a compatible set of parameters it will raise a TypeError exception. 3.6.2 Built-in class-based generic views Writing Web applications can be monotonous, because we repeat certain patterns again and again. Django tries to take away some of that monotony at the model and template layers, but Web developers also experience this boredom at the view level. Django’s generic views were developed to ease that pain. They take certain common idioms and patterns found in view development and abstract them so that you can quickly write common views of data without having to write too much code. We can recognize certain common tasks, like displaying a list of objects, and write code that displays a list of any object. Then the model in question can be passed as an extra argument to the URLconf. Django ships with generic views to do the following: • Display list and detail pages for a single object. If we were creating an application to manage conferences then a TalkListView and a RegisteredUserListView would be examples of list views. A single talk page is an example of what we call a “detail” view. • Present date-based objects in year/month/day archive pages, associated detail, and “latest” pages. 3.6. Class-based views 273
- 278. Django Documentation, Release 1.9.3.dev20160224120324 • Allow users to create, update, and delete objects – with or without authorization. Taken together, these views provide easy interfaces to perform the most common tasks developers encounter. Extending generic views There’s no question that using generic views can speed up development substantially. In most projects, however, there comes a moment when the generic views no longer suffice. Indeed, the most common question asked by new Django developers is how to make generic views handle a wider array of situations. This is one of the reasons generic views were redesigned for the 1.3 release - previously, they were just view functions with a bewildering array of options; now, rather than passing in a large amount of configuration in the URLconf, the recommended way to extend generic views is to subclass them, and override their attributes or methods. That said, generic views will have a limit. If you find you’re struggling to implement your view as a subclass of a generic view, then you may find it more effective to write just the code you need, using your own class-based or functional views. More examples of generic views are available in some third party applications, or you could write your own as needed. Generic views of objects TemplateView certainly is useful, but Django’s generic views really shine when it comes to presenting views of your database content. Because it’s such a common task, Django comes with a handful of built-in generic views that make generating list and detail views of objects incredibly easy. Let’s start by looking at some examples of showing a list of objects or an individual object. We’ll be using these models: # models.py from django.db import models class Publisher(models.Model): name = models.CharField(max_length=30) address = models.CharField(max_length=50) city = models.CharField(max_length=60) state_province = models.CharField(max_length=30) country = models.CharField(max_length=50) website = models.URLField() class Meta: ordering = ["-name"] def __str__(self): # __unicode__ on Python 2 return self.name class Author(models.Model): salutation = models.CharField(max_length=10) name = models.CharField(max_length=200) email = models.EmailField() headshot = models.ImageField(upload_to='author_headshots') def __str__(self): # __unicode__ on Python 2 return self.name class Book(models.Model): title = models.CharField(max_length=100) 274 Chapter 3. Using Django
- 279. Django Documentation, Release 1.9.3.dev20160224120324 authors = models.ManyToManyField('Author') publisher = models.ForeignKey(Publisher, on_delete=models.CASCADE) publication_date = models.DateField() Now we need to define a view: # views.py from django.views.generic import ListView from books.models import Publisher class PublisherList(ListView): model = Publisher Finally hook that view into your urls: # urls.py from django.conf.urls import url from books.views import PublisherList urlpatterns = [ url(r'^publishers/$', PublisherList.as_view()), ] That’s all the Python code we need to write. We still need to write a template, however. We could explicitly tell the view which template to use by adding a template_name attribute to the view, but in the absence of an explicit template Django will infer one from the object’s name. In this case, the inferred template will be "books/publisher_list.html" – the “books” part comes from the name of the app that defines the model, while the “publisher” bit is just the lowercased version of the model’s name. Note: Thus, when (for example) the APP_DIRS option of a DjangoTemplates backend is set to True in TEMPLATES, a template location could be: /path/to/project/books/templates/books/publisher_list.html This template will be rendered against a context containing a variable called object_list that contains all the publisher objects. A very simple template might look like the following: {% extends "base.html" %} {% block content %} <h2>Publishers</h2> <ul> {% for publisher in object_list %} <li>{{ publisher.name }}</li> {% endfor %} </ul> {% endblock %} That’s really all there is to it. All the cool features of generic views come from changing the attributes set on the generic view. The generic views reference documents all the generic views and their options in detail; the rest of this document will consider some of the common ways you might customize and extend generic views. Making “friendly” template contexts You might have noticed that our sample publisher list template stores all the publishers in a variable named object_list. While this works just fine, it isn’t all that “friendly” to template authors: they have to “just know” that they’re dealing with publishers here. 3.6. Class-based views 275
- 280. Django Documentation, Release 1.9.3.dev20160224120324 Well, if you’re dealing with a model object, this is already done for you. When you are dealing with an object or queryset, Django is able to populate the context using the lower cased version of the model class’ name. This is provided in addition to the default object_list entry, but contains exactly the same data, i.e. publisher_list. If this still isn’t a good match, you can manually set the name of the context variable. The context_object_name attribute on a generic view specifies the context variable to use: # views.py from django.views.generic import ListView from books.models import Publisher class PublisherList(ListView): model = Publisher context_object_name = 'my_favorite_publishers' Providing a useful context_object_name is always a good idea. Your coworkers who design templates will thank you. Adding extra context Often you simply need to present some extra information beyond that provided by the generic view. For example, think of showing a list of all the books on each publisher detail page. The DetailView generic view provides the publisher to the context, but how do we get additional information in that template? The answer is to subclass DetailView and provide your own implementation of the get_context_data method. The default implementation simply adds the object being displayed to the template, but you can override it to send more: from django.views.generic import DetailView from books.models import Publisher, Book class PublisherDetail(DetailView): model = Publisher def get_context_data(self, **kwargs): # Call the base implementation first to get a context context = super(PublisherDetail, self).get_context_data(**kwargs) # Add in a QuerySet of all the books context['book_list'] = Book.objects.all() return context Note: Generally, get_context_data will merge the context data of all parent classes with those of the current class. To preserve this behavior in your own classes where you want to alter the context, you should be sure to call get_context_data on the super class. When no two classes try to define the same key, this will give the expected results. However if any class attempts to override a key after parent classes have set it (after the call to super), any children of that class will also need to explicitly set it after super if they want to be sure to override all parents. If you’re having trouble, review the method resolution order of your view. Another consideration is that the context data from class-based generic views will override data provided by context processors; see get_context_data() for an example. 276 Chapter 3. Using Django
- 281. Django Documentation, Release 1.9.3.dev20160224120324 Viewing subsets of objects Now let’s take a closer look at the model argument we’ve been using all along. The model argument, which specifies the database model that the view will operate upon, is available on all the generic views that operate on a single object or a collection of objects. However, the model argument is not the only way to specify the objects that the view will operate upon – you can also specify the list of objects using the queryset argument: from django.views.generic import DetailView from books.models import Publisher class PublisherDetail(DetailView): context_object_name = 'publisher' queryset = Publisher.objects.all() Specifying model = Publisher is really just shorthand for saying queryset = Publisher.objects.all(). However, by using queryset to define a filtered list of objects you can be more specific about the objects that will be visible in the view (see Making queries for more information about QuerySet objects, and see the class-based views reference for the complete details). To pick a simple example, we might want to order a list of books by publication date, with the most recent first: from django.views.generic import ListView from books.models import Book class BookList(ListView): queryset = Book.objects.order_by('-publication_date') context_object_name = 'book_list' That’s a pretty simple example, but it illustrates the idea nicely. Of course, you’ll usually want to do more than just reorder objects. If you want to present a list of books by a particular publisher, you can use the same technique: from django.views.generic import ListView from books.models import Book class AcmeBookList(ListView): context_object_name = 'book_list' queryset = Book.objects.filter(publisher__name='Acme Publishing') template_name = 'books/acme_list.html' Notice that along with a filtered queryset, we’re also using a custom template name. If we didn’t, the generic view would use the same template as the “vanilla” object list, which might not be what we want. Also notice that this isn’t a very elegant way of doing publisher-specific books. If we want to add another publisher page, we’d need another handful of lines in the URLconf, and more than a few publishers would get unreasonable. We’ll deal with this problem in the next section. Note: If you get a 404 when requesting /books/acme/, check to ensure you actually have a Publisher with the name ‘ACME Publishing’. Generic views have an allow_empty parameter for this case. See the class-based-views reference for more details. Dynamic filtering Another common need is to filter down the objects given in a list page by some key in the URL. Earlier we hard-coded the publisher’s name in the URLconf, but what if we wanted to write a view that displayed all the books by some 3.6. Class-based views 277
- 282. Django Documentation, Release 1.9.3.dev20160224120324 arbitrary publisher? Handily, the ListView has a get_queryset() method we can override. Previously, it has just been returning the value of the queryset attribute, but now we can add more logic. The key part to making this work is that when class-based views are called, various useful things are stored on self; as well as the request (self.request) this includes the positional (self.args) and name-based (self.kwargs) arguments captured according to the URLconf. Here, we have a URLconf with a single captured group: # urls.py from django.conf.urls import url from books.views import PublisherBookList urlpatterns = [ url(r'^books/([w-]+)/$', PublisherBookList.as_view()), ] Next, we’ll write the PublisherBookList view itself: # views.py from django.shortcuts import get_object_or_404 from django.views.generic import ListView from books.models import Book, Publisher class PublisherBookList(ListView): template_name = 'books/books_by_publisher.html' def get_queryset(self): self.publisher = get_object_or_404(Publisher, name=self.args[0]) return Book.objects.filter(publisher=self.publisher) As you can see, it’s quite easy to add more logic to the queryset selection; if we wanted, we could use self.request.user to filter using the current user, or other more complex logic. We can also add the publisher into the context at the same time, so we can use it in the template: # ... def get_context_data(self, **kwargs): # Call the base implementation first to get a context context = super(PublisherBookList, self).get_context_data(**kwargs) # Add in the publisher context['publisher'] = self.publisher return context Performing extra work The last common pattern we’ll look at involves doing some extra work before or after calling the generic view. Imagine we had a last_accessed field on our Author model that we were using to keep track of the last time anybody looked at that author: # models.py from django.db import models class Author(models.Model): salutation = models.CharField(max_length=10) 278 Chapter 3. Using Django
- 283. Django Documentation, Release 1.9.3.dev20160224120324 name = models.CharField(max_length=200) email = models.EmailField() headshot = models.ImageField(upload_to='author_headshots') last_accessed = models.DateTimeField() The generic DetailView class, of course, wouldn’t know anything about this field, but once again we could easily write a custom view to keep that field updated. First, we’d need to add an author detail bit in the URLconf to point to a custom view: from django.conf.urls import url from books.views import AuthorDetailView urlpatterns = [ #... url(r'^authors/(?P<pk>[0-9]+)/$', AuthorDetailView.as_view(), name='author-detail'), ] Then we’d write our new view – get_object is the method that retrieves the object – so we simply override it and wrap the call: from django.views.generic import DetailView from django.utils import timezone from books.models import Author class AuthorDetailView(DetailView): queryset = Author.objects.all() def get_object(self): # Call the superclass object = super(AuthorDetailView, self).get_object() # Record the last accessed date object.last_accessed = timezone.now() object.save() # Return the object return object Note: The URLconf here uses the named group pk - this name is the default name that DetailView uses to find the value of the primary key used to filter the queryset. If you want to call the group something else, you can set pk_url_kwarg on the view. More details can be found in the reference for DetailView 3.6.3 Form handling with class-based views Form processing generally has 3 paths: • Initial GET (blank or prepopulated form) • POST with invalid data (typically redisplay form with errors) • POST with valid data (process the data and typically redirect) Implementing this yourself often results in a lot of repeated boilerplate code (see Using a form in a view). To help avoid this, Django provides a collection of generic class-based views for form processing. 3.6. Class-based views 279
- 284. Django Documentation, Release 1.9.3.dev20160224120324 Basic forms Given a simple contact form: forms.py from django import forms class ContactForm(forms.Form): name = forms.CharField() message = forms.CharField(widget=forms.Textarea) def send_email(self): # send email using the self.cleaned_data dictionary pass The view can be constructed using a FormView: views.py from myapp.forms import ContactForm from django.views.generic.edit import FormView class ContactView(FormView): template_name = 'contact.html' form_class = ContactForm success_url = '/thanks/' def form_valid(self, form): # This method is called when valid form data has been POSTed. # It should return an HttpResponse. form.send_email() return super(ContactView, self).form_valid(form) Notes: • FormView inherits TemplateResponseMixin so template_name can be used here. • The default implementation for form_valid() simply redirects to the success_url. Model forms Generic views really shine when working with models. These generic views will automatically create a ModelForm, so long as they can work out which model class to use: • If the model attribute is given, that model class will be used. • If get_object() returns an object, the class of that object will be used. • If a queryset is given, the model for that queryset will be used. Model form views provide a form_valid() implementation that saves the model automatically. You can override this if you have any special requirements; see below for examples. You don’t even need to provide a success_url for CreateView or UpdateView - they will use get_absolute_url() on the model object if available. If you want to use a custom ModelForm (for instance to add extra validation) simply set form_class on your view. 280 Chapter 3. Using Django
- 285. Django Documentation, Release 1.9.3.dev20160224120324 Note: When specifying a custom form class, you must still specify the model, even though the form_class may be a ModelForm. First we need to add get_absolute_url() to our Author class: models.py from django.core.urlresolvers import reverse from django.db import models class Author(models.Model): name = models.CharField(max_length=200) def get_absolute_url(self): return reverse('author-detail', kwargs={'pk': self.pk}) Then we can use CreateView and friends to do the actual work. Notice how we’re just configuring the generic class-based views here; we don’t have to write any logic ourselves: views.py from django.views.generic.edit import CreateView, UpdateView, DeleteView from django.core.urlresolvers import reverse_lazy from myapp.models import Author class AuthorCreate(CreateView): model = Author fields = ['name'] class AuthorUpdate(UpdateView): model = Author fields = ['name'] class AuthorDelete(DeleteView): model = Author success_url = reverse_lazy('author-list') Note: We have to use reverse_lazy() here, not just reverse as the urls are not loaded when the file is imported. The fields attribute works the same way as the fields attribute on the inner Meta class on ModelForm. Unless you define the form class in another way, the attribute is required and the view will raise an ImproperlyConfigured exception if it’s not. If you specify both the fields and form_class attributes, an ImproperlyConfigured exception will be raised. Omitting the fields attribute was previously allowed and resulted in a form with all of the model’s fields. Previously if both fields and form_class were specified, fields was silently ignored. Finally, we hook these new views into the URLconf: urls.py from django.conf.urls import url from myapp.views import AuthorCreate, AuthorUpdate, AuthorDelete 3.6. Class-based views 281
- 286. Django Documentation, Release 1.9.3.dev20160224120324 urlpatterns = [ # ... url(r'author/add/$', AuthorCreate.as_view(), name='author-add'), url(r'author/(?P<pk>[0-9]+)/$', AuthorUpdate.as_view(), name='author-update'), url(r'author/(?P<pk>[0-9]+)/delete/$', AuthorDelete.as_view(), name='author-delete'), ] Note: These views inherit SingleObjectTemplateResponseMixin which uses template_name_suffix to construct the template_name based on the model. In this example: • CreateView and UpdateView use myapp/author_form.html • DeleteView uses myapp/author_confirm_delete.html If you wish to have separate templates for CreateView and UpdateView, you can set either template_name or template_name_suffix on your view class. Models and request.user To track the user that created an object using a CreateView, you can use a custom ModelForm to do this. First, add the foreign key relation to the model: models.py from django.contrib.auth.models import User from django.db import models class Author(models.Model): name = models.CharField(max_length=200) created_by = models.ForeignKey(User, on_delete=models.CASCADE) # ... In the view, ensure that you don’t include created_by in the list of fields to edit, and override form_valid() to add the user: views.py from django.views.generic.edit import CreateView from myapp.models import Author class AuthorCreate(CreateView): model = Author fields = ['name'] def form_valid(self, form): form.instance.created_by = self.request.user return super(AuthorCreate, self).form_valid(form) Note that you’ll need to decorate this view using login_required(), or alternatively handle unauthorized users in the form_valid(). 282 Chapter 3. Using Django
- 287. Django Documentation, Release 1.9.3.dev20160224120324 AJAX example Here is a simple example showing how you might go about implementing a form that works for AJAX requests as well as ‘normal’ form POSTs: from django.http import JsonResponse from django.views.generic.edit import CreateView from myapp.models import Author class AjaxableResponseMixin(object): """ Mixin to add AJAX support to a form. Must be used with an object-based FormView (e.g. CreateView) """ def form_invalid(self, form): response = super(AjaxableResponseMixin, self).form_invalid(form) if self.request.is_ajax(): return JsonResponse(form.errors, status=400) else: return response def form_valid(self, form): # We make sure to call the parent's form_valid() method because # it might do some processing (in the case of CreateView, it will # call form.save() for example). response = super(AjaxableResponseMixin, self).form_valid(form) if self.request.is_ajax(): data = { 'pk': self.object.pk, } return JsonResponse(data) else: return response class AuthorCreate(AjaxableResponseMixin, CreateView): model = Author fields = ['name'] 3.6.4 Using mixins with class-based views Caution: This is an advanced topic. A working knowledge of Django’s class-based views is advised before exploring these techniques. Django’s built-in class-based views provide a lot of functionality, but some of it you may want to use separately. For instance, you may want to write a view that renders a template to make the HTTP response, but you can’t use TemplateView; perhaps you need to render a template only on POST, with GET doing something else entirely. While you could use TemplateResponse directly, this will likely result in duplicate code. For this reason, Django also provides a number of mixins that provide more discrete functionality. Template rendering, for instance, is encapsulated in the TemplateResponseMixin. The Django reference documentation contains full documentation of all the mixins. 3.6. Class-based views 283
- 288. Django Documentation, Release 1.9.3.dev20160224120324 Context and template responses Two central mixins are provided that help in providing a consistent interface to working with templates in class-based views. TemplateResponseMixin Every built in view which returns a TemplateResponse will call the render_to_response() method that TemplateResponseMixin provides. Most of the time this will be called for you (for instance, it is called by the get() method implemented by both TemplateView and DetailView); similarly, it’s unlikely that you’ll need to override it, although if you want your response to return something not rendered via a Django template then you’ll want to do it. For an example of this, see the JSONResponseMixin example. render_to_response() itself calls get_template_names(), which by de- fault will just look up template_name on the class-based view; two other mixins (SingleObjectTemplateResponseMixin and MultipleObjectTemplateResponseMixin) override this to provide more flexible defaults when dealing with actual objects. ContextMixin Every built in view which needs context data, such as for rendering a template (including TemplateResponseMixin above), should call get_context_data() passing any data they want to ensure is in there as keyword arguments. get_context_data() returns a dictionary; in ContextMixin it simply returns its keyword arguments, but it is common to override this to add more members to the dictionary. Building up Django’s generic class-based views Let’s look at how two of Django’s generic class-based views are built out of mixins providing discrete functionality. We’ll consider DetailView, which renders a “detail” view of an object, and ListView, which will render a list of objects, typically from a queryset, and optionally paginate them. This will introduce us to four mixins which between them provide useful functionality when working with either a single Django object, or multiple objects. There are also mixins involved in the generic edit views (FormView, and the model-specific views CreateView, UpdateView and DeleteView), and in the date-based generic views. These are covered in the mixin reference documentation. DetailView: working with a single Django object To show the detail of an object, we basically need to do two things: we need to look up the object and then we need to make a TemplateResponse with a suitable template, and that object as context. To get the object, DetailView relies on SingleObjectMixin, which provides a get_object() method that figures out the object based on the URL of the request (it looks for pk and slug keyword arguments as declared in the URLConf, and looks the object up either from the model attribute on the view, or the queryset attribute if that’s provided). SingleObjectMixin also overrides get_context_data(), which is used across all Django’s built in class-based views to supply context data for template renders. To then make a TemplateResponse, DetailView uses SingleObjectTemplateResponseMixin, which extends TemplateResponseMixin, overriding get_template_names() as discussed above. It actually provides a fairly sophisticated set of options, but the main one that most people are going to use is <app_label>/<model_name>_detail.html. The _detail part can be changed by setting template_name_suffix on a subclass to something else. (For instance, the generic edit views use _form for create and update views, and _confirm_delete for delete views.) ListView: working with many Django objects Lists of objects follow roughly the same pattern: we need a (possibly paginated) list of objects, typically a QuerySet, and then we need to make a TemplateResponse with a suitable template using that list of objects. 284 Chapter 3. Using Django
- 289. Django Documentation, Release 1.9.3.dev20160224120324 To get the objects, ListView uses MultipleObjectMixin, which provides both get_queryset() and paginate_queryset(). Unlike with SingleObjectMixin, there’s no need to key off parts of the URL to figure out the queryset to work with, so the default just uses the queryset or model attribute on the view class. A common reason to override get_queryset() here would be to dynamically vary the objects, such as depending on the current user or to exclude posts in the future for a blog. MultipleObjectMixin also overrides get_context_data() to include appropriate context variables for pagination (providing dummies if pagination is disabled). It relies on object_list being passed in as a keyword argument, which ListView arranges for it. To make a TemplateResponse, ListView then uses MultipleObjectTemplateResponseMixin; as with SingleObjectTemplateResponseMixin above, this overrides get_template_names() to provide a range of options, with the most commonly-used being <app_label>/<model_name>_list.html, with the _list part again being taken from the template_name_suffix attribute. (The date based generic views use suffixes such as _archive, _archive_year and so on to use different templates for the various specialized date-based list views.) Using Django’s class-based view mixins Now we’ve seen how Django’s generic class-based views use the provided mixins, let’s look at other ways we can combine them. Of course we’re still going to be combining them with either built-in class-based views, or other generic class-based views, but there are a range of rarer problems you can solve than are provided for by Django out of the box. Warning: Not all mixins can be used together, and not all generic class based views can be used with all other mixins. Here we present a few examples that do work; if you want to bring together other functionality then you’ll have to consider interactions between attributes and methods that overlap between the different classes you’re using, and how method resolution order will affect which versions of the methods will be called in what order. The reference documentation for Django’s class-based views and class-based view mixins will help you in under- standing which attributes and methods are likely to cause conflict between different classes and mixins. If in doubt, it’s often better to back off and base your work on View or TemplateView, perhaps with SingleObjectMixin and MultipleObjectMixin. Although you will probably end up writing more code, it is more likely to be clearly understandable to someone else coming to it later, and with fewer interactions to worry about you will save yourself some thinking. (Of course, you can always dip into Django’s implementation of the generic class-based views for inspiration on how to tackle problems.) Using SingleObjectMixin with View If we want to write a simple class-based view that responds only to POST, we’ll subclass View and write a post() method in the subclass. However if we want our processing to work on a particular object, identified from the URL, we’ll want the functionality provided by SingleObjectMixin. We’ll demonstrate this with the Author model we used in the generic class-based views introduction. views.py from django.http import HttpResponseForbidden, HttpResponseRedirect from django.core.urlresolvers import reverse from django.views.generic import View from django.views.generic.detail import SingleObjectMixin from books.models import Author class RecordInterest(SingleObjectMixin, View): """Records the current user's interest in an author.""" model = Author 3.6. Class-based views 285
- 290. Django Documentation, Release 1.9.3.dev20160224120324 def post(self, request, *args, **kwargs): if not request.user.is_authenticated(): return HttpResponseForbidden() # Look up the author we're interested in. self.object = self.get_object() # Actually record interest somehow here! return HttpResponseRedirect(reverse('author-detail', kwargs={'pk': self.object.pk})) In practice you’d probably want to record the interest in a key-value store rather than in a relational database, so we’ve left that bit out. The only bit of the view that needs to worry about using SingleObjectMixin is where we want to look up the author we’re interested in, which it just does with a simple call to self.get_object(). Everything else is taken care of for us by the mixin. We can hook this into our URLs easily enough: urls.py from django.conf.urls import url from books.views import RecordInterest urlpatterns = [ #... url(r'^author/(?P<pk>[0-9]+)/interest/$', RecordInterest.as_view(), name='author-interest'), ] Note the pk named group, which get_object() uses to look up the Author instance. You could also use a slug, or any of the other features of SingleObjectMixin. Using SingleObjectMixin with ListView ListView provides built-in pagination, but you might want to paginate a list of objects that are all linked (by a foreign key) to another object. In our publishing example, you might want to paginate through all the books by a particular publisher. One way to do this is to combine ListView with SingleObjectMixin, so that the queryset for the paginated list of books can hang off the publisher found as the single object. In order to do this, we need to have two different querysets: Book queryset for use by ListView Since we have access to the Publisher whose books we want to list, we simply override get_queryset() and use the Publisher’s reverse foreign key manager. Publisher queryset for use in get_object() We’ll rely on the default implementation of get_object() to fetch the correct Publisher object. However, we need to explicitly pass a queryset argument because otherwise the default implementation of get_object() would call get_queryset() which we have over- ridden to return Book objects instead of Publisher ones. Note: We have to think carefully about get_context_data(). Since both SingleObjectMixin and ListView will put things in the context data under the value of context_object_name if it’s set, we’ll in- stead explicitly ensure the Publisher is in the context data. ListView will add in the suitable page_obj and paginator for us providing we remember to call super(). Now we can write a new PublisherDetail: 286 Chapter 3. Using Django
- 291. Django Documentation, Release 1.9.3.dev20160224120324 from django.views.generic import ListView from django.views.generic.detail import SingleObjectMixin from books.models import Publisher class PublisherDetail(SingleObjectMixin, ListView): paginate_by = 2 template_name = "books/publisher_detail.html" def get(self, request, *args, **kwargs): self.object = self.get_object(queryset=Publisher.objects.all()) return super(PublisherDetail, self).get(request, *args, **kwargs) def get_context_data(self, **kwargs): context = super(PublisherDetail, self).get_context_data(**kwargs) context['publisher'] = self.object return context def get_queryset(self): return self.object.book_set.all() Notice how we set self.object within get() so we can use it again later in get_context_data() and get_queryset(). If you don’t set template_name, the template will default to the normal ListView choice, which in this case would be "books/book_list.html" because it’s a list of books; ListView knows nothing about SingleObjectMixin, so it doesn’t have any clue this view is anything to do with a Publisher. The paginate_by is deliberately small in the example so you don’t have to create lots of books to see the pagination working! Here’s the template you’d want to use: {% extends "base.html" %} {% block content %} <h2>Publisher {{ publisher.name }}</h2> <ol> {% for book in page_obj %} <li>{{ book.title }}</li> {% endfor %} </ol> <div class="pagination"> <span class="step-links"> {% if page_obj.has_previous %} <a href="?page={{ page_obj.previous_page_number }}">previous</a> {% endif %} <span class="current"> Page {{ page_obj.number }} of {{ paginator.num_pages }}. </span> {% if page_obj.has_next %} <a href="?page={{ page_obj.next_page_number }}">next</a> {% endif %} </span> </div> {% endblock %} 3.6. Class-based views 287
- 292. Django Documentation, Release 1.9.3.dev20160224120324 Avoid anything more complex Generally you can use TemplateResponseMixin and SingleObjectMixin when you need their functional- ity. As shown above, with a bit of care you can even combine SingleObjectMixin with ListView. However things get increasingly complex as you try to do so, and a good rule of thumb is: Hint: Each of your views should use only mixins or views from one of the groups of generic class-based views: detail, list, editing and date. For example it’s fine to combine TemplateView (built in view) with MultipleObjectMixin (generic list), but you’re likely to have problems combining SingleObjectMixin (generic detail) with MultipleObjectMixin (generic list). To show what happens when you try to get more sophisticated, we show an example that sacrifices readability and maintainability when there is a simpler solution. First, let’s look at a naive attempt to combine DetailView with FormMixin to enable use to POST a Django Form to the same URL as we’re displaying an object using DetailView. Using FormMixin with DetailView Think back to our earlier example of using View and SingleObjectMixin together. We were recording a user’s interest in a particular author; say now that we want to let them leave a message saying why they like them. Again, let’s assume we’re not going to store this in a relational database but instead in something more esoteric that we won’t worry about here. At this point it’s natural to reach for a Form to encapsulate the information sent from the user’s browser to Django. Say also that we’re heavily invested in REST, so we want to use the same URL for displaying the author as for capturing the message from the user. Let’s rewrite our AuthorDetailView to do that. We’ll keep the GET handling from DetailView, although we’ll have to add a Form into the context data so we can render it in the template. We’ll also want to pull in form processing from FormMixin, and write a bit of code so that on POST the form gets called appropriately. Note: We use FormMixin and implement post() ourselves rather than try to mix DetailView with FormView (which provides a suitable post() already) because both of the views implement get(), and things would get much more confusing. Our new AuthorDetail looks like this: # CAUTION: you almost certainly do not want to do this. # It is provided as part of a discussion of problems you can # run into when combining different generic class-based view # functionality that is not designed to be used together. from django import forms from django.http import HttpResponseForbidden from django.core.urlresolvers import reverse from django.views.generic import DetailView from django.views.generic.edit import FormMixin from books.models import Author class AuthorInterestForm(forms.Form): message = forms.CharField() class AuthorDetail(FormMixin, DetailView): model = Author 288 Chapter 3. Using Django
- 293. Django Documentation, Release 1.9.3.dev20160224120324 form_class = AuthorInterestForm def get_success_url(self): return reverse('author-detail', kwargs={'pk': self.object.pk}) def get_context_data(self, **kwargs): context = super(AuthorDetail, self).get_context_data(**kwargs) context['form'] = self.get_form() return context def post(self, request, *args, **kwargs): if not request.user.is_authenticated(): return HttpResponseForbidden() self.object = self.get_object() form = self.get_form() if form.is_valid(): return self.form_valid(form) else: return self.form_invalid(form) def form_valid(self, form): # Here, we would record the user's interest using the message # passed in form.cleaned_data['message'] return super(AuthorDetail, self).form_valid(form) get_success_url() is just providing somewhere to redirect to, which gets used in the default implementation of form_valid(). We have to provide our own post() as noted earlier, and override get_context_data() to make the Form available in the context data. A better solution It should be obvious that the number of subtle interactions between FormMixin and DetailView is already testing our ability to manage things. It’s unlikely you’d want to write this kind of class yourself. In this case, it would be fairly easy to just write the post() method yourself, keeping DetailView as the only generic functionality, although writing Form handling code involves a lot of duplication. Alternatively, it would still be easier than the above approach to have a separate view for processing the form, which could use FormView distinct from DetailView without concerns. An alternative better solution What we’re really trying to do here is to use two different class based views from the same URL. So why not do just that? We have a very clear division here: GET requests should get the DetailView (with the Form added to the context data), and POST requests should get the FormView. Let’s set up those views first. The AuthorDisplay view is almost the same as when we first introduced AuthorDetail; we have to write our own get_context_data() to make the AuthorInterestForm available to the template. We’ll skip the get_object() override from before for clarity: from django.views.generic import DetailView from django import forms from books.models import Author class AuthorInterestForm(forms.Form): message = forms.CharField() 3.6. Class-based views 289
- 294. Django Documentation, Release 1.9.3.dev20160224120324 class AuthorDisplay(DetailView): model = Author def get_context_data(self, **kwargs): context = super(AuthorDisplay, self).get_context_data(**kwargs) context['form'] = AuthorInterestForm() return context Then the AuthorInterest is a simple FormView, but we have to bring in SingleObjectMixin so we can find the author we’re talking about, and we have to remember to set template_name to ensure that form errors will render the same template as AuthorDisplay is using on GET: from django.core.urlresolvers import reverse from django.http import HttpResponseForbidden from django.views.generic import FormView from django.views.generic.detail import SingleObjectMixin class AuthorInterest(SingleObjectMixin, FormView): template_name = 'books/author_detail.html' form_class = AuthorInterestForm model = Author def post(self, request, *args, **kwargs): if not request.user.is_authenticated(): return HttpResponseForbidden() self.object = self.get_object() return super(AuthorInterest, self).post(request, *args, **kwargs) def get_success_url(self): return reverse('author-detail', kwargs={'pk': self.object.pk}) Finally we bring this together in a new AuthorDetail view. We already know that calling as_view() on a class-based view gives us something that behaves exactly like a function based view, so we can do that at the point we choose between the two subviews. You can of course pass through keyword arguments to as_view() in the same way you would in your URLconf, such as if you wanted the AuthorInterest behavior to also appear at another URL but using a different template: from django.views.generic import View class AuthorDetail(View): def get(self, request, *args, **kwargs): view = AuthorDisplay.as_view() return view(request, *args, **kwargs) def post(self, request, *args, **kwargs): view = AuthorInterest.as_view() return view(request, *args, **kwargs) This approach can also be used with any other generic class-based views or your own class-based views inheriting directly from View or TemplateView, as it keeps the different views as separate as possible. More than just HTML Where class-based views shine is when you want to do the same thing many times. Suppose you’re writing an API, and every view should return JSON instead of rendered HTML. 290 Chapter 3. Using Django
- 295. Django Documentation, Release 1.9.3.dev20160224120324 We can create a mixin class to use in all of our views, handling the conversion to JSON once. For example, a simple JSON mixin might look something like this: from django.http import JsonResponse class JSONResponseMixin(object): """ A mixin that can be used to render a JSON response. """ def render_to_json_response(self, context, **response_kwargs): """ Returns a JSON response, transforming 'context' to make the payload. """ return JsonResponse( self.get_data(context), **response_kwargs ) def get_data(self, context): """ Returns an object that will be serialized as JSON by json.dumps(). """ # Note: This is *EXTREMELY* naive; in reality, you'll need # to do much more complex handling to ensure that arbitrary # objects -- such as Django model instances or querysets # -- can be serialized as JSON. return context Note: Check out the Serializing Django objects documentation for more information on how to correctly transform Django models and querysets into JSON. This mixin provides a render_to_json_response() method with the same signature as render_to_response(). To use it, we simply need to mix it into a TemplateView for example, and override render_to_response() to call render_to_json_response() instead: from django.views.generic import TemplateView class JSONView(JSONResponseMixin, TemplateView): def render_to_response(self, context, **response_kwargs): return self.render_to_json_response(context, **response_kwargs) Equally we could use our mixin with one of the generic views. We can make our own version of DetailView by mixing JSONResponseMixin with the django.views.generic.detail.BaseDetailView – (the DetailView before template rendering behavior has been mixed in): from django.views.generic.detail import BaseDetailView class JSONDetailView(JSONResponseMixin, BaseDetailView): def render_to_response(self, context, **response_kwargs): return self.render_to_json_response(context, **response_kwargs) This view can then be deployed in the same way as any other DetailView, with exactly the same behavior – except for the format of the response. If you want to be really adventurous, you could even mix a DetailView subclass that is able to return both HTML and JSON content, depending on some property of the HTTP request, such as a query argument or a HTTP header. Just mix in both the JSONResponseMixin and a SingleObjectTemplateResponseMixin, and override 3.6. Class-based views 291
- 296. Django Documentation, Release 1.9.3.dev20160224120324 the implementation of render_to_response() to defer to the appropriate rendering method depending on the type of response that the user requested: from django.views.generic.detail import SingleObjectTemplateResponseMixin class HybridDetailView(JSONResponseMixin, SingleObjectTemplateResponseMixin, BaseDetailView): def render_to_response(self, context): # Look for a 'format=json' GET argument if self.request.GET.get('format') == 'json': return self.render_to_json_response(context) else: return super(HybridDetailView, self).render_to_response(context) Because of the way that Python resolves method overloading, the call to super(HybridDetailView, self).render_to_response(context) ends up calling the render_to_response() implementation of TemplateResponseMixin. 3.6.5 Basic examples Django provides base view classes which will suit a wide range of applications. All views inherit from the View class, which handles linking the view in to the URLs, HTTP method dispatching and other simple features. RedirectView is for a simple HTTP redirect, and TemplateView extends the base class to make it also render a template. 3.6.6 Simple usage in your URLconf The simplest way to use generic views is to create them directly in your URLconf. If you’re only changing a few simple attributes on a class-based view, you can simply pass them into the as_view() method call itself: from django.conf.urls import url from django.views.generic import TemplateView urlpatterns = [ url(r'^about/', TemplateView.as_view(template_name="about.html")), ] Any arguments passed to as_view() will override attributes set on the class. In this example, we set template_name on the TemplateView. A similar overriding pattern can be used for the url attribute on RedirectView. 3.6.7 Subclassing generic views The second, more powerful way to use generic views is to inherit from an existing view and override attributes (such as the template_name) or methods (such as get_context_data) in your subclass to provide new values or methods. Consider, for example, a view that just displays one template, about.html. Django has a generic view to do this - TemplateView - so we can just subclass it, and override the template name: # some_app/views.py from django.views.generic import TemplateView class AboutView(TemplateView): template_name = "about.html" Then we just need to add this new view into our URLconf. TemplateView is a class, not a function, so we point the URL to the as_view() class method instead, which provides a function-like entry to class-based views: 292 Chapter 3. Using Django
- 297. Django Documentation, Release 1.9.3.dev20160224120324 # urls.py from django.conf.urls import url from some_app.views import AboutView urlpatterns = [ url(r'^about/', AboutView.as_view()), ] For more information on how to use the built in generic views, consult the next topic on generic class-based views. Supporting other HTTP methods Suppose somebody wants to access our book library over HTTP using the views as an API. The API client would connect every now and then and download book data for the books published since last visit. But if no new books appeared since then, it is a waste of CPU time and bandwidth to fetch the books from the database, render a full response and send it to the client. It might be preferable to ask the API when the most recent book was published. We map the URL to book list view in the URLconf: from django.conf.urls import url from books.views import BookListView urlpatterns = [ url(r'^books/$', BookListView.as_view()), ] And the view: from django.http import HttpResponse from django.views.generic import ListView from books.models import Book class BookListView(ListView): model = Book def head(self, *args, **kwargs): last_book = self.get_queryset().latest('publication_date') response = HttpResponse('') # RFC 1123 date format response['Last-Modified'] = last_book.publication_date.strftime('%a, %d %b %Y %H:%M:%S GMT') return response If the view is accessed from a GET request, a plain-and-simple object list is returned in the response (using book_list.html template). But if the client issues a HEAD request, the response has an empty body and the Last-Modified header indicates when the most recent book was published. Based on this information, the client may or may not download the full object list. 3.7 Migrations Migrations are Django’s way of propagating changes you make to your models (adding a field, deleting a model, etc.) into your database schema. They’re designed to be mostly automatic, but you’ll need to know when to make migrations, when to run them, and the common problems you might run into. 3.7. Migrations 293
- 298. Django Documentation, Release 1.9.3.dev20160224120324 3.7.1 The Commands There are several commands which you will use to interact with migrations and Django’s handling of database schema: • migrate, which is responsible for applying migrations, as well as unapplying and listing their status. • makemigrations, which is responsible for creating new migrations based on the changes you have made to your models. • sqlmigrate, which displays the SQL statements for a migration. • showmigrations, which lists a project’s migrations. You should think of migrations as a version control system for your database schema. makemigrations is respon- sible for packaging up your model changes into individual migration files - analogous to commits - and migrate is responsible for applying those to your database. The migration files for each app live in a “migrations” directory inside of that app, and are designed to be committed to, and distributed as part of, its codebase. You should be making them once on your development machine and then running the same migrations on your colleagues’ machines, your staging machines, and eventually your production machines. Note: It is possible to override the name of the package which contains the migrations on a per-app basis by modifying the MIGRATION_MODULES setting. Migrations will run the same way on the same dataset and produce consistent results, meaning that what you see in development and staging is, under the same circumstances, exactly what will happen in production. Django will make migrations for any change to your models or fields - even options that don’t affect the database - as the only way it can reconstruct a field correctly is to have all the changes in the history, and you might need those options in some data migrations later on (for example, if you’ve set custom validators). 3.7.2 Backend Support Migrations are supported on all backends that Django ships with, as well as any third-party backends if they have programmed in support for schema alteration (done via the SchemaEditor class). However, some databases are more capable than others when it comes to schema migrations; some of the caveats are covered below. PostgreSQL PostgreSQL is the most capable of all the databases here in terms of schema support; the only caveat is that adding columns with default values will cause a full rewrite of the table, for a time proportional to its size. For this reason, it’s recommended you always create new columns with null=True, as this way they will be added immediately. MySQL MySQL lacks support for transactions around schema alteration operations, meaning that if a migration fails to apply you will have to manually unpick the changes in order to try again (it’s impossible to roll back to an earlier point). In addition, MySQL will fully rewrite tables for almost every schema operation and generally takes a time proportional to the number of rows in the table to add or remove columns. On slower hardware this can be worse than a minute 294 Chapter 3. Using Django
- 299. Django Documentation, Release 1.9.3.dev20160224120324 per million rows - adding a few columns to a table with just a few million rows could lock your site up for over ten minutes. Finally, MySQL has reasonably small limits on name lengths for columns, tables and indexes, as well as a limit on the combined size of all columns an index covers. This means that indexes that are possible on other backends will fail to be created under MySQL. SQLite SQLite has very little built-in schema alteration support, and so Django attempts to emulate it by: • Creating a new table with the new schema • Copying the data across • Dropping the old table • Renaming the new table to match the original name This process generally works well, but it can be slow and occasionally buggy. It is not recommended that you run and migrate SQLite in a production environment unless you are very aware of the risks and its limitations; the support Django ships with is designed to allow developers to use SQLite on their local machines to develop less complex Django projects without the need for a full database. 3.7.3 Workflow Working with migrations is simple. Make changes to your models - say, add a field and remove a model - and then run makemigrations: $ python manage.py makemigrations Migrations for 'books': 0003_auto.py: - Alter field author on book Your models will be scanned and compared to the versions currently contained in your migration files, and then a new set of migrations will be written out. Make sure to read the output to see what makemigrations thinks you have changed - it’s not perfect, and for complex changes it might not be detecting what you expect. Once you have your new migration files, you should apply them to your database to make sure they work as expected: $ python manage.py migrate Operations to perform: Apply all migrations: books Running migrations: Rendering model states... DONE Applying books.0003_auto... OK Once the migration is applied, commit the migration and the models change to your version control system as a single commit - that way, when other developers (or your production servers) check out the code, they’ll get both the changes to your models and the accompanying migration at the same time. If you want to give the migration(s) a meaningful name instead of a generated one, you can use the makemigrations --name option: $ python manage.py makemigrations --name changed_my_model your_app_label 3.7. Migrations 295
- 300. Django Documentation, Release 1.9.3.dev20160224120324 Version control Because migrations are stored in version control, you’ll occasionally come across situations where you and another developer have both committed a migration to the same app at the same time, resulting in two migrations with the same number. Don’t worry - the numbers are just there for developers’ reference, Django just cares that each migration has a different name. Migrations specify which other migrations they depend on - including earlier migrations in the same app - in the file, so it’s possible to detect when there’s two new migrations for the same app that aren’t ordered. When this happens, Django will prompt you and give you some options. If it thinks it’s safe enough, it will offer to automatically linearize the two migrations for you. If not, you’ll have to go in and modify the migrations yourself - don’t worry, this isn’t difficult, and is explained more in Migration files below. 3.7.4 Dependencies While migrations are per-app, the tables and relationships implied by your models are too complex to be created for just one app at a time. When you make a migration that requires something else to run - for example, you add a ForeignKey in your books app to your authors app - the resulting migration will contain a dependency on a migration in authors. This means that when you run the migrations, the authors migration runs first and creates the table the ForeignKey references, and then the migration that makes the ForeignKey column runs afterwards and cre- ates the constraint. If this didn’t happen, the migration would try to create the ForeignKey column without the table it’s referencing existing and your database would throw an error. This dependency behavior affects most migration operations where you restrict to a single app. Restricting to a single app (either in makemigrations or migrate) is a best-efforts promise, and not a guarantee; any other apps that need to be used to get dependencies correct will be. 3.7.5 Migration files Migrations are stored as an on-disk format, referred to here as “migration files”. These files are actually just normal Python files with an agreed-upon object layout, written in a declarative style. A basic migration file looks like this: from django.db import migrations, models class Migration(migrations.Migration): dependencies = [("migrations", "0001_initial")] operations = [ migrations.DeleteModel("Tribble"), migrations.AddField("Author", "rating", models.IntegerField(default=0)), ] What Django looks for when it loads a migration file (as a Python module) is a subclass of django.db.migrations.Migration called Migration. It then inspects this object for four attributes, only two of which are used most of the time: • dependencies, a list of migrations this one depends on. • operations, a list of Operation classes that define what this migration does. 296 Chapter 3. Using Django
- 301. Django Documentation, Release 1.9.3.dev20160224120324 The operations are the key; they are a set of declarative instructions which tell Django what schema changes need to be made. Django scans them and builds an in-memory representation of all of the schema changes to all apps, and uses this to generate the SQL which makes the schema changes. That in-memory structure is also used to work out what the differences are between your models and the current state of your migrations; Django runs through all the changes, in order, on an in-memory set of models to come up with the state of your models last time you ran makemigrations. It then uses these models to compare against the ones in your models.py files to work out what you have changed. You should rarely, if ever, need to edit migration files by hand, but it’s entirely possible to write them manually if you need to. Some of the more complex operations are not autodetectable and are only available via a hand-written migration, so don’t be scared about editing them if you have to. Custom fields You can’t modify the number of positional arguments in an already migrated custom field without raising a TypeError. The old migration will call the modified __init__ method with the old signature. So if you need a new argument, please create a keyword argument and add something like assert ’argument_name’ in kwargs in the constructor. Model managers You can optionally serialize managers into migrations and have them available in RunPython operations. This is done by defining a use_in_migrations attribute on the manager class: class MyManager(models.Manager): use_in_migrations = True class MyModel(models.Model): objects = MyManager() If you are using the from_queryset() function to dynamically generate a manager class, you need to inherit from the generated class to make it importable: class MyManager(MyBaseManager.from_queryset(CustomQuerySet)): use_in_migrations = True class MyModel(models.Model): objects = MyManager() Please refer to the notes about Historical models in migrations to see the implications that come along. Initial migrations Migration.initial The “initial migrations” for an app are the migrations that create the first version of that app’s tables. Usually an app will have just one initial migration, but in some cases of complex model interdependencies it may have two or more. Initial migrations are marked with an initial = True class attribute on the migration class. If an initial class attribute isn’t found, a migration will be considered “initial” if it is the first migration in the app (i.e. if it has no dependencies on any other migration in the same app). When the migrate --fake-initial option is used, these initial migrations are treated specially. For an initial migration that creates one or more tables (CreateModel operation), Django checks that all of those tables already exist in the database and fake-applies the migration if so. Similarly, for an initial migration that adds one or more 3.7. Migrations 297
- 302. Django Documentation, Release 1.9.3.dev20160224120324 fields (AddField operation), Django checks that all of the respective columns already exist in the database and fake- applies the migration if so. Without --fake-initial, initial migrations are treated no differently from any other migration. 3.7.6 Adding migrations to apps Adding migrations to new apps is straightforward - they come preconfigured to accept migrations, and so just run makemigrations once you’ve made some changes. If your app already has models and database tables, and doesn’t have migrations yet (for example, you created it against a previous Django version), you’ll need to convert it to use migrations; this is a simple process: $ python manage.py makemigrations your_app_label This will make a new initial migration for your app. Now, run python manage.py migrate --fake-initial, and Django will detect that you have an initial migration and that the tables it wants to cre- ate already exist, and will mark the migration as already applied. (Without the migrate --fake-initial flag, the command would error out because the tables it wants to create already exist.) Note that this only works given two things: • You have not changed your models since you made their tables. For migrations to work, you must make the initial migration first and then make changes, as Django compares changes against migration files, not the database. • You have not manually edited your database - Django won’t be able to detect that your database doesn’t match your models, you’ll just get errors when migrations try to modify those tables. The --fake-initial flag to migrate was added. Previously, Django would always automatically fake-apply initial migrations if it detected that the tables exist. 3.7.7 Historical models When you run migrations, Django is working from historical versions of your models stored in the migration files. If you write Python code using the RunPython operation, or if you have allow_migrate methods on your database routers, you will be exposed to these versions of your models. Because it’s impossible to serialize arbitrary Python code, these historical models will not have any custom meth- ods that you have defined. They will, however, have the same fields, relationships, managers (limited to those with use_in_migrations = True) and Meta options (also versioned, so they may be different from your current ones). Warning: This means that you will NOT have custom save() methods called on objects when you access them in migrations, and you will NOT have any custom constructors or instance methods. Plan appropriately! References to functions in field options such as upload_to and limit_choices_to and model manager dec- larations with managers having use_in_migrations = True are serialized in migrations, so the functions and classes will need to be kept around for as long as there is a migration referencing them. Any custom model fields will also need to be kept, since these are imported directly by migrations. In addition, the base classes of the model are just stored as pointers, so you must always keep base classes around for as long as there is a migration that contains a reference to them. On the plus side, methods and managers from these base classes inherit normally, so if you absolutely need access to these you can opt to move them into a superclass. 298 Chapter 3. Using Django
- 303. Django Documentation, Release 1.9.3.dev20160224120324 3.7.8 Considerations when removing model fields Similar to the “references to historical functions” considerations described in the previous section, removing custom model fields from your project or third-party app will cause a problem if they are referenced in old migrations. To help with this situation, Django provides some model field attributes to assist with model field deprecation using the system checks framework. Add the system_check_deprecated_details attribute to your model field similar to the following: class IPAddressField(Field): system_check_deprecated_details = { 'msg': ( 'IPAddressField has been deprecated. Support for it (except ' 'in historical migrations) will be removed in Django 1.9.' ), 'hint': 'Use GenericIPAddressField instead.', # optional 'id': 'fields.W900', # pick a unique ID for your field. } After a deprecation period of your choosing (two or three feature releases for fields in Django itself), change the system_check_deprecated_details attribute to system_check_removed_details and update the dictionary similar to: class IPAddressField(Field): system_check_removed_details = { 'msg': ( 'IPAddressField has been removed except for support in ' 'historical migrations.' ), 'hint': 'Use GenericIPAddressField instead.', 'id': 'fields.E900', # pick a unique ID for your field. } You should keep the field’s methods that are required for it to operate in database migrations such as __init__(), deconstruct(), and get_internal_type(). Keep this stub field for as long as any migrations which refer- ence the field exist. For example, after squashing migrations and removing the old ones, you should be able to remove the field completely. 3.7.9 Data Migrations As well as changing the database schema, you can also use migrations to change the data in the database itself, in conjunction with the schema if you want. Migrations that alter data are usually called “data migrations”; they’re best written as separate migrations, sitting alongside your schema migrations. Django can’t automatically generate data migrations for you, as it does with schema migrations, but it’s not very hard to write them. Migration files in Django are made up of Operations, and the main operation you use for data migrations is RunPython. To start, make an empty migration file you can work from (Django will put the file in the right place, suggest a name, and add dependencies for you): python manage.py makemigrations --empty yourappname Then, open up the file; it should look something like this: 3.7. Migrations 299
- 304. Django Documentation, Release 1.9.3.dev20160224120324 # -*- coding: utf-8 -*- # Generated by Django A.B on YYYY-MM-DD HH:MM from __future__ import unicode_literals from django.db import migrations, models class Migration(migrations.Migration): initial = True dependencies = [ ('yourappname', '0001_initial'), ] operations = [ ] Now, all you need to do is create a new function and have RunPython use it. RunPython expects a callable as its argument which takes two arguments - the first is an app registry that has the historical versions of all your models loaded into it to match where in your history the migration sits, and the second is a SchemaEditor, which you can use to manually effect database schema changes (but beware, doing this can confuse the migration autodetector!) Let’s write a simple migration that populates our new name field with the combined values of first_name and last_name (we’ve come to our senses and realized that not everyone has first and last names). All we need to do is use the historical model and iterate over the rows: # -*- coding: utf-8 -*- from __future__ import unicode_literals from django.db import migrations, models def combine_names(apps, schema_editor): # We can't import the Person model directly as it may be a newer # version than this migration expects. We use the historical version. Person = apps.get_model("yourappname", "Person") for person in Person.objects.all(): person.name = "%s %s" % (person.first_name, person.last_name) person.save() class Migration(migrations.Migration): initial = True dependencies = [ ('yourappname', '0001_initial'), ] operations = [ migrations.RunPython(combine_names), ] Once that’s done, we can just run python manage.py migrate as normal and the data migration will run in place alongside other migrations. You can pass a second callable to RunPython to run whatever logic you want executed when migrating backwards. If this callable is omitted, migrating backwards will raise an exception. 300 Chapter 3. Using Django
- 305. Django Documentation, Release 1.9.3.dev20160224120324 Accessing models from other apps When writing a RunPython function that uses models from apps other than the one in which the migration is located, the migration’s dependencies attribute should include the latest migration of each app that is involved, otherwise you may get an error similar to: LookupError: No installed app with label ’myappname’ when you try to retrieve the model in the RunPython function using apps.get_model(). In the following example, we have a migration in app1 which needs to use models in app2. We aren’t concerned with the details of move_m1 other than the fact it will need to access models from both apps. Therefore we’ve added a dependency that specifies the last migration of app2: class Migration(migrations.Migration): dependencies = [ ('app1', '0001_initial'), # added dependency to enable using models from app2 in move_m1 ('app2', '0004_foobar'), ] operations = [ migrations.RunPython(move_m1), ] More advanced migrations If you’re interested in the more advanced migration operations, or want to be able to write your own, see the migration operations reference and the “how-to” on writing migrations. 3.7.10 Squashing migrations You are encouraged to make migrations freely and not worry about how many you have; the migration code is opti- mized to deal with hundreds at a time without much slowdown. However, eventually you will want to move back from having several hundred migrations to just a few, and that’s where squashing comes in. Squashing is the act of reducing an existing set of many migrations down to one (or sometimes a few) migrations which still represent the same changes. Django does this by taking all of your existing migrations, extracting their Operations and putting them all in sequence, and then running an optimizer over them to try and reduce the length of the list - for example, it knows that CreateModel and DeleteModel cancel each other out, and it knows that AddField can be rolled into CreateModel. Once the operation sequence has been reduced as much as possible - the amount possible depends on how closely intertwined your models are and if you have any RunSQL or RunPython operations (which can’t be optimized through) - Django will then write it back out into a new set of migration files. These files are marked to say they replace the previously-squashed migrations, so they can coexist with the old mi- gration files, and Django will intelligently switch between them depending where you are in the history. If you’re still part-way through the set of migrations that you squashed, it will keep using them until it hits the end and then switch to the squashed history, while new installs will just use the new squashed migration and skip all the old ones. This enables you to squash and not mess up systems currently in production that aren’t fully up-to-date yet. The recommended process is to squash, keeping the old files, commit and release, wait until all systems are upgraded with the new release (or if you’re a third-party project, just ensure your users upgrade releases in order without skipping any), and then remove the old files, commit and do a second release. 3.7. Migrations 301
- 306. Django Documentation, Release 1.9.3.dev20160224120324 The command that backs all this is squashmigrations - just pass it the app label and migration name you want to squash up to, and it’ll get to work: $ ./manage.py squashmigrations myapp 0004 Will squash the following migrations: - 0001_initial - 0002_some_change - 0003_another_change - 0004_undo_something Do you wish to proceed? [yN] y Optimizing... Optimized from 12 operations to 7 operations. Created new squashed migration /home/andrew/Programs/DjangoTest/test/migrations/0001_squashed_0004_un You should commit this migration but leave the old ones in place; the new migration will be used for new installs. Once you are sure all instances of the codebase have applied the migrations you squashed, you can delete them. Note that model interdependencies in Django can get very complex, and squashing may result in migrations that do not run; either mis-optimized (in which case you can try again with --no-optimize, though you should also report an issue), or with a CircularDependencyError, in which case you can manually resolve it. To manually resolve a CircularDependencyError, break out one of the ForeignKeys in the circular dependency loop into a separate migration, and move the dependency on the other app with it. If you’re unsure, see how makem- igrations deals with the problem when asked to create brand new migrations from your models. In a future release of Django, squashmigrations will be updated to attempt to resolve these errors itself. Once you’ve squashed your migration, you should then commit it alongside the migrations it replaces and distribute this change to all running instances of your application, making sure that they run migrate to store the change in their database. You must then transition the squashed migration to a normal migration by: • Deleting all the migration files it replaces. • Updating all migrations that depend on the deleted migrations to depend on the squashed migration instead. • Removing the replaces attribute in the Migration class of the squashed migration (this is how Django tells that it is a squashed migration). Note: Once you’ve squashed a migration, you should not then re-squash that squashed migration until you have fully transitioned it to a normal migration. 3.7.11 Serializing values Migrations are just Python files containing the old definitions of your models - thus, to write them, Django must take the current state of your models and serialize them out into a file. While Django can serialize most things, there are some things that we just can’t serialize out into a valid Python representation - there’s no Python standard for how a value can be turned back into code (repr() only works for basic values, and doesn’t specify import paths). Django can serialize the following: • int, long, float, bool, str, unicode, bytes, None • list, set, tuple, dict 302 Chapter 3. Using Django
- 307. Django Documentation, Release 1.9.3.dev20160224120324 • datetime.date, datetime.time, and datetime.datetime instances (include those that are timezone-aware) • decimal.Decimal instances • functools.partial instances which have serializable func, args, and keywords values. • LazyObject instances which wrap a serializable value. • Any Django field • Any function or method reference (e.g. datetime.datetime.today) (must be in module’s top-level scope) • Any class reference (must be in module’s top-level scope) • Anything with a custom deconstruct() method (see below) Serialization support for functools.partial and LazyObject instances was added. Django can serialize the following on Python 3 only: • Unbound methods used from within the class body (see below) Django cannot serialize: • Nested classes • Arbitrary class instances (e.g. MyClass(4.3, 5.7)) • Lambdas Due to the fact __qualname__ was only introduced in Python 3, Django can only serialize the following pattern (an unbound method used within the class body) on Python 3, and will fail to serialize a reference to it on Python 2: class MyModel(models.Model): def upload_to(self): return "something dynamic" my_file = models.FileField(upload_to=upload_to) If you are using Python 2, we recommend you move your methods for upload_to and similar arguments that accept callables (e.g. default) to live in the main module body, rather than the class body. Adding a deconstruct() method You can let Django serialize your own custom class instances by giving the class a deconstruct() method. It takes no arguments, and should return a tuple of three things (path, args, kwargs): • path should be the Python path to the class, with the class name included as the last part (for example, myapp.custom_things.MyClass). If your class is not available at the top level of a module it is not serializable. • args should be a list of positional arguments to pass to your class’ __init__ method. Everything in this list should itself be serializable. • kwargs should be a dict of keyword arguments to pass to your class’ __init__ method. Every value should itself be serializable. Note: This return value is different from the deconstruct() method for custom fields which returns a tuple of four items. 3.7. Migrations 303
- 308. Django Documentation, Release 1.9.3.dev20160224120324 Django will write out the value as an instantiation of your class with the given arguments, similar to the way it writes out references to Django fields. To prevent a new migration from being created each time makemigrations is run, you should also add a __eq__() method to the decorated class. This function will be called by Django’s migration framework to detect changes between states. As long as all of the arguments to your class’ constructor are themselves serializable, you can use the @deconstructible class decorator from django.utils.deconstruct to add the deconstruct() method: from django.utils.deconstruct import deconstructible @deconstructible class MyCustomClass(object): def __init__(self, foo=1): self.foo = foo ... def __eq__(self, other): return self.foo == other.foo The decorator adds logic to capture and preserve the arguments on their way into your constructor, and then returns those arguments exactly when deconstruct() is called. 3.7.12 Supporting Python 2 and 3 In order to generate migrations that support both Python 2 and 3, all string literals used in your models and fields (e.g. verbose_name, related_name, etc.), must be consistently either bytestrings or text (unicode) strings in both Python 2 and 3 (rather than bytes in Python 2 and text in Python 3, the default situation for unmarked string literals.) Otherwise running makemigrations under Python 3 will generate spurious new migrations to convert all these string attributes to text. The easiest way to achieve this is to follow the advice in Django’s Python 3 porting guide and make sure that all your modules begin with from __future__ import unicode_literals, so that all unmarked string literals are always unicode, regardless of Python version. When you add this to an app with existing migrations generated on Python 2, your next run of makemigrations on Python 3 will likely generate many changes as it converts all the bytestring attributes to text strings; this is normal and should only happen once. 3.7.13 Supporting multiple Django versions If you are the maintainer of a third-party app with models, you may need to ship migrations that support multiple Django versions. In this case, you should always run makemigrations with the lowest Django version you wish to support. The migrations system will maintain backwards-compatibility according to the same policy as the rest of Django, so migration files generated on Django X.Y should run unchanged on Django X.Y+1. The migrations system does not promise forwards-compatibility, however. New features may be added, and migration files generated with newer versions of Django may not work on older versions. Upgrading from South If you already have pre-existing migrations created with South, then the upgrade process to use django.db.migrations is quite simple: 304 Chapter 3. Using Django
- 309. Django Documentation, Release 1.9.3.dev20160224120324 • Ensure all installs are fully up-to-date with their migrations. • Remove ’south’ from INSTALLED_APPS. • Delete all your (numbered) migration files, but not the directory or __init__.py - make sure you remove the .pyc files too. • Run python manage.py makemigrations. Django should see the empty migration directories and make new initial migrations in the new format. • Run python manage.py migrate --fake-initial. Django will see that the tables for the initial migrations already exist and mark them as applied without running them. (Django won’t check that the table schema match your models, just that the right table names exist). The migrate --fake-initial flag was added. Previously, initial migrations were always automatically fake- applied if existing tables were detected. Libraries/Third-party Apps If you are a library or app maintainer, and wish to support both South migrations (for Django 1.6 and below) and Django migrations (for 1.7 and above) you should keep two parallel migration sets in your app, one in each format. To aid in this, South 1.0 will automatically look for South-format migrations in a south_migrations directory first, before looking in migrations, meaning that users’ projects will transparently use the correct set as long as you put your South migrations in the south_migrations directory and your Django migrations in the migrations directory. More information is available in the South 1.0 release notes. See also: The Migrations Operations Reference Covers the schema operations API, special operations, and writing your own operations. The Writing Migrations “how-to” Explains how to structure and write database migrations for different scenarios you might encounter. 3.8 Managing files This document describes Django’s file access APIs for files such as those uploaded by a user. The lower level APIs are general enough that you could use them for other purposes. If you want to handle “static files” (JS, CSS, etc.), see Managing static files (e.g. images, JavaScript, CSS). By default, Django stores files locally, using the MEDIA_ROOT and MEDIA_URL settings. The examples below assume that you’re using these defaults. However, Django provides ways to write custom file storage systems that allow you to completely customize where and how Django stores files. The second half of this document describes how these storage systems work. 3.8.1 Using files in models When you use a FileField or ImageField, Django provides a set of APIs you can use to deal with that file. Consider the following model, using an ImageField to store a photo: 3.8. Managing files 305
- 310. Django Documentation, Release 1.9.3.dev20160224120324 from django.db import models class Car(models.Model): name = models.CharField(max_length=255) price = models.DecimalField(max_digits=5, decimal_places=2) photo = models.ImageField(upload_to='cars') Any Car instance will have a photo attribute that you can use to get at the details of the attached photo: >>> car = Car.objects.get(name="57 Chevy") >>> car.photo <ImageFieldFile: chevy.jpg> >>> car.photo.name 'cars/chevy.jpg' >>> car.photo.path '/media/cars/chevy.jpg' >>> car.photo.url 'http://media.example.com/cars/chevy.jpg' This object – car.photo in the example – is a File object, which means it has all the methods and attributes described below. Note: The file is saved as part of saving the model in the database, so the actual file name used on disk cannot be relied on until after the model has been saved. For example, you can change the file name by setting the file’s name to a path relative to the file storage’s location (MEDIA_ROOT if you are using the default FileSystemStorage): >>> import os >>> from django.conf import settings >>> initial_path = car.photo.path >>> car.photo.name = 'cars/chevy_ii.jpg' >>> new_path = settings.MEDIA_ROOT + car.photo.name >>> # Move the file on the filesystem >>> os.rename(initial_path, new_path) >>> car.save() >>> car.photo.path '/media/cars/chevy_ii.jpg' >>> car.photo.path == new_path True 3.8.2 The File object Internally, Django uses a django.core.files.File instance any time it needs to represent a file. This object is a thin wrapper around Python’s built-in file object with some Django-specific additions. Most of the time you’ll simply use a File that Django’s given you (i.e. a file attached to a model as above, or perhaps an uploaded file). If you need to construct a File yourself, the easiest way is to create one using a Python built-in file object: >>> from django.core.files import File # Create a Python file object using open() >>> f = open('/path/to/hello.world', 'w') >>> myfile = File(f) 306 Chapter 3. Using Django
- 311. Django Documentation, Release 1.9.3.dev20160224120324 Now you can use any of the documented attributes and methods of the File class. Be aware that files created in this way are not automatically closed. The following approach may be used to close files automatically: >>> from django.core.files import File # Create a Python file object using open() and the with statement >>> with open('/path/to/hello.world', 'w') as f: ... myfile = File(f) ... myfile.write('Hello World') ... >>> myfile.closed True >>> f.closed True Closing files is especially important when accessing file fields in a loop over a large number of objects. If files are not manually closed after accessing them, the risk of running out of file descriptors may arise. This may lead to the following error: IOError: [Errno 24] Too many open files 3.8.3 File storage Behind the scenes, Django delegates decisions about how and where to store files to a file storage system. This is the object that actually understands things like file systems, opening and reading files, etc. Django’s default file storage is given by the DEFAULT_FILE_STORAGE setting; if you don’t explicitly provide a storage system, this is the one that will be used. See below for details of the built-in default file storage system, and see Writing a custom storage system for information on writing your own file storage system. Storage objects Though most of the time you’ll want to use a File object (which delegates to the proper storage for that file), you can use file storage systems directly. You can create an instance of some custom file storage class, or – often more useful – you can use the global default storage system: >>> from django.core.files.storage import default_storage >>> from django.core.files.base import ContentFile >>> path = default_storage.save('/path/to/file', ContentFile('new content')) >>> path '/path/to/file' >>> default_storage.size(path) 11 >>> default_storage.open(path).read() 'new content' >>> default_storage.delete(path) >>> default_storage.exists(path) False See File storage API for the file storage API. 3.8. Managing files 307
- 312. Django Documentation, Release 1.9.3.dev20160224120324 The built-in filesystem storage class Django ships with a django.core.files.storage.FileSystemStorage class which implements basic local filesystem file storage. For example, the following code will store uploaded files under /media/photos regardless of what your MEDIA_ROOT setting is: from django.db import models from django.core.files.storage import FileSystemStorage fs = FileSystemStorage(location='/media/photos') class Car(models.Model): ... photo = models.ImageField(storage=fs) Custom storage systems work the same way: you can pass them in as the storage argument to a FileField. 3.9 Testing in Django Automated testing is an extremely useful bug-killing tool for the modern Web developer. You can use a collection of tests – a test suite – to solve, or avoid, a number of problems: • When you’re writing new code, you can use tests to validate your code works as expected. • When you’re refactoring or modifying old code, you can use tests to ensure your changes haven’t affected your application’s behavior unexpectedly. Testing a Web application is a complex task, because a Web application is made of several layers of logic – from HTTP-level request handling, to form validation and processing, to template rendering. With Django’s test-execution framework and assorted utilities, you can simulate requests, insert test data, inspect your application’s output and generally verify your code is doing what it should be doing. The best part is, it’s really easy. The preferred way to write tests in Django is using the unittest module built in to the Python standard library. This is covered in detail in the Writing and running tests document. You can also use any other Python test framework; Django provides an API and tools for that kind of integration. They are described in the Using different testing frameworks section of Advanced testing topics. 3.9.1 Writing and running tests See also: The testing tutorial, the testing tools reference, and the advanced testing topics. This document is split into two primary sections. First, we explain how to write tests with Django. Then, we explain how to run them. Writing tests Django’s unit tests use a Python standard library module: unittest. This module defines tests using a class-based approach. 308 Chapter 3. Using Django
- 313. Django Documentation, Release 1.9.3.dev20160224120324 Here is an example which subclasses from django.test.TestCase, which is a subclass of unittest.TestCase that runs each test inside a transaction to provide isolation: from django.test import TestCase from myapp.models import Animal class AnimalTestCase(TestCase): def setUp(self): Animal.objects.create(name="lion", sound="roar") Animal.objects.create(name="cat", sound="meow") def test_animals_can_speak(self): """Animals that can speak are correctly identified""" lion = Animal.objects.get(name="lion") cat = Animal.objects.get(name="cat") self.assertEqual(lion.speak(), 'The lion says "roar"') self.assertEqual(cat.speak(), 'The cat says "meow"') When you run your tests, the default behavior of the test utility is to find all the test cases (that is, subclasses of unittest.TestCase) in any file whose name begins with test, automatically build a test suite out of those test cases, and run that suite. For more details about unittest, see the Python documentation. Where should the tests live? The default startapp template creates a tests.py file in the new application. This might be fine if you only have a few tests, but as your test suite grows you’ll likely want to restructure it into a tests package so you can split your tests into different submodules such as test_models.py, test_views.py, test_forms.py, etc. Feel free to pick whatever organizational scheme you like. See also Using the Django test runner to test reusable applications. Warning: If your tests rely on database access such as creating or querying models, be sure to create your test classes as subclasses of django.test.TestCase rather than unittest.TestCase. Using unittest.TestCase avoids the cost of running each test in a transaction and flushing the database, but if your tests interact with the database their behavior will vary based on the order that the test runner executes them. This can lead to unit tests that pass when run in isolation but fail when run in a suite. Running tests Once you’ve written tests, run them using the test command of your project’s manage.py utility: $ ./manage.py test Test discovery is based on the unittest module’s built-in test discovery. By default, this will discover tests in any file named “test*.py” under the current working directory. You can specify particular tests to run by supplying any number of “test labels” to ./manage.py test. Each test label can be a full Python dotted path to a package, module, TestCase subclass, or test method. For instance: # Run all the tests in the animals.tests module $ ./manage.py test animals.tests # Run all the tests found within the 'animals' package $ ./manage.py test animals 3.9. Testing in Django 309
- 314. Django Documentation, Release 1.9.3.dev20160224120324 # Run just one test case $ ./manage.py test animals.tests.AnimalTestCase # Run just one test method $ ./manage.py test animals.tests.AnimalTestCase.test_animals_can_speak You can also provide a path to a directory to discover tests below that directory: $ ./manage.py test animals/ You can specify a custom filename pattern match using the -p (or --pattern) option, if your test files are named differently from the test*.py pattern: $ ./manage.py test --pattern="tests_*.py" If you press Ctrl-C while the tests are running, the test runner will wait for the currently running test to complete and then exit gracefully. During a graceful exit the test runner will output details of any test failures, report on how many tests were run and how many errors and failures were encountered, and destroy any test databases as usual. Thus pressing Ctrl-C can be very useful if you forget to pass the --failfast option, notice that some tests are unexpectedly failing and want to get details on the failures without waiting for the full test run to complete. If you do not want to wait for the currently running test to finish, you can press Ctrl-C a second time and the test run will halt immediately, but not gracefully. No details of the tests run before the interruption will be reported, and any test databases created by the run will not be destroyed. Test with warnings enabled It’s a good idea to run your tests with Python warnings enabled: python -Wall manage.py test. The -Wall flag tells Python to display deprecation warnings. Django, like many other Python libraries, uses these warnings to flag when features are going away. It also might flag areas in your code that aren’t strictly wrong but could benefit from a better implementation. The test database Tests that require a database (namely, model tests) will not use your “real” (production) database. Separate, blank databases are created for the tests. Regardless of whether the tests pass or fail, the test databases are destroyed when all the tests have been executed. You can prevent the test databases from being destroyed by using the test --keepdb flag. This preserves the test database between runs. If the database does not exist, it will first be created. Any migrations will also be applied in order to keep it up to date. The default test database names are created by prepending test_ to the value of each NAME in DATABASES. When using SQLite, the tests will use an in-memory database by default (i.e., the database will be created in memory, bypassing the filesystem entirely!). The TEST dictionary in DATABASES offers a number of settings to configure your test database. For example, if you want to use a different database name, specify NAME in the TEST dictionary for any given database in DATABASES. On PostgreSQL, USER will also need read access to the built-in postgres database. Aside from using a separate database, the test runner will otherwise use all of the same database settings you have in your settings file: ENGINE, USER, HOST, etc. The test database is created by the user specified by USER, so you’ll need to make sure that the given user account has sufficient privileges to create a new database on the system. 310 Chapter 3. Using Django
- 315. Django Documentation, Release 1.9.3.dev20160224120324 For fine-grained control over the character encoding of your test database, use the CHARSET TEST option. If you’re using MySQL, you can also use the COLLATION option to control the particular collation used by the test database. See the settings documentation for details of these and other advanced settings. If using a SQLite in-memory database with Python 3.4+ and SQLite 3.7.13+, shared cache will be enabled, so you can write tests with ability to share the database between threads. The ability to use SQLite with a shared cache as described above was added. Finding data from your production database when running tests? If your code attempts to access the database when its modules are compiled, this will occur before the test database is set up, with potentially unexpected results. For example, if you have a database query in module-level code and a real database exists, production data could pollute your tests. It is a bad idea to have such import-time database queries in your code anyway - rewrite your code so that it doesn’t do this. This also applies to customized implementations of ready(). See also: The advanced multi-db testing topics. Order in which tests are executed In order to guarantee that all TestCase code starts with a clean database, the Django test runner reorders tests in the following way: • All TestCase subclasses are run first. • Then, all other Django-based tests (test cases based on SimpleTestCase, including TransactionTestCase) are run with no particular ordering guaranteed nor enforced among them. • Then any other unittest.TestCase tests (including doctests) that may alter the database without restoring it to its original state are run. Note: The new ordering of tests may reveal unexpected dependencies on test case ordering. This is the case with doctests that relied on state left in the database by a given TransactionTestCase test, they must be updated to be able to run independently. You may reverse the execution order inside groups by passing the test --reverse option. This can help ensure your tests are independent from each other. Rollback emulation Any initial data loaded in migrations will only be available in TestCase tests and not in TransactionTestCase tests, and additionally only on backends where transactions are supported (the most important exception being My- ISAM). This is also true for tests which rely on TransactionTestCase such as LiveServerTestCase and StaticLiveServerTestCase. Django can reload that data for you on a per-testcase basis by setting the serialized_rollback option to True in the body of the TestCase or TransactionTestCase, but note that this will slow down that test suite by approximately 3x. 3.9. Testing in Django 311
- 316. Django Documentation, Release 1.9.3.dev20160224120324 Third-party apps or those developing against MyISAM will need to set this; in general, however, you should be developing your own projects against a transactional database and be using TestCase for most tests, and thus not need this setting. The initial serialization is usually very quick, but if you wish to exclude some apps from this process (and speed up test runs slightly), you may add those apps to TEST_NON_SERIALIZED_APPS. To prevent serialized data from being loaded twice, setting serialized_rollback=True disables the post_migrate signal when flushing the test database. Other test conditions Regardless of the value of the DEBUG setting in your configuration file, all Django tests run with DEBUG=False. This is to ensure that the observed output of your code matches what will be seen in a production setting. Caches are not cleared after each test, and running “manage.py test fooapp” can insert data from the tests into the cache of a live system if you run your tests in production because, unlike databases, a separate “test cache” is not used. This behavior may change in the future. Understanding the test output When you run your tests, you’ll see a number of messages as the test runner prepares itself. You can control the level of detail of these messages with the verbosity option on the command line: Creating test database... Creating table myapp_animal Creating table myapp_mineral This tells you that the test runner is creating a test database, as described in the previous section. Once the test database has been created, Django will run your tests. If everything goes well, you’ll see something like this: ---------------------------------------------------------------------- Ran 22 tests in 0.221s OK If there are test failures, however, you’ll see full details about which tests failed: ====================================================================== FAIL: test_was_published_recently_with_future_poll (polls.tests.PollMethodTests) ---------------------------------------------------------------------- Traceback (most recent call last): File "/dev/mysite/polls/tests.py", line 16, in test_was_published_recently_with_future_poll self.assertEqual(future_poll.was_published_recently(), False) AssertionError: True != False ---------------------------------------------------------------------- Ran 1 test in 0.003s FAILED (failures=1) A full explanation of this error output is beyond the scope of this document, but it’s pretty intuitive. You can consult the documentation of Python’s unittest library for details. Note that the return code for the test-runner script is 1 for any number of failed and erroneous tests. If all the tests pass, the return code is 0. This feature is useful if you’re using the test-runner script in a shell script and need to test for success or failure at that level. 312 Chapter 3. Using Django
- 317. Django Documentation, Release 1.9.3.dev20160224120324 Speeding up the tests In recent versions of Django, the default password hasher is rather slow by design. If during your tests you are authenticating many users, you may want to use a custom settings file and set the PASSWORD_HASHERS setting to a faster hashing algorithm: PASSWORD_HASHERS = [ 'django.contrib.auth.hashers.MD5PasswordHasher', ] Don’t forget to also include in PASSWORD_HASHERS any hashing algorithm used in fixtures, if any. 3.9.2 Testing tools Django provides a small set of tools that come in handy when writing tests. The test client The test client is a Python class that acts as a dummy Web browser, allowing you to test your views and interact with your Django-powered application programmatically. Some of the things you can do with the test client are: • Simulate GET and POST requests on a URL and observe the response – everything from low-level HTTP (result headers and status codes) to page content. • See the chain of redirects (if any) and check the URL and status code at each step. • Test that a given request is rendered by a given Django template, with a template context that contains certain values. Note that the test client is not intended to be a replacement for Selenium or other “in-browser” frameworks. Django’s test client has a different focus. In short: • Use Django’s test client to establish that the correct template is being rendered and that the template is passed the correct context data. • Use in-browser frameworks like Selenium to test rendered HTML and the behavior of Web pages, namely JavaScript functionality. Django also provides special support for those frameworks; see the section on LiveServerTestCase for more details. A comprehensive test suite should use a combination of both test types. Overview and a quick example To use the test client, instantiate django.test.Client and retrieve Web pages: >>> from django.test import Client >>> c = Client() >>> response = c.post('/login/', {'username': 'john', 'password': 'smith'}) >>> response.status_code 200 >>> response = c.get('/customer/details/') >>> response.content b'<!DOCTYPE html...' 3.9. Testing in Django 313
- 318. Django Documentation, Release 1.9.3.dev20160224120324 As this example suggests, you can instantiate Client from within a session of the Python interactive interpreter. Note a few important things about how the test client works: • The test client does not require the Web server to be running. In fact, it will run just fine with no Web server running at all! That’s because it avoids the overhead of HTTP and deals directly with the Django framework. This helps make the unit tests run quickly. • When retrieving pages, remember to specify the path of the URL, not the whole domain. For example, this is correct: >>> c.get('/login/') This is incorrect: >>> c.get('https://www.example.com/login/') The test client is not capable of retrieving Web pages that are not powered by your Django project. If you need to retrieve other Web pages, use a Python standard library module such as urllib. • To resolve URLs, the test client uses whatever URLconf is pointed-to by your ROOT_URLCONF setting. • Although the above example would work in the Python interactive interpreter, some of the test client’s function- ality, notably the template-related functionality, is only available while tests are running. The reason for this is that Django’s test runner performs a bit of black magic in order to determine which template was loaded by a given view. This black magic (essentially a patching of Django’s template system in memory) only happens during test running. • By default, the test client will disable any CSRF checks performed by your site. If, for some reason, you want the test client to perform CSRF checks, you can create an instance of the test client that enforces CSRF checks. To do this, pass in the enforce_csrf_checks argument when you construct your client: >>> from django.test import Client >>> csrf_client = Client(enforce_csrf_checks=True) Making requests Use the django.test.Client class to make requests. class Client(enforce_csrf_checks=False, **defaults) It requires no arguments at time of construction. However, you can use keywords arguments to specify some default headers. For example, this will send a User-Agent HTTP header in each request: >>> c = Client(HTTP_USER_AGENT='Mozilla/5.0') The values from the extra keywords arguments passed to get(), post(), etc. have precedence over the defaults passed to the class constructor. The enforce_csrf_checks argument can be used to test CSRF protection (see above). Once you have a Client instance, you can call any of the following methods: get(path, data=None, follow=False, secure=False, **extra) Makes a GET request on the provided path and returns a Response object, which is documented below. The key-value pairs in the data dictionary are used to create a GET data payload. For example: >>> c = Client() >>> c.get('/customers/details/', {'name': 'fred', 'age': 7}) 314 Chapter 3. Using Django
- 319. Django Documentation, Release 1.9.3.dev20160224120324 ...will result in the evaluation of a GET request equivalent to: /customers/details/?name=fred&age=7 The extra keyword arguments parameter can be used to specify headers to be sent in the request. For example: >>> c = Client() >>> c.get('/customers/details/', {'name': 'fred', 'age': 7}, ... HTTP_X_REQUESTED_WITH='XMLHttpRequest') ...will send the HTTP header HTTP_X_REQUESTED_WITH to the details view, which is a good way to test code paths that use the django.http.HttpRequest.is_ajax() method. CGI specification The headers sent via **extra should follow CGI specification. For example, emulating a different “Host” header as sent in the HTTP request from the browser to the server should be passed as HTTP_HOST. If you already have the GET arguments in URL-encoded form, you can use that encoding instead of using the data argument. For example, the previous GET request could also be posed as: >>> c = Client() >>> c.get('/customers/details/?name=fred&age=7') If you provide a URL with both an encoded GET data and a data argument, the data argument will take precedence. If you set follow to True the client will follow any redirects and a redirect_chain attribute will be set in the response object containing tuples of the intermediate urls and status codes. If you had a URL /redirect_me/ that redirected to /next/, that redirected to /final/, this is what you’d see: >>> response = c.get('/redirect_me/', follow=True) >>> response.redirect_chain [('http://testserver/next/', 302), ('http://testserver/final/', 302)] If you set secure to True the client will emulate an HTTPS request. post(path, data=None, content_type=MULTIPART_CONTENT, follow=False, secure=False, **extra) Makes a POST request on the provided path and returns a Response object, which is documented below. The key-value pairs in the data dictionary are used to submit POST data. For example: >>> c = Client() >>> c.post('/login/', {'name': 'fred', 'passwd': 'secret'}) ...will result in the evaluation of a POST request to this URL: /login/ ...with this POST data: name=fred&passwd=secret If you provide content_type (e.g. text/xml for an XML payload), the contents of data will be sent as-is in the POST request, using content_type in the HTTP Content-Type header. 3.9. Testing in Django 315
- 320. Django Documentation, Release 1.9.3.dev20160224120324 If you don’t provide a value for content_type, the values in data will be transmitted with a con- tent type of multipart/form-data. In this case, the key-value pairs in data will be encoded as a multipart message and used to create the POST data payload. To submit multiple values for a given key – for example, to specify the selections for a <select multiple> – provide the values as a list or tuple for the required key. For example, this value of data would submit three selected values for the field named choices: {'choices': ('a', 'b', 'd')} Submitting files is a special case. To POST a file, you need only provide the file field name as a key, and a file handle to the file you wish to upload as a value. For example: >>> c = Client() >>> with open('wishlist.doc') as fp: ... c.post('/customers/wishes/', {'name': 'fred', 'attachment': fp}) (The name attachment here is not relevant; use whatever name your file-processing code expects.) You may also provide any file-like object (e.g., StringIO or BytesIO) as a file handle. The ability to use a file-like object was added. Note that if you wish to use the same file handle for multiple post() calls then you will need to manually reset the file pointer between posts. The easiest way to do this is to manually close the file after it has been provided to post(), as demonstrated above. You should also ensure that the file is opened in a way that allows the data to be read. If your file contains binary data such as an image, this means you will need to open the file in rb (read binary) mode. The extra argument acts the same as for Client.get(). If the URL you request with a POST contains encoded parameters, these parameters will be made available in the request.GET data. For example, if you were to make the request: >>> c.post('/login/?visitor=true', {'name': 'fred', 'passwd': 'secret'}) ... the view handling this request could interrogate request.POST to retrieve the username and password, and could interrogate request.GET to determine if the user was a visitor. If you set follow to True the client will follow any redirects and a redirect_chain attribute will be set in the response object containing tuples of the intermediate urls and status codes. If you set secure to True the client will emulate an HTTPS request. head(path, data=None, follow=False, secure=False, **extra) Makes a HEAD request on the provided path and returns a Response object. This method works just like Client.get(), including the follow, secure and extra arguments, except it does not return a message body. options(path, data=’‘, content_type=’application/octet-stream’, follow=False, secure=False, **ex- tra) Makes an OPTIONS request on the provided path and returns a Response object. Useful for testing RESTful interfaces. When data is provided, it is used as the request body, and a Content-Type header is set to content_type. The follow, secure and extra arguments act the same as for Client.get(). put(path, data=’‘, content_type=’application/octet-stream’, follow=False, secure=False, **extra) Makes a PUT request on the provided path and returns a Response object. Useful for testing RESTful interfaces. 316 Chapter 3. Using Django
- 321. Django Documentation, Release 1.9.3.dev20160224120324 When data is provided, it is used as the request body, and a Content-Type header is set to content_type. The follow, secure and extra arguments act the same as for Client.get(). patch(path, data=’‘, content_type=’application/octet-stream’, follow=False, secure=False, **extra) Makes a PATCH request on the provided path and returns a Response object. Useful for testing REST- ful interfaces. The follow, secure and extra arguments act the same as for Client.get(). delete(path, data=’‘, content_type=’application/octet-stream’, follow=False, secure=False, **extra) Makes an DELETE request on the provided path and returns a Response object. Useful for testing RESTful interfaces. When data is provided, it is used as the request body, and a Content-Type header is set to content_type. The follow, secure and extra arguments act the same as for Client.get(). trace(path, follow=False, secure=False, **extra) Makes a TRACE request on the provided path and returns a Response object. Useful for simulating diagnostic probes. Unlike the other request methods, data is not provided as a keyword parameter in order to comply with RFC 2616, which mandates that TRACE requests should not have an entity-body. The follow, secure, and extra arguments act the same as for Client.get(). login(**credentials) If your site uses Django’s authentication system and you deal with logging in users, you can use the test client’s login() method to simulate the effect of a user logging into the site. Inactive users (is_active=False) are not permitted to login as this method is meant to be equivalent to the login() view which uses AuthenticationForm and therefore defaults to rejecting users who are inactive. After you call this method, the test client will have all the cookies and session data required to pass any login-based tests that may form part of a view. The format of the credentials argument depends on which authentication backend you’re using (which is configured by your AUTHENTICATION_BACKENDS setting). If you’re using the standard authentication backend provided by Django (ModelBackend), credentials should be the user’s username and password, provided as keyword arguments: >>> c = Client() >>> c.login(username='fred', password='secret') # Now you can access a view that's only available to logged-in users. If you’re using a different authentication backend, this method may require different credentials. It requires whichever credentials are required by your backend’s authenticate() method. login() returns True if it the credentials were accepted and login was successful. Finally, you’ll need to remember to create user accounts before you can use this method. As we explained above, the test runner is executed using a test database, which contains no users by default. As a result, user accounts that are valid on your production site will not work under test conditions. You’ll need to create users as part of the test suite – either manually (using the Django model API) or with a test fixture. Remember that if you want your test user to have a password, you can’t set the user’s password by setting the password attribute directly – you must use the set_password() function to store a correctly hashed 3.9. Testing in Django 317
- 322. Django Documentation, Release 1.9.3.dev20160224120324 password. Alternatively, you can use the create_user() helper method to create a new user with a correctly hashed password. force_login(user, backend=None) If your site uses Django’s authentication system, you can use the force_login() method to simulate the effect of a user logging into the site. Use this method instead of login() when a test requires a user be logged in and the details of how a user logged in aren’t important. Unlike login(), this method skips the authentication and verification steps: inactive users (is_active=False) are permitted to login and the user’s credentials don’t need to be provided. The user will have its backend attribute set to the value of the backend argument (which should be a dotted Python path string), or to settings.AUTHENTICATION_BACKENDS[0] if a value isn’t provided. The authenticate() function called by login() normally annotates the user like this. This method is faster than login() since the expensive password hashing algorithms are bypassed. Also, you can speed up login() by using a weaker hasher while testing. logout() If your site uses Django’s authentication system, the logout() method can be used to simulate the effect of a user logging out of your site. After you call this method, the test client will have all the cookies and session data cleared to defaults. Subsequent requests will appear to come from an AnonymousUser. Testing responses The get() and post() methods both return a Response object. This Response object is not the same as the HttpResponse object returned by Django views; the test response object has some additional data useful for test code to verify. Specifically, a Response object has the following attributes: class Response client The test client that was used to make the request that resulted in the response. content The body of the response, as a bytestring. This is the final page content as rendered by the view, or any error message. context The template Context instance that was used to render the template that produced the response content. If the rendered page used multiple templates, then context will be a list of Context objects, in the order in which they were rendered. Regardless of the number of templates used during rendering, you can retrieve context values using the [] operator. For example, the context variable name could be retrieved using: >>> response = client.get('/foo/') >>> response.context['name'] 'Arthur' Not using Django templates? 318 Chapter 3. Using Django
- 323. Django Documentation, Release 1.9.3.dev20160224120324 This attribute is only populated when using the DjangoTemplates backend. If you’re using another template engine, context_data may be a suitable alternative on responses with that attribute. json(**kwargs) The body of the response, parsed as JSON. Extra keyword arguments are passed to json.loads(). For example: >>> response = client.get('/foo/') >>> response.json()['name'] 'Arthur' If the Content-Type header is not "application/json", then a ValueError will be raised when trying to parse the response. request The request data that stimulated the response. wsgi_request The WSGIRequest instance generated by the test handler that generated the response. status_code The HTTP status of the response, as an integer. See RFC 2616#section-10 for a full list of HTTP status codes. templates A list of Template instances used to render the final content, in the order they were rendered. For each template in the list, use template.name to get the template’s file name, if the template was loaded from a file. (The name is a string such as ’admin/index.html’.) Not using Django templates? This attribute is only populated when using the DjangoTemplates backend. If you’re using another template engine, template_name may be a suitable alternative if you only need the name of the tem- plate used for rendering. resolver_match An instance of ResolverMatch for the response. You can use the func attribute, for example, to verify the view that served the response: # my_view here is a function based view self.assertEqual(response.resolver_match.func, my_view) # class-based views need to be compared by name, as the functions # generated by as_view() won't be equal self.assertEqual(response.resolver_match.func.__name__, MyView.as_view().__name__) If the given URL is not found, accessing this attribute will raise a Resolver404 exception. You can also use dictionary syntax on the response object to query the value of any settings in the HTTP headers. For example, you could determine the content type of a response using response[’Content-Type’]. Exceptions If you point the test client at a view that raises an exception, that exception will be visible in the test case. You can then use a standard try ... except block or assertRaises() to test for exceptions. 3.9. Testing in Django 319
- 324. Django Documentation, Release 1.9.3.dev20160224120324 The only exceptions that are not visible to the test client are Http404, PermissionDenied, SystemExit, and SuspiciousOperation. Django catches these exceptions internally and converts them into the appropriate HTTP response codes. In these cases, you can check response.status_code in your test. Persistent state The test client is stateful. If a response returns a cookie, then that cookie will be stored in the test client and sent with all subsequent get() and post() requests. Expiration policies for these cookies are not followed. If you want a cookie to expire, either delete it manually or create a new Client instance (which will effectively delete all cookies). A test client has two attributes that store persistent state information. You can access these properties as part of a test condition. Client.cookies A Python SimpleCookie object, containing the current values of all the client cookies. See the documentation of the http.cookies module for more. Client.session A dictionary-like object containing session information. See the session documentation for full details. To modify the session and then save it, it must be stored in a variable first (because a new SessionStore is created every time this property is accessed): def test_something(self): session = self.client.session session['somekey'] = 'test' session.save() Example The following is a simple unit test using the test client: import unittest from django.test import Client class SimpleTest(unittest.TestCase): def setUp(self): # Every test needs a client. self.client = Client() def test_details(self): # Issue a GET request. response = self.client.get('/customer/details/') # Check that the response is 200 OK. self.assertEqual(response.status_code, 200) # Check that the rendered context contains 5 customers. self.assertEqual(len(response.context['customers']), 5) See also: django.test.RequestFactory 320 Chapter 3. Using Django
- 325. Django Documentation, Release 1.9.3.dev20160224120324 Provided test case classes Normal Python unit test classes extend a base class of unittest.TestCase. Django provides a few extensions of this base class: standard library unittest django.test LiveServerTestCaseTestCase TransactionTestCase SimpleTestCase TestCase Fig. 3.1: Hierarchy of Django unit testing classes SimpleTestCase class SimpleTestCase A thin subclass of unittest.TestCase, it extends it with some basic functionality like: • Saving and restoring the Python warning machinery state. • Some useful assertions like: – Checking that a callable raises a certain exception. – Testing form field rendering and error treatment. – Testing HTML responses for the presence/lack of a given fragment. – Verifying that a template has/hasn’t been used to generate a given response content. – Verifying a HTTP redirect is performed by the app. – Robustly testing two HTML fragments for equality/inequality or containment. – Robustly testing two XML fragments for equality/inequality. 3.9. Testing in Django 321
- 326. Django Documentation, Release 1.9.3.dev20160224120324 – Robustly testing two JSON fragments for equality. • The ability to run tests with modified settings. • Using the client Client. • Custom test-time URL maps. If you need any of the other more complex and heavyweight Django-specific features like: • Testing or using the ORM. • Database fixtures. • Test skipping based on database backend features. • The remaining specialized assert* methods. then you should use TransactionTestCase or TestCase instead. SimpleTestCase.allow_database_queries SimpleTestCase disallows database queries by default. This helps to avoid executing write queries which will affect other tests since each SimpleTestCase test isn’t run in a transaction. If you aren’t concerned about this problem, you can disable this behavior by setting the allow_database_queries class attribute to True on your test class. SimpleTestCase inherits from unittest.TestCase. Warning: SimpleTestCase and its subclasses (e.g. TestCase, ...) rely on setUpClass() and tearDownClass() to perform some class-wide initialization (e.g. overriding settings). If you need to over- ride those methods, don’t forget to call the super implementation: class MyTestCase(TestCase): @classmethod def setUpClass(cls): super(MyTestCase, cls).setUpClass() ... @classmethod def tearDownClass(cls): ... super(MyTestCase, cls).tearDownClass() Be sure to account for Python’s behavior if an exception is raised during setUpClass(). If that happens, neither the tests in the class nor tearDownClass() are run. In the case of django.test.TestCase, this will leak the transaction created in super() which results in various symptoms including a segmentation fault on some platforms (reported on OS X). If you want to intentionally raise an exception such as unittest.SkipTest in setUpClass(), be sure to do it before calling super() to avoid this. TransactionTestCase class TransactionTestCase Django’s TestCase class (described below) makes use of database transaction facilities to speed up the process of resetting the database to a known state at the beginning of each test. A consequence of this, however, is that some database behaviors cannot be tested within a Django TestCase class. For instance, you cannot test that a block of code is executing within a transaction, as is required when using select_for_update(). In those cases, you should use TransactionTestCase. 322 Chapter 3. Using Django
- 327. Django Documentation, Release 1.9.3.dev20160224120324 In older versions of Django, the effects of transaction commit and rollback could not be tested within a TestCase. With the completion of the deprecation cycle of the old-style transaction management in Django 1.8, transaction management commands (e.g. transaction.commit()) are no longer disabled within TestCase. TransactionTestCase and TestCase are identical except for the manner in which the database is reset to a known state and the ability for test code to test the effects of commit and rollback: • A TransactionTestCase resets the database after the test runs by truncating all tables. A TransactionTestCase may call commit and rollback and observe the effects of these calls on the database. • A TestCase, on the other hand, does not truncate tables after a test. Instead, it encloses the test code in a database transaction that is rolled back at the end of the test. This guarantees that the rollback at the end of the test restores the database to its initial state. Warning: TestCase running on a database that does not support rollback (e.g. MySQL with the MyISAM storage engine), and all instances of TransactionTestCase, will roll back at the end of the test by deleting all data from the test database. Apps will not see their data reloaded; if you need this functionality (for example, third-party apps should enable this) you can set serialized_rollback = True inside the TestCase body. TransactionTestCase inherits from SimpleTestCase. TestCase class TestCase This class provides some additional capabilities that can be useful for testing websites. Converting a normal unittest.TestCase to a Django TestCase is easy: Just change the base class of your test from ’unittest.TestCase’ to ’django.test.TestCase’. All of the standard Python unit test function- ality will continue to be available, but it will be augmented with some useful additions, including: • Automatic loading of fixtures. • Wraps the tests within two nested atomic blocks: one for the whole class and one for each test. • Creates a TestClient instance. • Django-specific assertions for testing for things like redirection and form errors. classmethod TestCase.setUpTestData() The class-level atomic block described above allows the creation of initial data at the class level, once for the whole TestCase. This technique allows for faster tests as compared to using setUp(). For example: from django.test import TestCase class MyTests(TestCase): @classmethod def setUpTestData(cls): # Set up data for the whole TestCase cls.foo = Foo.objects.create(bar="Test") ... def test1(self): # Some test using self.foo ... def test2(self): 3.9. Testing in Django 323
- 328. Django Documentation, Release 1.9.3.dev20160224120324 # Some other test using self.foo ... Note that if the tests are run on a database with no transaction support (for instance, MySQL with the MyISAM engine), setUpTestData() will be called before each test, negating the speed benefits. Be careful not to modify any objects created in setUpTestData() in your test methods. Modifications to in-memory objects from setup work done at the class level will persist between test methods. If you do need to modify them, you could reload them in the setUp() method with refresh_from_db(), for example. Warning: If you want to test some specific database transaction behavior, you should use TransactionTestCase, as TestCase wraps test execution within an atomic() block. TestCase inherits from TransactionTestCase. LiveServerTestCase class LiveServerTestCase LiveServerTestCase does basically the same as TransactionTestCase with one extra feature: it launches a live Django server in the background on setup, and shuts it down on teardown. This allows the use of automated test clients other than the Django dummy client such as, for example, the Selenium client, to execute a series of functional tests inside a browser and simulate a real user’s actions. By default the live server listens on localhost and picks the first available port in the 8081-8179 range. Its full URL can be accessed with self.live_server_url during the tests. In earlier versions, the live server’s default address was always ’localhost:8081’. If you’d like to select another address, you may pass a different one using the test --liveserver option, for example: $ ./manage.py test --liveserver=localhost:8082 In older versions live_server_url could only be accessed from an instance. It now is a class property and can be accessed from class methods like setUpClass(). Another way of changing the default server address is by setting the DJANGO_LIVE_TEST_SERVER_ADDRESS environment variable somewhere in your code (for example, in a custom test runner): import os os.environ['DJANGO_LIVE_TEST_SERVER_ADDRESS'] = 'localhost:8082' In the case where the tests are run by multiple processes in parallel (for example, in the context of several simulta- neous continuous integration builds), the processes will compete for the same address, and therefore your tests might randomly fail with an “Address already in use” error. To avoid this problem, you can pass a comma-separated list of ports or ranges of ports (at least as many as the number of potential parallel processes). For example: $ ./manage.py test --liveserver=localhost:8082,8090-8100,9000-9200,7041 Then, during test execution, each new live test server will try every specified port until it finds one that is free and takes it. To demonstrate how to use LiveServerTestCase, let’s write a simple Selenium test. First of all, you need to install the selenium package into your Python path: $ pip install selenium 324 Chapter 3. Using Django
- 329. Django Documentation, Release 1.9.3.dev20160224120324 Then, add a LiveServerTestCase-based test to your app’s tests module (for example: myapp/tests.py). For this example, we’ll assume you’re using the staticfiles app and want to have static files served during the execution of your tests similar to what we get at development time with DEBUG=True, i.e. without having to collect them using collectstatic. We’ll use the StaticLiveServerTestCase subclass which provides that functionality. Replace it with django.test.LiveServerTestCase if you don’t need that. The code for this test may look as follows: from django.contrib.staticfiles.testing import StaticLiveServerTestCase from selenium.webdriver.firefox.webdriver import WebDriver class MySeleniumTests(StaticLiveServerTestCase): fixtures = ['user-data.json'] @classmethod def setUpClass(cls): super(MySeleniumTests, cls).setUpClass() cls.selenium = WebDriver() @classmethod def tearDownClass(cls): cls.selenium.quit() super(MySeleniumTests, cls).tearDownClass() def test_login(self): self.selenium.get('%s%s' % (self.live_server_url, '/login/')) username_input = self.selenium.find_element_by_name("username") username_input.send_keys('myuser') password_input = self.selenium.find_element_by_name("password") password_input.send_keys('secret') self.selenium.find_element_by_xpath('//input[@value="Log in"]').click() Finally, you may run the test as follows: $ ./manage.py test myapp.tests.MySeleniumTests.test_login This example will automatically open Firefox then go to the login page, enter the credentials and press the “Log in” button. Selenium offers other drivers in case you do not have Firefox installed or wish to use another browser. The example above is just a tiny fraction of what the Selenium client can do; check out the full reference for more details. Note: When using an in-memory SQLite database to run the tests, the same database connection will be shared by two threads in parallel: the thread in which the live server is run and the thread in which the test case is run. It’s important to prevent simultaneous database queries via this shared connection by the two threads, as that may sometimes randomly cause the tests to fail. So you need to ensure that the two threads don’t access the database at the same time. In particular, this means that in some cases (for example, just after clicking a link or submitting a form), you might need to check that a response is received by Selenium and that the next page is loaded before proceeding with further test execution. Do this, for example, by making Selenium wait until the <body> HTML tag is found in the response (requires Selenium > 2.13): def test_login(self): from selenium.webdriver.support.wait import WebDriverWait timeout = 2 ... self.selenium.find_element_by_xpath('//input[@value="Log in"]').click() # Wait until the response is received WebDriverWait(self.selenium, timeout).until( lambda driver: driver.find_element_by_tag_name('body')) 3.9. Testing in Django 325
- 330. Django Documentation, Release 1.9.3.dev20160224120324 The tricky thing here is that there’s really no such thing as a “page load,” especially in modern Web apps that generate HTML dynamically after the server generates the initial document. So, simply checking for the presence of <body> in the response might not necessarily be appropriate for all use cases. Please refer to the Selenium FAQ and Selenium documentation for more information. Test cases features Default test client SimpleTestCase.client Every test case in a django.test.*TestCase instance has access to an instance of a Django test client. This client can be accessed as self.client. This client is recreated for each test, so you don’t have to worry about state (such as cookies) carrying over from one test to another. This means, instead of instantiating a Client in each test: import unittest from django.test import Client class SimpleTest(unittest.TestCase): def test_details(self): client = Client() response = client.get('/customer/details/') self.assertEqual(response.status_code, 200) def test_index(self): client = Client() response = client.get('/customer/index/') self.assertEqual(response.status_code, 200) ...you can just refer to self.client, like so: from django.test import TestCase class SimpleTest(TestCase): def test_details(self): response = self.client.get('/customer/details/') self.assertEqual(response.status_code, 200) def test_index(self): response = self.client.get('/customer/index/') self.assertEqual(response.status_code, 200) Customizing the test client SimpleTestCase.client_class If you want to use a different Client class (for example, a subclass with customized behavior), use the client_class class attribute: from django.test import TestCase, Client class MyTestClient(Client): # Specialized methods for your environment 326 Chapter 3. Using Django
- 331. Django Documentation, Release 1.9.3.dev20160224120324 ... class MyTest(TestCase): client_class = MyTestClient def test_my_stuff(self): # Here self.client is an instance of MyTestClient... call_some_test_code() Fixture loading TransactionTestCase.fixtures A test case for a database-backed website isn’t much use if there isn’t any data in the database. Tests are more readable and it’s more maintainable to create objects using the ORM, for example in TestCase.setUpTestData(), however, you can also use fixtures. A fixture is a collection of data that Django knows how to import into a database. For example, if your site has user accounts, you might set up a fixture of fake user accounts in order to populate your database during tests. The most straightforward way of creating a fixture is to use the manage.py dumpdata command. This assumes you already have some data in your database. See the dumpdata documentation for more details. Once you’ve created a fixture and placed it in a fixtures directory in one of your INSTALLED_APPS, you can use it in your unit tests by specifying a fixtures class attribute on your django.test.TestCase subclass: from django.test import TestCase from myapp.models import Animal class AnimalTestCase(TestCase): fixtures = ['mammals.json', 'birds'] def setUp(self): # Test definitions as before. call_setup_methods() def testFluffyAnimals(self): # A test that uses the fixtures. call_some_test_code() Here’s specifically what will happen: • At the start of each test, before setUp() is run, Django will flush the database, returning the database to the state it was in directly after migrate was called. • Then, all the named fixtures are installed. In this example, Django will install any JSON fixture named mammals, followed by any fixture named birds. See the loaddata documentation for more details on defining and installing fixtures. For performance reasons, TestCase loads fixtures once for the entire test class, before setUpTestData(), in- stead of before each test, and it uses transactions to clean the database before each test. In any case, you can be certain that the outcome of a test will not be affected by another test or by the order of test execution. By default, fixtures are only loaded into the default database. If you are using multiple databases and set multi_db=True, fixtures will be loaded into all databases. 3.9. Testing in Django 327
- 332. Django Documentation, Release 1.9.3.dev20160224120324 URLconf configuration SimpleTestCase.urls Deprecated since version 1.8: Use @override_settings(ROOT_URLCONF=...) instead for URLconf con- figuration. If your application provides views, you may want to include tests that use the test client to exercise those views. However, an end user is free to deploy the views in your application at any URL of their choosing. This means that your tests can’t rely upon the fact that your views will be available at a particular URL. In order to provide a reliable URL space for your test, django.test.*TestCase classes provide the ability to customize the URLconf configuration for the duration of the execution of a test suite. If your *TestCase instance defines an urls attribute, the *TestCase will use the value of that attribute as the ROOT_URLCONF for the duration of that test. For example: from django.test import TestCase class TestMyViews(TestCase): urls = 'myapp.test_urls' def test_index_page_view(self): # Here you'd test your view using ``Client``. call_some_test_code() This test case will use the contents of myapp.test_urls as the URLconf for the duration of the test case. Multi-database support TransactionTestCase.multi_db Django sets up a test database corresponding to every database that is defined in the DATABASES definition in your settings file. However, a big part of the time taken to run a Django TestCase is consumed by the call to flush that ensures that you have a clean database at the start of each test run. If you have multiple databases, multiple flushes are required (one for each database), which can be a time consuming activity – especially if your tests don’t need to test multi-database activity. As an optimization, Django only flushes the default database at the start of each test run. If your setup contains multiple databases, and you have a test that requires every database to be clean, you can use the multi_db attribute on the test suite to request a full flush. For example: class TestMyViews(TestCase): multi_db = True def test_index_page_view(self): call_some_test_code() This test case will flush all the test databases before running test_index_page_view. The multi_db flag also affects into which databases the attr:TransactionTestCase.fixtures are loaded. By default (when multi_db=False), fixtures are only loaded into the default database. If multi_db=True, fixtures are loaded into all databases. 328 Chapter 3. Using Django
- 333. Django Documentation, Release 1.9.3.dev20160224120324 Overriding settings Warning: Use the functions below to temporarily alter the value of settings in tests. Don’t manipulate django.conf.settings directly as Django won’t restore the original values after such manipulations. SimpleTestCase.settings() For testing purposes it’s often useful to change a setting temporarily and revert to the original value after run- ning the testing code. For this use case Django provides a standard Python context manager (see PEP 343) called settings(), which can be used like this: from django.test import TestCase class LoginTestCase(TestCase): def test_login(self): # First check for the default behavior response = self.client.get('/sekrit/') self.assertRedirects(response, '/accounts/login/?next=/sekrit/') # Then override the LOGIN_URL setting with self.settings(LOGIN_URL='/other/login/'): response = self.client.get('/sekrit/') self.assertRedirects(response, '/other/login/?next=/sekrit/') This example will override the LOGIN_URL setting for the code in the with block and reset its value to the previous state afterwards. SimpleTestCase.modify_settings() It can prove unwieldy to redefine settings that contain a list of values. In practice, adding or removing values is often sufficient. The modify_settings() context manager makes it easy: from django.test import TestCase class MiddlewareTestCase(TestCase): def test_cache_middleware(self): with self.modify_settings(MIDDLEWARE_CLASSES={ 'append': 'django.middleware.cache.FetchFromCacheMiddleware', 'prepend': 'django.middleware.cache.UpdateCacheMiddleware', 'remove': [ 'django.contrib.sessions.middleware.SessionMiddleware', 'django.contrib.auth.middleware.AuthenticationMiddleware', 'django.contrib.messages.middleware.MessageMiddleware', ], }): response = self.client.get('/') # ... For each action, you can supply either a list of values or a string. When the value already exists in the list, append and prepend have no effect; neither does remove when the value doesn’t exist. override_settings() In case you want to override a setting for a test method, Django provides the override_settings() decorator (see PEP 318). It’s used like this: 3.9. Testing in Django 329
- 334. Django Documentation, Release 1.9.3.dev20160224120324 from django.test import TestCase, override_settings class LoginTestCase(TestCase): @override_settings(LOGIN_URL='/other/login/') def test_login(self): response = self.client.get('/sekrit/') self.assertRedirects(response, '/other/login/?next=/sekrit/') The decorator can also be applied to TestCase classes: from django.test import TestCase, override_settings @override_settings(LOGIN_URL='/other/login/') class LoginTestCase(TestCase): def test_login(self): response = self.client.get('/sekrit/') self.assertRedirects(response, '/other/login/?next=/sekrit/') modify_settings() Likewise, Django provides the modify_settings() decorator: from django.test import TestCase, modify_settings class MiddlewareTestCase(TestCase): @modify_settings(MIDDLEWARE_CLASSES={ 'append': 'django.middleware.cache.FetchFromCacheMiddleware', 'prepend': 'django.middleware.cache.UpdateCacheMiddleware', }) def test_cache_middleware(self): response = self.client.get('/') # ... The decorator can also be applied to test case classes: from django.test import TestCase, modify_settings @modify_settings(MIDDLEWARE_CLASSES={ 'append': 'django.middleware.cache.FetchFromCacheMiddleware', 'prepend': 'django.middleware.cache.UpdateCacheMiddleware', }) class MiddlewareTestCase(TestCase): def test_cache_middleware(self): response = self.client.get('/') # ... Note: When given a class, these decorators modify the class directly and return it; they don’t create and re- turn a modified copy of it. So if you try to tweak the above examples to assign the return value to a different name than LoginTestCase or MiddlewareTestCase, you may be surprised to find that the original test case classes are still equally affected by the decorator. For a given class, modify_settings() is always applied after override_settings(). 330 Chapter 3. Using Django
- 335. Django Documentation, Release 1.9.3.dev20160224120324 Warning: The settings file contains some settings that are only consulted during initialization of Django internals. If you change them with override_settings, the setting is changed if you access it via the django.conf.settings module, however, Django’s internals access it differently. Effectively, using override_settings() or modify_settings() with these settings is probably not going to do what you expect it to do. We do not recommend altering the DATABASES setting. Altering the CACHES setting is possible, but a bit tricky if you are using internals that make using of caching, like django.contrib.sessions. For example, you will have to reinitialize the session backend in a test that uses cached sessions and overrides CACHES. Finally, avoid aliasing your settings as module-level constants as override_settings() won’t work on such values since they are only evaluated the first time the module is imported. You can also simulate the absence of a setting by deleting it after settings have been overridden, like this: @override_settings() def test_something(self): del settings.LOGIN_URL ... When overriding settings, make sure to handle the cases in which your app’s code uses a cache or similar feature that retains state even if the setting is changed. Django provides the django.test.signals.setting_changed signal that lets you register callbacks to clean up and otherwise reset state when settings are changed. Django itself uses this signal to reset various data: Overridden settings Data reset USE_TZ, TIME_ZONE Databases timezone TEMPLATES Template engines SERIALIZATION_MODULES Serializers cache LOCALE_PATHS, LANGUAGE_CODE Default translation and loaded translations MEDIA_ROOT, DEFAULT_FILE_STORAGE Default file storage Emptying the test outbox If you use any of Django’s custom TestCase classes, the test runner will clear the contents of the test email outbox at the start of each test case. For more detail on email services during tests, see Email services below. Assertions As Python’s normal unittest.TestCase class implements assertion methods such as assertTrue() and assertEqual(), Django’s custom TestCase class provides a number of custom assertion methods that are useful for testing Web applications: The failure messages given by most of these assertion methods can be customized with the msg_prefix argument. This string will be prefixed to any failure message generated by the assertion. This allows you to provide additional details that may help you to identify the location and cause of an failure in your test suite. SimpleTestCase.assertRaisesMessage(expected_exception, expected_message, callable, *args, **kwargs) SimpleTestCase.assertRaisesMessage(expected_exception, expected_message) Asserts that execution of callable raises expected_exception and that expected_message is found in the exception’s message. Any other outcome is reported as a failure. It’s a simpler version of unittest.TestCase.assertRaisesRegex() with the difference that expected_message isn’t treated as a regular expression. 3.9. Testing in Django 331
- 336. Django Documentation, Release 1.9.3.dev20160224120324 If only the expected_exception and expected_message parameters are given, returns a context man- ager so that the code being tested can be written inline rather than as a function: with self.assertRaisesMessage(ValueError, 'invalid literal for int()'): int('a') Deprecated since version 1.9: Passing callable as a keyword argument called callable_obj is depre- cated. Pass the callable as a positional argument instead. SimpleTestCase.assertFieldOutput(fieldclass, valid, invalid, field_args=None, field_kwargs=None, empty_value=’‘) Asserts that a form field behaves correctly with various inputs. Parameters • fieldclass – the class of the field to be tested. • valid – a dictionary mapping valid inputs to their expected cleaned values. • invalid – a dictionary mapping invalid inputs to one or more raised error messages. • field_args – the args passed to instantiate the field. • field_kwargs – the kwargs passed to instantiate the field. • empty_value – the expected clean output for inputs in empty_values. For example, the following code tests that an EmailField accepts [email protected] as a valid email address, but rejects aaa with a reasonable error message: self.assertFieldOutput(EmailField, {'[email protected]': '[email protected]'}, {'aaa': ['Enter a valid email address SimpleTestCase.assertFormError(response, form, field, errors, msg_prefix=’‘) Asserts that a field on a form raises the provided list of errors when rendered on the form. form is the name the Form instance was given in the template context. field is the name of the field on the form to check. If field has a value of None, non-field errors (errors you can access via form.non_field_errors()) will be checked. errors is an error string, or a list of error strings, that are expected as a result of form validation. SimpleTestCase.assertFormsetError(response, formset, form_index, field, errors, msg_prefix=’‘) Asserts that the formset raises the provided list of errors when rendered. formset is the name the Formset instance was given in the template context. form_index is the number of the form within the Formset. If form_index has a value of None, non-form errors (errors you can access via formset.non_form_errors()) will be checked. field is the name of the field on the form to check. If field has a value of None, non-field errors (errors you can access via form.non_field_errors()) will be checked. errors is an error string, or a list of error strings, that are expected as a result of form validation. SimpleTestCase.assertContains(response, text, count=None, status_code=200, msg_prefix=’‘, html=False) Asserts that a Response instance produced the given status_code and that text appears in the content of the response. If count is provided, text must occur exactly count times in the response. Set html to True to handle text as HTML. The comparison with the response content will be based on HTML semantics instead of character-by-character equality. Whitespace is ignored in most cases, attribute ordering is not significant. See assertHTMLEqual() for more details. 332 Chapter 3. Using Django
- 337. Django Documentation, Release 1.9.3.dev20160224120324 SimpleTestCase.assertNotContains(response, text, status_code=200, msg_prefix=’‘, html=False) Asserts that a Response instance produced the given status_code and that text does not appear in the content of the response. Set html to True to handle text as HTML. The comparison with the response content will be based on HTML semantics instead of character-by-character equality. Whitespace is ignored in most cases, attribute ordering is not significant. See assertHTMLEqual() for more details. SimpleTestCase.assertTemplateUsed(response, template_name, msg_prefix=’‘, count=None) Asserts that the template with the given name was used in rendering the response. The name is a string such as ’admin/index.html’. The count argument is an integer indicating the number of times the template should be rendered. Default is None, meaning that the template should be rendered one or more times. You can use this as a context manager, like this: with self.assertTemplateUsed('index.html'): render_to_string('index.html') with self.assertTemplateUsed(template_name='index.html'): render_to_string('index.html') SimpleTestCase.assertTemplateNotUsed(response, template_name, msg_prefix=’‘) Asserts that the template with the given name was not used in rendering the response. You can use this as a context manager in the same way as assertTemplateUsed(). SimpleTestCase.assertRedirects(response, expected_url, status_code=302, target_status_code=200, msg_prefix=’‘, fetch_redirect_response=True) Asserts that the response returned a status_code redirect status, redirected to expected_url (including any GET data), and that the final page was received with target_status_code. If your request used the follow argument, the expected_url and target_status_code will be the url and status code for the final point of the redirect chain. If fetch_redirect_response is False, the final page won’t be loaded. Since the test client can’t fetch externals URLs, this is particularly useful if expected_url isn’t part of your Django app. Scheme is handled correctly when making comparisons between two URLs. If there isn’t any scheme specified in the location where we are redirected to, the original request’s scheme is used. If present, the scheme in expected_url is the one used to make the comparisons to. Deprecated since version 1.9: The host argument is deprecated, as redirections are no longer forced to be absolute URLs. SimpleTestCase.assertHTMLEqual(html1, html2, msg=None) Asserts that the strings html1 and html2 are equal. The comparison is based on HTML semantics. The comparison takes following things into account: •Whitespace before and after HTML tags is ignored. •All types of whitespace are considered equivalent. •All open tags are closed implicitly, e.g. when a surrounding tag is closed or the HTML document ends. •Empty tags are equivalent to their self-closing version. •The ordering of attributes of an HTML element is not significant. •Attributes without an argument are equal to attributes that equal in name and value (see the examples). The following examples are valid tests and don’t raise any AssertionError: 3.9. Testing in Django 333
- 338. Django Documentation, Release 1.9.3.dev20160224120324 self.assertHTMLEqual( '<p>Hello <b>world!</p>', '''<p> Hello <b>world! <b/> </p>''' ) self.assertHTMLEqual( '<input type="checkbox" checked="checked" id="id_accept_terms" />', '<input id="id_accept_terms" type="checkbox" checked>' ) html1 and html2 must be valid HTML. An AssertionError will be raised if one of them cannot be parsed. Output in case of error can be customized with the msg argument. SimpleTestCase.assertHTMLNotEqual(html1, html2, msg=None) Asserts that the strings html1 and html2 are not equal. The comparison is based on HTML semantics. See assertHTMLEqual() for details. html1 and html2 must be valid HTML. An AssertionError will be raised if one of them cannot be parsed. Output in case of error can be customized with the msg argument. SimpleTestCase.assertXMLEqual(xml1, xml2, msg=None) Asserts that the strings xml1 and xml2 are equal. The comparison is based on XML semantics. Similarly to assertHTMLEqual(), the comparison is made on parsed content, hence only semantic differences are considered, not syntax differences. When invalid XML is passed in any parameter, an AssertionError is always raised, even if both string are identical. Output in case of error can be customized with the msg argument. SimpleTestCase.assertXMLNotEqual(xml1, xml2, msg=None) Asserts that the strings xml1 and xml2 are not equal. The comparison is based on XML semantics. See assertXMLEqual() for details. Output in case of error can be customized with the msg argument. SimpleTestCase.assertInHTML(needle, haystack, count=None, msg_prefix=’‘) Asserts that the HTML fragment needle is contained in the haystack one. If the count integer argument is specified, then additionally the number of needle occurrences will be strictly verified. Whitespace in most cases is ignored, and attribute ordering is not significant. The passed-in arguments must be valid HTML. SimpleTestCase.assertJSONEqual(raw, expected_data, msg=None) Asserts that the JSON fragments raw and expected_data are equal. Usual JSON non-significant whitespace rules apply as the heavyweight is delegated to the json library. Output in case of error can be customized with the msg argument. SimpleTestCase.assertJSONNotEqual(raw, expected_data, msg=None) Asserts that the JSON fragments raw and expected_data are not equal. See assertJSONEqual() for further details. Output in case of error can be customized with the msg argument. TransactionTestCase.assertQuerysetEqual(qs, values, transform=repr, ordered=True, msg=None) Asserts that a queryset qs returns a particular list of values values. 334 Chapter 3. Using Django
- 339. Django Documentation, Release 1.9.3.dev20160224120324 The comparison of the contents of qs and values is performed using the function transform; by default, this means that the repr() of each value is compared. Any other callable can be used if repr() doesn’t provide a unique or helpful comparison. By default, the comparison is also ordering dependent. If qs doesn’t provide an implicit ordering, you can set the ordered parameter to False, which turns the comparison into a collections.Counter comparison. If the order is undefined (if the given qs isn’t ordered and the comparison is against more than one ordered values), a ValueError is raised. Output in case of error can be customized with the msg argument. TransactionTestCase.assertNumQueries(num, func, *args, **kwargs) Asserts that when func is called with *args and **kwargs that num database queries are executed. If a "using" key is present in kwargs it is used as the database alias for which to check the number of queries. If you wish to call a function with a using parameter you can do it by wrapping the call with a lambda to add an extra parameter: self.assertNumQueries(7, lambda: my_function(using=7)) You can also use this as a context manager: with self.assertNumQueries(2): Person.objects.create(name="Aaron") Person.objects.create(name="Daniel") Email services If any of your Django views send email using Django’s email functionality, you probably don’t want to send email each time you run a test using that view. For this reason, Django’s test runner automatically redirects all Django-sent email to a dummy outbox. This lets you test every aspect of sending email – from the number of messages sent to the contents of each message – without actually sending the messages. The test runner accomplishes this by transparently replacing the normal email backend with a testing backend. (Don’t worry – this has no effect on any other email senders outside of Django, such as your machine’s mail server, if you’re running one.) django.core.mail.outbox During test running, each outgoing email is saved in django.core.mail.outbox. This is a simple list of all EmailMessage instances that have been sent. The outbox attribute is a special attribute that is created only when the locmem email backend is used. It doesn’t normally exist as part of the django.core.mail module and you can’t import it directly. The code below shows how to access this attribute correctly. Here’s an example test that examines django.core.mail.outbox for length and contents: from django.core import mail from django.test import TestCase class EmailTest(TestCase): def test_send_email(self): # Send message. mail.send_mail('Subject here', 'Here is the message.', '[email protected]', ['[email protected]'], fail_silently=False) # Test that one message has been sent. self.assertEqual(len(mail.outbox), 1) 3.9. Testing in Django 335
- 340. Django Documentation, Release 1.9.3.dev20160224120324 # Verify that the subject of the first message is correct. self.assertEqual(mail.outbox[0].subject, 'Subject here') As noted previously, the test outbox is emptied at the start of every test in a Django *TestCase. To empty the outbox manually, assign the empty list to mail.outbox: from django.core import mail # Empty the test outbox mail.outbox = [] Management Commands Management commands can be tested with the call_command() function. The output can be redirected into a StringIO instance: from django.core.management import call_command from django.test import TestCase from django.utils.six import StringIO class ClosepollTest(TestCase): def test_command_output(self): out = StringIO() call_command('closepoll', stdout=out) self.assertIn('Expected output', out.getvalue()) Skipping tests The unittest library provides the @skipIf and @skipUnless decorators to allow you to skip tests if you know ahead of time that those tests are going to fail under certain conditions. For example, if your test requires a particular optional library in order to succeed, you could decorate the test case with @skipIf. Then, the test runner will report that the test wasn’t executed and why, instead of failing the test or omitting the test altogether. To supplement these test skipping behaviors, Django provides two additional skip decorators. Instead of testing a generic boolean, these decorators check the capabilities of the database, and skip the test if the database doesn’t support a specific named feature. The decorators use a string identifier to describe database features. This string corresponds to attributes of the database connection features class. See django.db.backends.BaseDatabaseFeatures class for a full list of database features that can be used as a basis for skipping tests. skipIfDBFeature(*feature_name_strings) Skip the decorated test or TestCase if all of the named database features are supported. For example, the following test will not be executed if the database supports transactions (e.g., it would not run under PostgreSQL, but it would under MySQL with MyISAM tables): class MyTests(TestCase): @skipIfDBFeature('supports_transactions') def test_transaction_behavior(self): # ... conditional test code pass skipIfDBFeature can accept multiple feature strings. 336 Chapter 3. Using Django
- 341. Django Documentation, Release 1.9.3.dev20160224120324 skipUnlessDBFeature(*feature_name_strings) Skip the decorated test or TestCase if any of the named database features are not supported. For example, the following test will only be executed if the database supports transactions (e.g., it would run under PostgreSQL, but not under MySQL with MyISAM tables): class MyTests(TestCase): @skipUnlessDBFeature('supports_transactions') def test_transaction_behavior(self): # ... conditional test code pass skipUnlessDBFeature can accept multiple feature strings. 3.9.3 Advanced testing topics The request factory class RequestFactory The RequestFactory shares the same API as the test client. However, instead of behaving like a browser, the RequestFactory provides a way to generate a request instance that can be used as the first argument to any view. This means you can test a view function the same way as you would test any other function – as a black box, with exactly known inputs, testing for specific outputs. The API for the RequestFactory is a slightly restricted subset of the test client API: • It only has access to the HTTP methods get(), post(), put(), delete(), head(), options(), and trace(). • These methods accept all the same arguments except for follows. Since this is just a factory for producing requests, it’s up to you to handle the response. • It does not support middleware. Session and authentication attributes must be supplied by the test itself if required for the view to function properly. Example The following is a simple unit test using the request factory: from django.contrib.auth.models import AnonymousUser, User from django.test import TestCase, RequestFactory from .views import MyView, my_view class SimpleTest(TestCase): def setUp(self): # Every test needs access to the request factory. self.factory = RequestFactory() self.user = User.objects.create_user( username='jacob', email='jacob@...', password='top_secret') def test_details(self): # Create an instance of a GET request. request = self.factory.get('/customer/details') # Recall that middleware are not supported. You can simulate a 3.9. Testing in Django 337
- 342. Django Documentation, Release 1.9.3.dev20160224120324 # logged-in user by setting request.user manually. request.user = self.user # Or you can simulate an anonymous user by setting request.user to # an AnonymousUser instance. request.user = AnonymousUser() # Test my_view() as if it were deployed at /customer/details response = my_view(request) # Use this syntax for class-based views. response = MyView.as_view()(request) self.assertEqual(response.status_code, 200) Tests and multiple databases Testing primary/replica configurations If you’re testing a multiple database configuration with primary/replica (referred to as master/slave by some databases) replication, this strategy of creating test databases poses a problem. When the test databases are created, there won’t be any replication, and as a result, data created on the primary won’t be seen on the replica. To compensate for this, Django allows you to define that a database is a test mirror. Consider the following (simplified) example database configuration: DATABASES = { 'default': { 'ENGINE': 'django.db.backends.mysql', 'NAME': 'myproject', 'HOST': 'dbprimary', # ... plus some other settings }, 'replica': { 'ENGINE': 'django.db.backends.mysql', 'NAME': 'myproject', 'HOST': 'dbreplica', 'TEST': { 'MIRROR': 'default', }, # ... plus some other settings } } In this setup, we have two database servers: dbprimary, described by the database alias default, and dbreplica described by the alias replica. As you might expect, dbreplica has been configured by the database administrator as a read replica of dbprimary, so in normal activity, any write to default will appear on replica. If Django created two independent test databases, this would break any tests that expected replication to occur. How- ever, the replica database has been configured as a test mirror (using the MIRROR test setting), indicating that under testing, replica should be treated as a mirror of default. When the test environment is configured, a test version of replica will not be created. Instead the connection to replica will be redirected to point at default. As a result, writes to default will appear on replica – but because they are actually the same database, not because there is data replication between the two databases. 338 Chapter 3. Using Django
- 343. Django Documentation, Release 1.9.3.dev20160224120324 Controlling creation order for test databases By default, Django will assume all databases depend on the default database and therefore always create the default database first. However, no guarantees are made on the creation order of any other databases in your test setup. If your database configuration requires a specific creation order, you can specify the dependencies that exist using the DEPENDENCIES test setting. Consider the following (simplified) example database configuration: DATABASES = { 'default': { # ... db settings 'TEST': { 'DEPENDENCIES': ['diamonds'], }, }, 'diamonds': { ... db settings 'TEST': { 'DEPENDENCIES': [], }, }, 'clubs': { # ... db settings 'TEST': { 'DEPENDENCIES': ['diamonds'], }, }, 'spades': { # ... db settings 'TEST': { 'DEPENDENCIES': ['diamonds', 'hearts'], }, }, 'hearts': { # ... db settings 'TEST': { 'DEPENDENCIES': ['diamonds', 'clubs'], }, } } Under this configuration, the diamonds database will be created first, as it is the only database alias without de- pendencies. The default and clubs alias will be created next (although the order of creation of this pair is not guaranteed), then hearts, and finally spades. If there are any circular dependencies in the DEPENDENCIES definition, an ImproperlyConfigured exception will be raised. Advanced features of TransactionTestCase TransactionTestCase.available_apps Warning: This attribute is a private API. It may be changed or removed without a deprecation period in the future, for instance to accommodate changes in application loading. It’s used to optimize Django’s own test suite, which contains hundreds of models but no relations between models in different applications. 3.9. Testing in Django 339
- 344. Django Documentation, Release 1.9.3.dev20160224120324 By default, available_apps is set to None. After each test, Django calls flush to reset the database state. This empties all tables and emits the post_migrate signal, which re-creates one content type and three permissions for each model. This operation gets expensive proportionally to the number of models. Setting available_apps to a list of applications instructs Django to behave as if only the models from these applications were available. The behavior of TransactionTestCase changes as follows: •post_migrate is fired before each test to create the content types and permissions for each model in available apps, in case they’re missing. •After each test, Django empties only tables corresponding to models in available apps. However, at the database level, truncation may cascade to related models in unavailable apps. Furthermore post_migrate isn’t fired; it will be fired by the next TransactionTestCase, after the correct set of applications is selected. Since the database isn’t fully flushed, if a test creates instances of models not included in available_apps, they will leak and they may cause unrelated tests to fail. Be careful with tests that use sessions; the default session engine stores them in the database. Since post_migrate isn’t emitted after flushing the database, its state after a TransactionTestCase isn’t the same as after a TestCase: it’s missing the rows created by listeners to post_migrate. Considering the order in which tests are executed, this isn’t an issue, provided either all TransactionTestCase in a given test suite declare available_apps, or none of them. available_apps is mandatory in Django’s own test suite. TransactionTestCase.reset_sequences Setting reset_sequences = True on a TransactionTestCase will make sure sequences are always reset before the test run: class TestsThatDependsOnPrimaryKeySequences(TransactionTestCase): reset_sequences = True def test_animal_pk(self): lion = Animal.objects.create(name="lion", sound="roar") # lion.pk is guaranteed to always be 1 self.assertEqual(lion.pk, 1) Unless you are explicitly testing primary keys sequence numbers, it is recommended that you do not hard code primary key values in tests. Using reset_sequences = True will slow down the test, since the primary key reset is an relatively expensive database operation. Using the Django test runner to test reusable applications If you are writing a reusable application you may want to use the Django test runner to run your own test suite and thus benefit from the Django testing infrastructure. A common practice is a tests directory next to the application code, with the following structure: runtests.py polls/ __init__.py models.py ... tests/ __init__.py models.py 340 Chapter 3. Using Django
- 345. Django Documentation, Release 1.9.3.dev20160224120324 test_settings.py tests.py Let’s take a look inside a couple of those files: runtests.py #!/usr/bin/env python import os import sys import django from django.conf import settings from django.test.utils import get_runner if __name__ == "__main__": os.environ['DJANGO_SETTINGS_MODULE'] = 'tests.test_settings' django.setup() TestRunner = get_runner(settings) test_runner = TestRunner() failures = test_runner.run_tests(["tests"]) sys.exit(bool(failures)) This is the script that you invoke to run the test suite. It sets up the Django environment, creates the test database and runs the tests. For the sake of clarity, this example contains only the bare minimum necessary to use the Django test runner. You may want to add command-line options for controlling verbosity, passing in specific test labels to run, etc. tests/test_settings.py SECRET_KEY = 'fake-key' INSTALLED_APPS = [ "tests", ] This file contains the Django settings required to run your app’s tests. Again, this is a minimal example; your tests may require additional settings to run. Since the tests package is included in INSTALLED_APPS when running your tests, you can define test-only models in its models.py file. Using different testing frameworks Clearly, unittest is not the only Python testing framework. While Django doesn’t provide explicit support for alternative frameworks, it does provide a way to invoke tests constructed for an alternative framework as if they were normal Django tests. When you run ./manage.py test, Django looks at the TEST_RUNNER setting to determine what to do. By default, TEST_RUNNER points to ’django.test.runner.DiscoverRunner’. This class defines the default Django testing behavior. This behavior involves: 1. Performing global pre-test setup. 2. Looking for tests in any file below the current directory whose name matches the pattern test*.py. 3. Creating the test databases. 4. Running migrate to install models and initial data into the test databases. 3.9. Testing in Django 341
- 346. Django Documentation, Release 1.9.3.dev20160224120324 5. Running the tests that were found. 6. Destroying the test databases. 7. Performing global post-test teardown. If you define your own test runner class and point TEST_RUNNER at that class, Django will execute your test runner whenever you run ./manage.py test. In this way, it is possible to use any test framework that can be executed from Python code, or to modify the Django test execution process to satisfy whatever testing requirements you may have. Defining a test runner A test runner is a class defining a run_tests() method. Django ships with a DiscoverRunner class that defines the default Django testing behavior. This class defines the run_tests() entry point, plus a selection of other methods that are used to by run_tests() to set up, execute and tear down the test suite. class DiscoverRunner(pattern=’test*.py’, top_level=None, verbosity=1, interactive=True, failfast=True, keepdb=False, reverse=False, debug_sql=False, **kwargs) DiscoverRunner will search for tests in any file matching pattern. top_level can be used to specify the directory containing your top-level Python modules. Usually Django can figure this out automatically, so it’s not necessary to specify this option. If specified, it should generally be the directory containing your manage.py file. verbosity determines the amount of notification and debug information that will be printed to the console; 0 is no output, 1 is normal output, and 2 is verbose output. If interactive is True, the test suite has permission to ask the user for instructions when the test suite is executed. An example of this behavior would be asking for permission to delete an existing test database. If interactive is False, the test suite must be able to run without any manual intervention. If failfast is True, the test suite will stop running after the first test failure is detected. If keepdb is True, the test suite will use the existing database, or create one if necessary. If False, a new database will be created, prompting the user to remove the existing one, if present. If reverse is True, test cases will be executed in the opposite order. This could be useful to debug tests that aren’t properly isolated and have side effects. Grouping by test class is preserved when using this option. If debug_sql is True, failing test cases will output SQL queries logged to the django.db.backends logger as well as the traceback. If verbosity is 2, then queries in all tests are output. Django may, from time to time, extend the capabilities of the test runner by adding new arguments. The **kwargs declaration allows for this expansion. If you subclass DiscoverRunner or write your own test runner, ensure it accepts **kwargs. Your test runner may also define additional command-line options. Create or override an add_arguments(cls, parser) class method and add custom arguments by calling parser.add_argument() inside the method, so that the test command will be able to use those arguments. Previously, you had to provide an option_list attribute to a subclassed test runner to add options to the list of command-line options that the test command could use. The keepdb, reverse, and debug_sql arguments were added. Attributes 342 Chapter 3. Using Django
- 347. Django Documentation, Release 1.9.3.dev20160224120324 DiscoverRunner.test_suite The class used to build the test suite. By default it is set to unittest.TestSuite. This can be overridden if you wish to implement different logic for collecting tests. DiscoverRunner.test_runner This is the class of the low-level test runner which is used to execute the individual tests and format the results. By default it is set to unittest.TextTestRunner. Despite the unfortunate similarity in naming conven- tions, this is not the same type of class as DiscoverRunner, which covers a broader set of responsibilities. You can override this attribute to modify the way tests are run and reported. DiscoverRunner.test_loader This is the class that loads tests, whether from TestCases or modules or otherwise and bundles them into test suites for the runner to execute. By default it is set to unittest.defaultTestLoader. You can override this attribute if your tests are going to be loaded in unusual ways. DiscoverRunner.option_list This is the tuple of optparse options which will be fed into the management command’s OptionParser for parsing arguments. See the documentation for Python’s optparse module for more details. Deprecated since version 1.8: You should now override the add_arguments() class method to add custom arguments accepted by the test management command. Methods DiscoverRunner.run_tests(test_labels, extra_tests=None, **kwargs) Run the test suite. test_labels allows you to specify which tests to run and supports several formats (see DiscoverRunner.build_suite() for a list of supported formats). extra_tests is a list of extra TestCase instances to add to the suite that is executed by the test runner. These extra tests are run in addition to those discovered in the modules listed in test_labels. This method should return the number of tests that failed. classmethod DiscoverRunner.add_arguments(parser) Override this class method to add custom arguments accepted by the test management command. See argparse.ArgumentParser.add_argument() for details about adding arguments to a parser. DiscoverRunner.setup_test_environment(**kwargs) Sets up the test environment by calling setup_test_environment() and setting DEBUG to False. DiscoverRunner.build_suite(test_labels, extra_tests=None, **kwargs) Constructs a test suite that matches the test labels provided. test_labels is a list of strings describing the tests to be run. A test label can take one of four forms: •path.to.test_module.TestCase.test_method – Run a single test method in a test case. •path.to.test_module.TestCase – Run all the test methods in a test case. •path.to.module – Search for and run all tests in the named Python package or module. •path/to/directory – Search for and run all tests below the named directory. If test_labels has a value of None, the test runner will search for tests in all files below the current directory whose names match its pattern (see above). extra_tests is a list of extra TestCase instances to add to the suite that is executed by the test runner. These extra tests are run in addition to those discovered in the modules listed in test_labels. Returns a TestSuite instance ready to be run. 3.9. Testing in Django 343
- 348. Django Documentation, Release 1.9.3.dev20160224120324 DiscoverRunner.setup_databases(**kwargs) Creates the test databases. Returns a data structure that provides enough detail to undo the changes that have been made. This data will be provided to the teardown_databases() function at the conclusion of testing. DiscoverRunner.run_suite(suite, **kwargs) Runs the test suite. Returns the result produced by the running the test suite. DiscoverRunner.teardown_databases(old_config, **kwargs) Destroys the test databases, restoring pre-test conditions. old_config is a data structure defining the changes in the database configuration that need to be reversed. It is the return value of the setup_databases() method. DiscoverRunner.teardown_test_environment(**kwargs) Restores the pre-test environment. DiscoverRunner.suite_result(suite, result, **kwargs) Computes and returns a return code based on a test suite, and the result from that test suite. Testing utilities django.test.utils To assist in the creation of your own test runner, Django provides a number of utility methods in the django.test.utils module. setup_test_environment() Performs any global pre-test setup, such as the installing the instrumentation of the template rendering system and setting up the dummy email outbox. teardown_test_environment() Performs any global post-test teardown, such as removing the black magic hooks into the template system and restoring normal email services. django.db.connection.creation The creation module of the database backend also provides some utili- ties that can be useful during testing. create_test_db(verbosity=1, autoclobber=False, serialize=True, keepdb=False) Creates a new test database and runs migrate against it. verbosity has the same behavior as in run_tests(). autoclobber describes the behavior that will occur if a database with the same name as the test database is discovered: •If autoclobber is False, the user will be asked to approve destroying the existing database. sys.exit is called if the user does not approve. •If autoclobber is True, the database will be destroyed without consulting the user. serialize determines if Django serializes the database into an in-memory JSON string before running tests (used to restore the database state between tests if you don’t have transactions). You can set this to False to speed up creation time if you don’t have any test classes with serialized_rollback=True. If you are using the default test runner, you can control this with the the SERIALIZE entry in the TEST dictionary. 344 Chapter 3. Using Django
- 349. Django Documentation, Release 1.9.3.dev20160224120324 keepdb determines if the test run should use an existing database, or create a new one. If True, the existing database will be used, or created if not present. If False, a new database will be created, prompting the user to remove the existing one, if present. Returns the name of the test database that it created. create_test_db() has the side effect of modifying the value of NAME in DATABASES to match the name of the test database. The keepdb argument was added. destroy_test_db(old_database_name, verbosity=1, keepdb=False) Destroys the database whose name is the value of NAME in DATABASES, and sets NAME to the value of old_database_name. The verbosity argument has the same behavior as for DiscoverRunner. If the keepdb argument is True, then the connection to the database will be closed, but the database will not be destroyed. The keepdb argument was added. Integration with coverage.py Code coverage describes how much source code has been tested. It shows which parts of your code are being exercised by tests and which are not. It’s an important part of testing applications, so it’s strongly recommended to check the coverage of your tests. Django can be easily integrated with coverage.py, a tool for measuring code coverage of Python programs. First, install coverage.py. Next, run the following from your project folder containing manage.py: coverage run --source='.' manage.py test myapp This runs your tests and collects coverage data of the executed files in your project. You can see a report of this data by typing following command: coverage report Note that some Django code was executed while running tests, but it is not listed here because of the source flag passed to the previous command. For more options like annotated HTML listings detailing missed lines, see the coverage.py docs. 3.10 User authentication in Django 3.10.1 Using the Django authentication system This document explains the usage of Django’s authentication system in its default configuration. This configuration has evolved to serve the most common project needs, handling a reasonably wide range of tasks, and has a careful implementation of passwords and permissions. For projects where authentication needs differ from the default, Django supports extensive extension and customization of authentication. Django authentication provides both authentication and authorization together and is generally referred to as the au- thentication system, as these features are somewhat coupled. 3.10. User authentication in Django 345
- 350. Django Documentation, Release 1.9.3.dev20160224120324 User objects User objects are the core of the authentication system. They typically represent the people interacting with your site and are used to enable things like restricting access, registering user profiles, associating content with creators etc. Only one class of user exists in Django’s authentication framework, i.e., ’superusers’ or admin ’staff’ users are just user objects with special attributes set, not different classes of user objects. The primary attributes of the default user are: • username • password • email • first_name • last_name See the full API documentation for full reference, the documentation that follows is more task oriented. Creating users The most direct way to create users is to use the included create_user() helper function: >>> from django.contrib.auth.models import User >>> user = User.objects.create_user('john', '[email protected]', 'johnpassword') # At this point, user is a User object that has already been saved # to the database. You can continue to change its attributes # if you want to change other fields. >>> user.last_name = 'Lennon' >>> user.save() If you have the Django admin installed, you can also create users interactively. Creating superusers Create superusers using the createsuperuser command: $ python manage.py createsuperuser --username=joe [email protected] You will be prompted for a password. After you enter one, the user will be created immediately. If you leave off the --username or --email options, it will prompt you for those values. Changing passwords Django does not store raw (clear text) passwords on the user model, but only a hash (see documentation of how passwords are managed for full details). Because of this, do not attempt to manipulate the password attribute of the user directly. This is why a helper function is used when creating a user. To change a user’s password, you have several options: manage.py changepassword *username* offers a method of changing a User’s password from the com- mand line. It prompts you to change the password of a given user which you must enter twice. If they both match, the new password will be changed immediately. If you do not supply a user, the command will attempt to change the password whose username matches the current system user. 346 Chapter 3. Using Django
- 351. Django Documentation, Release 1.9.3.dev20160224120324 You can also change a password programmatically, using set_password(): >>> from django.contrib.auth.models import User >>> u = User.objects.get(username='john') >>> u.set_password('new password') >>> u.save() If you have the Django admin installed, you can also change user’s passwords on the authentication system’s admin pages. Django also provides views and forms that may be used to allow users to change their own passwords. Changing a user’s password will log out all their sessions if the SessionAuthenticationMiddleware is en- abled. See Session invalidation on password change for details. Authenticating users authenticate(**credentials) To authenticate a given username and password, use authenticate(). It takes credentials in the form of keyword arguments, for the default configuration this is username and password, and it returns a User object if the password is valid for the given username. If the password is invalid, authenticate() returns None. Example: from django.contrib.auth import authenticate user = authenticate(username='john', password='secret') if user is not None: # the password verified for the user if user.is_active: print("User is valid, active and authenticated") else: print("The password is valid, but the account has been disabled!") else: # the authentication system was unable to verify the username and password print("The username and password were incorrect.") Note: This is a low level way to authenticate a set of credentials; for example, it’s used by the RemoteUserMiddleware. Unless you are writing your own authentication system, you probably won’t use this. Rather if you are looking for a way to limit access to logged in users, see the login_required() decorator. Permissions and Authorization Django comes with a simple permissions system. It provides a way to assign permissions to specific users and groups of users. It’s used by the Django admin site, but you’re welcome to use it in your own code. The Django admin site uses permissions as follows: • Access to view the “add” form and add an object is limited to users with the “add” permission for that type of object. • Access to view the change list, view the “change” form and change an object is limited to users with the “change” permission for that type of object. • Access to delete an object is limited to users with the “delete” permission for that type of object. 3.10. User authentication in Django 347
- 352. Django Documentation, Release 1.9.3.dev20160224120324 Permissions can be set not only per type of object, but also per specific object instance. By using the has_add_permission(), has_change_permission() and has_delete_permission() methods provided by the ModelAdmin class, it is possible to customize permissions for different object instances of the same type. User objects have two many-to-many fields: groups and user_permissions. User objects can access their related objects in the same way as any other Django model: myuser.groups = [group_list] myuser.groups.add(group, group, ...) myuser.groups.remove(group, group, ...) myuser.groups.clear() myuser.user_permissions = [permission_list] myuser.user_permissions.add(permission, permission, ...) myuser.user_permissions.remove(permission, permission, ...) myuser.user_permissions.clear() Default permissions When django.contrib.auth is listed in your INSTALLED_APPS setting, it will ensure that three default per- missions – add, change and delete – are created for each Django model defined in one of your installed applications. These permissions will be created when you run manage.py migrate; the first time you run migrate after adding django.contrib.auth to INSTALLED_APPS, the default permissions will be created for all previously- installed models, as well as for any new models being installed at that time. Afterward, it will create default permis- sions for new models each time you run manage.py migrate (the function that creates permissions is connected to the post_migrate signal). Assuming you have an application with an app_label foo and a model named Bar, to test for basic permissions you should use: • add: user.has_perm(’foo.add_bar’) • change: user.has_perm(’foo.change_bar’) • delete: user.has_perm(’foo.delete_bar’) The Permission model is rarely accessed directly. Groups django.contrib.auth.models.Group models are a generic way of categorizing users so you can apply permissions, or some other label, to those users. A user can belong to any number of groups. A user in a group automatically has the permissions granted to that group. For example, if the group Site editors has the permission can_edit_home_page, any user in that group will have that permission. Beyond permissions, groups are a convenient way to categorize users to give them some label, or extended functional- ity. For example, you could create a group ’Special users’, and you could write code that could, say, give them access to a members-only portion of your site, or send them members-only email messages. Programmatically creating permissions While custom permissions can be defined within a model’s Meta class, you can also create permissions directly. For example, you can create the can_publish permission for a BlogPost model in myapp: 348 Chapter 3. Using Django
- 353. Django Documentation, Release 1.9.3.dev20160224120324 from myapp.models import BlogPost from django.contrib.auth.models import Permission from django.contrib.contenttypes.models import ContentType content_type = ContentType.objects.get_for_model(BlogPost) permission = Permission.objects.create(codename='can_publish', name='Can Publish Posts', content_type=content_type) The permission can then be assigned to a User via its user_permissions attribute or to a Group via its permissions attribute. Permission caching The ModelBackend caches permissions on the User object after the first time they need to be fetched for a per- missions check. This is typically fine for the request-response cycle since permissions are not typically checked immediately after they are added (in the admin, for example). If you are adding permissions and checking them im- mediately afterward, in a test or view for example, the easiest solution is to re-fetch the User from the database. For example: from django.contrib.auth.models import Permission, User from django.shortcuts import get_object_or_404 def user_gains_perms(request, user_id): user = get_object_or_404(User, pk=user_id) # any permission check will cache the current set of permissions user.has_perm('myapp.change_bar') permission = Permission.objects.get(codename='change_bar') user.user_permissions.add(permission) # Checking the cached permission set user.has_perm('myapp.change_bar') # False # Request new instance of User user = get_object_or_404(User, pk=user_id) # Permission cache is repopulated from the database user.has_perm('myapp.change_bar') # True ... Authentication in Web requests Django uses sessions and middleware to hook the authentication system into request objects. These provide a request.user attribute on every request which represents the current user. If the current user has not logged in, this attribute will be set to an instance of AnonymousUser, otherwise it will be an instance of User. You can tell them apart with is_authenticated(), like so: if request.user.is_authenticated(): # Do something for authenticated users. ... else: 3.10. User authentication in Django 349
- 354. Django Documentation, Release 1.9.3.dev20160224120324 # Do something for anonymous users. ... How to log a user in If you have an authenticated user you want to attach to the current session - this is done with a login() function. login(request, user) To log a user in, from a view, use login(). It takes an HttpRequest object and a User object. login() saves the user’s ID in the session, using Django’s session framework. Note that any data set during the anonymous session is retained in the session after a user logs in. This example shows how you might use both authenticate() and login(): from django.contrib.auth import authenticate, login def my_view(request): username = request.POST['username'] password = request.POST['password'] user = authenticate(username=username, password=password) if user is not None: if user.is_active: login(request, user) # Redirect to a success page. else: # Return a 'disabled account' error message ... else: # Return an 'invalid login' error message. ... Calling authenticate() first When you’re manually logging a user in, you must successfully authenticate the user with authenticate() before you call login(). authenticate() sets an attribute on the User noting which authentication backend success- fully authenticated that user (see the backends documentation for details), and this information is needed later during the login process. An error will be raised if you try to login a user object retrieved from the database directly. Selecting the authentication backend When a user logs in, the user’s ID and the backend that was used for authen- tication are saved in the user’s session. This allows the same authentication backend to fetch the user’s details on a future request. The authentication backend to save in the session is selected as follows: 1. Use the value of the optional backend argument, if provided. 2. Use the value of the user.backend attribute, if present. This allows pairing authenticate() and login(): authenticate() sets the user.backend attribute on the User object it returns. 3. Use the backend in AUTHENTICATION_BACKENDS, if there is only one. 4. Otherwise, raise an exception. In cases 1 and 2, the value of the backend argument or the user.backend attribute should be a dotted import path string (like that found in AUTHENTICATION_BACKENDS), not the actual backend class. 350 Chapter 3. Using Django
- 355. Django Documentation, Release 1.9.3.dev20160224120324 How to log a user out logout(request) To log out a user who has been logged in via django.contrib.auth.login(), use django.contrib.auth.logout() within your view. It takes an HttpRequest object and has no return value. Example: from django.contrib.auth import logout def logout_view(request): logout(request) # Redirect to a success page. Note that logout() doesn’t throw any errors if the user wasn’t logged in. When you call logout(), the session data for the current request is completely cleaned out. All existing data is removed. This is to prevent another person from using the same Web browser to log in and have access to the previous user’s session data. If you want to put anything into the session that will be available to the user immediately after logging out, do that after calling django.contrib.auth.logout(). Limiting access to logged-in users The raw way The simple, raw way to limit access to pages is to check request.user.is_authenticated() and either redirect to a login page: from django.conf import settings from django.shortcuts import redirect def my_view(request): if not request.user.is_authenticated(): return redirect('%s?next=%s' % (settings.LOGIN_URL, request.path)) # ... ...or display an error message: from django.shortcuts import render def my_view(request): if not request.user.is_authenticated(): return render(request, 'myapp/login_error.html') # ... The login_required decorator login_required(redirect_field_name=’next’, login_url=None) As a shortcut, you can use the convenient login_required() decorator: from django.contrib.auth.decorators import login_required @login_required def my_view(request): ... login_required() does the following: •If the user isn’t logged in, redirect to settings.LOGIN_URL, passing the current absolute path in the query string. Example: /accounts/login/?next=/polls/3/. 3.10. User authentication in Django 351
- 356. Django Documentation, Release 1.9.3.dev20160224120324 •If the user is logged in, execute the view normally. The view code is free to assume the user is logged in. By default, the path that the user should be redirected to upon successful authentication is stored in a query string parameter called "next". If you would prefer to use a different name for this parameter, login_required() takes an optional redirect_field_name parameter: from django.contrib.auth.decorators import login_required @login_required(redirect_field_name='my_redirect_field') def my_view(request): ... Note that if you provide a value to redirect_field_name, you will most likely need to customize your login template as well, since the template context variable which stores the redirect path will use the value of redirect_field_name as its key rather than "next" (the default). login_required() also takes an optional login_url parameter. Example: from django.contrib.auth.decorators import login_required @login_required(login_url='/accounts/login/') def my_view(request): ... Note that if you don’t specify the login_url parameter, you’ll need to ensure that the settings.LOGIN_URL and your login view are properly associated. For example, using the defaults, add the following lines to your URLconf: from django.contrib.auth import views as auth_views url(r'^accounts/login/$', auth_views.login), The settings.LOGIN_URL also accepts view function names and named URL patterns. This allows you to freely remap your login view within your URLconf without having to update the setting. Note: The login_required decorator does NOT check the is_active flag on a user. See also: If you are writing custom views for Django’s admin (or need the same authorization check that the built-in views use), you may find the django.contrib.admin.views.decorators.staff_member_required() decora- tor a useful alternative to login_required(). The LoginRequired mixin When using class-based views, you can achieve the same behavior as with login_required by using the LoginRequiredMixin. This mixin should be at the leftmost position in the inheritance list. class LoginRequiredMixin If a view is using this mixin, all requests by non-authenticated users will be redirected to the login page or shown an HTTP 403 Forbidden error, depending on the raise_exception parameter. You can set any of the parameters of AccessMixin to customize the handling of unauthorized users: from django.contrib.auth.mixins import LoginRequiredMixin class MyView(LoginRequiredMixin, View): login_url = '/login/' redirect_field_name = 'redirect_to' 352 Chapter 3. Using Django
- 357. Django Documentation, Release 1.9.3.dev20160224120324 Note: Just as the login_required decorator, this mixin does NOT check the is_active flag on a user. Limiting access to logged-in users that pass a test To limit access based on certain permissions or some other test, you’d do essentially the same thing as described in the previous section. The simple way is to run your test on request.user in the view directly. For example, this view checks to make sure the user has an email in the desired domain and if not, redirects to the login page: from django.shortcuts import redirect def my_view(request): if not request.user.email.endswith('@example.com'): return redirect('/login/?next=%s' % request.path) # ... user_passes_test(test_func, login_url=None, redirect_field_name=’next’) As a shortcut, you can use the convenient user_passes_test decorator which performs a redirect when the callable returns False: from django.contrib.auth.decorators import user_passes_test def email_check(user): return user.email.endswith('@example.com') @user_passes_test(email_check) def my_view(request): ... user_passes_test() takes a required argument: a callable that takes a User object and returns True if the user is allowed to view the page. Note that user_passes_test() does not automatically check that the User is not anonymous. user_passes_test() takes two optional arguments: login_url Lets you specify the URL that users who don’t pass the test will be redirected to. It may be a login page and defaults to settings.LOGIN_URL if you don’t specify one. redirect_field_name Same as for login_required(). Setting it to None removes it from the URL, which you may want to do if you are redirecting users that don’t pass the test to a non-login page where there’s no “next page”. For example: @user_passes_test(email_check, login_url='/login/') def my_view(request): ... class UserPassesTestMixin When using class-based views, you can use the UserPassesTestMixin to do this. test_func() You have to override the test_func() method of the class to provide the test that is performed. Fur- thermore, you can set any of the parameters of AccessMixin to customize the handling of unauthorized users: from django.contrib.auth.mixins import UserPassesTestMixin class MyView(UserPassesTestMixin, View): 3.10. User authentication in Django 353
- 358. Django Documentation, Release 1.9.3.dev20160224120324 def test_func(self): return self.request.user.email.endswith('@example.com') get_test_func() You can also override the get_test_func() method to have the mixin use a differently named function for its checks (instead of test_func()). Stacking UserPassesTestMixin Due to the way UserPassesTestMixin is implemented, you cannot stack them in your inheritance list. The following does NOT work: class TestMixin1(UserPassesTestMixin): def test_func(self): return self.request.user.email.endswith('@example.com') class TestMixin2(UserPassesTestMixin): def test_func(self): return self.request.user.username.startswith('django') class MyView(TestMixin1, TestMixin2, View): ... If TestMixin1 would call super() and take that result into account, TestMixin1 wouldn’t work stan- dalone anymore. The permission_required decorator permission_required(perm, login_url=None, raise_exception=False) It’s a relatively common task to check whether a user has a particular permission. For that reason, Django provides a shortcut for that case: the permission_required() decorator.: from django.contrib.auth.decorators import permission_required @permission_required('polls.can_vote') def my_view(request): ... Just like the has_perm() method, permission names take the form "<app label>.<permission codename>" (i.e. polls.can_vote for a permission on a model in the polls application). The decorator may also take an iterable of permissions, in which case the user must have all of the permissions in order to access the view. Note that permission_required() also takes an optional login_url parameter: from django.contrib.auth.decorators import permission_required @permission_required('polls.can_vote', login_url='/loginpage/') def my_view(request): ... As in the login_required() decorator, login_url defaults to settings.LOGIN_URL. If the raise_exception parameter is given, the decorator will raise PermissionDenied, prompting the 403 (HTTP Forbidden) view instead of redirecting to the login page. 354 Chapter 3. Using Django
- 359. Django Documentation, Release 1.9.3.dev20160224120324 If you want to use raise_exception but also give your users a chance to login first, you can add the login_required() decorator: from django.contrib.auth.decorators import login_required, permission_required @permission_required('polls.can_vote', raise_exception=True) @login_required def my_view(request): ... In older versions, the permission parameter only worked with strings, lists, and tuples instead of strings and any iterable. The PermissionRequiredMixin mixin To apply permission checks to class-based views, you can use the PermissionRequiredMixin: class PermissionRequiredMixin This mixin, just like the permission_required decorator, checks whether the user accessing a view has all given permissions. You should specify the permission (or an iterable of permissions) using the permission_required parameter: from django.contrib.auth.mixins import PermissionRequiredMixin class MyView(PermissionRequiredMixin, View): permission_required = 'polls.can_vote' # Or multiple of permissions: permission_required = ('polls.can_open', 'polls.can_edit') You can set any of the parameters of AccessMixin to customize the handling of unauthorized users. You may also override these methods: get_permission_required() Returns an iterable of permission names used by the mixin. Defaults to the permission_required attribute, converted to a tuple if necessary. has_permission() Returns a boolean denoting whether the current user has permission to execute the decorated view. By default, this returns the result of calling has_perms() with the list of permissions returned by get_permission_required(). Redirecting unauthorized requests in class-based views To ease the handling of access restrictions in class-based views, the AccessMixin can be used to redirect a user to the login page or issue an HTTP 403 Forbidden response. class AccessMixin login_url Default return value for get_login_url(). Defaults to None in which case get_login_url() falls back to settings.LOGIN_URL. permission_denied_message Default return value for get_permission_denied_message(). Defaults to an empty string. redirect_field_name Default return value for get_redirect_field_name(). Defaults to "next". 3.10. User authentication in Django 355
- 360. Django Documentation, Release 1.9.3.dev20160224120324 raise_exception If this attribute is set to True, a PermissionDenied exception will be raised instead of the redirect. Defaults to False. get_login_url() Returns the URL that users who don’t pass the test will be redirected to. Returns login_url if set, or settings.LOGIN_URL otherwise. get_permission_denied_message() When raise_exception is True, this method can be used to control the error message passed to the error handler for display to the user. Returns the permission_denied_message attribute by default. get_redirect_field_name() Returns the name of the query parameter that will contain the URL the user should be redirected to after a successful login. If you set this to None, a query parameter won’t be added. Returns the redirect_field_name attribute by default. handle_no_permission() Depending on the value of raise_exception, the method either raises a PermissionDenied ex- ception or redirects the user to the login_url, optionally including the redirect_field_name if it is set. Session invalidation on password change Warning: This protection only applies if SessionAuthenticationMidd MIDDLEWARE_CLASSES. It’s included if settings.py was generated by start 1.7. Session verification will become mandatory in Django 1.10 regardless SessionAuthenticationMiddleware is enabled. If you have a pre-1.7 p using a template that doesn’t include SessionAuthenticationMiddleware, co then after reading the upgrade considerations below. If your AUTH_USER_MODEL inherits from AbstractBaseUser or implements its own get_session_auth_hash() method, authenticated sessions will include the hash returned by this function. In the AbstractBaseUser case, this is an HMAC of the password field. If the SessionAuthenticationMiddleware is enabled, Django verifies that the hash sent along with each request matches the one that’s computed server-side. This allows a user to log out all of their sessions by changing their password. The default password change views included with Django, django.contrib.auth.views.password_change() and the user_change_password view in the django.contrib.auth admin, update the session with the new password hash so that a user changing their own password won’t log themselves out. If you have a custom password change view and wish to have similar behavior, use this function: update_session_auth_hash(request, user) This function takes the current request and the updated user object from which the new session hash will be derived and updates the session hash appropriately. Example usage: from django.contrib.auth import update_session_auth_hash def password_change(request): if request.method == 'POST': form = PasswordChangeForm(user=request.user, data=request.POST) if form.is_valid(): form.save() update_session_auth_hash(request, form.user) else: ... 356 Chapter 3. Using Django
- 361. Django Documentation, Release 1.9.3.dev20160224120324 If you are upgrading an existing site and wish to enable this middleware without requiring all your users to re- login afterward, you should first upgrade to Django 1.7 and run it for a while so that as sessions are naturally recreated as users login, they include the session hash as described above. Once you start running your site with SessionAuthenticationMiddleware, any users who have not logged in and had their session updated with the verification hash will have their existing session invalidated and be required to login. Note: Since get_session_auth_hash() is based on SECRET_KEY, updating your site to use a new secret will invalidate all existing sessions. Authentication Views Django provides several views that you can use for handling login, logout, and password management. These make use of the stock auth forms but you can pass in your own forms as well. Django provides no default template for the authentication views. You should create your own templates for the views you want to use. The template context is documented in each view, see All authentication views. Using the views There are different methods to implement these views in your project. The easiest way is to include the provided URLconf in django.contrib.auth.urls in your own URLconf, for example: urlpatterns = [ url('^', include('django.contrib.auth.urls')) ] This will include the following URL patterns: ^login/$ [name='login'] ^logout/$ [name='logout'] ^password_change/$ [name='password_change'] ^password_change/done/$ [name='password_change_done'] ^password_reset/$ [name='password_reset'] ^password_reset/done/$ [name='password_reset_done'] ^reset/(?P<uidb64>[0-9A-Za-z_-]+)/(?P<token>[0-9A-Za-z]{1,13}-[0-9A-Za-z]{1,20})/$ [name='password_r ^reset/done/$ [name='password_reset_complete'] The views provide a URL name for easier reference. See the URL documentation for details on using named URL patterns. If you want more control over your URLs, you can reference a specific view in your URLconf: from django.contrib.auth import views as auth_views urlpatterns = [ url('^change-password/', auth_views.password_change) ] The views have optional arguments you can use to alter the behavior of the view. For example, if you want to change the template name a view uses, you can provide the template_name argument. A way to do this is to provide keyword arguments in the URLconf, these will be passed on to the view. For example: urlpatterns = [ url( '^change-password/', auth_views.password_change, {'template_name': 'change-password.html'} 3.10. User authentication in Django 357
- 362. Django Documentation, Release 1.9.3.dev20160224120324 ) ] All views return a TemplateResponse instance, which allows you to easily customize the response data before rendering. A way to do this is to wrap a view in your own view: from django.contrib.auth import views def change_password(request): template_response = views.password_change(request) # Do something with `template_response` return template_response For more details, see the TemplateResponse documentation. All authentication views This is a list with all the views django.contrib.auth provides. For implementation details see Using the views. login(request, template_name=‘registration/login.html‘, redirect_field_name=, authentication_form, cur- rent_app, extra_context) URL name: login See the URL documentation for details on using named URL patterns. Optional arguments: •template_name: The name of a template to display for the view used to log the user in. Defaults to registration/login.html. •redirect_field_name: The name of a GET field containing the URL to redirect to after login. De- faults to next. •authentication_form: A callable (typically just a form class) to use for authentication. Defaults to AuthenticationForm. •current_app: A hint indicating which application contains the current view. See the namespaced URL resolution strategy for more information. •extra_context: A dictionary of context data that will be added to the default context data passed to the template. Deprecated since version 1.9: The current_app parameter is deprecated and will be removed in Django 2.0. Callers should set request.current_app instead. Here’s what django.contrib.auth.views.login does: •If called via GET, it displays a login form that POSTs to the same URL. More on this in a bit. •If called via POST with user submitted credentials, it tries to log the user in. If login is suc- cessful, the view redirects to the URL specified in next. If next isn’t provided, it redirects to settings.LOGIN_REDIRECT_URL (which defaults to /accounts/profile/). If login isn’t suc- cessful, it redisplays the login form. It’s your responsibility to provide the html for the login template , called registration/login.html by default. This template gets passed four template context variables: •form: A Form object representing the AuthenticationForm. •next: The URL to redirect to after successful login. This may contain a query string, too. 358 Chapter 3. Using Django
- 363. Django Documentation, Release 1.9.3.dev20160224120324 •site: The current Site, according to the SITE_ID setting. If you don’t have the site framework installed, this will be set to an instance of RequestSite, which derives the site name and domain from the current HttpRequest. •site_name: An alias for site.name. If you don’t have the site framework installed, this will be set to the value of request.META[’SERVER_NAME’]. For more on sites, see The “sites” framework. If you’d prefer not to call the template registration/login.html, you can pass the template_name parameter via the extra arguments to the view in your URLconf. For example, this URLconf line would use myapp/login.html instead: url(r'^accounts/login/$', auth_views.login, {'template_name': 'myapp/login.html'}), You can also specify the name of the GET field which contains the URL to redirect to after login by passing redirect_field_name to the view. By default, the field is called next. Here’s a sample registration/login.html template you can use as a starting point. It assumes you have a base.html template that defines a content block: {% extends "base.html" %} {% block content %} {% if form.errors %} <p>Your username and password didn't match. Please try again.</p> {% endif %} {% if next %} {% if user.is_authenticated %} <p>Your account doesn't have access to this page. To proceed, please login with an account that has access.</p> {% else %} <p>Please login to see this page.</p> {% endif %} {% endif %} <form method="post" action="{% url 'login' %}"> {% csrf_token %} <table> <tr> <td>{{ form.username.label_tag }}</td> <td>{{ form.username }}</td> </tr> <tr> <td>{{ form.password.label_tag }}</td> <td>{{ form.password }}</td> </tr> </table> <input type="submit" value="login" /> <input type="hidden" name="next" value="{{ next }}" /> </form> {# Assumes you setup the password_reset view in your URLconf #} <p><a href="{% url 'password_reset' %}">Lost password?</a></p> {% endblock %} If you have customized authentication (see Customizing Authentication) you can pass a custom authentication form to the login view via the authentication_form parameter. This form must accept a request key- 3.10. User authentication in Django 359
- 364. Django Documentation, Release 1.9.3.dev20160224120324 word argument in its __init__ method, and provide a get_user() method which returns the authenticated user object (this method is only ever called after successful form validation). logout(request, next_page=None, template_name=’registration/logged_out.html’, redi- rect_field_name=’next’, current_app=None, extra_context=None) Logs a user out. URL name: logout Optional arguments: •next_page: The URL to redirect to after logout. •template_name: The full name of a template to display after logging the user out. Defaults to registration/logged_out.html if no argument is supplied. •redirect_field_name: The name of a GET field containing the URL to redirect to after log out. Defaults to next. Overrides the next_page URL if the given GET parameter is passed. •current_app: A hint indicating which application contains the current view. See the namespaced URL resolution strategy for more information. •extra_context: A dictionary of context data that will be added to the default context data passed to the template. Deprecated since version 1.9: The current_app parameter is deprecated and will be removed in Django 2.0. Callers should set request.current_app instead. Template context: •title: The string “Logged out”, localized. •site: The current Site, according to the SITE_ID setting. If you don’t have the site framework installed, this will be set to an instance of RequestSite, which derives the site name and domain from the current HttpRequest. •site_name: An alias for site.name. If you don’t have the site framework installed, this will be set to the value of request.META[’SERVER_NAME’]. For more on sites, see The “sites” framework. •current_app: A hint indicating which application contains the current view. See the namespaced URL resolution strategy for more information. •extra_context: A dictionary of context data that will be added to the default context data passed to the template. logout_then_login(request, login_url=None, current_app=None, extra_context=None) Logs a user out, then redirects to the login page. URL name: No default URL provided Optional arguments: •login_url: The URL of the login page to redirect to. Defaults to settings.LOGIN_URL if not supplied. •current_app: A hint indicating which application contains the current view. See the namespaced URL resolution strategy for more information. •extra_context: A dictionary of context data that will be added to the default context data passed to the template. Deprecated since version 1.9: The current_app parameter is deprecated and will be removed in Django 2.0. Callers should set request.current_app instead. 360 Chapter 3. Using Django
- 365. Django Documentation, Release 1.9.3.dev20160224120324 password_change(request, template_name=’registration/password_change_form.html’, post_change_redirect=None, password_change_form=PasswordChangeForm, cur- rent_app=None, extra_context=None) Allows a user to change their password. URL name: password_change Optional arguments: •template_name: The full name of a template to use for displaying the password change form. Defaults to registration/password_change_form.html if not supplied. •post_change_redirect: The URL to redirect to after a successful password change. •password_change_form: A custom “change password” form which must accept a user key- word argument. The form is responsible for actually changing the user’s password. Defaults to PasswordChangeForm. •current_app: A hint indicating which application contains the current view. See the namespaced URL resolution strategy for more information. •extra_context: A dictionary of context data that will be added to the default context data passed to the template. Deprecated since version 1.9: The current_app parameter is deprecated and will be removed in Django 2.0. Callers should set request.current_app instead. Template context: •form: The password change form (see password_change_form above). password_change_done(request, template_name=’registration/password_change_done.html’, cur- rent_app=None, extra_context=None) The page shown after a user has changed their password. URL name: password_change_done Optional arguments: •template_name: The full name of a template to use. Defaults to registration/password_change_done.html if not supplied. •current_app: A hint indicating which application contains the current view. See the namespaced URL resolution strategy for more information. •extra_context: A dictionary of context data that will be added to the default context data passed to the template. Deprecated since version 1.9: The current_app parameter is deprecated and will be removed in Django 2.0. Callers should set request.current_app instead. password_reset(request, is_admin_site=False, template_name=’registration/password_reset_form.html’, email_template_name=’registration/password_reset_email.html’, sub- ject_template_name=’registration/password_reset_subject.txt’, pass- word_reset_form=PasswordResetForm, token_generator=default_token_generator, post_reset_redirect=None, from_email=None, current_app=None, extra_context=None, html_email_template_name=None, extra_email_context=None) Allows a user to reset their password by generating a one-time use link that can be used to reset the password, and sending that link to the user’s registered email address. If the email address provided does not exist in the system, this view won’t send an email, but the user won’t re- ceive any error message either. This prevents information leaking to potential attackers. If you want to provide an error message in this case, you can subclass PasswordResetForm and use the password_reset_form argument. 3.10. User authentication in Django 361
- 366. Django Documentation, Release 1.9.3.dev20160224120324 Users flagged with an unusable password (see set_unusable_password() aren’t allowed to request a password reset to prevent misuse when using an external authentication source like LDAP. Note that they won’t receive any error message since this would expose their account’s existence but no mail will be sent either. URL name: password_reset Optional arguments: •template_name: The full name of a template to use for displaying the password reset form. Defaults to registration/password_reset_form.html if not supplied. •email_template_name: The full name of a template to use for generating the email with the reset password link. Defaults to registration/password_reset_email.html if not supplied. •subject_template_name: The full name of a template to use for the subject of the email with the reset password link. Defaults to registration/password_reset_subject.txt if not supplied. •password_reset_form: Form that will be used to get the email of the user to reset the password for. Defaults to PasswordResetForm. •token_generator: Instance of the class to check the one time link. This will default to default_token_generator, it’s an instance of django.contrib.auth.tokens.PasswordResetTokenGenerator. •post_reset_redirect: The URL to redirect to after a successful password reset request. •from_email: A valid email address. By default Django uses the DEFAULT_FROM_EMAIL. •current_app: A hint indicating which application contains the current view. See the namespaced URL resolution strategy for more information. •extra_context: A dictionary of context data that will be added to the default context data passed to the template. •html_email_template_name: The full name of a template to use for generating a text/html multipart email with the password reset link. By default, HTML email is not sent. •extra_email_context: A dictionary of context data that will available in the email template. Deprecated since version 1.8: The is_admin_site argument is deprecated and will be removed in Django 1.10. Deprecated since version 1.9: The current_app parameter is deprecated and will be removed in Django 2.0. Callers should set request.current_app instead. The extra_email_context parameter was added. Template context: •form: The form (see password_reset_form above) for resetting the user’s password. Email template context: •email: An alias for user.email •user: The current User, according to the email form field. Only active users are able to reset their passwords (User.is_active is True). •site_name: An alias for site.name. If you don’t have the site framework installed, this will be set to the value of request.META[’SERVER_NAME’]. For more on sites, see The “sites” framework. •domain: An alias for site.domain. If you don’t have the site framework installed, this will be set to the value of request.get_host(). •protocol: http or https 362 Chapter 3. Using Django
- 367. Django Documentation, Release 1.9.3.dev20160224120324 •uid: The user’s primary key encoded in base 64. •token: Token to check that the reset link is valid. Sample registration/password_reset_email.html (email body template): Someone asked for password reset for email {{ email }}. Follow the link below: {{ protocol}}://{{ domain }}{% url 'password_reset_confirm' uidb64=uid token=token %} The same template context is used for subject template. Subject must be single line plain text string. password_reset_done(request, template_name=’registration/password_reset_done.html’, cur- rent_app=None, extra_context=None) The page shown after a user has been emailed a link to reset their password. This view is called by default if the password_reset() view doesn’t have an explicit post_reset_redirect URL set. URL name: password_reset_done Note: If the email address provided does not exist in the system, the user is inactive, or has an unusable password, the user will still be redirected to this view but no email will be sent. Optional arguments: •template_name: The full name of a template to use. Defaults to registration/password_reset_done.html if not supplied. •current_app: A hint indicating which application contains the current view. See the namespaced URL resolution strategy for more information. •extra_context: A dictionary of context data that will be added to the default context data passed to the template. Deprecated since version 1.9: The current_app parameter is deprecated and will be removed in Django 2.0. Callers should set request.current_app instead. password_reset_confirm(request, uidb64=None, token=None, tem- plate_name=’registration/password_reset_confirm.html’, to- ken_generator=default_token_generator, set_password_form=SetPasswordForm, post_reset_redirect=None, current_app=None, extra_context=None) Presents a form for entering a new password. URL name: password_reset_confirm Optional arguments: •uidb64: The user’s id encoded in base 64. Defaults to None. •token: Token to check that the password is valid. Defaults to None. •template_name: The full name of a template to display the confirm password view. Default value is registration/password_reset_confirm.html. •token_generator: Instance of the class to check the password. This will default to default_token_generator, it’s an instance of django.contrib.auth.tokens.PasswordResetTokenGenerator. •set_password_form: Form that will be used to set the password. Defaults to SetPasswordForm •post_reset_redirect: URL to redirect after the password reset done. Defaults to None. •current_app: A hint indicating which application contains the current view. See the namespaced URL resolution strategy for more information. 3.10. User authentication in Django 363
- 368. Django Documentation, Release 1.9.3.dev20160224120324 •extra_context: A dictionary of context data that will be added to the default context data passed to the template. Template context: •form: The form (see set_password_form above) for setting the new user’s password. •validlink: Boolean, True if the link (combination of uidb64 and token) is valid or unused yet. Deprecated since version 1.9: The current_app parameter is deprecated and will be removed in Django 2.0. Callers should set request.current_app instead. password_reset_complete(request, template_name=’registration/password_reset_complete.html’, current_app=None, extra_context=None) Presents a view which informs the user that the password has been successfully changed. URL name: password_reset_complete Optional arguments: •template_name: The full name of a template to display the view. Defaults to registration/password_reset_complete.html. •current_app: A hint indicating which application contains the current view. See the namespaced URL resolution strategy for more information. •extra_context: A dictionary of context data that will be added to the default context data passed to the template. Deprecated since version 1.9: The current_app parameter is deprecated and will be removed in Django 2.0. Callers should set request.current_app instead. Helper functions redirect_to_login(next, login_url=None, redirect_field_name=’next’) Redirects to the login page, and then back to another URL after a successful login. Required arguments: •next: The URL to redirect to after a successful login. Optional arguments: •login_url: The URL of the login page to redirect to. Defaults to settings.LOGIN_URL if not supplied. •redirect_field_name: The name of a GET field containing the URL to redirect to after log out. Overrides next if the given GET parameter is passed. Built-in forms If you don’t want to use the built-in views, but want the convenience of not having to write forms for this functionality, the authentication system provides several built-in forms located in django.contrib.auth.forms: Note: The built-in authentication forms make certain assumptions about the user model that they are working with. If you’re using a custom User model, it may be necessary to define your own forms for the authentication system. For more information, refer to the documentation about using the built-in authentication forms with custom user models. 364 Chapter 3. Using Django
- 369. Django Documentation, Release 1.9.3.dev20160224120324 class AdminPasswordChangeForm A form used in the admin interface to change a user’s password. Takes the user as the first positional argument. class AuthenticationForm A form for logging a user in. Takes request as its first positional argument, which is stored on the form instance for use by sub-classes. confirm_login_allowed(user) By default, AuthenticationForm rejects users whose is_active flag is set to False. You may override this behavior with a custom policy to determine which users can log in. Do this with a custom form that subclasses AuthenticationForm and overrides the confirm_login_allowed() method. This method should raise a ValidationError if the given user may not log in. For example, to allow all users to log in regardless of “active” status: from django.contrib.auth.forms import AuthenticationForm class AuthenticationFormWithInactiveUsersOkay(AuthenticationForm): def confirm_login_allowed(self, user): pass Or to allow only some active users to log in: class PickyAuthenticationForm(AuthenticationForm): def confirm_login_allowed(self, user): if not user.is_active: raise forms.ValidationError( _("This account is inactive."), code='inactive', ) if user.username.startswith('b'): raise forms.ValidationError( _("Sorry, accounts starting with 'b' aren't welcome here."), code='no_b_users', ) class PasswordChangeForm A form for allowing a user to change their password. class PasswordResetForm A form for generating and emailing a one-time use link to reset a user’s password. send_email(subject_template_name, email_template_name, context, from_email, to_email, html_email_template_name=None) Uses the arguments to send an EmailMultiAlternatives. Can be overridden to customize how the email is sent to the user. Parameters • subject_template_name – the template for the subject. • email_template_name – the template for the email body. • context – context passed to the subject_template, email_template, and html_email_template (if it is not None). • from_email – the sender’s email. • to_email – the email of the requester. 3.10. User authentication in Django 365
- 370. Django Documentation, Release 1.9.3.dev20160224120324 • html_email_template_name – the template for the HTML body; defaults to None, in which case a plain text email is sent. By default, save() populates the context with the same variables that password_reset() passes to its email context. class SetPasswordForm A form that lets a user change their password without entering the old password. class UserChangeForm A form used in the admin interface to change a user’s information and permissions. class UserCreationForm A form for creating a new user. Authentication data in templates The currently logged-in user and their permissions are made available in the template context when you use RequestContext. Technicality Technically, these variables are only made available in the template context if you use RequestContext and the ’django.contrib.auth.context_processors.auth’ context processor is enabled. It is in the default generated settings file. For more, see the RequestContext docs. Users When rendering a template RequestContext, the currently logged-in user, either a User instance or an AnonymousUser instance, is stored in the template variable {{ user }}: {% if user.is_authenticated %} <p>Welcome, {{ user.username }}. Thanks for logging in.</p> {% else %} <p>Welcome, new user. Please log in.</p> {% endif %} This template context variable is not available if a RequestContext is not being used. Permissions The currently logged-in user’s permissions are stored in the template variable {{ perms }}. This is an instance of django.contrib.auth.context_processors.PermWrapper, which is a template- friendly proxy of permissions. In the {{ perms }} object, single-attribute lookup is a proxy to User.has_module_perms. This example would display True if the logged-in user had any permissions in the foo app: {{ perms.foo }} Two-level-attribute lookup is a proxy to User.has_perm. This example would display True if the logged-in user had the permission foo.can_vote: {{ perms.foo.can_vote }} Thus, you can check permissions in template {% if %} statements: 366 Chapter 3. Using Django
- 371. Django Documentation, Release 1.9.3.dev20160224120324 {% if perms.foo %} <p>You have permission to do something in the foo app.</p> {% if perms.foo.can_vote %} <p>You can vote!</p> {% endif %} {% if perms.foo.can_drive %} <p>You can drive!</p> {% endif %} {% else %} <p>You don't have permission to do anything in the foo app.</p> {% endif %} It is possible to also look permissions up by {% if in %} statements. For example: {% if 'foo' in perms %} {% if 'foo.can_vote' in perms %} <p>In lookup works, too.</p> {% endif %} {% endif %} Managing users in the admin When you have both django.contrib.admin and django.contrib.auth installed, the admin provides a convenient way to view and manage users, groups, and permissions. Users can be created and deleted like any Django model. Groups can be created, and permissions can be assigned to users or groups. A log of user edits to models made within the admin is also stored and displayed. Creating users You should see a link to “Users” in the “Auth” section of the main admin index page. The “Add user” admin page is different than standard admin pages in that it requires you to choose a username and password before allowing you to edit the rest of the user’s fields. Also note: if you want a user account to be able to create users using the Django admin site, you’ll need to give them permission to add users and change users (i.e., the “Add user” and “Change user” permissions). If an account has permission to add users but not to change them, that account won’t be able to add users. Why? Because if you have permission to add users, you have the power to create superusers, which can then, in turn, change other users. So Django requires add and change permissions as a slight security measure. Be thoughtful about how you allow users to manage permissions. If you give a non-superuser the ability to edit users, this is ultimately the same as giving them superuser status because they will be able to elevate permissions of users including themselves! Changing passwords User passwords are not displayed in the admin (nor stored in the database), but the password storage details are displayed. Included in the display of this information is a link to a password change form that allows admins to change user passwords. 3.10.2 Password management in Django Password management is something that should generally not be reinvented unnecessarily, and Django endeavors to provide a secure and flexible set of tools for managing user passwords. This document describes how Django stores 3.10. User authentication in Django 367
- 372. Django Documentation, Release 1.9.3.dev20160224120324 passwords, how the storage hashing can be configured, and some utilities to work with hashed passwords. See also: Even though users may use strong passwords, attackers might be able to eavesdrop on their connections. Use HTTPS to avoid sending passwords (or any other sensitive data) over plain HTTP connections because they will be vulnerable to password sniffing. How Django stores passwords Django provides a flexible password storage system and uses PBKDF2 by default. The password attribute of a User object is a string in this format: <algorithm>$<iterations>$<salt>$<hash> Those are the components used for storing a User’s password, separated by the dollar-sign character and consist of: the hashing algorithm, the number of algorithm iterations (work factor), the random salt, and the resulting password hash. The algorithm is one of a number of one-way hashing or password storage algorithms Django can use; see below. Iterations describe the number of times the algorithm is run over the hash. Salt is the random seed used and the hash is the result of the one-way function. By default, Django uses the PBKDF2 algorithm with a SHA256 hash, a password stretching mechanism recommended by NIST. This should be sufficient for most users: it’s quite secure, requiring massive amounts of computing time to break. However, depending on your requirements, you may choose a different algorithm, or even use a custom algorithm to match your specific security situation. Again, most users shouldn’t need to do this – if you’re not sure, you probably don’t. If you do, please read on: Django chooses the algorithm to use by consulting the PASSWORD_HASHERS setting. This is a list of hashing algorithm classes that this Django installation supports. The first entry in this list (that is, settings.PASSWORD_HASHERS[0]) will be used to store passwords, and all the other entries are valid hash- ers that can be used to check existing passwords. This means that if you want to use a different algorithm, you’ll need to modify PASSWORD_HASHERS to list your preferred algorithm first in the list. The default for PASSWORD_HASHERS is: PASSWORD_HASHERS = [ 'django.contrib.auth.hashers.PBKDF2PasswordHasher', 'django.contrib.auth.hashers.PBKDF2SHA1PasswordHasher', 'django.contrib.auth.hashers.BCryptSHA256PasswordHasher', 'django.contrib.auth.hashers.BCryptPasswordHasher', 'django.contrib.auth.hashers.SHA1PasswordHasher', 'django.contrib.auth.hashers.MD5PasswordHasher', 'django.contrib.auth.hashers.CryptPasswordHasher', ] This means that Django will use PBKDF2 to store all passwords, but will support checking passwords stored with PBKDF2SHA1, bcrypt, SHA1, etc. The next few sections describe a couple of common ways advanced users may want to modify this setting. Using bcrypt with Django Bcrypt is a popular password storage algorithm that’s specifically designed for long-term password storage. It’s not the default used by Django since it requires the use of third-party libraries, but since many people may want to use it Django supports bcrypt with minimal effort. 368 Chapter 3. Using Django
- 373. Django Documentation, Release 1.9.3.dev20160224120324 To use Bcrypt as your default storage algorithm, do the following: 1. Install the bcrypt library. This can be done by running pip install django[bcrypt], or by download- ing the library and installing it with python setup.py install. 2. Modify PASSWORD_HASHERS to list BCryptSHA256PasswordHasher first. That is, in your settings file, you’d put: PASSWORD_HASHERS = [ 'django.contrib.auth.hashers.BCryptSHA256PasswordHasher', 'django.contrib.auth.hashers.BCryptPasswordHasher', 'django.contrib.auth.hashers.PBKDF2PasswordHasher', 'django.contrib.auth.hashers.PBKDF2SHA1PasswordHasher', 'django.contrib.auth.hashers.SHA1PasswordHasher', 'django.contrib.auth.hashers.MD5PasswordHasher', 'django.contrib.auth.hashers.CryptPasswordHasher', ] (You need to keep the other entries in this list, or else Django won’t be able to upgrade passwords; see below). That’s it – now your Django install will use Bcrypt as the default storage algorithm. Password truncation with BCryptPasswordHasher The designers of bcrypt truncate all passwords at 72 characters which means that bcrypt(password_with_100_chars) == bcrypt(password_with_100_chars[:72]). The original BCryptPasswordHasher does not have any special handling and thus is also subject to this hidden password length limit. BCryptSHA256PasswordHasher fixes this by first first hashing the password using sha256. This prevents the password truncation and so should be preferred over the BCryptPasswordHasher. The practical ramification of this truncation is pretty marginal as the average user does not have a password greater than 72 characters in length and even being truncated at 72 the compute powered required to brute force bcrypt in any useful amount of time is still astronomical. Nonetheless, we recommend you use BCryptSHA256PasswordHasher anyway on the principle of “better safe than sorry”. Other bcrypt implementations There are several other implementations that allow bcrypt to be used with Django. Django’s bcrypt support is NOT directly compatible with these. To upgrade, you will need to modify the hashes in your database to be in the form bcrypt$(raw bcrypt output). For example: bcrypt$$2a$12$NT0I31Sa7ihGEWpka9ASYrEFkhuTNeBQ2xfZskIiiJeyFXhRgS.Sy. Increasing the work factor The PBKDF2 and bcrypt algorithms use a number of iterations or rounds of hashing. This deliberately slows down attackers, making attacks against hashed passwords harder. However, as computing power increases, the number of iterations needs to be increased. We’ve chosen a reasonable default (and will increase it with each release of Django), but you may wish to tune it up or down, depending on your security needs and available processing power. To do so, you’ll subclass the appropriate algorithm and override the iterations parameters. For example, to increase the number of iterations used by the default PBKDF2 algorithm: 1. Create a subclass of django.contrib.auth.hashers.PBKDF2PasswordHasher: from django.contrib.auth.hashers import PBKDF2PasswordHasher class MyPBKDF2PasswordHasher(PBKDF2PasswordHasher): 3.10. User authentication in Django 369
- 374. Django Documentation, Release 1.9.3.dev20160224120324 """ A subclass of PBKDF2PasswordHasher that uses 100 times more iterations. """ iterations = PBKDF2PasswordHasher.iterations * 100 Save this somewhere in your project. For example, you might put this in a file like myproject/hashers.py. 2. Add your new hasher as the first entry in PASSWORD_HASHERS: PASSWORD_HASHERS = [ 'myproject.hashers.MyPBKDF2PasswordHasher', 'django.contrib.auth.hashers.PBKDF2PasswordHasher', 'django.contrib.auth.hashers.PBKDF2SHA1PasswordHasher', 'django.contrib.auth.hashers.BCryptSHA256PasswordHasher', 'django.contrib.auth.hashers.BCryptPasswordHasher', 'django.contrib.auth.hashers.SHA1PasswordHasher', 'django.contrib.auth.hashers.MD5PasswordHasher', 'django.contrib.auth.hashers.CryptPasswordHasher', ] That’s it – now your Django install will use more iterations when it stores passwords using PBKDF2. Password upgrading When users log in, if their passwords are stored with anything other than the preferred algorithm, Django will auto- matically upgrade the algorithm to the preferred one. This means that old installs of Django will get automatically more secure as users log in, and it also means that you can switch to new (and better) storage algorithms as they get invented. However, Django can only upgrade passwords that use algorithms mentioned in PASSWORD_HASHERS, so as you upgrade to new systems you should make sure never to remove entries from this list. If you do, users using unmentioned algorithms won’t be able to upgrade. Hashed passwords will be updated when increasing (or decreasing) the number of PBKDF2 iterations or bcrypt rounds. Passwords updates when changing the number of bcrypt rounds was added. Password upgrading without requiring a login If you have an existing database with an older, weak hash such as MD5 or SHA1, you might want to upgrade those hashes yourself instead of waiting for the upgrade to happen when a user logs in (which may never happen if a user doesn’t return to your site). In this case, you can use a “wrapped” password hasher. For this example, we’ll migrate a collection of SHA1 hashes to use PBKDF2(SHA1(password)) and add the cor- responding password hasher for checking if a user entered the correct password on login. We assume we’re using the built-in User model and that our project has an accounts app. You can modify the pattern to work with any algorithm or with a custom user model. First, we’ll add the custom hasher: accounts/hashers.py from django.contrib.auth.hashers import ( PBKDF2PasswordHasher, SHA1PasswordHasher, ) class PBKDF2WrappedSHA1PasswordHasher(PBKDF2PasswordHasher): 370 Chapter 3. Using Django
- 375. Django Documentation, Release 1.9.3.dev20160224120324 algorithm = 'pbkdf2_wrapped_sha1' def encode_sha1_hash(self, sha1_hash, salt, iterations=None): return super(PBKDF2WrappedSHA1PasswordHasher, self).encode(sha1_hash, salt, iterations) def encode(self, password, salt, iterations=None): _, _, sha1_hash = SHA1PasswordHasher().encode(password, salt).split('$', 2) return self.encode_sha1_hash(sha1_hash, salt, iterations) The data migration might look something like: accounts/migrations/0002_migrate_sha1_passwords.py from django.db import migrations from ..hashers import PBKDF2WrappedSHA1PasswordHasher def forwards_func(apps, schema_editor): User = apps.get_model('auth', 'User') users = User.objects.filter(password__startswith='sha1$') hasher = PBKDF2WrappedSHA1PasswordHasher() for user in users: algorithm, salt, sha1_hash = user.password.split('$', 2) user.password = hasher.encode_sha1_hash(sha1_hash, salt) user.save(update_fields=['password']) class Migration(migrations.Migration): dependencies = [ ('accounts', '0001_initial'), # replace this with the latest migration in contrib.auth ('auth', '####_migration_name'), ] operations = [ migrations.RunPython(forwards_func), ] Be aware that this migration will take on the order of several minutes for several thousand users, depending on the speed of your hardware. Finally, we’ll add a PASSWORD_HASHERS setting: mysite/settings.py PASSWORD_HASHERS = [ 'django.contrib.auth.hashers.PBKDF2PasswordHasher', 'accounts.hashers.PBKDF2WrappedSHA1PasswordHasher', ] Include any other hashers that your site uses in this list. Manually managing a user’s password The django.contrib.auth.hashers module provides a set of functions to create and validate hashed pass- word. You can use them independently from the User model. 3.10. User authentication in Django 371
- 376. Django Documentation, Release 1.9.3.dev20160224120324 check_password(password, encoded) If you’d like to manually authenticate a user by comparing a plain-text password to the hashed password in the database, use the convenience function check_password(). It takes two arguments: the plain-text password to check, and the full value of a user’s password field in the database to check against, and returns True if they match, False otherwise. make_password(password, salt=None, hasher=’default’) Creates a hashed password in the format used by this application. It takes one mandatory argument: the password in plain-text. Optionally, you can provide a salt and a hashing algorithm to use, if you don’t want to use the defaults (first entry of PASSWORD_HASHERS setting). Currently supported algo- rithms are: ’pbkdf2_sha256’, ’pbkdf2_sha1’, ’bcrypt_sha256’ (see Using bcrypt with Django), ’bcrypt’, ’sha1’, ’md5’, ’unsalted_md5’ (only for backward compatibility) and ’crypt’ if you have the crypt library installed. If the password argument is None, an unusable password is returned (a one that will be never accepted by check_password()). is_password_usable(encoded_password) Checks if the given string is a hashed password that has a chance of being verified against check_password(). Password validation Users often choose poor passwords. To help mitigate this problem, Django offers pluggable password validation. You can configure multiple password validators at the same time. A few validators are included in Django, but it’s simple to write your own as well. Each password validator must provide a help text to explain the requirements to the user, validate a given password and return an error message if it does not meet the requirements, and optionally receive passwords that have been set. Validators can also have optional settings to fine tune their behavior. Validation is controlled by the AUTH_PASSWORD_VALIDATORS setting. By default, validators are used in the forms to reset or change passwords. The default for the setting is an empty list, which means no validators are applied. In new projects created with the default startproject template, a simple set of validators is enabled. Note: Password validation can prevent the use of many types of weak passwords. However, the fact that a password passes all the validators doesn’t guarantee that it is a strong password. There are many factors that can weaken a password that are not detectable by even the most advanced password validators. Enabling password validation Password validation is configured in the AUTH_PASSWORD_VALIDATORS setting: AUTH_PASSWORD_VALIDATORS = [ { 'NAME': 'django.contrib.auth.password_validation.UserAttributeSimilarityValidator', }, { 'NAME': 'django.contrib.auth.password_validation.MinimumLengthValidator', 'OPTIONS': { 'min_length': 9, } }, { 'NAME': 'django.contrib.auth.password_validation.CommonPasswordValidator', }, 372 Chapter 3. Using Django
- 377. Django Documentation, Release 1.9.3.dev20160224120324 { 'NAME': 'django.contrib.auth.password_validation.NumericPasswordValidator', }, ] This example enables all four included validators: • UserAttributeSimilarityValidator, which checks the similarity between the password and a set of attributes of the user. • MinimumLengthValidator, which simply checks whether the password meets a minimum length. This validator is configured with a custom option: it now requires the minimum length to be nine characters, instead of the default eight. • CommonPasswordValidator, which checks whether the password occurs in a list of common passwords. By default, it compares to an included list of 1000 common passwords. • NumericPasswordValidator, which checks whether the password isn’t entirely numeric. For UserAttributeSimilarityValidator and CommonPasswordValidator, we’re simply using the default settings in this example. NumericPasswordValidator has no settings. The help texts and any errors from password validators are always returned in the order they are listed in AUTH_PASSWORD_VALIDATORS. Included validators Django includes four validators: class MinimumLengthValidator(min_length=8) Validates whether the password meets a minimum length. The minimum length can be customized with the min_length parameter. class UserAttributeSimilarityValidator(user_attributes=DEFAULT_USER_ATTRIBUTES, max_similarity=0.7) Validates whether the password is sufficiently different from certain attributes of the user. The user_attributes parameter should be an iterable of names of user attributes to compare to. If this argument is not provided, the default is used: ’username’, ’first_name’, ’last_name’, ’email’. Attributes that don’t exist are ignored. The maximum similarity the password can have, before it is rejected, can be set with the max_similarity parameter, on a scale of 0 to 1. A setting of 0 will cause all passwords to be rejected, whereas a setting of 1 will cause it to only reject passwords that are identical to an attribute’s value. class CommonPasswordValidator(password_list_path=DEFAULT_PASSWORD_LIST_PATH) Validates whether the password is not a common password. By default, this checks against a list of 1000 common password created by Mark Burnett. The password_list_path can be set to the path of a custom file of common passwords. This file should contain one password per line and may be plain text or gzipped. class NumericPasswordValidator Validates whether the password is not entirely numeric. Integrating validation There are a few functions in django.contrib.auth.password_validation that you can call from your own forms or other code to integrate password validation. This can be useful if you use custom forms for password 3.10. User authentication in Django 373
- 378. Django Documentation, Release 1.9.3.dev20160224120324 setting, or if you have API calls that allow passwords to be set, for example. validate_password(password, user=None, password_validators=None) Validates a password. If all validators find the password valid, returns None. If one or more validators reject the password, raises a ValidationError with all the error messages from the validators. The user object is optional: if it’s not provided, some validators may not be able to perform any validation and will accept any password. password_changed(password, user=None, password_validators=None) Informs all validators that the password has been changed. This can be used by validators such as one that prevents password reuse. This should be called once the password has been successfully changed. For subclasses of AbstractBaseUser, the password field will be marked as “dirty” when calling set_password() which triggers a call to password_changed() after the user is saved. password_validators_help_texts(password_validators=None) Returns a list of the help texts of all validators. These explain the password requirements to the user. password_validators_help_text_html(password_validators=None) Returns an HTML string with all help texts in an <ul>. This is helpful when adding password validation to forms, as you can pass the output directly to the help_text parameter of a form field. get_password_validators(validator_config) Returns a set of validator objects based on the validator_config parameter. By default, all functions use the validators defined in AUTH_PASSWORD_VALIDATORS, but by calling this function with an alternate set of validators and then passing the result into the password_validators parameter of the other functions, your custom set of validators will be used instead. This is useful when you have a typical set of validators to use for most scenarios, but also have a special situation that requires a custom set. If you always use the same set of validators, there is no need to use this function, as the configuration from AUTH_PASSWORD_VALIDATORS is used by default. The structure of validator_config is identical to the structure of AUTH_PASSWORD_VALIDATORS. The return value of this function can be passed into the password_validators parameter of the functions listed above. Note that where the password is passed to one of these functions, this should always be the clear text password - not a hashed password. Writing your own validator If Django’s built-in validators are not sufficient, you can write your own password validators. Validators are fairly simple classes. They must implement two methods: • validate(self, password, user=None): validate a password. Return None if the password is valid, or raise a ValidationError with an error message if the password is not valid. You must be able to deal with user being None - if that means your validator can’t run, simply return None for no error. • get_help_text(): provide a help text to explain the requirements to the user. Any items in the OPTIONS in AUTH_PASSWORD_VALIDATORS for your validator will be passed to the constructor. All constructor arguments should have a default value. Here’s a basic example of a validator, with one optional setting: from django.core.exceptions import ValidationError from django.utils.translation import ugettext as _ class MinimumLengthValidator(object): def __init__(self, min_length=8): 374 Chapter 3. Using Django
- 379. Django Documentation, Release 1.9.3.dev20160224120324 self.min_length = min_length def validate(self, password, user=None): if len(password) < self.min_length: raise ValidationError( _("This password must contain at least %(min_length)d characters."), code='password_too_short', params={'min_length': self.min_length}, ) def get_help_text(self): return _( "Your password must contain at least %(min_length)d characters." % {'min_length': self.min_length} ) You can also implement password_changed(password, user=None), which will be called after a successful password change. That can be used to prevent password reuse, for example. However, if you decide to store a user’s previous passwords, you should never do so in clear text. 3.10.3 Customizing authentication in Django The authentication that comes with Django is good enough for most common cases, but you may have needs not met by the out-of-the-box defaults. To customize authentication to your projects needs involves understanding what points of the provided system are extensible or replaceable. This document provides details about how the auth system can be customized. Authentication backends provide an extensible system for when a username and password stored with the User model need to be authenticated against a different service than Django’s default. You can give your models custom permissions that can be checked through Django’s authorization system. You can extend the default User model, or substitute a completely customized model. Other authentication sources There may be times you have the need to hook into another authentication source – that is, another source of usernames and passwords or authentication methods. For example, your company may already have an LDAP setup that stores a username and password for every employee. It’d be a hassle for both the network administrator and the users themselves if users had separate accounts in LDAP and the Django-based applications. So, to handle situations like this, the Django authentication system lets you plug in other authentication sources. You can override Django’s default database-based scheme, or you can use the default system in tandem with other systems. See the authentication backend reference for information on the authentication backends included with Django. Specifying authentication backends Behind the scenes, Django maintains a list of “authentication backends” that it checks for authentication. When somebody calls django.contrib.auth.authenticate() – as described in How to log a user in – Django tries authenticating across all of its authentication backends. If the first authentication method fails, Django tries the second one, and so on, until all backends have been attempted. 3.10. User authentication in Django 375
- 380. Django Documentation, Release 1.9.3.dev20160224120324 The list of authentication backends to use is specified in the AUTHENTICATION_BACKENDS setting. This should be a list of Python path names that point to Python classes that know how to authenticate. These classes can be anywhere on your Python path. By default, AUTHENTICATION_BACKENDS is set to: ['django.contrib.auth.backends.ModelBackend'] That’s the basic authentication backend that checks the Django users database and queries the built-in permissions. It does not provide protection against brute force attacks via any rate limiting mechanism. You may either implement your own rate limiting mechanism in a custom auth backend, or use the mechanisms provided by most Web servers. The order of AUTHENTICATION_BACKENDS matters, so if the same username and password is valid in multiple backends, Django will stop processing at the first positive match. If a backend raises a PermissionDenied exception, authentication will immediately fail. Django won’t check the backends that follow. Note: Once a user has authenticated, Django stores which backend was used to authenticate the user in the user’s session, and re-uses the same backend for the duration of that session whenever access to the currently authenticated user is needed. This effectively means that authentication sources are cached on a per-session basis, so if you change AUTHENTICATION_BACKENDS, you’ll need to clear out session data if you need to force users to re-authenticate using different methods. A simple way to do that is simply to execute Session.objects.all().delete(). Writing an authentication backend An authentication backend is a class that implements two required methods: get_user(user_id) and authenticate(**credentials), as well as a set of optional permission related authorization methods. The get_user method takes a user_id – which could be a username, database ID or whatever, but has to be the primary key of your User object – and returns a User object. The authenticate method takes credentials as keyword arguments. Most of the time, it’ll just look like this: class MyBackend(object): def authenticate(self, username=None, password=None): # Check the username/password and return a User. ... But it could also authenticate a token, like so: class MyBackend(object): def authenticate(self, token=None): # Check the token and return a User. ... Either way, authenticate should check the credentials it gets, and it should return a User object that matches those credentials, if the credentials are valid. If they’re not valid, it should return None. The Django admin is tightly coupled to the Django User object. The best way to deal with this is to create a Django User object for each user that exists for your backend (e.g., in your LDAP directory, your external SQL database, etc.) You can either write a script to do this in advance, or your authenticate method can do it the first time a user logs in. Here’s an example backend that authenticates against a username and password variable defined in your settings.py file and creates a Django User object the first time a user authenticates: 376 Chapter 3. Using Django
- 381. Django Documentation, Release 1.9.3.dev20160224120324 from django.conf import settings from django.contrib.auth.hashers import check_password from django.contrib.auth.models import User class SettingsBackend(object): """ Authenticate against the settings ADMIN_LOGIN and ADMIN_PASSWORD. Use the login name, and a hash of the password. For example: ADMIN_LOGIN = 'admin' ADMIN_PASSWORD = 'pbkdf2_sha256$30000$Vo0VlMnkR4Bk$qEvtdyZRWTcOsCnI/oQ7fVOu1XAURIZYoOZ3iq8Dr4M=' """ def authenticate(self, username=None, password=None): login_valid = (settings.ADMIN_LOGIN == username) pwd_valid = check_password(password, settings.ADMIN_PASSWORD) if login_valid and pwd_valid: try: user = User.objects.get(username=username) except User.DoesNotExist: # Create a new user. Note that we can set password # to anything, because it won't be checked; the password # from settings.py will. user = User(username=username, password='get from settings.py') user.is_staff = True user.is_superuser = True user.save() return user return None def get_user(self, user_id): try: return User.objects.get(pk=user_id) except User.DoesNotExist: return None Handling authorization in custom backends Custom auth backends can provide their own permissions. The user model will delegate permission lookup functions (get_group_permissions(), get_all_permissions(), has_perm(), and has_module_perms()) to any authentication backend that implements these functions. The permissions given to the user will be the superset of all permissions returned by all backends. That is, Django grants a permission to a user that any one backend grants. If a backend raises a PermissionDenied exception in has_perm() or has_module_perms(), the autho- rization will immediately fail and Django won’t check the backends that follow. The simple backend above could implement permissions for the magic admin fairly simply: class SettingsBackend(object): ... def has_perm(self, user_obj, perm, obj=None): if user_obj.username == settings.ADMIN_LOGIN: return True 3.10. User authentication in Django 377
- 382. Django Documentation, Release 1.9.3.dev20160224120324 else: return False This gives full permissions to the user granted access in the above example. Notice that in addition to the same arguments given to the associated django.contrib.auth.models.User functions, the backend auth functions all take the user object, which may be an anonymous user, as an argument. A full authorization implementation can be found in the ModelBackend class in django/contrib/auth/backends.py, which is the default backend and queries the auth_permission table most of the time. If you wish to pro- vide custom behavior for only part of the backend API, you can take advantage of Python inheritance and subclass ModelBackend instead of implementing the complete API in a custom backend. Authorization for anonymous users An anonymous user is one that is not authenticated i.e. they have provided no valid authentication details. However, that does not necessarily mean they are not authorized to do anything. At the most basic level, most websites authorize anonymous users to browse most of the site, and many allow anonymous posting of comments etc. Django’s permission framework does not have a place to store permissions for anonymous users. However, the user object passed to an authentication backend may be an django.contrib.auth.models.AnonymousUser object, allowing the backend to specify custom authorization behavior for anonymous users. This is especially useful for the authors of re-usable apps, who can delegate all questions of authorization to the auth backend, rather than needing settings, for example, to control anonymous access. Authorization for inactive users An inactive user is a one that is authenticated but has its attribute is_active set to False. However this does not mean they are not authorized to do anything. For example they are allowed to activate their account. The support for anonymous users in the permission system allows for a scenario where anonymous users have permis- sions to do something while inactive authenticated users do not. Do not forget to test for the is_active attribute of the user in your own backend permission methods. Handling object permissions Django’s permission framework has a foundation for object permissions, though there is no implementation for it in the core. That means that checking for object permissions will always return False or an empty list (depending on the check performed). An authentication backend will receive the keyword parameters obj and user_obj for each object related authorization method and can return the object level permission as appropriate. Custom permissions To create custom permissions for a given model object, use the permissions model Meta attribute. This example Task model creates three custom permissions, i.e., actions users can or cannot do with Task instances, specific to your application: class Task(models.Model): ... class Meta: permissions = ( ("view_task", "Can see available tasks"), ("change_task_status", "Can change the status of tasks"), ("close_task", "Can remove a task by setting its status as closed"), ) The only thing this does is create those extra permissions when you run manage.py migrate (the function that creates permissions is connected to the post_migrate signal). Your code is in charge of checking the value of these 378 Chapter 3. Using Django
- 383. Django Documentation, Release 1.9.3.dev20160224120324 permissions when a user is trying to access the functionality provided by the application (viewing tasks, changing the status of tasks, closing tasks.) Continuing the above example, the following checks if a user may view tasks: user.has_perm('app.view_task') Extending the existing User model There are two ways to extend the default User model without substituting your own model. If the changes you need are purely behavioral, and don’t require any change to what is stored in the database, you can create a proxy model based on User. This allows for any of the features offered by proxy models including default ordering, custom managers, or custom model methods. If you wish to store information related to User, you can use a OneToOneField to a model containing the fields for additional information. This one-to-one model is often called a profile model, as it might store non-auth related information about a site user. For example you might create an Employee model: from django.contrib.auth.models import User class Employee(models.Model): user = models.OneToOneField(User, on_delete=models.CASCADE) department = models.CharField(max_length=100) Assuming an existing Employee Fred Smith who has both a User and Employee model, you can access the related information using Django’s standard related model conventions: >>> u = User.objects.get(username='fsmith') >>> freds_department = u.employee.department To add a profile model’s fields to the user page in the admin, define an InlineModelAdmin (for this example, we’ll use a StackedInline) in your app’s admin.py and add it to a UserAdmin class which is registered with the User class: from django.contrib import admin from django.contrib.auth.admin import UserAdmin as BaseUserAdmin from django.contrib.auth.models import User from my_user_profile_app.models import Employee # Define an inline admin descriptor for Employee model # which acts a bit like a singleton class EmployeeInline(admin.StackedInline): model = Employee can_delete = False verbose_name_plural = 'employee' # Define a new User admin class UserAdmin(BaseUserAdmin): inlines = (EmployeeInline, ) # Re-register UserAdmin admin.site.unregister(User) admin.site.register(User, UserAdmin) These profile models are not special in any way - they are just Django models that happen to have a one- to-one link with a User model. As such, they do not get auto created when a user is created, but a django.db.models.signals.post_save could be used to create or update related models as appropriate. 3.10. User authentication in Django 379
- 384. Django Documentation, Release 1.9.3.dev20160224120324 Note that using related models results in additional queries or joins to retrieve the related data, and depending on your needs substituting the User model and adding the related fields may be your better option. However existing links to the default User model within your project’s apps may justify the extra database load. Substituting a custom User model Some kinds of projects may have authentication requirements for which Django’s built-in User model is not always appropriate. For instance, on some sites it makes more sense to use an email address as your identification token instead of a username. Django allows you to override the default User model by providing a value for the AUTH_USER_MODEL setting that references a custom model: AUTH_USER_MODEL = 'myapp.MyUser' This dotted pair describes the name of the Django app (which must be in your INSTALLED_APPS), and the name of the Django model that you wish to use as your User model. Warning: Changing AUTH_USER_MODEL has a big effect on your database structure. It changes the tables that are available, and it will affect the construction of foreign keys and many-to-many relationships. If you intend to set AUTH_USER_MODEL, you should set it before creating any migrations or running manage.py migrate for the first time. Changing this setting after you have tables created is not supported by makemigrations and will result in you having to manually fix your schema, port your data from the old user table, and possibly manually reapply some migrations. Warning: Due to limitations of Django’s dynamic dependency feature for swappable models, you must ensure that the model referenced by AUTH_USER_MODEL is created in the first migration of its app (usually called 0001_initial); otherwise, you will have dependency issues. In addition, you may run into a CircularDependencyError when running your migrations as Django won’t be able to automatically break the dependency loop due to the dynamic dependency. If you see this error, you should break the loop by moving the models depended on by your User model into a second migration (you can try making two normal models that have a ForeignKey to each other and seeing how makemigrations resolves that circular dependency if you want to see how it’s usually done) Reusable apps and AUTH_USER_MODEL Reusable apps shouldn’t implement a custom user model. A project may use many apps, and two reusable apps that implemented a custom user model couldn’t be used together. If you need to store per user information in your app, use a ForeignKey or OneToOneField to settings.AUTH_USER_MODEL as described below. Referencing the User model If you reference User directly (for example, by referring to it in a foreign key), your code will not work in projects where the AUTH_USER_MODEL setting has been changed to a different User model. get_user_model() Instead of referring to User directly, you should reference the user model using django.contrib.auth.get_user_model(). This method will return the currently active User model – the custom User model if one is specified, or User otherwise. 380 Chapter 3. Using Django
- 385. Django Documentation, Release 1.9.3.dev20160224120324 When you define a foreign key or many-to-many relations to the User model, you should specify the custom model using the AUTH_USER_MODEL setting. For example: from django.conf import settings from django.db import models class Article(models.Model): author = models.ForeignKey( settings.AUTH_USER_MODEL, on_delete=models.CASCADE, ) When connecting to signals sent by the User model, you should specify the custom model using the AUTH_USER_MODEL setting. For example: from django.conf import settings from django.db.models.signals import post_save def post_save_receiver(sender, instance, created, **kwargs): pass post_save.connect(post_save_receiver, sender=settings.AUTH_USER_MODEL) Generally speaking, you should reference the User model with the AUTH_USER_MODEL setting in code that is executed at import time. get_user_model() only works once Django has imported all models. Specifying a custom User model Model design considerations Think carefully before handling information not directly related to authentication in your custom User Model. It may be better to store app-specific user information in a model that has a relation with the User model. That allows each app to specify its own user data requirements without risking conflicts with other apps. On the other hand, queries to retrieve this related information will involve a database join, which may have an effect on performance. Django expects your custom User model to meet some minimum requirements. 1. If you use the default authentication backend, then your model must have a single unique field that can be used for identification purposes. This can be a username, an email address, or any other unique attribute. A non-unique username field is allowed if you use a custom authentication backend that can support it. 2. Your model must provide a way to address the user in a “short” and “long” form. The most common interpreta- tion of this would be to use the user’s given name as the “short” identifier, and the user’s full name as the “long” identifier. However, there are no constraints on what these two methods return - if you want, they can return exactly the same value. Older versions of Django required your model to have an integer primary key as well. The easiest way to construct a compliant custom User model is to inherit from AbstractBaseUser. AbstractBaseUser provides the core implementation of a User model, including hashed passwords and tok- enized password resets. You must then provide some key implementation details: class models.CustomUser USERNAME_FIELD A string describing the name of the field on the User model that is used as the unique identifier. This will 3.10. User authentication in Django 381
- 386. Django Documentation, Release 1.9.3.dev20160224120324 usually be a username of some kind, but it can also be an email address, or any other unique identifier. The field must be unique (i.e., have unique=True set in its definition), unless you use a custom authentication backend that can support non-unique usernames. In the following example, the field identifier is used as the identifying field: class MyUser(AbstractBaseUser): identifier = models.CharField(max_length=40, unique=True) ... USERNAME_FIELD = 'identifier' USERNAME_FIELD now supports ForeignKeys. Since there is no way to pass model instances during the createsuperuser prompt, expect the user to enter the value of to_field value (the primary_key by default) of an existing instance. REQUIRED_FIELDS A list of the field names that will be prompted for when creating a user via the createsuperuser management command. The user will be prompted to supply a value for each of these fields. It must include any field for which blank is False or undefined and may include additional fields you want prompted for when a user is created interactively. REQUIRED_FIELDS has no effect in other parts of Django, like creating a user in the admin. For example, here is the partial definition for a User model that defines two required fields - a date of birth and height: class MyUser(AbstractBaseUser): ... date_of_birth = models.DateField() height = models.FloatField() ... REQUIRED_FIELDS = ['date_of_birth', 'height'] Note: REQUIRED_FIELDS must contain all required fields on your User model, but should not contain the USERNAME_FIELD or password as these fields will always be prompted for. REQUIRED_FIELDS now supports ForeignKeys. Since there is no way to pass model instances during the createsuperuser prompt, expect the user to enter the value of to_field value (the primary_key by default) of an existing instance. is_active A boolean attribute that indicates whether the user is considered “active”. This attribute is provided as an attribute on AbstractBaseUser defaulting to True. How you choose to implement it will depend on the details of your chosen auth backends. See the documentation of the is_active attribute on the built-in user model for details. get_full_name() A longer formal identifier for the user. A common interpretation would be the full name of the user, but it can be any string that identifies the user. get_short_name() A short, informal identifier for the user. A common interpretation would be the first name of the user, but it can be any string that identifies the user in an informal way. It may also return the same value as django.contrib.auth.models.User.get_full_name(). Importing AbstractBaseUser AbstractBaseUser and BaseUserManager are importable from 382 Chapter 3. Using Django
- 387. Django Documentation, Release 1.9.3.dev20160224120324 django.contrib.auth.base_user so that they can be imported without including django.contrib.auth in INSTALLED_APPS (this raised a deprecation warning in older versions and is no longer supported in Django 1.9). The following methods are available on any subclass of AbstractBaseUser: class models.AbstractBaseUser get_username() Returns the value of the field nominated by USERNAME_FIELD. is_anonymous() Always returns False. This is a way of differentiating from AnonymousUser objects. Generally, you should prefer using is_authenticated() to this method. is_authenticated() Always returns True. This is a way to tell if the user has been authenticated. This does not imply any permissions, and doesn’t check if the user is active - it only indicates that the user has provided a valid username and password. set_password(raw_password) Sets the user’s password to the given raw string, taking care of the password hashing. Doesn’t save the AbstractBaseUser object. When the raw_password is None, the password will be set to an unusable password, as if set_unusable_password() were used. check_password(raw_password) Returns True if the given raw string is the correct password for the user. (This takes care of the password hashing in making the comparison.) set_unusable_password() Marks the user as having no password set. This isn’t the same as having a blank string for a password. check_password() for this user will never return True. Doesn’t save the AbstractBaseUser object. You may need this if authentication for your application takes place against an existing external source such as an LDAP directory. has_usable_password() Returns False if set_unusable_password() has been called for this user. get_session_auth_hash() Returns an HMAC of the password field. Used for Session invalidation on password change. You should also define a custom manager for your User model. If your User model defines username, email, is_staff, is_active, is_superuser, last_login, and date_joined fields the same as Django’s de- fault User, you can just install Django’s UserManager; however, if your User model defines different fields, you will need to define a custom manager that extends BaseUserManager providing two additional methods: class models.CustomUserManager create_user(*username_field*, password=None, **other_fields) The prototype of create_user() should accept the username field, plus all required fields as argu- ments. For example, if your user model uses email as the username field, and has date_of_birth as a required field, then create_user should be defined as: 3.10. User authentication in Django 383
- 388. Django Documentation, Release 1.9.3.dev20160224120324 def create_user(self, email, date_of_birth, password=None): # create user here ... create_superuser(*username_field*, password, **other_fields) The prototype of create_superuser() should accept the username field, plus all required fields as arguments. For example, if your user model uses email as the username field, and has date_of_birth as a required field, then create_superuser should be defined as: def create_superuser(self, email, date_of_birth, password): # create superuser here ... Unlike create_user(), create_superuser() must require the caller to provide a password. BaseUserManager provides the following utility methods: class models.BaseUserManager normalize_email(email) A classmethod that normalizes email addresses by lowercasing the domain portion of the email ad- dress. get_by_natural_key(username) Retrieves a user instance using the contents of the field nominated by USERNAME_FIELD. make_random_password(length=10, allowed_chars=’abcdefghjkmnpqrstuvwxyzABCDEFGHJKLMNPQRSTUVWXYZ2345 Returns a random password with the given length and given string of allowed characters. Note that the default value of allowed_chars doesn’t contain letters that can cause user confusion, including: •i, l, I, and 1 (lowercase letter i, lowercase letter L, uppercase letter i, and the number one) •o, O, and 0 (lowercase letter o, uppercase letter o, and zero) Extending Django’s default User If you’re entirely happy with Django’s User model and you just want to add some additional profile information, you could simply subclass django.contrib.auth.models.AbstractUser and add your custom profile fields, although we’d recommend a separate model as described in the “Model design considerations” note of Specifying a custom User model. AbstractUser provides the full implementation of the default User as an abstract model. Custom users and the built-in auth forms Django’s built-in forms and views make certain assumptions about the user model that they are working with. The following forms are compatible with any subclass of AbstractBaseUser: • AuthenticationForm: Uses the username field specified by USERNAME_FIELD. • SetPasswordForm • PasswordChangeForm • AdminPasswordChangeForm The following forms make assumptions about the user model and can be used as-is if those assumptions are met: • PasswordResetForm: Assumes that the user model has a field named email that can be used to identify the user and a boolean field named is_active to prevent password resets for inactive users. 384 Chapter 3. Using Django
- 389. Django Documentation, Release 1.9.3.dev20160224120324 Finally, the following forms are tied to User and need to be rewritten or extended to work with a custom user model: • UserCreationForm • UserChangeForm If your custom user model is a simple subclass of AbstractUser, then you can extend these forms in this manner: from django.contrib.auth.forms import UserCreationForm from myapp.models import CustomUser class CustomUserCreationForm(UserCreationForm): class Meta(UserCreationForm.Meta): model = CustomUser fields = UserCreationForm.Meta.fields + ('custom_field',) Custom users and django.contrib.admin If you want your custom User model to also work with Admin, your User model must define some additional attributes and methods. These methods allow the admin to control access of the User to admin content: class models.CustomUser is_staff Returns True if the user is allowed to have access to the admin site. is_active Returns True if the user account is currently active. has_perm(perm, obj=None): Returns True if the user has the named permission. If obj is provided, the permission needs to be checked against a specific object instance. has_module_perms(app_label): Returns True if the user has permission to access models in the given app. You will also need to register your custom User model with the admin. If your custom User model extends django.contrib.auth.models.AbstractUser, you can use Django’s exist- ing django.contrib.auth.admin.UserAdmin class. However, if your User model extends AbstractBaseUser, you’ll need to define a custom ModelAdmin class. It may be possible to subclass the default django.contrib.auth.admin.UserAdmin; however, you’ll need to override any of the defini- tions that refer to fields on django.contrib.auth.models.AbstractUser that aren’t on your custom User class. Custom users and permissions To make it easy to include Django’s permission framework into your own User class, Django provides PermissionsMixin. This is an abstract model you can include in the class hierarchy for your User model, giving you all the methods and database fields necessary to support Django’s permission model. PermissionsMixin provides the following methods and attributes: class models.PermissionsMixin is_superuser Boolean. Designates that this user has all permissions without explicitly assigning them. 3.10. User authentication in Django 385
- 390. Django Documentation, Release 1.9.3.dev20160224120324 get_group_permissions(obj=None) Returns a set of permission strings that the user has, through their groups. If obj is passed in, only returns the group permissions for this specific object. get_all_permissions(obj=None) Returns a set of permission strings that the user has, both through group and user permissions. If obj is passed in, only returns the permissions for this specific object. has_perm(perm, obj=None) Returns True if the user has the specified permission, where perm is in the format "<app label>.<permission codename>" (see permissions). If the user is inactive, this method will always return False. If obj is passed in, this method won’t check for a permission for the model, but for this specific object. has_perms(perm_list, obj=None) Returns True if the user has each of the specified permissions, where each perm is in the format "<app label>.<permission codename>". If the user is inactive, this method will always return False. If obj is passed in, this method won’t check for permissions for the model, but for the specific object. has_module_perms(package_name) Returns True if the user has any permissions in the given package (the Django app label). If the user is inactive, this method will always return False. PermissionsMixin and ModelBackend If you don’t include the PermissionsMixin, you must ensure you don’t invoke the permissions methods on ModelBackend. ModelBackend assumes that certain fields are available on your user model. If your User model doesn’t provide those fields, you will receive database errors when you check permissions. Custom users and proxy models One limitation of custom User models is that installing a custom User model will break any proxy model extending User. Proxy models must be based on a concrete base class; by defining a custom User model, you remove the ability of Django to reliably identify the base class. If your project uses proxy models, you must either modify the proxy to extend the User model that is currently in use in your project, or merge your proxy’s behavior into your User subclass. A full example Here is an example of an admin-compliant custom user app. This user model uses an email address as the username, and has a required date of birth; it provides no permission checking, beyond a simple admin flag on the user account. This model would be compatible with all the built-in auth forms and views, except for the User creation forms. This example illustrates how most of the components work together, but is not intended to be copied directly into projects for production use. This code would all live in a models.py file for a custom authentication app: from django.db import models from django.contrib.auth.models import ( BaseUserManager, AbstractBaseUser ) 386 Chapter 3. Using Django
- 391. Django Documentation, Release 1.9.3.dev20160224120324 class MyUserManager(BaseUserManager): def create_user(self, email, date_of_birth, password=None): """ Creates and saves a User with the given email, date of birth and password. """ if not email: raise ValueError('Users must have an email address') user = self.model( email=self.normalize_email(email), date_of_birth=date_of_birth, ) user.set_password(password) user.save(using=self._db) return user def create_superuser(self, email, date_of_birth, password): """ Creates and saves a superuser with the given email, date of birth and password. """ user = self.create_user(email, password=password, date_of_birth=date_of_birth ) user.is_admin = True user.save(using=self._db) return user class MyUser(AbstractBaseUser): email = models.EmailField( verbose_name='email address', max_length=255, unique=True, ) date_of_birth = models.DateField() is_active = models.BooleanField(default=True) is_admin = models.BooleanField(default=False) objects = MyUserManager() USERNAME_FIELD = 'email' REQUIRED_FIELDS = ['date_of_birth'] def get_full_name(self): # The user is identified by their email address return self.email def get_short_name(self): # The user is identified by their email address return self.email def __str__(self): # __unicode__ on Python 2 return self.email 3.10. User authentication in Django 387
- 392. Django Documentation, Release 1.9.3.dev20160224120324 def has_perm(self, perm, obj=None): "Does the user have a specific permission?" # Simplest possible answer: Yes, always return True def has_module_perms(self, app_label): "Does the user have permissions to view the app `app_label`?" # Simplest possible answer: Yes, always return True @property def is_staff(self): "Is the user a member of staff?" # Simplest possible answer: All admins are staff return self.is_admin Then, to register this custom User model with Django’s admin, the following code would be required in the app’s admin.py file: from django import forms from django.contrib import admin from django.contrib.auth.models import Group from django.contrib.auth.admin import UserAdmin as BaseUserAdmin from django.contrib.auth.forms import ReadOnlyPasswordHashField from customauth.models import MyUser class UserCreationForm(forms.ModelForm): """A form for creating new users. Includes all the required fields, plus a repeated password.""" password1 = forms.CharField(label='Password', widget=forms.PasswordInput) password2 = forms.CharField(label='Password confirmation', widget=forms.PasswordInput) class Meta: model = MyUser fields = ('email', 'date_of_birth') def clean_password2(self): # Check that the two password entries match password1 = self.cleaned_data.get("password1") password2 = self.cleaned_data.get("password2") if password1 and password2 and password1 != password2: raise forms.ValidationError("Passwords don't match") return password2 def save(self, commit=True): # Save the provided password in hashed format user = super(UserCreationForm, self).save(commit=False) user.set_password(self.cleaned_data["password1"]) if commit: user.save() return user class UserChangeForm(forms.ModelForm): """A form for updating users. Includes all the fields on the user, but replaces the password field with admin's 388 Chapter 3. Using Django
- 393. Django Documentation, Release 1.9.3.dev20160224120324 password hash display field. """ password = ReadOnlyPasswordHashField() class Meta: model = MyUser fields = ('email', 'password', 'date_of_birth', 'is_active', 'is_admin') def clean_password(self): # Regardless of what the user provides, return the initial value. # This is done here, rather than on the field, because the # field does not have access to the initial value return self.initial["password"] class UserAdmin(BaseUserAdmin): # The forms to add and change user instances form = UserChangeForm add_form = UserCreationForm # The fields to be used in displaying the User model. # These override the definitions on the base UserAdmin # that reference specific fields on auth.User. list_display = ('email', 'date_of_birth', 'is_admin') list_filter = ('is_admin',) fieldsets = ( (None, {'fields': ('email', 'password')}), ('Personal info', {'fields': ('date_of_birth',)}), ('Permissions', {'fields': ('is_admin',)}), ) # add_fieldsets is not a standard ModelAdmin attribute. UserAdmin # overrides get_fieldsets to use this attribute when creating a user. add_fieldsets = ( (None, { 'classes': ('wide',), 'fields': ('email', 'date_of_birth', 'password1', 'password2')} ), ) search_fields = ('email',) ordering = ('email',) filter_horizontal = () # Now register the new UserAdmin... admin.site.register(MyUser, UserAdmin) # ... and, since we're not using Django's built-in permissions, # unregister the Group model from admin. admin.site.unregister(Group) Finally, specify the custom model as the default user model for your project using the AUTH_USER_MODEL setting in your settings.py: AUTH_USER_MODEL = 'customauth.MyUser' Django comes with a user authentication system. It handles user accounts, groups, permissions and cookie-based user sessions. This section of the documentation explains how the default implementation works out of the box, as well as how to extend and customize it to suit your project’s needs. 3.10. User authentication in Django 389
- 394. Django Documentation, Release 1.9.3.dev20160224120324 3.10.4 Overview The Django authentication system handles both authentication and authorization. Briefly, authentication verifies a user is who they claim to be, and authorization determines what an authenticated user is allowed to do. Here the term authentication is used to refer to both tasks. The auth system consists of: • Users • Permissions: Binary (yes/no) flags designating whether a user may perform a certain task. • Groups: A generic way of applying labels and permissions to more than one user. • A configurable password hashing system • Forms and view tools for logging in users, or restricting content • A pluggable backend system The authentication system in Django aims to be very generic and doesn’t provide some features commonly found in web authentication systems. Solutions for some of these common problems have been implemented in third-party packages: • Password strength checking • Throttling of login attempts • Authentication against third-parties (OAuth, for example) 3.10.5 Installation Authentication support is bundled as a Django contrib module in django.contrib.auth. By default, the required configuration is already included in the settings.py generated by django-admin startproject, these consist of two items listed in your INSTALLED_APPS setting: 1. ’django.contrib.auth’ contains the core of the authentication framework, and its default models. 2. ’django.contrib.contenttypes’ is the Django content type system, which allows permissions to be associated with models you create. and these items in your MIDDLEWARE_CLASSES setting: 1. SessionMiddleware manages sessions across requests. 2. AuthenticationMiddleware associates users with requests using sessions. 3. SessionAuthenticationMiddleware logs users out of their other sessions after a password change. With these settings in place, running the command manage.py migrate creates the necessary database tables for auth related models and permissions for any models defined in your installed apps. 3.10.6 Usage Using Django’s default implementation • Working with User objects • Permissions and authorization • Authentication in web requests • Managing users in the admin 390 Chapter 3. Using Django
- 395. Django Documentation, Release 1.9.3.dev20160224120324 API reference for the default implementation Customizing Users and authentication Password management in Django 3.11 Django’s cache framework A fundamental trade-off in dynamic websites is, well, they’re dynamic. Each time a user requests a page, the Web server makes all sorts of calculations – from database queries to template rendering to business logic – to create the page that your site’s visitor sees. This is a lot more expensive, from a processing-overhead perspective, than your standard read-a-file-off-the-filesystem server arrangement. For most Web applications, this overhead isn’t a big deal. Most Web applications aren’t washingtonpost.com or slashdot.org; they’re simply small- to medium-sized sites with so-so traffic. But for medium- to high-traffic sites, it’s essential to cut as much overhead as possible. That’s where caching comes in. To cache something is to save the result of an expensive calculation so that you don’t have to perform the calculation next time. Here’s some pseudocode explaining how this would work for a dynamically generated Web page: given a URL, try finding that page in the cache if the page is in the cache: return the cached page else: generate the page save the generated page in the cache (for next time) return the generated page Django comes with a robust cache system that lets you save dynamic pages so they don’t have to be calculated for each request. For convenience, Django offers different levels of cache granularity: You can cache the output of specific views, you can cache only the pieces that are difficult to produce, or you can cache your entire site. Django also works well with “downstream” caches, such as Squid and browser-based caches. These are the types of caches that you don’t directly control but to which you can provide hints (via HTTP headers) about which parts of your site should be cached, and how. See also: The Cache Framework design philosophy explains a few of the design decisions of the framework. 3.11.1 Setting up the cache The cache system requires a small amount of setup. Namely, you have to tell it where your cached data should live – whether in a database, on the filesystem or directly in memory. This is an important decision that affects your cache’s performance; yes, some cache types are faster than others. Your cache preference goes in the CACHES setting in your settings file. Here’s an explanation of all available values for CACHES. Memcached The fastest, most efficient type of cache supported natively by Django, Memcached is an entirely memory-based cache server, originally developed to handle high loads at LiveJournal.com and subsequently open-sourced by Danga 3.11. Django’s cache framework 391
- 396. Django Documentation, Release 1.9.3.dev20160224120324 Interactive. It is used by sites such as Facebook and Wikipedia to reduce database access and dramatically increase site performance. Memcached runs as a daemon and is allotted a specified amount of RAM. All it does is provide a fast interface for adding, retrieving and deleting data in the cache. All data is stored directly in memory, so there’s no overhead of database or filesystem usage. After installing Memcached itself, you’ll need to install a Memcached binding. There are several Python Memcached bindings available; the two most common are python-memcached and pylibmc. To use Memcached with Django: • Set BACKEND to django.core.cache.backends.memcached.MemcachedCache or django.core.cache.backends.memcached.PyLibMCCache (depending on your chosen mem- cached binding) • Set LOCATION to ip:port values, where ip is the IP address of the Memcached daemon and port is the port on which Memcached is running, or to a unix:path value, where path is the path to a Memcached Unix socket file. In this example, Memcached is running on localhost (127.0.0.1) port 11211, using the python-memcached binding: CACHES = { 'default': { 'BACKEND': 'django.core.cache.backends.memcached.MemcachedCache', 'LOCATION': '127.0.0.1:11211', } } In this example, Memcached is available through a local Unix socket file /tmp/memcached.sock using the python-memcached binding: CACHES = { 'default': { 'BACKEND': 'django.core.cache.backends.memcached.MemcachedCache', 'LOCATION': 'unix:/tmp/memcached.sock', } } When using the pylibmc binding, do not include the unix:/ prefix: CACHES = { 'default': { 'BACKEND': 'django.core.cache.backends.memcached.PyLibMCCache', 'LOCATION': '/tmp/memcached.sock', } } One excellent feature of Memcached is its ability to share a cache over multiple servers. This means you can run Memcached daemons on multiple machines, and the program will treat the group of machines as a single cache, without the need to duplicate cache values on each machine. To take advantage of this feature, include all server addresses in LOCATION, either separated by semicolons or as a list. In this example, the cache is shared over Memcached instances running on IP address 172.19.26.240 and 172.19.26.242, both on port 11211: CACHES = { 'default': { 'BACKEND': 'django.core.cache.backends.memcached.MemcachedCache', 'LOCATION': [ '172.19.26.240:11211', 392 Chapter 3. Using Django
- 397. Django Documentation, Release 1.9.3.dev20160224120324 '172.19.26.242:11211', ] } } In the following example, the cache is shared over Memcached instances running on the IP addresses 172.19.26.240 (port 11211), 172.19.26.242 (port 11212), and 172.19.26.244 (port 11213): CACHES = { 'default': { 'BACKEND': 'django.core.cache.backends.memcached.MemcachedCache', 'LOCATION': [ '172.19.26.240:11211', '172.19.26.242:11212', '172.19.26.244:11213', ] } } A final point about Memcached is that memory-based caching has a disadvantage: because the cached data is stored in memory, the data will be lost if your server crashes. Clearly, memory isn’t intended for permanent data storage, so don’t rely on memory-based caching as your only data storage. Without a doubt, none of the Django caching backends should be used for permanent storage – they’re all intended to be solutions for caching, not storage – but we point this out here because memory-based caching is particularly temporary. Database caching Django can store its cached data in your database. This works best if you’ve got a fast, well-indexed database server. To use a database table as your cache backend: • Set BACKEND to django.core.cache.backends.db.DatabaseCache • Set LOCATION to tablename, the name of the database table. This name can be whatever you want, as long as it’s a valid table name that’s not already being used in your database. In this example, the cache table’s name is my_cache_table: CACHES = { 'default': { 'BACKEND': 'django.core.cache.backends.db.DatabaseCache', 'LOCATION': 'my_cache_table', } } Creating the cache table Before using the database cache, you must create the cache table with this command: python manage.py createcachetable This creates a table in your database that is in the proper format that Django’s database-cache system expects. The name of the table is taken from LOCATION. If you are using multiple database caches, createcachetable creates one table for each cache. If you are using multiple databases, createcachetable observes the allow_migrate() method of your database routers (see below). 3.11. Django’s cache framework 393
- 398. Django Documentation, Release 1.9.3.dev20160224120324 Like migrate, createcachetable won’t touch an existing table. It will only create missing tables. To print the SQL that would be run, rather than run it, use the createcachetable --dry-run option. Multiple databases If you use database caching with multiple databases, you’ll also need to set up routing instructions for your database cache table. For the purposes of routing, the database cache table appears as a model named CacheEntry, in an application named django_cache. This model won’t appear in the models cache, but the model details can be used for routing purposes. For example, the following router would direct all cache read operations to cache_replica, and all write operations to cache_primary. The cache table will only be synchronized onto cache_primary: class CacheRouter(object): """A router to control all database cache operations""" def db_for_read(self, model, **hints): "All cache read operations go to the replica" if model._meta.app_label == 'django_cache': return 'cache_replica' return None def db_for_write(self, model, **hints): "All cache write operations go to primary" if model._meta.app_label == 'django_cache': return 'cache_primary' return None def allow_migrate(self, db, app_label, model_name=None, **hints): "Only install the cache model on primary" if app_label == 'django_cache': return db == 'cache_primary' return None If you don’t specify routing directions for the database cache model, the cache backend will use the default database. Of course, if you don’t use the database cache backend, you don’t need to worry about providing routing instructions for the database cache model. Filesystem caching The file-based backend serializes and stores each cache value as a separate file. To use this backend set BACKEND to "django.core.cache.backends.filebased.FileBasedCache" and LOCATION to a suitable direc- tory. For example, to store cached data in /var/tmp/django_cache, use this setting: CACHES = { 'default': { 'BACKEND': 'django.core.cache.backends.filebased.FileBasedCache', 'LOCATION': '/var/tmp/django_cache', } } If you’re on Windows, put the drive letter at the beginning of the path, like this: 394 Chapter 3. Using Django
- 399. Django Documentation, Release 1.9.3.dev20160224120324 CACHES = { 'default': { 'BACKEND': 'django.core.cache.backends.filebased.FileBasedCache', 'LOCATION': 'c:/foo/bar', } } The directory path should be absolute – that is, it should start at the root of your filesystem. It doesn’t matter whether you put a slash at the end of the setting. Make sure the directory pointed-to by this setting exists and is readable and writable by the system user under which your Web server runs. Continuing the above example, if your server runs as the user apache, make sure the directory /var/tmp/django_cache exists and is readable and writable by the user apache. Local-memory caching This is the default cache if another is not specified in your settings file. If you want the speed ad- vantages of in-memory caching but don’t have the capability of running Memcached, consider the local- memory cache backend. This cache is per-process (see below) and thread-safe. To use it, set BACKEND to "django.core.cache.backends.locmem.LocMemCache". For example: CACHES = { 'default': { 'BACKEND': 'django.core.cache.backends.locmem.LocMemCache', 'LOCATION': 'unique-snowflake', } } The cache LOCATION is used to identify individual memory stores. If you only have one locmem cache, you can omit the LOCATION; however, if you have more than one local memory cache, you will need to assign a name to at least one of them in order to keep them separate. Note that each process will have its own private cache instance, which means no cross-process caching is possible. This obviously also means the local memory cache isn’t particularly memory-efficient, so it’s probably not a good choice for production environments. It’s nice for development. Dummy caching (for development) Finally, Django comes with a “dummy” cache that doesn’t actually cache – it just implements the cache interface without doing anything. This is useful if you have a production site that uses heavy-duty caching in various places but a development/test environment where you don’t want to cache and don’t want to have to change your code to special-case the latter. To activate dummy caching, set BACKEND like so: CACHES = { 'default': { 'BACKEND': 'django.core.cache.backends.dummy.DummyCache', } } Using a custom cache backend While Django includes support for a number of cache backends out-of-the-box, sometimes you might want to use a customized cache backend. To use an external cache backend with Django, use the Python import path as the 3.11. Django’s cache framework 395
- 400. Django Documentation, Release 1.9.3.dev20160224120324 BACKEND of the CACHES setting, like so: CACHES = { 'default': { 'BACKEND': 'path.to.backend', } } If you’re building your own backend, you can use the standard cache backends as reference implementations. You’ll find the code in the django/core/cache/backends/ directory of the Django source. Note: Without a really compelling reason, such as a host that doesn’t support them, you should stick to the cache backends included with Django. They’ve been well-tested and are easy to use. Cache arguments Each cache backend can be given additional arguments to control caching behavior. These arguments are provided as additional keys in the CACHES setting. Valid arguments are as follows: • TIMEOUT: The default timeout, in seconds, to use for the cache. This argument defaults to 300 seconds (5 minutes). You can set TIMEOUT to None so that, by default, cache keys never expire. A value of 0 causes keys to immediately expire (effectively “don’t cache”). • OPTIONS: Any options that should be passed to the cache backend. The list of valid options will vary with each backend, and cache backends backed by a third-party library will pass their options directly to the underlying cache library. Cache backends that implement their own culling strategy (i.e., the locmem, filesystem and database backends) will honor the following options: – MAX_ENTRIES: The maximum number of entries allowed in the cache before old values are deleted. This argument defaults to 300. – CULL_FREQUENCY: The fraction of entries that are culled when MAX_ENTRIES is reached. The ac- tual ratio is 1 / CULL_FREQUENCY, so set CULL_FREQUENCY to 2 to cull half the entries when MAX_ENTRIES is reached. This argument should be an integer and defaults to 3. A value of 0 for CULL_FREQUENCY means that the entire cache will be dumped when MAX_ENTRIES is reached. On some backends (database in particular) this makes culling much faster at the expense of more cache misses. • KEY_PREFIX: A string that will be automatically included (prepended by default) to all cache keys used by the Django server. See the cache documentation for more information. • VERSION: The default version number for cache keys generated by the Django server. See the cache documentation for more information. • KEY_FUNCTION A string containing a dotted path to a function that defines how to compose a prefix, version and key into a final cache key. See the cache documentation for more information. In this example, a filesystem backend is being configured with a timeout of 60 seconds, and a maximum capacity of 1000 items: CACHES = { 'default': { 'BACKEND': 'django.core.cache.backends.filebased.FileBasedCache', 'LOCATION': '/var/tmp/django_cache', 396 Chapter 3. Using Django
- 401. Django Documentation, Release 1.9.3.dev20160224120324 'TIMEOUT': 60, 'OPTIONS': { 'MAX_ENTRIES': 1000 } } } Invalid arguments are silently ignored, as are invalid values of known arguments. 3.11.2 The per-site cache Once the cache is set up, the simplest way to use caching is to cache your entire site. You’ll need to add ’django.middleware.cache.UpdateCacheMiddleware’ and ’django.middleware.cache.FetchFromCacheMiddleware’ to your MIDDLEWARE_CLASSES setting, as in this example: MIDDLEWARE_CLASSES = [ 'django.middleware.cache.UpdateCacheMiddleware', 'django.middleware.common.CommonMiddleware', 'django.middleware.cache.FetchFromCacheMiddleware', ] Note: No, that’s not a typo: the “update” middleware must be first in the list, and the “fetch” middleware must be last. The details are a bit obscure, but see Order of MIDDLEWARE_CLASSES below if you’d like the full story. Then, add the following required settings to your Django settings file: • CACHE_MIDDLEWARE_ALIAS – The cache alias to use for storage. • CACHE_MIDDLEWARE_SECONDS – The number of seconds each page should be cached. • CACHE_MIDDLEWARE_KEY_PREFIX – If the cache is shared across multiple sites using the same Django installation, set this to the name of the site, or some other string that is unique to this Django instance, to prevent key collisions. Use an empty string if you don’t care. FetchFromCacheMiddleware caches GET and HEAD responses with status 200, where the request and response headers allow. Responses to requests for the same URL with different query parameters are considered to be unique pages and are cached separately. This middleware expects that a HEAD request is answered with the same response headers as the corresponding GET request; in which case it can return a cached GET response for HEAD request. Additionally, UpdateCacheMiddleware automatically sets a few headers in each HttpResponse: • Sets the Last-Modified header to the current date/time when a fresh (not cached) version of the page is requested. • Sets the Expires header to the current date/time plus the defined CACHE_MIDDLEWARE_SECONDS. • Sets the Cache-Control header to give a max age for the page – again, from the CACHE_MIDDLEWARE_SECONDS setting. See Middleware for more on middleware. If a view sets its own cache expiry time (i.e. it has a max-age section in its Cache-Control header) then the page will be cached until the expiry time, rather than CACHE_MIDDLEWARE_SECONDS. Using the decorators in django.views.decorators.cache you can easily set a view’s expiry time (using the cache_control decorator) or disable caching for a view (using the never_cache decorator). See the using other headers section for more on these decorators. If USE_I18N is set to True then the generated cache key will include the name of the 3.11. Django’s cache framework 397
- 402. Django Documentation, Release 1.9.3.dev20160224120324 active language – see also How Django discovers language preference). This allows you to easily cache multilingual sites without having to create the cache key yourself. Cache keys also include the active language when USE_L10N is set to True and the current time zone when USE_TZ is set to True. 3.11.3 The per-view cache django.views.decorators.cache.cache_page() A more granular way to use the caching framework is by caching the output of individual views. django.views.decorators.cache defines a cache_page decorator that will automatically cache the view’s response for you. It’s easy to use: from django.views.decorators.cache import cache_page @cache_page(60 * 15) def my_view(request): ... cache_page takes a single argument: the cache timeout, in seconds. In the above example, the result of the my_view() view will be cached for 15 minutes. (Note that we’ve written it as 60 * 15 for the purpose of read- ability. 60 * 15 will be evaluated to 900 – that is, 15 minutes multiplied by 60 seconds per minute.) The per-view cache, like the per-site cache, is keyed off of the URL. If multiple URLs point at the same view, each URL will be cached separately. Continuing the my_view example, if your URLconf looks like this: urlpatterns = [ url(r'^foo/([0-9]{1,2})/$', my_view), ] then requests to /foo/1/ and /foo/23/ will be cached separately, as you may expect. But once a particular URL (e.g., /foo/23/) has been requested, subsequent requests to that URL will use the cache. cache_page can also take an optional keyword argument, cache, which directs the decorator to use a specific cache (from your CACHES setting) when caching view results. By default, the default cache will be used, but you can specify any cache you want: @cache_page(60 * 15, cache="special_cache") def my_view(request): ... You can also override the cache prefix on a per-view basis. cache_page takes an optional keyword argument, key_prefix, which works in the same way as the CACHE_MIDDLEWARE_KEY_PREFIX setting for the middle- ware. It can be used like this: @cache_page(60 * 15, key_prefix="site1") def my_view(request): ... The key_prefix and cache arguments may be specified together. The key_prefix argument and the KEY_PREFIX specified under CACHES will be concatenated. Specifying per-view cache in the URLconf The examples in the previous section have hard-coded the fact that the view is cached, because cache_page alters the my_view function in place. This approach couples your view to the cache system, which is not ideal for several reasons. For instance, you might want to reuse the view functions on another, cache-less site, or you might want to 398 Chapter 3. Using Django
- 403. Django Documentation, Release 1.9.3.dev20160224120324 distribute the views to people who might want to use them without being cached. The solution to these problems is to specify the per-view cache in the URLconf rather than next to the view functions themselves. Doing so is easy: simply wrap the view function with cache_page when you refer to it in the URLconf. Here’s the old URLconf from earlier: urlpatterns = [ url(r'^foo/([0-9]{1,2})/$', my_view), ] Here’s the same thing, with my_view wrapped in cache_page: from django.views.decorators.cache import cache_page urlpatterns = [ url(r'^foo/([0-9]{1,2})/$', cache_page(60 * 15)(my_view)), ] 3.11.4 Template fragment caching If you’re after even more control, you can also cache template fragments using the cache template tag. To give your template access to this tag, put {% load cache %} near the top of your template. The {% cache %} template tag caches the contents of the block for a given amount of time. It takes at least two arguments: the cache timeout, in seconds, and the name to give the cache fragment. The name will be taken as is, do not use a variable. For example: {% load cache %} {% cache 500 sidebar %} .. sidebar .. {% endcache %} Sometimes you might want to cache multiple copies of a fragment depending on some dynamic data that appears inside the fragment. For example, you might want a separate cached copy of the sidebar used in the previous example for every user of your site. Do this by passing additional arguments to the {% cache %} template tag to uniquely identify the cache fragment: {% load cache %} {% cache 500 sidebar request.user.username %} .. sidebar for logged in user .. {% endcache %} It’s perfectly fine to specify more than one argument to identify the fragment. Simply pass as many arguments to {% cache %} as you need. If USE_I18N is set to True the per-site middleware cache will respect the active language. For the cache template tag you could use one of the translation-specific variables available in templates to achieve the same result: {% load i18n %} {% load cache %} {% get_current_language as LANGUAGE_CODE %} {% cache 600 welcome LANGUAGE_CODE %} {% trans "Welcome to example.com" %} {% endcache %} The cache timeout can be a template variable, as long as the template variable resolves to an integer value. For example, if the template variable my_timeout is set to the value 600, then the following two examples are equivalent: 3.11. Django’s cache framework 399
- 404. Django Documentation, Release 1.9.3.dev20160224120324 {% cache 600 sidebar %} ... {% endcache %} {% cache my_timeout sidebar %} ... {% endcache %} This feature is useful in avoiding repetition in templates. You can set the timeout in a variable, in one place, and just reuse that value. By default, the cache tag will try to use the cache called “template_fragments”. If no such cache exists, it will fall back to using the default cache. You may select an alternate cache backend to use with the using keyword argument, which must be the last argument to the tag. {% cache 300 local-thing ... using="localcache" %} It is considered an error to specify a cache name that is not configured. django.core.cache.utils.make_template_fragment_key(fragment_name, vary_on=None) If you want to obtain the cache key used for a cached fragment, you can use make_template_fragment_key. fragment_name is the same as second argument to the cache template tag; vary_on is a list of all additional arguments passed to the tag. This function can be useful for invalidating or overwriting a cached item, for example: >>> from django.core.cache import cache >>> from django.core.cache.utils import make_template_fragment_key # cache key for {% cache 500 sidebar username %} >>> key = make_template_fragment_key('sidebar', [username]) >>> cache.delete(key) # invalidates cached template fragment 3.11.5 The low-level cache API Sometimes, caching an entire rendered page doesn’t gain you very much and is, in fact, inconvenient overkill. Perhaps, for instance, your site includes a view whose results depend on several expensive queries, the results of which change at different intervals. In this case, it would not be ideal to use the full-page caching that the per-site or per-view cache strategies offer, because you wouldn’t want to cache the entire result (since some of the data changes often), but you’d still want to cache the results that rarely change. For cases like this, Django exposes a simple, low-level cache API. You can use this API to store objects in the cache with any level of granularity you like. You can cache any Python object that can be pickled safely: strings, dictionaries, lists of model objects, and so forth. (Most common Python objects can be pickled; refer to the Python documentation for more information about pickling.) Accessing the cache django.core.cache.caches You can access the caches configured in the CACHES setting through a dict-like object: django.core.cache.caches. Repeated requests for the same alias in the same thread will return the same object. >>> from django.core.cache import caches >>> cache1 = caches['myalias'] >>> cache2 = caches['myalias'] >>> cache1 is cache2 True If the named key does not exist, InvalidCacheBackendError will be raised. To provide thread-safety, a different instance of the cache backend will be returned for each thread. 400 Chapter 3. Using Django
- 405. Django Documentation, Release 1.9.3.dev20160224120324 django.core.cache.cache As a shortcut, the default cache is available as django.core.cache.cache: >>> from django.core.cache import cache This object is equivalent to caches[’default’]. Basic usage The basic interface is set(key, value, timeout) and get(key): >>> cache.set('my_key', 'hello, world!', 30) >>> cache.get('my_key') 'hello, world!' The timeout argument is optional and defaults to the timeout argument of the appropriate backend in the CACHES setting (explained above). It’s the number of seconds the value should be stored in the cache. Passing in None for timeout will cache the value forever. A timeout of 0 won’t cache the value. If the object doesn’t exist in the cache, cache.get() returns None: # Wait 30 seconds for 'my_key' to expire... >>> cache.get('my_key') None We advise against storing the literal value None in the cache, because you won’t be able to distinguish between your stored None value and a cache miss signified by a return value of None. cache.get() can take a default argument. This specifies which value to return if the object doesn’t exist in the cache: >>> cache.get('my_key', 'has expired') 'has expired' To add a key only if it doesn’t already exist, use the add() method. It takes the same parameters as set(), but it will not attempt to update the cache if the key specified is already present: >>> cache.set('add_key', 'Initial value') >>> cache.add('add_key', 'New value') >>> cache.get('add_key') 'Initial value' If you need to know whether add() stored a value in the cache, you can check the return value. It will return True if the value was stored, False otherwise. If you want to get a key’s value or set a value if the key isn’t in the cache, there is the get_or_set() method. It takes the same parameters as get() but the default is set as the new cache value for that key, rather than simply returned: >>> cache.get('my_new_key') # returns None >>> cache.get_or_set('my_new_key', 'my new value', 100) 'my new value' You can also pass any callable as a default value: >>> import datetime >>> cache.get_or_set('some-timestamp-key', datetime.datetime.now) datetime.datetime(2014, 12, 11, 0, 15, 49, 457920) 3.11. Django’s cache framework 401
- 406. Django Documentation, Release 1.9.3.dev20160224120324 The get_or_set() method was added. There’s also a get_many() interface that only hits the cache once. get_many() returns a dictionary with all the keys you asked for that actually exist in the cache (and haven’t expired): >>> cache.set('a', 1) >>> cache.set('b', 2) >>> cache.set('c', 3) >>> cache.get_many(['a', 'b', 'c']) {'a': 1, 'b': 2, 'c': 3} To set multiple values more efficiently, use set_many() to pass a dictionary of key-value pairs: >>> cache.set_many({'a': 1, 'b': 2, 'c': 3}) >>> cache.get_many(['a', 'b', 'c']) {'a': 1, 'b': 2, 'c': 3} Like cache.set(), set_many() takes an optional timeout parameter. You can delete keys explicitly with delete(). This is an easy way of clearing the cache for a particular object: >>> cache.delete('a') If you want to clear a bunch of keys at once, delete_many() can take a list of keys to be cleared: >>> cache.delete_many(['a', 'b', 'c']) Finally, if you want to delete all the keys in the cache, use cache.clear(). Be careful with this; clear() will remove everything from the cache, not just the keys set by your application. >>> cache.clear() You can also increment or decrement a key that already exists using the incr() or decr() methods, respectively. By default, the existing cache value will incremented or decremented by 1. Other increment/decrement values can be specified by providing an argument to the increment/decrement call. A ValueError will be raised if you attempt to increment or decrement a nonexistent cache key.: >>> cache.set('num', 1) >>> cache.incr('num') 2 >>> cache.incr('num', 10) 12 >>> cache.decr('num') 11 >>> cache.decr('num', 5) 6 Note: incr()/decr() methods are not guaranteed to be atomic. On those backends that support atomic in- crement/decrement (most notably, the memcached backend), increment and decrement operations will be atomic. However, if the backend doesn’t natively provide an increment/decrement operation, it will be implemented using a two-step retrieve/update. You can close the connection to your cache with close() if implemented by the cache backend. >>> cache.close() Note: For caches that don’t implement close methods it is a no-op. 402 Chapter 3. Using Django
- 407. Django Documentation, Release 1.9.3.dev20160224120324 Cache key prefixing If you are sharing a cache instance between servers, or between your production and development environments, it’s possible for data cached by one server to be used by another server. If the format of cached data is different between servers, this can lead to some very hard to diagnose problems. To prevent this, Django provides the ability to prefix all cache keys used by a server. When a particular cache key is saved or retrieved, Django will automatically prefix the cache key with the value of the KEY_PREFIX cache setting. By ensuring each Django instance has a different KEY_PREFIX, you can ensure that there will be no collisions in cache values. Cache versioning When you change running code that uses cached values, you may need to purge any existing cached values. The easiest way to do this is to flush the entire cache, but this can lead to the loss of cache values that are still valid and useful. Django provides a better way to target individual cache values. Django’s cache framework has a system-wide version identifier, specified using the VERSION cache setting. The value of this setting is automatically combined with the cache prefix and the user-provided cache key to obtain the final cache key. By default, any key request will automatically include the site default cache key version. However, the primitive cache functions all include a version argument, so you can specify a particular cache key version to set or get. For example: # Set version 2 of a cache key >>> cache.set('my_key', 'hello world!', version=2) # Get the default version (assuming version=1) >>> cache.get('my_key') None # Get version 2 of the same key >>> cache.get('my_key', version=2) 'hello world!' The version of a specific key can be incremented and decremented using the incr_version() and decr_version() methods. This enables specific keys to be bumped to a new version, leaving other keys unaf- fected. Continuing our previous example: # Increment the version of 'my_key' >>> cache.incr_version('my_key') # The default version still isn't available >>> cache.get('my_key') None # Version 2 isn't available, either >>> cache.get('my_key', version=2) None # But version 3 *is* available >>> cache.get('my_key', version=3) 'hello world!' Cache key transformation As described in the previous two sections, the cache key provided by a user is not used verbatim – it is combined with the cache prefix and key version to provide a final cache key. By default, the three parts are joined using colons to produce a final string: 3.11. Django’s cache framework 403
- 408. Django Documentation, Release 1.9.3.dev20160224120324 def make_key(key, key_prefix, version): return ':'.join([key_prefix, str(version), key]) If you want to combine the parts in different ways, or apply other processing to the final key (e.g., taking a hash digest of the key parts), you can provide a custom key function. The KEY_FUNCTION cache setting specifies a dotted-path to a function matching the prototype of make_key() above. If provided, this custom key function will be used instead of the default key combining function. Cache key warnings Memcached, the most commonly-used production cache backend, does not allow cache keys longer than 250 char- acters or containing whitespace or control characters, and using such keys will cause an exception. To encour- age cache-portable code and minimize unpleasant surprises, the other built-in cache backends issue a warning (django.core.cache.backends.base.CacheKeyWarning) if a key is used that would cause an error on memcached. If you are using a production backend that can accept a wider range of keys (a custom backend, or one of the non-memcached built-in backends), and want to use this wider range without warnings, you can silence CacheKeyWarning with this code in the management module of one of your INSTALLED_APPS: import warnings from django.core.cache import CacheKeyWarning warnings.simplefilter("ignore", CacheKeyWarning) If you want to instead provide custom key validation logic for one of the built-in backends, you can subclass it, override just the validate_key method, and follow the instructions for using a custom cache backend. For instance, to do this for the locmem backend, put this code in a module: from django.core.cache.backends.locmem import LocMemCache class CustomLocMemCache(LocMemCache): def validate_key(self, key): """Custom validation, raising exceptions or warnings as needed.""" # ... ...and use the dotted Python path to this class in the BACKEND portion of your CACHES setting. 3.11.6 Downstream caches So far, this document has focused on caching your own data. But another type of caching is relevant to Web develop- ment, too: caching performed by “downstream” caches. These are systems that cache pages for users even before the request reaches your website. Here are a few examples of downstream caches: • Your ISP may cache certain pages, so if you requested a page from https://example.com/, your ISP would send you the page without having to access example.com directly. The maintainers of example.com have no knowledge of this caching; the ISP sits between example.com and your Web browser, handling all of the caching transparently. • Your Django website may sit behind a proxy cache, such as Squid Web Proxy Cache (http://www.squid- cache.org/), that caches pages for performance. In this case, each request first would be handled by the proxy, and it would be passed to your application only if needed. 404 Chapter 3. Using Django
- 409. Django Documentation, Release 1.9.3.dev20160224120324 • Your Web browser caches pages, too. If a Web page sends out the appropriate headers, your browser will use the local cached copy for subsequent requests to that page, without even contacting the Web page again to see whether it has changed. Downstream caching is a nice efficiency boost, but there’s a danger to it: Many Web pages’ contents differ based on authentication and a host of other variables, and cache systems that blindly save pages based purely on URLs could expose incorrect or sensitive data to subsequent visitors to those pages. For example, say you operate a Web email system, and the contents of the “inbox” page obviously depend on which user is logged in. If an ISP blindly cached your site, then the first user who logged in through that ISP would have their user-specific inbox page cached for subsequent visitors to the site. That’s not cool. Fortunately, HTTP provides a solution to this problem. A number of HTTP headers exist to instruct downstream caches to differ their cache contents depending on designated variables, and to tell caching mechanisms not to cache particular pages. We’ll look at some of these headers in the sections that follow. 3.11.7 Using Vary headers The Vary header defines which request headers a cache mechanism should take into account when building its cache key. For example, if the contents of a Web page depend on a user’s language preference, the page is said to “vary on language.” By default, Django’s cache system creates its cache keys using the requested fully-qualified URL – e.g., "https://www.example.com/stories/2005/?order_by=author". This means every request to that URL will use the same cached version, regardless of user-agent differences such as cookies or language preferences. However, if this page produces different content based on some difference in request headers – such as a cookie, or a language, or a user-agent – you’ll need to use the Vary header to tell caching mechanisms that the page output depends on those things. To do this in Django, use the convenient django.views.decorators.vary.vary_on_headers() view decorator, like so: from django.views.decorators.vary import vary_on_headers @vary_on_headers('User-Agent') def my_view(request): # ... In this case, a caching mechanism (such as Django’s own cache middleware) will cache a separate version of the page for each unique user-agent. The advantage to using the vary_on_headers decorator rather than manually setting the Vary header (using something like response[’Vary’] = ’user-agent’) is that the decorator adds to the Vary header (which may already exist), rather than setting it from scratch and potentially overriding anything that was already in there. You can pass multiple headers to vary_on_headers(): @vary_on_headers('User-Agent', 'Cookie') def my_view(request): # ... This tells downstream caches to vary on both, which means each combination of user-agent and cookie will get its own cache value. For example, a request with the user-agent Mozilla and the cookie value foo=bar will be considered different from a request with the user-agent Mozilla and the cookie value foo=ham. Because varying on cookie is so common, there’s a django.views.decorators.vary.vary_on_cookie() decorator. These two views are equivalent: 3.11. Django’s cache framework 405
- 410. Django Documentation, Release 1.9.3.dev20160224120324 @vary_on_cookie def my_view(request): # ... @vary_on_headers('Cookie') def my_view(request): # ... The headers you pass to vary_on_headers are not case sensitive; "User-Agent" is the same thing as "user-agent". You can also use a helper function, django.utils.cache.patch_vary_headers(), directly. This function sets, or adds to, the Vary header. For example: from django.shortcuts import render from django.utils.cache import patch_vary_headers def my_view(request): # ... response = render(request, 'template_name', context) patch_vary_headers(response, ['Cookie']) return response patch_vary_headers takes an HttpResponse instance as its first argument and a list/tuple of case-insensitive header names as its second argument. For more on Vary headers, see the official Vary spec. 3.11.8 Controlling cache: Using other headers Other problems with caching are the privacy of data and the question of where data should be stored in a cascade of caches. A user usually faces two kinds of caches: their own browser cache (a private cache) and their provider’s cache (a public cache). A public cache is used by multiple users and controlled by someone else. This poses problems with sensitive data–you don’t want, say, your bank account number stored in a public cache. So Web applications need a way to tell caches which data is private and which is public. The solution is to indicate a page’s cache should be “private.” To do this in Django, use the cache_control view decorator. Example: from django.views.decorators.cache import cache_control @cache_control(private=True) def my_view(request): # ... This decorator takes care of sending out the appropriate HTTP header behind the scenes. Note that the cache control settings “private” and “public” are mutually exclusive. The decorator ensures that the “public” directive is removed if “private” should be set (and vice versa). An example use of the two directives would be a blog site that offers both private and public entries. Public entries may be cached on any shared cache. The following code uses django.utils.cache.patch_cache_control(), the manual way to modify the cache control header (it is internally called by the cache_control decorator): from django.views.decorators.cache import patch_cache_control from django.views.decorators.vary import vary_on_cookie @vary_on_cookie 406 Chapter 3. Using Django
- 411. Django Documentation, Release 1.9.3.dev20160224120324 def list_blog_entries_view(request): if request.user.is_anonymous(): response = render_only_public_entries() patch_cache_control(response, public=True) else: response = render_private_and_public_entries(request.user) patch_cache_control(response, private=True) return response There are a few other ways to control cache parameters. For example, HTTP allows applications to do the following: • Define the maximum time a page should be cached. • Specify whether a cache should always check for newer versions, only delivering the cached content when there are no changes. (Some caches might deliver cached content even if the server page changed, simply because the cache copy isn’t yet expired.) In Django, use the cache_control view decorator to specify these cache parameters. In this example, cache_control tells caches to revalidate the cache on every access and to store cached versions for, at most, 3,600 seconds: from django.views.decorators.cache import cache_control @cache_control(must_revalidate=True, max_age=3600) def my_view(request): # ... Any valid Cache-Control HTTP directive is valid in cache_control(). Here’s a full list: • public=True • private=True • no_cache=True • no_transform=True • must_revalidate=True • proxy_revalidate=True • max_age=num_seconds • s_maxage=num_seconds For explanation of Cache-Control HTTP directives, see the Cache-Control spec. (Note that the caching middleware already sets the cache header’s max-age with the value of the CACHE_MIDDLEWARE_SECONDS setting. If you use a custom max_age in a cache_control decorator, the decorator will take precedence, and the header values will be merged correctly.) If you want to use headers to disable caching altogether, django.views.decorators.cache.never_cache() is a view decorator that adds headers to ensure the response won’t be cached by browsers or other caches. Example: from django.views.decorators.cache import never_cache @never_cache def myview(request): # ... 3.11. Django’s cache framework 407
- 412. Django Documentation, Release 1.9.3.dev20160224120324 3.11.9 Order of MIDDLEWARE_CLASSES If you use caching middleware, it’s important to put each half in the right place within the MIDDLEWARE_CLASSES setting. That’s because the cache middleware needs to know which headers by which to vary the cache storage. Middleware always adds something to the Vary response header when it can. UpdateCacheMiddleware runs during the response phase, where middleware is run in reverse order, so an item at the top of the list runs last during the response phase. Thus, you need to make sure that UpdateCacheMiddleware appears before any other middleware that might add something to the Vary header. The following middleware mod- ules do so: • SessionMiddleware adds Cookie • GZipMiddleware adds Accept-Encoding • LocaleMiddleware adds Accept-Language FetchFromCacheMiddleware, on the other hand, runs during the request phase, where middleware is applied first-to-last, so an item at the top of the list runs first during the request phase. The FetchFromCacheMiddleware also needs to run after other middleware updates the Vary header, so FetchFromCacheMiddleware must be after any item that does so. 3.12 Conditional View Processing HTTP clients can send a number of headers to tell the server about copies of a resource that they have already seen. This is commonly used when retrieving a Web page (using an HTTP GET request) to avoid sending all the data for something the client has already retrieved. However, the same headers can be used for all HTTP methods (POST, PUT, DELETE, etc.). For each page (response) that Django sends back from a view, it might provide two HTTP headers: the ETag header and the Last-Modified header. These headers are optional on HTTP responses. They can be set by your view function, or you can rely on the CommonMiddleware middleware to set the ETag header. When the client next requests the same resource, it might send along a header such as either If-modified-since or If-unmodified-since, containing the date of the last modification time it was sent, or either If-match or If-none-match, containing the last ETag it was sent. If the current version of the page matches the ETag sent by the client, or if the resource has not been modified, a 304 status code can be sent back, instead of a full response, telling the client that nothing has changed. Depending on the header, if the page has been modified or does not match the ETag sent by the client, a 412 status code (Precondition Failed) may be returned. When you need more fine-grained control you may use per-view conditional processing functions. Support for the If-unmodified-since header was added to conditional view processing. 3.12.1 The condition decorator Sometimes (in fact, quite often) you can create functions to rapidly compute the ETag value or the last-modified time for a resource, without needing to do all the computations needed to construct the full view. Django can then use these functions to provide an “early bailout” option for the view processing. Telling the client that the content has not been modified since the last request, perhaps. These two functions are passed as parameters the django.views.decorators.http.condition decorator. This decorator uses the two functions (you only need to supply one, if you can’t compute both quantities easily and quickly) to work out if the headers in the HTTP request match those on the resource. If they don’t match, a new copy of the resource must be computed and your normal view is called. The condition decorator’s signature looks like this: 408 Chapter 3. Using Django
- 413. Django Documentation, Release 1.9.3.dev20160224120324 condition(etag_func=None, last_modified_func=None) The two functions, to compute the ETag and the last modified time, will be passed the incoming request object and the same parameters, in the same order, as the view function they are helping to wrap. The function passed last_modified_func should return a standard datetime value specifying the last time the resource was modified, or None if the resource doesn’t exist. The function passed to the etag decorator should return a string representing the Etag for the resource, or None if it doesn’t exist. Using this feature usefully is probably best explained with an example. Suppose you have this pair of models, repre- senting a simple blog system: import datetime from django.db import models class Blog(models.Model): ... class Entry(models.Model): blog = models.ForeignKey(Blog) published = models.DateTimeField(default=datetime.datetime.now) ... If the front page, displaying the latest blog entries, only changes when you add a new blog entry, you can compute the last modified time very quickly. You need the latest published date for every entry associated with that blog. One way to do this would be: def latest_entry(request, blog_id): return Entry.objects.filter(blog=blog_id).latest("published").published You can then use this function to provide early detection of an unchanged page for your front page view: from django.views.decorators.http import condition @condition(last_modified_func=latest_entry) def front_page(request, blog_id): ... 3.12.2 Shortcuts for only computing one value As a general rule, if you can provide functions to compute both the ETag and the last modified time, you should do so. You don’t know which headers any given HTTP client will send you, so be prepared to handle both. However, sometimes only one value is easy to compute and Django provides decorators that handle only ETag or only last- modified computations. The django.views.decorators.http.etag and django.views.decorators.http.last_modified decorators are passed the same type of functions as the condition decorator. Their signatures are: etag(etag_func) last_modified(last_modified_func) We could write the earlier example, which only uses a last-modified function, using one of these decorators: @last_modified(latest_entry) def front_page(request, blog_id): ... ...or: 3.12. Conditional View Processing 409
- 414. Django Documentation, Release 1.9.3.dev20160224120324 def front_page(request, blog_id): ... front_page = last_modified(latest_entry)(front_page) Use condition when testing both conditions It might look nicer to some people to try and chain the etag and last_modified decorators if you want to test both preconditions. However, this would lead to incorrect behavior. # Bad code. Don't do this! @etag(etag_func) @last_modified(last_modified_func) def my_view(request): # ... # End of bad code. The first decorator doesn’t know anything about the second and might answer that the response is not modified even if the second decorators would determine otherwise. The condition decorator uses both callback functions simulta- neously to work out the right action to take. 3.12.3 Using the decorators with other HTTP methods The condition decorator is useful for more than only GET and HEAD requests (HEAD requests are the same as GET in this situation). It can also be used to provide checking for POST, PUT and DELETE requests. In these situations, the idea isn’t to return a “not modified” response, but to tell the client that the resource they are trying to change has been altered in the meantime. For example, consider the following exchange between the client and server: 1. Client requests /foo/. 2. Server responds with some content with an ETag of "abcd1234". 3. Client sends an HTTP PUT request to /foo/ to update the resource. It also sends an If-Match: "abcd1234" header to specify the version it is trying to update. 4. Server checks to see if the resource has changed, by computing the ETag the same way it does for a GET request (using the same function). If the resource has changed, it will return a 412 status code code, meaning “precondition failed”. 5. Client sends a GET request to /foo/, after receiving a 412 response, to retrieve an updated version of the content before updating it. The important thing this example shows is that the same functions can be used to compute the ETag and last modifi- cation values in all situations. In fact, you should use the same functions, so that the same values are returned every time. 3.12.4 Comparison with middleware conditional processing You may notice that Django already provides simple and straightforward conditional GET handling via the django.middleware.http.ConditionalGetMiddleware and CommonMiddleware. While certainly being easy to use and suitable for many situations, those pieces of middleware functionality have limitations for ad- vanced usage: • They are applied globally to all views in your project 410 Chapter 3. Using Django
- 415. Django Documentation, Release 1.9.3.dev20160224120324 • They don’t save you from generating the response itself, which may be expensive • They are only appropriate for HTTP GET requests. You should choose the most appropriate tool for your particular problem here. If you have a way to compute ETags and modification times quickly and if some view takes a while to generate the content, you should consider using the condition decorator described in this document. If everything already runs fairly quickly, stick to using the middleware and the amount of network traffic sent back to the clients will still be reduced if the view hasn’t changed. 3.13 Cryptographic signing The golden rule of Web application security is to never trust data from untrusted sources. Sometimes it can be useful to pass data through an untrusted medium. Cryptographically signed values can be passed through an untrusted channel safe in the knowledge that any tampering will be detected. Django provides both a low-level API for signing values and a high-level API for setting and reading signed cookies, one of the most common uses of signing in Web applications. You may also find signing useful for the following: • Generating “recover my account” URLs for sending to users who have lost their password. • Ensuring data stored in hidden form fields has not been tampered with. • Generating one-time secret URLs for allowing temporary access to a protected resource, for example a down- loadable file that a user has paid for. 3.13.1 Protecting the SECRET_KEY When you create a new Django project using startproject, the settings.py file is generated automatically and gets a random SECRET_KEY value. This value is the key to securing signed data – it is vital you keep this secure, or attackers could use it to generate their own signed values. 3.13.2 Using the low-level API Django’s signing methods live in the django.core.signing module. To sign a value, first instantiate a Signer instance: >>> from django.core.signing import Signer >>> signer = Signer() >>> value = signer.sign('My string') >>> value 'My string:GdMGD6HNQ_qdgxYP8yBZAdAIV1w' The signature is appended to the end of the string, following the colon. You can retrieve the original value using the unsign method: >>> original = signer.unsign(value) >>> original 'My string' If the signature or value have been altered in any way, a django.core.signing.BadSignature exception will be raised: 3.13. Cryptographic signing 411
- 416. Django Documentation, Release 1.9.3.dev20160224120324 >>> from django.core import signing >>> value += 'm' >>> try: ... original = signer.unsign(value) ... except signing.BadSignature: ... print("Tampering detected!") By default, the Signer class uses the SECRET_KEY setting to generate signatures. You can use a different secret by passing it to the Signer constructor: >>> signer = Signer('my-other-secret') >>> value = signer.sign('My string') >>> value 'My string:EkfQJafvGyiofrdGnuthdxImIJw' class Signer(key=None, sep=’:’, salt=None) Returns a signer which uses key to generate signatures and sep to separate values. sep cannot be in the URL safe base64 alphabet. This alphabet contains alphanumeric characters, hyphens, and underscores. Using the salt argument If you do not wish for every occurrence of a particular string to have the same signature hash, you can use the optional salt argument to the Signer class. Using a salt will seed the signing hash function with both the salt and your SECRET_KEY: >>> signer = Signer() >>> signer.sign('My string') 'My string:GdMGD6HNQ_qdgxYP8yBZAdAIV1w' >>> signer = Signer(salt='extra') >>> signer.sign('My string') 'My string:Ee7vGi-ING6n02gkcJ-QLHg6vFw' >>> signer.unsign('My string:Ee7vGi-ING6n02gkcJ-QLHg6vFw') 'My string' Using salt in this way puts the different signatures into different namespaces. A signature that comes from one namespace (a particular salt value) cannot be used to validate the same plaintext string in a different namespace that is using a different salt setting. The result is to prevent an attacker from using a signed string generated in one place in the code as input to another piece of code that is generating (and verifying) signatures using a different salt. Unlike your SECRET_KEY, your salt argument does not need to stay secret. Verifying timestamped values TimestampSigner is a subclass of Signer that appends a signed timestamp to the value. This allows you to confirm that a signed value was created within a specified period of time: >>> from datetime import timedelta >>> from django.core.signing import TimestampSigner >>> signer = TimestampSigner() >>> value = signer.sign('hello') >>> value 'hello:1NMg5H:oPVuCqlJWmChm1rA2lyTUtelC-c' >>> signer.unsign(value) 'hello' >>> signer.unsign(value, max_age=10) ... 412 Chapter 3. Using Django
- 417. Django Documentation, Release 1.9.3.dev20160224120324 SignatureExpired: Signature age 15.5289158821 > 10 seconds >>> signer.unsign(value, max_age=20) 'hello' >>> signer.unsign(value, max_age=timedelta(seconds=20)) 'hello' class TimestampSigner(key=None, sep=’:’, salt=None) sign(value) Sign value and append current timestamp to it. unsign(value, max_age=None) Checks if value was signed less than max_age seconds ago, otherwise raises SignatureExpired. The max_age parameter can accept an integer or a datetime.timedelta object. Previously, the max_age parameter only accepted an integer. Protecting complex data structures If you wish to protect a list, tuple or dictionary you can do so using the signing module’s dumps and loads functions. These imitate Python’s pickle module, but use JSON serialization under the hood. JSON ensures that even if your SECRET_KEY is stolen an attacker will not be able to execute arbitrary commands by exploiting the pickle format: >>> from django.core import signing >>> value = signing.dumps({"foo": "bar"}) >>> value 'eyJmb28iOiJiYXIifQ:1NMg1b:zGcDE4-TCkaeGzLeW9UQwZesciI' >>> signing.loads(value) {'foo': 'bar'} Because of the nature of JSON (there is no native distinction between lists and tuples) if you pass in a tuple, you will get a list from signing.loads(object): >>> from django.core import signing >>> value = signing.dumps(('a','b','c')) >>> signing.loads(value) ['a', 'b', 'c'] dumps(obj, key=None, salt=’django.core.signing’, compress=False) Returns URL-safe, sha1 signed base64 compressed JSON string. Serialized object is signed using TimestampSigner. loads(string, key=None, salt=’django.core.signing’, max_age=None) Reverse of dumps(), raises BadSignature if signature fails. Checks max_age (in seconds) if given. 3.14 Sending email Although Python makes sending email relatively easy via the smtplib module, Django provides a couple of light wrappers over it. These wrappers are provided to make sending email extra quick, to make it easy to test email sending during development, and to provide support for platforms that can’t use SMTP. The code lives in the django.core.mail module. 3.14. Sending email 413
- 418. Django Documentation, Release 1.9.3.dev20160224120324 3.14.1 Quick example In two lines: from django.core.mail import send_mail send_mail('Subject here', 'Here is the message.', '[email protected]', ['[email protected]'], fail_silently=False) Mail is sent using the SMTP host and port specified in the EMAIL_HOST and EMAIL_PORT settings. The EMAIL_HOST_USER and EMAIL_HOST_PASSWORD settings, if set, are used to authenticate to the SMTP server, and the EMAIL_USE_TLS and EMAIL_USE_SSL settings control whether a secure connection is used. Note: The character set of email sent with django.core.mail will be set to the value of your DEFAULT_CHARSET setting. 3.14.2 send_mail() send_mail(subject, message, from_email, recipient_list, fail_silently=False, auth_user=None, auth_password=None, connection=None, html_message=None) The simplest way to send email is using django.core.mail.send_mail(). The subject, message, from_email and recipient_list parameters are required. • subject: A string. • message: A string. • from_email: A string. • recipient_list: A list of strings, each an email address. Each member of recipient_list will see the other recipients in the “To:” field of the email message. • fail_silently: A boolean. If it’s False, send_mail will raise an smtplib.SMTPException. See the smtplib docs for a list of possible exceptions, all of which are subclasses of SMTPException. • auth_user: The optional username to use to authenticate to the SMTP server. If this isn’t provided, Django will use the value of the EMAIL_HOST_USER setting. • auth_password: The optional password to use to authenticate to the SMTP server. If this isn’t provided, Django will use the value of the EMAIL_HOST_PASSWORD setting. • connection: The optional email backend to use to send the mail. If unspecified, an instance of the default backend will be used. See the documentation on Email backends for more details. • html_message: If html_message is provided, the resulting email will be a multipart/alternative email with message as the text/plain content type and html_message as the text/html content type. The return value will be the number of successfully delivered messages (which can be 0 or 1 since it can only send one message). 3.14.3 send_mass_mail() send_mass_mail(datatuple, fail_silently=False, auth_user=None, auth_password=None, connec- tion=None) 414 Chapter 3. Using Django
- 419. Django Documentation, Release 1.9.3.dev20160224120324 django.core.mail.send_mass_mail() is intended to handle mass emailing. datatuple is a tuple in which each element is in this format: (subject, message, from_email, recipient_list) fail_silently, auth_user and auth_password have the same functions as in send_mail(). Each separate element of datatuple results in a separate email message. As in send_mail(), recipients in the same recipient_list will all see the other addresses in the email messages’ “To:” field. For example, the following code would send two different messages to two different sets of recipients; however, only one connection to the mail server would be opened: message1 = ('Subject here', 'Here is the message', '[email protected]', ['[email protected]', 'other@e message2 = ('Another Subject', 'Here is another message', '[email protected]', ['[email protected]']) send_mass_mail((message1, message2), fail_silently=False) The return value will be the number of successfully delivered messages. send_mass_mail() vs. send_mail() The main difference between send_mass_mail() and send_mail() is that send_mail() opens a connec- tion to the mail server each time it’s executed, while send_mass_mail() uses a single connection for all of its messages. This makes send_mass_mail() slightly more efficient. 3.14.4 mail_admins() mail_admins(subject, message, fail_silently=False, connection=None, html_message=None) django.core.mail.mail_admins() is a shortcut for sending an email to the site admins, as defined in the ADMINS setting. mail_admins() prefixes the subject with the value of the EMAIL_SUBJECT_PREFIX setting, which is "[Django] " by default. The “From:” header of the email will be the value of the SERVER_EMAIL setting. This method exists for convenience and readability. If html_message is provided, the resulting email will be a multipart/alternative email with message as the text/plain content type and html_message as the text/html content type. 3.14.5 mail_managers() mail_managers(subject, message, fail_silently=False, connection=None, html_message=None) django.core.mail.mail_managers() is just like mail_admins(), except it sends an email to the site managers, as defined in the MANAGERS setting. 3.14.6 Examples This sends a single email to [email protected] and [email protected], with them both appearing in the “To:”: send_mail('Subject', 'Message.', '[email protected]', ['[email protected]', '[email protected]']) 3.14. Sending email 415
- 420. Django Documentation, Release 1.9.3.dev20160224120324 This sends a message to [email protected] and [email protected], with them both receiving a separate email: datatuple = ( ('Subject', 'Message.', '[email protected]', ['[email protected]']), ('Subject', 'Message.', '[email protected]', ['[email protected]']), ) send_mass_mail(datatuple) 3.14.7 Preventing header injection Header injection is a security exploit in which an attacker inserts extra email headers to control the “To:” and “From:” in email messages that your scripts generate. The Django email functions outlined above all protect against header injection by forbidding newlines in header values. If any subject, from_email or recipient_list contains a newline (in either Unix, Windows or Mac style), the email function (e.g. send_mail()) will raise django.core.mail.BadHeaderError (a subclass of ValueError) and, hence, will not send the email. It’s your responsibility to validate all data before passing it to the email functions. If a message contains headers at the start of the string, the headers will simply be printed as the first bit of the email message. Here’s an example view that takes a subject, message and from_email from the request’s POST data, sends that to [email protected] and redirects to “/contact/thanks/” when it’s done: from django.core.mail import send_mail, BadHeaderError from django.http import HttpResponse, HttpResponseRedirect def send_email(request): subject = request.POST.get('subject', '') message = request.POST.get('message', '') from_email = request.POST.get('from_email', '') if subject and message and from_email: try: send_mail(subject, message, from_email, ['[email protected]']) except BadHeaderError: return HttpResponse('Invalid header found.') return HttpResponseRedirect('/contact/thanks/') else: # In reality we'd use a form class # to get proper validation errors. return HttpResponse('Make sure all fields are entered and valid.') 3.14.8 The EmailMessage class Django’s send_mail() and send_mass_mail() functions are actually thin wrappers that make use of the EmailMessage class. Not all features of the EmailMessage class are available through the send_mail() and related wrapper functions. If you wish to use advanced features, such as BCC’ed recipients, file attachments, or multi-part email, you’ll need to create EmailMessage instances directly. Note: This is a design feature. send_mail() and related functions were originally the only interface Django provided. However, the list of parameters they accepted was slowly growing over time. It made sense to move to a more object-oriented design for email messages and retain the original functions only for backwards compatibility. 416 Chapter 3. Using Django
- 421. Django Documentation, Release 1.9.3.dev20160224120324 EmailMessage is responsible for creating the email message itself. The email backend is then responsible for sending the email. For convenience, EmailMessage provides a simple send() method for sending a single email. If you need to send multiple messages, the email backend API provides an alternative. EmailMessage Objects class EmailMessage The EmailMessage class is initialized with the following parameters (in the given order, if positional arguments are used). All parameters are optional and can be set at any time prior to calling the send() method. • subject: The subject line of the email. • body: The body text. This should be a plain text message. • from_email: The sender’s address. Both [email protected] and Fred <[email protected]> forms are legal. If omitted, the DEFAULT_FROM_EMAIL setting is used. • to: A list or tuple of recipient addresses. • bcc: A list or tuple of addresses used in the “Bcc” header when sending the email. • connection: An email backend instance. Use this parameter if you want to use the same connection for multiple messages. If omitted, a new connection is created when send() is called. • attachments: A list of attachments to put on the message. These can be either email.MIMEBase.MIMEBase instances, or (filename, content, mimetype) triples. • headers: A dictionary of extra headers to put on the message. The keys are the header name, values are the header values. It’s up to the caller to ensure header names and values are in the correct format for an email message. The corresponding attribute is extra_headers. • cc: A list or tuple of recipient addresses used in the “Cc” header when sending the email. • reply_to: A list or tuple of recipient addresses used in the “Reply-To” header when sending the email. The reply_to parameter was added. For example: from django.core.mail import EmailMessage email = EmailMessage('Hello', 'Body goes here', '[email protected]', ['[email protected]', '[email protected]'], ['[email protected]'], reply_to=['[email protected]'], headers={'Message-ID': 'foo'}) The class has the following methods: • send(fail_silently=False) sends the message. If a connection was specified when the email was constructed, that connection will be used. Otherwise, an instance of the default backend will be instantiated and used. If the keyword argument fail_silently is True, exceptions raised while sending the message will be quashed. An empty list of recipients will not raise an exception. • message() constructs a django.core.mail.SafeMIMEText object (a subclass of Python’s email.MIMEText.MIMEText class) or a django.core.mail.SafeMIMEMultipart object hold- ing the message to be sent. If you ever need to extend the EmailMessage class, you’ll probably want to override this method to put the content you want into the MIME object. • recipients() returns a list of all the recipients of the message, whether they’re recorded in the to, cc or bcc attributes. This is another method you might need to override when subclassing, because the SMTP server 3.14. Sending email 417
- 422. Django Documentation, Release 1.9.3.dev20160224120324 needs to be told the full list of recipients when the message is sent. If you add another way to specify recipients in your class, they need to be returned from this method as well. • attach() creates a new file attachment and adds it to the message. There are two ways to call attach(): – You can pass it a single argument that is an email.MIMEBase.MIMEBase instance. This will be inserted directly into the resulting message. – Alternatively, you can pass attach() three arguments: filename, content and mimetype. filename is the name of the file attachment as it will appear in the email, content is the data that will be contained inside the attachment and mimetype is the optional MIME type for the attachment. If you omit mimetype, the MIME content type will be guessed from the filename of the attachment. For example: message.attach('design.png', img_data, 'image/png') If you specify a mimetype of message/rfc822, it will also accept django.core.mail.EmailMessage and email.message.Message. In addition, message/rfc822 attachments will no longer be base64-encoded in violation of RFC 2046#section-5.2.1, which can cause issues with displaying the attachments in Evolution and Thunder- bird. • attach_file() creates a new attachment using a file from your filesystem. Call it with the path of the file to attach and, optionally, the MIME type to use for the attachment. If the MIME type is omitted, it will be guessed from the filename. The simplest use would be: message.attach_file('/images/weather_map.png') Sending alternative content types It can be useful to include multiple versions of the content in an email; the classic example is to send both text and HTML versions of a message. With Django’s email library, you can do this using the EmailMultiAlternatives class. This subclass of EmailMessage has an attach_alternative() method for including extra versions of the message body in the email. All the other methods (including the class initialization) are inherited directly from EmailMessage. To send a text and HTML combination, you could write: from django.core.mail import EmailMultiAlternatives subject, from_email, to = 'hello', '[email protected]', '[email protected]' text_content = 'This is an important message.' html_content = '<p>This is an <strong>important</strong> message.</p>' msg = EmailMultiAlternatives(subject, text_content, from_email, [to]) msg.attach_alternative(html_content, "text/html") msg.send() By default, the MIME type of the body parameter in an EmailMessage is "text/plain". It is good practice to leave this alone, because it guarantees that any recipient will be able to read the email, regardless of their mail client. However, if you are confident that your recipients can handle an alternative content type, you can use the content_subtype attribute on the EmailMessage class to change the main content type. The major type will always be "text", but you can change the subtype. For example: msg = EmailMessage(subject, html_content, from_email, [to]) msg.content_subtype = "html" # Main content is now text/html msg.send() 418 Chapter 3. Using Django
- 423. Django Documentation, Release 1.9.3.dev20160224120324 3.14.9 Email backends The actual sending of an email is handled by the email backend. The email backend class has the following methods: • open() instantiates a long-lived email-sending connection. • close() closes the current email-sending connection. • send_messages(email_messages) sends a list of EmailMessage objects. If the connection is not open, this call will implicitly open the connection, and close the connection afterwards. If the connection is already open, it will be left open after mail has been sent. It can also be used as a context manager, which will automatically call open() and close() as needed: from django.core import mail with mail.get_connection() as connection: mail.EmailMessage(subject1, body1, from1, [to1], connection=connection).send() mail.EmailMessage(subject2, body2, from2, [to2], connection=connection).send() The context manager protocol was added. Obtaining an instance of an email backend The get_connection() function in django.core.mail returns an instance of the email backend that you can use. get_connection(backend=None, fail_silently=False, *args, **kwargs) By default, a call to get_connection() will return an instance of the email backend specified in EMAIL_BACKEND. If you specify the backend argument, an instance of that backend will be instantiated. The fail_silently argument controls how the backend should handle errors. If fail_silently is True, exceptions during the email sending process will be silently ignored. All other arguments are passed directly to the constructor of the email backend. Django ships with several email sending backends. With the exception of the SMTP backend (which is the default), these backends are only useful during testing and development. If you have special email sending requirements, you can write your own email backend. SMTP backend class backends.smtp.EmailBackend(host=None, port=None, username=None, password=None, use_tls=None, fail_silently=False, use_ssl=None, time- out=None, ssl_keyfile=None, ssl_certfile=None, **kwargs) This is the default backend. Email will be sent through a SMTP server. The value for each argument is retrieved from the matching setting if the argument is None: •host: EMAIL_HOST •port: EMAIL_PORT •username: EMAIL_HOST_USER •password: EMAIL_HOST_PASSWORD 3.14. Sending email 419
- 424. Django Documentation, Release 1.9.3.dev20160224120324 •use_tls: EMAIL_USE_TLS •use_ssl: EMAIL_USE_SSL •timeout: EMAIL_TIMEOUT •ssl_keyfile: EMAIL_SSL_KEYFILE •ssl_certfile: EMAIL_SSL_CERTFILE The SMTP backend is the default configuration inherited by Django. If you want to specify it explicitly, put the following in your settings: EMAIL_BACKEND = 'django.core.mail.backends.smtp.EmailBackend' If unspecified, the default timeout will be the one provided by socket.getdefaulttimeout(), which defaults to None (no timeout). The ssl_keyfile, and ssl_certfile parameters and corresponding settings were added. The ability to customize timeout using a setting (EMAIL_TIMEOUT) was added. Console backend Instead of sending out real emails the console backend just writes the emails that would be sent to the standard output. By default, the console backend writes to stdout. You can use a different stream-like object by providing the stream keyword argument when constructing the connection. To specify this backend, put the following in your settings: EMAIL_BACKEND = 'django.core.mail.backends.console.EmailBackend' This backend is not intended for use in production – it is provided as a convenience that can be used during develop- ment. File backend The file backend writes emails to a file. A new file is created for each new session that is opened on this backend. The directory to which the files are written is either taken from the EMAIL_FILE_PATH setting or from the file_path keyword when creating a connection with get_connection(). To specify this backend, put the following in your settings: EMAIL_BACKEND = 'django.core.mail.backends.filebased.EmailBackend' EMAIL_FILE_PATH = '/tmp/app-messages' # change this to a proper location This backend is not intended for use in production – it is provided as a convenience that can be used during develop- ment. In-memory backend The ’locmem’ backend stores messages in a special attribute of the django.core.mail module. The outbox attribute is created when the first message is sent. It’s a list with an EmailMessage instance for each message that would be sent. To specify this backend, put the following in your settings: EMAIL_BACKEND = 'django.core.mail.backends.locmem.EmailBackend' 420 Chapter 3. Using Django
- 425. Django Documentation, Release 1.9.3.dev20160224120324 This backend is not intended for use in production – it is provided as a convenience that can be used during development and testing. Dummy backend As the name suggests the dummy backend does nothing with your messages. To specify this backend, put the following in your settings: EMAIL_BACKEND = 'django.core.mail.backends.dummy.EmailBackend' This backend is not intended for use in production – it is provided as a convenience that can be used during develop- ment. Defining a custom email backend If you need to change how emails are sent you can write your own email backend. The EMAIL_BACKEND setting in your settings file is then the Python import path for your backend class. Custom email backends should subclass BaseEmailBackend that is located in the django.core.mail.backends.base module. A custom email backend must implement the send_messages(email_messages) method. This method receives a list of EmailMessage instances and returns the number of successfully delivered messages. If your backend has any concept of a persistent session or connection, you should also implement the open() and close() methods. Refer to smtp.EmailBackend for a reference implementation. Sending multiple emails Establishing and closing an SMTP connection (or any other network connection, for that matter) is an expensive process. If you have a lot of emails to send, it makes sense to reuse an SMTP connection, rather than creating and destroying a connection every time you want to send an email. There are two ways you tell an email backend to reuse a connection. Firstly, you can use the send_messages() method. send_messages() takes a list of EmailMessage in- stances (or subclasses), and sends them all using a single connection. For example, if you have a function called get_notification_email() that returns a list of EmailMessage objects representing some periodic email you wish to send out, you could send these emails using a single call to send_messages: from django.core import mail connection = mail.get_connection() # Use default email connection messages = get_notification_email() connection.send_messages(messages) In this example, the call to send_messages() opens a connection on the backend, sends the list of messages, and then closes the connection again. The second approach is to use the open() and close() methods on the email backend to manually control the connection. send_messages() will not manually open or close the connection if it is already open, so if you manually open the connection, you can control when it is closed. For example: from django.core import mail connection = mail.get_connection() # Manually open the connection 3.14. Sending email 421
- 426. Django Documentation, Release 1.9.3.dev20160224120324 connection.open() # Construct an email message that uses the connection email1 = mail.EmailMessage('Hello', 'Body goes here', '[email protected]', ['[email protected]'], connection=connection) email1.send() # Send the email # Construct two more messages email2 = mail.EmailMessage('Hello', 'Body goes here', '[email protected]', ['[email protected]']) email3 = mail.EmailMessage('Hello', 'Body goes here', '[email protected]', ['[email protected]']) # Send the two emails in a single call - connection.send_messages([email2, email3]) # The connection was already open so send_messages() doesn't close it. # We need to manually close the connection. connection.close() 3.14.10 Configuring email for development There are times when you do not want Django to send emails at all. For example, while developing a website, you probably don’t want to send out thousands of emails – but you may want to validate that emails will be sent to the right people under the right conditions, and that those emails will contain the correct content. The easiest way to configure email for local development is to use the console email backend. This backend redirects all email to stdout, allowing you to inspect the content of mail. The file email backend can also be useful during development – this backend dumps the contents of every SMTP connection to a file that can be inspected at your leisure. Another approach is to use a “dumb” SMTP server that receives the emails locally and displays them to the terminal, but does not actually send anything. Python has a built-in way to accomplish this with a single command: python -m smtpd -n -c DebuggingServer localhost:1025 This command will start a simple SMTP server listening on port 1025 of localhost. This server simply prints to standard output all email headers and the email body. You then only need to set the EMAIL_HOST and EMAIL_PORT accordingly. For a more detailed discussion of SMTP server options, see the Python documentation for the smtpd module. For information about unit-testing the sending of emails in your application, see the Email services section of the testing documentation. 3.15 Internationalization and localization 3.15.1 Translation Overview In order to make a Django project translatable, you have to add a minimal number of hooks to your Python code and templates. These hooks are called translation strings. They tell Django: “This text should be translated into the end user’s language, if a translation for this text is available in that language.” It’s your responsibility to mark translatable strings; the system can only translate strings it knows about. 422 Chapter 3. Using Django
- 427. Django Documentation, Release 1.9.3.dev20160224120324 Django then provides utilities to extract the translation strings into a message file. This file is a convenient way for translators to provide the equivalent of the translation strings in the target language. Once the translators have filled in the message file, it must be compiled. This process relies on the GNU gettext toolset. Once this is done, Django takes care of translating Web apps on the fly in each available language, according to users’ language preferences. Django’s internationalization hooks are on by default, and that means there’s a bit of i18n-related overhead in certain places of the framework. If you don’t use internationalization, you should take the two seconds to set USE_I18N = False in your settings file. Then Django will make some optimizations so as not to load the internationalization machinery. Note: There is also an independent but related USE_L10N setting that controls if Django should implement format localization. See Format localization for more details. Note: Make sure you’ve activated translation for your project (the fastest way is to check if MIDDLEWARE_CLASSES includes django.middleware.locale.LocaleMiddleware). If you haven’t yet, see How Django discovers language preference. Internationalization: in Python code Standard translation Specify a translation string by using the function ugettext(). It’s convention to import this as a shorter alias, _, to save typing. Note: Python’s standard library gettext module installs _() into the global namespace, as an alias for gettext(). In Django, we have chosen not to follow this practice, for a couple of reasons: 1. For international character set (Unicode) support, ugettext() is more useful than gettext(). Sometimes, you should be using ugettext_lazy() as the default translation method for a particular file. Without _() in the global namespace, the developer has to think about which is the most appropriate translation function. 2. The underscore character (_) is used to represent “the previous result” in Python’s interactive shell and doctest tests. Installing a global _() function causes interference. Explicitly importing ugettext() as _() avoids this problem. In this example, the text "Welcome to my site." is marked as a translation string: from django.utils.translation import ugettext as _ from django.http import HttpResponse def my_view(request): output = _("Welcome to my site.") return HttpResponse(output) Obviously, you could code this without using the alias. This example is identical to the previous one: from django.utils.translation import ugettext from django.http import HttpResponse def my_view(request): 3.15. Internationalization and localization 423
- 428. Django Documentation, Release 1.9.3.dev20160224120324 output = ugettext("Welcome to my site.") return HttpResponse(output) Translation works on computed values. This example is identical to the previous two: def my_view(request): words = ['Welcome', 'to', 'my', 'site.'] output = _(' '.join(words)) return HttpResponse(output) Translation works on variables. Again, here’s an identical example: def my_view(request): sentence = 'Welcome to my site.' output = _(sentence) return HttpResponse(output) (The caveat with using variables or computed values, as in the previous two examples, is that Django’s translation- string-detecting utility, django-admin makemessages, won’t be able to find these strings. More on makemessages later.) The strings you pass to _() or ugettext() can take placeholders, specified with Python’s standard named-string interpolation syntax. Example: def my_view(request, m, d): output = _('Today is %(month)s %(day)s.') % {'month': m, 'day': d} return HttpResponse(output) This technique lets language-specific translations reorder the placeholder text. For example, an English translation may be "Today is November 26.", while a Spanish translation may be "Hoy es 26 de Noviembre." – with the month and the day placeholders swapped. For this reason, you should use named-string interpolation (e.g., %(day)s) instead of positional interpolation (e.g., %s or %d) whenever you have more than a single parameter. If you used positional interpolation, translations wouldn’t be able to reorder placeholder text. Comments for translators If you would like to give translators hints about a translatable string, you can add a comment prefixed with the Translators keyword on the line preceding the string, e.g.: def my_view(request): # Translators: This message appears on the home page only output = ugettext("Welcome to my site.") The comment will then appear in the resulting .po file associated with the translatable construct located below it and should also be displayed by most translation tools. Note: Just for completeness, this is the corresponding fragment of the resulting .po file: #. Translators: This message appears on the home page only # path/to/python/file.py:123 msgid "Welcome to my site." msgstr "" This also works in templates. See Comments for translators in templates for more details. 424 Chapter 3. Using Django
- 429. Django Documentation, Release 1.9.3.dev20160224120324 Marking strings as no-op Use the function django.utils.translation.ugettext_noop() to mark a string as a translation string without translating it. The string is later translated from a variable. Use this if you have constant strings that should be stored in the source language because they are exchanged over systems or users – such as strings in a database – but should be translated at the last possible point in time, such as when the string is presented to the user. Pluralization Use the function django.utils.translation.ungettext() to specify pluralized messages. ungettext takes three arguments: the singular translation string, the plural translation string and the number of objects. This function is useful when you need your Django application to be localizable to languages where the number and complexity of plural forms is greater than the two forms used in English (‘object’ for the singular and ‘objects’ for all the cases where count is different from one, irrespective of its value.) For example: from django.utils.translation import ungettext from django.http import HttpResponse def hello_world(request, count): page = ungettext( 'there is %(count)d object', 'there are %(count)d objects', count) % { 'count': count, } return HttpResponse(page) In this example the number of objects is passed to the translation languages as the count variable. Note that pluralization is complicated and works differently in each language. Comparing count to 1 isn’t always the correct rule. This code looks sophisticated, but will produce incorrect results for some languages: from django.utils.translation import ungettext from myapp.models import Report count = Report.objects.count() if count == 1: name = Report._meta.verbose_name else: name = Report._meta.verbose_name_plural text = ungettext( 'There is %(count)d %(name)s available.', 'There are %(count)d %(name)s available.', count ) % { 'count': count, 'name': name } Don’t try to implement your own singular-or-plural logic, it won’t be correct. In a case like this, consider something like the following: 3.15. Internationalization and localization 425
- 430. Django Documentation, Release 1.9.3.dev20160224120324 text = ungettext( 'There is %(count)d %(name)s object available.', 'There are %(count)d %(name)s objects available.', count ) % { 'count': count, 'name': Report._meta.verbose_name, } Note: When using ungettext(), make sure you use a single name for every extrapolated variable included in the literal. In the examples above, note how we used the name Python variable in both translation strings. This example, besides being incorrect in some languages as noted above, would fail: text = ungettext( 'There is %(count)d %(name)s available.', 'There are %(count)d %(plural_name)s available.', count ) % { 'count': Report.objects.count(), 'name': Report._meta.verbose_name, 'plural_name': Report._meta.verbose_name_plural } You would get an error when running django-admin compilemessages: a format specification for argument 'name', as in 'msgstr[0]', doesn't exist in 'msgid' Note: Plural form and po files Django does not support custom plural equations in po files. As all translation catalogs are merged, only the plural form for the main Django po file (in django/conf/locale/<lang_code>/LC_MESSAGES/django.po) is considered. Plural forms in all other po files are ignored. Therefore, you should not use different plural equations in your project or application po files. Contextual markers Sometimes words have several meanings, such as "May" in English, which refers to a month name and to a verb. To enable translators to translate these words correctly in different contexts, you can use the django.utils.translation.pgettext() function, or the django.utils.translation.npgettext() function if the string needs pluralization. Both take a context string as the first variable. In the resulting .po file, the string will then appear as often as there are different contextual markers for the same string (the context will appear on the msgctxt line), allowing the translator to give a different translation for each of them. For example: from django.utils.translation import pgettext month = pgettext("month name", "May") or: 426 Chapter 3. Using Django
- 431. Django Documentation, Release 1.9.3.dev20160224120324 from django.db import models from django.utils.translation import pgettext_lazy class MyThing(models.Model): name = models.CharField(help_text=pgettext_lazy( 'help text for MyThing model', 'This is the help text')) will appear in the .po file as: msgctxt "month name" msgid "May" msgstr "" Contextual markers are also supported by the trans and blocktrans template tags. Lazy translation Use the lazy versions of translation functions in django.utils.translation (easily recognizable by the lazy suffix in their names) to translate strings lazily – when the value is accessed rather than when they’re called. These functions store a lazy reference to the string – not the actual translation. The translation itself will be done when the string is used in a string context, such as in template rendering. This is essential when calls to these functions are located in code paths that are executed at module load time. This is something that can easily happen when defining models, forms and model forms, because Django implements these such that their fields are actually class-level attributes. For that reason, make sure to use lazy translations in the following cases: Model fields and relationships verbose_name and help_text option values For example, to translate the help text of the name field in the following model, do the following: from django.db import models from django.utils.translation import ugettext_lazy as _ class MyThing(models.Model): name = models.CharField(help_text=_('This is the help text')) You can mark names of ForeignKey, ManyToManyField or OneToOneField relationship as translatable by using their verbose_name options: class MyThing(models.Model): kind = models.ForeignKey( ThingKind, on_delete=models.CASCADE, related_name='kinds', verbose_name=_('kind'), ) Just like you would do in verbose_name you should provide a lowercase verbose name text for the relation as Django will automatically titlecase it when required. Model verbose names values It is recommended to always provide explicit verbose_name and verbose_name_plural options rather than relying on the fallback English-centric and somewhat naïve deter- mination of verbose names Django performs by looking at the model’s class name: 3.15. Internationalization and localization 427
- 432. Django Documentation, Release 1.9.3.dev20160224120324 from django.db import models from django.utils.translation import ugettext_lazy as _ class MyThing(models.Model): name = models.CharField(_('name'), help_text=_('This is the help text')) class Meta: verbose_name = _('my thing') verbose_name_plural = _('my things') Model methods short_description attribute values For model methods, you can provide translations to Django and the admin site with the short_description attribute: from django.db import models from django.utils.translation import ugettext_lazy as _ class MyThing(models.Model): kind = models.ForeignKey( ThingKind, on_delete=models.CASCADE, related_name='kinds', verbose_name=_('kind'), ) def is_mouse(self): return self.kind.type == MOUSE_TYPE is_mouse.short_description = _('Is it a mouse?') Working with lazy translation objects The result of a ugettext_lazy() call can be used wherever you would use a unicode string (an object with type unicode) in Python. If you try to use it where a bytestring (a str object) is expected, things will not work as expected, since a ugettext_lazy() object doesn’t know how to convert itself to a bytestring. You can’t use a unicode string inside a bytestring, either, so this is consistent with normal Pyth