Downloaded 670 times


![Angular Data Binding
• Two-Way Data Binding
• You can use a property + event binding
• Or [ ( ) ] syntax
49Angular](https://image.slidesharecdn.com/introductiontoangularwithasimplebutcompleteproject-171127023401/75/Introduction-to-angular-with-a-simple-but-complete-project-49-2048.jpg)


![Angular Communicate with back end
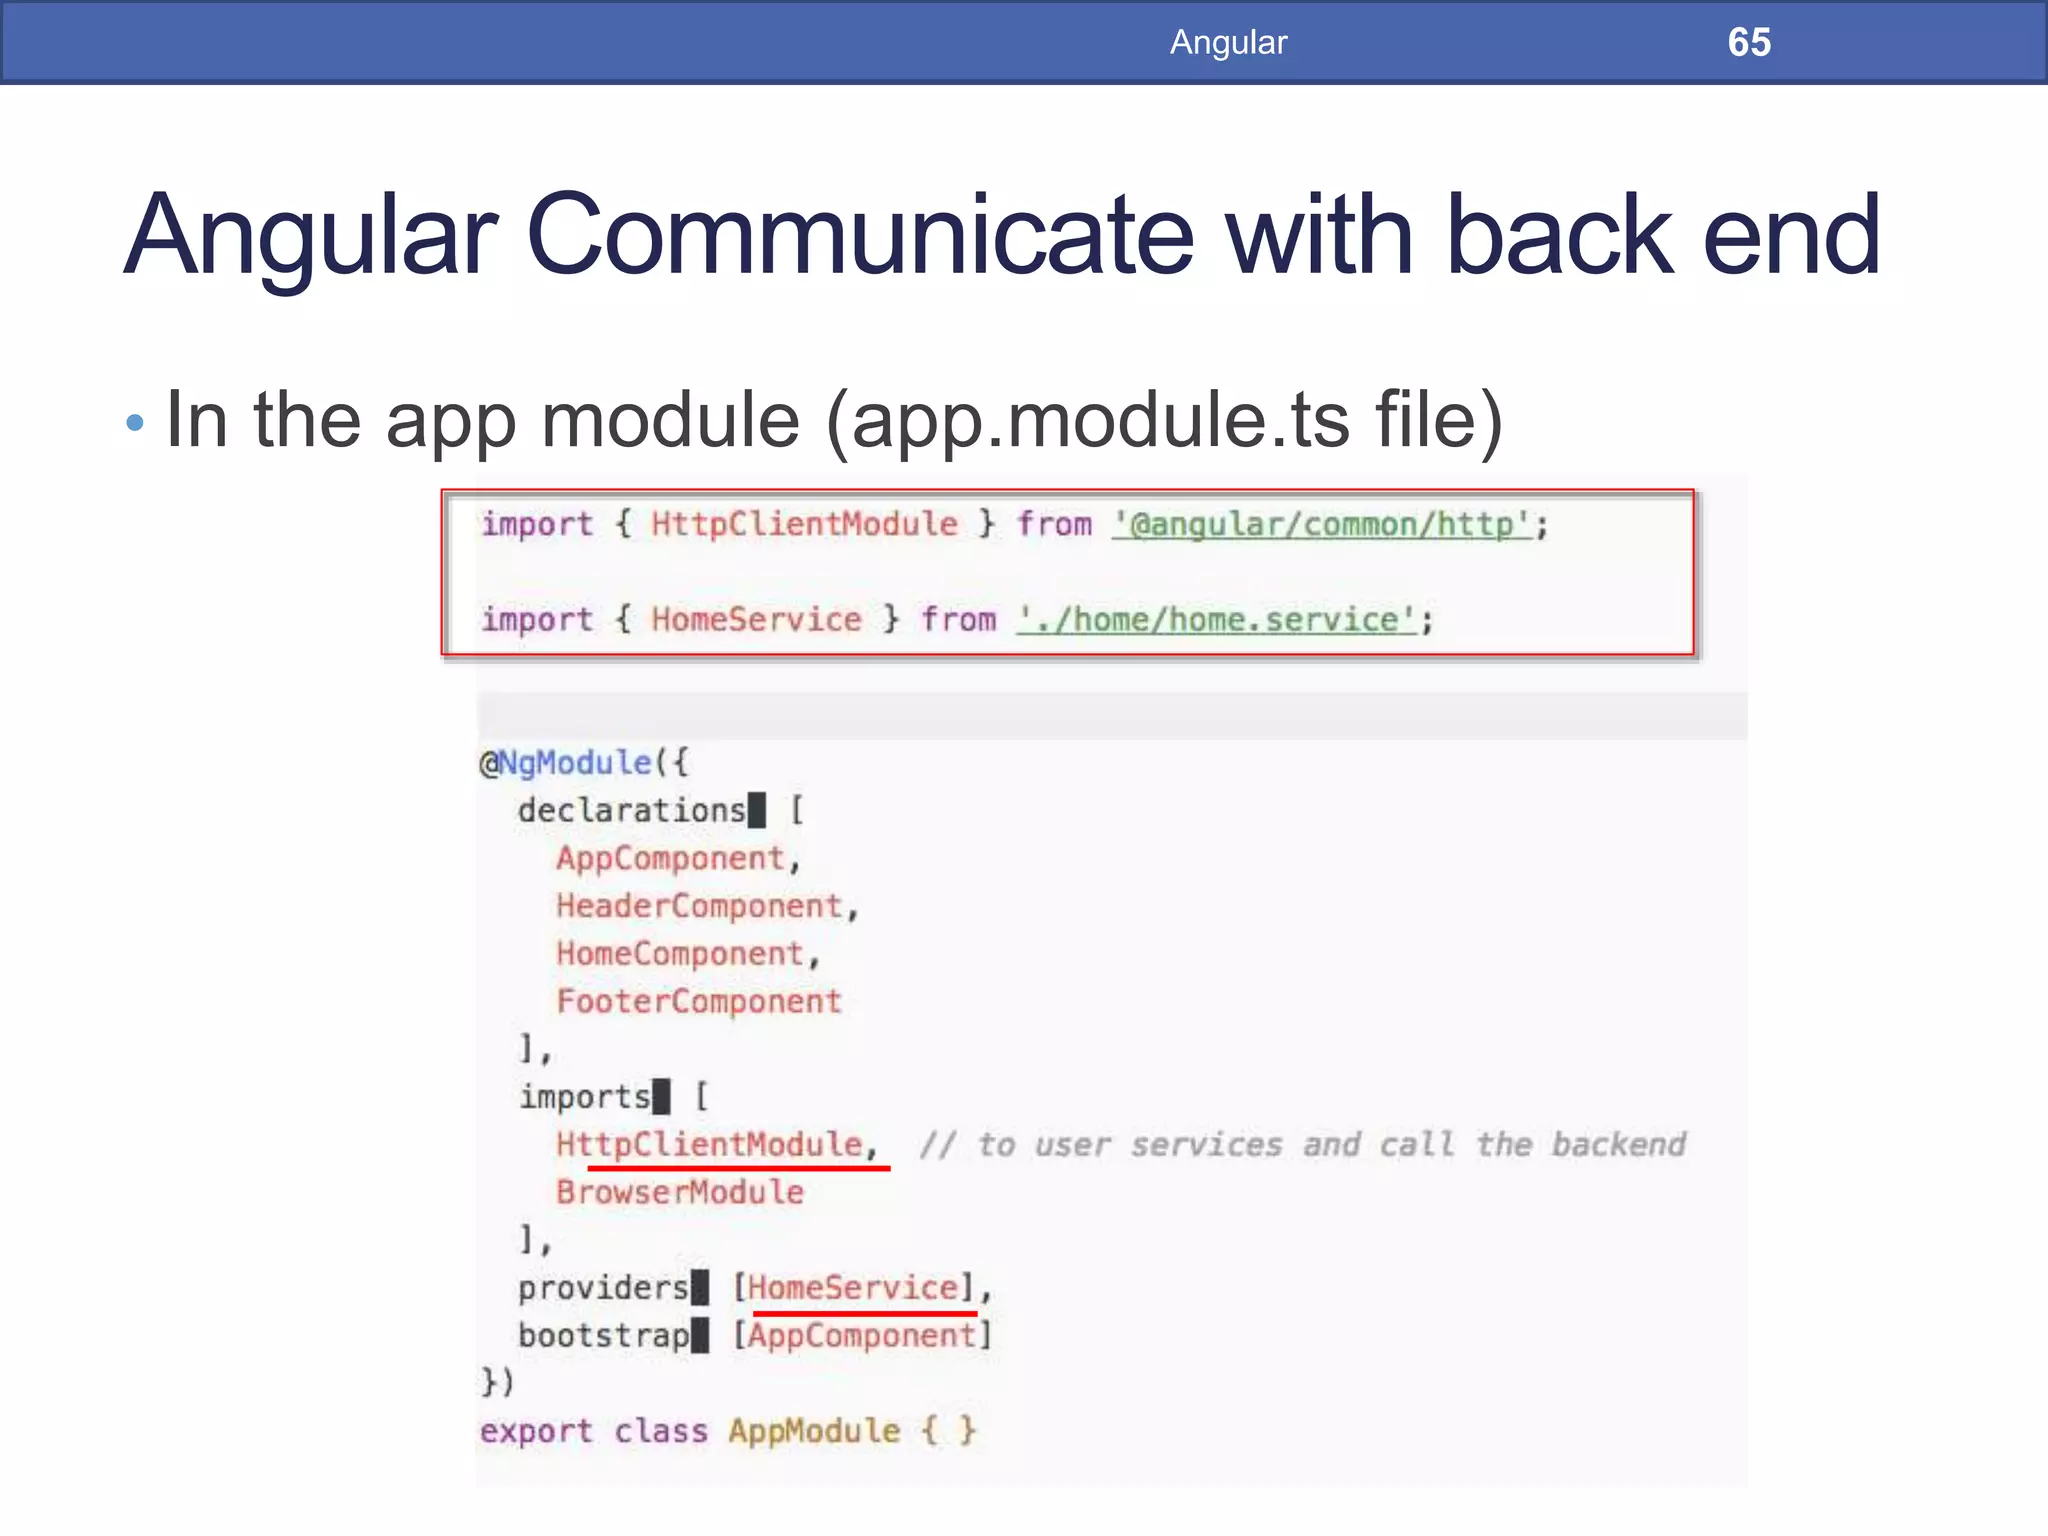
• In app module (app.module.ts file)
• import the HttpClientModule and the HomeService
• add HttpClientModule in imports[] arrays and
HomeService in providers[] array
64Angular](https://image.slidesharecdn.com/introductiontoangularwithasimplebutcompleteproject-171127023401/75/Introduction-to-angular-with-a-simple-but-complete-project-64-2048.jpg)


![Angular Communicate with back end
• The Scenario[] arrays return by getScenarios()
method of HomeService will have fields with the
same name of ScenarioDTO return by back end.
68Angular](https://image.slidesharecdn.com/introductiontoangularwithasimplebutcompleteproject-171127023401/75/Introduction-to-angular-with-a-simple-but-complete-project-68-2048.jpg)


Angular is a framework for building client applications in HTML, CSS and TypeScript. It provides best practices like modularity, separation of concerns and testability for client-side development. The document discusses creating an Angular project, generating components, binding data, using directives, communicating with backend services, routing between components and building for production. Key steps include generating components, services and modules, binding data, calling REST APIs, defining routes and building the app.
Introduction to Angular as a client application framework and its evolution, focusing on modular programming and front-end/back-end separation.
Overview of Traditional Web Architecture vs. Service Oriented Front End Architecture (SOFEA), highlighting scalability, interoperability, and SPA benefits.
Instructions on setting up an Angular development environment, including tools like ATOM, Node.js, npm, and Angular CLI installation.
Steps to create and run a new Angular project, including project setup and accessing the default Angular page.
Introduction to components in Angular, including creation, structure, and usage of Bootstrap for enhancing application appearance.
Explanation of data binding methods in Angular: interpolation, property binding, event binding, and two-way data binding.
Overview of directives in Angular, including Attribute and Structural directives, with specific examples like ngIf and ngFor.
Process of integrating Angular with backend services through HttpClient, creating services, and managing data flow between front end and back end.
Angular routing functions that allow navigation between components within a Single Page Application without reloading the page.
Best practices for managing Angular projects' versions with .gitignore and handling different environments by configuring environment variables.
Steps for preparing an Angular application for production, including editing index.html, building with ng build, and deploying to a server.
Summary of key Angular commands and an overview of project structure, highlighting folder organization and important files.List of references and sources used throughout the presentation for further learning and insights on Angular.


![[Final] ReactJS presentation](https://cdn.slidesharecdn.com/ss_thumbnails/65cfd4f9-740f-4f41-b769-b496b6e60802-170119143904-thumbnail.jpg?width=640&height=640&fit=bounds)


